Articles
How To Bind A Quilt Using The Backing
Modified: August 28, 2024
Learn how to bind a quilt using the backing with our helpful articles. Find step-by-step instructions and expert tips to complete your quilting project effortlessly.
(Many of the links in this article redirect to a specific reviewed product. Your purchase of these products through affiliate links helps to generate commission for Storables.com, at no extra cost. Learn more)
Introduction
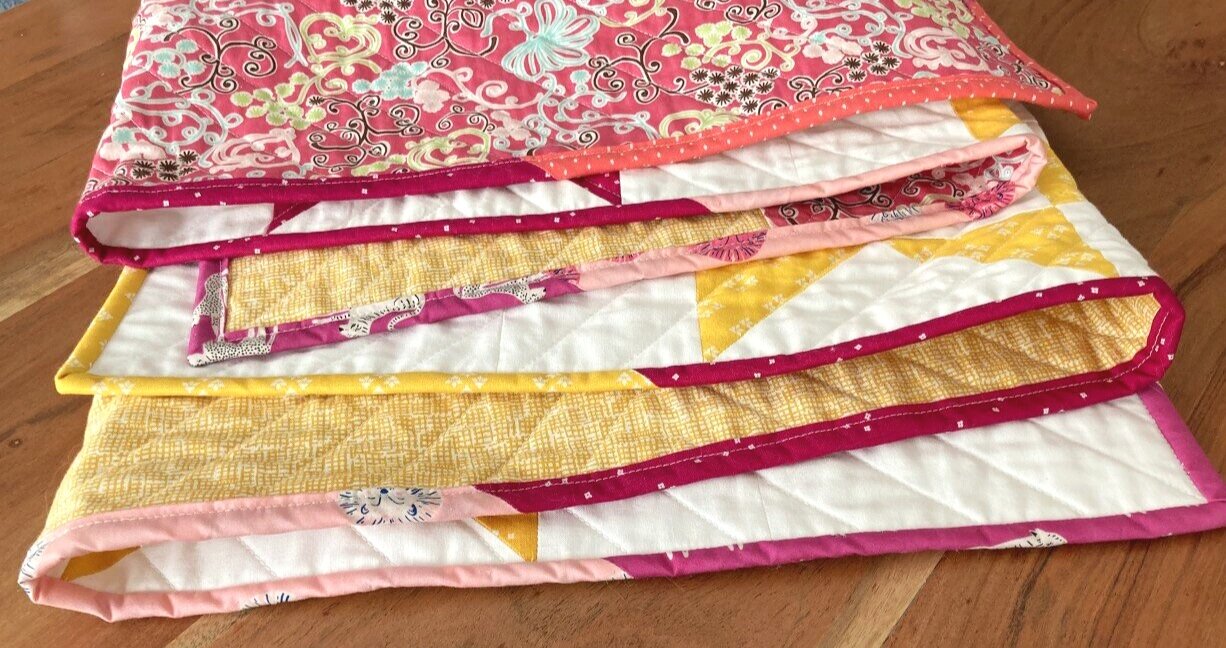
Quilting is not only a timeless craft but also a beautiful way to create functional and decorative pieces. One essential step in quilting is binding the quilt, which adds a polished and finished look to the edges. Binding not only holds the layers of the quilt together but also protects them from fraying or coming apart over time.
When it comes to binding a quilt, there are various techniques you can use, but one popular method is binding using the backing fabric. This method not only ensures a seamless and cohesive look but also makes efficient use of the fabric, as it requires less additional material for binding strips.
In this article, we will guide you through the process of binding a quilt using the backing fabric, from choosing the right fabric to the final finishing touches. Whether you’re a beginner or an experienced quilter, this step-by-step guide will help you achieve beautiful and professional-looking bindings for your quilted creations.
Key Takeaways:
- Choosing the right backing fabric and properly preparing it are essential steps in achieving a professional-looking quilt binding. Consider factors like fabric type, width, quality, and thread count for a durable and visually appealing result.
- Mitering the corners and binding the back of the quilt are crucial for a polished finish. Attention to detail and precision in sewing the binding ensure a durable and beautiful quilt that will be cherished for years to come.
Read more: How To Self-Bind A Quilt With Minky Backing
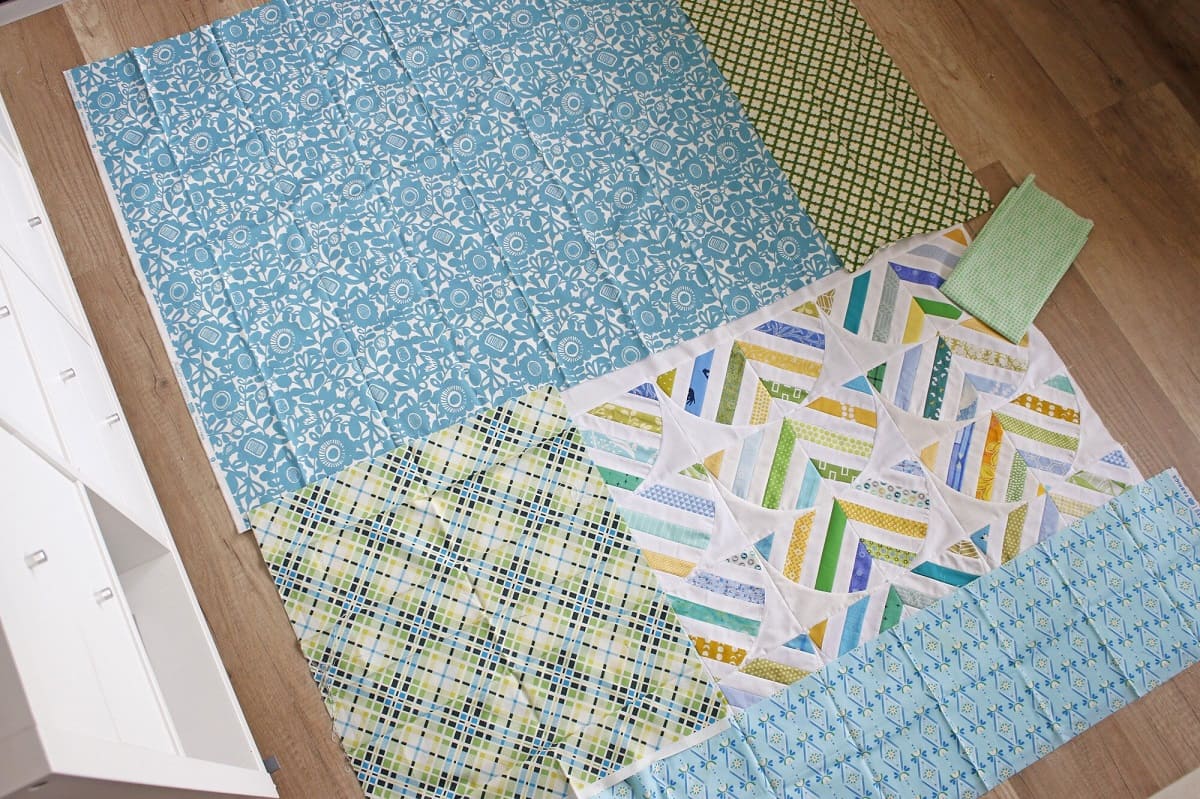
Choosing the Right Backing Fabric
When it comes to choosing the backing fabric for your quilt, there are a few factors to consider. The backing fabric not only adds visual appeal but also contributes to the overall durability and longevity of the quilt. Here are some points to keep in mind when selecting your backing fabric:
- Fabric Type: Choose a fabric that complements the design and theme of your quilt. Consider the color, pattern, and texture of the fabric to ensure it enhances the overall aesthetic appeal of the quilt.
- Fabric Width: Select a backing fabric that is wide enough to cover the entire quilt without having to piece it together. Backing fabrics typically come in widths of 42 to 108 inches, so choose a width that is suitable for your quilt size.
- Fabric Quality: Opt for a high-quality fabric that is durable and can withstand regular use and washing. It should be sturdy enough to hold up against the wear and tear of daily life.
- Thread Count: Consider the thread count of the fabric, which refers to the number of threads per square inch. A higher thread count indicates a finer and denser fabric, which tends to be stronger and smoother.
- Colorfastness: Ensure that the backing fabric is colorfast and won’t bleed or fade when washed. This is especially important if your quilt will be frequently used or washed.
- Preshrinking: It’s a good idea to prewash the backing fabric to prevent any shrinkage or color bleeding after the quilt is completed. Follow the fabric manufacturer’s recommendations for preshrinking to ensure the best results.
By considering these factors, you can choose a backing fabric that not only complements your quilt but also ensures its longevity and durability. Now that you have selected the perfect backing fabric, it’s time to prepare it for binding.
Preparing the Backing Fabric
Before you can begin binding your quilt with the backing fabric, it’s important to prepare the fabric properly. Follow these steps to ensure your backing fabric is ready for the binding process:
- Measure and Cut: Start by measuring the size of your quilt top. Add a few inches to each side to account for any shrinkage or stretching during the quilting process. Use these measurements to cut the backing fabric to the appropriate size.
- Press and Remove Wrinkles: Lay the backing fabric flat on an ironing board and use a steam iron to press out any wrinkles or creases. Make sure the fabric is completely smooth to avoid any unwanted folds or puckers in the finished quilt.
- Squaring Up: Double-check that the edges of the backing fabric are straight and square. Use a quilting ruler or square ruler to trim any excess fabric and ensure the edges are even. This will make it easier to align the layers of the quilt during the binding process.
- Seam Allowance: Consider the seam allowance you will be using for binding. Typically, a quarter-inch seam allowance is used for quilt bindings. If desired, you can mark or fold under a quarter-inch seam allowance along the edges of the backing fabric to make it easier when attaching the binding later on.
- Backstitching or Reinforcement: If you anticipate heavy use or frequent washing of the quilt, consider reinforcing the edges of the backing fabric. You can do this by backstitching along the edges or applying a line of clear fabric glue to secure the fabric and prevent fraying.
- Pressing After Preparation: Once you have prepared the backing fabric, give it a final press to ensure it remains smooth and crease-free. This will make the layering and basting process easier and will result in a more professional-looking quilt.
By properly preparing the backing fabric, you set yourself up for a successful binding process. Now that the backing fabric is ready, it’s time to move on to layering the quilt sandwich.
Layering the Quilt Sandwich
Layering the quilt sandwich is an important step in quilt binding as it sets the foundation for the entire quilting process. Follow these steps to properly layer your quilt sandwich:
- Prepare Your Workspace: Clear a large, flat surface such as a table or floor to lay out your quilt sandwich. Make sure the surface is clean and free of any debris that could transfer onto the fabric.
- Backing Fabric: Start by laying the prepared backing fabric face down on the workspace. Smooth it out to remove any wrinkles or folds, ensuring it lies flat and is taut but not stretched.
- Batting: Place the batting on top of the backing fabric, aligning the edges. Smooth out any wrinkles or lumps in the batting to create an even layer. Polyester or cotton batting is commonly used, but choose one that suits your desired quilt thickness and warmth.
- Quilt Top: Finally, carefully place the quilt top right side up on top of the batting. Align the edges of the quilt top with the edges of the backing fabric and smooth out any wrinkles or puckers.
- Secure the Layers: Once the layers are aligned and smooth, you can secure them together to prevent shifting during the quilting process. Some methods for securing the layers include using safety pins, basting spray, or thread basting. Choose the method that suits your preferences and the size of your quilt.
- Smooth Out Any Lumps: Take the time to carefully smooth out any lumps or wrinkles in the layers of the quilt sandwich. This will ensure that your quilting stitches lay flat and even, resulting in a professional-looking finished quilt.
Remember, the layering process is an important step that should not be rushed. Take the time to align and smooth out the layers properly, as this will set the stage for a successful binding and quilting process. Once the layers are securely in place, it’s time to move on to basting the layers together.
Basting the Layers Together
After layering the quilt sandwich, the next step in the binding process is to baste the layers together. Basting ensures that the layers stay in place during the quilting process and helps prevent shifting or puckering. There are several methods you can use to baste your quilt layers together:
- Hand Basting: Hand basting involves using a large needle and thread to stitch long, evenly spaced stitches through the layers of the quilt. This method allows for greater control and precision, but it can be time-consuming.
- Spray Basting: Spray basting involves using a temporary adhesive spray to hold the layers together. Spray a thin layer of adhesive on each layer, starting with the backing fabric, then place the batting and quilt top on top. Smooth out any wrinkles or bubbles, applying firm pressure to secure the layers together.
- Pin Basting: Pin basting involves using safety pins to hold the layers together. Starting in the center of the quilt, insert safety pins through all three layers, spaced about 4-6 inches apart. Work your way towards the edges, smoothing out any wrinkles as you go.
- Thread Basting: Thread basting involves using a long stitch on your sewing machine to temporarily hold the layers together. Use a contrasting thread color so it’s easily visible and remove the basting stitches after quilting.
Choose the method that suits your preference and the size of your quilt. Remember to baste the layers together carefully and evenly, paying attention to the edges and corners. Take your time with this step to ensure the layers are securely held together before moving on to the quilting process.
Once the layers are basted together, you are ready to quilt your quilt. Quilting is the process of stitching through the layers to add texture, design, and stability to your quilt. In the next section, we will guide you through the quilting process to create beautiful and functional quilts.
Read more: What To Use For Quilt Backing
Quilting the Quilt
Quilting is the process of stitching through the layers of the quilt to create a decorative pattern, add texture, and secure the layers together. There are various quilting techniques and designs to choose from based on your preference and the desired look of your quilt. Here are some common quilting methods:
- Hand Quilting: Hand quilting involves using a needle and thread to stitch small, even stitches through the layers. This method allows for precise control and a traditional look, but it can be time-consuming.
- Machine Quilting: Machine quilting involves using a sewing machine to stitch the layers together. It can be done with a regular sewing machine or a long-arm quilting machine for larger quilts. Machine quilting is faster and more suitable for intricate designs.
- Free-motion Quilting: Free-motion quilting is a technique where you move the fabric freely under the sewing machine needle, creating unique and organic designs. It requires practice and a darning foot for your sewing machine.
- Walking Foot Quilting: Walking foot quilting uses a specialized foot that helps feed the layers of the quilt evenly through the machine. It is ideal for straight-line quilting or stitching in the ditch.
When choosing a quilting design, consider the style and purpose of your quilt. You can create intricate patterns, simple geometric shapes, or follow the natural lines of the fabric. Experiment with different quilting techniques until you find the one that suits your vision for the quilt.
As you quilt, take your time to ensure even and consistent stitch lengths. Start from the center of the quilt and work your way outwards, smoothing out any wrinkles or puckers as you go. Remember to backstitch or secure your stitches at the beginning and end of each quilting line to prevent unraveling.
Once you have completed the quilting, carefully remove any basting stitches or safety pins that were holding the layers together. This will reveal the beautifully quilted design and prepare the quilt for the next step – binding.
Now that the quilt is quilted, it’s time to trim away the excess batting and backing fabric in preparation for binding. In the following section, we will guide you through the trimming process to achieve clean and crisp edges for your quilt.
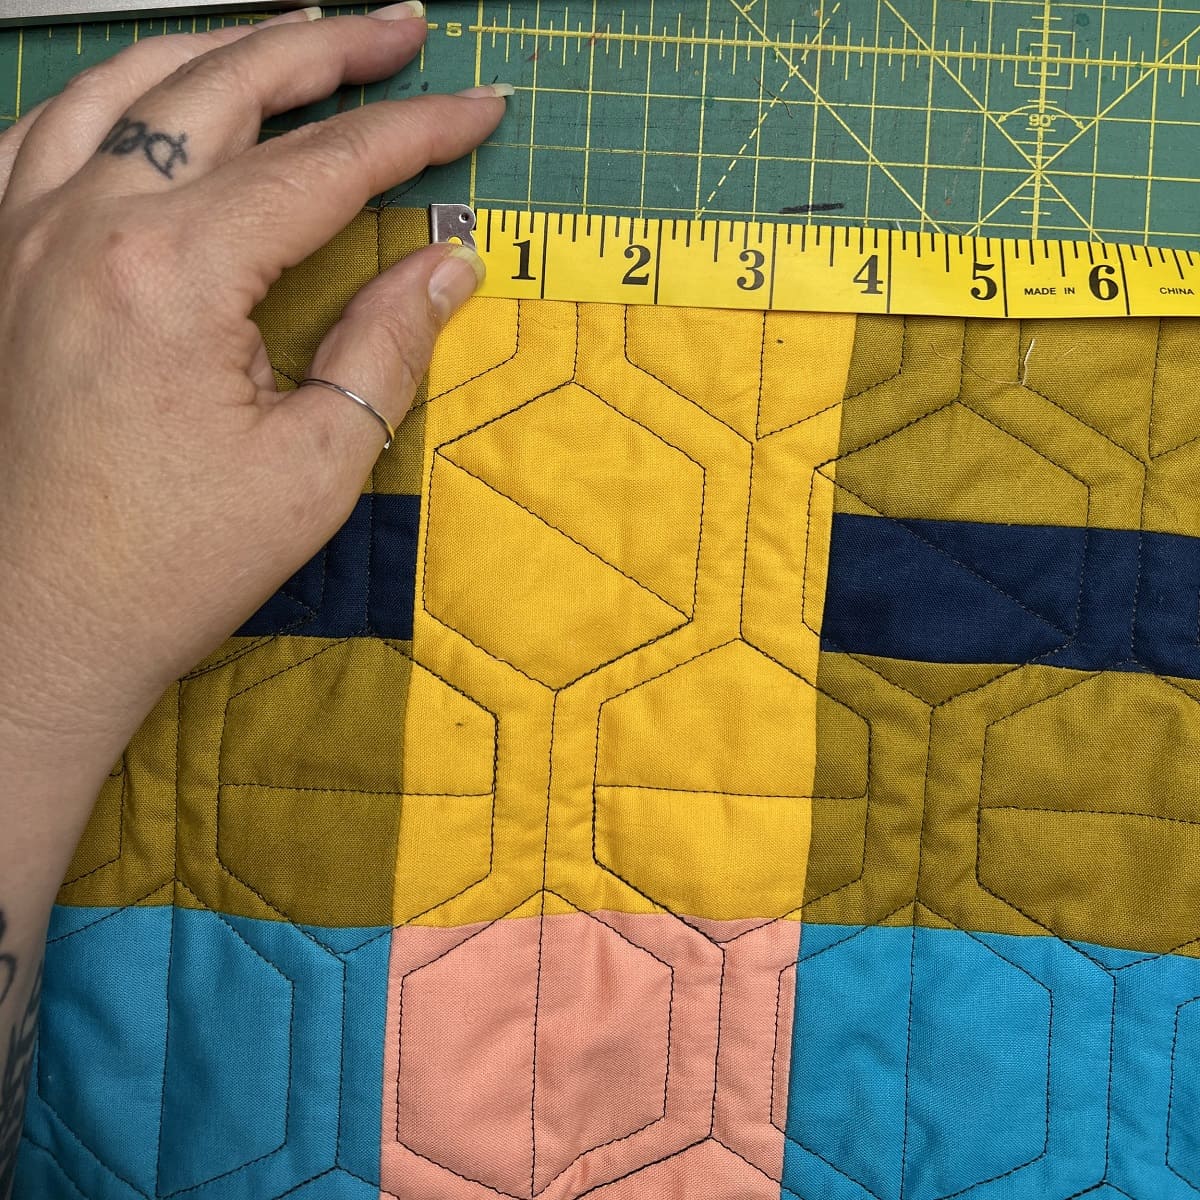
Trimming the Excess Batting and Backing
After quilting your quilt, it’s time to trim away the excess batting and backing fabric to create clean and even edges. Trimming the quilt not only gives it a professional finish but also helps in achieving a straight and neat binding. Follow these steps to trim the excess batting and backing fabric:
- Lay Out the Quilt: Find a large, flat surface to lay out your quilt. Ensure that the quilt is spread out evenly and that all the layers are smooth and flat.
- Measure and Mark: Use a ruler or measuring tape to measure the desired width for your binding. Mark the measurement with a fabric-safe pen or chalk, ensuring that the lines are straight and parallel to the quilt’s edges.
- Trim the Batting: Start by trimming the excess batting to match the marked lines. Use a sharp pair of fabric scissors or a rotary cutter and ruler combination for accuracy. Take care not to cut into the quilt top or backing fabric while trimming.
- Trim the Backing Fabric: Once the batting is neatly trimmed, repeat the process to trim the backing fabric. Align the ruler or measuring tape with the marked lines and carefully trim away the excess fabric. Again, make sure not to cut into the quilt top or batting.
- Inspect the Edges: After trimming, inspect the edges of the quilt to ensure they are even and straight. If necessary, make any final adjustments by trimming off any uneven edges.
- Remove Loose Threads: Check for any loose threads or stray fibers along the trimmed edges. Carefully trim them away to achieve a clean and neat appearance.
By trimming the excess batting and backing fabric, you create a polished and professional look for your quilt. The trimmed edges will also make it easier to attach the binding and achieve a smooth finish.
With the excess batting and backing fabric removed, it’s time to move on to the next stage of the binding process – sewing the binding strips. In the following section, we will guide you through this essential step to complete the binding and finish your quilt.
When binding a quilt using the backing fabric, make sure to trim the backing and batting evenly with the quilt top before attaching the binding. This will ensure a clean and professional finish.
Sewing the Binding Strips
Once you’ve trimmed the excess batting and backing fabric, the next step in the quilt binding process is sewing the binding strips. The binding is a fabric strip that wraps around the edges of the quilt, providing a finished look and securing the quilt layers together. Follow these steps to sew the binding strips:
- Calculate the Binding Length: Measure the perimeter of your quilt to determine the length of binding needed. Add a few extra inches to account for mitered corners and overlapping at the ends.
- Prepare the Binding Strips: Cut fabric strips for binding, ensuring the width is suitable for your desired finished binding width. Typically, binding strips are cut between 2.5 to 3 inches wide. Sew the individual strips together using a diagonal seam to create one continuous binding strip.
- Press and Fold the Binding: Fold the binding strip in half lengthwise, wrong sides together, and press it with an iron to create a crisp crease. This will help in aligning the binding with the quilt edges.
- Starting the Binding: Position the folded binding strip along one side of the quilt, aligning the raw edges of the binding with the raw edges of the quilt. Leave a small tail of binding loose at the starting point, as it will be used later for joining the ends.
- Sewing the Binding: Using a quarter-inch seam allowance, stitch along the edge of the binding, starting a few inches away from the loose end. Sew until you are a few inches away from the first corner of the quilt.
- Mitering the Corners: When you approach the corner, stop stitching a quarter-inch from the corner. Fold the binding strip up, creating a 45-degree angle, and then fold it back down to align with the next edge of the quilt. Continue stitching along the next edge, repeating the mitered corner process for all corners.
- Joining the Ends: To join the ends of the binding, overlap the loose tail with the starting point of the binding. Trim the excess to leave a quarter-inch overlap and then stitch the two ends together with a diagonal seam.
- Finishing Stitches: Once the binding is fully sewn around the quilt, fold it over to the back of the quilt and secure it with pins or clips. Stitch in the ditch along the folded edge of the binding, making sure to catch the binding on the back of the quilt for an invisible finish.
Take your time while sewing the binding to ensure neat and accurate stitching. The binding not only provides a beautiful finishing touch but also plays a crucial role in protecting the quilt’s edges and adding durability.
With the binding sewn to the front of the quilt, the final steps include mitering the corners and binding the back of the quilt. We will guide you through these steps in the next sections to complete the binding process and finalize your quilt.
Attaching the Binding to the Front of the Quilt
Now that you’ve sewn the binding strips together, it’s time to attach the binding to the front of the quilt. This step will secure the binding in place and give your quilt a polished look. Follow these steps to attach the binding to the front of the quilt:
- Prepare the Quilt: Lay your quilt flat with the quilt top facing down and the backing fabric facing up. Make sure the quilt is smooth and free from any wrinkles or folds.
- Starting Point: Choose a starting point on one side of the quilt, leaving a tail of binding loose to be joined later. Place the raw edges of the binding along the raw edges of the quilt, aligning them evenly.
- Pinning or Clipping: Secure the binding to the quilt front by either pinning or using binding clips. Start from the point where you want to begin stitching and work your way toward the corners and edges.
- Stitching: Using a quarter-inch seam allowance, stitch along the folded edge of the binding. Start at the beginning of the binding, backstitching to secure the stitching, and continue until you reach a few inches before the first corner.
- Mitering the Corners: When you approach a corner, stop stitching a quarter-inch from the corner. Fold the binding up, creating a 45-degree angle, and then fold it back down to align with the next edge of the quilt. Continue stitching along the next edge, repeating the mitered corner process for all corners.
- Continuing and Joining the Binding: After rounding all the corners, continue stitching the binding to the quilt until you reach a few inches before the starting point. Trim the loose binding tail, leaving a quarter-inch overlap. Fold back the binding to meet the starting point and place the loose tail on top. Stitch diagonally to join the two ends of the binding together.
- Pressing the Binding: Fold the binding over the raw edges of the quilt to the back, taking care to create neat and mitered corners. Use an iron to press the binding in place, ensuring a crisp and professional finish.
Attaching the binding to the front of the quilt requires precision and attention to detail. Take your time to ensure the binding lies flat along the edges and the corners are neatly folded. Once the binding is secure, it’s time to move on to mitering the corners to give your quilt a clean and professional look.
In the next section, we’ll guide you through the process of mitering the corners, an essential step in achieving beautifully finished quilt bindings.
Read more: How To Use Double Fold Quilt Binding
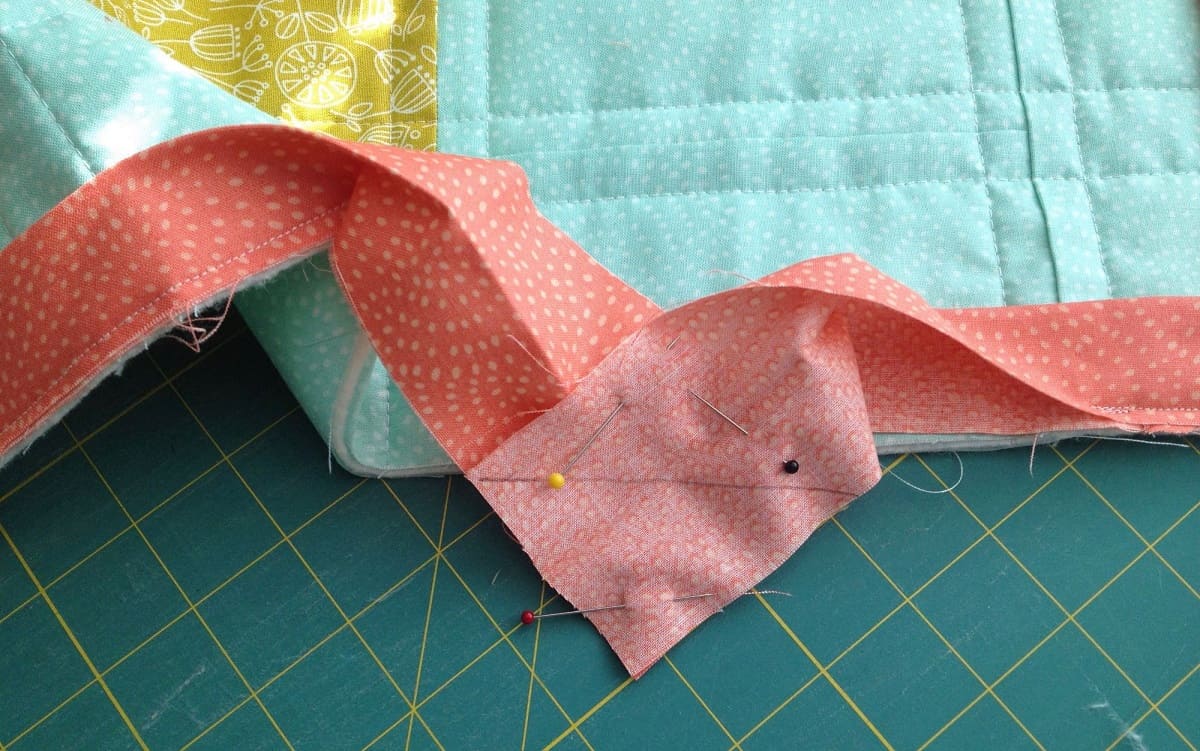
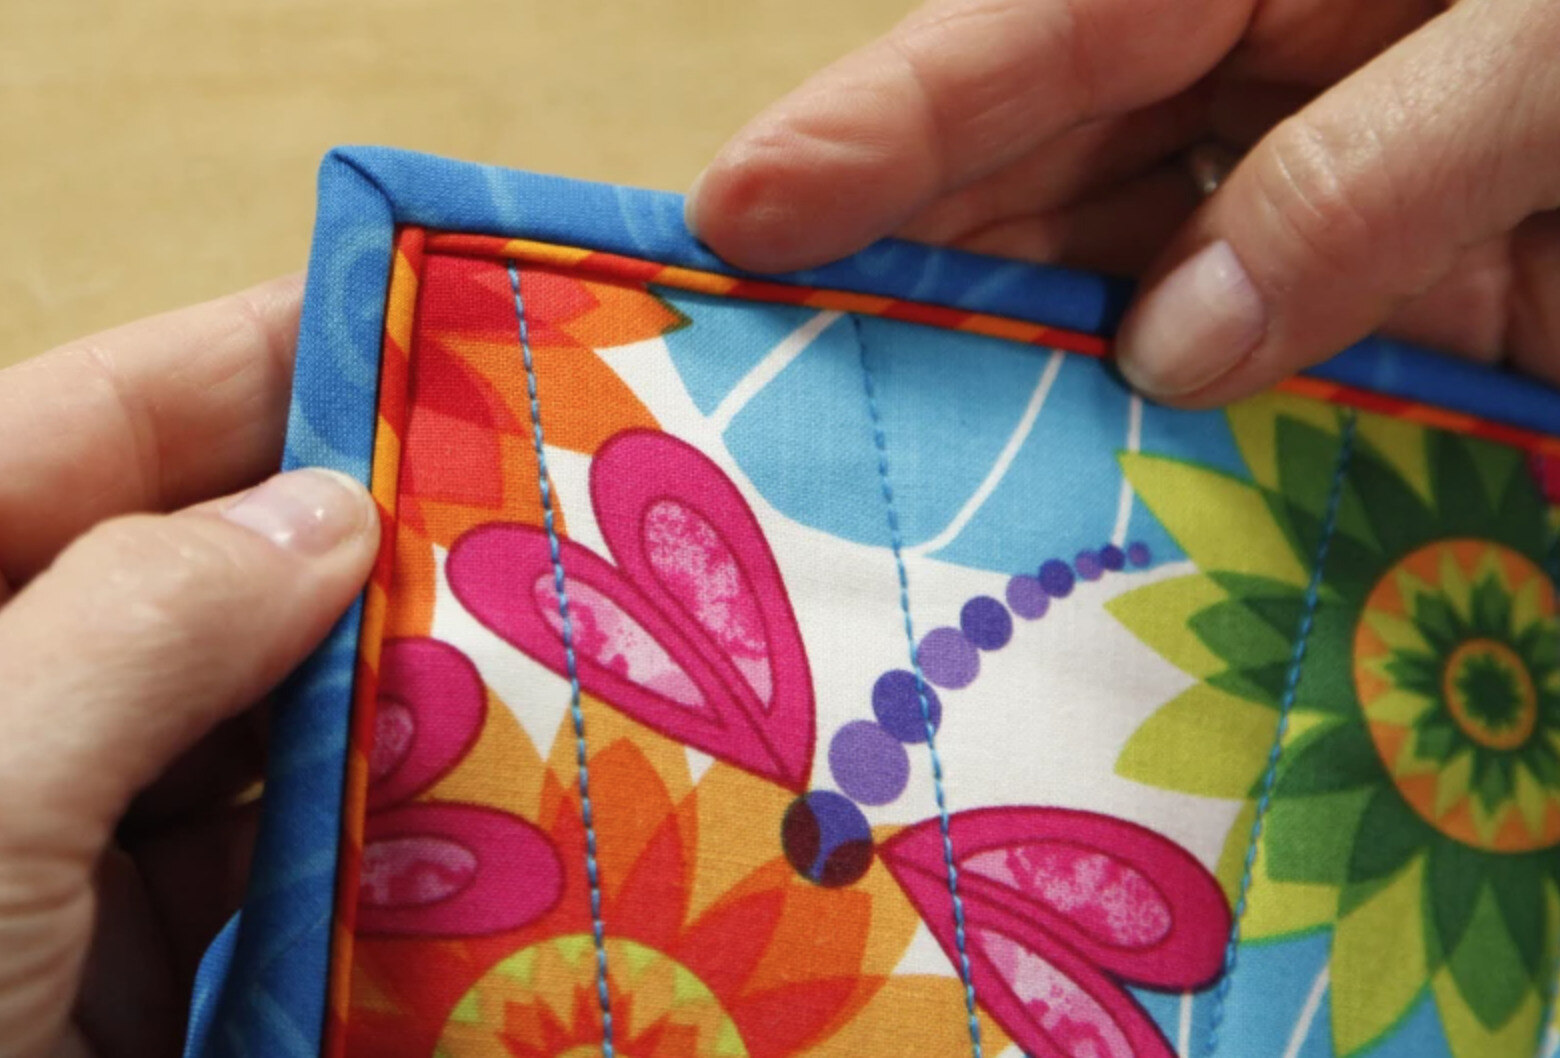
Mitering the Corners
Mitering the corners of your quilt binding adds a clean and professional touch to the finished look. It creates a diagonal fold that neatly wraps around the corner, giving the binding a seamless appearance. Follow these steps to miter the corners of your quilt:
- Take Note of the Corner: Identify the first corner where you want to start mitering. This will typically be the corner closest to where you began stitching the binding.
- Mark the Cutting Line: Using a fabric pencil or removable marker, draw a diagonal line from the corner of the quilt to where the binding strip meets the edge of the quilt. This line will serve as a cutting guide.
- Cut the Binding: Carefully cut along the marked line, ensuring you cut through both layers of the binding strip. Take your time to ensure a clean and straight cut.
- Fold and Pin: Open up the binding strip and fold it diagonally along the cut edge, forming a 45-degree angle. This creates a neat fold that aligns with the edge of the quilt. Secure the fold with pins to keep it in place.
- Continue Sewing: Continue sewing the binding, starting at the fold and working your way down the next side of the quilt. Repeat the mitering process for each corner, taking care to fold and pin the binding to achieve clean and crisp corner folds.
Mitering the corners requires precision and attention to detail, but the result is well worth the effort. The folded corners create a professional finish and give the binding a seamless and polished appearance. Take your time to ensure that the corners are neatly folded and securely pinned before proceeding with sewing.
With the corners mitered, it’s time to move on to the final step – binding the back of the quilt. This will secure the binding in place and complete the overall look of your quilt.
In the following section, we will guide you through the process of binding the back of your quilt for a beautifully finished project.
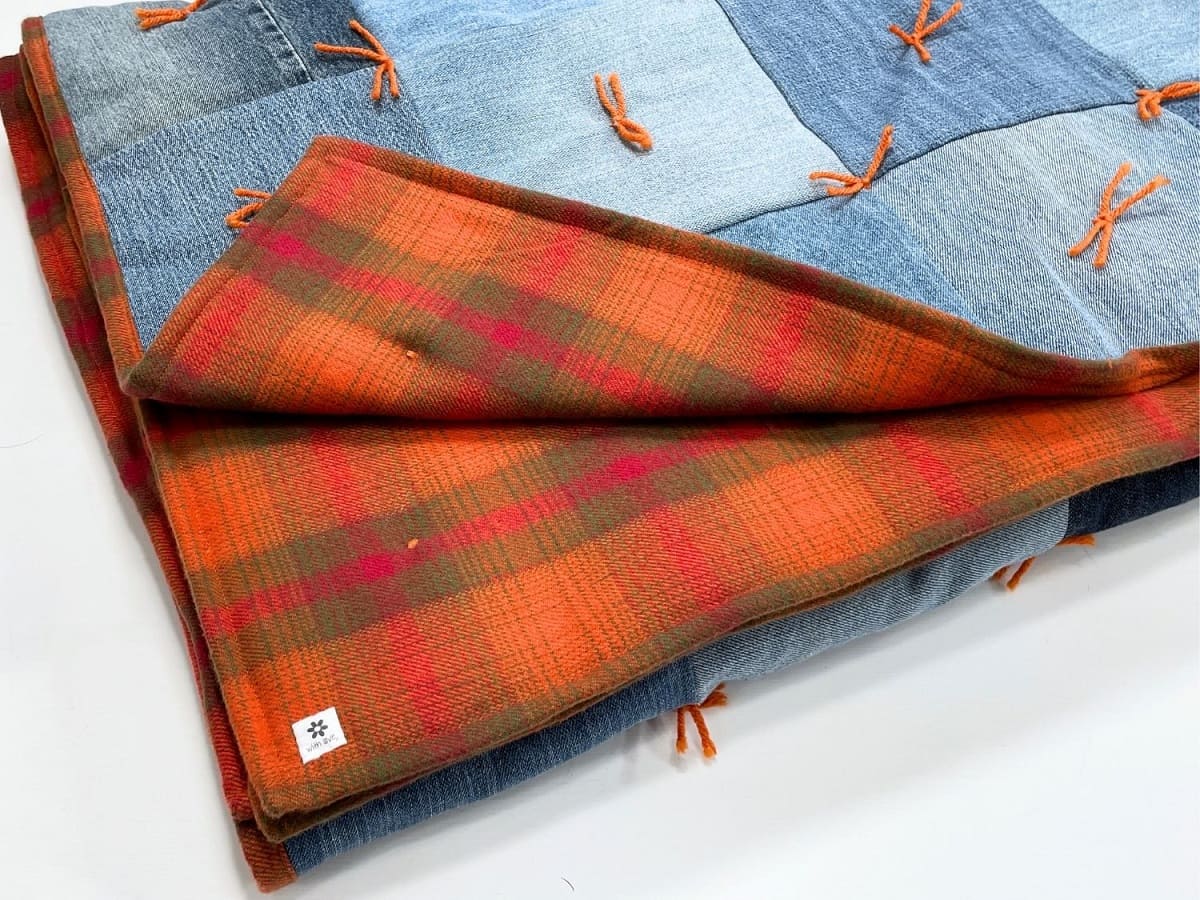
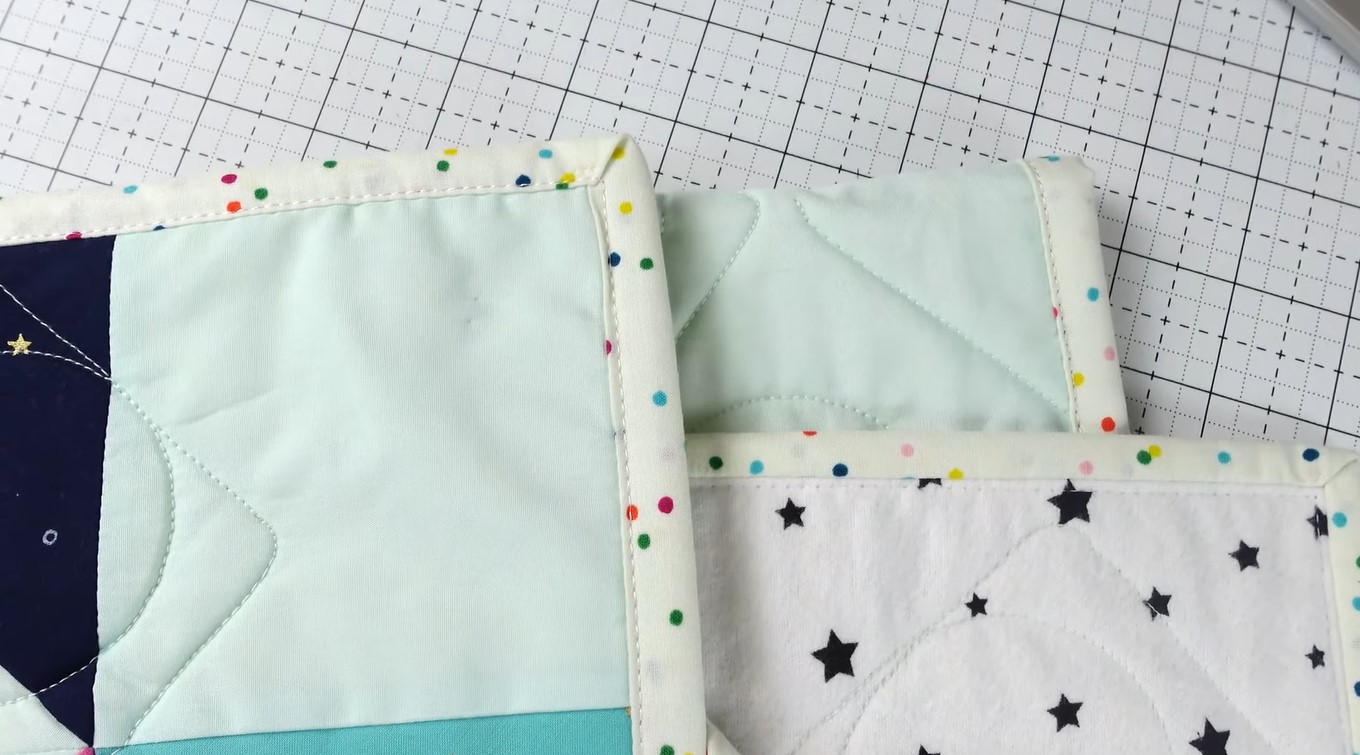
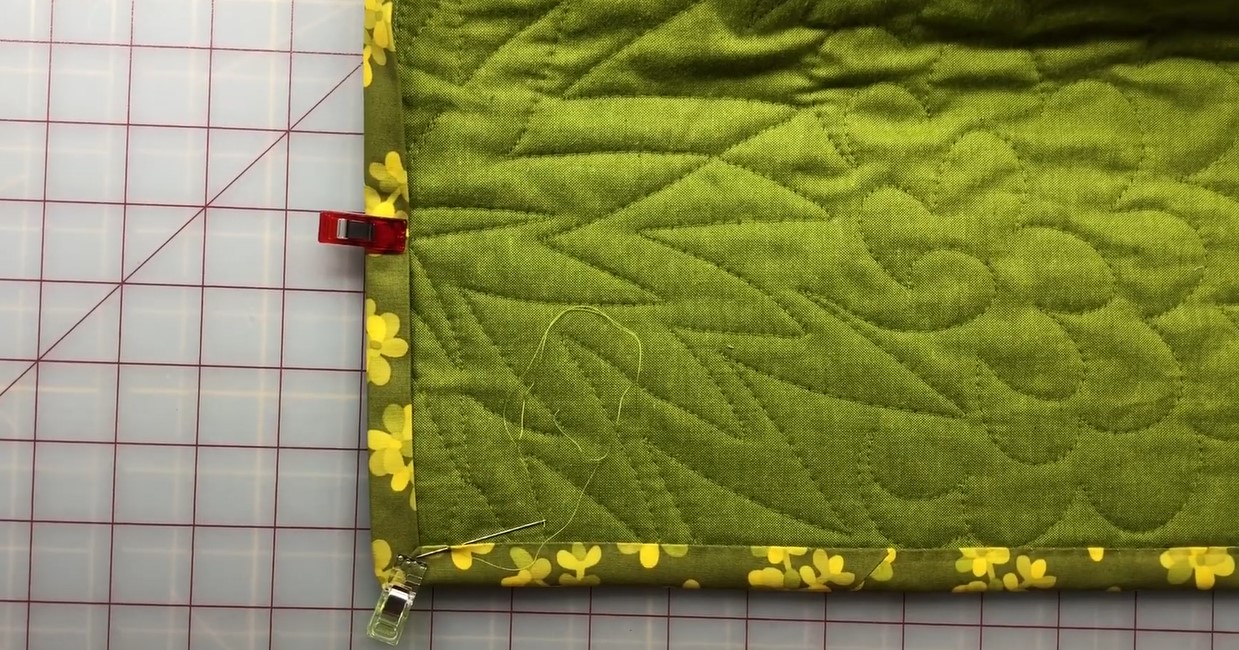
Binding the Back of the Quilt
Binding the back of the quilt is the final step in the quilt binding process. This step secures the binding in place and creates a clean and finished look from both the front and back of the quilt. Follow these steps to bind the back of your quilt:
- Prepare the Quilt: Lay your quilt flat with the quilt back facing up. Make sure the quilt is smooth and free from any wrinkles or folds.
- Trimming the Backing: Trim the excess backing fabric, if necessary, to align with the trimmed edge of the quilt top. Ensure that the backing fabric is even and matches the dimensions of the quilt top.
- Fold the Binding: Fold the binding strip over to the back of the quilt, covering the raw edges of the quilt back. Use clips or pins to hold the binding in place along the entire length.
- Stitching: Starting at a random point along the binding, stitch along the folded edge using a blind stitch or a slip stitch. Take care to catch only the folded binding and the backing fabric, ensuring that the stitches are invisible from the front of the quilt.
- Continue Sewing: Continue stitching along the entire length of the binding, removing the pins or clips as you go. Take your time to maintain even stitching and create an invisible, professional finish.
- Mitering the Back Corners: As you approach the back corners of the quilt, fold the binding using the same mitered technique as done on the front corners. This will create neatly folded corners that match the front of the quilt.
- Tying Off the Threads: Once you have sewn all around the quilt, tie off and secure the thread ends. Trim any excess thread, being careful not to cut through the binding or backing fabric.
Binding the back of the quilt ensures that the binding is secure and creates a professional finish from both sides of the quilt. Taking your time and using careful stitching techniques will result in a neat and durable binding that adds the perfect finishing touch to your quilt.
With the back of the quilt bound, your quilt is now complete! All that’s left to do is admire your beautiful creation and enjoy the warmth and comfort it brings. Quilting is a labor of love, and taking the time to bind your quilt properly will result in a quilt that will be cherished for years to come.
Congratulations on completing the quilt binding process! Through careful preparation and attention to detail, you have successfully created a quilt that is not only functional but also a work of art. Now it’s time to showcase your quilt and share it with pride.
Whether you are gifting the quilt or keeping it for yourself, the binding you have created will ensure that your quilt stands the test of time. Happy quilting!
Finishing Touches
Before you declare your quilt fully finished, there are a few final touches you can add to give it that extra special touch. These finishing touches can enhance the overall appearance of your quilt and make it truly unique. Consider the following ideas:
- Label Your Quilt: Create a fabric label that includes your name, the date, and any other relevant information about the quilt. Attach it to the back of the quilt to leave a personal and lasting mark.
- Add Embellishments: Consider adding embellishments such as buttons, lace, ribbons, or applique to your quilt. These decorative elements can add texture and visual interest to specific areas of your quilt.
- Quilt Label Embroidery: Instead of a fabric label, you can embroider the details of your quilt directly onto the backing fabric. This adds a personal touch and can become a part of the quilt’s overall design.
- Quilt Sleeve: If you plan to hang your quilt, attaching a quilt sleeve to the back makes it easier to display. A quilt sleeve is a fabric tube that allows you to insert a rod for hanging purposes.
- Quilt Care Instructions: Include a quilt care label with instructions on how to properly clean and care for your quilt. This information will help the recipient or future generations preserve the quilt for years to come.
- Quilt Binding Embellishments: Consider adding decorative stitches, piping, or contrasting fabric to the binding to add a pop of color and visual interest. This can give your quilt a unique and finished look.
- Quilt Hanging Sleeve: If you plan to hang your quilt on a wall, sewing a hanging sleeve to the back of the quilt will make it easier to display. This allows you to slide a dowel or rod through the sleeve for hanging.
These finishing touches give your quilt that personal touch and make it truly yours. Whether you choose to add a decorative element or provide detailed information about the quilt, these final steps complete the journey of your quilt-making process.
Remember to enjoy the process of finishing your quilt and take pride in the beautiful piece you have created. Whether you keep it as a cherished heirloom or gift it to someone special, your quilt is a testament to your creativity and skill as a quilter.
Congratulations on completing your quilt, and may it bring warmth, comfort, and joy for years to come!
Conclusion
Quilting is not just a craft, but a creative journey that allows you to express your artistry and create something beautiful and meaningful. Binding your quilt is a crucial step in finishing the quilt and giving it a polished, professional look. By following the steps outlined in this article, you have learned how to bind a quilt using the backing fabric.
We began by discussing the importance of selecting the right backing fabric for your quilt, considering factors such as fabric type, width, quality, thread count, colorfastness, and preshrinking. Preparing the backing fabric involved measuring and cutting it to size, removing wrinkles, squaring up the edges, and considering the seam allowance and backstitching for reinforcement.
Layering the quilt sandwich involved carefully positioning the backing fabric, batting, and quilt top to create a smooth and even surface for quilting. Basting the layers together ensured that they stayed in place during the quilting process, with options such as hand basting, spray basting, pin basting, or thread basting.
The quilting process involved stitching through the layers to add texture, design, and stability to your quilt. Various techniques like hand quilting, machine quilting, free-motion quilting, or walking foot quilting can be used to achieve the desired effect.
Once the quilting was complete, we moved on to trimming the excess batting and backing fabric to create clean and even edges. Then, we sewed the binding strips together and attached them to the front of the quilt, mitering the corners for a professional finish.
Binding the back of the quilt ensured that the binding was secure and created a clean and finished look from both sides. Finally, we explored various finishing touches like adding a fabric label, embellishments, quilt sleeves, care instructions, or decorative elements to give your quilt a personal touch.
Quilting is a meditative and fulfilling art form, and mastering the binding process is a vital step in completing your quilting project. By following the techniques and tips shared in this article, you are equipped with the knowledge and skills to bind your quilts with confidence, ensuring they withstand the test of time and bring joy for generations to come.
Now, it’s time to put your newfound knowledge into practice and continue exploring the endless possibilities of quilting. So gather your materials, unleash your creativity, and embark on your next quilting adventure!
Frequently Asked Questions about How To Bind A Quilt Using The Backing
Was this page helpful?
At Storables.com, we guarantee accurate and reliable information. Our content, validated by Expert Board Contributors, is crafted following stringent Editorial Policies. We're committed to providing you with well-researched, expert-backed insights for all your informational needs.


0 thoughts on “How To Bind A Quilt Using The Backing”