
Articles
How To Wash A Handmade Quilt
Modified: October 19, 2024
Discover the proper technique for washing your handmade quilt with these helpful articles. Preserve the beauty and longevity of your quilt with our expert advice.
(Many of the links in this article redirect to a specific reviewed product. Your purchase of these products through affiliate links helps to generate commission for Storables.com, at no extra cost. Learn more)
Introduction
Handmade quilts are not only beautiful works of art but also cherished heirlooms passed down from generation to generation. These intricate creations require special care and attention when it comes to cleaning to ensure their longevity and preservation. While many quilts can be safely washed in a washing machine, certain quilts, especially those made with delicate fabrics or intricate stitching, require a more gentle approach. In this article, we will guide you through the process of washing a handmade quilt by hand, ensuring that it remains clean and well-maintained for years to come.
Before embarking on the journey of washing a handmade quilt, it is essential to gather all the necessary supplies. Having everything prepared beforehand will streamline the process and ensure that the quilt receives the care it deserves.
Gathering the Necessary Supplies
1. Mild Detergent: Choose a mild, gentle detergent specifically formulated for delicate fabrics. Avoid using bleach or harsh chemicals, as they can damage the quilt’s fibers.
2. Large Bathtub or Basin: Find a clean, spacious bathtub or basin that can comfortably accommodate the quilt. It should be large enough to allow the quilt to have ample space for movement.
3. Clean Towels: Have a supply of clean and absorbent towels ready for drying the quilt later.
4. Soft Brush or Sponge: Obtain a soft-bristle brush or sponge to gently remove any stubborn stains or dirt from the quilt’s surface.
5. Distilled Water: If your tap water is hard or contains minerals, consider using distilled water for washing to prevent any mineral deposits on the quilt.
6. Drying Rack: Prepare a drying rack or a clean, flat surface where the quilt can be laid out to dry.
Preparing the Quilt
Before immersing the quilt in water, it is crucial to take some preparatory steps to prevent damage and ensure effective cleaning.
1. Spot Cleaning: Inspect the quilt for any visible stains or spots. Gently treat these areas with a small amount of pre-wash stain remover, following the instructions on the product.
2. Test for Colorfastness: If you are unsure about the quilt’s colorfastness, choose a small, inconspicuous area and test a small amount of water and detergent to ensure that the colors do not bleed or fade.
3. Close Seams and Fastenings: Check for any loose seams or fastenings, such as buttons or snaps, and ensure that they are securely closed. This will prevent any damage or tangles during the washing process.
Once you have gathered the necessary supplies and prepared the quilt, you are ready to embark on the hand washing process.
Key Takeaways:
- Hand washing a handmade quilt requires patience, gentle care, and attention to detail to preserve its beauty and longevity. Following preparatory steps, using mild detergent, and allowing for proper drying are essential for effective cleaning.
- Gathering the necessary supplies, preparing the quilt, hand washing with care, and ensuring proper drying are crucial steps in maintaining the delicate fabrics and intricate stitching of a handmade quilt. Following these guidelines will help preserve its beauty and sentimental value for years to come.
Read more: How To Tell If A Quilt Is Handmade
Gathering the Necessary Supplies
When it comes to washing a handmade quilt, having the right supplies is crucial to ensure successful and gentle cleaning. Here are the essential items you will need:
1. Mild Detergent
Choose a mild and gentle detergent specifically formulated for delicate fabrics. Look for a detergent that is free from harsh chemicals, bleach, and optical brighteners, as these can damage the quilt’s fibers. Consider using a detergent specifically designed for quilts or delicate laundry items, as they are formulated to be gentle and effective in preserving the quilt’s colors and fabric.
2. Large Bathtub or Basin
Find a clean and spacious bathtub or basin that can comfortably accommodate the quilt. Make sure it is large enough to allow the quilt to have ample space for movement during the washing process. The bathtub or basin should be clean, free from any dirt or residue that could transfer to the quilt during washing.
3. Clean Towels
Prepare a supply of clean and absorbent towels for drying the quilt after washing. These towels will help absorb excess water and provide a soft surface for the quilt to rest on during the drying process. Ensure the towels are clean and free from any dirt or stains that could transfer to the quilt.
4. Soft Brush or Sponge
Obtain a soft-bristle brush or a sponge to gently remove any stubborn stains or dirt from the quilt’s surface. Ensure that the brush or sponge is clean and soft to avoid causing any damage to the fabric or stitching of the quilt.
5. Distilled Water
If your tap water is hard or contains minerals, it is recommended to use distilled water for washing the quilt. Hard water or water with minerals can leave behind deposits on the quilt, affecting its appearance and texture. Using distilled water will help prevent any mineral buildup and ensure a thorough and gentle cleaning.
6. Drying Rack
Prepare a drying rack or a clean, flat surface where the quilt can be laid out to dry. Make sure the drying area is secure and away from direct sunlight, which can fade the colors of the quilt. The drying rack should be clean and sturdy to support the weight of the damp quilt without causing any damage.
Having all these supplies ready before starting the washing process will save you time and ensure that you have everything needed to clean your handmade quilt effectively and safely.
Preparing the Quilt
Before immersing your handmade quilt in water, it is important to take some preparatory steps to ensure its safety and effective cleaning. Follow these guidelines to prepare your quilt for hand washing:
1. Spot Cleaning
Inspect the quilt for any visible stains or spots. Before washing the entire quilt, it is best to treat these areas individually. Gently apply a small amount of pre-wash stain remover to the affected areas following the instructions provided with the product. Use a clean, soft cloth to dab the stain gently without rubbing or scrubbing, as this can damage the fabric and the quilt’s delicate stitching. Allow the stain remover to work for the recommended time and then proceed with washing the quilt.
2. Test for Colorfastness
To ensure that the colors of your quilt do not bleed or fade during the washing process, it is important to perform a colorfastness test. Choose a small, inconspicuous area of the quilt, such as a corner or seam, and test a small amount of water and mild detergent. Gently dab the solution onto the fabric and make sure to check for any color transfer or fading. If the colors remain intact, you can proceed with hand washing the quilt. If you notice any color bleeding or fading, it is best to consult a professional or explore alternative cleaning methods to avoid damaging the quilt.
3. Close Seams and Fastenings
Before washing your quilt, check for any loose seams or fastenings, such as buttons or snaps. Ensure that all seams are securely closed to prevent any damage or tangling during the washing process. Fasten any loose buttons or snaps to avoid them snagging on other parts of the quilt or causing unnecessary stress on the fabric and stitching. Taking this precaution will help maintain the overall structural integrity of your quilt.
4. Consider Pre-washing New Quilts
If your quilt is newly made or has been recently acquired, it is advisable to pre-wash it before regular use. This step helps to remove any residual dyes, chemicals, or dirt that may be present from the manufacturing process. Follow the manufacturer’s instructions or consult with the quilt’s maker for specific pre-washing recommendations for the particular type of fabric used.
By following these preparatory steps, you can ensure that your handmade quilt is well-prepared for gentle and effective hand washing. Taking the time to handle and care for your quilt properly will help maintain its beauty and integrity for years to come.
Hand Washing the Quilt
Hand washing a quilt requires patience, care, and attention to detail to ensure the best results without causing any damage to the delicate fabric or stitching. Follow these steps to hand wash your handmade quilt:
1. Fill the Bathtub or Basin
Fill the Bathtub or Basin with lukewarm water, ensuring that there is enough water to comfortably submerge the quilt. Avoid using hot water, as it can cause the colors to fade or bleed.
2. Add the Mild Detergent
Add a small amount of mild detergent to the water and gently swirl it to create a soapy solution. Use the recommended amount of detergent based on the manufacturer’s instructions.
3. Submerge the Quilt
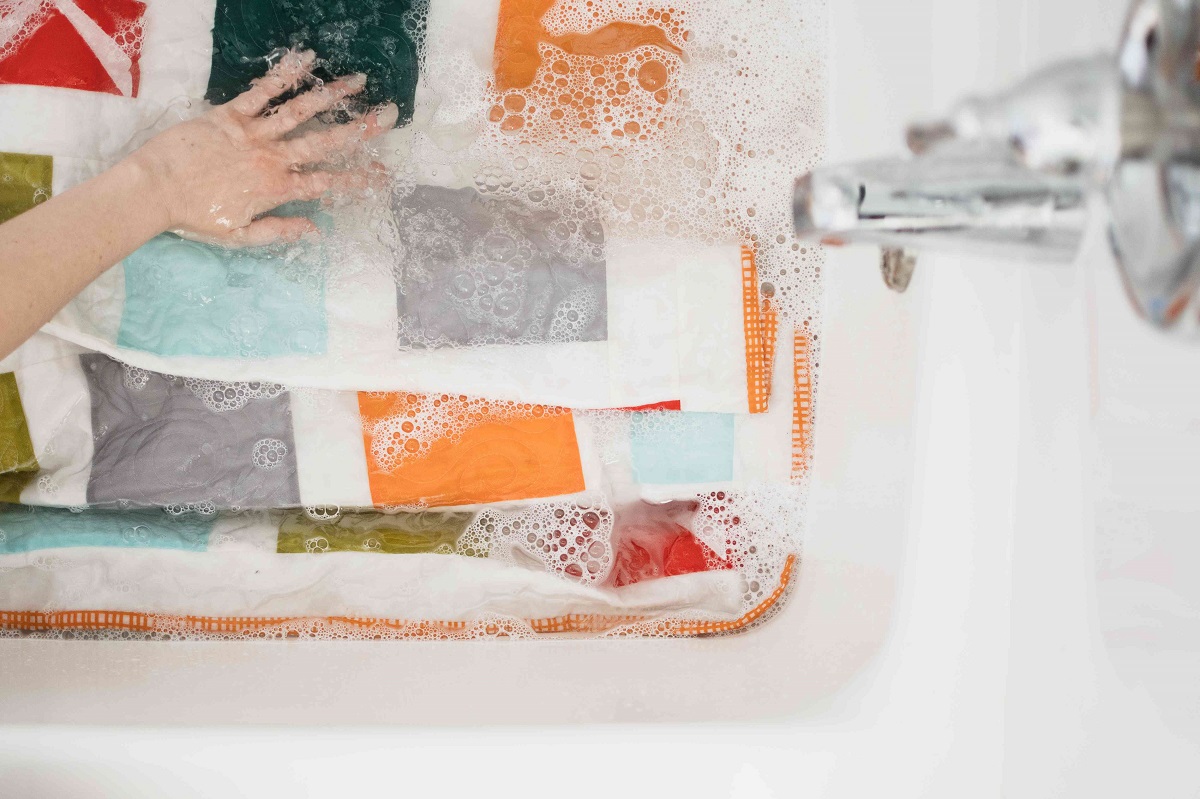
Carefully place the quilt into the soapy water, ensuring that it is fully submerged. Gently move the quilt around in the water to allow the detergent to penetrate the fabric and loosen any dirt or stains. Avoid excessive agitation or scrubbing, as this can cause damage to the quilt’s fibers or stitching.
4. Spot Clean if Needed
If there are any remaining stains or spots on the quilt, take a soft-bristled brush or sponge and gently work the soapy water into the affected areas. Be careful not to scrub too vigorously, as this can weaken the fabric or disrupt the quilt’s intricate stitching. Rinse the brush or sponge frequently to remove any dirt or soap residue.
5. Rinse the Quilt
Once you have finished washing, drain the soapy water from the tub or basin. Refill it with clean, lukewarm water to rinse the quilt. Gently agitate the quilt in the water to remove any remaining detergent. Repeat this rinsing process until the water runs clear, indicating that all soap residue has been removed.
6. Drain and Squeeze Out Excess Water
Carefully drain the rinse water from the tub or basin. To remove excess water from the quilt, gently press down on the quilt with your hands or use a clean towel to absorb the moisture. Avoid wringing or twisting the quilt, as this can damage the fabric or cause it to lose its shape.
7. Transfer to Drying Rack
Once you have removed as much water as possible, transfer the quilt to a drying rack or a clean, flat surface. Arrange the quilt in its natural shape, smoothing out any wrinkles or folds. Ensure that the drying area is secure and well-ventilated, avoiding direct sunlight or excessive heat, which can cause the fabric to fade or shrink.
Remember that the drying process may take several days, depending on the quilt’s size and thickness. It is essential to allow the quilt to dry completely before storing or using it to prevent any moisture-related issues, such as mold or mildew.
By following these steps, you can safely and effectively hand wash your handmade quilt, preserving its beauty and intricate details for years to come.
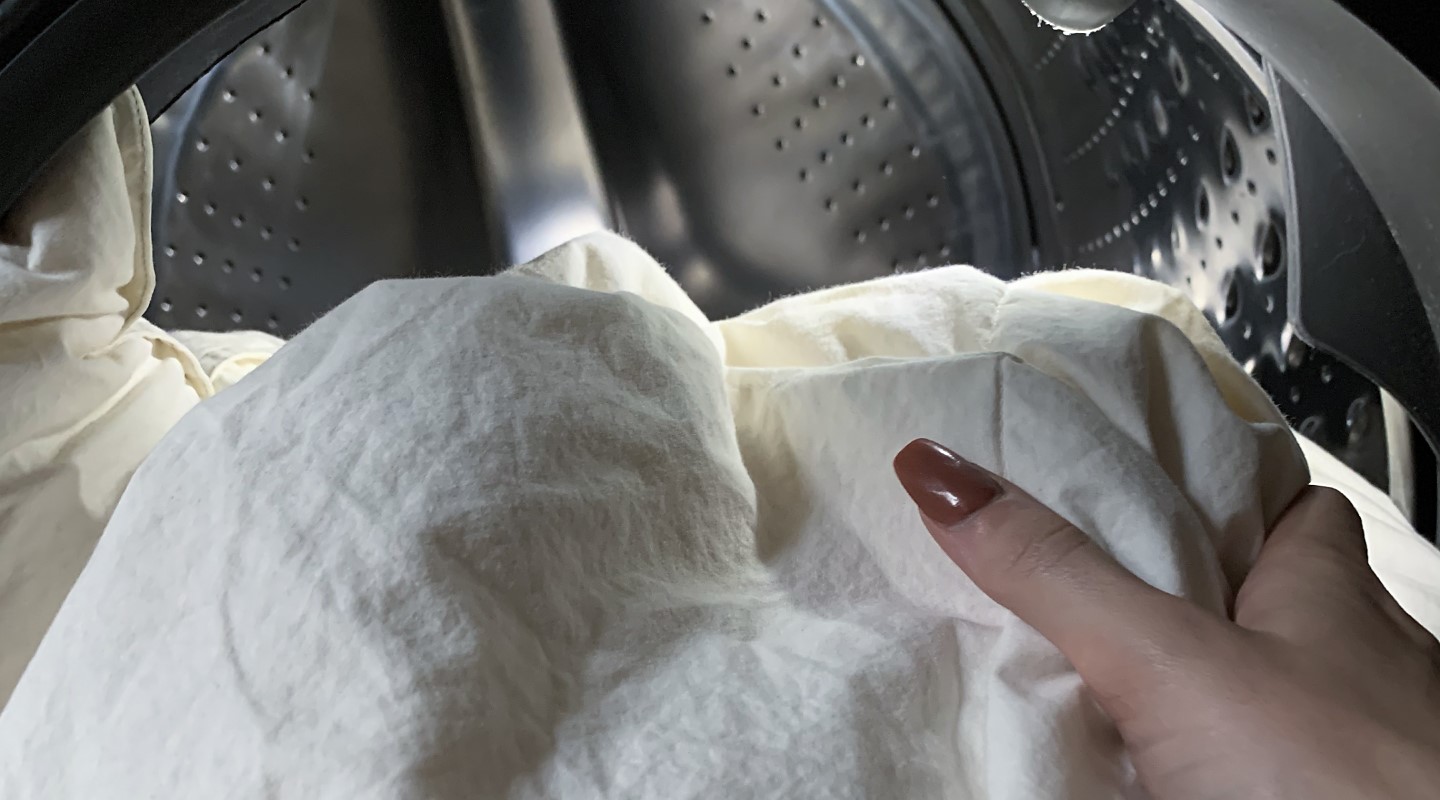
When washing a handmade quilt, use a gentle detergent and wash on a delicate cycle with cold water to prevent damage to the fabric and stitching. Avoid using a dryer and instead air dry the quilt to maintain its shape and integrity.
Drying the Quilt
After hand washing your handmade quilt, it is crucial to dry it properly to prevent any potential damage, such as shrinkage or mildew. Follow these steps to ensure a safe and effective drying process:
1. Prepare a Drying Area
Choose a well-ventilated area for drying the quilt. It should be clean and free from any dirt, dust, or pet hair that could transfer to the quilt. Avoid drying the quilt in direct sunlight, as this can cause colors to fade. Lay out a clean, flat surface or use a drying rack that can support the weight of the damp quilt without stretching or distorting its shape.
2. Arrange the Quilt
Gently arrange the quilt on the drying surface, ensuring that it is spread out in its natural shape. Smooth out any wrinkles or folds, paying attention to the corners and edges. Avoid hanging the quilt, as this can result in stretching or uneven drying.
3. Flip and Air Out
During the drying process, it is recommended to flip the quilt periodically to promote even drying. This helps to prevent any potential moisture buildup and ensures that all parts of the quilt dry thoroughly. You can also gently lift and fluff the quilt to allow air circulation and speed up the drying process.
4. Patience is Key
It is important to be patient during the drying process. Depending on the quilt’s thickness and the surrounding humidity, it may take several days or longer for the quilt to dry completely. Rushing the drying process by applying heat or using a dryer can potentially damage the fabric or cause shrinkage. Allow the quilt to air dry naturally, which will help preserve its quality and structural integrity.
5. Check for Dryness
To ensure that your quilt is completely dry, perform a touch test. Gently press your hand against the quilt’s center and other areas to check for any residual dampness. If the quilt feels cool or damp, it is not fully dry and should continue drying. If the quilt feels dry to the touch, it is safe to proceed to the next step.
6. Optional Fluffing
If your quilt appears slightly flattened after drying, you can give it a gentle fluffing. Use your hands or a soft-bristled brush to lightly fluff and restore the loft and texture of the quilt. Be careful not to apply excessive force or brush too vigorously, as this can damage the fabric or disrupt the quilt’s stitching.
By following these steps, you can ensure that your handmade quilt dries properly, maintaining its beauty and protecting its longevity for years to come. Remember to exercise patience and handle the quilt with care during the drying process to ensure the best results.
Read more: How Much Is A Handmade Quilt Worth
Important Tips and Guidelines
When it comes to washing a handmade quilt, there are some important tips and guidelines to keep in mind to ensure the best results and preserve the quilt’s beauty and integrity. Here are some key considerations:
1. Read and Follow the Care Instructions
Before washing your handmade quilt, carefully read any care instructions provided by the quilt’s maker or any labels attached to the quilt. Follow the specific guidelines or recommendations for cleaning to ensure that you are treating the quilt appropriately and avoiding any potential damage.
2. Test the Fabric
If you are uncertain about the fabric composition or its reaction to water and detergents, perform a spot test on a small, inconspicuous area of the quilt. This will help you determine its colorfastness and vulnerability to potential shrinkage or damage before washing the entire quilt.
3. Handle with Care
When washing and drying your quilt, handle it with care to avoid stretching, pulling, or causing any unnecessary stress on the fabric or stitching. Treat the quilt gently throughout the process to preserve its intricate details and prevent any potential damage.
4. Avoid Excessive Agitation
During the hand washing process, avoid excessive agitation or scrubbing. Agitating the quilt too vigorously can weaken the fabric, damage the stitching, or cause colors to bleed. Use a gentle swishing motion or lightly press the quilt to help loosen dirt and stains without causing harm.
5. Avoid Compression
When drying the quilt, avoid folding or stacking heavy items on top of it, as this can compress and distort the quilt’s shape. Allow the quilt to lay flat or hang freely to air dry, ensuring that it has ample space to breathe and regain its original form.
6. Protect from Direct Sunlight
Direct sunlight can cause colors to fade and fabric fibers to weaken over time. When drying your quilt, choose a drying location away from direct sunlight. If you display your quilt, periodically rotate and position it in areas where it is not exposed to prolonged sunlight to maintain its vibrancy.
7. Consider Professional Cleaning
If your handmade quilt has significant stains, intricate stitching, or delicate fabrics, it may be advisable to seek professional cleaning services. Professional quilt cleaners have experience in handling delicate items and can employ specialized techniques to ensure thorough cleaning while preserving the quilt’s condition.
8. Store Properly
After washing and drying your handmade quilt, it is crucial to store it properly to protect it from dust, insects, and potential damage. Place the quilt in a clean, well-ventilated storage area away from direct sunlight or excessive humidity. Consider using acid-free tissue paper or a cotton sheet to wrap the quilt and help maintain its shape and prevent any potential color transfer.
By following these important tips and guidelines, you can take proper care of your handmade quilt, ensuring its longevity, and allowing you to continue enjoying its beauty for years to come.
Conclusion
Washing a handmade quilt by hand requires patience, attention to detail, and proper care. By following the guidelines and tips outlined in this article, you can safely and effectively clean your quilt while preserving its beauty and longevity.
From gathering the necessary supplies to preparing the quilt, hand washing, and drying it, each step plays a crucial role in maintaining the quilt’s delicate fabrics and intricate stitching. Taking the time to spot clean, test for colorfastness, and securely fasten any loose seams or fastenings ensures a gentle and thorough cleaning process.
Remember, hand washing allows you to control the process and avoid any potential damage that could occur in a washing machine. Although it may require more time and effort, the results are well worth it when it comes to preserving the quilt’s craftsmanship and sentimental value.
Throughout the entire process, it is important to handle the quilt with care, avoiding excessive agitation or compression. Choosing the right detergent, using distilled water, and allowing the quilt to air dry in a well-ventilated area ensures the best results.
Lastly, it is crucial to follow any care instructions provided by the quilt’s maker and test the fabric if uncertain. If in doubt or if the quilt has significant stains or delicate fabrics, it may be best to seek professional cleaning services to ensure its preservation.
By implementing these practices and considering the unique characteristics of your handmade quilt, you can maintain its beauty, prolong its lifespan, and continue to cherish it as a cherished heirloom for years to come.
Frequently Asked Questions about How To Wash A Handmade Quilt
Was this page helpful?
At Storables.com, we guarantee accurate and reliable information. Our content, validated by Expert Board Contributors, is crafted following stringent Editorial Policies. We're committed to providing you with well-researched, expert-backed insights for all your informational needs.





0 thoughts on “How To Wash A Handmade Quilt”