Articles
How To Quilt A Panel
Modified: August 22, 2024
Learn the art of quilting with panels. Discover helpful articles and tips for quilting panels to create beautiful designs.
(Many of the links in this article redirect to a specific reviewed product. Your purchase of these products through affiliate links helps to generate commission for Storables.com, at no extra cost. Learn more)
Introduction
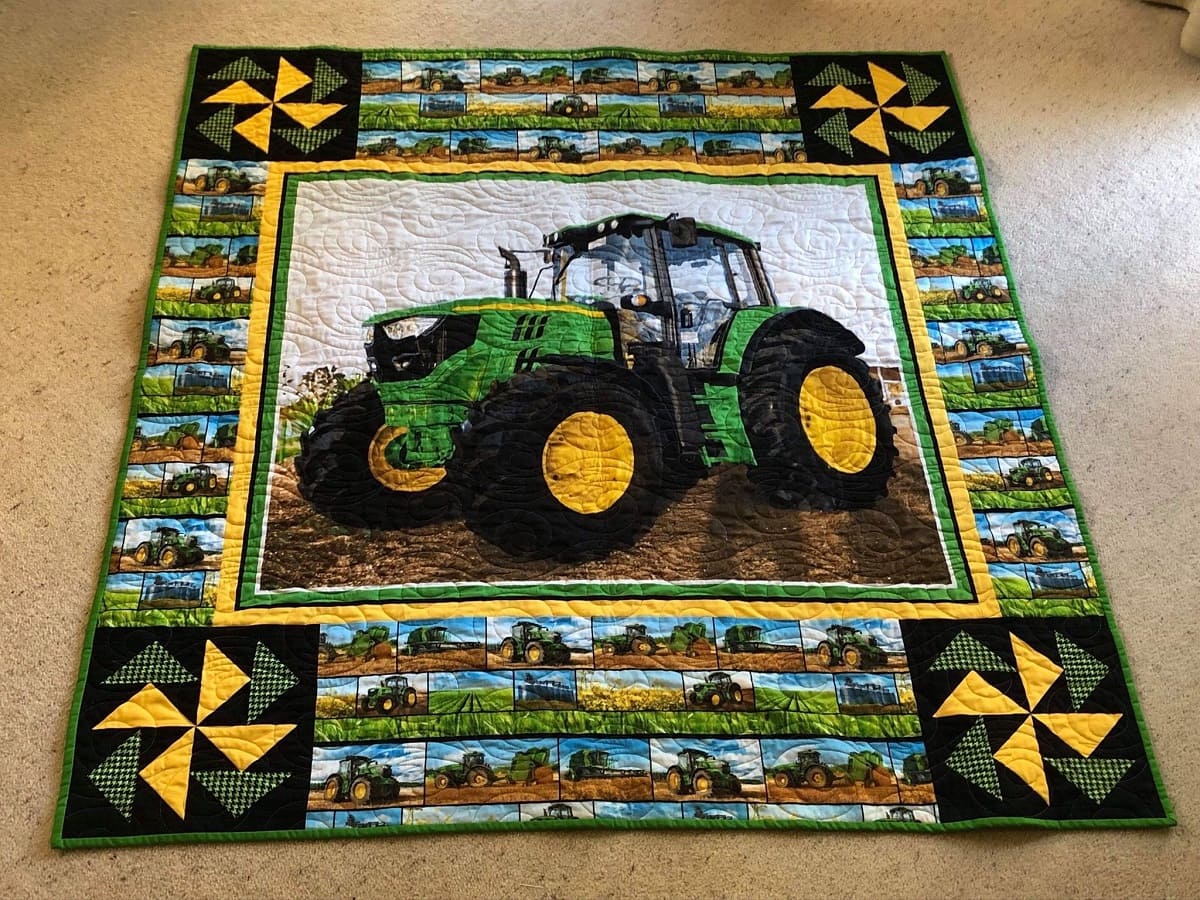
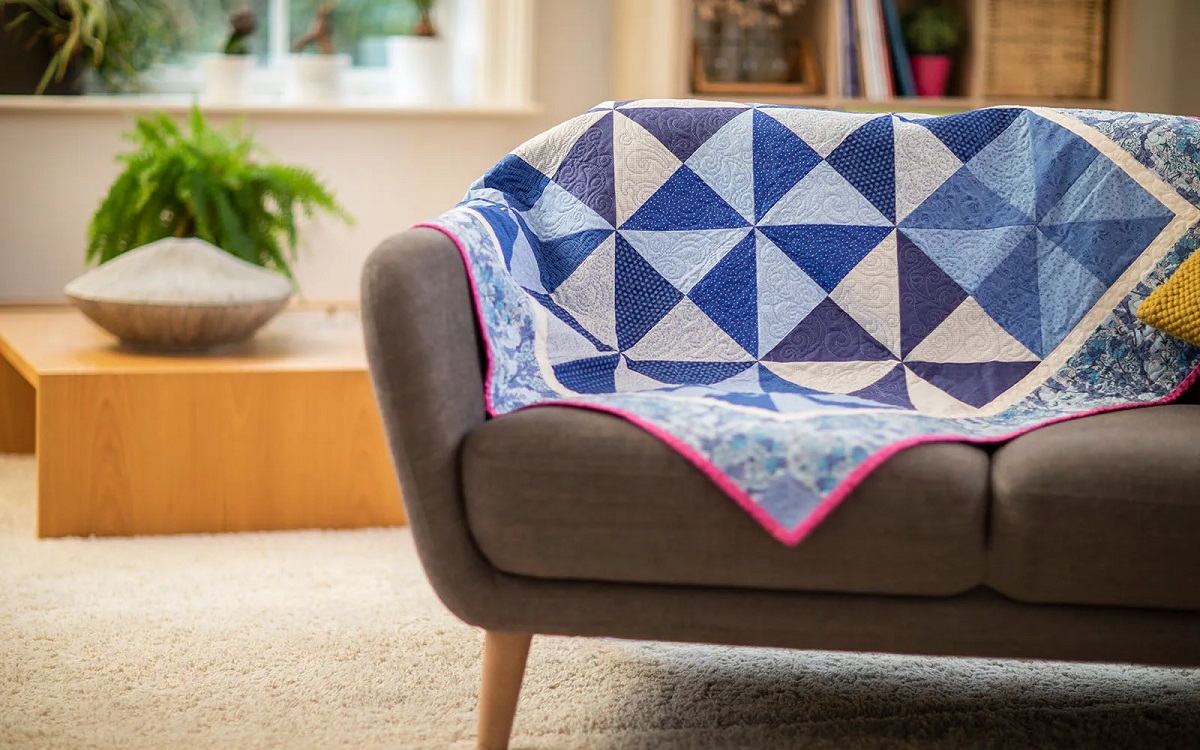
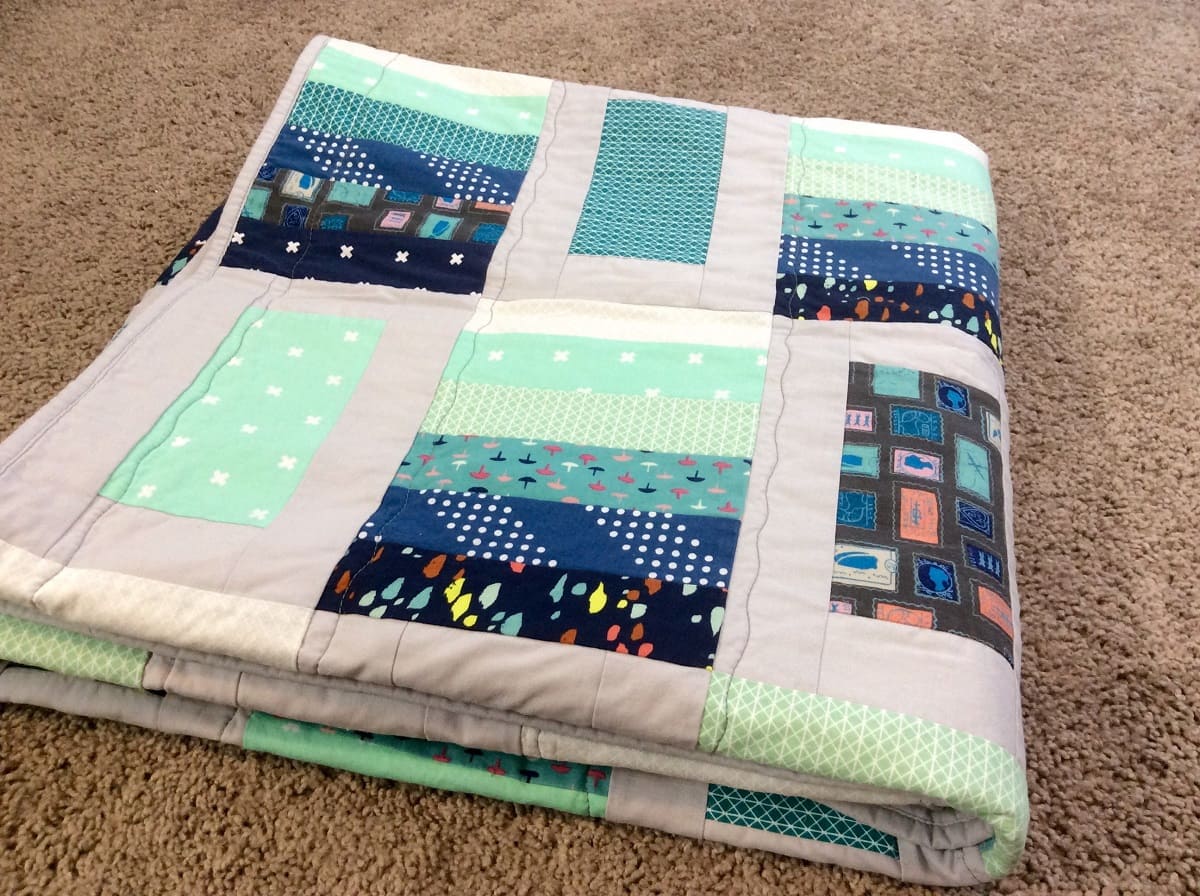
Welcome to the world of quilting! Quilting is a timeless art form that allows you to create beautiful and functional pieces using fabric, thread, and your imagination. One of the most popular quilt projects for beginners is quilting a panel. Quilt panels are pre-printed fabric pieces featuring intricate designs, images, or patterns. They provide a great focal point for a quilt and make it easy to create a visually stunning piece.
In this article, we’ll guide you through the process of quilting a panel from start to finish. Whether you’re a newbie to quilting or an experienced quilter looking for some fresh ideas, this step-by-step guide will help you create a gorgeous quilt to cherish.
Before we dive into the process, let’s take a look at the materials you’ll need to get started.
Key Takeaways:
- Quilting a panel involves careful material selection, precise preparation, and thoughtful design choices. Embrace the creative process and enjoy the journey of transforming fabric into a stunning and unique quilt.
- The art of quilting goes beyond creating beautiful pieces; it’s a meditative and joyful experience that allows for personal expression and connection to tradition. Embrace your passion, share your creations, and continue to explore the endless possibilities of quilting.
Read also: 8 Best Quilt Panels for 2025
Materials Needed
Before you begin quilting a panel, gather the following materials:
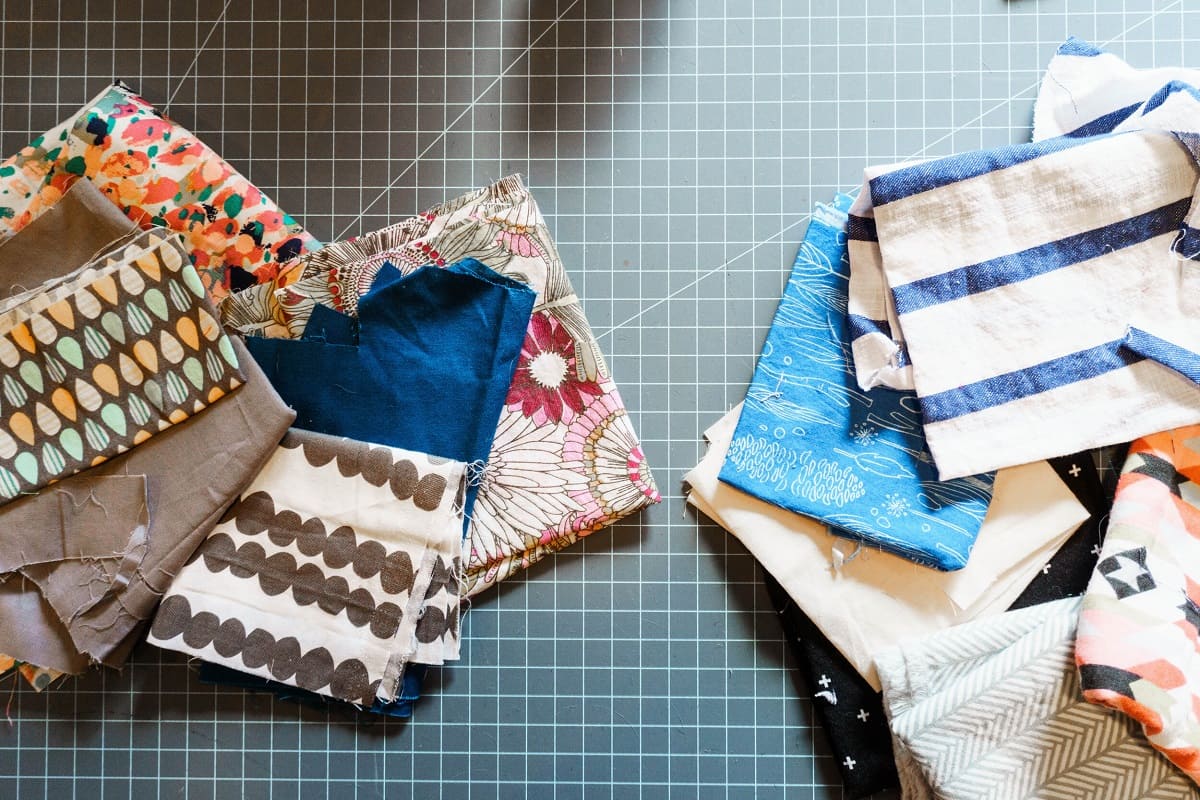
- Fabric panel: Choose a fabric panel that suits your style and preference. These panels come in various themes and designs, such as floral, wildlife, or geometric patterns. Select a panel that inspires you and matches the overall aesthetic you want to achieve with your quilt.
- Backing fabric: This is the fabric that will be used for the back of your quilt. Choose a fabric that complements the panel or coordinates with the colors and theme.
- Batting: Batting provides the loft and warmth to your quilt. Select a batting that suits your desired level of warmth and thickness.
- Fabric for borders: You’ll need additional fabric to create borders around your panel. Choose a coordinating fabric that enhances the design and helps frame the panel.
- Thread: Use a high-quality thread that matches or complements the colors of your panel and borders.
- Quilting ruler: A quilting ruler is a useful tool for measuring and cutting fabric accurately.
- Rotary cutter and mat: These tools are essential for precise fabric cutting.
- Pins or clips: Use pins or clips to hold the layers of your quilt together during the quilting process.
- Quilting needles: Choose quilting needles that are appropriate for hand quilting or machine quilting, depending on your preferred method.
- Iron and ironing board: A hot iron and ironing board are essential for pressing your fabric and achieving neat seams.
- Sewing machine or needle and thread: Depending on your preference, you can hand quilting or machine quilt your project.
Now that you have all the necessary materials, let’s move on to choosing a quilt panel.
Choosing a Quilt Panel
When selecting a quilt panel for your project, there are a few factors to consider.
Theme and Design: Quilt panels come in a wide range of themes and designs, such as animals, nature, sports, or abstract patterns. Choose a panel that speaks to your interests and preferences. Consider the overall aesthetic you want to achieve with your quilt and select a panel that complements that vision.
Size: Quilt panels come in various sizes, so it’s essential to choose a panel that is appropriate for your desired quilt dimensions. Measure the space you have available or determine the size you want your finished quilt to be before selecting a panel.
Color Scheme: Pay attention to the color scheme of the panel and how it will coordinate with the rest of your quilt. Consider the colors you want to use for the borders and backing fabric. Choose a panel with colors that harmonize with your design vision.
Fabric Quality: Inspect the fabric quality of the panel before purchasing. Look for panels made from durable, high-quality cotton or cotton-blend fabric. The fabric should feel soft and have a smooth texture, allowing for easy quilting.
Personal Preference: Ultimately, the choice of quilt panel comes down to your personal preference and what inspires you. Let your creativity guide you in selecting a panel that sparks joy and excitement for your quilting project.
TIP: If you’re having trouble finding the perfect quilt panel, consider designing your own. Using fabric markers or paints, you can create a custom panel with personalized images or designs.
Once you’ve chosen your quilt panel, it’s time to prepare it for quilting. Let’s move on to the next step: preparing the panel.
Preparing the Panel
Before you start quilting your panel, it’s essential to prepare it properly to ensure a smooth and seamless process. Follow these steps to get your panel ready:
- Measure and trim: Begin by measuring your panel to determine its exact dimensions. Use a quilting ruler and rotary cutter to trim any excess fabric from the edges of the panel. Ensure that all sides are straight and even.
- Press the panel: Use an iron set to the appropriate temperature for your fabric to press the panel. Start from the center and move outward, pressing gently to avoid stretching or distorting the fabric. Pay extra attention to the corners and edges to ensure they are crisp and flat.
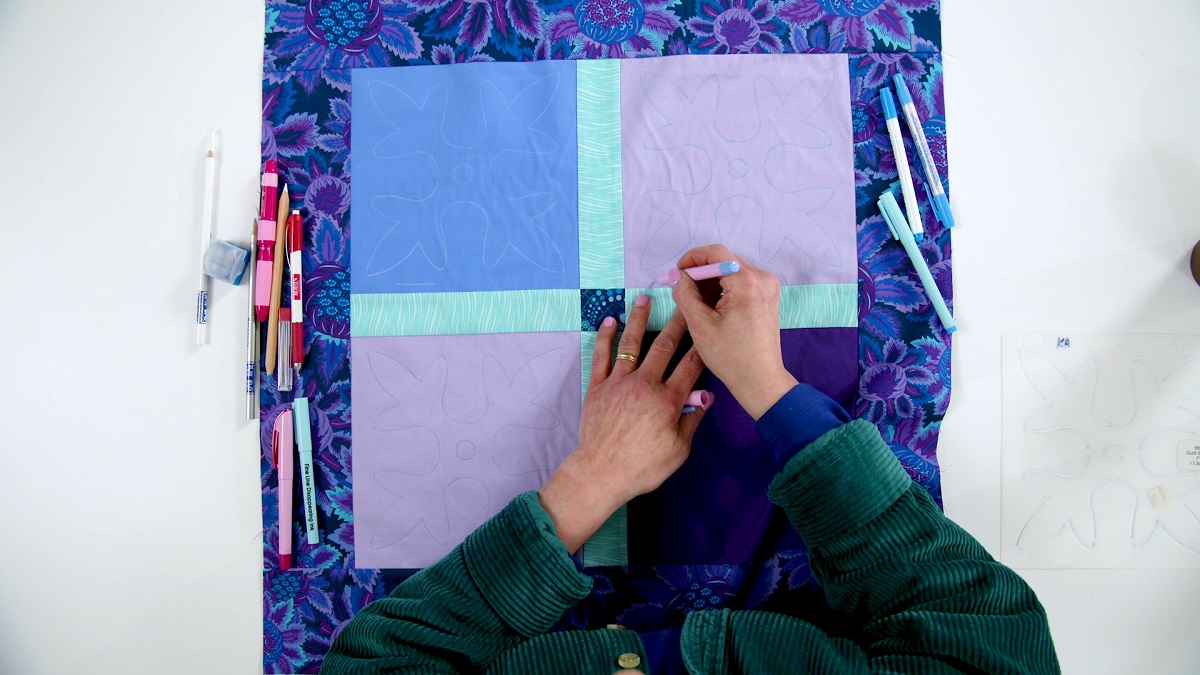
- Mark the quilting lines (optional): If you wish to add quilting lines or designs to your panel, use a water-soluble fabric marker or chalk to mark the desired lines on the back of the panel. This will serve as a guide during the quilting process and help maintain symmetry and accuracy.
- Staystitch the edges: To prevent the edges of your panel from fraying or stretching, it’s a good idea to staystitch around the perimeter. Use a straight stitch with a ¼ inch seam allowance and sew a row of stitching close to the edge of the panel. This will stabilize the fabric and keep it in place during the quilting process.
Once you have prepared the panel, it’s time to select the fabric for the borders. Let’s explore this step in detail.
Selecting the Fabric for Borders
Choosing the right fabric for the borders of your quilt is crucial as it can greatly enhance the overall design and visual appeal. Follow these tips to select the perfect fabric:
- Coordinate with the panel: Look for fabric colors and patterns that complement the colors and theme of your quilt panel. Consider pulling out specific colors or motifs from the panel to guide your fabric choice.
- Contrast or blend: Decide whether you want the borders to stand out and create a contrast with the panel or blend in seamlessly. Both options can yield beautiful results, so choose based on your desired aesthetic.
- Consider scale: Pay attention to the scale of the prints or patterns on the border fabric. If the panel has a large design, you may want to choose a border fabric with smaller-scale prints or vice versa.
- Opt for complementary colors: Use the color wheel as a guide to choose complementary colors for your border fabric. Complementary colors are located opposite each other on the color wheel and create a visually pleasing contrast.
- Evaluate fabric weight: Consider the weight and texture of the border fabric. Make sure it complements the panel fabric in terms of weight. You want the quilt to have a balanced feel without any one layer overpowering the others.
- Take inspiration from existing patterns: If the quilt panel features specific patterns or motifs, look for border fabrics that incorporate similar elements. This can create a cohesive look and tie the quilt together.
Once you have chosen the perfect border fabric, it’s time to cut it to the appropriate size. Let’s move on to the next step: cutting the borders.
Read more: How To Machine Quilt A Large Quilt
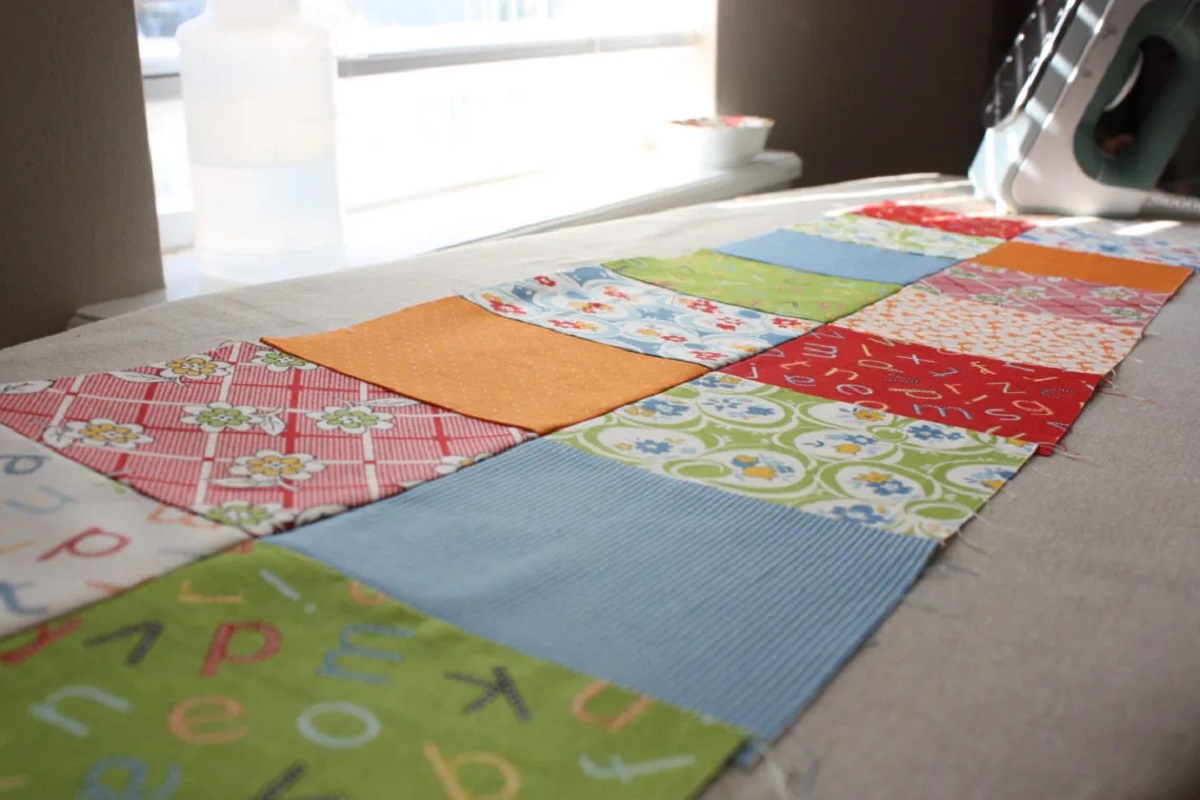
Cutting the Borders
Now that you have selected the fabric for the borders of your quilt, it’s time to cut them to the appropriate size. Follow these steps to cut the borders:
- Measure the panel: Measure the length and width of your quilt panel. Take note of the measurements, as they will guide you in cutting the borders accurately.
- Determine border width: Decide on the desired width of your borders. This will depend on your personal preference and the overall design of your quilt. A common border width is around 2.5 to 4 inches, but feel free to choose a different width that suits your vision.
- Calculate border length: Calculate the length of the borders by adding the panel’s length plus twice the border width to account for the top and bottom borders. Repeat this calculation for the width of the quilt by adding the panel’s width plus twice the border width to account for the side borders.
- Cut the border fabric: Using a rotary cutter and quilting ruler, cut strips of fabric according to the determined border width and length. To ensure accuracy, use a sharp blade and make smooth, straight cuts.
- Join the border strips: If the borders need to be longer than the length or width of the fabric strips, join additional strips together by sewing them with a ¼ inch seam allowance. Press the seams open and trim any excess fabric.
- Mark the borders: Once the border strips are ready, mark them according to their placement on the quilt. Use fabric markers or pins to indicate the top, bottom, and sides of each strip.
Congratulations! You have successfully cut the borders for your quilt. Now it’s time to attach them to the quilt panel. Let’s move on to the next step: attaching the borders.
When quilting a panel, use a walking foot to prevent shifting and puckering. Start by quilting along the panel’s printed lines to enhance the design.
Attaching the Borders to the Panel
Now that you have your border fabric cut to the appropriate size, it’s time to attach them to the quilt panel. Follow these steps to successfully attach the borders:
- Arrange the borders: Lay out the quilt panel on a flat surface and place the border fabric strips along the edges of the panel. Take note of the top, bottom, and side borders to ensure proper placement.
- Pin or mark the borders: Use pins or fabric markers to secure the borders to the panel. Place pins or mark the fabric at regular intervals to prevent shifting during the sewing process.
- Sew the borders: Starting with one side of the panel, align the edges of the border fabric strip with the corresponding edge of the panel. Pin the fabric together and sew using a ¼ inch seam allowance. Backstitch at the beginning and end of the seam for added durability.
- Continue sewing: Repeat the process for the remaining sides of the panel, attaching the borders in the correct order. Take care to maintain the alignment and prevent any puckering or stretching as you sew.
- Press the seams: Once all the borders are attached to the panel, press the seams using an iron set to the appropriate temperature for your fabric. Press the seams towards the borders to create a flat and tidy appearance.
- Trim excess fabric: Trim any excess fabric from the borders to ensure a smooth and even edge. Use a rotary cutter and quilting ruler to achieve straight and precise cuts.
Congratulations! You have successfully attached the borders to your quilt panel. The next step is to layer and baste the quilt. Let’s proceed to the next step: layering and basting the quilt.
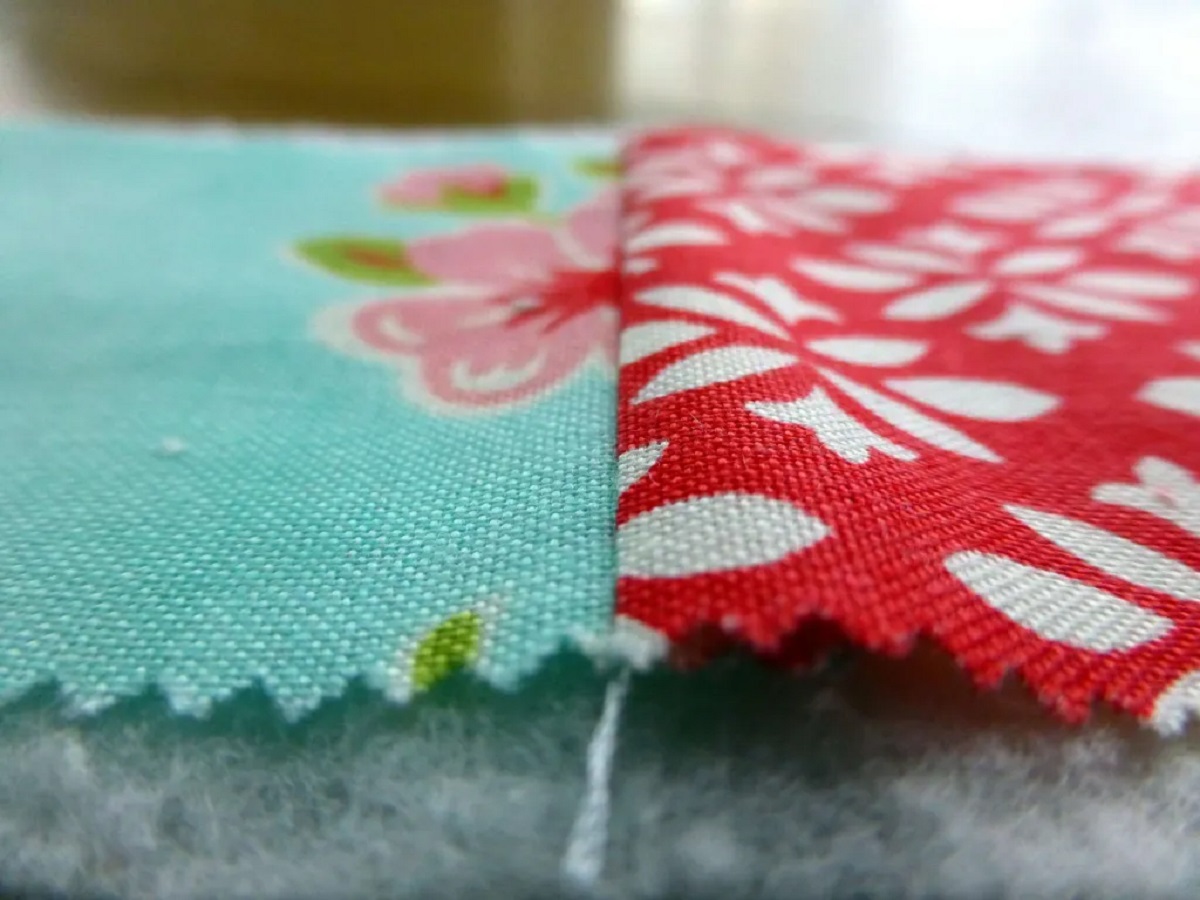
Layering and Basting the Quilt
Now that you have attached the borders to your quilt panel, it’s time to layer the quilt and secure the layers together with basting. Follow these steps to properly layer and baste your quilt:
- Lay out the backing fabric: Start by laying the backing fabric on a large, flat surface, right side down. Smooth out any wrinkles or creases to create a clean and even surface.
- Place the batting: On top of the backing fabric, carefully place the batting. Smooth it out and ensure it covers the entire surface of the quilt evenly. Trim any excess batting if necessary.
- Position the quilt panel: Take your quilt panel with attached borders and place it on top of the batting, right side up. Center the panel on the batting, aligning it with the edges.
- Smooth out the layers: Starting from the center and working outwards, smooth out the layers of the quilt, removing any wrinkles or bubbles. Ensure that the backing, batting, and panel are all smooth and flat.
- Baste the layers: To hold the layers together during the quilting process, basting is essential. You can choose from various basting methods, such as using safety pins, thread basting, or spray basting. Select the method that works best for you and baste the layers at regular intervals, keeping the layers taut and secure.
- Check for evenness: Once the quilt is basted, check for any areas that may have shifted or become uneven. Smooth out the layers again if necessary to ensure a neat and even surface.
Congratulations! You have successfully layered and basted your quilt. The next step is to dive into the quilting process. Let’s move on to quilting the panel.
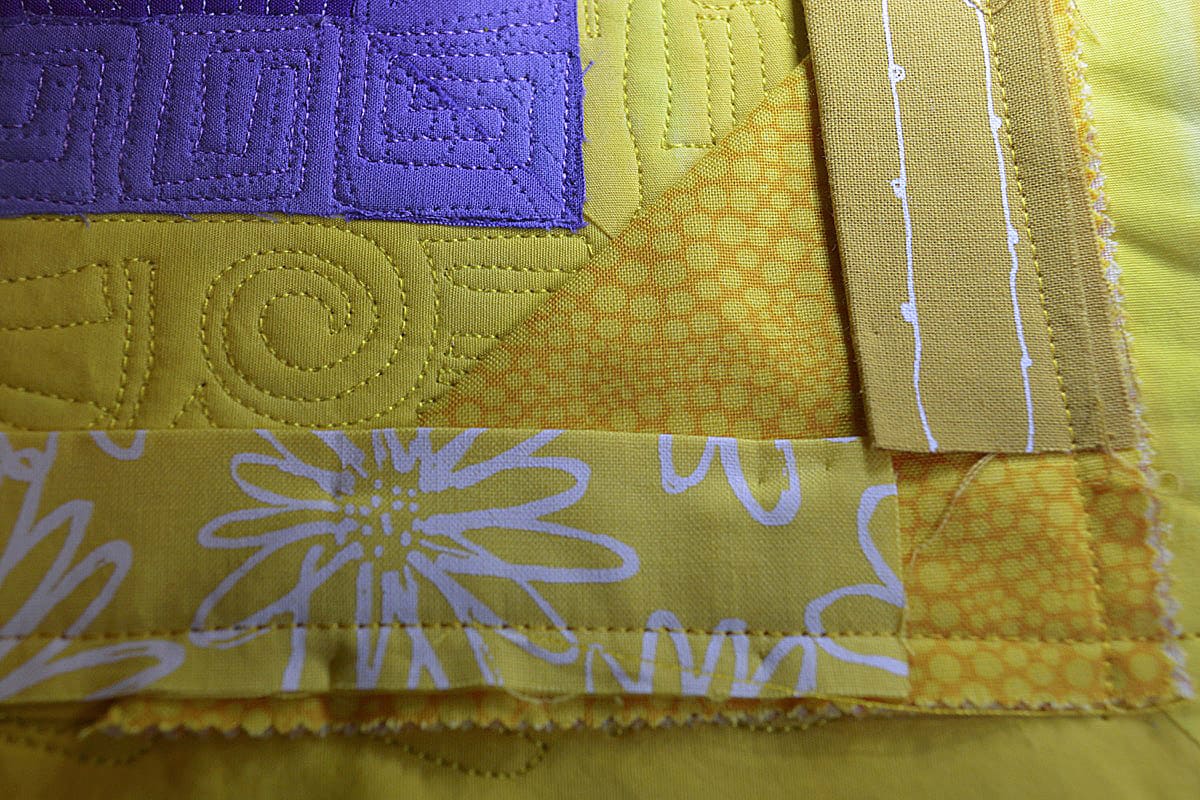
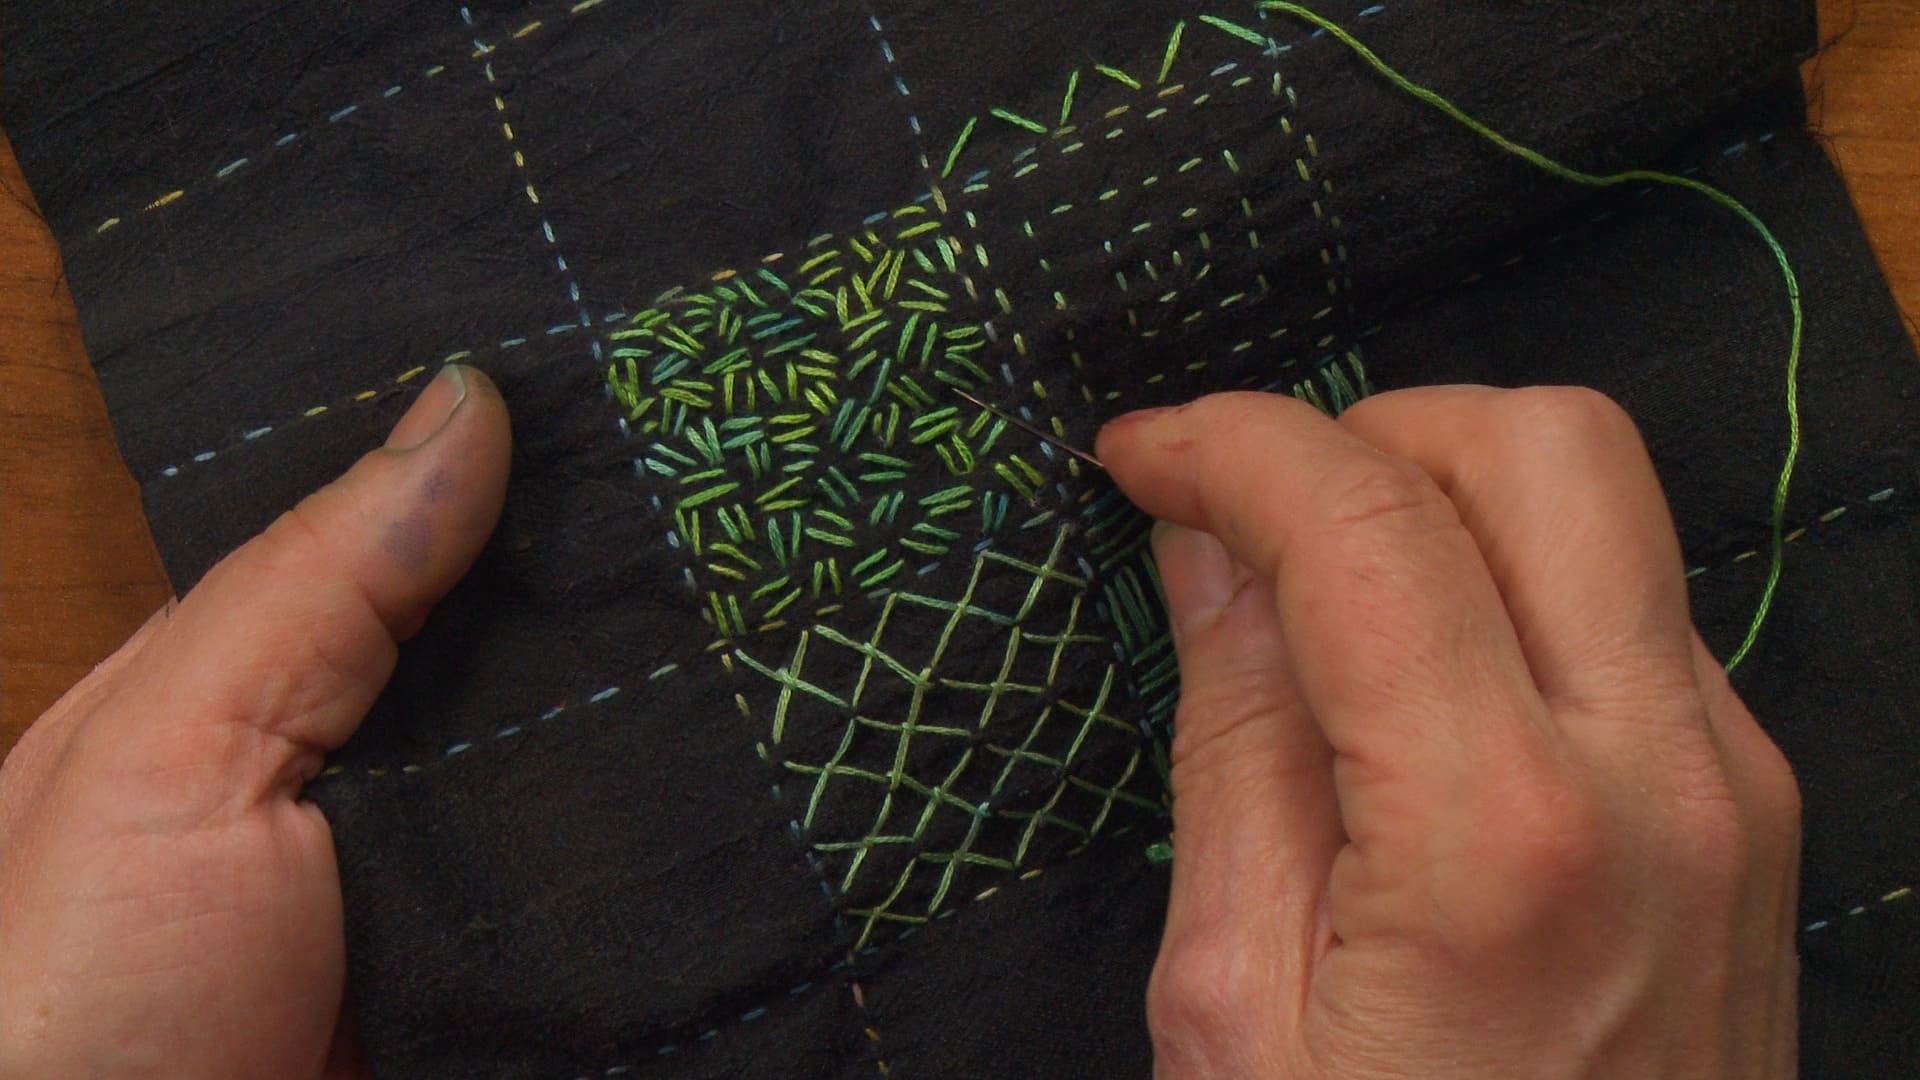
Quilting the Panel
Now that your quilt is layered and basted, it’s time to bring it to life by quilting the panel. Quilting not only adds visual interest but also secures the layers together. There are several methods and techniques you can use to quilt your panel:
- Hand Quilting: Hand quilting involves using a quilting needle and thread to sew small, even stitches through the layers of the quilt. This method provides a traditional, textured look and allows for intricate designs. Take your time and enjoy the meditative process of hand quilting.
- Machine Quilting: Machine quilting involves using a sewing machine to stitch through the layers of the quilt. This method is faster and more suitable for larger, more complex quilts. You can choose from various machine quilting techniques, such as straight line quilting, free-motion quilting, or using decorative stitches.
- Tie Quilting: Tie quilting is a simpler method that involves using yarn or thread to hand-tie knots at regular intervals throughout the quilt. This method provides a cozy and rustic look and is great for beginners or quilts that don’t require intricate quilting designs.
Choose the quilting method that appeals to you and matches the style of your quilt. Take your time to quilt the panel, paying attention to even stitches and ensuring that the layers are securely quilted together. If needed, refer to quilting patterns or stencils to guide your design.
Once you’ve finished quilting the panel, it’s time to add the final touch: binding. Let’s proceed to the next step: adding binding to the quilt.
Read more: How To Quilt A Jelly Roll Race Quilt
Adding Binding to the Quilt
After quilting the panel, it’s time to add the binding, which provides a finished edge to your quilt. Follow these steps to add binding to your quilt:
- Calculate the binding length: Measure the perimeter of your quilt and add a few extra inches to account for corners and seam allowances. This will give you the total length of binding needed.
- Cut the binding strips: Cut fabric strips for the binding, making sure they are the desired width (usually 2.5 inches) and the length you calculated in the previous step. If needed, join the strips together to create one continuous strip.
- Fold and press the binding: Fold the binding strip in half lengthwise, wrong sides together, and press it with an iron to create a crease. This will be the edge that will be sewn to the quilt.
- Attach the binding: Starting in the middle of one side of the quilt, align the raw edges of the binding strip with the raw edges of the quilt. Pin or clip the binding in place, and sew it to the quilt using a ¼ inch seam allowance, backstitching at the beginning and end.
- Miter the corners: When you reach a corner, stop sewing ¼ inch before reaching the edge. Lift the presser foot and pivot the quilt. Fold the binding strip upwards, creating a 45-degree angle at the corner. Then fold it back down, aligning it with the new edge. Continue sewing along the next side, repeating this process for all corners.
- Join the binding ends: When you reach the starting point, leave a few inches of excess binding. Open the ends of the binding strips and place them right sides together. Sew them diagonally from corner to corner and trim the excess fabric. Fold the binding back in half and finish sewing.
- Fold and secure the binding: Fold the binding over to the back of the quilt, neatly encasing the raw edges. Hand-stitch or use your sewing machine to stitch the binding in place. Take care to ensure your stitches are neat and even.
Once you have sewn and secured the binding, your quilt is almost complete! The final step is to add some finishing touches.
Next, we’ll explore those finishing touches to complete your quilting project.
Finishing Touches
With the binding in place, your quilt is almost ready to be showcased and enjoyed. However, there are a few finishing touches you can add to make your quilt truly exceptional:
- Trim excess threads: Carefully inspect your quilt for any loose threads or stray ends from the quilting and binding process. Use scissors to trim them to ensure a clean and polished look.
- Press the quilt: Give your quilt a final press with an iron, using a low heat setting. Pressing will help to further flatten and set the seams, giving your quilt a professional finish.
- Add a label: Consider adding a fabric label to your quilt. This label can serve as a reminder of your hard work and creativity. Include your name, date, and any other details you’d like to commemorate.
- Sleeve or hanging tabs (optional): If you plan to hang your quilt on a wall or display it, you may want to add a sleeve or hanging tabs to the back. This will allow you to easily and securely hang your quilt for everyone to admire.
- Document your quilt: Take photos and write in your quilting journal to document the process and details of your quilt. This will help you remember and share the story behind your creation.
By adding these finishing touches, you make your quilt even more special and personal. Now it’s time to step back and admire your completed masterpiece!
Congratulations! You have successfully quilted a panel and transformed it into a beautiful and functional piece. Quilting is an art form that can bring joy and creativity into your life, and with each project, you’ll continue to refine your skills and develop your unique style.
Remember, this is just one way to quilt a panel, and there are countless variations and techniques you can explore. Embrace your creativity, experiment with different fabrics and designs, and most importantly, have fun with your quilting journey.
Now, go ahead and enjoy your stunning quilted panel! Happy quilting!
———-
Note: This article is purely instructional and may not cover all possible aspects of quilting a panel.
Conclusion
Congratulations on completing your journey of quilting a panel! You have learned the step-by-step process of transforming a fabric panel into a stunning quilt, showcasing your creativity and craftsmanship. Through careful selection of materials, choosing the right quilt panel, preparing the fabric, attaching borders, and quilting the panel, you have created a unique and beautiful piece.
Quilting is not just about creating fabric masterpieces; it’s about the joy of working with fabric, expressing your creativity, and the meditative process of stitching. It’s an art form that connects us to tradition while allowing us to add our own personal touch.
As you continue your quilting journey, remember that there are no limits to what you can create. Explore different patterns, designs, and techniques. Let your imagination run wild, and don’t be afraid to make mistakes along the way. Each quilt is a reflection of your passion, skill, and individuality.
Enjoy the process of quilting, not just the end result. Savor the feel of the fabric, the satisfaction of a well-sewn seam, and the joy of transforming simple materials into something extraordinary. Whether quilting as a hobby or pursuing it as an art form, embrace the time and effort spent in each stitch.
Share your quilts with pride, whether gifting them to loved ones or displaying them in your home. Each quilt carries its own story, a tale of creativity, dedication, and the love that went into making it. Your quilted panel is a testament to your passion for quilting and the artistry that resides within you.
Continue to challenge yourself, learn new techniques and patterns, and connect with other quilters. Join quilting communities, attend workshops, and share your journey with fellow enthusiasts. The quilting world is filled with inspiration, knowledge, and support from individuals who share your love for this timeless craft.
So, gather your materials, choose your next quilt panel, and embark on another exciting quilting adventure. Whether you’re creating quilts for your loved ones or simply immersing yourself in the soothing process of stitching, find joy in the art of quilting.
Remember, every stitch tells a story!
Frequently Asked Questions about How To Quilt A Panel
Was this page helpful?
At Storables.com, we guarantee accurate and reliable information. Our content, validated by Expert Board Contributors, is crafted following stringent Editorial Policies. We're committed to providing you with well-researched, expert-backed insights for all your informational needs.


0 thoughts on “How To Quilt A Panel”