Articles
How To Widen Your Driveway
Modified: August 17, 2024
Learn effective techniques and tips from our articles on how to widen your driveway. Enhance your property's curb appeal and create more space for your vehicles.
(Many of the links in this article redirect to a specific reviewed product. Your purchase of these products through affiliate links helps to generate commission for Storables.com, at no extra cost. Learn more)
Introduction
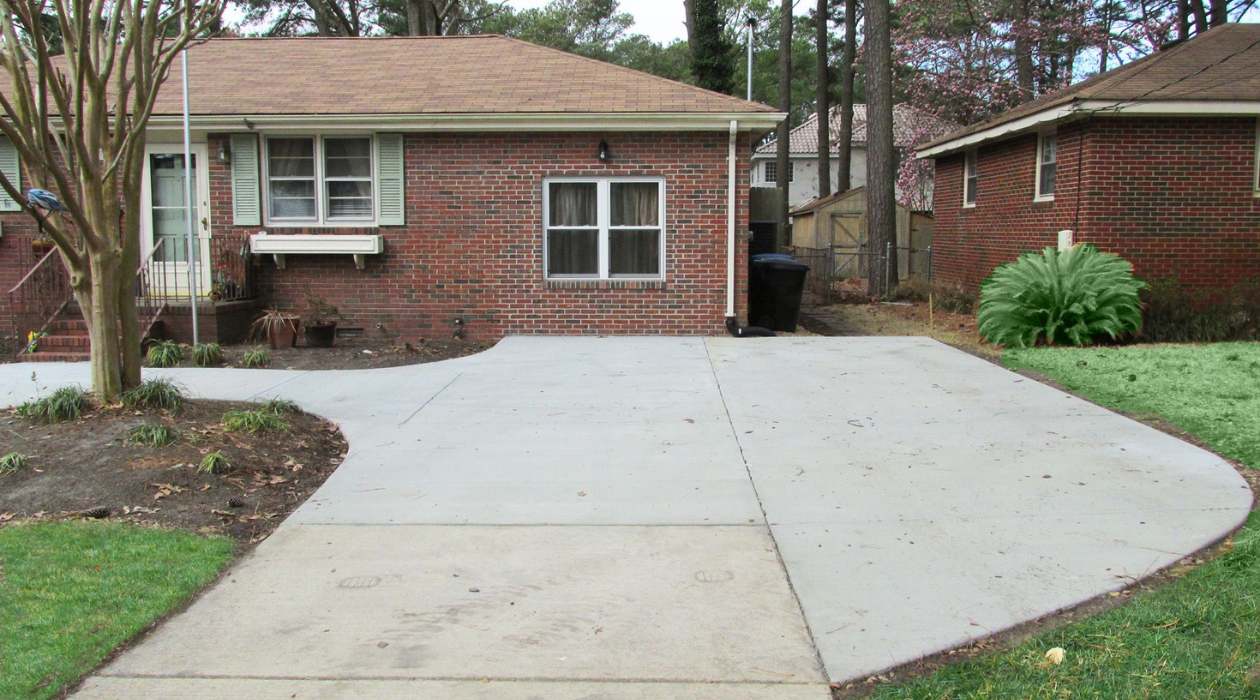
Having a wide driveway can make a significant difference in the functionality and aesthetic appeal of your property. Whether you need extra space to accommodate multiple vehicles, want to create a striking entrance to your home, or simply desire a more spacious driveway, widening your driveway is a valuable investment. However, this project requires careful planning and execution to ensure successful results.
In this article, we will provide you with a comprehensive guide on how to widen your driveway. From assessing the space and obtaining necessary permits to hiring a contractor and completing the construction process, we will walk you through every step of the way. So, let’s get started and turn your narrow driveway into a spacious and welcoming entryway.
Key Takeaways:
- Proper planning, obtaining necessary permits, and hiring a reputable contractor are crucial for successfully widening your driveway. Clearing the area, adding a strong base, and finishing with care ensure a durable and visually appealing result.
- Regular cleaning, prompt stain removal, and periodic sealing are essential for maintaining the longevity and functionality of your widened driveway. Addressing cracks and repairs promptly helps preserve the integrity of the driveway over time.
Read more: How To Clean Your Driveway
Assessing the Space
Before you start widening your driveway, it is crucial to assess the available space and determine the desired dimensions for your expanded driveway. Measure the width and length of the existing driveway to understand how much additional space you need to create.
Consider factors such as the number of vehicles you need to accommodate, the width of these vehicles, and any restrictions imposed by local zoning regulations. Keep in mind that you may also need to factor in additional space for turning and maneuvering your vehicles.
Another important consideration when assessing the space is the terrain and any obstacles in the area. Take note of any trees, bushes, or other landscaping features that might need to be relocated or removed to make way for the expanded driveway. Additionally, consider the slope of the land and whether any modifications will be necessary to ensure proper drainage and prevent water pooling on your driveway.
Once you have a clear understanding of the space available and your desired dimensions, it’s a good idea to mark the boundaries of your new driveway with spray paint or stakes. This will help you visualize the final outcome and ensure accuracy during the construction process.
Remember, accurate assessment and planning at this stage will play a crucial role in the success of your driveway widening project. It’s always a good idea to consult with a professional contractor or engineer to ensure that your plans are feasible and comply with any local regulations.
Obtaining Necessary Permits
Before you proceed with widening your driveway, it’s important to determine whether you will need any permits or approvals from your local municipality or homeowners association. The requirements may vary depending on your location and the extent of the project. Failing to obtain the necessary permits can result in legal issues and costly fines, so it’s crucial to do your due diligence.
Start by contacting your local building department or planning office to inquire about the specific permits and approvals required for driveway expansion. They will provide you with the necessary information and guidance on the application process.
In most cases, you will need to submit a detailed plan of the proposed driveway expansion, including dimensions, materials, and any necessary drainage considerations. The plan should also comply with any setback requirements, which dictate the minimum distance between the edge of your driveway and property lines or neighboring structures.
Additionally, you may be required to provide documentation such as property surveys, engineer certifications, and proof of liability insurance. It’s important to gather all the required documents and fill out the permit application accurately and thoroughly.
Once you have submitted your application, it may take several weeks for the permit to be reviewed and approved. Be patient and avoid starting any construction work until you have received the necessary permits.
Remember, obtaining the appropriate permits is not just a legal requirement but also ensures that your driveway expansion is done safely and in compliance with local regulations. It’s always advisable to consult with professionals or seek legal advice if you are unsure about the permit requirements in your area.
Hiring a Contractor
Widening your driveway is a complex construction project that requires specialized skills and knowledge. Hiring a professional contractor is crucial to ensure that the job is done correctly and efficiently. Here are some essential considerations when hiring a contractor for your driveway widening project:
Experience and Expertise:
Look for contractors with extensive experience in driveway construction and widening projects. Check their portfolio to see if they have successfully completed similar projects in the past. A contractor with expertise in handling different types of driveways, terrain, and materials will be better equipped to handle any challenges that may arise during your project.
Read more: How To Pave Your Own Driveway
Licenses and Insurance:
Ensure that the contractor you hire is fully licensed and insured. A valid license indicates that they have met the necessary requirements and are authorized to perform the work. Insurance coverage protects you from any liability or damages that may occur during the construction process.
References and Reviews:
Ask for references from past clients and take the time to speak to them about their experience working with the contractor. You can also check online review platforms to get an idea of the contractor’s reputation and customer satisfaction level.
Cost Estimates:
Obtain detailed cost estimates from multiple contractors and compare them. Keep in mind that the lowest bid may not always be the best option. Consider the contractor’s experience, quality of work, and the materials they plan on using. Remember, investing in a reputable and experienced contractor will ensure a durable and long-lasting driveway.
Timeline and Availability:
Discuss the timeline for the project and ensure that the contractor can accommodate your desired schedule. It’s important to have a clear understanding of the estimated start and completion dates to avoid any unnecessary delays.
Communication and Trust:
Effective communication and mutual trust are essential when working with a contractor. Choose someone who listens to your ideas, addresses your concerns, and keeps you informed throughout the entire process. A contractor who values your input and provides regular updates will make the project a more positive and successful experience.
By carefully selecting a qualified and reliable contractor, you can ensure that your driveway widening project is completed to your satisfaction, on time, and within budget.
Read more: How To Remove Oil Stains From Your Driveway
Clearing the Area
Once you have hired a contractor and obtained the necessary permits, the next step in widening your driveway is clearing the area. Clearing the area involves removing any existing obstructions or structures that are in the way of the expanded driveway.
Here are the key steps involved in clearing the area:
1. Marking the Boundaries:
Start by marking the boundaries of the new driveway expansion using spray paint or stakes. This will provide a clear visual guide and help the contractors understand the exact area that needs to be cleared.
2. Removing Vegetation and Landscaping:
If there are any trees, shrubs, or plants in the path of the widened driveway, they will need to be removed. Hire professional landscapers or arborists to handle the removal process safely and efficiently. Make sure to follow any local regulations or obtain permits if necessary, especially for the removal of large or protected trees.
3. Demolishing Existing Structures:
If there are any structures in the way, such as walls, fences, or old driveways, they will need to be demolished. This is typically done using heavy machinery and specialized tools to break down and remove the structures. Ensure that the contractor takes proper safety precautions during the demolition process.
4. Excavating the Ground:
After clearing the area, the next step is to excavate the ground to create space for the widened driveway. Excavation involves using heavy machinery to dig out the soil and create a level surface for the new driveway. The depth of excavation will depend on the desired thickness of the base material and the type of soil in the area.
During the excavation process, it’s important to consider proper drainage. Slope the ground away from the house or other structures to ensure that water drains properly and does not pool on the driveway.
5. Hauling and Disposing of Debris:
Properly dispose of all the debris and waste generated during the clearing and excavation process. This may involve renting a dumpster or arranging for debris removal services. Ensure that the disposal methods comply with local regulations and environmental standards.
By clearing the area thoroughly and efficiently, you are setting the stage for the next steps in widening your driveway. It’s important to hire experienced professionals to ensure safety and effectiveness during the clearing process.
Removing Existing Structures
When widening your driveway, it’s common to encounter existing structures that need to be removed to make way for the expanded area. These structures may include walls, fences, old driveways, or any other obstacles that obstruct the path of the widened driveway. Removal of these structures is an important step in the overall process of creating a wider and more functional driveway. Here’s how you can effectively remove existing structures:
1. Assess the Structures:
Start by assessing the condition and type of structures that need to be removed. Evaluate their strength, stability, and the amount of effort required for removal. This evaluation will help you determine whether you can undertake the removal yourself or if professional assistance is needed.
Read more: How Long Can You Keep A Pod In Your Driveway
2. Safety Precautions:
Ensure that you take all necessary safety precautions before starting the removal process. Wear appropriate safety gear, such as gloves, goggles, and helmets, to protect yourself from any potential hazards. Consider consulting with professionals if you are unsure about the safety protocols or if the structures are complex to remove.
3. Demolition Methods:
Depending on the nature of the structures, there are several methods you can use to facilitate their removal:
– Manual Demolition: For smaller structures like fences or garden walls, manual demolition can be done using basic hand tools like hammers, pry bars, and saws. Break down the structures into manageable pieces and remove them carefully.
– Mechanical Demolition: Larger structures, such as old driveways or concrete walls, may require mechanical demolition using heavy machinery like excavators or jackhammers. Rent or hire equipment with experienced operators to safely and efficiently demolish the structures.
– Professional Demolition Services: For complex or hazardous structures, it’s best to hire professional demolition services. They have the expertise, tools, and safety measures necessary to handle more challenging removals.
4. Proper Disposal:
Once the structures are properly demolished, it’s essential to dispose of the debris responsibly. You can opt to rent a dumpster or arrange for debris removal services. Make sure to follow local waste disposal guidelines and recycling practices, if applicable, to minimize environmental impact.
5. Site Preparation:
After removing the structures, the area may need to be cleared of any remaining debris or materials. This will ensure a clean and smooth surface for the next steps in the driveway widening process. Clear the area thoroughly and dispose of any remaining waste appropriately.
Remember, removing existing structures requires proper planning, safety measures, and the right tools or professionals. By following these steps, you can effectively remove obstacles and create the space needed to widen your driveway.
Read more: How To Make A Driveway
Excavating the Ground
Excavating the ground is a critical step in widening your driveway. This process involves removing the existing soil or materials to create a level surface for the new widened driveway. Excavation ensures proper drainage, a stable foundation, and sufficient space to accommodate the expanded driveway. Here’s a step-by-step guide on how to excavate the ground for your driveway widening project:
1. Mark the Excavation Area:
Begin by marking the boundaries of the new driveway expansion using spray paint or stakes. This will provide a clear visual guide for the contractors and ensure the excavation is done accurately.
2. Prepare the Equipment:
Gather all the necessary equipment and tools for the excavation process. This may include excavation machinery such as a mini-excavator or a small backhoe. Ensure that the equipment is in good working condition and that you have any required permits or licenses for its operation.
3. Start Excavation:
Begin digging out the existing soil or materials within the marked area. The depth of the excavation will depend on the desired thickness of the base material and the specific requirements of your project. It’s important to excavate evenly and maintain a consistent depth throughout the area to ensure a level surface for the new driveway.
Read more: How Wide Is A Driveway
4. Handle Underground Utilities:
During the excavation process, pay close attention to any underground utilities such as water pipes, gas lines, or electrical cables. It’s crucial to locate and avoid damaging these utilities. If necessary, call the appropriate utility companies to mark the locations of underground lines before proceeding with excavation.
5. Dispose of Excavated Material:
As you excavate, you will create a significant amount of excavated material that needs to be properly disposed of. Consider hiring a waste removal service or renting a dumpster to remove and dispose of the excess soil or materials. Follow local regulations and environmental guidelines for proper disposal.
6. Inspect and Level the Excavated Area:
Once the excavation is complete, inspect the area for any obstructions, rocks, or uneven surfaces. Remove any remaining debris and ensure that the excavated area is level and ready for the next steps in the driveway construction process.
Remember, excavation is a crucial step in widening your driveway, as it sets the foundation for the smooth and stable construction of the new driveway. If you are unfamiliar with excavation processes or have a complex project, it’s advisable to hire experienced professionals to ensure accurate and efficient excavation.
Adding Base Material
Adding a proper base material is essential when widening your driveway. The base material provides stability, prevents shifting, and helps distribute the load evenly across the surface of the driveway. The base material also aids in proper drainage, preventing the accumulation of water and potential damage to the driveway. Here’s a step-by-step guide on how to add base material for your widened driveway:
Read more: How To Stain A Driveway
1. Prepare the Excavated Area:
Before adding the base material, ensure that the excavated area is clean and free of any debris, rocks, or loose soil. Take the time to inspect the area for any unevenness or low spots and make any necessary adjustments to ensure a level surface.
2. Choose the Right Base Material:
Selecting the appropriate base material is crucial for the stability and durability of your driveway. Common base materials include crushed stone, gravel, or recycled concrete. Consult with professionals or your contractor to determine the most suitable option for your specific project and local conditions.
3. Calculate the Depth:
Determine the required depth of the base material. This will depend on factors such as the type of soil, the anticipated traffic load, and any local building codes. As a general guideline, a base material depth of 4 to 6 inches is often recommended for driveways.
4. Add the Base Material:
Spread the base material evenly across the excavated area. Use a shovel or a landscape rake to distribute the material and ensure a uniform layer. Begin by adding a layer of around 2 to 3 inches and compact it using a plate compactor or a hand tamper. Continue adding the base material in layers until the desired depth is achieved.
Read more: How To Redo A Driveway
5. Compact the Base Material:
Compact the base material thoroughly to provide a solid and stable foundation for your driveway. Use a plate compactor or a hand tamper to compact the material evenly across the surface. Pay extra attention to the edges and any layered areas to ensure proper compaction throughout.
6. Check for Levelness:
After compacting the base material, check for any uneven areas or low spots. Address these issues by adding additional base material and compacting again until the surface is level and even.
By adding a proper base material, you are creating a strong foundation for your widened driveway. Taking the time to properly prepare and compact the base material will ensure a long-lasting and stable driveway that can withstand the weight of vehicles and endure various weather conditions.
Compacting the Base
After adding the base material to your widened driveway, the next crucial step is compacting the base. Compacting the base material is essential to create a solid and stable foundation for your driveway. It helps eliminate air gaps, increase density, and enhance the load-bearing capacity of the base. Here’s a step-by-step guide on how to properly compact the base material:
1. Choose the Right Compaction Equipment:
Select the appropriate compaction equipment based on the size and scale of your project. For smaller driveways, a handheld plate compactor or a hand tamper can be sufficient. For larger driveways, a larger vibratory plate compactor or a roller may be necessary. Consult with your contractor or equipment supplier to determine the best option for your specific project.
Read more: How To Seal A Driveway
2. Start Compacting at the Edges:
Begin by compacting the base material at the edges of the driveway. Work your way inward in a systematic pattern, applying even pressure across the entire surface. This ensures that the edges receive the same level of compaction as the center of the driveway.
3. Overlap Each Pass:
When using a plate compactor or roller, overlap each pass by approximately one-third. This helps ensure that there are no missed areas and results in uniform compaction across the entire surface of the base material.
4. Vary the Direction of Compaction:
Vary the direction of compaction with each pass to achieve a more even and consistent compaction of the base material. For example, if you initially compact in a north-south direction, switch to an east-west direction on the next pass.
5. Pay Attention to Edges and Corners:
Pay extra attention to the edges and corners of the driveway. Use a hand tamper or smaller compactor to ensure the base material is properly compacted in these areas. This helps prevent any potential shifting or settling along the edges.
Read more: How To Shovel A Driveway
6. Check for Adequate Compaction:
Regularly check the compaction of the base material using a hand probe or a compaction density tester. The base material should be firm and have minimal give when lightly pressed. If needed, add more base material and repeat the compacting process in any areas that are not adequately compacted.
7. Revisit Compactibility Levels:
If you encounter areas of the base material that prove difficult to compact, it may be necessary to revisit the gradation and moisture content of the material. Adjustments to the base material can enhance its compactability and ensure a solid foundation for the driveway.
Properly compacting the base material is crucial for the stability and longevity of your driveway. Take the time and effort to ensure thorough and uniform compaction to create a strong foundation that can withstand the weight of vehicles and the test of time.
Extending the Edges
Extending the edges of your widened driveway is an important step that helps ensure a smooth transition and a visually appealing design. By extending the edges, you create a defined boundary for your driveway, enhancing its functionality and aesthetics. Here’s a step-by-step guide on how to extend the edges of your widened driveway:
1. Determine the Desired Width:
Decide on the width of your extended driveway edges. This will depend on personal preference, the available space, and any local regulations or requirements. Consider factors such as the size of your vehicles, the amount of pedestrian traffic, and any landscaping or architectural features you want to incorporate.
Read more: How To Edge A Driveway
2. Mark the Edge Line:
Using stakes, string, or spray paint, mark the edge line along the perimeter of the widened driveway. Ensure that the marked line is parallel and evenly spaced on both sides of the driveway.
3. Excavate the Edge Area:
Excavate the area along the marked edge line to create space for extending the driveway. Remove any existing vegetation, debris, or obstacles within the marked area. Pay attention to any underground utilities and take appropriate measures to avoid damaging them.
4. Add Base Material:
Similar to the base material used for the main driveway, add a layer of suitable base material to the excavated edge area. Level the material using a rake or shovel, ensuring a consistent thickness across the entire edge extension. Compact the base material using a plate compactor or a hand tamper to establish a stable foundation.
5. Extend the Surfacing Material:
Extend the surfacing material used for your driveway across the newly added base material in the edge area. Whether it’s concrete, asphalt, or pavers, make sure the surfacing material seamlessly blends with the existing driveway. Maintain the same thickness and levelness to create a smooth transition between the main driveway and the extended edges.
Read more: How To Fix Driveway Erosion
6. Use Edging Materials:
Consider using edging materials to define and enhance the edges of your widened driveway. Edging materials, such as concrete curbs, pavers, or landscape borders, can provide a finished look and help prevent erosion or shifting at the edges. Install the chosen edging material securely along the length of the extended edges.
7. Create a Transition Area:
To ensure a seamless transition, create a gradual slope or taper between the main driveway and the extended edges. This helps prevent tripping hazards and allows for smooth vehicle entry and exit. Use a shovel or grading rake to gently slope the surfacing material from the driveway towards the extended edges.
By extending the edges of your widened driveway, you not only enhance its appearance but also improve functionality and safety. Take care to plan and execute this step properly to ensure a cohesive and visually pleasing end result.
Pouring and Leveling the Concrete
Pouring and leveling the concrete is a critical step in the construction of your widened driveway. Concrete provides a durable and long-lasting surface that can withstand the weight of vehicles and various weather conditions. Proper pouring and leveling techniques ensure a smooth and even finish. Here’s a step-by-step guide on how to pour and level the concrete for your widened driveway:
1. Prepare the Formwork:
Start by erecting formwork along the edges of the driveway to contain the concrete. Use wooden boards or metal stakes and ensure they are properly aligned and leveled. This will create a boundary for the concrete and prevent it from spreading beyond the desired area.
Read more: How To Level A Gravel Driveway
2. Calculate the Concrete Volume:
Determine the amount of concrete needed for your widened driveway. Calculate the volume by multiplying the length, width, and thickness of the driveway. Consider adding a margin for any unforeseen variations or extras like reinforcing mesh or fiber additives, if required. Consult with a concrete supplier or professional to ensure accurate calculations.
3. Order and Receive the Concrete:
Contact a reputable concrete supplier and place an order for the calculated volume of concrete. Provide them with the necessary details, such as the project address and the desired slump (the consistency of the concrete). Arrange the delivery time to align with the pouring and leveling process.
4. Coordinate the Pouring Process:
Coordinate with the concrete contractor or a team of helpers to ensure a smooth pouring process. Prepare the necessary tools and equipment, such as wheelbarrows, shovels, or concrete pump (if applicable), to efficiently transport and pour the concrete.
5. Pour the Concrete:
Start pouring the concrete into the formwork, working one section at a time. Use a concrete pump or wheelbarrows to transport the concrete to the pouring area. Fill the formwork evenly to achieve a uniform thickness and ensure proper coverage. Avoid pouring too quickly or from a height that may cause segregation or displacement of the aggregates.
Read more: How To Grade A Driveway By Hand
6. Use a Screed to Level the Surface:
Once the concrete is poured, use a straight, sturdy board called a screed to level the surface. Place the screed board perpendicular to the formwork and pull it across the concrete, applying light pressure and moving in a back-and-forth motion. This helps distribute the concrete evenly and removes excess material.
7. Smooth the Surface:
After screeding, use a bull float to further smooth and level the surface of the concrete. Move it across the driveway in large arcs, applying gentle pressure to eliminate any inconsistencies or low spots. This step helps achieve a professional-looking finish.
8. Finish the Surface:
Once the concrete has initially set, use a trowel to create a smooth and polished surface. This can be done by making small circular motions or long, sweeping strokes. Pay attention to the edges and corners, ensuring they are properly finished.
Remember, pouring and leveling the concrete requires proper planning, coordination, and attention to detail. Consulting with professionals in the concrete industry can provide valuable insights to ensure a successful and visually appealing outcome for your widened driveway.
Finishing and Curing the Driveway
After pouring and leveling the concrete for your widened driveway, the next step is to finish and properly cure the surface. Finishing the driveway enhances its appearance, durability, and longevity, while curing ensures that the concrete reaches its maximum strength. Here’s a step-by-step guide on how to finish and cure your driveway:
Read more: How To Chip And Seal A Driveway
1. Edging and Grooving:
Once the concrete has reached the appropriate consistency, create neat edges along the sides of the driveway using an edging tool. This step helps define the driveway’s boundaries and prevents crumbling or chipping along the edges. Additionally, create contraction joints by making shallow grooves across the driveway, spacing them at regular intervals. These joints allow for expansion and contraction of the concrete and minimize the risk of cracking.
2. Apply a Surface Finish:
Choose the desired surface finish for your driveway, such as a broom finish for added traction or a smooth finish for a sleek look. To achieve a broom finish, drag a broom across the surface in long, even strokes. For a smooth finish, use a steel trowel to gently glide over the surface, creating a polished appearance. Consider consulting with a professional or concrete supplier for specific finish recommendations.
3. Cover the Surface:
Protect the freshly poured concrete from drying too quickly and minimize the risk of cracking by covering it with a curing compound. This compound helps retain moisture and facilitates proper curing. Alternatively, you can use plastic sheeting or damp burlap to cover the concrete. Ensure that the surface is completely covered and avoid stepping on or disturbing the concrete during this critical curing period.
4. Allow Sufficient Curing Time:
The curing time will vary depending on factors such as temperature, humidity, and the type of concrete mix used. In general, concrete takes about 7 to 14 days to cure fully. During this time, avoid heavy loads, vehicle traffic, or any activities that could put stress on the newly poured concrete. Refer to the manufacturer’s recommendations or seek guidance from professionals to determine the optimal curing duration for your specific project.
Read more: How To Chip And Seal A Driveway
5. Properly Maintain and Protect the Driveway:
Once the concrete has cured, remember to regularly maintain and protect your widened driveway. This includes cleaning it regularly, avoiding the use of harsh chemicals or de-icing agents, and promptly addressing any cracks or damages that may occur over time. Consider applying a concrete sealer to enhance the driveway’s longevity, protect it from staining, and prevent the penetration of water or harmful substances.
By properly finishing and curing your driveway, you ensure its strength, durability, and aesthetic appeal for years to come. Following these steps and taking proper care of your newly widened driveway will contribute to its longevity and functionality.
Cleaning and Maintenance Tips
Keeping your widened driveway clean and well-maintained is essential for its longevity, appearance, and functionality. Regular maintenance helps prevent stains, cracks, and deterioration, keeping your driveway in optimal condition. Here are some cleaning and maintenance tips to help you take care of your widened driveway:
1. Regularly Sweep and Remove Debris:
Sweeping your driveway regularly, especially in areas with trees or foliage, helps prevent the buildup of leaves, twigs, dirt, and other debris. Clearing the surface of debris prevents stains, reduces the risk of slips and falls, and maintains the overall cleanliness of your driveway.
2. Use Mild Cleaning Solutions:
For routine cleaning, use mild cleaning solutions such as soap and water. Avoid using harsh chemicals that can damage the concrete or harm the environment. If needed, consult with a professional or concrete supplier for safe and suitable cleaning products for your driveway.
Read more: How To Chip And Seal A Driveway
3. Avoid Heavy-Duty Pressure Washing:
While pressure washing can be effective for removing tough stains or grime, make sure to use it sparingly on your driveway. Excessive pressure or improper technique can cause damage to the concrete surface or dislodge the jointing materials. If using a pressure washer, follow the manufacturer’s instructions and maintain a safe distance from the surface.
4. Seal Your Driveway:
Consider applying a concrete sealer every few years to protect your widened driveway from stains, weathering, and water penetration. The sealer acts as a protective barrier, enhancing the longevity and appearance of your driveway. Follow the manufacturer’s instructions for application and reapplication intervals.
5. Address Stains Promptly:
If you notice stains on your widened driveway, address them promptly to prevent permanent discoloration. Different types of stains may require specific cleaning techniques or stain removers. Grease or oil stains can typically be removed using a degreaser, while rust stains may require a rust remover. Follow the instructions provided by the manufacturer or seek professional advice for stubborn stains.
6. Avoid Heavy Loads and Sharp Objects:
Avoid placing heavy objects or vehicles with sharp edges directly on your widened driveway, as they can cause cracks or damage to the concrete surface. Use planks or pads to disperse the weight or create a protective barrier to prevent unnecessary stress on the driveway.
Read more: How To Chip And Seal A Driveway
7. Address Cracks and Repairs:
Inspect your widened driveway regularly for any cracks, fissures, or signs of damage. Promptly address these issues to prevent further deterioration. Minor cracks can often be repaired using specialized concrete patching materials or epoxy fillers. For larger or significant damage, consult with a professional to assess the best repair methods.
By following these cleaning and maintenance tips, you can ensure that your widened driveway remains in excellent condition, providing a functional and visually appealing entrance to your property for years to come.
Conclusion
Widening your driveway is a significant investment that can enhance the functionality, aesthetics, and value of your property. By following the comprehensive guide outlined in this article, you can successfully navigate the process of widening your driveway. From assessing the space and obtaining necessary permits to hiring a contractor, clearing the area, and completing the construction process, each step is crucial to achieving a well-designed and durable widened driveway.
Through careful planning and execution, you can create a widened driveway that accommodates your needs, whether it’s providing space for additional vehicles, improving accessibility, or creating a striking entrance to your home. By assessing the space, obtaining necessary permits, and hiring a reputable contractor, you can ensure that the project is completed safely and efficiently.
Clearing the area and removing existing structures create a clean and open canvas for the construction process. Excavating the ground and adding a proper base material provide a strong foundation that supports the weight of vehicles and improves drainage. Extending the edges and pouring and leveling the concrete create a seamless and visually appealing transition from the existing driveway to the expanded area.
Finishing and curing the driveway with attention to detail and proper maintenance ensure its longevity and durability. Regular cleaning, prompt stain removal, and periodic sealing help protect the driveway from damage caused by weather, stains, and everyday wear and tear. Additionally, addressing any cracks or repairs in a timely manner prevents further deterioration and maintains the integrity of the driveway.
By following these steps and implementing the cleaning and maintenance tips, you can enjoy a widened driveway that not only meets your functional needs but also enhances the curb appeal and value of your property.
In conclusion, widening your driveway requires careful planning, proper execution, and regular maintenance. By investing time and effort in each step of the process, you can create a spacious, beautiful, and functional driveway that enhances your property for many years to come.
Now that you've learned how to expand your driveway, why not consider sprucing up your garden's boundaries? Our latest article on garden fence ideas offers creative and stylish options that blend seamlessly with your landscaping efforts. Whether you're looking for privacy, charm, or a way to frame your newly widened driveway, there's something for everyone. Dive into our guide and find the perfect fence to complement your home's outdoor space.
Frequently Asked Questions about How To Widen Your Driveway
Was this page helpful?
At Storables.com, we guarantee accurate and reliable information. Our content, validated by Expert Board Contributors, is crafted following stringent Editorial Policies. We're committed to providing you with well-researched, expert-backed insights for all your informational needs.
0 thoughts on “How To Widen Your Driveway”