Home>Articles>Can You Paint Tile? Here’s What To Know Before You Try It
Articles
Can You Paint Tile? Here’s What To Know Before You Try It
Modified: October 28, 2024
Looking to paint your tile? Read this article before attempting to give you the best tips and advice for a successful DIY tile painting project.
(Many of the links in this article redirect to a specific reviewed product. Your purchase of these products through affiliate links helps to generate commission for Storables.com, at no extra cost. Learn more)
Introduction
Are you tired of the outdated tiles in your kitchen or bathroom? Are you looking for a cost-effective way to refresh the look of your space without the hassle of replacing the tiles? Painting tile might be the solution you’ve been searching for.
Painting tile is a popular DIY project that can dramatically transform the appearance of your space. By giving tiles a fresh new color or pattern, you can update the look and feel of a room without the expense of a full renovation. However, before you grab a brush and start painting, there are a few important factors to consider.
In this article, we will delve into the details of painting tile, discussing the types of tiles that can be painted, the necessary preparation steps, choosing the right paint, applying the paint, curing and sealing, and the overall maintenance and longevity of painted tile.
Before you embark on this project, it’s crucial to understand the pros and cons of painting tile. While this can be a cost-effective and visually pleasing solution, it’s important to note that there are limitations. Understanding these factors will help you decide if painting tile is the right choice for your space.
So, let’s explore the world of painted tile and uncover everything you need to know before you embark on this exciting home improvement project. By the end of this article, you’ll be equipped with the knowledge and confidence to tackle the task of painting tile with ease.
Key Takeaways:
- Transform your space with a cost-effective tile painting project, but carefully consider tile condition, material, and long-term plans before diving in.
- Proper preparation, choosing the right paint, and meticulous application are essential for achieving a beautiful and durable painted tile surface that enhances your space.
Factors to Consider Before You Start
Before you start painting tile, it’s essential to consider a few important factors. These factors will help you determine if painting tile is the right choice for your specific situation.
1. Tile Condition: Evaluate the condition of your existing tile. Painting is best suited for tiles that are in good condition, without cracks, chips, or extensive damage. If your tiles are damaged or worn out, it may be more beneficial to consider replacing them.
2. Tile Material: Another crucial factor to consider is the material of your tiles. Not all tile materials are suitable for painting. Ceramic and porcelain tiles are the most common types that can be painted, as they provide a smooth and non-porous surface for the paint to adhere to. However, natural stone tiles, such as marble or granite, are not typically recommended for painting due to their porous nature.
3. Tile Location: Consider the location of the tiles you wish to paint. Tiles in high-traffic areas or surfaces that come into contact with water frequently, such as shower walls or kitchen backsplashes, may not be the best candidates for painting. The constant exposure to moisture and abrasive cleaning may cause the paint to peel or chip over time.
4. Long-Term Plan: Think about your long-term plans for the space. If you’re planning to renovate or sell your home in the near future, painting the tiles temporarily to refresh the look might be a good option. However, if you’re looking for a long-term solution, replacing the tiles entirely might be a more durable choice.
5. Budget: Painting tile can be a cost-effective alternative to replacing it. However, it’s essential to consider your budget and compare the cost of painting versus the cost of tile replacement. Additionally, factor in the cost of quality paint, primers, and sealers necessary for the project.
By assessing these factors, you can determine if painting tile is a feasible and suitable option for your specific situation. Consider consulting with a professional or seeking advice from a reputable source to make an informed decision before proceeding.
Types of Tile that can be Painted
When it comes to painting tile, not all types of tile are created equal. While some tiles are suitable for painting, others may not yield the desired results or adhere properly to the paint. Let’s explore the types of tile that can be painted:
1. Ceramic and Porcelain: Ceramic and porcelain tiles are the most popular and commonly painted tiles. They have a smooth and non-porous surface that allows paint to adhere well. These tiles are ideal for painting because they offer a durable and long-lasting finish when properly prepared and painted.
2. Terracotta: Terracotta tiles, with their earthy and rustic appearance, can also be painted. However, it’s important to note that terracotta tiles are porous, so they require additional preparation and a specialized primer to ensure that the paint adheres properly and doesn’t flake or peel over time.
3. Concrete: Concrete tiles are another suitable candidate for painting. They offer a sturdy surface that allows paint to adhere well. However, it’s important to thoroughly clean and prime the concrete surface to ensure the paint bonds properly and provides a smooth finish.
4. Vinyl: While vinyl tiles are technically paintable, it’s important to be cautious when considering painting this type of tile. Vinyl tiles have a slick surface that can make it challenging for paint to adhere properly. Additionally, the flexibility of vinyl can cause the paint to crack or chip over time. It’s recommended to consult with a professional or explore alternative options, such as vinyl floor decals, for a more durable and lasting solution.
5. Laminate: Similarly to vinyl tiles, painting laminate tiles can be a tricky process. Laminate has a smooth and glossy surface that makes it difficult for paint to adhere well. The paint may peel or chip easily, especially in high-traffic areas. If you’re considering painting laminate tiles, proper surface preparation and using a high-quality primer are critical for better paint adhesion and longevity.
Remember, regardless of the type of tile you plan to paint, proper cleaning, surface preparation, and using the right primers and paints are crucial for a successful outcome. It’s always advisable to conduct a small test area or consult with a professional to ensure that the chosen paint adheres well and provides the desired finish.
Preparation Steps
Proper preparation is key to achieving a successful and long-lasting painted tile finish. Follow these essential preparation steps before you start painting your tiles:
1. Clean the Tile: Begin by thoroughly cleaning the tile surface. Remove any dirt, grime, or grease using a mild detergent, warm water, and a scrub brush. Rinse the tiles well and allow them to dry completely. A clean surface will ensure better paint adhesion.
2. Repair any Damaged Areas: Inspect the tiles for any cracks, chips, or loose grout. Repair any damaged areas by filling in cracks with grout or using a tile repair kit. Smooth out the surface and allow it to dry completely before proceeding.
3. Sand the Tile: Use a fine-grit sandpaper or sanding block to lightly sand the tile surface. This will help create a rough texture that allows the paint to adhere better. Carefully sand the tile in a circular motion, focusing on any glossy or smooth areas. Wipe away the sanding residue with a clean, damp cloth.
4. Mask Off Areas: Use painter’s tape to mask off any areas that you don’t want to paint, such as edges, fixtures, or adjacent surfaces. This will help create clean lines and prevent accidental paint application on undesired areas.
5. Apply a Tile Primer: Applying a high-quality tile primer is crucial for better paint adhesion and durability. Choose a primer specifically designed for tile surfaces. Apply the primer evenly with a brush or roller, following the manufacturer’s instructions. Allow the primer to dry completely before moving on to the next step.
By following these preparation steps, you’re setting a solid foundation for a successful tile painting project. Taking the time to properly clean, repair, and prime the tiles will help ensure that the paint adheres well and provides a smooth and long-lasting finish.
Cleaning and Priming the Tile
As you embark on your tile painting project, cleaning and priming the tile surfaces are crucial steps that set the foundation for a successful transformation. Let’s explore the cleaning and priming process in detail:
1. Cleaning the Tile:
Start by thoroughly cleaning the tile surfaces. Remove any dirt, grime, or grease using a mild detergent, warm water, and a scrub brush. It’s important to ensure that the tiles are completely clean and free from any residue that could prevent the paint from adhering properly. Rinse the tiles well with clean water and allow them to dry completely before moving on to the next step.
2. Repairing Damaged Areas:
Inspect the tiles for any cracks, chips, or loose grout. Repair any damaged areas by filling in cracks with grout or using a tile repair kit. Smooth out the surface and allow it to dry completely before proceeding. It’s important to have a smooth and even surface to achieve a professional-looking finish.
3. Sanding the Tile:
Using a fine-grit sandpaper or sanding block, lightly sand the tile surface. This step helps create a rough texture, allowing the primer and paint to adhere better. Gently sand the tiles in a circular motion, focusing on any glossy or smooth areas that may resist adhesion. After sanding, wipe away the sanding residue using a clean, damp cloth.
4. Masking Off Areas:
Prior to priming, use painter’s tape to mask off any areas that you don’t want to paint, such as edges, fixtures, or adjacent surfaces. This will ensure crisp and clean lines and prevent accidental paint application in undesired areas.
5. Applying a Tile Primer:
Applying a high-quality tile primer is essential for optimal paint adhesion and durability. Choose a primer specifically designed for tile surfaces. Using a brush or roller, apply the primer evenly to the tiles, following the manufacturer’s instructions. Make sure to cover the entire surface, including grout lines, as the primer helps create a uniform base for the paint. Allow the primer to dry completely before proceeding to the next step.
Cleaning and priming the tile surfaces are critical steps that ensure the paint adheres well and provides a long-lasting finish. Taking the time to properly clean, repair, and prime the tiles will greatly contribute to the success of your tile painting project.
Yes, you can paint tile, but it’s important to properly clean and prime the surface before applying the paint. Use a high-quality, durable paint specifically designed for tile to ensure long-lasting results.
Choosing the Right Paint
Choosing the right paint is a crucial step in achieving a beautiful and durable finish when painting tile. The type of paint you select will determine not only the aesthetic appeal but also the longevity of the painted surface. Here are some factors to consider when choosing the right paint for your tile:
1. Tile Material:
Consider the material of your tiles when selecting paint. For ceramic or porcelain tiles, use epoxy or latex-based paint specifically formulated for tile surfaces. These paints are designed to adhere well to smooth and non-porous surfaces. If you’re painting terracotta tiles, choose a paint that is suitable for porous surfaces and can withstand varying moisture levels.
2. Paint Type:
Two common types of paint used for tile surfaces are oil-based paints and water-based latex paints. Each has its pros and cons. Oil-based paints provide a more durable and long-lasting finish but may have a strong odor and require longer drying times. Latex paints are more user-friendly, with faster drying times and low VOC levels, but may not be as durable. Consider the specific needs of your project and choose the paint type accordingly.
3. Finish:
The finish of the paint will impact the overall look and feel of the painted tile. Choose from options like matte, satin, semi-gloss, or high-gloss finishes. Keep in mind that higher gloss finishes tend to show imperfections more easily, while matte or satin finishes offer a more forgiving appearance. Think about the desired aesthetic and the level of durability you need when selecting the finish.
4. Durability and Resistance:
Consider the durability and resistance properties of the paint. Look for paints that are specifically formulated to withstand high moisture and heavy use, especially if you’re painting tiles in areas prone to water exposure, such as bathrooms or kitchens. These paints are designed to resist staining, chipping, and peeling, ensuring a long-lasting finish.
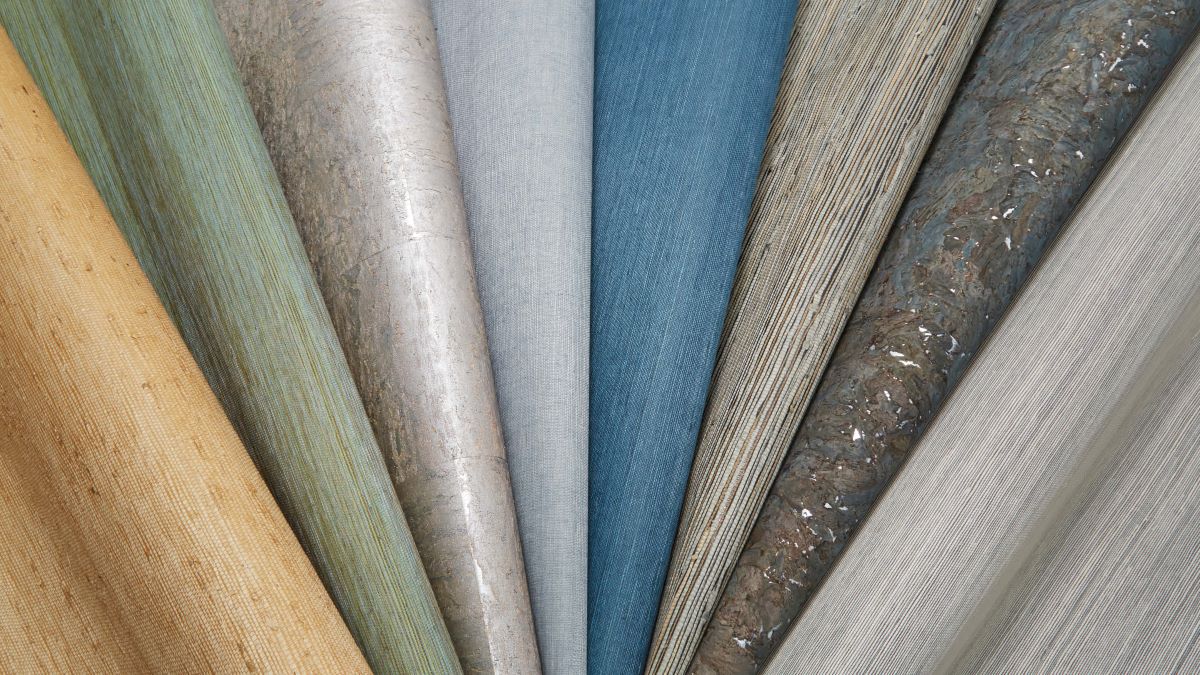
5. Color Selection:
Choose a paint color that complements your desired aesthetic. Consider the overall color scheme of the room and how the painted tiles will fit into the design. Keep in mind that lighter colors may require additional coats for full coverage, while darker colors can be more forgiving in terms of coverage but may show imperfections more prominently.
Before purchasing the paint, it’s always a good idea to consult with a professional or reputable paint supplier who can guide you in selecting the best paint type and finish for your specific tile surface. Additionally, consider conducting a small test area to ensure that the chosen paint adheres well and provides the desired appearance before proceeding to paint the entire surface.
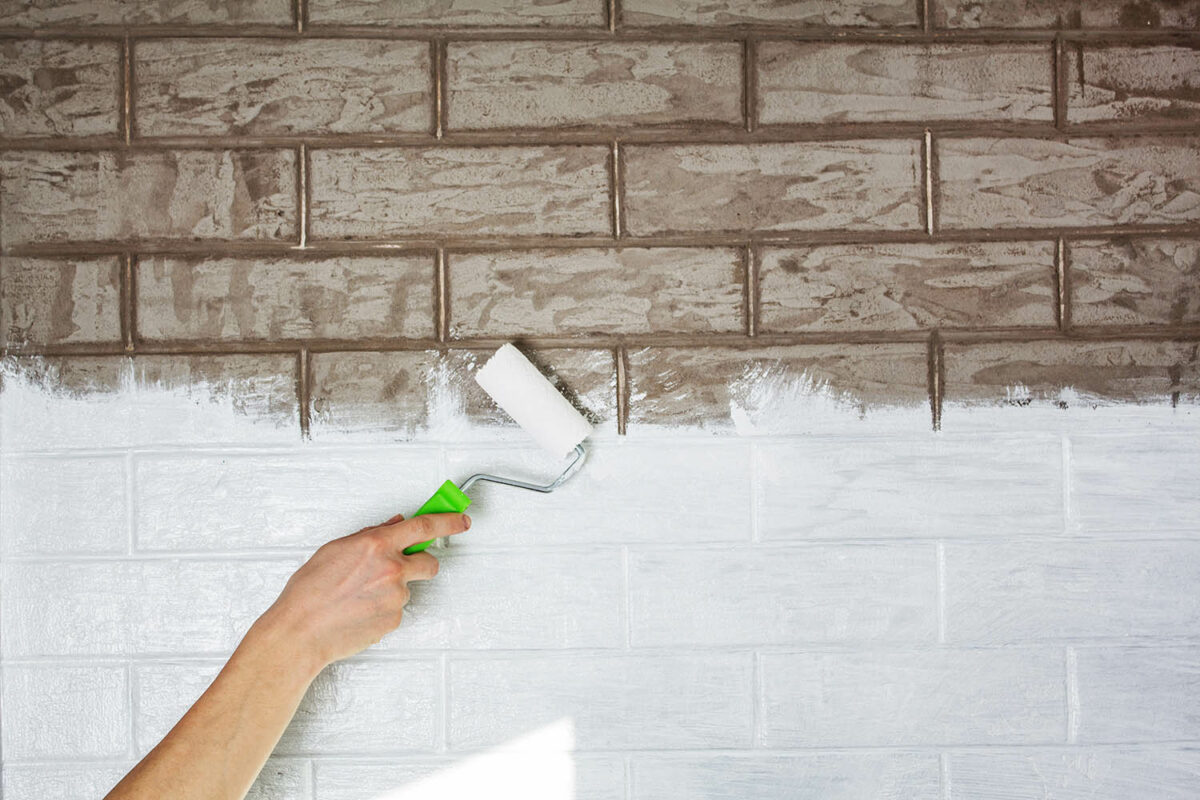
Applying the Paint
Now that you’ve prepared the tile surfaces and chosen the right paint, it’s time to start applying the paint. Follow these steps for a successful and beautiful application:
1. Prepare the Workspace:
Ensure that your workspace is well-ventilated and adequately protected. Open windows or use fans to improve ventilation and wear appropriate protective gear, such as gloves and a mask, to minimize exposure to paint fumes and particles. Cover nearby surfaces and furniture with drop cloths or plastic sheets to protect them from accidental paint splatters.
2. Stir the Paint:
Before you begin painting, stir the paint thoroughly with a stir stick. This ensures that the color pigments are evenly distributed throughout the paint, resulting in consistent color coverage.
3. Start with the Edges:
Using a smaller paintbrush, start by carefully painting the edges and corners of the tiles. Take your time and ensure that the paint is evenly applied along the edges. This will help create a clean and defined perimeter for the rest of the tile surface.
4. Apply the Paint:
Using a brush or roller, apply the paint to the main areas of the tile surface. If you’re using a brush, use smooth and even strokes to prevent visible brush marks. If you’re using a roller, apply the paint in a consistent and overlapping pattern to ensure proper coverage.
5. Allow the First Coat to Dry:
After applying the first coat of paint, allow it to dry completely according to the manufacturer’s instructions. This may take a few hours or overnight, depending on the type of paint used. Avoid touching or disturbing the painted surface during this time to prevent smudges or marks.
6. Apply Additional Coats:
Depending on the desired coverage and color intensity, you may need to apply additional coats of paint. Allow each coat to dry completely before applying the next. Multiple thin coats are preferable to thick, heavy coats as they provide better adhesion and a more uniform finish.
7. Finishing Touches:
Once all the coats of paint have dried, assess the surface for any touch-ups. Use a small brush to fix any imperfections or areas that may need extra coverage. Take your time and ensure that the final result is smooth, even, and visually appealing.
8. Allow the Paint to Cure:
After completing the painting process, allow the paint to cure for the recommended time period before subjecting the tiles to any heavy use or moisture exposure. This ensures that the paint fully sets and provides a durable and long-lasting finish.
By following these steps, you’ll be able to apply the paint evenly and achieve a professional-looking finish. Remember to take your time, work in a well-ventilated area, and allow proper drying and curing times for the best results.
Curing and Sealing the Painted Tile
After painting the tile surfaces, it’s important to allow the paint to properly cure and apply a sealant to protect the painted finish. Curing and sealing are essential steps in ensuring the longevity and durability of your painted tile. Follow these steps to effectively cure and seal the painted tile:
1. Curing Time:
After the final coat of paint has dried, it’s crucial to allow the paint to cure fully before subjecting the tiles to regular use or moisture exposure. This curing time typically varies depending on the type of paint used. Refer to the manufacturer’s instructions for the recommended curing time, which can range from a few days to a couple of weeks. During this time, avoid exposing the painted tile to excessive moisture or harsh cleaning products.
2. Avoid Heavy Use:
During the curing period, it’s important to avoid any heavy use or abrasive cleaning on the painted tile surface. Be gentle when cleaning the tiles and use mild cleaning products and a soft cloth or sponge. This will help prevent any damage or premature wear to the painted surface.
3. Sealing the Painted Tile:
Once the paint has cured completely, applying a sealant can help protect the painted finish and provide an extra layer of durability. Choose a clear, water-based tile sealer that is specifically designed for painted surfaces. Ensure that the sealer is compatible with the type of paint you used.
4. Read and Follow Instructions:
Read the instructions on the sealant product carefully, and follow the manufacturer’s guidelines for application. Some sealants may require multiple coats, while others only need a single application. Use a brush or roller to apply the sealant evenly across the painted tile, following the recommended drying times between coats.
5. Allow for Drying and Curing:
Once the sealant is applied, allow the recommended drying and curing time for the sealer to fully set. This will ensure that the sealant forms a protective barrier on the painted tile surface, making it more resistant to moisture, stains, and scratches.
6. Regular Maintenance:
To keep your painted tile looking its best, follow the manufacturer’s maintenance guidelines for the sealant product. Avoid using harsh chemicals or abrasive cleaners that may damage the painted surface or weaken the sealant. Instead, use gentle, non-abrasive cleaners and a soft cloth or sponge for regular cleaning.
Curing and sealing the painted tile are essential steps to protect the paint and maintain its durability over time. By following these steps and taking proper care of your painted tile, you can enjoy a beautiful and long-lasting finish in your space.
Maintenance and Longevity of Painted Tile
Proper maintenance is key to ensuring the longevity and beauty of your painted tile. With regular care and attention, you can extend the lifespan of the painted surface and keep it looking fresh for years to come. Here are some maintenance tips to help you maintain your painted tile:
1. Gentle Cleaning:
When cleaning your painted tile, it’s important to use gentle methods to avoid damaging the painted surface. Avoid abrasive cleaners and harsh scrub brushes that can scratch or dull the finish. Instead, opt for mild, non-abrasive cleaners and a soft cloth or sponge. Gently wipe the surface to remove dirt and grime, and avoid applying excessive pressure.
2. Stain Prevention:
To prevent stains, it’s important to address spills and messes promptly. Wipe up any spills as soon as they occur to prevent the paint from absorbing the liquid and causing discoloration. Be cautious when using strong chemicals or products that may stain or damage the painted tile. It’s best to use gentle, non-abrasive cleaners that are safe for painted surfaces.
3. Avoid Harsh Scrubbing:
Avoid using rough scrub brushes or abrasive sponges as they can scratch or wear away the paint. Instead, opt for soft cloths or non-abrasive sponges to gently clean the surface. Applying too much force or scrubbing vigorously can weaken the paint and cause it to peel or chip over time.
4. Regular Inspections:
Periodically inspect your painted tile for any signs of wear, chipping, or peeling. If you notice any areas that require touch-ups or repairs, address them as soon as possible. Fixing minor issues promptly can prevent further damage and maintain the overall integrity of the painted surface.
5. Avoid Excessive Heat Exposure:
Excessive heat exposure can cause the paint to deteriorate over time. Avoid placing hot objects directly on the painted tile surface, such as hot pots or pans in the kitchen. Instead, use trivets or heat-resistant pads to protect the painted surface from direct contact with heat sources.
6. Regular Touch-ups:
Over time, even with proper maintenance, painted tile may require some touch-ups. Keep leftover paint or note down the color code for future touch-ups. When doing touch-ups, ensure that the new paint blends seamlessly with the existing paint to maintain a consistent appearance.
By following these maintenance tips, you can help extend the longevity and preserve the appearance of your painted tile. Regular care and attention will ensure that your painted surfaces continue to enhance the aesthetic appeal of your space for years to come.
Conclusion
Painting tile can be a cost-effective and creative way to transform the look of your space without the need for a costly renovation. By understanding the factors to consider before starting, such as the condition and material of the tiles, you can determine if painting tile is the right choice for your specific situation.
When embarking on a tile painting project, proper preparation is essential. Thoroughly cleaning the tiles, repairing any damaged areas, and applying a primer will ensure that the paint adheres well and provides a smooth and long-lasting finish.
Choosing the right paint is also crucial. Consider the tile material, paint type, finish, and durability when selecting the paint. Taking the time to select the appropriate paint will result in a beautiful and durable painted tile surface.
When it comes to applying the paint, following the proper steps, including starting with the edges and applying multiple coats, will help achieve a professional-looking finish. Allow the paint to cure fully before sealing it with a tile-specific sealant to protect the painted surface from moisture, stains, and scratches.
Maintaining your painted tile is key to its longevity. Regular gentle cleaning, avoiding harsh scrubbing, and addressing spills promptly will keep your painted tile looking fresh. Periodic inspections and touch-ups will help maintain the integrity of the painted surface over time.
In conclusion, painting tile can be a rewarding DIY project that allows you to update the look and feel of a space on a budget. By considering the factors, properly preparing the tiles, choosing the right paint, and following the proper application and maintenance steps, you can achieve a beautiful and durable painted tile surface that transforms your space for years to come.
Excited about transforming your space with painted tile? Keep that momentum going and learn more about enhancing your home! Discover how efficient bathroom renovation can be and tackle your next project with confidence. Or, if you’re keen to add practical touches to your newly painted bathroom, find out the best way to hang a towel bar on ceramic tile. Both guides offer essential insights and clever tips to help you continue improving every corner of your home.
Frequently Asked Questions about Can You Paint Tile? Here’s What To Know Before You Try It
Was this page helpful?
At Storables.com, we guarantee accurate and reliable information. Our content, validated by Expert Board Contributors, is crafted following stringent Editorial Policies. We're committed to providing you with well-researched, expert-backed insights for all your informational needs.


0 thoughts on “Can You Paint Tile? Here’s What To Know Before You Try It”