Articles
How To Repair Grout On Tile Floor
Modified: August 28, 2024
Learn how to repair grout on your tile floor with our informative articles. Discover step-by-step guides and expert tips to restore your grout and rejuvenate your floor.
(Many of the links in this article redirect to a specific reviewed product. Your purchase of these products through affiliate links helps to generate commission for Storables.com, at no extra cost. Learn more)
Introduction
Grout is an essential component of any tile floor, providing stability and preventing water damage. Over time, however, grout can become cracked, discolored, or even worn away, leaving your tile floor looking dull and unattractive. Fortunately, repairing grout on a tile floor is a relatively simple DIY project that can restore the beauty of your flooring.
In this article, we will guide you through the step-by-step process of repairing grout on a tile floor. We will cover everything from assessing the damage, gathering the necessary tools and materials, to removing the old grout and applying the new grout. By following these instructions, you can repair your grout and give your tile floor a fresh, polished appearance.
Before we begin, it’s essential to note that this guide focuses on repairing grout for ceramic or porcelain tile floors. The process may vary for other types of tile or more extensive repairs. If you are unsure about the compatibility or complexity of your project, it’s always recommended to consult a professional.
Now, let’s dive into the steps needed to repair grout on your tile floor and restore its former glory.
Key Takeaways:
- Revitalize your tile floor by following a step-by-step guide to repairing grout, from assessing damage to sealing the grout for long-lasting beauty and durability.
- Ensure the longevity and attractiveness of your tile floor by maintaining regular cleaning and proper maintenance, including sealing the grout and using mats in high-traffic areas.
Read more: How To Tile And Grout A Floor
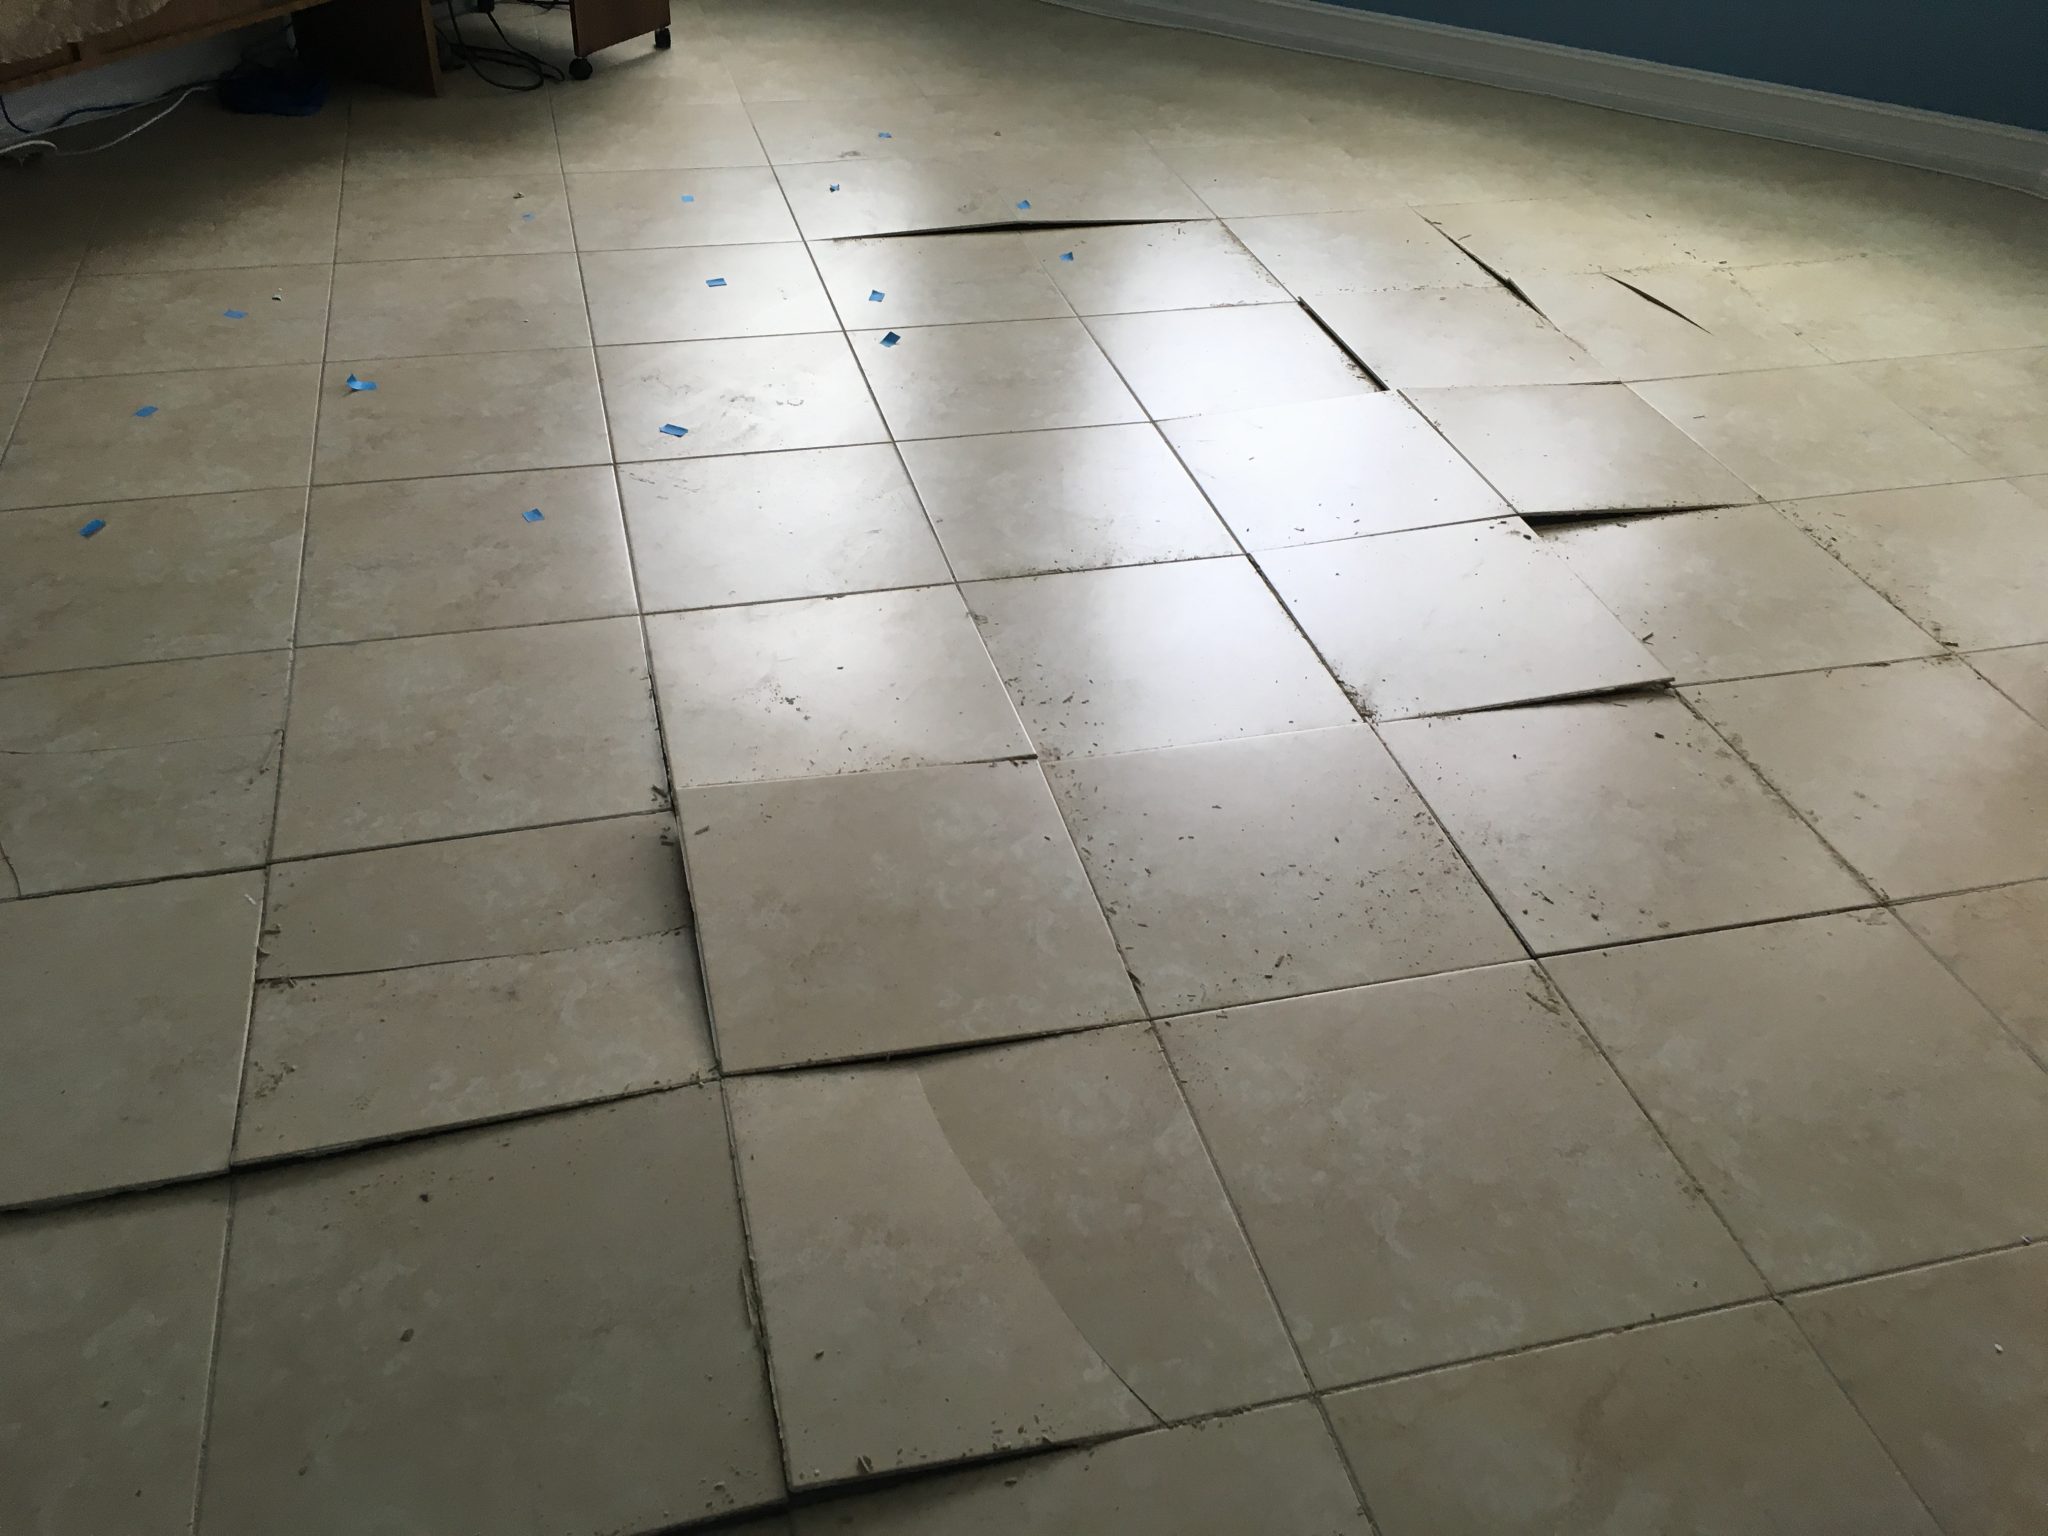
Step 1: Assessing the damage
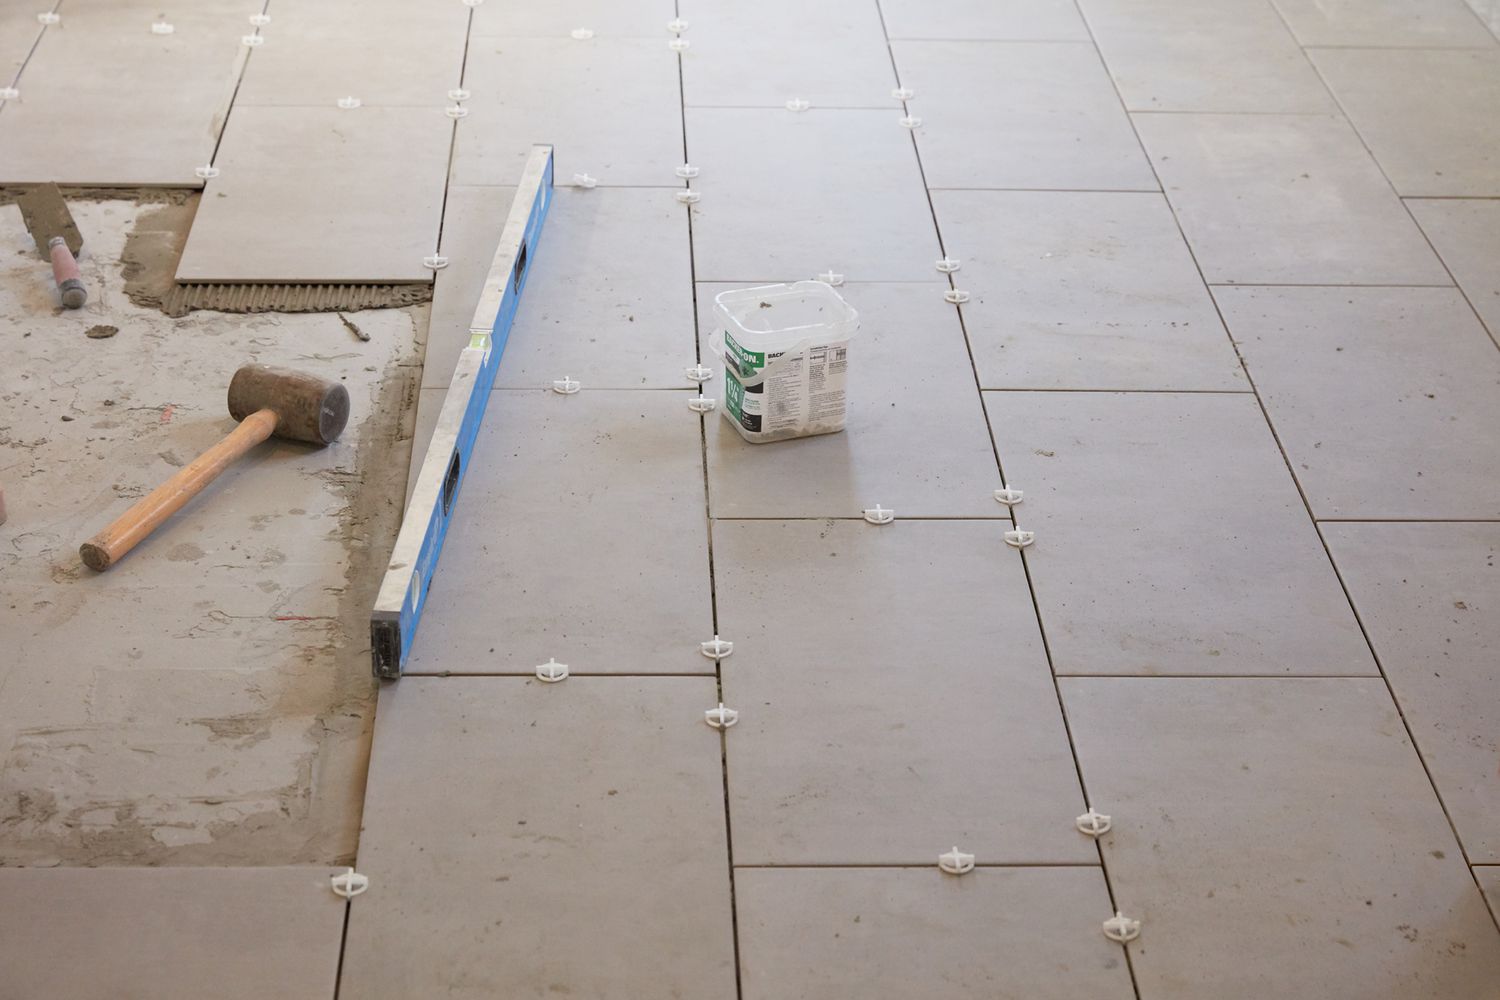
The first step in repairing grout on a tile floor is to assess the extent of the damage. Take a close look at the grout lines and tiles to identify any visible signs of damage, such as cracks, discoloration, or missing grout. Additionally, pay attention to any areas where the tiles may be loose or shifted, as this can indicate underlying issues that may need to be addressed.
Use a flashlight to inspect the grout lines more closely, especially in areas with high traffic or moisture exposure. Look for signs of mold or mildew, which can indicate water damage or inadequate sealing. Taking the time to thoroughly assess the damage will help you determine the appropriate course of action and ensure that you have the necessary tools and materials for the repair.
Keep in mind that if the damage is widespread, with multiple areas of cracked or missing grout, it may be more efficient to consider regrouting the entire floor. This will provide a more uniform and consistent appearance and minimize the chances of future grout issues. However, if the damage is localized to specific areas, it is possible to focus on those areas for the repair.
Once you have assessed the damage, make a note of any specific areas that require attention and take measurements if needed. This will help you determine the amount of grout and other materials necessary for the repair. Additionally, it can be helpful to take pictures of the damaged areas to refer to later during the repair process.
Assessing the damage is an essential first step in repairing grout on a tile floor. It allows you to understand the scope of the repair and make informed decisions about which areas to focus on. With a clear understanding of the damage, you are ready to move on to the next step: gathering the necessary tools and materials.
Step 2: Gathering necessary tools and materials
Once you have assessed the damage on your tile floor, the next step is to gather the necessary tools and materials for the grout repair. Having everything ready before starting the repair process will ensure a smooth and efficient workflow. Here are the essential tools and materials you will need:
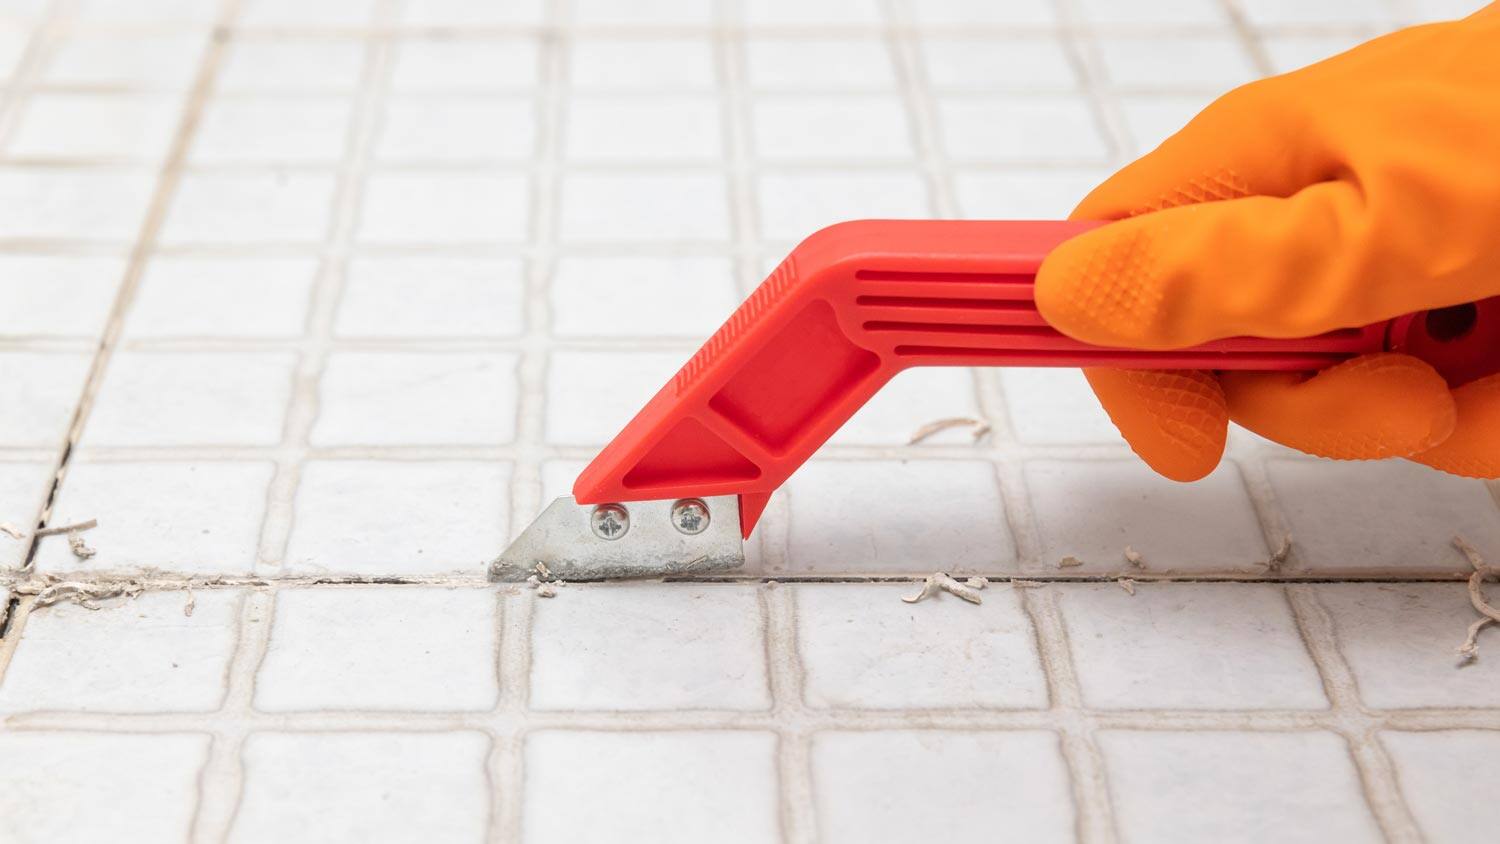
- Grout removal tool: This can be a grout saw, grout scraper, or an oscillating tool with a grout removal attachment. This tool will help you remove the damaged grout from the tile joints.
- Grout: Choose a grout color that matches your existing grout or opt for a contrasting color for a unique look. Make sure to select a grout that is suitable for your specific tile and the area where it will be installed. There are different types of grout available, such as sanded or unsanded, so be sure to choose the appropriate one.
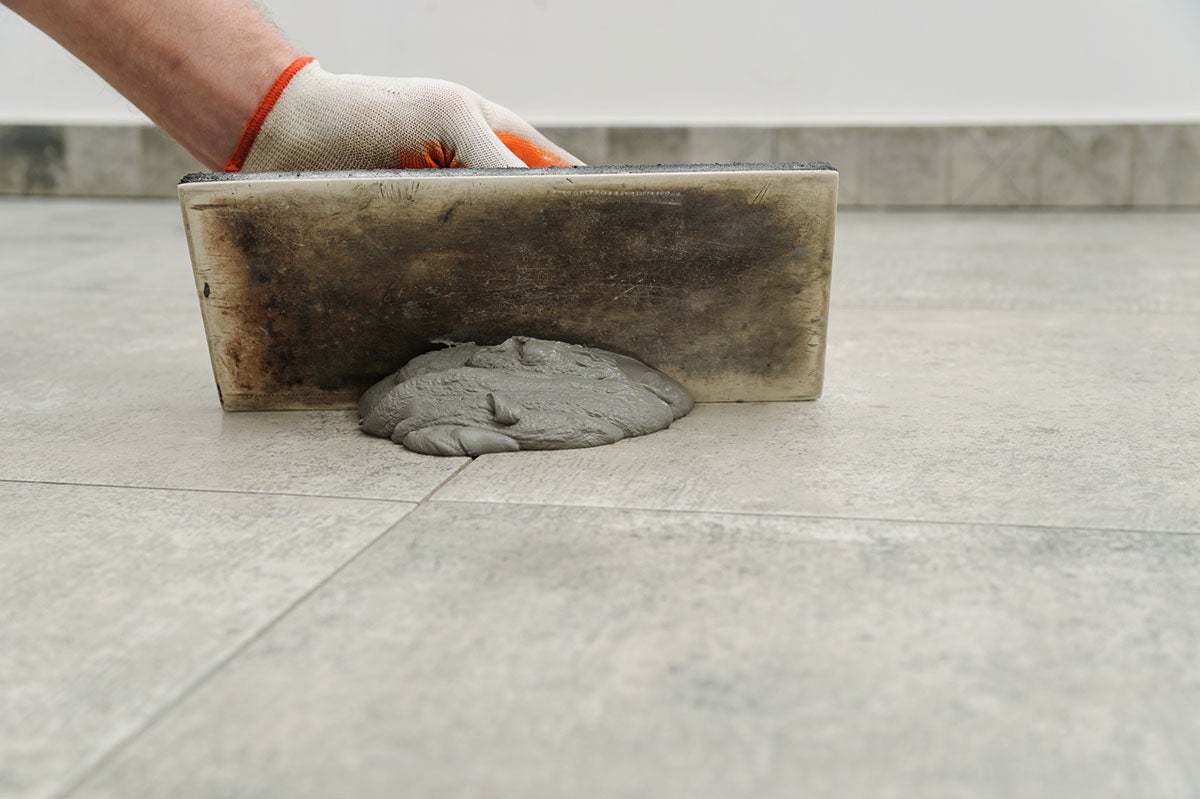
- Grout float: This tool is used to apply the new grout into the tile joints. Look for a rubber or silicone grout float, as they provide better control and smoother application.
- Bucket and sponge: You will need a bucket to mix the grout and a sponge for cleaning the tile surface after grouting.
- Protective gear: It’s important to protect yourself during the grout repair process. Wear safety goggles, gloves, and a dust mask to prevent any potential hazards.
- Caulk or sealant: Depending on the type of tile floor you have, you may need caulk or sealant to seal the perimeter or any gaps between the tiles.
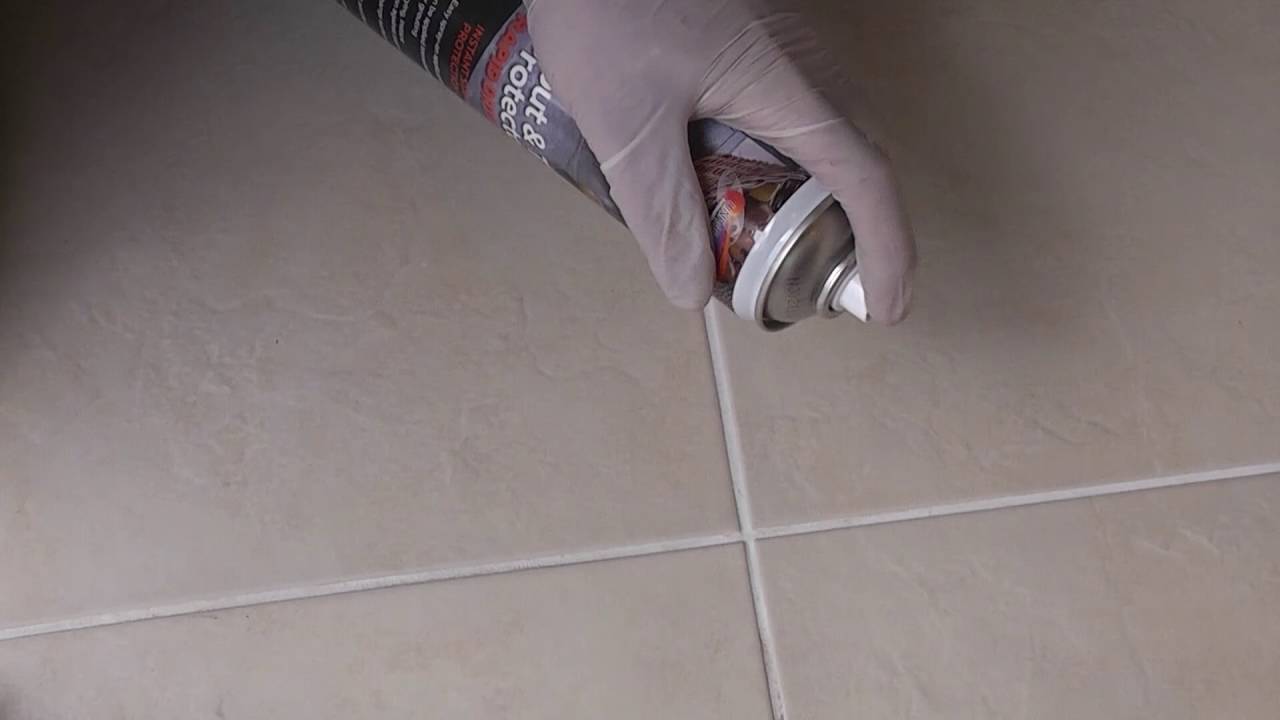
- Grout sealer: Once the new grout has fully cured, it’s recommended to seal it to protect against stains and moisture damage. Choose a grout sealer specifically designed for your type of grout and follow the manufacturer’s instructions.
- Clean cloth or towel: This will be used to wipe away any excess grout and to buff the tile surface after the repair.
Ensure that you have all the tools and materials mentioned above before starting the grout repair. This will save you time and frustration during the process. It’s also a good idea to have a well-ventilated workspace and to cover adjacent surfaces or furniture to protect them from any accidental spills or splatters.
With the necessary tools and materials gathered, you are now ready to proceed to the next step: removing the damaged grout.
Step 3: Removing the damaged grout
With the necessary tools and materials in hand, it’s time to begin the process of removing the damaged grout from the tile floor. Follow these steps to effectively remove the old grout:
- Put on your safety goggles and dust mask to protect yourself from any grout dust or debris.
- Choose the appropriate grout removal tool for your specific situation. A grout saw, grout scraper, or oscillating tool with a grout removal attachment are common options.
- Hold the tool at a slight angle and apply gentle pressure to the grout line. Start at one end of the damaged area and work your way along the grout joint, carefully scraping or sawing away the old grout.
- Be cautious not to damage the tile surface while removing the grout. Take your time and work slowly and patiently.
- Continue removing the grout until you have cleared the entire damaged area. Use the grout removal tool to ensure that the joints are clean and free from any remaining grout or debris.
- Once the grout has been removed, use a vacuum or a clean, dry cloth to remove any loose grout particles or dust from the tile joints.
- Inspect the tile joints to ensure that they are clean and ready for the application of new grout. If necessary, use a toothbrush or a small brush to clean any hard-to-reach areas.
It’s important to note that removing old grout can be a time-consuming and labor-intensive process, especially if the damage is extensive. Be patient and take breaks when needed to avoid fatigue. Remember to follow safety precautions and use proper techniques to protect yourself and the tile surface.
Once you have successfully removed the damaged grout, you’re ready to move on to the next step: preparing the grout mixture.
Step 4: Preparing the grout mixture
Now that the old grout has been removed, it’s time to prepare the grout mixture for the repair. Follow these steps to ensure that your grout is properly mixed and ready for application:
- Read the manufacturer’s instructions on the grout package carefully to determine the correct water-to-grout ratio and mixing instructions.
- Pour the desired amount of grout powder into a clean bucket. Start with a small amount to avoid wasting excess grout.
- Slowly add water to the grout powder while stirring with a grout float or a mixing tool. Add the water little by little until you achieve a smooth, thick consistency. Avoid adding too much water at once as it can make the grout too runny.
- Continue stirring the grout mixture until it is well blended and doesn’t have any dry clumps. Make sure there are no lumps or dry pockets of grout in the mixture.
- Allow the grout mixture to sit for a few minutes as specified by the manufacturer to activate the binding agents and ensure proper hydration.
- After the resting period, give the grout mixture one final stir to ensure it is evenly mixed and ready for application.
It’s essential to follow the manufacturer’s instructions regarding water-to-grout ratios and mixing times to ensure that your grout mixture is the right consistency for application. Adding too much or too little water can affect the durability and final appearance of the grout.
During the grout mixing process, it’s a good idea to wear gloves to protect your hands from any potential skin irritation caused by the grout mixture. Additionally, work in a well-ventilated area to minimize exposure to any grout fumes.
With the grout mixture properly prepared, you are now ready to move on to the next step: applying the new grout.
Use a grout saw to remove damaged grout, then mix and apply new grout with a grout float. Wipe away excess grout with a damp sponge and let it cure for 24 hours. Apply a grout sealer to protect the new grout.
Read more: How To Clean Floor Tile Grout
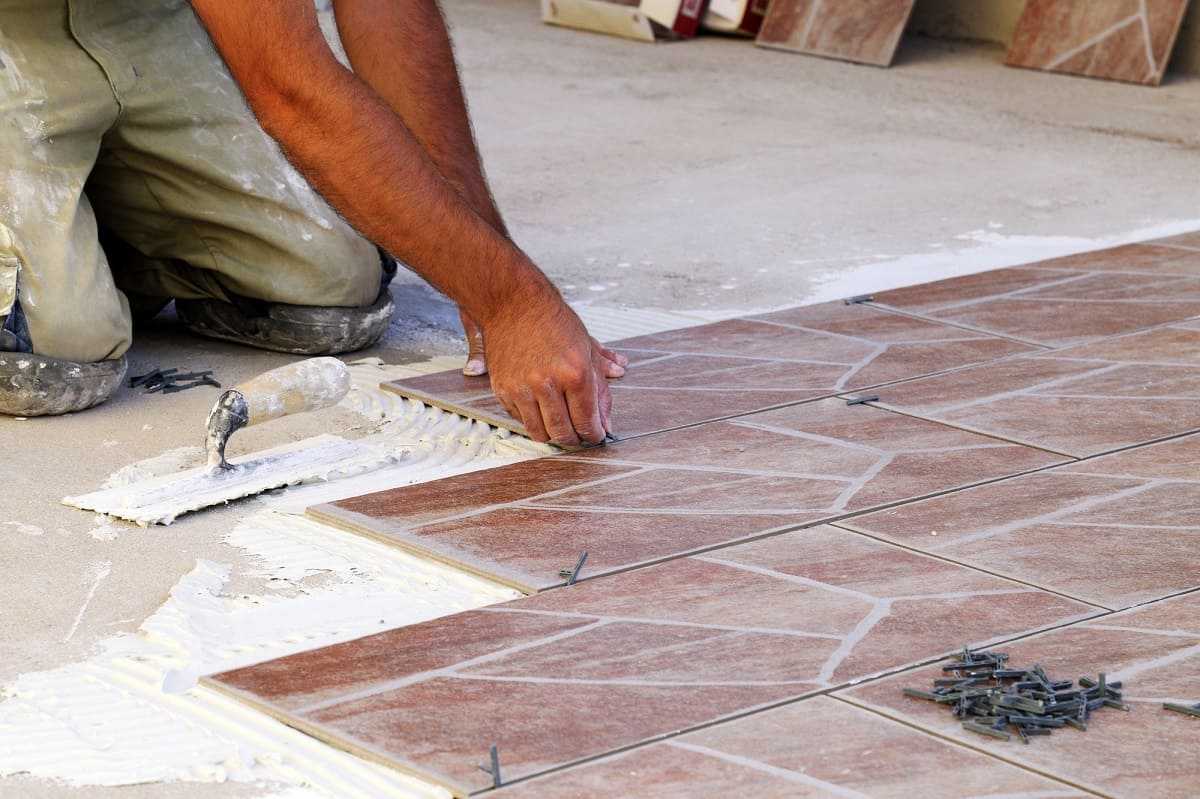
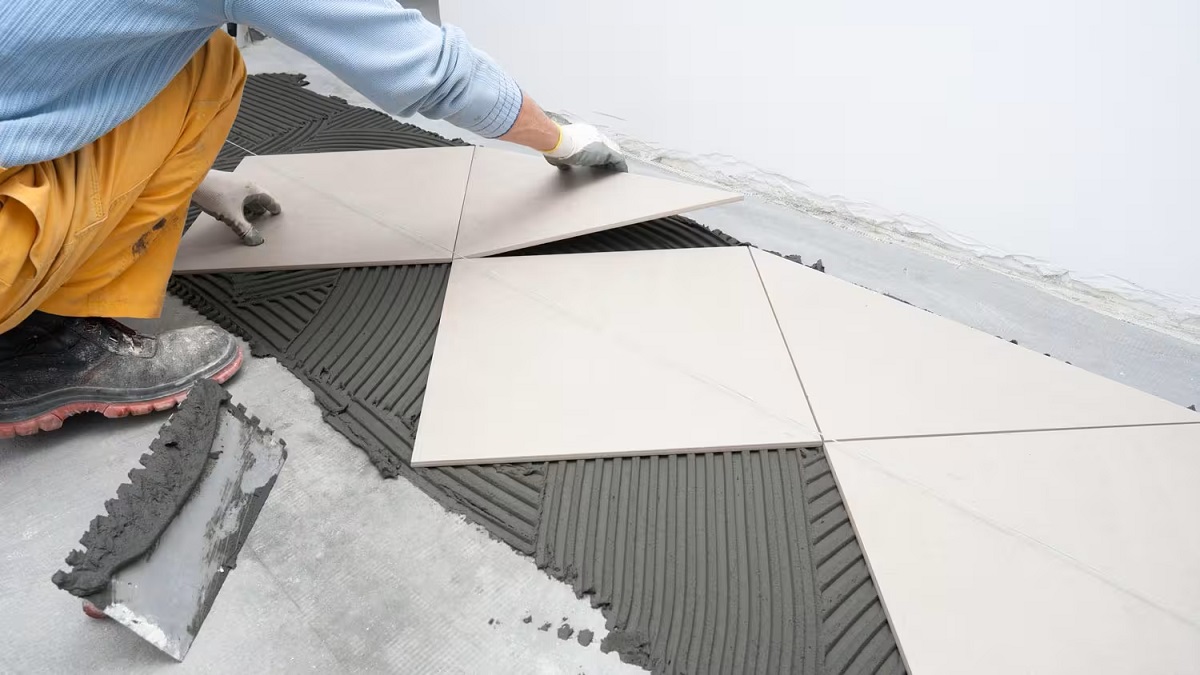
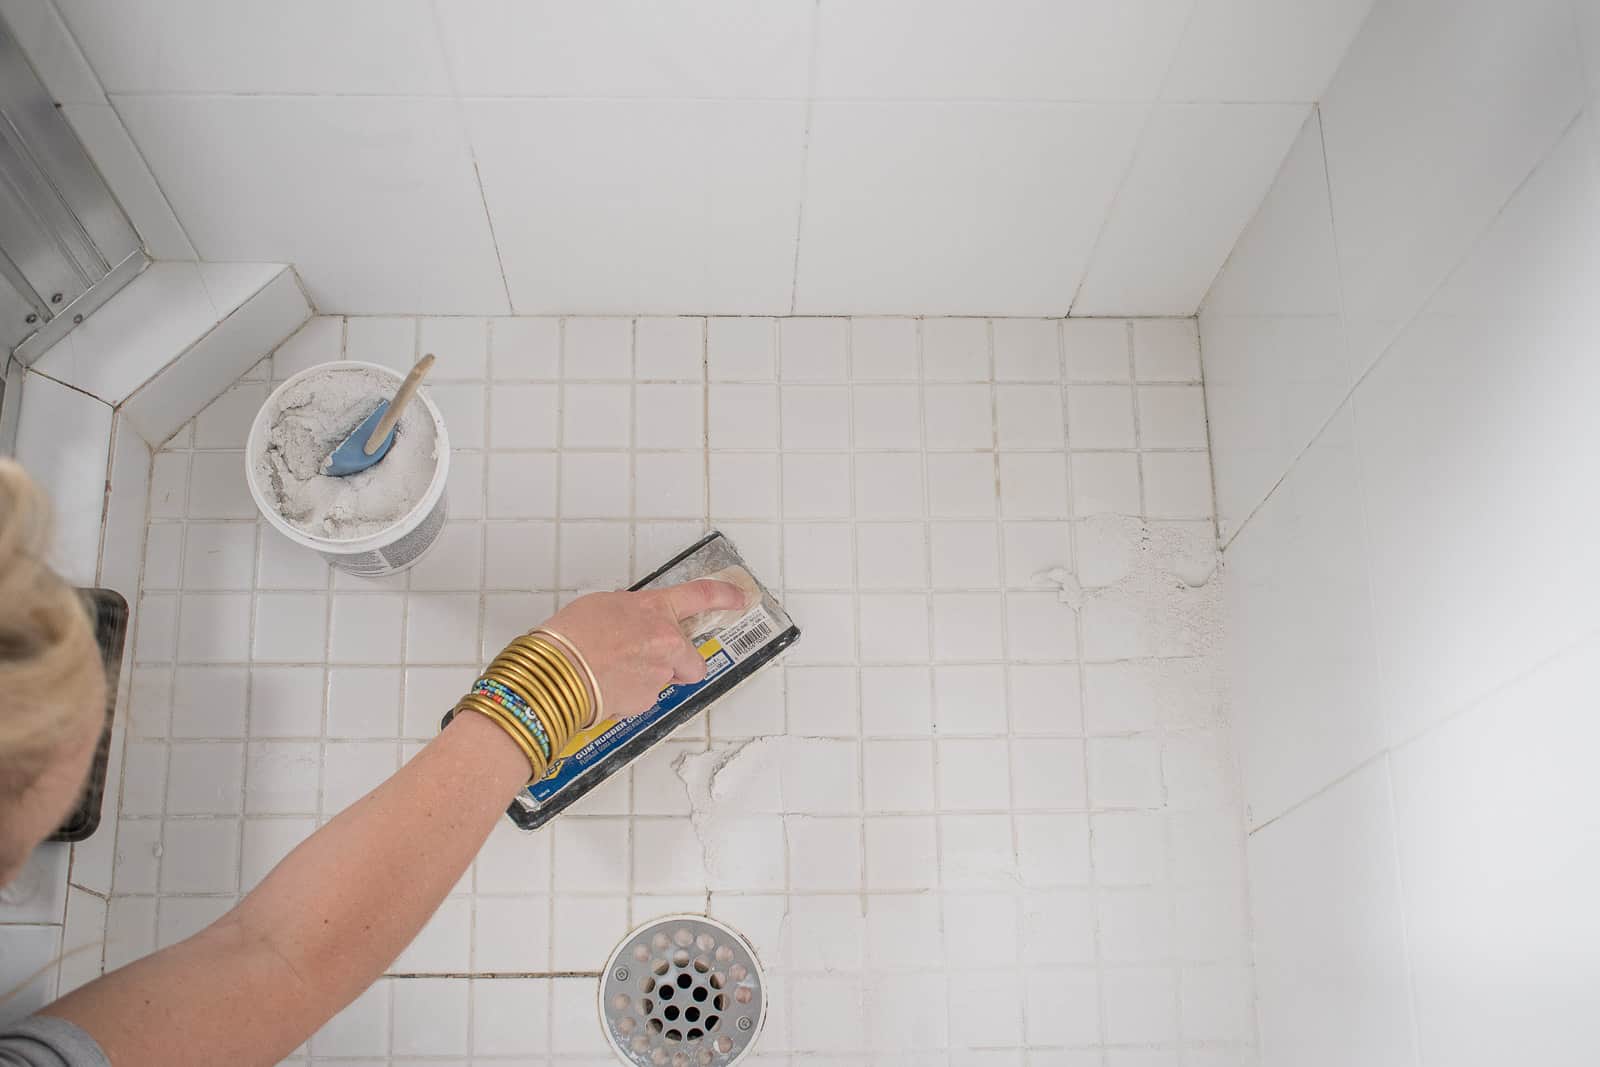
Step 5: Applying the new grout
Now that you have the grout mixture prepared, it’s time to apply the new grout to the tile joints and begin the process of restoring the appearance of your tile floor. Follow these steps to ensure a successful application of the new grout:
- Put on your gloves and take your grout float or a putty knife that fits the width of your tile joints.
- Dip the grout float or putty knife into the prepared grout mixture and scoop up a small amount of grout onto the tool.
- Hold the grout float or putty knife at a 45-degree angle to the tile surface and firmly press the grout into the joints, ensuring that they are completely filled. Work in small sections to prevent the grout from drying out before you can clean the tiles.
- Use the edge of the grout float or putty knife to scrape off any excess grout from the tile surface. Holding the tool at a 45-degree angle, move it diagonally across the joints to remove any excess grout.
- Continue to apply and smooth the grout in small sections until the entire damaged area is filled. Work methodically to ensure consistent application.
- Periodically clean the excess grout from the tile surface using a slightly damp sponge. Gently wipe the tiles diagonally to remove the excess grout without disturbing the freshly applied grout in the joints.
- Be careful not to scrub too hard or use too much water, as it can wash away the grout from the joints. Rinse the sponge frequently to prevent grout buildup on the tiles.
- Allow the newly applied grout to set for the time specified by the manufacturer. This will typically be around 15-30 minutes.
- After the initial setting time, lightly dampen the tiled surface with water and use the sponge to gently wipe away any haze or residue left by the grout. Rinse and wring out the sponge frequently.
- Continue to rinse and wipe the tiles until all grout residue is removed, being careful not to disturb the newly applied grout in the joints.
It’s important to work efficiently during the grout application process to prevent the grout from drying out before you can clean the tiles. If the grout does dry on the surface, it can be difficult to remove and may require more extensive cleaning methods.
Once you have completed the grout application and cleaning, allow the grout to cure according to the manufacturer’s instructions before walking on the tiled area. This will ensure that the grout has time to harden and set properly, providing a durable and long-lasting finish.
Now that the new grout has been applied, it’s time to move on to the next step: cleaning the tile surface to reveal the full beauty of your tile floor.
Step 6: Cleaning the tile surface
Now that the new grout has been applied and allowed to cure, it’s time to clean the tile surface to reveal the full beauty of your tile floor. Follow these steps to effectively clean the tile surface:
- Fill a bucket with warm water and add a mild pH-neutral tile cleaner or a small amount of mild dish soap.
- Dip a clean sponge into the soapy water and gently scrub the tiled surface, focusing on the areas where grout was applied.
- Be careful not to scrub too vigorously, as it may remove or damage the newly applied grout. Use gentle circular motions to clean the tiles and grout lines.
- If there are any stubborn stains or residue on the tile surface, you can use a soft-bristled brush or an old toothbrush to scrub those areas gently.
- Rinse the sponge frequently in clean water to remove any dirt or grime picked up during cleaning.
- Once you have cleaned the entire tile surface, thoroughly rinse the area with clean water to remove any soap residue.
- Dry the tile floor with a clean, dry cloth or towel to prevent water spots and promote faster drying.
- Take a step back and admire your newly repaired and clean tile floor.
It’s important to use a mild pH-neutral tile cleaner or dish soap to avoid damaging the tiles or the grout. Avoid using abrasive cleaners or harsh chemicals, as they can erode the grout and dull the tile’s finish.
Regular cleaning and maintenance of your tile floor will help prolong its lifespan and keep it looking its best. Depending on the level of foot traffic and the type of tile, cleaning may be done weekly or as needed. It’s also a good practice to use doormats or rugs in high-traffic areas to prevent dirt and debris from being tracked onto the tile.
With the tile surface now clean and pristine, it’s time for the final step: applying the finishing touches and sealing the grout.
Step 7: Final touches and sealing the grout
Congratulations on reaching the final step of repairing and revitalizing your tile floor! In this step, we will focus on applying the finishing touches and sealing the grout to ensure its long-lasting durability. Follow these steps to complete the repair process:
- Inspect the newly repaired grout lines and tile surface. Check for any areas that may need touch-ups or additional cleaning. Use a clean, dry cloth or towel to wipe away any remaining residue or moisture.
- If there are any small gaps or areas where the grout is slightly low, you can use a grout pen or grout touch-up sealer to fill in those spaces. Follow the manufacturer’s instructions for application and drying time.
- Allow the grout to fully cure and dry according to the manufacturer’s instructions. This typically takes around 24-48 hours, but it’s essential to check the specific recommendations on the grout packaging.
- Once the grout is completely dry, it’s time to seal it. Choose a high-quality grout sealer that is suitable for your specific type of grout. Apply the sealer according to the manufacturer’s instructions, typically using a brush or a sponge applicator.
- Apply a thin, even coat of the sealer onto the surface of the grout, making sure to cover all grout lines. Be careful not to get the sealer on the tiles, as it can leave behind a hazy residue.
- Allow the grout sealer to soak into the grout for the recommended amount of time specified by the manufacturer.
- Wipe away any excess sealer from the tile surface using a clean, dry cloth or towel. Buff the tiles gently to remove any haze or residue left by the sealer.
- Allow the grout sealer to cure completely before exposing the floor to foot traffic or moisture. This might take a few hours or longer, depending on the specific product.
- Regularly maintain your tile floor by cleaning it with a mild pH-neutral tile cleaner, mopping up spills promptly, and avoiding harsh chemicals or abrasive materials that can damage the grout or tiles.
- Consider using floor mats or rugs in high-traffic areas to further protect the tile floor and reduce the wear and tear on the grout.
By sealing the grout, you are providing an extra layer of protection against stains, moisture, and discoloration. Regularly inspect and reapply the grout sealer as needed to maintain its effectiveness.
With the final touches applied and the grout sealed, your tile floor repair is now complete! Take a moment to admire your handiwork and enjoy your beautifully restored tile floor.
Remember, the key to maintaining a healthy and attractive tile floor is regular cleaning and proper maintenance. By taking care of your tile floor, you can ensure its longevity and keep it looking like new for years to come.
Thank you for following this step-by-step guide on how to repair grout on a tile floor. We hope that this article has been helpful and that you have found success in your grout repair project. Happy renovating!
Conclusion
Repairing grout on a tile floor is an essential maintenance task that can significantly improve the appearance and durability of your flooring. By following the steps outlined in this guide, you can successfully repair the grout and restore your tile floor to its former glory.
Before starting the grout repair process, it’s important to assess the damage and gather the necessary tools and materials. Remove the old grout carefully, ensuring that the tile surface remains undamaged. Prepare the grout mixture according to the manufacturer’s instructions and apply it evenly into the tile joints.
Cleaning the tile surface and ensuring the grout is fully cured are crucial steps in the repair process. Use a mild cleaner to clean the tiles and remove any grout residue. Finally, seal the grout to protect it from stains and moisture, which will help prolong its lifespan and maintain its beauty.
Regular maintenance and cleaning of your tile floor, including prompt cleanup of spills and the use of mats in high-traffic areas, will help preserve the grout and tiles. By following these practices, you can ensure that your tile floor remains a standout feature of your home for years to come.
Remember, if you’re unsure about any aspect of the grout repair process, it’s always best to consult a professional. They can provide expert guidance and ensure that the repair is done correctly and efficiently.
Thank you for reading this comprehensive guide on how to repair grout on a tile floor. We hope that this article has provided valuable insights and empowered you to tackle this DIY project with confidence. Enjoy your rejuvenated tile floor and the improved aesthetics it brings to your space!
Frequently Asked Questions about How To Repair Grout On Tile Floor
Was this page helpful?
At Storables.com, we guarantee accurate and reliable information. Our content, validated by Expert Board Contributors, is crafted following stringent Editorial Policies. We're committed to providing you with well-researched, expert-backed insights for all your informational needs.


0 thoughts on “How To Repair Grout On Tile Floor”