Home>Furniture & Design>Bathroom Fixtures>How To Repair A Shower Tile Grout

Bathroom Fixtures
How To Repair A Shower Tile Grout
Modified: August 27, 2024
Learn how to repair shower tile grout with our expert tips and tricks. Keep your bathroom fixtures looking like new with our easy DIY solutions.
(Many of the links in this article redirect to a specific reviewed product. Your purchase of these products through affiliate links helps to generate commission for Storables.com, at no extra cost. Learn more)
Introduction
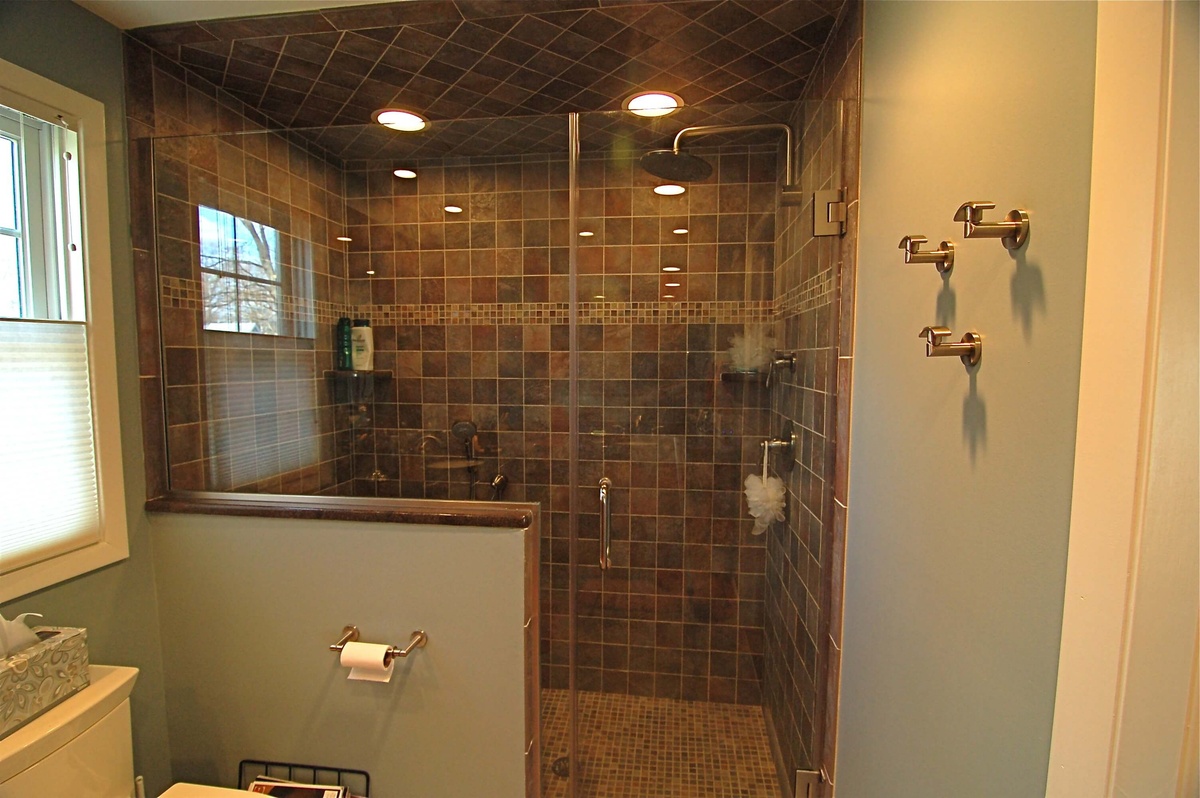
Welcome to the ultimate guide on how to repair shower tile grout! Over time, the grout between your shower tiles can become discolored, cracked, or even begin to crumble. Not only does this detract from the aesthetic appeal of your bathroom, but it can also lead to water damage and mold growth if left unaddressed. Fortunately, with a bit of know-how and the right tools, you can restore your shower’s grout to its former glory.
In this comprehensive guide, we will walk you through the step-by-step process of assessing the damage, preparing the area, removing old grout, applying new grout, and adding the finishing touches. Whether you’re a seasoned DIY enthusiast or a novice looking to tackle your first home improvement project, this guide is designed to equip you with the knowledge and confidence to revitalize your shower’s grout with ease.
So, roll up your sleeves, gather your materials, and let’s dive into the world of shower tile grout repair. By the end of this journey, you’ll not only have a beautifully restored shower, but also a newfound sense of accomplishment in mastering this essential home maintenance skill.
Key Takeaways:
- Say goodbye to discolored and crumbling shower tile grout! Assess, prepare, remove old grout, apply new grout, and add finishing touches for a beautifully restored shower.
- Revitalize your shower with fresh grout and sparkling tiles. Take pride in mastering grout repair and enjoy a welcoming, well-maintained bathroom space.
Read more: How To Grout A Shower Tile
Assessing the Damage
Before diving into the repair process, it’s crucial to assess the extent of the damage to your shower tile grout. Start by closely inspecting the grout lines for any signs of discoloration, cracking, or crumbling. Discolored grout may indicate the presence of mold or mildew, while cracks and crumbling suggest structural issues that need attention.
Use a screwdriver or a similar tool to gently prod the grout lines. If the grout feels soft or crumbly, it’s a clear sign that it needs to be replaced. Additionally, check for any areas where the grout has pulled away from the tiles, as this can create vulnerabilities for water seepage and further damage.
Next, assess the condition of the surrounding tiles. Look for any loose or chipped tiles, as these may need to be addressed alongside the grout repair. It’s essential to ensure that the tiles are securely in place before proceeding with the grout repair to prevent future issues.
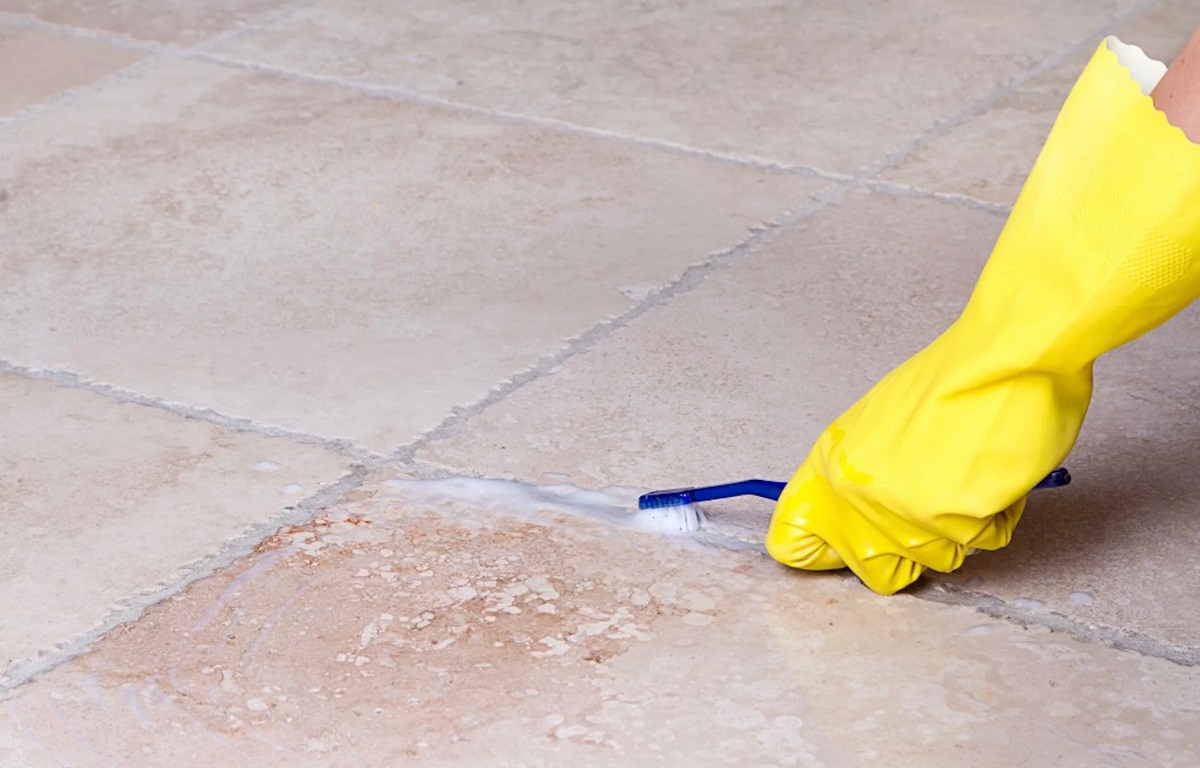
Finally, consider the presence of mold or mildew. If you notice any dark or discolored patches within the grout lines, it’s a sign of mold growth. This not only affects the appearance of your shower but also poses health risks. Addressing mold and mildew is crucial for maintaining a clean and hygienic shower environment.
By thoroughly assessing the damage, you’ll gain a clear understanding of the scope of the repair work required. This initial evaluation sets the stage for the subsequent steps in the grout repair process, ensuring that you can approach the project with a well-informed plan of action.
Preparing the Area
Before embarking on the grout repair process, it’s essential to prepare the surrounding area to ensure a smooth and efficient workflow. Start by gathering the necessary tools and materials, including a grout saw or removal tool, grout, a grout float, a sponge, and a bucket of water. Additionally, ensure proper ventilation in the bathroom by opening windows or using a fan to minimize exposure to dust and fumes.
Next, thoroughly clean the shower tiles and grout lines to remove any surface dirt, soap scum, or mold. A mixture of water and mild detergent can be used to scrub the tiles and grout, followed by a rinse with clean water. Allow the area to dry completely before proceeding, as this will ensure optimal conditions for the grout repair process.
It’s also advisable to protect the surrounding surfaces from accidental grout splatter or damage. Cover the shower pan and any adjacent walls with plastic sheeting or drop cloths to safeguard them from grout residue. Taking these precautions will help maintain a tidy workspace and prevent unnecessary cleanup after the repair is complete.
If mold or mildew is present, consider using a mold-killing solution to treat the affected areas before beginning the grout repair. This extra step will help eliminate any existing mold spores and inhibit future growth, contributing to a healthier shower environment.
Finally, ensure that you have adequate lighting in the shower area to facilitate a clear view of the grout lines and tiles. Proper lighting is essential for precision work and ensures that no details are overlooked during the repair process.
By taking the time to prepare the area thoroughly, you’ll create an optimal environment for conducting the grout repair. This proactive approach sets the stage for a successful and satisfying repair experience, allowing you to focus on the task at hand with confidence and clarity.
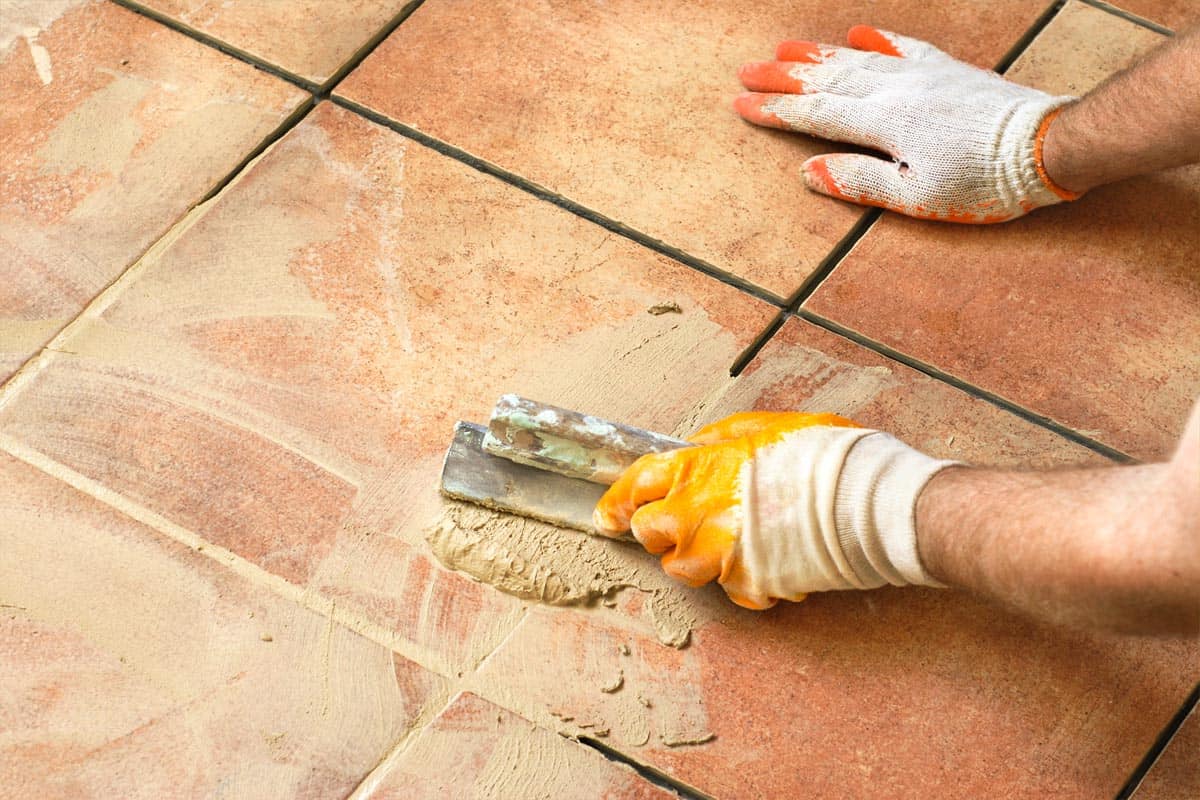
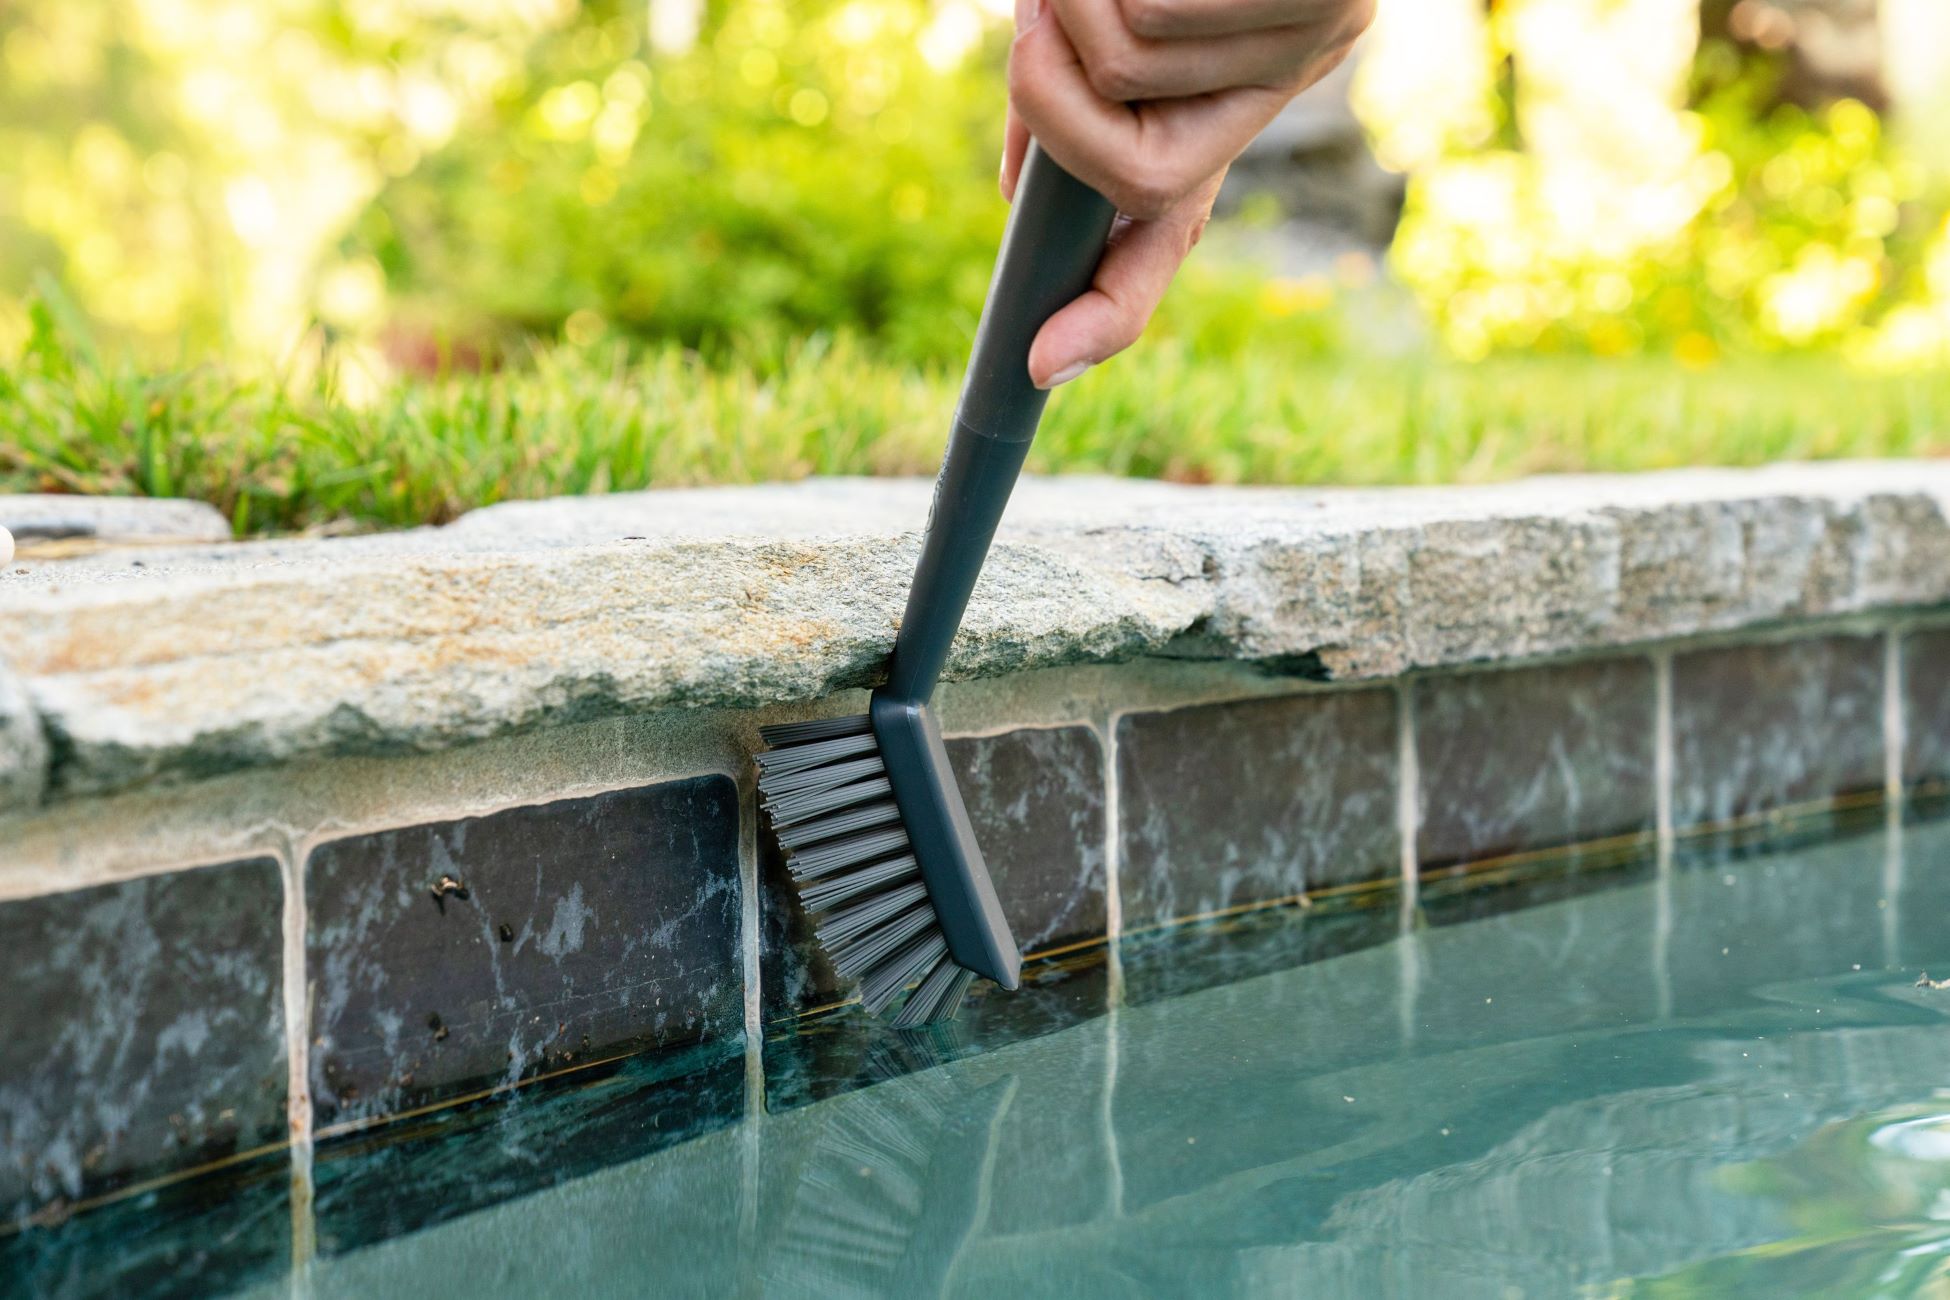
Removing Old Grout
With the area prepared and the extent of the damage assessed, it’s time to tackle the removal of the old grout. This step is essential for creating a clean foundation and ensuring proper adhesion of the new grout.
Begin by using a grout saw or a rotary tool with a grout removal attachment to carefully cut through the old grout along the grout lines. Take care to avoid damaging the surrounding tiles during this process. Work methodically, focusing on one grout line at a time to ensure thorough removal.
As you remove the old grout, periodically vacuum or wipe away the debris to maintain a clear view of your progress. This also prevents the loosened grout particles from settling back into the lines, allowing for a more effective removal process.
Once the majority of the old grout has been removed, use a small brush or vacuum attachment to clean out the remaining debris from the grout lines. It’s crucial to achieve a clean and debris-free surface to facilitate proper adhesion of the new grout.
After the old grout has been removed and the area thoroughly cleaned, take a moment to inspect the grout lines and ensure that they are free of any lingering residue. This meticulous approach sets the stage for a successful application of the new grout, ensuring a durable and visually appealing result.
By taking the time and care to remove the old grout thoroughly, you’ll establish a solid foundation for the subsequent steps in the repair process. This meticulous approach sets the stage for a successful application of the new grout, ensuring a durable and visually appealing result.
Use a grout saw to remove damaged grout, then clean the area with a mixture of water and vinegar. Apply new grout with a grout float, and wipe away excess with a damp sponge. Allow to dry completely before using the shower.
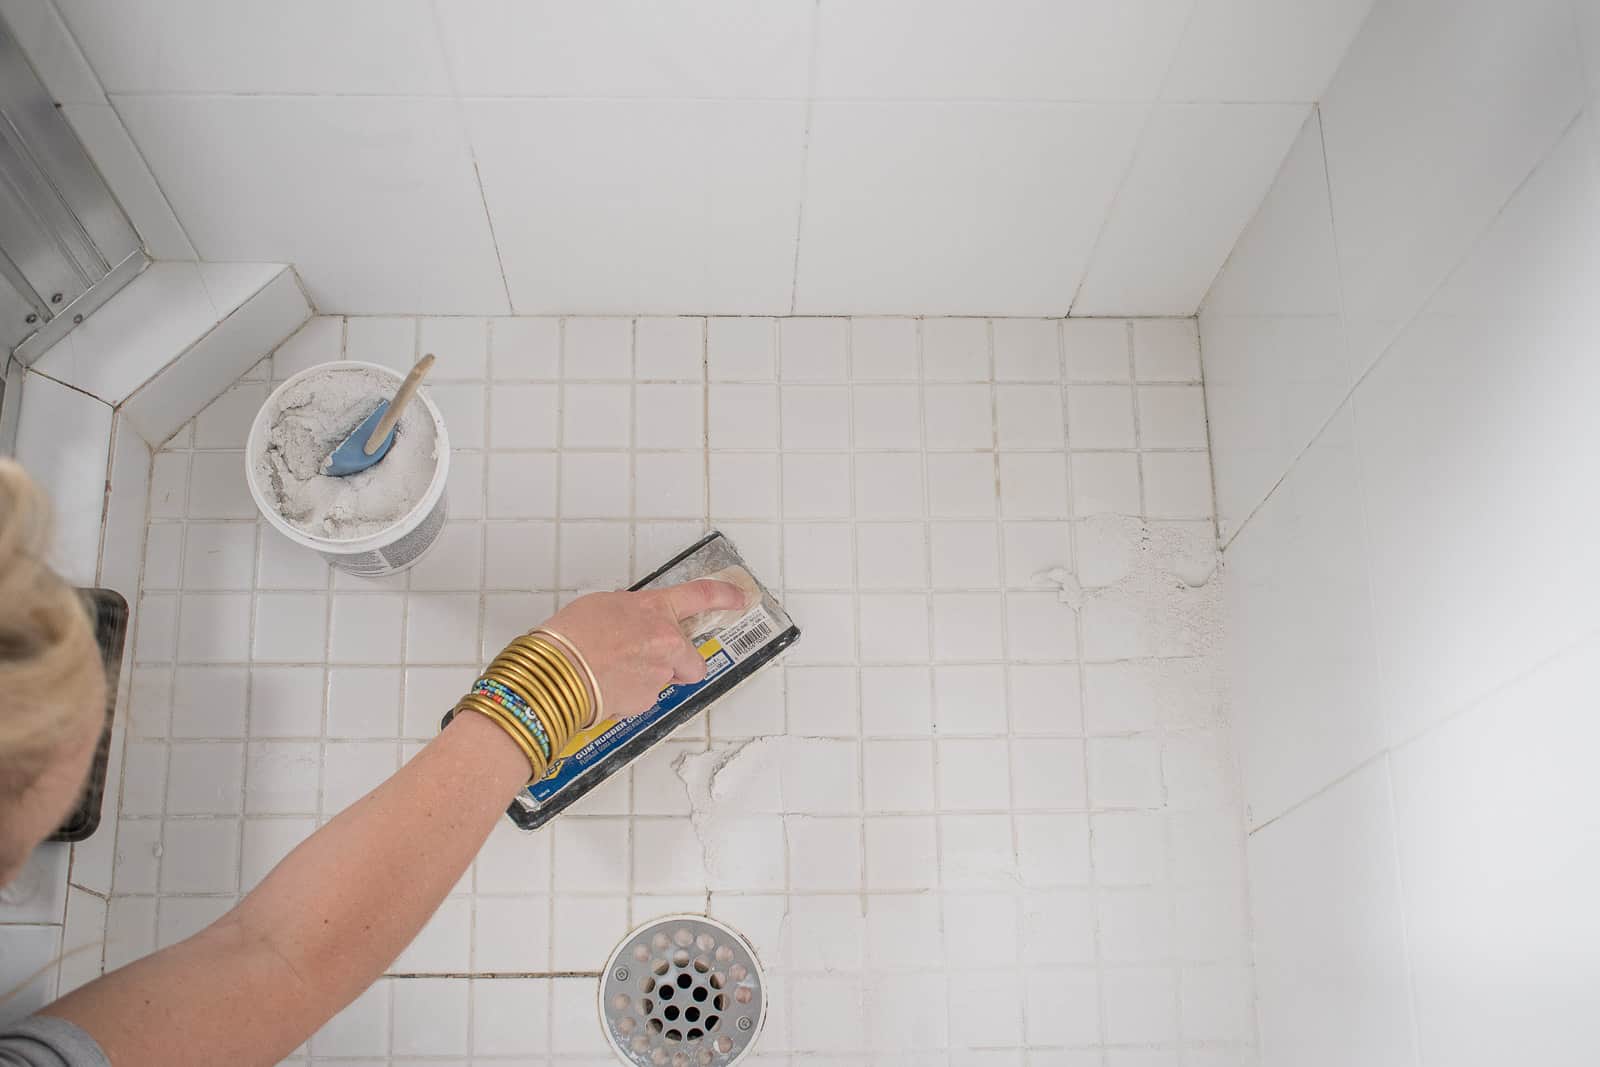
Applying New Grout
With the old grout successfully removed, it’s time to breathe new life into your shower tiles by applying fresh grout. This transformative step will not only enhance the appearance of your shower but also contribute to its structural integrity.
Before proceeding, carefully read the manufacturer’s instructions for the grout product you have selected. Prepare the grout mixture according to the specified ratios, ensuring a smooth and lump-free consistency. It’s advisable to mix only the amount of grout that can be applied within a reasonable timeframe to prevent it from drying out prematurely.
Using a grout float, apply the prepared grout to the grout lines, holding the float at a 45-degree angle to ensure thorough coverage. Work in small sections, pressing the grout firmly into the lines while ensuring that all gaps are filled completely. A sweeping motion with the grout float helps pack the grout evenly and minimizes air pockets.
Once the grout lines are filled, use the edge of the grout float to scrape away excess grout, leaving the surface of the tiles clean. Take care not to remove grout from the lines while doing so, as this can compromise the integrity of the application.
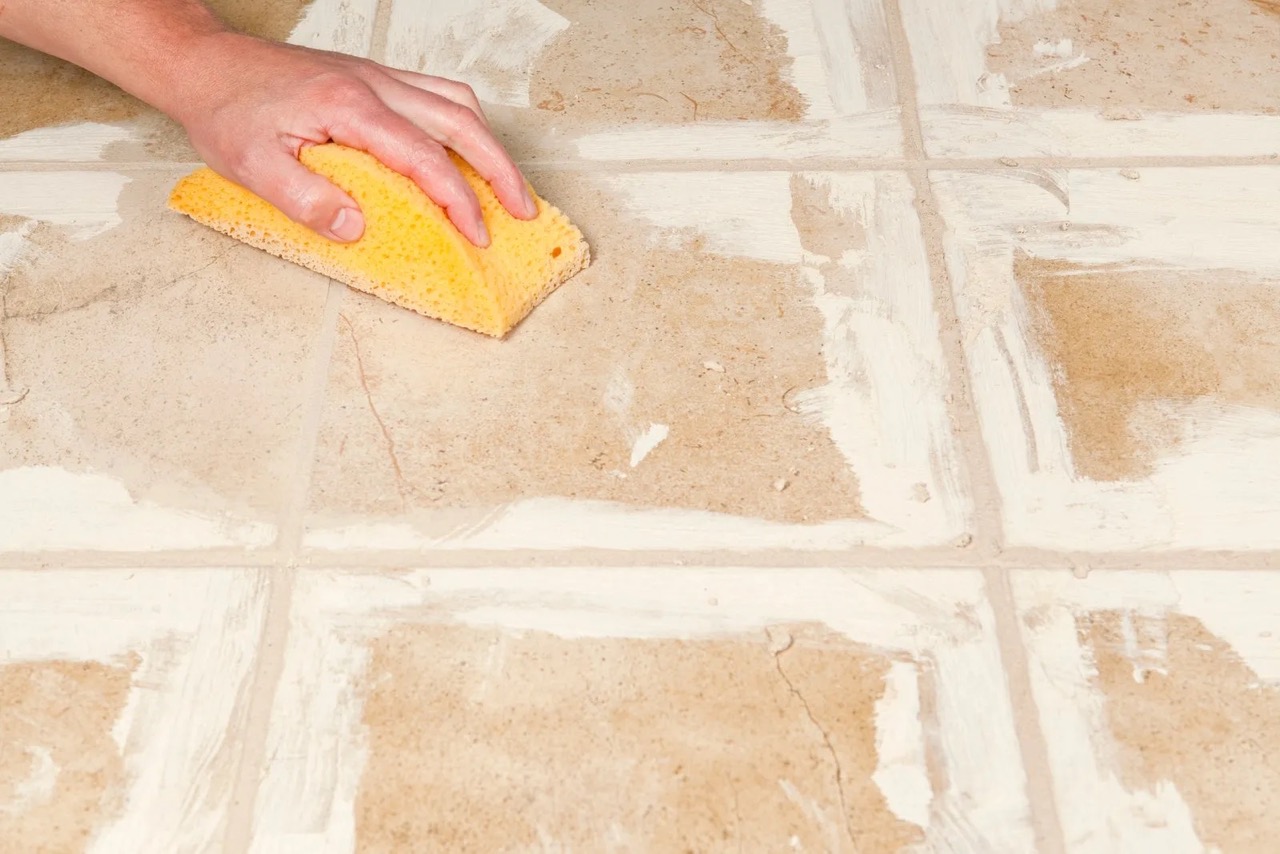
After allowing the grout to set for a brief period as per the manufacturer’s instructions, use a damp sponge to gently wipe away any grout haze from the tile surfaces. Rinse the sponge frequently and avoid applying excessive pressure to prevent dislodging the freshly applied grout.
As the grout cures, monitor the area for any signs of shrinkage or settling. If necessary, apply additional grout to areas where settling has occurred, ensuring a uniform and consistent appearance across the entire surface.
By following these steps with precision and care, you’ll achieve a beautifully restored shower with fresh, durable grout. This transformative process not only rejuvenates the aesthetic appeal of your shower but also enhances its longevity and resilience against moisture and wear.
Read more: How To Repair Grout On Tile Floor
Finishing Touches
As the newly applied grout sets and transforms your shower, it’s time to add the finishing touches that will elevate the overall result and ensure a polished, professional appearance.
Once the grout has fully cured according to the manufacturer’s recommendations, inspect the entire area for any remaining grout haze or residue. Use a clean, dry cloth to buff the tile surfaces and achieve a pristine, gleaming finish. This final touch will enhance the visual impact of the newly restored grout and tiles.
If any areas require additional cleaning or touch-ups, a gentle scrub with a damp sponge or cloth can be employed to address minor imperfections. Take care not to disturb the freshly cured grout during this process, and avoid using abrasive cleaners that could damage the grout or tiles.
For added protection and longevity, consider applying a grout sealer to the newly repaired grout lines. A quality grout sealer will help repel moisture, prevent staining, and prolong the lifespan of the grout, contributing to a durable and low-maintenance shower environment.
Once the sealer has been applied and allowed to cure, take a step back and admire the transformation that has taken place. Your shower now boasts freshly restored grout, sparkling tiles, and a rejuvenated aesthetic that enhances the overall appeal of your bathroom.
As a final touch, consider adding a personal accent, such as a decorative border or trim, to complement the refreshed grout and tiles. This creative addition can infuse your shower with a touch of individuality and style, further enhancing the visual impact of the repair and reflecting your personal taste.
By attending to these finishing touches with care and attention to detail, you’ll elevate the outcome of the grout repair, ensuring a result that is not only visually stunning but also enduring and resilient in the face of daily use.
Conclusion
Congratulations on successfully navigating the journey of repairing your shower tile grout! By following the comprehensive steps outlined in this guide, you’ve not only revitalized the appearance of your shower but also fortified its structural integrity, setting the stage for long-lasting enjoyment and functionality.
Throughout this process, you’ve demonstrated a commendable blend of patience, precision, and a willingness to tackle a hands-on home improvement project. Your dedication to restoring your shower’s grout speaks volumes about your commitment to maintaining a clean, hygienic, and visually appealing bathroom environment.
As you revel in the accomplishment of your grout repair endeavor, take a moment to appreciate the transformative power of this seemingly small yet impactful task. The rejuvenated grout and tiles stand as a testament to your ability to enhance your living space through proactive maintenance and DIY ingenuity.
Furthermore, the skills and knowledge you’ve gained in the process of repairing your shower tile grout extend far beyond this singular project. You’ve acquired valuable insights into the intricacies of grout maintenance, setting the stage for confidently addressing future grout-related challenges with ease and expertise.
As you bask in the satisfaction of a job well done, take the opportunity to share your newfound expertise with friends and family who may benefit from your insights. Your experience and success in grout repair can serve as a source of inspiration and guidance for others embarking on similar home improvement endeavors.
In closing, the revitalized grout in your shower stands as a testament to your dedication to maintaining a welcoming and well-maintained home. Embrace the pride that comes with knowing that you’ve not only repaired your shower’s grout but also elevated the overall comfort and appeal of your living space through your resourcefulness and determination.
Thank you for joining us on this journey, and may your newly restored shower bring you joy and satisfaction for years to come.
Frequently Asked Questions about How To Repair A Shower Tile Grout
Was this page helpful?
At Storables.com, we guarantee accurate and reliable information. Our content, validated by Expert Board Contributors, is crafted following stringent Editorial Policies. We're committed to providing you with well-researched, expert-backed insights for all your informational needs.


0 thoughts on “How To Repair A Shower Tile Grout”