
Articles
How To Tile And Grout A Floor
Modified: August 26, 2024
Learn the step-by-step process of tiling and grouting a floor with our informative articles. Get expert tips and tricks for a flawless finish.
(Many of the links in this article redirect to a specific reviewed product. Your purchase of these products through affiliate links helps to generate commission for Storables.com, at no extra cost. Learn more)
Introduction
When it comes to renovating or remodeling your home, one of the most transformative changes you can make is tiling and grouting a floor. Whether you’re updating your kitchen, bathroom, or any other room, adding new tiles can completely rejuvenate the space and give it a fresh, modern look. In addition to aesthetics, tiling also offers practical benefits such as durability and easy maintenance.
However, the process of tiling and grouting a floor can be quite daunting, especially if you’ve never done it before. But fear not! In this comprehensive guide, we’ll walk you through the step-by-step process of tile installation and grouting, providing you with all the information and tips you need to successfully complete the project.
Key Takeaways:
- Transform your space with a fresh, modern look and ensure durability by following step-by-step instructions for tiling and grouting a floor. Enjoy the beauty, functionality, and value it adds to your home.
- Prepare, plan, apply, lay, and finish – the comprehensive guide to tiling and grouting a floor ensures professional results. With patience and attention to detail, achieve a long-lasting, visually appealing tiled floor.
Read more: How To Clean Floor Tile Grout
Tools and Materials Needed
Before we dive into the specific steps, it’s important to gather all the necessary tools and materials. Here’s a list of what you’ll need:
- Tile: Choose the type of tile that suits your style and the intended use of the space.
- Grout: Select a grout color that complements your tiles.
- Tile adhesive: Use a high-quality adhesive suitable for your chosen tile and subfloor.
- Grout float: This tool is essential for applying grout evenly and smoothly.
- Trowel: A trowel is used to spread the adhesive on the floor.
- Sponge: Used for cleaning excess grout and wiping off the tiles.
- Bucket: Use a bucket to mix the adhesive and grout.
- Tile spacers: These ensure consistent spacing between tiles.
- Tape measure: Measure the area to determine the amount of tile needed.
- Level: Essential for ensuring a level installation.
- Safety glasses: Protect your eyes from debris and tile shards.
- Gloves: Protect your hands while working with tile adhesive and grout.
- Dust mask: Prevent inhalation of dust and particles during tile cutting.
Make sure to gather all these tools and materials before starting the tiling and grouting process. This will ensure a smooth and efficient installation.
Key Takeaways:
- Transform your space with a fresh, modern look and ensure durability by following step-by-step instructions for tiling and grouting a floor. Enjoy the beauty, functionality, and value it adds to your home.
- Prepare, plan, apply, lay, and finish – the comprehensive guide to tiling and grouting a floor ensures professional results. With patience and attention to detail, achieve a long-lasting, visually appealing tiled floor.
Read more: How To Clean Floor Tile Grout
Tools and Materials Needed
When embarking on a tiling and grouting project, it’s important to have the right tools and materials at your disposal to ensure a successful and efficient installation. Here are the key items you’ll need:
Tile
The first essential item on your list is the tile itself. Choose a tile that suits your aesthetic preferences, as well as the specific requirements of the space you’re tiling. There are countless options available, from ceramic and porcelain to natural stone and glass tiles. Consider factors such as durability, water resistance, and maintenance when selecting your tile.
Grout
Grout serves as the filler between tiles and plays a crucial role in keeping them in place and preventing moisture from seeping through. Choose a grout color that complements your tile and enhances the overall look of the floor. Grout comes in various types, including sanded and unsanded versions, so make sure to select the appropriate one based on the width of your grout lines.
Read more: How To Repair Grout On Tile Floor
Tile Adhesive
Tile adhesive, also known as thin-set mortar, is an adhesive material used to bond the tile to the floor. It provides a strong, durable bond that ensures the tiles remain in place over time. Choose a high-quality adhesive suitable for your specific tile and subfloor type, whether it’s cement, wood, or concrete.
Grout Float
A grout float is an essential tool for applying the grout to the tile surface. It features a rubber or foam pad that allows for easy spreading and filling of the grout lines. The float helps ensure an even distribution of grout and smoothens the surface, resulting in a professional finish.
Trowel
A trowel is a handy tool used to spread the tile adhesive onto the floor before laying the tiles. It typically has a flat, rectangular blade with a handle and is available in various sizes. The size of the trowel notch is important as it determines the thickness and coverage of the adhesive. Consult the adhesive manufacturer’s instructions for the recommended notch size based on the tile size and type.
Sponge
A sponge is a versatile tool that comes in handy during the grouting process. It is used to clean the excess grout from the surface of the tiles and ensure a clean, polished finish. Dampen the sponge with water and gently wipe the tiles to remove any grout residue without disturbing the grouted joints.
Read more: How To Grout Peel And Stick Floor Tile
Bucket
A bucket is needed to mix the tile adhesive and grout. Make sure to choose a sturdy and spacious bucket that can accommodate the amount of adhesive or grout required for your project. Use a mixing paddle or a drill with a mixing attachment to ensure thorough and consistent mixing.
Tile Spacers
Tile spacers are small plastic crosses or wedges used to maintain consistent spacing between tiles. They ensure that the grout lines are of uniform width throughout the installation, creating a neat and professional look. Spacers come in various sizes, so choose the appropriate size based on your desired grout line width.
Tape Measure
Accurate measurement is key to a successful tiling project. Use a tape measure to determine the dimensions of the area you’ll be tiling. Measure the length and width of the space to calculate the number of tiles needed. It’s a good idea to purchase extra tiles to account for any breakage or mistakes during installation.
Level
A level is an essential tool for ensuring that your tile installation is straight and level. Place the level on the tiles periodically to check for any unevenness. It’s crucial to have a level floor so that the tiles lay flat and are visually pleasing.
Read more: How To Grout Shower Floor
Safety Glasses
Protect your eyes during tile installation by wearing safety glasses. Tiling involves handling sharp tile shards, dust, and debris. Safety glasses provide essential eye protection, ensuring that you can work comfortably and safely.
Gloves
When working with tile adhesive and grout, it’s important to protect your hands from irritation and potential skin damage. Wear gloves to safeguard your skin and ensure safe and hygienic work practices.
Dust Mask
During the tile cutting process, dust and small particles can become airborne and be inhaled. To protect your respiratory system, wear a dust mask. This simple precaution will help ensure that you’re not exposed to potentially harmful dust and maintain good air quality in your work area.
By having these essential tools and materials ready, you’ll be well-prepared to tackle your tiling and grouting project. Remember to gather everything before starting to ensure a smooth and successful installation process.
Preparing the Floor
Before you begin the tile installation process, it’s crucial to properly prepare the floor to ensure a successful and long-lasting result. Here are the key steps involved in preparing the floor:
Read more: How To Grout Outdoor Tiles
Removing the Old Flooring
If you have existing flooring, you’ll need to remove it before proceeding with tile installation. This may involve removing carpet, vinyl, laminate, or any other type of floor covering. Carefully remove the flooring material and dispose of it properly. Ensure that the subfloor is exposed and ready for inspection and preparation.
Cleaning and Inspecting the Subfloor
Once the old flooring is removed, thoroughly clean the subfloor. Remove any debris, adhesive residue, or dust using a broom, vacuum, or mop. Ensure that the surface is clean, dry, and free from any contaminants that could interfere with the bond between the tile adhesive and the subfloor.
After cleaning, inspect the subfloor for any damage or unevenness. Look for loose boards, cracks, or dips in the floor. It’s important to address and repair these issues before proceeding with tile installation to ensure a stable and level surface.
Repairing Any Damages
If you encounter any damages during the inspection, take the necessary steps to repair them. Replace any damaged or rotting boards, fill in cracks or gaps, and ensure that the subfloor is structurally sound. This is crucial for the overall stability of the tiled floor and to prevent future issues.
Ensuring the Surface is Level
One of the most important aspects of a successful tile installation is having a level surface. Use a level tool to check the floor for any unevenness. If you notice any areas that are not level, you’ll need to address them before proceeding. Depending on the severity of the unevenness, you may need to use a self-leveling compound or additional underlayment to create a smooth and level surface.
By taking the time to properly prepare the floor, you’ll create a solid foundation for your tile installation. This will help ensure that your tiles adhere properly and that the finished floor is not only visually appealing but also durable and long-lasting.
Read more: How To Grout A Shower Tile
Planning the Tile Layout
Before you start installing the tiles, it’s essential to carefully plan the layout to achieve a visually pleasing and well-proportioned result. Here are the key steps involved in planning the tile layout:
Measuring the Area
The first step in planning your tile layout is to accurately measure the area you’ll be tiling. Use a tape measure to determine the length and width of the space. It’s crucial to measure all dimensions precisely to ensure that you have enough tiles for the entire area and to avoid any wastage. If the space is irregularly shaped, break it down into smaller sections and measure each section separately.
Deciding on the Tile Pattern
Next, consider the tile pattern that will best suit your space and design preferences. There are various tile patterns to choose from, including straight lay, diagonal, herringbone, chevron, and more. Each pattern creates a unique visual effect and can enhance or complement the overall aesthetic of the room. Take into account the shape and size of the tiles you’re using when deciding on the pattern.
For smaller spaces, such as bathrooms or powder rooms, a simple straight lay pattern can create a clean and classic look. Diagonal patterns can add interest and depth to larger areas, while herringbone or chevron patterns can bring a touch of elegance and sophistication. Consider the style of your space and choose a tile pattern that best reflects your design vision.
Marking Guidelines
Once you’ve decided on the tile pattern, it’s time to mark the guidelines on the floor. Start by identifying the center point of the room. Measure the width of the room and divide it in half to find the center. Repeat this process for the length of the room. The center point will serve as your starting point for laying the tiles.
Using a chalk line or pencil, create a guideline from the center point to the walls in both directions. This guideline will help you lay the tiles in a straight and aligned manner. Additionally, mark guidelines parallel to the centerline to indicate where the first row of tiles will be laid. These guidelines will ensure that the tiles are properly spaced and aligned throughout the installation.
Take your time during the planning phase to ensure that the tile layout is well thought out and suits your style and space. Proper planning and marking of guidelines will save you time and effort during the actual installation process and result in a professionally finished floor.
Read more: How To Seal Floor Grout
Applying the Tile Adhesive
Now that you’ve planned your tile layout, it’s time to start applying the tile adhesive. The tile adhesive is vital for securing the tiles to the floor and ensuring a strong bond. Here’s a step-by-step guide on how to apply the tile adhesive:
Mixing the Tile Adhesive
Start by preparing the tile adhesive according to the manufacturer’s instructions. The adhesive usually comes in powder form and needs to be mixed with water. Use a bucket and a mixing paddle or a drill with a mixing attachment to combine the adhesive and water. Mix the adhesive until you achieve a smooth and workable consistency. Avoid over-mixing, as it can lead to air bubbles in the adhesive.
Spreading the Adhesive on the Floor
Once the tile adhesive is mixed, begin spreading it on the floor using a trowel. Start at one corner of the room, working in small sections to ensure that the adhesive doesn’t dry out before you can lay the tiles. Hold the trowel at a 45-degree angle and use the flat side to spread the adhesive evenly and create ridges.
Working in Small Sections
It’s important to work in small sections to ensure that the adhesive remains workable. The size of the section will depend on how quickly you can lay the tiles. A good rule of thumb is to work within an area where you can comfortably reach and complete the tiling process within 10-15 minutes.
Spread the adhesive in smooth and even strokes, creating ridges with the notched side of the trowel. The ridges help create a solid bond between the tiles and the floor. Avoid spreading the adhesive too thickly, as it can prevent proper adhesion and leveling of the tiles.
Read more: How To Repair A Shower Tile Grout
Combining Adhesive Ridges
After spreading the adhesive in a section, use the flat side of the trowel to gently comb over the ridges in one direction. This helps to level out the ridges and ensure a consistent thickness of adhesive. Comb the adhesive in the same direction as you plan to lay the tiles.
When applying the adhesive, pay attention to the tile layout and follow the marked guidelines. Work methodically and ensure that the adhesive is evenly spread and properly leveled within each section. By following these steps, you’ll create a solid foundation for laying the tiles and achieve a professional, long-lasting result.
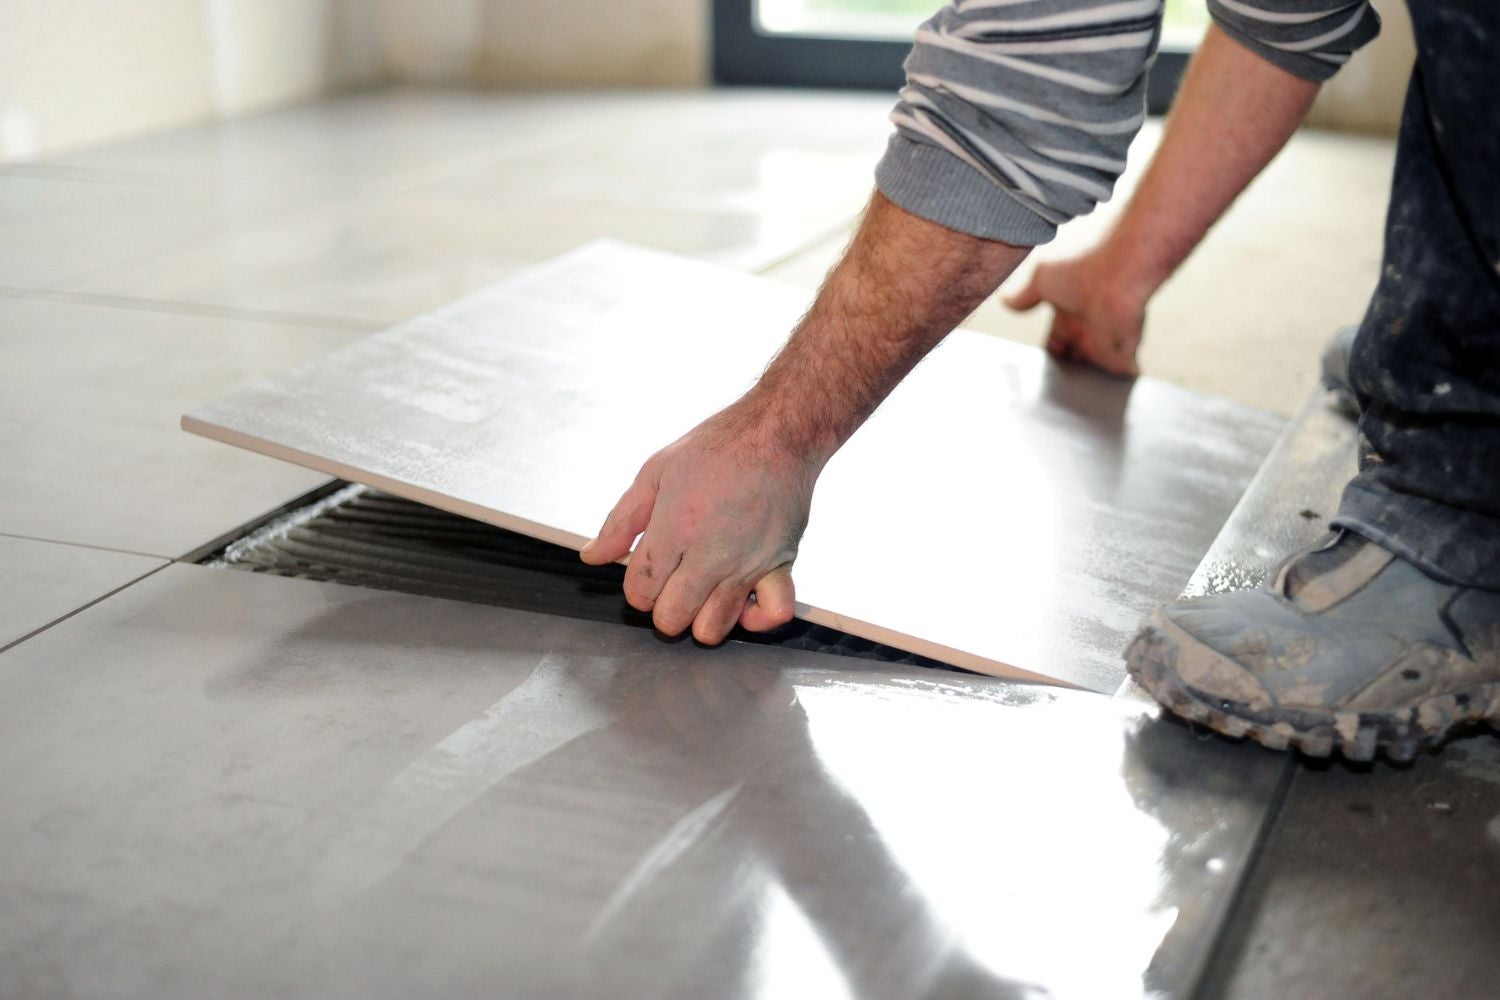
Laying the Tiles
Now that the tile adhesive has been applied, it’s time to start laying the tiles. This step involves positioning and securing the tiles onto the adhesive to create the desired pattern and layout. Here’s a step-by-step guide on how to lay the tiles:
Placing the First Tile
Begin by placing the first tile at the starting point of your layout, following the marked guidelines. Press the tile firmly into the adhesive, applying a slight twist to ensure it sets properly. Use a level to check that the tile is flat and aligned with the guidelines. This first tile will serve as a reference point for the rest of the installation.
Using Tile Spacers for Even Spacing
As you lay each tile, insert tile spacers along the edges to create consistent gaps between the tiles. Tile spacers come in various sizes and allow for uniform spacing, which ensures that the grout lines are even. The size of the spacer will depend on your desired grout line width. Press the spacers firmly into the adhesive, pushing them down until they are flush with the tile surface.
Read more: How To Grout Tiles: Step-by-step
Cutting Tiles to Fit Corners or Edges
Inevitably, you’ll encounter areas where the standard-sized tiles need to be cut to fit corners, edges, or around obstacles such as pipes or electrical outlets. Measure the required dimensions carefully and use a tile cutter or wet saw to make precise cuts. Take your time and wear safety glasses and gloves when cutting tiles. Remember to allow for the width of the grout line when measuring and cutting the tiles.
Checking Alignment and Levelness
As you continue laying the tiles, periodically check their alignment and levelness. Use a level to ensure that the tiles are flat and even. Adjust the position of each tile as necessary, gently tapping it with a rubber mallet or the handle of a putty knife to achieve the desired alignment. The use of a level and periodic checks will help you maintain a professional and visually appealing tile installation.
It’s important to take your time during the tile laying process to ensure accurate placement and alignment. Carefully follow the marked guidelines and use tile spacers to achieve consistent spacing. Regular checks with a level will help you maintain a level and visually pleasing installation.
Allowing the Adhesive to Dry
After laying the tiles, it’s crucial to allow the adhesive to dry thoroughly before proceeding with the next steps. Drying time is essential to ensure that the tiles adhere properly to the floor and to avoid any movement or displacement. Here’s what you need to do:
Waiting for the Recommended Drying Time
The drying time of the adhesive will vary depending on the type and brand you’ve chosen, as well as the environmental conditions such as temperature and humidity. It’s important to follow the manufacturer’s instructions for the recommended drying time. This information is usually provided on the adhesive packaging or in the product guidelines.
Avoid rushing the process or walking on the tiles too soon. Premature foot traffic or movement can disturb the adhesive and compromise the bond between the tiles and the floor. Patience is key to ensuring a successful and long-lasting tile installation.
Read more: What Grout To Use For Outdoor Tile
Removing Tile Spacers
While you wait for the adhesive to dry, you can begin removing the tile spacers. Once the adhesive has set and the tiles are firmly in place, carefully remove the spacers by hand or with a pair of pliers. Gently twist and pull them out of the gaps between the tiles. Take care not to disturb or displace the tiles while removing the spacers.
Removing the spacers will give you a clear view of the grout lines and prepare the surface for the next crucial step: applying the grout.
By allowing the adhesive to dry completely and patiently waiting for the recommended drying time, you’ll ensure that the tiles are securely bonded to the floor. The next step, grouting, can only be carried out once the adhesive is fully dried and hardened.
Mixing and Applying the Grout
Once the tile adhesive has fully dried, it’s time to mix and apply the grout. Grout not only fills the gaps between the tiles but also provides strength and stability to the tiled surface. Here’s a step-by-step guide on how to mix and apply grout:
Mixing the Grout
Start by selecting the grout color that complements your tiles and desired aesthetic. Follow the manufacturer’s instructions to mix the grout. Usually, grout is available as a powder that needs to be mixed with water. Use a clean bucket and a grout mixing paddle or a drill with a mixing attachment to combine the grout and water to achieve a smooth, lump-free consistency. Be careful not to overmix the grout, as it can introduce air bubbles.
Applying Grout with a Grout Float
Once the grout is mixed, take a small amount onto the grout float. Holding the float at a 45-degree angle, apply the grout diagonally, pressing it into the spaces between the tiles. Use firm, even pressure to ensure the grout fills the gaps completely. Work in small sections to avoid the grout drying out before you can clean it off the surface.
Read more: How To Clean Tile Grout In A Swimming Pool
Removing Excess Grout from the Tile Surface
After applying the grout, use the grout float to remove excess grout from the tile surface. Hold the float at a steeper angle (almost upright) and scrape it diagonally across the tiles to remove the excess grout. This helps ensure that the grout lines are properly filled and the surface of the tiles is clean and smooth. Collect the excess grout with a grout float or sponge as you work to keep the area tidy.
Cleaning the Grout Lines
Once the excess grout is removed, wait for the grout to set slightly. This usually takes about 15-30 minutes, depending on the grout and environmental conditions. Then, dampen a clean sponge or a grout sponge with water and gently wipe over the tiles in circular motions, cleaning off any remaining grout residue and smoothing the grout lines.
Make sure to rinse the sponge frequently to keep it clean and prevent grout smears on the tiles. Avoid applying excessive pressure that may dislodge the freshly applied grout. Once you’re done cleaning, allow the grout to dry completely before subjecting it to heavy foot traffic or cleaning.
By following these steps, you’ll achieve a clean and professional finish with properly applied grout. The grout not only enhances the appearance of your tiled floor but also adds strength and durability to the overall installation.
Allowing the Grout to Cure
After applying the grout, it’s important to allow it sufficient time to cure and settle. This curing period is crucial for the grout to fully harden, strengthen, and reach its maximum durability. Here’s what you need to do:
Waiting for the Grout to Settle
Grout will typically take anywhere from 24 to 72 hours to fully dry and cure, depending on several factors such as the type of grout, humidity levels, and room temperature. It’s essential to refer to the manufacturer’s instructions for the specific drying and curing time recommended for the grout you’re using.
During this curing time, it’s important to keep the tiled floor undisturbed and avoid walking on it. The weight and movement can affect the grout’s ability to set properly and compromise the durability of the installation. Place caution signs or barriers to prevent people from accidentally walking on the floor.
Read more: How To Clean Grout For A Perfect Tile Lines
Protecting the Floor During Drying
While the grout is curing, take precautions to protect the floor and the freshly applied grout. Avoid any water exposure or excessive moisture during this period, as it can hinder the curing process. Be careful not to spill any liquids or subject the floor to excessive humidity.
It’s also important to avoid any heavy objects or furniture that may create pressure or indentations on the freshly grouted floor. Move with caution when accessing the area and keep pets away from the tiled floor to prevent any accidental damage or disturbance to the curing grout.
Allowing the grout to cure undisturbed and following the recommended drying time will ensure a strong and durable final result. By taking these precautions, you’ll help the grout to fully harden and reach its optimal strength, ensuring a long-lasting and beautiful tiled floor.
Final Touches
With the grout fully cured and the tile installation complete, there are a few final touches you can apply to ensure a polished and well-maintained finish. Here are the last steps in the tiling and grouting process:
Cleaning the Tiles
After the grout has cured, it’s time to give your tiles a thorough cleaning to remove any remaining residue or haze. Use a clean, damp sponge or cloth to carefully wipe the surface of the tiles, removing any grout smears or leftover grout film. Make sure to change the water in your bucket frequently to avoid spreading any grout residue from previous cleanings.
If there are stubborn stains or grout haze, you can use a non-abrasive tile cleaner specifically designed for the type of tile you have installed. Follow the cleaner’s instructions and use a soft-bristled brush or sponge to gently scrub away any stains. Rinse the tiles thoroughly with clean water and dry them with a clean cloth.
Sealing the Grout
Applying a grout sealer is an optional but highly recommended step to protect the grout and prolong its lifespan. A grout sealer forms a protective barrier that helps repel dirt, stains, and moisture, making the grout easier to clean and maintain. Follow these steps to seal the grout:
- Ensure that the grout is completely dry before applying the sealer. Refer to the sealer manufacturer’s instructions for the recommended drying time.
- Using a sealant applicator or a small brush, apply the grout sealer evenly over the grout lines. Take care not to get any sealer on the tiles themselves.
- Allow the sealer to penetrate the grout for the recommended amount of time specified by the manufacturer.
- Wipe off any excess sealer from the tiles using a clean cloth or sponge. Be careful not to disturb the freshly applied sealer on the grout.
- Allow the sealer to fully cure according to the manufacturer’s instructions. This usually takes around 24 to 48 hours.
Remember to periodically reseal the grout as recommended by the sealer manufacturer to ensure continued protection and maintenance.
By cleaning the tiles thoroughly and sealing the grout, you’ll enhance the longevity and appearance of your newly tiled floor. These final touches will leave your tiles looking pristine and make regular cleaning and maintenance easier in the future.
Read more: How To Remove Grout From Floor
Conclusion
Congratulations! You have successfully completed the process of tiling and grouting a floor. By following these step-by-step instructions, you’ve transformed your space with a fresh and modern look while ensuring a durable and long-lasting installation. Here’s a recap of the key steps involved:
1. Prepare the floor by removing old flooring, cleaning and inspecting the subfloor, repairing any damages, and ensuring a level surface.
2. Plan the tile layout by measuring the area, deciding on the tile pattern, and marking guidelines.
3. Apply the tile adhesive by mixing it according to the manufacturer’s instructions, spreading it on the floor, working in small sections, and combining adhesive ridges.
4. Lay the tiles by placing the first tile, using tile spacers for even spacing, cutting tiles to fit corners or edges, and checking alignment and levelness.
5. Allow the adhesive to dry completely before proceeding.
6. Mix and apply the grout by mixing it to a smooth consistency, applying it with a grout float, removing excess grout from the tile surface, and cleaning the grout lines.
7. Allow the grout to cure according to the manufacturer’s instructions.
8. Clean the tiles thoroughly, removing any grout residue and ensuring a polished appearance.
9. Optional but recommended, seal the grout to protect it from stains and moisture.
Remember, this guide provides a general overview, and it’s always important to refer to the specific instructions and recommendations provided by the manufacturers of the tiles, adhesive, grout, and sealant you are using.
Tiling and grouting a floor may initially seem like a daunting task, but with the right tools, materials, and step-by-step approach, you can achieve professional results. Enjoy your newly tiled floor and take pride in the work you’ve accomplished. Whether it’s a kitchen, bathroom, or any other room, your tiled floor will add beauty, functionality, and value to your home for years to come.
Happy tiling!
Frequently Asked Questions about How To Tile And Grout A Floor
Was this page helpful?
At Storables.com, we guarantee accurate and reliable information. Our content, validated by Expert Board Contributors, is crafted following stringent Editorial Policies. We're committed to providing you with well-researched, expert-backed insights for all your informational needs.


0 thoughts on “How To Tile And Grout A Floor”