
Articles
Why Is My Whirlpool Ice Maker Not Working
Modified: October 19, 2024
Having trouble with your Whirlpool ice maker? Read our informative articles to find out why it's not working and how to fix it efficiently.
(Many of the links in this article redirect to a specific reviewed product. Your purchase of these products through affiliate links helps to generate commission for Storables.com, at no extra cost. Learn more)
Introduction
Ice makers have become a staple in modern refrigerators, providing convenient access to refreshing ice cubes whenever you need them. However, if you find that your Whirlpool ice maker is not working, it can be frustrating and inconvenient. The good news is that there are several possible reasons for this issue, and in this article, we will explore them in detail.
Before we dive into the troubleshooting steps, it’s important to note that while Whirlpool ice makers are highly reliable, occasional malfunctions can occur. By understanding the potential causes of the problem, you’ll be better equipped to identify and resolve the issue, potentially avoiding the need for costly repairs or replacements.
So, if you find that your Whirlpool ice maker is not producing ice or is not working as efficiently as it should be, join us as we explore the possible reasons behind this malfunction and learn how to fix it.
Key Takeaways:
- Keep your Whirlpool ice maker running smoothly by checking power connections, water supply, and control module. Regular cleaning and proper freezer temperature are key to optimal performance.
- Troubleshoot Whirlpool ice maker issues by inspecting components, testing switches, and verifying water inlet valves. Regular maintenance and prompt repairs can prevent future malfunctions.
Read more: Why Is My Portable Ice Maker Not Working
Possible Reasons for Whirlpool Ice Maker Not Working
There are several factors that can contribute to a Whirlpool ice maker not working properly. It’s important to consider each of these possibilities and perform the necessary checks to pinpoint the exact issue. Let’s examine some of the common causes:
- Power connection issues
- Water supply problems
- Malfunctioning ice maker control module
- Defective ice maker switch
- Faulty water inlet valve
- Issues with the ice maker assembly
- Dirty or clogged ice maker components
- Inadequate freezer temperature
Now that we are familiar with the potential causes, let’s go through each one of them in greater detail and explore the necessary steps to troubleshoot and resolve the issues.
Key Takeaways:
- Keep your Whirlpool ice maker running smoothly by checking power connections, water supply, and control module. Regular cleaning and proper freezer temperature are key to optimal performance.
- Troubleshoot Whirlpool ice maker issues by inspecting components, testing switches, and verifying water inlet valves. Regular maintenance and prompt repairs can prevent future malfunctions.
Read more: Why Is My Portable Ice Maker Not Working
Possible Reasons for Whirlpool Ice Maker Not Working
If you find that your Whirlpool ice maker is not working, there could be several possible reasons behind it. Understanding these potential causes will help you diagnose and resolve the issue more effectively. Let’s explore some of the common reasons why your Whirlpool ice maker may not be functioning properly:
1. Power connection issues: Start by checking the power connection of your ice maker. Ensure that it is securely plugged into a power outlet and that there are no loose wires or connections. A faulty power connection can prevent the ice maker from operating.
2. Water supply problems: Your ice maker requires a steady supply of water to produce ice cubes. Check that the water supply valve is fully open, allowing water to flow freely. Additionally, ensure that the water line is not kinked or blocked, as this can restrict water flow to the ice maker.
3. Malfunctioning ice maker control module: The control module is responsible for coordinating the various functions of the ice maker. If it becomes faulty or unresponsive, it can result in the ice maker not working. Inspect the control module for any signs of damage or wear, and consider replacing it if necessary.
4. Defective ice maker switch: The ice maker switch controls the operation of the ice maker. If it is not functioning correctly, it may prevent the ice maker from producing ice. Test the switch by toggling it on and off to see if it activates the ice maker. If not, you may need to replace the switch.
5. Faulty water inlet valve: The water inlet valve controls the flow of water into the ice maker. If it is defective or clogged, it can hinder the ice-making process. Inspect the valve for any signs of damage or debris, and clean or replace it as necessary.
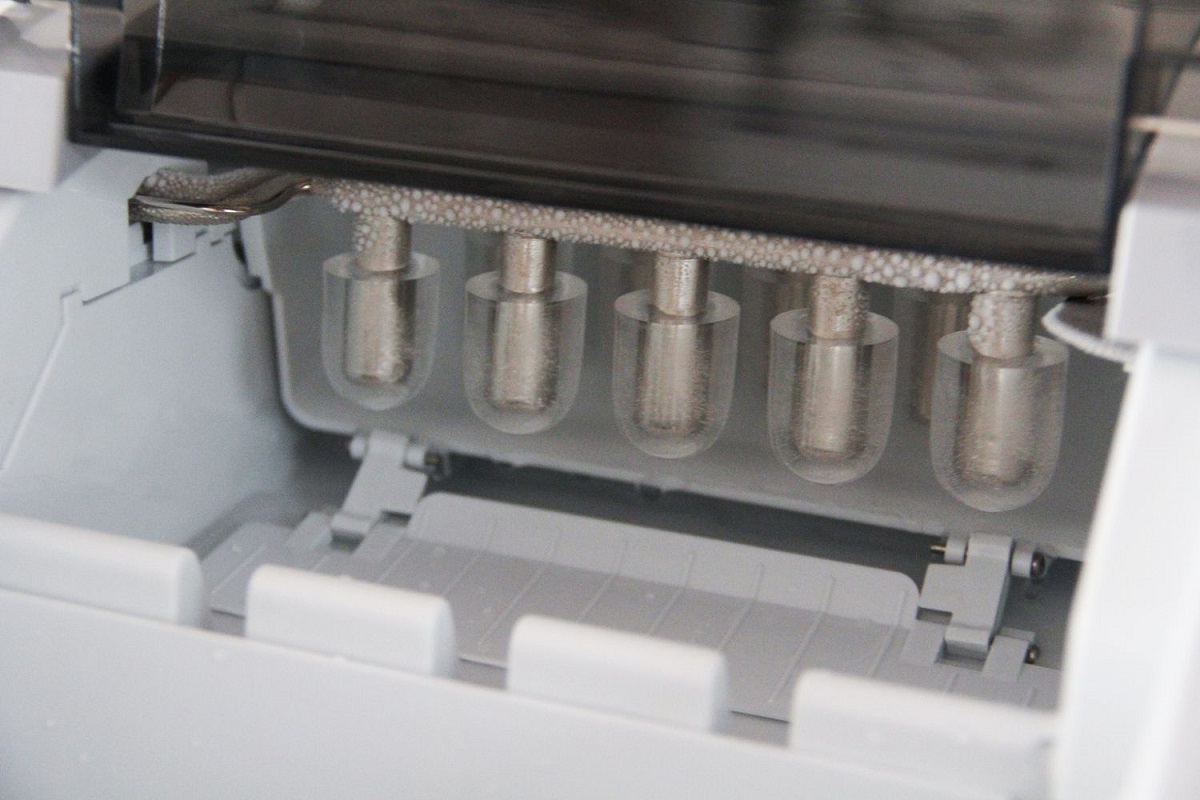
6. Issues with the ice maker assembly: The ice maker assembly consists of various components that work together to produce ice. If any of these components, such as the ice mold or ice level sensor, are damaged or malfunctioning, it can affect the ice-making process. Carefully inspect the assembly and repair or replace any faulty parts.
7. Dirty or clogged ice maker components: Over time, ice maker components can accumulate mineral deposits or become clogged with debris, affecting their performance. Clean the ice maker thoroughly, paying attention to the ice mold, water inlet, and other crucial parts. Use a mixture of vinegar and water to remove any mineral deposits that may have built up.
8. Inadequate freezer temperature: The ice maker relies on a specific freezer temperature range to function optimally. If the freezer temperature is too warm, it can hinder the ice-making process. Check that the freezer temperature is set between 0 and 5 degrees Fahrenheit (-18 and -15 degrees Celsius) to ensure proper ice production.
By considering these possible reasons and performing the necessary checks, you can diagnose the issue with your Whirlpool ice maker more effectively. In the following sections, we will delve deeper into each of these potential causes and discuss the troubleshooting steps to resolve them.
Check the Power Connection
When your Whirlpool ice maker is not working, one of the first things you should check is the power connection. A faulty or loose power connection can prevent the ice maker from functioning properly. Follow these steps to check the power connection:
- Ensure that the ice maker is properly plugged into a working power outlet. Sometimes, the plug may become loose or accidentally unplugged during cleaning or maintenance.
- If the ice maker is plugged in and there is still no power, try connecting another appliance to the same outlet to check if it is receiving power. This will help determine if the issue is with the ice maker or the power supply.
- If the outlet is not supplying power, check the circuit breaker or fuse box to see if the breaker has tripped or the fuse has blown. Reset the breaker or replace the fuse if necessary. It’s also a good idea to check any GFCI outlets that may be connected to the ice maker.
- Inspect the power cord for any visible damage such as fraying or cuts. If you notice any damage, it’s important to replace the power cord to ensure safe and reliable operation.
By checking the power connection, you can resolve issues related to a faulty or disconnected power supply. If the power connection is intact and the ice maker still does not work, move on to the next troubleshooting step.
Note: If you’re uncomfortable working with electrical connections or if you suspect any electrical issues, it’s always best to consult a professional technician for assistance.
Inspect the Water Supply
Another common reason for a Whirlpool ice maker not working is an issue with the water supply. The ice maker requires a steady flow of water to produce ice cubes. Here’s how you can inspect the water supply:
- Check that the water supply valve, usually located behind the refrigerator, is fully open. Ensure that the valve is turned counterclockwise to allow water to flow freely to the ice maker.
- Inspect the water line connected to the refrigerator for any kinks, twists, or obstructions. Straighten the line if necessary to ensure a smooth water flow.
- If you have a water filter installed, check its condition. A clogged or old water filter can hinder water flow to the ice maker. Replace the filter if it is dirty or hasn’t been changed in a while.
- In some cases, the water inlet valve may be defective or clogged, preventing water from reaching the ice maker. Remove the water inlet valve and examine it for any signs of damage or debris. Clean or replace the valve if necessary.
- Make sure that the water pressure in your home is adequate for the ice maker to operate efficiently. Low water pressure can affect the ice production. Test the water pressure from the supply line by turning off the ice maker, placing a measuring cup under the water dispenser, and turning on the water. The cup should fill in about 8-10 seconds for sufficient water pressure.
- If you have recently moved or installed a new water line, check that it is properly connected and doesn’t have any leaks.
By inspecting the water supply and addressing any issues, you can ensure that the ice maker receives a consistent flow of water necessary for ice production. If the water supply is not the cause of the problem, continue to the next troubleshooting step.
Note: If you are uncertain about any plumbing-related tasks or are experiencing complex water supply issues, it’s recommended to seek the assistance of a professional plumber.
Read more: Why Is My Ge Ice Maker Not Working
Examine the Ice Maker Control Module
The ice maker control module is responsible for coordinating the functions of the ice maker, ensuring that it operates smoothly and produces ice cubes. If your Whirlpool ice maker is not working, it’s important to examine this component. Here’s what you can do:
- Locate the ice maker control module, which is usually located inside the freezer compartment. Refer to your appliance’s manual if you’re unsure about its exact location.
- Inspect the control module for any visible signs of damage, such as burn marks or corrosion. These can indicate a faulty module that needs to be replaced.
- If the control module appears to be in good condition, gently press any reset buttons or switches that may be present. Some ice makers have a reset button that can help restore the functionality.
- Disconnect the power supply to the ice maker and leave it disconnected for a few minutes. Then, reconnect the power to perform a hard reset. This can sometimes resolve temporary glitches in the control module.
- Consider testing the control module using a multimeter. This can help determine if it is functioning properly or if it needs to be replaced. Refer to the appliance’s manual for specific instructions on how to test the control module.
If you find any issues with the ice maker control module during your examination, such as visible damage or a failed test using a multimeter, it may be necessary to replace the module. Contact Whirlpool customer support or consult a professional technician for assistance in obtaining the correct replacement part.
By carefully examining the ice maker control module, you can identify any potential issues and take the appropriate steps to resolve them. If the control module is not the cause of the problem, continue with the next troubleshooting step.
Note: When working with electrical components, always ensure that the power is disconnected to avoid any potential hazards, and consider seeking the help of a professional technician if you’re unsure.
Check if the water supply is connected and the water filter is not clogged. Also, ensure the ice maker is turned on and the freezer is set to the correct temperature. If the issue persists, consider contacting a professional for further assistance.
Test the Ice Maker Switch
The ice maker switch controls the operation of the ice maker, allowing you to start or stop the ice-making process. If your Whirlpool ice maker is not working, it’s crucial to test the ice maker switch to determine if it is functioning properly. Here’s how you can do it:
- Locate the ice maker switch, which is typically located on the front or side of the ice maker unit. Refer to your appliance’s manual if you’re unsure about its exact location.
- Check the position of the switch. If it is in the “OFF” or “0” position, toggle it to the “ON” or “1” position. Wait for a few seconds to see if you hear any sounds indicating that the ice maker is operating. If you hear a humming sound or see the ice maker’s parts moving, it means that the switch is functioning properly.
- If there are no signs of activity after switching it on, try toggling it off and on a couple of times to ensure that the contacts inside the switch are making proper connections. Sometimes, the switch can get stuck in between positions, preventing the ice maker from operating.
- Inspect the ice maker switch for any visible damage, such as loose wires or broken connections. If you notice any issues, it may be necessary to repair or replace the switch. Refer to the appliance’s manual or contact Whirlpool customer support for guidance on obtaining the correct replacement part.
- Consider using a multimeter to test the continuity of the switch. Disconnect the power supply to the ice maker, remove the switch from its housing, and use the multimeter to test for continuity when the switch is in the “ON” position. If there is no continuity, it indicates a faulty switch that needs to be replaced.
Testing the ice maker switch will help you determine if it is the cause of the ice maker not working. If the switch is faulty, replacing it should restore the functionality of the ice maker. However, if the switch is not the issue, proceed to the next troubleshooting step.
Note: If you’re uncomfortable working with electrical components or testing for continuity, it’s recommended to seek the assistance of a professional technician.
Verify the Water Inlet Valve
The water inlet valve plays a crucial role in supplying water to your Whirlpool ice maker. If it is not functioning properly, it can lead to a malfunctioning ice maker. To ensure that the water inlet valve is working as it should, follow these steps:
- Locate the water inlet valve, which is usually situated at the back of the refrigerator or inside the bottom compartment. Refer to your appliance’s manual if you’re unsure about its exact location.
- Inspect the valve for any visible signs of damage, such as cracks, corrosion, or leaks. Any damage to the water inlet valve indicates that it needs to be replaced.
- Check the water inlet valve solenoid coils using a multimeter to verify if they are functioning properly. Disconnect the power supply to the refrigerator and remove the wires connected to the solenoid coils. Set the multimeter to the Ohms setting and place the probes on the terminals of the coils. A reading of zero or near-zero Ohms indicates that the coils are in good working condition. Any other reading suggests that the coils may be faulty.
- Inspect the screens or filters located on the water inlet valve for any clogs or debris. Over time, mineral deposits or impurities can accumulate, obstructing the water flow. If necessary, use a soft brush or toothbrush to clean these screens or filters.
- If the water inlet valve is free from damage and the coils test within the appropriate range, try manually activating the water inlet valve. This can be done by using a jumper wire or small piece of insulated wire to create a connection between the terminals of the water inlet valve. If water flows into the ice maker during this manual test, it indicates that the valve is working properly, and the issue may lie elsewhere in the ice maker assembly.
By verifying the functionality of the water inlet valve, you can ensure that water is flowing properly to the ice maker. If the valve is damaged or the solenoid coils are faulty, consider replacing the water inlet valve. Consult the appliance’s manual or contact Whirlpool customer support for guidance on obtaining the correct replacement part.
Note: If you’re uncomfortable working with electrical components or don’t have experience in plumbing tasks, it’s advisable to consult a professional technician to inspect and replace the water inlet valve.
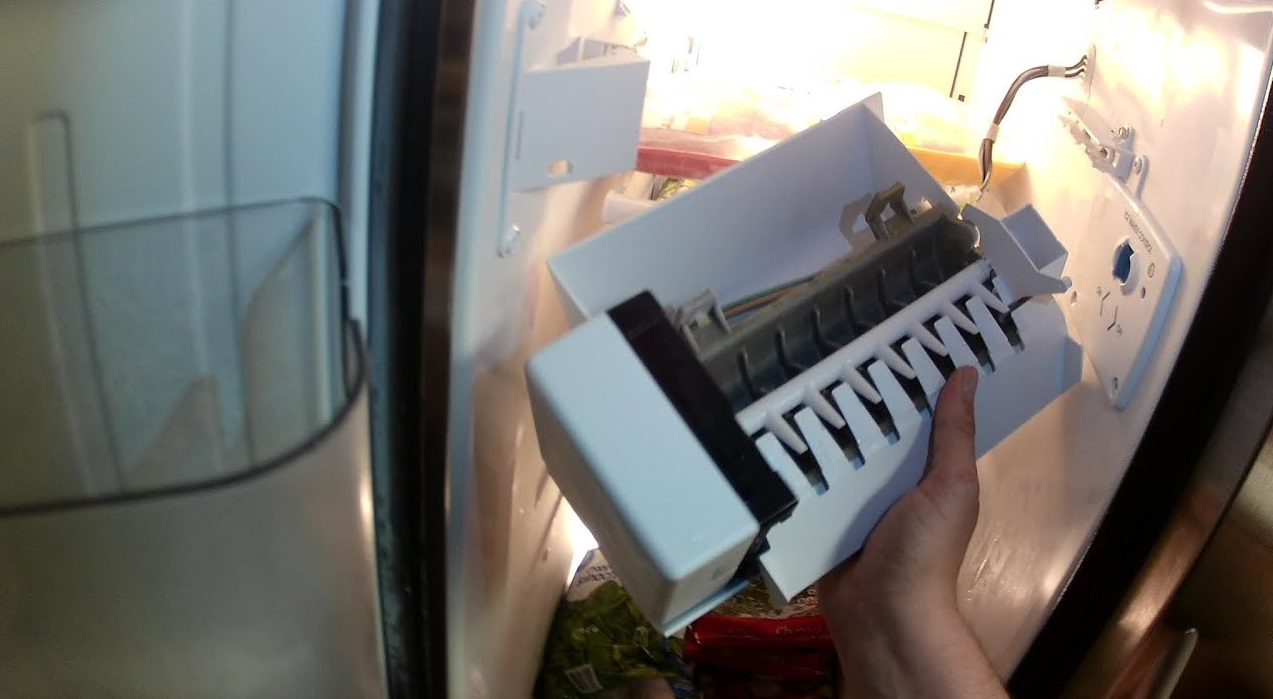
Inspect the Ice Maker Assembly
The ice maker assembly consists of various components that work together to produce ice. If there are issues with any of these components, it can result in a Whirlpool ice maker not working properly. Follow these steps to inspect the ice maker assembly:
- Locate the ice maker assembly, which is typically found inside the freezer compartment. Consult your appliance’s manual if you’re unsure about its exact location.
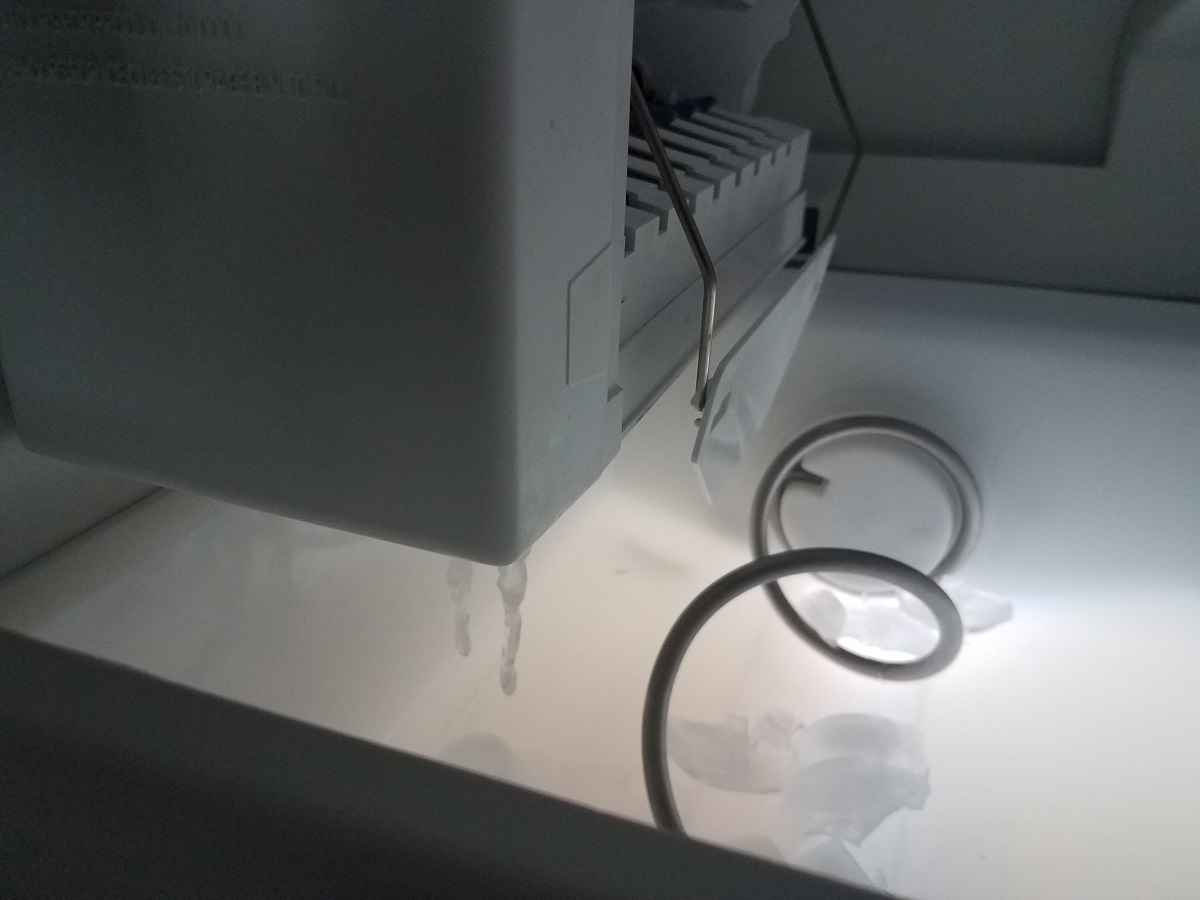
- Carefully examine the ice maker components for any visible signs of damage, such as cracks, breaks, or misalignments. Pay close attention to the ice maker mold, ice level sensor, and other critical parts.
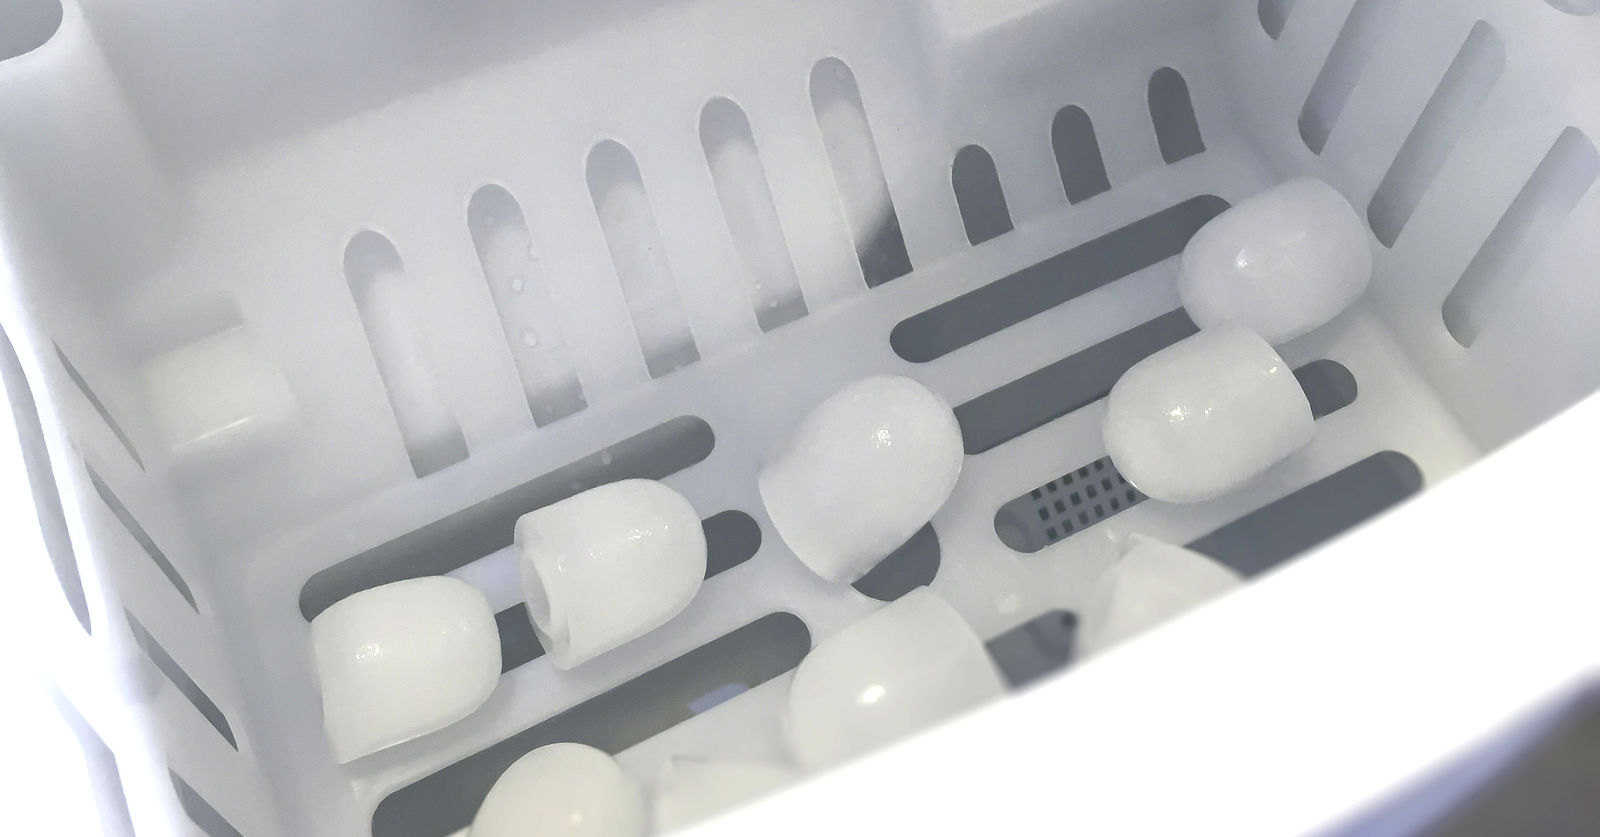
- Check the ice maker mold for any ice blockages or stuck cubes. If there is an excessive buildup of ice or if the mold is not releasing the ice properly, it can prevent new ice cubes from forming. Use a plastic utensil or your hand to gently remove any ice buildup or obstructions.
- Inspect the ice level sensor, located near the ice maker mold, for any signs of damage or misalignment. The sensor is responsible for detecting the ice level and signaling the ice maker to start or stop producing ice. If the sensor is faulty, it may not accurately read the ice level, causing issues with ice production.
- Ensure that the ice maker arm is in the correct position. The arm should be hanging down to signal the ice maker to produce ice. If the arm is stuck or in the up position, it will prevent the ice maker from initiating the ice-making process. Gently lower the arm if it is raised or stuck.
- If there are no visible issues with the ice maker assembly components, consider performing a manual harvest test. Refer to your appliance’s manual for specific instructions on how to initiate a manual harvest test. This test helps determine if the ice maker is functioning properly and can assist in diagnosing any underlying problems.
By thoroughly inspecting the ice maker assembly, you can identify any visible issues that may be causing the ice maker not to work as expected. If you notice any damaged or misaligned components, consider repairing or replacing them as necessary. If no visible issues are found, proceed to the next troubleshooting step.
Note: If you’re unsure about the specific components or need assistance with disassembling the ice maker assembly, it’s recommended to consult the appliance’s manual or seek the help of a professional technician.
Read more: Why Is My GE Opal Ice Maker Not Working
Clean the Ice Maker Components
Over time, ice maker components can accumulate mineral deposits or become clogged with debris, affecting their performance. Cleaning these components can help restore the proper functioning of your Whirlpool ice maker. Here’s how you can clean the ice maker components:
- Turn off the ice maker and disconnect it from the power supply for safety.
- Remove the ice bin or bucket from the freezer. Empty any ice cubes that may be in the bin.
- Take a soft-bristled brush or toothbrush and gently scrub the ice maker’s interior, including the ice mold and other surfaces. This will help remove any built-up residue or mineral deposits that could be hindering the ice-making process. For hard-to-reach areas, you can use a mixture of vinegar and water to dissolve stubborn deposits.
- Clean the water inlet valve screen, located at the back of the ice maker where the water line connects. Remove any debris or mineral buildup that may be blocking the water flow.
- Inspect the water line for any signs of clogs or obstructions. Use a mixture of vinegar and water to flush out any residue that may be affecting the water flow to the ice maker.
- Wipe down the exterior of the ice maker with a damp cloth to remove any dust or dirt.
- Once all the cleaning is complete, reassemble the ice maker, including the ice bin or bucket, and reconnect it to the power supply.
- Turn on the ice maker and allow it to run through a few cycles to ensure that any remaining cleaning solution or debris is flushed out.
Regularly cleaning the ice maker components can help maintain optimal ice production and ensure the longevity of your Whirlpool ice maker. It is recommended to clean the ice maker at least every three to six months, or as needed based on your water quality.
Note: Always consult your appliance’s manual for specific cleaning instructions and safety precautions. If you’re unsure about any cleaning tasks or are experiencing complex issues, it’s advised to seek the assistance of a professional technician.
Check the Freezer Temperature
The temperature of your freezer plays a crucial role in the proper functioning of your Whirlpool ice maker. If the freezer temperature is too warm, it can hinder the ice-making process. Here’s how you can check and adjust the freezer temperature:
- Locate the temperature controls for your freezer. Depending on your Whirlpool refrigerator model, the controls may be located on the refrigerator’s exterior or inside the freezer compartment.
- Check the current temperature setting of the freezer. The ideal temperature range for proper ice production is between 0 and 5 degrees Fahrenheit (-18 and -15 degrees Celsius).
- If the freezer temperature is set too high, adjust the controls to lower the temperature. Refer to your appliance’s manual for specific instructions on how to adjust the temperature setting for your particular model.
- Wait for the freezer to reach the new set temperature. This may take a few hours, so be patient and allow the freezer to cool down to the desired temperature range.
- Monitor the freezer temperature over the next 24 hours using a refrigerator thermometer. This will help you ensure that the temperature remains within the optimal range for ice production.
- If adjusting the temperature doesn’t resolve the ice maker issue, consider checking for any obstructions that may be blocking the freezer vents. Blocked vents can affect the circulation of cold air, leading to inconsistent temperatures.
- Additionally, check that the freezer door is properly sealed. A faulty or loose door seal can allow warm air to enter the freezer, leading to temperature fluctuations. Replace the door seal if necessary.
By checking and adjusting the freezer temperature, you can create the ideal environment for your Whirlpool ice maker to function properly. Remember to give the freezer time to reach the new temperature setting and monitor it to ensure consistent cooling. If the freezer temperature is not the cause of the ice maker issue, proceed to the next troubleshooting step.
Note: It’s important to consult your appliance’s manual for specific temperature control instructions, as different models may have varying procedures.
Conclusion
A properly functioning ice maker is a convenient feature in your Whirlpool refrigerator, allowing you to enjoy refreshing ice cubes on demand. However, if you find that your ice maker is not working, it can be frustrating. By understanding the potential causes of the problem and following the appropriate troubleshooting steps, you can resolve the issue and regain the functionality of your ice maker.
In this article, we have explored various possible reasons for a Whirlpool ice maker not working, including power connection issues, water supply problems, malfunctioning control modules, defective switches, faulty water inlet valves, issues with the ice maker assembly, dirty components, and inadequate freezer temperatures. By checking each of these areas and performing the necessary inspections and tests, you can pinpoint the specific problem and take the appropriate actions to resolve it.
Remember to always refer to your appliance’s manual for specific instructions and safety precautions. If you’re uncomfortable with any troubleshooting steps or if the issue persists despite your efforts, it’s best to consult a professional technician for assistance. They have the expertise and knowledge to accurately diagnose and fix any complex issues with your Whirlpool ice maker.
Regular maintenance and cleaning of your ice maker, along with proper usage, can help prevent future problems and ensure its optimal performance. It’s recommended to clean the ice maker components regularly, check the freezer temperature periodically, and address any water supply issues promptly to avoid further complications.
By following the guidelines outlined in this article and taking proactive measures, you can keep your Whirlpool ice maker in top working condition, ensuring a continuous supply of ice cubes to enhance your everyday convenience and enjoyment.
Frequently Asked Questions about Why Is My Whirlpool Ice Maker Not Working
Was this page helpful?
At Storables.com, we guarantee accurate and reliable information. Our content, validated by Expert Board Contributors, is crafted following stringent Editorial Policies. We're committed to providing you with well-researched, expert-backed insights for all your informational needs.

0 thoughts on “Why Is My Whirlpool Ice Maker Not Working”