Home>Construction & Tools>Building Materials>How To Cover Concrete Steps With Brick Pavers
Building Materials
How To Cover Concrete Steps With Brick Pavers
Modified: May 6, 2024
Learn how to enhance your outdoor space with brick pavers. Find the best building materials to cover concrete steps and create a beautiful, durable finish.
(Many of the links in this article redirect to a specific reviewed product. Your purchase of these products through affiliate links helps to generate commission for Storables.com, at no extra cost. Learn more)
Introduction
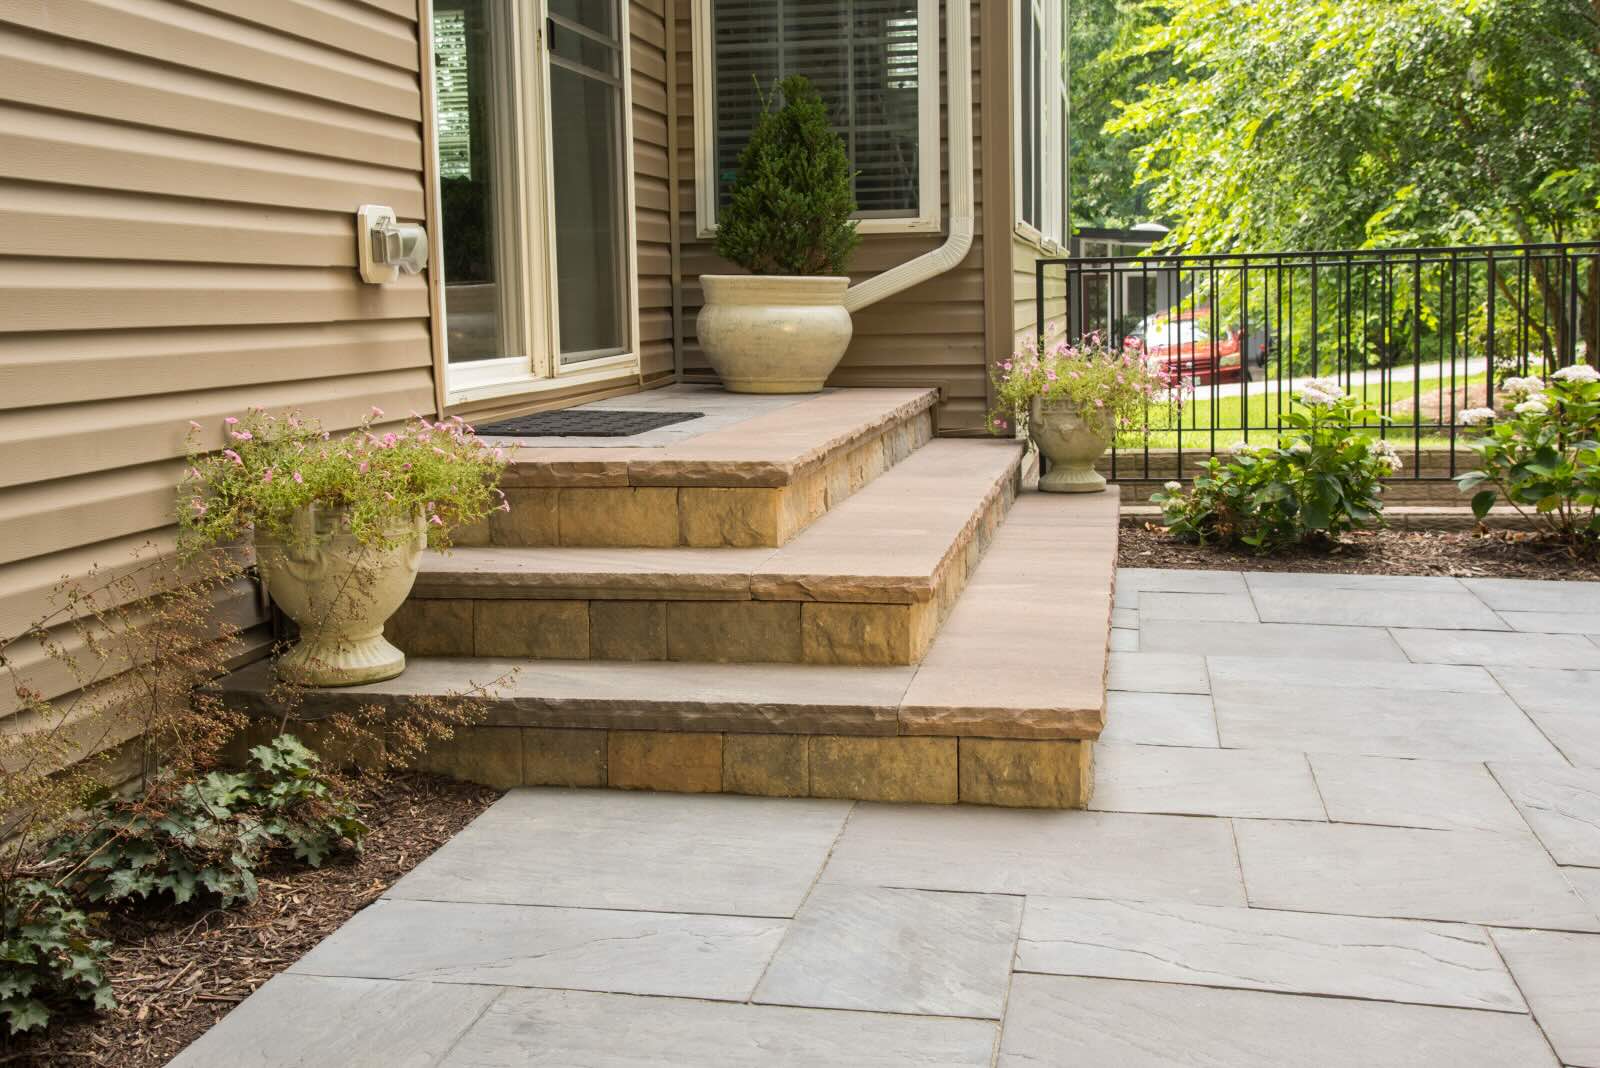
Transforming plain concrete steps into a stunning focal point of your home exterior is a rewarding project that combines functionality with aesthetic appeal. By covering concrete steps with brick pavers, you can elevate the visual charm of your entryway while enhancing durability and slip resistance. This comprehensive guide will walk you through the process, from gathering materials and tools to the final touches that will bring your project to life.
Whether you’re a seasoned DIY enthusiast or a novice looking to embark on your first home improvement project, this step-by-step tutorial will equip you with the knowledge and confidence to achieve professional-looking results. So, roll up your sleeves and get ready to embark on a journey that will not only enhance the curb appeal of your home but also provide a sense of accomplishment that comes with mastering a new skill.
Key Takeaways:
- Transform your concrete steps into a stunning focal point by covering them with brick pavers. Elevate your home’s curb appeal while enhancing durability and slip resistance with this rewarding DIY project.
- Meticulous preparation, precise installation, and thoughtful finishing touches are key to achieving professional and enduring results when covering concrete steps with brick pavers. Celebrate the transformation and take pride in your newfound home exterior beauty.
Read more: How To Cover Brick Fireplace With Concrete
Materials and Tools
Before diving into the project, it’s essential to gather all the necessary materials and tools. Here’s a comprehensive list to ensure you’re well-prepared:
Materials
- Brick pavers: Choose a style and color that complements your home's exterior.
- Concrete adhesive: Opt for a high-quality adhesive designed for outdoor use.
- Polymeric sand: This specialized sand will be used for filling the joints between the pavers.
- Gravel: Required for creating a stable base beneath the pavers.
- Landscape fabric: Helps prevent weed growth and maintain the integrity of the base.
- Pressure-treated lumber: Use this for constructing the edging around the steps.
- Concrete mix: If any repairs or leveling of the existing steps are necessary.
- Sealer: Consider applying a sealer to protect the pavers and enhance their color.
Tools
- Measuring tape and level: Essential for ensuring accuracy throughout the project.
- Shovel and wheelbarrow: For excavating and transporting materials.
- Masonry saw: Needed for cutting pavers to fit the edges and corners.
- Trowel: Use for applying adhesive and leveling the sand base.
- Rubber mallet: For gently tapping the pavers into place without damaging them.
- Broom: To sweep and distribute the polymeric sand into the joints.
- Protective gear: Safety glasses, gloves, and a dust mask for personal protection.
By ensuring you have all the required materials and tools on hand, you can streamline the construction process and minimize interruptions, allowing for a more efficient and enjoyable experience.
Preparation
Before commencing the transformation of your concrete steps, it’s crucial to prepare the area thoroughly. Here’s a step-by-step guide to ensure a solid foundation for your project:
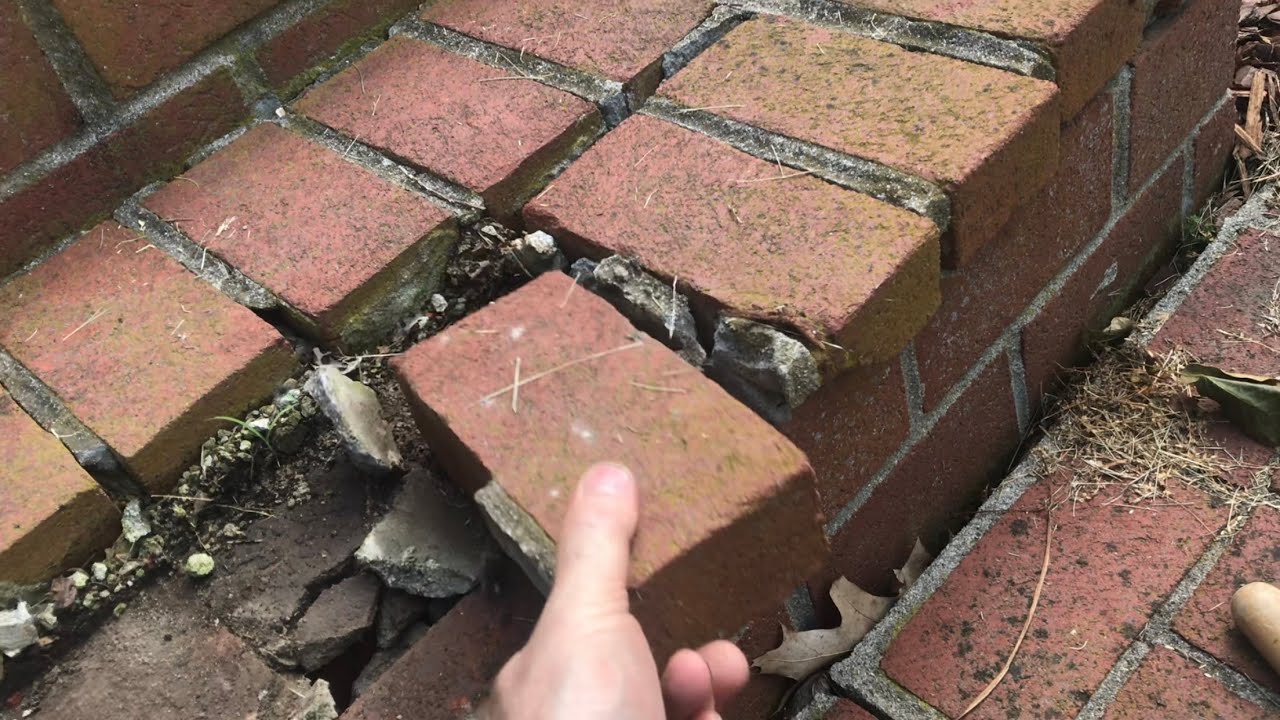
Assess the Condition of the Concrete Steps
Inspect the existing concrete steps for any signs of damage, such as cracks or uneven surfaces. Address any necessary repairs before proceeding with the paver installation. It’s important to start with a structurally sound base to ensure the longevity of your project.
Clear the Area
Remove any debris, plants, or obstacles from the vicinity of the steps. This includes sweeping away loose dirt and ensuring the surface is clean and free from any obstructions that could interfere with the installation process.
Measure and Plan
Accurately measure the dimensions of the steps and surrounding area to determine the quantity of materials required. Create a detailed plan for the layout of the pavers, considering any design patterns or specific arrangements you wish to incorporate.
Excavate and Level
Using a shovel, excavate the area in front of and around the steps to create space for the gravel base. Ensure the ground is leveled, and make any necessary adjustments to achieve a uniform surface for the subsequent layers.
Read more: What Is A Brick Paver
Install Edging
Construct a sturdy edging around the perimeter of the steps using pressure-treated lumber. This edging will contain the pavers and provide a clean, finished look to the project.
Apply Landscape Fabric
Lay down landscape fabric within the excavated area to prevent weed growth and promote drainage while maintaining the integrity of the base layers.
By meticulously preparing the area, you’ll establish a solid foundation for the paver installation, setting the stage for a successful and visually striking transformation of your concrete steps.
Laying the Base
Creating a stable and well-prepared base is essential for the longevity and durability of your brick paver steps. Follow these steps to lay the groundwork for a successful installation:
Add a Layer of Gravel
Begin by adding a layer of gravel to the excavated area. The gravel will provide crucial drainage and stability for the paver structure. Spread the gravel evenly and use a tamper to compact it, ensuring a solid and level base.
Read more: How To Remove A Paver Brick
Compact the Gravel
Using a hand tamper or plate compactor, firmly compact the gravel to create a sturdy foundation. This step is vital for preventing shifting or settling of the pavers over time.
Apply a Layer of Sand
Once the gravel base is in place, spread a layer of coarse sand over the compacted gravel. The sand will serve as a leveling agent, allowing for minor adjustments to be made during the paver installation process.
Level the Sand
Using a straight board or screed, level the sand to ensure a uniform surface. This step is crucial for achieving a smooth and even foundation for the pavers.
Compact the Sand
Once the sand is leveled, compact it using a plate compactor or hand tamper. This will further stabilize the base and create a solid surface for the paver installation.
Read more: How To Paint Brick Pavers
Check for Level
Use a level to verify that the sand base is even and at the desired height. Making adjustments at this stage will ensure that the pavers are laid on a stable and level surface.
By meticulously laying the base, you’ll establish a solid and reliable foundation for the brick pavers, setting the stage for the next phase of the project: installing the pavers themselves.
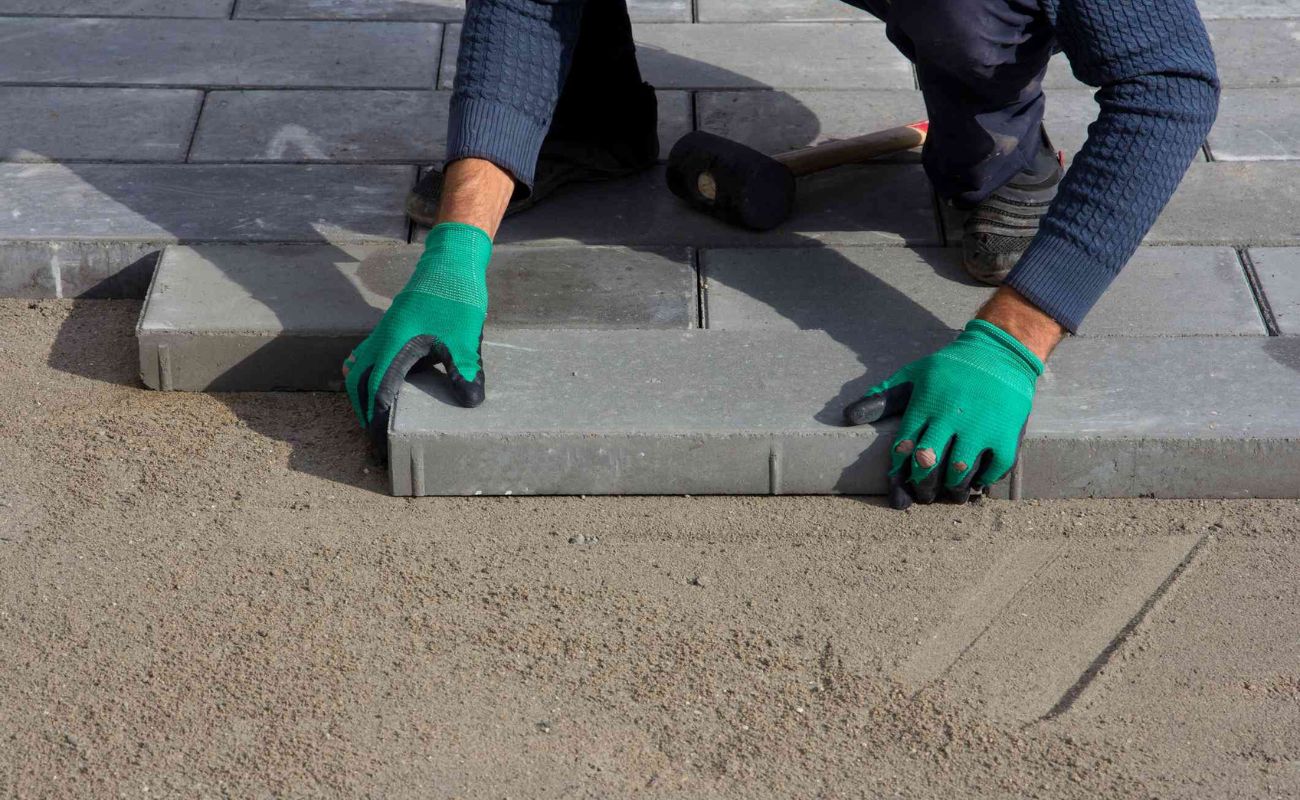
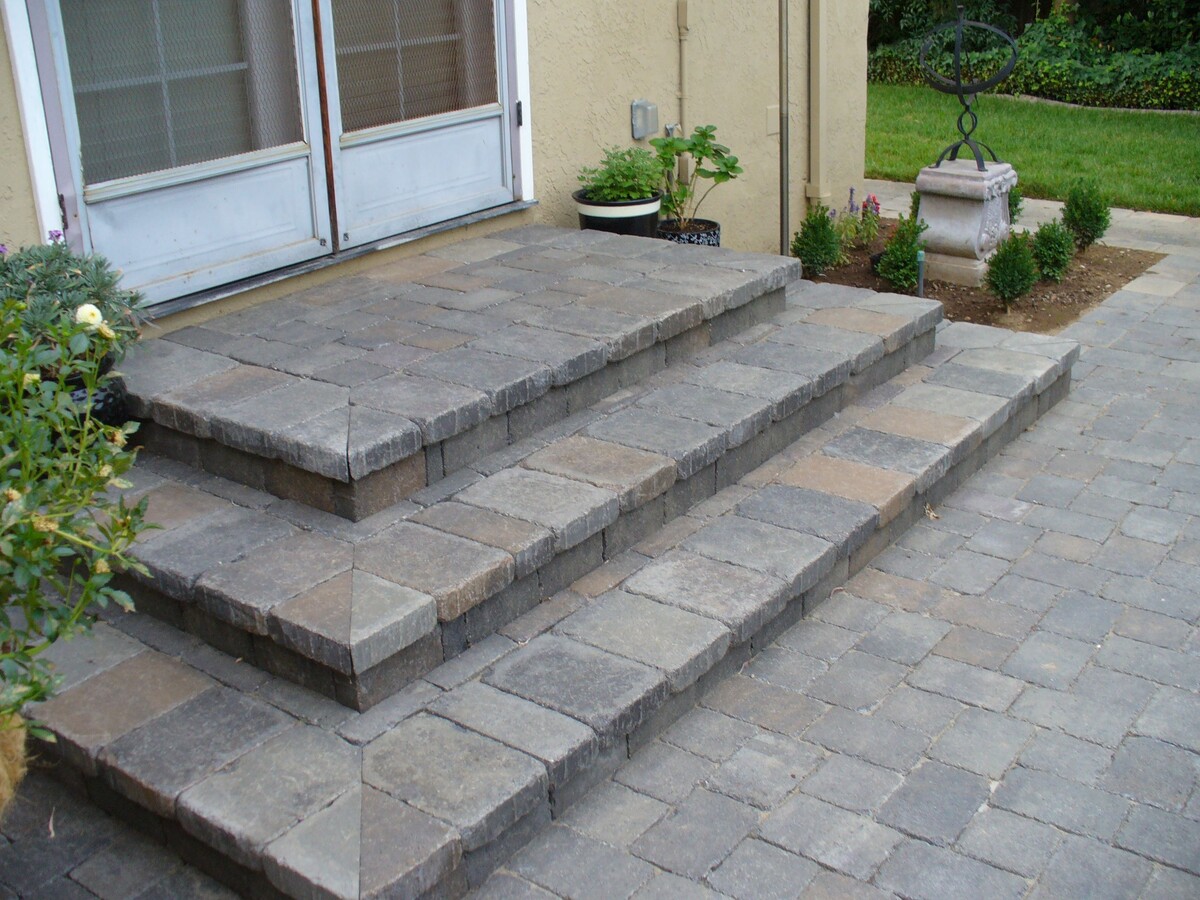
Installing the Pavers
With the base meticulously prepared, it’s time to embark on the exciting phase of installing the brick pavers. Follow these steps to bring your vision to life:
Begin at the Bottom
Start at the bottom of the steps and work your way up. Apply a layer of concrete adhesive to the back of each paver before placing it onto the prepared sand base. This adhesive will ensure a secure bond between the pavers and the substrate.
Ensure Proper Spacing
Place plastic spacers between the pavers to maintain consistent spacing and allow for the insertion of polymeric sand later in the process. This will ensure a professional and uniform appearance once the project is complete.
Read more: How To Seal Brick Pavers
Cut Pavers as Needed
Use a masonry saw to cut pavers to fit the edges and corners of the steps. Accurate and precise cuts will contribute to a polished and seamless end result.
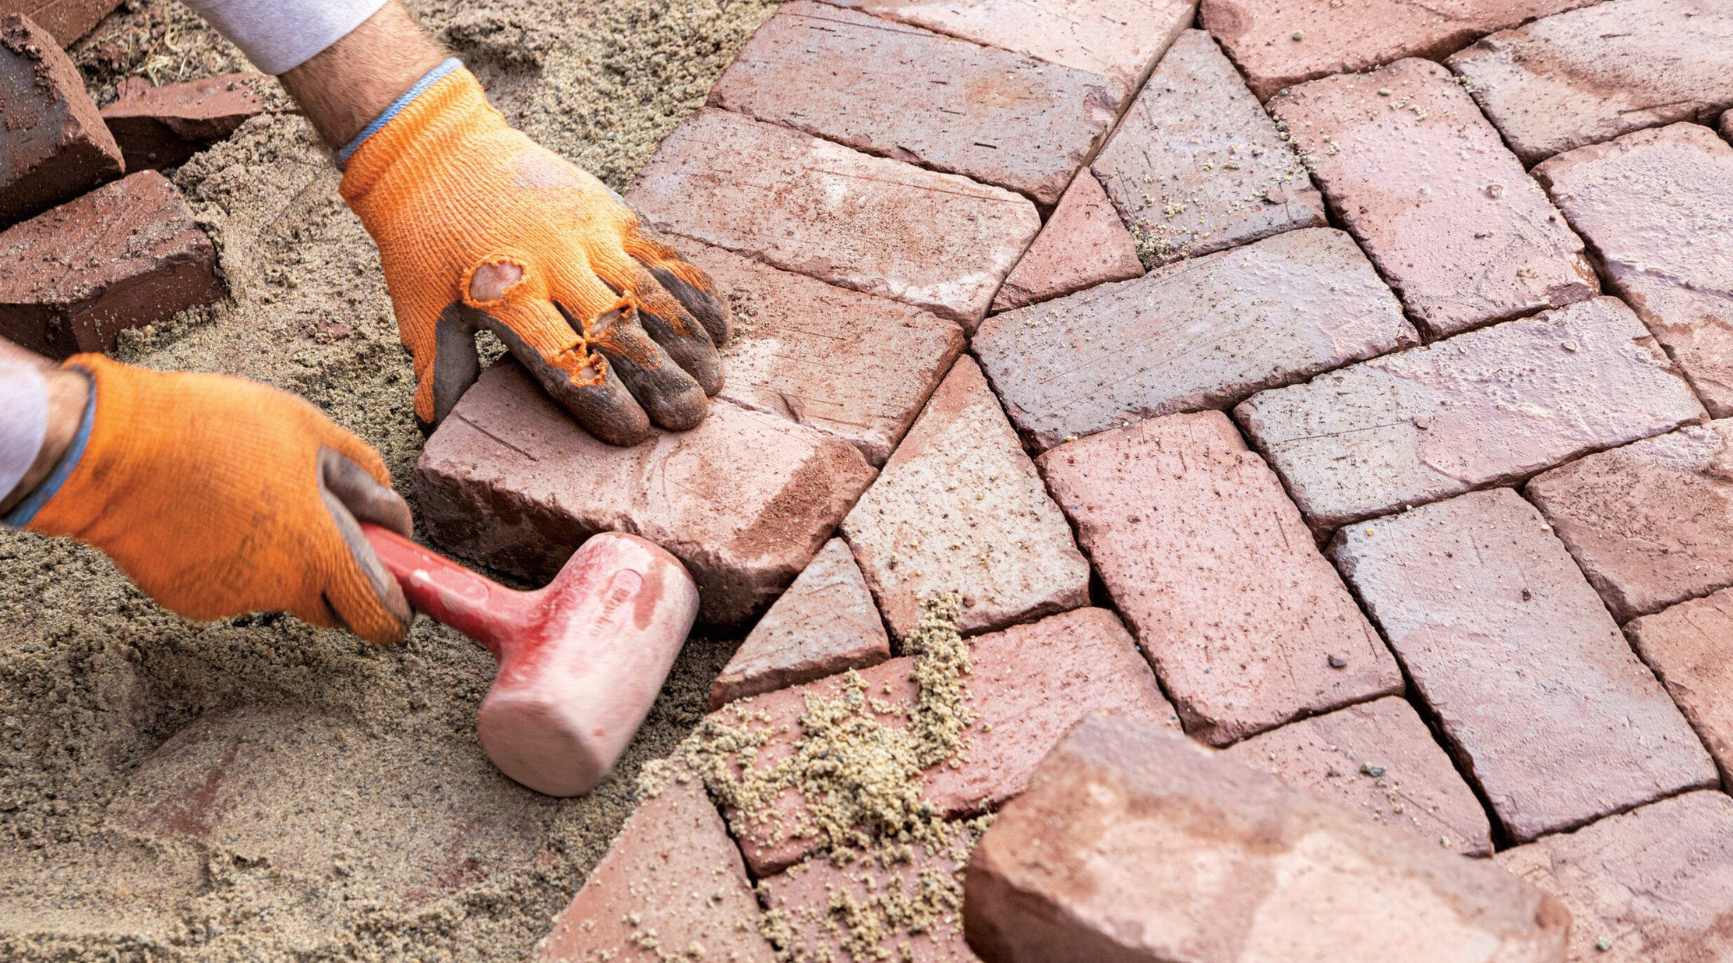
Tap Pavers Into Place
Gently tap each paver into place using a rubber mallet. This will ensure that the pavers are securely set while preventing damage to the surface of the bricks.
Check for Alignment and Level
Regularly use a level to verify that the pavers are aligned and level with one another. Making adjustments as you progress will result in a visually pleasing and structurally sound installation.
Fill Joints with Polymeric Sand
Once all the pavers are in place, sweep polymeric sand into the joints between the bricks. This specialized sand will harden when moistened, providing stability and preventing weed growth while allowing for flexibility.
By following these steps meticulously, you’ll achieve a professional and visually striking installation of brick pavers, transforming your concrete steps into an eye-catching feature of your home exterior.
Read more: What Are The Dimensions Of A Brick Paver
Finishing Touches
As you near the completion of the project, it’s time to add the finishing touches that will elevate the visual appeal and longevity of your newly installed brick paver steps. Pay attention to these crucial details to ensure a polished and professional outcome:
Apply a Sealer
Consider applying a high-quality sealer to the brick pavers. This protective coating will enhance the color of the pavers, provide resistance to stains, and protect the surface from the elements, ensuring long-lasting beauty and durability.
Compact the Pavers
Using a plate compactor, carefully compact the pavers to ensure they are firmly set in place. This step will enhance the stability and longevity of the installation, creating a solid and secure surface for years to come.
Clean the Surface
Thoroughly clean the surface of the pavers to remove any residual adhesive, sand, or debris. A clean finish will showcase the beauty of the pavers and contribute to the overall visual impact of the project.
Inspect and Make Adjustments
Conduct a comprehensive inspection of the entire installation. Make any necessary adjustments to the alignment, level, and overall appearance of the steps to ensure a flawless and professional result.
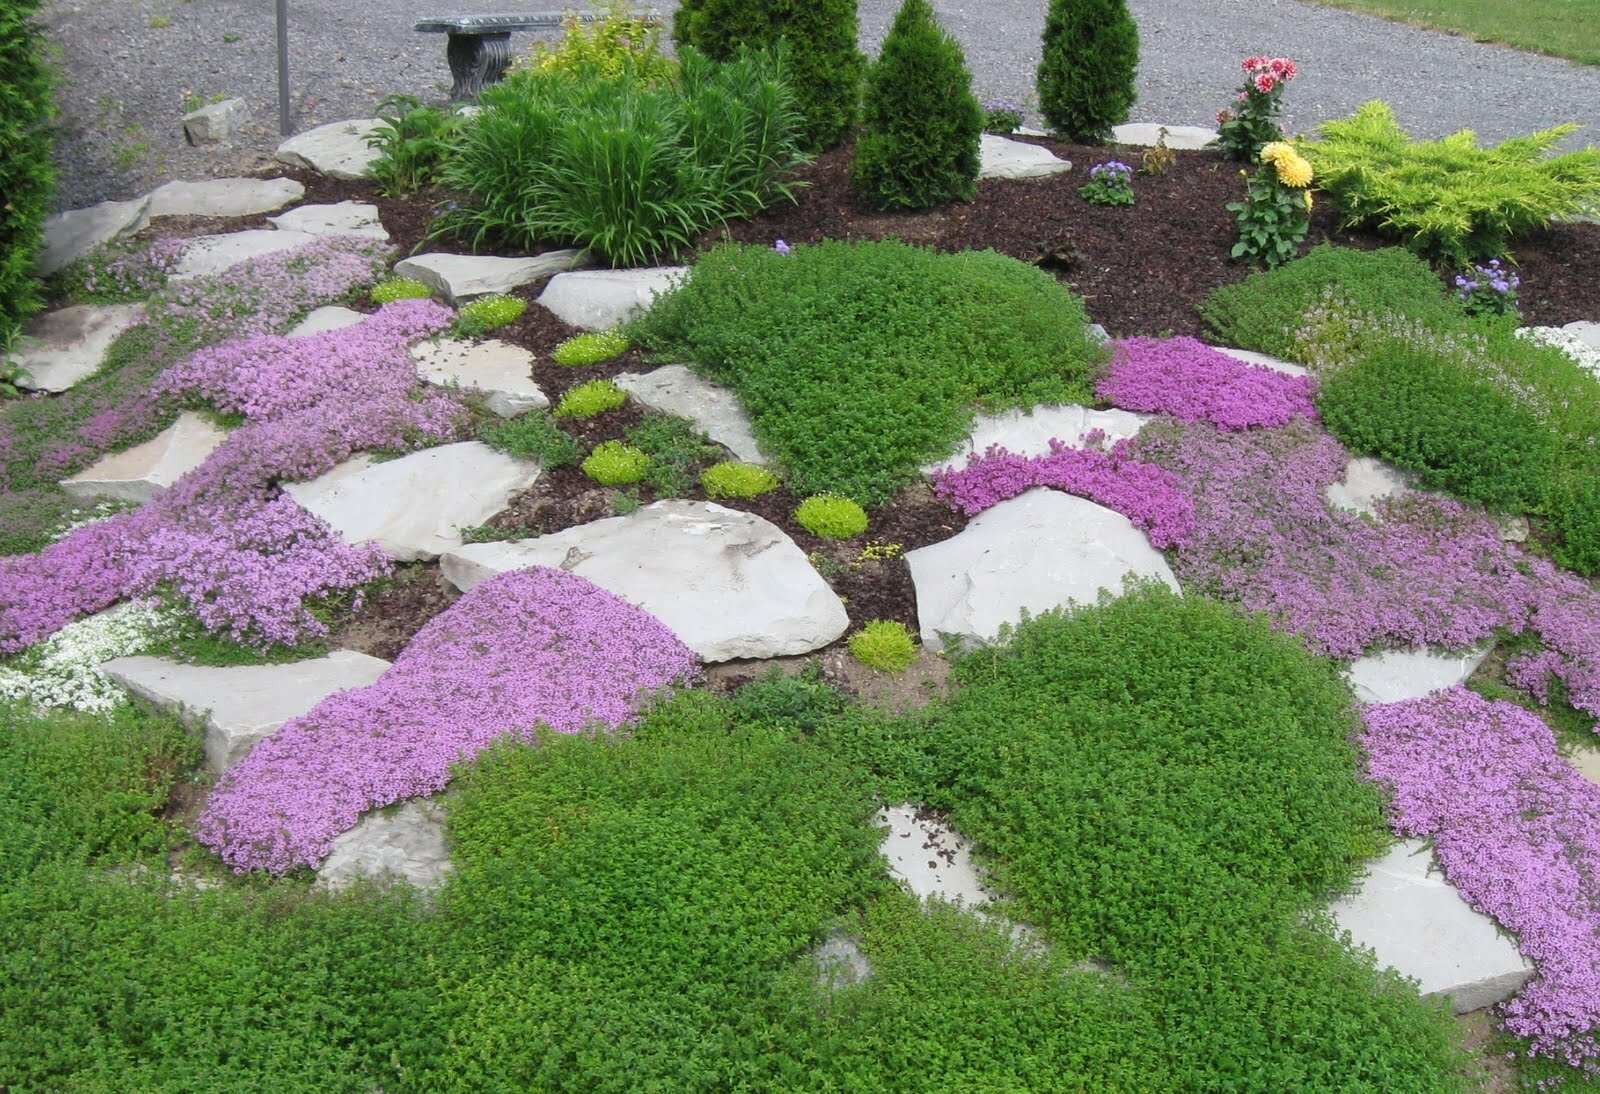
Enhance with Landscaping
Consider adding landscaping elements around the newly installed paver steps to complement and enhance the overall aesthetic. This could include planters, lighting, or decorative features that further elevate the visual appeal of the entryway.
Maintain Regularly
Establish a maintenance routine for the paver steps, including periodic cleaning, reapplication of sealer as needed, and addressing any issues such as weed growth or minor repairs. Regular maintenance will preserve the beauty and functionality of the installation over time.
By attending to these finishing touches with care and attention to detail, you’ll bring your brick paver step project to its full potential, creating an enduring and captivating addition to your home’s exterior.
Conclusion
Embarking on the journey to cover concrete steps with brick pavers is a gratifying endeavor that yields both aesthetic and functional rewards. By following the steps outlined in this guide, you have the opportunity to transform a mundane entryway into a stunning focal point that enhances the curb appeal of your home.
Throughout the process, meticulous preparation, precise installation, and thoughtful finishing touches are key to achieving a professional and enduring result. The combination of high-quality materials, careful planning, and skilled craftsmanship will culminate in a visually striking and structurally sound enhancement to your home exterior.
As you admire the finished project, take pride in the newfound beauty and durability of your entryway. The timeless allure of brick pavers, coupled with the satisfaction of a successful DIY endeavor, will undoubtedly leave a lasting impression on both residents and visitors alike.
With regular maintenance and care, your newly installed brick paver steps will continue to enhance the aesthetic appeal of your home for years to come. As the seasons change and the years pass, the enduring charm and functionality of this home improvement project will serve as a testament to your dedication to creating a welcoming and visually captivating environment.
So, celebrate the completion of your project, and revel in the transformation that has taken place right at your doorstep. Your commitment to enhancing your home’s exterior has not only added value and beauty but has also provided a sense of accomplishment and pride in your ability to create lasting improvements with your own hands.
Excited to spruce up your home's exterior even further? Dive into our detailed guide on pouring concrete steps for a porch or outdoor entryway. This step-by-step tutorial will equip you with all necessary skills for building robust and stylish entry stairs. If you're craving more hands-on projects, our comprehensive DIY home improvement guide offers innovative ideas and practical tips for transforming any space in your house. Whether you're a novice or a seasoned DIYer, these resources are invaluable for anyone looking to enhance their living environment.
Frequently Asked Questions about How To Cover Concrete Steps With Brick Pavers
Was this page helpful?
At Storables.com, we guarantee accurate and reliable information. Our content, validated by Expert Board Contributors, is crafted following stringent Editorial Policies. We're committed to providing you with well-researched, expert-backed insights for all your informational needs.


0 thoughts on “How To Cover Concrete Steps With Brick Pavers”