Home>Articles>How To Pour Concrete Steps For A Porch Or Outdoor Entryway
Articles
How To Pour Concrete Steps For A Porch Or Outdoor Entryway
Modified: August 27, 2024
Learn how to pour concrete steps for your porch or outdoor entryway with our comprehensive articles. Find step-by-step instructions and pro tips to ensure a sturdy and durable result.
(Many of the links in this article redirect to a specific reviewed product. Your purchase of these products through affiliate links helps to generate commission for Storables.com, at no extra cost. Learn more)
Introduction
Welcome to our comprehensive guide on how to pour concrete steps for a porch or outdoor entryway. Whether you are looking to upgrade your home’s curb appeal or enhance the functionality of your outdoor space, building concrete steps can be a rewarding project. By following the step-by-step instructions outlined in this article, you will be able to create sturdy and aesthetically pleasing steps that will withstand the test of time.
Concrete steps offer a range of benefits, including durability, low maintenance, and versatility in design. They can be customized to match the style of your porch or entryway, making them a seamless addition to your overall aesthetic. Additionally, concrete steps provide a safe and secure way to navigate elevation changes, offering stability and support.
Before diving into the process of concrete step construction, it is essential to gather the necessary materials and tools. By being well-prepared, you can ensure a smooth and efficient workflow. Throughout this guide, we will provide detailed instructions on each stage of the process, including site preparation, formwork setup, concrete mixing, pouring, finishing, curing, and adding finishing touches.
Whether you are a seasoned DIY enthusiast or a beginner looking to tackle your first home improvement project, this guide is designed to be accessible and comprehensive. We will not only cover the technical aspects of pouring concrete steps but also offer practical tips and insights to help you achieve professional-looking results.
Note that while the steps in this guide are general, it is important to consult with local building codes and regulations before you begin your project. Specific requirements may vary depending on your location and the height and design of your steps. Taking the time to do your research and obtain any necessary permits will ensure that your construction is safe and compliant.
Now that you understand the importance and benefits of concrete steps, let’s get started with the first step – gathering the materials and tools you will need for this project.
Key Takeaways:
- Proper preparation is essential for successful concrete step construction. Clear the area, measure dimensions, and compact the soil to create a stable foundation for long-lasting and visually appealing steps.
- Attention to detail during the pouring, finishing, and curing stages is crucial. Smooth the surface, allow for proper curing, and add finishing touches to create safe, durable, and aesthetically pleasing concrete steps.
Read more: How To Build A Concrete Porch With Steps
Step 1: Gather Materials and Tools
Before you begin pouring concrete steps, it is crucial to gather all the necessary materials and tools. Having everything prepared and organized will streamline the construction process and prevent delays or interruptions. Here is a list of the essential items you will need:
- Concrete mix: Choose a high-quality concrete mix that is suitable for outdoor applications. Look for a mix that is specifically formulated for steps or slabs.
- Rebar or wire mesh: Reinforcement is important to strengthen the steps and prevent cracking. Depending on the design and dimensions of your steps, you may need either rebar or wire mesh.
- Form lumber: You will need lumber boards to create the formwork for the steps. Opt for strong and straight boards, such as 2×4 or 2×6 planks.
- Concrete form stakes: These stakes will secure the formwork in place and prevent it from shifting during the pouring process.
- Gravel or compacted stone: A layer of gravel or compacted stone will serve as a base for the concrete steps, providing drainage and stability.
- Trowels: You will need both a finishing trowel and a margin trowel for smoothing and shaping the concrete surface.
- Concrete float: A float is used to create a smooth and even finish on the concrete surface.
- Mixing tools: Depending on the scale of your project, you can use a mixing tub, wheelbarrow, or a concrete mixer to mix the concrete.
- Protective gear: Safety should always be a priority. Wear safety goggles, gloves, and a dust mask to protect yourself from any potential hazards.
- Measuring tools: A measuring tape and a level will help ensure that your steps are even and properly aligned.
It is important to note that these are the basic materials and tools required for a standard concrete step construction project. Additional items may be necessary based on the specific design or requirements of your steps. Take the time to assess your project and consult with a professional or local building codes to determine if any additional materials or tools are needed.
Once you have gathered all the necessary materials and tools, you are ready to move on to the next step: preparing the area for the concrete steps. This involves clearing the space, determining the dimensions, and excavating the soil. In the following section, we will provide detailed instructions on how to prepare the area for the construction of your concrete steps.
Step 2: Prepare the Area
Before you can begin pouring concrete steps, it is crucial to properly prepare the area where the steps will be constructed. This involves clearing the space, determining the dimensions, and excavating the soil. By taking the time to prepare the area correctly, you can ensure a solid foundation and a successful project. So let’s get started:
- Clear the space: Remove any obstacles, debris, or vegetation from the area where you plan to build the steps. This includes rocks, plants, and any existing structures or materials that may interfere with the construction process. It is important to have a clean and level surface to work with.
- Determine the dimensions: Measure and determine the dimensions of the steps you want to build. Consider factors such as height, width, and depth. Take into account the available space and the functionality of the steps. It’s a good idea to sketch a rough plan or create a diagram to visualize the final design.
- Excavate the soil: Using a shovel or a mini-excavator, dig a trench where the steps will be located. The depth of the trench will depend on the height of the steps and any additional layers such as gravel or compacted stone. Remove enough soil to accommodate the thickness of the concrete and the desired depth of the steps.
- Compact the soil: After excavating the soil, use a compacting tool or a hand tamper to firmly compact the soil in the trench. This will ensure a stable base for the concrete steps and help prevent settling or shifting over time.
- Install a base layer: To further enhance stability and drainage, add a layer of gravel or compacted stone to the bottom of the trench. This will provide a solid base for the concrete and allow water to drain away from the steps.
- Check the level: Use a level to ensure that the base layer is even and level. Make any necessary adjustments by adding or removing material until you achieve a properly leveled surface.
By following these steps to prepare the area, you will create a solid foundation for your concrete steps and ensure the longevity and stability of the structure. Taking the time to properly prepare the area will minimize any issues that may arise during the pouring and finishing stages of the project.
Once the area is properly prepared, it’s time to move on to the next step: setting up the formwork. In the following section, we will guide you through the process of creating the formwork that will shape and contain the concrete for your steps.
Step 3: Set Up Formwork
Formwork is an essential part of pouring concrete steps, as it helps shape and contain the concrete during the pouring and curing process. In this step, we will guide you through the process of setting up the formwork for your concrete steps:
- Measure and cut the form lumber: Determine the dimensions of your steps and cut the form lumber accordingly. Use a saw or a circular saw to cut the boards to the desired length. Depending on the design of your steps, you may need both vertical and horizontal boards to create the formwork.
- Align and level the form boards: Place the form boards along the sides of the steps, ensuring that they are aligned and level. Use a level to check the straightness and adjust the boards as necessary. Secure the form boards by driving stakes into the ground, ensuring that they are firmly anchored.
- Secure the formwork: To prevent the form boards from bulging outward when concrete is poured, brace the formwork with additional horizontal boards or stakes. This will help maintain the shape and integrity of the concrete steps.
- Add a riser form: If your steps require a vertical riser, attach a riser form to the front of the form boards using screws or nails. This will create the vertical face of the steps, ensuring a uniform height for each step.
- Seal the formwork: To prevent concrete from leaking out of the formwork, use silicone caulking or a similar sealant to seal any gaps or joints between the form boards. This will help maintain the shape and ensure a clean finish for your steps.
It is important to take your time during the formwork setup process to ensure that the form boards are securely in place and properly aligned. This will greatly influence the final appearance and functionality of your concrete steps. Keep in mind that the formwork should be strong enough to withstand the weight and pressure of the concrete during pouring and curing.
Once the formwork is set up, you are ready to move on to the next step: mixing the concrete. In the following section, we will provide detailed instructions on how to mix the concrete for your steps, ensuring a strong and durable end result.
Step 4: Mix Concrete
Now that the formwork is in place, it’s time to mix the concrete for your steps. Mixing concrete correctly is essential for achieving a strong and durable end result. Follow these steps to ensure a successful concrete mix:
- Gather your materials: Before you begin mixing the concrete, make sure you have all the necessary materials on hand. This includes the concrete mix, water, and any additives or reinforcements such as rebar or wire mesh.
- Calculate the right amount of concrete: Refer to the instructions provided by the concrete mix manufacturer to determine the correct ratio of water to mix. Measure the amount of water needed using a measuring jug or bucket.
- Prepare the mixing container: Use a clean mixing container, such as a wheelbarrow, mixing tub, or concrete mixer. Ensure that the container is free from debris and contaminants that could compromise the strength of the concrete.
- Add the concrete mix: Gradually add the concrete mix to the mixing container, following the recommended ratio of water to mix. Use a shovel or a trowel to incorporate the mix into the water, ensuring that it is evenly distributed.
- Mix thoroughly: Use a mixing tool, such as a hoe or a concrete mixer, to thoroughly mix the water and concrete mix together. Continue mixing until a uniform consistency is achieved, with no dry pockets or clumps in the mixture.
- Add any necessary reinforcements: If your concrete steps require reinforcements, such as rebar or wire mesh, now is the time to add them. Follow the recommended guidelines for placement and spacing, ensuring that they are positioned correctly within the concrete mixture.
- Continue mixing: After adding reinforcements, continue mixing the concrete until they are fully incorporated and evenly distributed throughout the mixture.
During the mixing process, it is important to follow the guidelines provided by the concrete mix manufacturer. This will ensure that the concrete achieves the desired strength and consistency. Take care not to overmix the concrete, as this can lead to a loss of strength.
Once the concrete is mixed to the desired consistency, you are ready to move on to the next step: pouring the concrete into the formwork. In the following section, we will guide you through the process of pouring the concrete for your steps, ensuring a smooth and level surface.
Read more: How To Pour Concrete Countertops In Place
Step 5: Pour the Concrete Steps
The moment has arrived to pour the concrete for your steps. This step requires careful handling and precision to ensure a smooth and level surface. Follow these steps to pour the concrete steps:
- Prepare the formwork: Before pouring the concrete, check the formwork to ensure that it is secure and properly aligned. Double-check the level to ensure that the steps will be even and balanced.
- Start pouring the concrete: Begin pouring the concrete into the formwork, starting from the bottom step and working your way up. Fill each step completely, ensuring that the concrete reaches the edges and corners of the formwork.
- Distribute the concrete: Use a shovel or a trowel to distribute the concrete evenly throughout each step. This will help eliminate air bubbles and ensure a solid and well-compacted structure. Tap the sides of the formwork gently to further settle the concrete.
- Consolidate the concrete: Use a vibrating tool or a rod to consolidate the concrete within the formwork. This will help remove any trapped air and ensure a dense and solid surface.
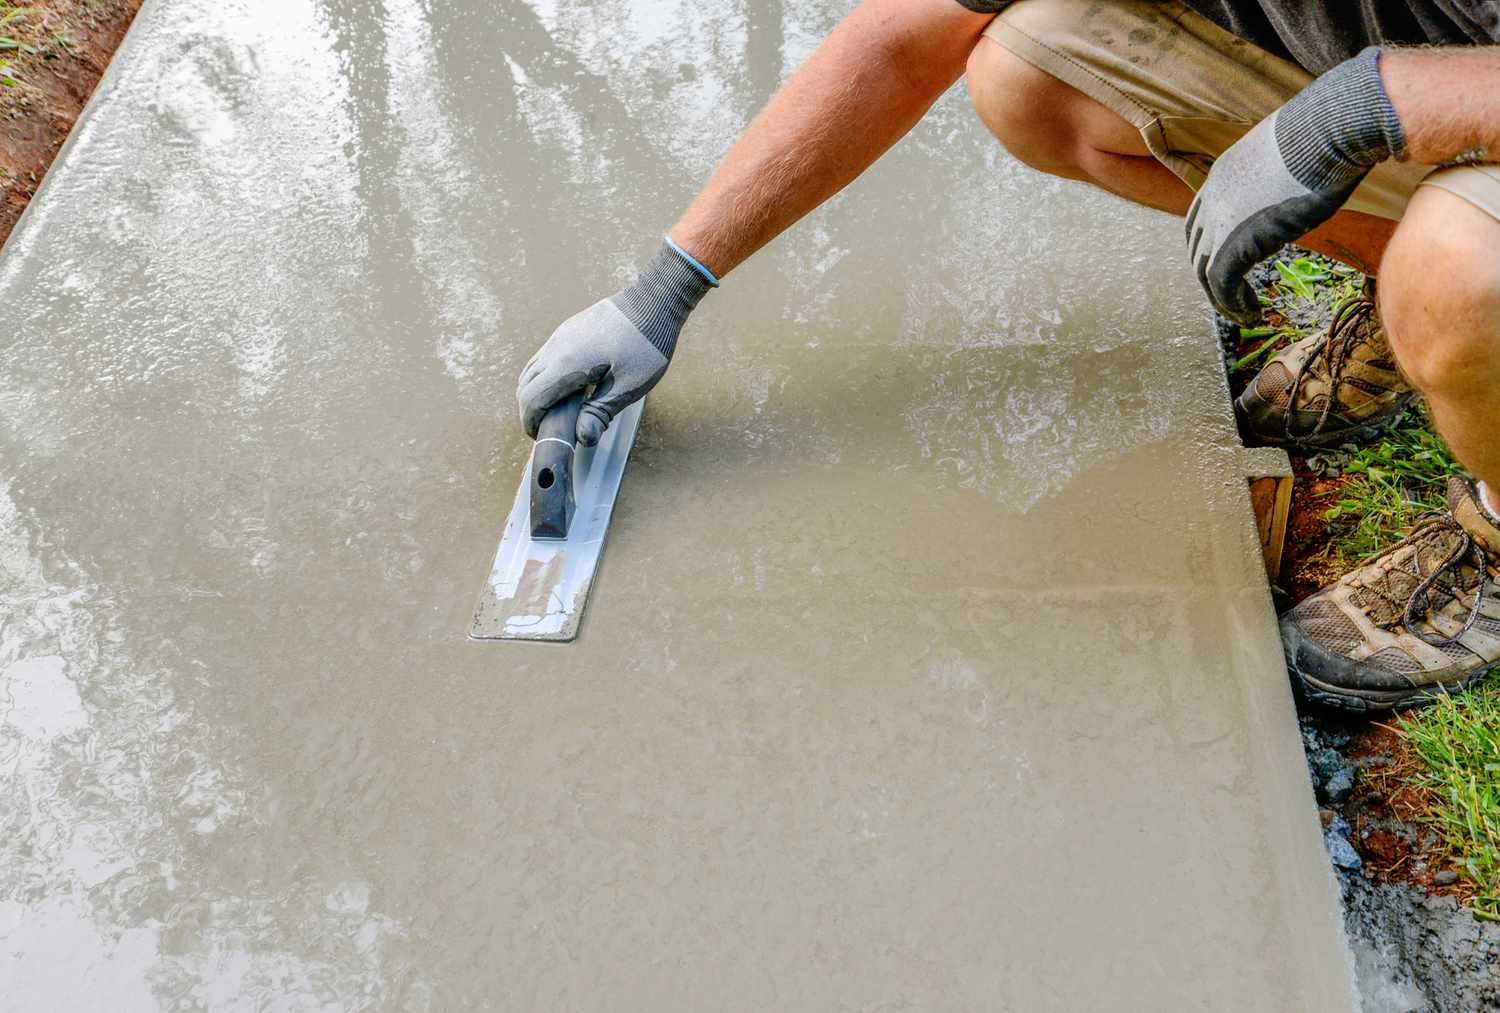
- Smooth the surface: Use a float or a trowel to smooth the surface of the concrete, ensuring an even and flat finish. Work the trowel in a back and forth motion to achieve a smooth texture.
- Check for level: Use a level to ensure that the steps are level from front to back and side to side. Make any necessary adjustments by tapping the formwork or adding/removing concrete as needed.
- Continue pouring: Repeat the pouring, distributing, consolidating, and smoothing process for each step until all steps are filled with concrete.
When pouring the concrete, it is important to work efficiently to prevent the concrete from drying too quickly. Avoid pouring on a hot day or in direct sunlight, as this can cause the concrete to set too fast and potentially lead to cracking.
Once the concrete steps are poured, it is essential to allow the concrete to cure properly. In the next step, we will discuss the curing process and provide guidelines for ensuring a strong and durable end result.
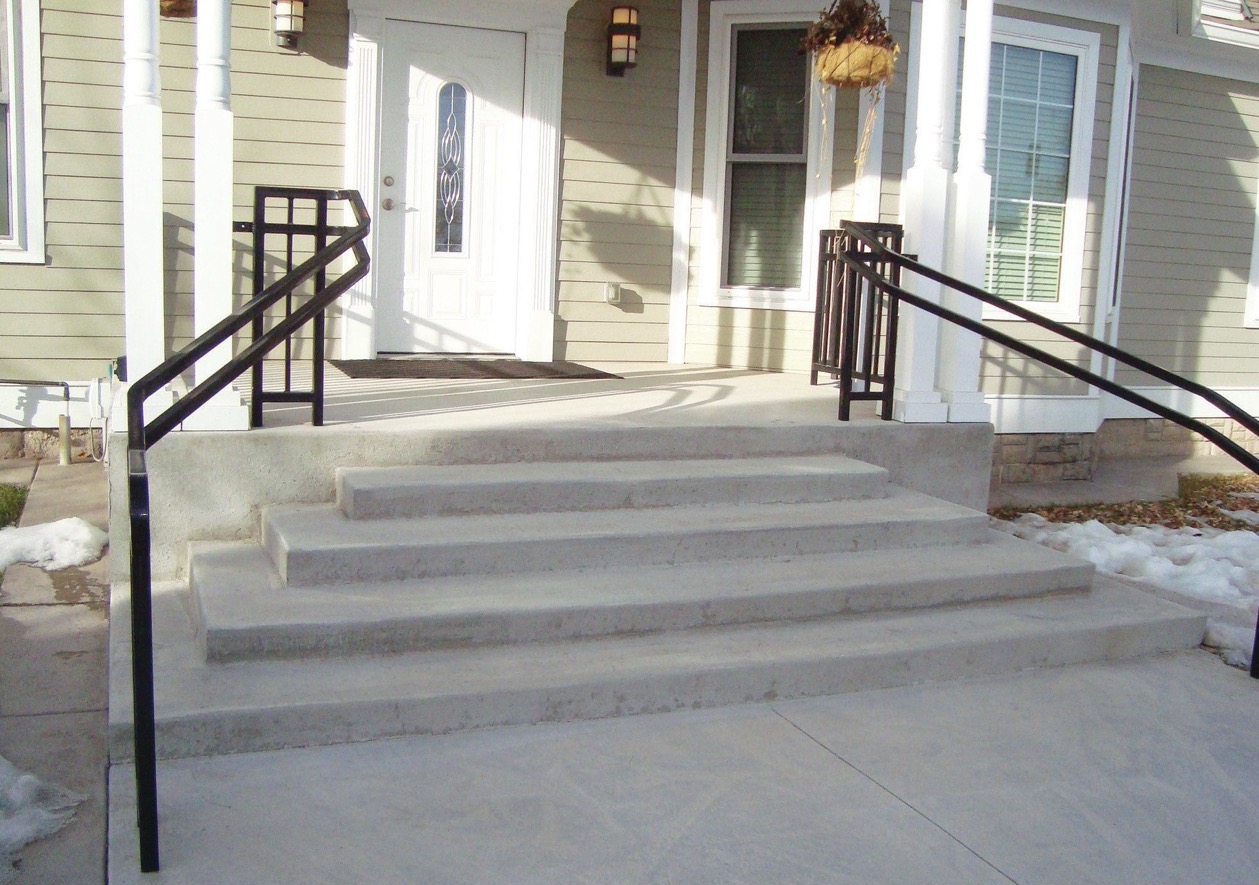
Make sure to properly prepare the area by leveling the ground and creating sturdy formwork before pouring the concrete for your porch or outdoor entryway steps. This will ensure a smooth and even finish.
Step 6: Smooth and Finish the Surface
After pouring the concrete steps, the next step is to smooth and finish the surface to achieve a polished and professional appearance. This process involves careful attention to detail and the use of the right tools and techniques. Follow these steps to smooth and finish the surface of your concrete steps:
- Wait for the concrete to set: Before starting the smoothing and finishing process, it is important to allow the concrete to set. This typically takes around 1 to 2 hours, but it can vary depending on the temperature and humidity.
- Use a concrete float: Begin by using a concrete float to level and smooth the surface of the steps. Hold the float at a slight angle and move it in a circular or back-and-forth motion, working from the top step downwards. This will help fill in any voids or imperfections in the concrete.
- Fill in low spots: If you notice any low spots or uneven areas during the floating process, use a trowel to add additional concrete to those areas. Smooth and blend the added concrete with the surrounding surface for a consistent finish.
- Finish with a trowel: Once the surface is relatively smooth, switch to a finishing trowel to achieve a finer texture. Working from the top step downwards, use the trowel to create a smooth, slightly glossy surface. Angle the trowel to create a clean edge along the front of the steps.
- Add texture (optional): If desired, you can add texture to the concrete steps using a broom or a concrete finishing brush. Simply drag the broom or brush gently across the surface, creating light grooves or patterns. This will provide traction and prevent the steps from becoming too slippery when wet.
- Touch up any imperfections: After the initial finishing, inspect the surface of the steps for any remaining imperfections or blemishes. Use a trowel or a float to smooth out any rough spots or fill in small depressions.
During the smoothing and finishing process, it is important to work carefully and attentively to achieve the desired results. Take your time to ensure a high-quality finish, as the appearance of the steps will greatly contribute to the overall aesthetic of your porch or outdoor entryway.
Once you are satisfied with the smoothness and appearance of the surface, it’s time to move on to the next step: allowing the concrete to cure. In the following section, we will discuss the importance of proper curing and provide guidelines for ensuring the strength and durability of your concrete steps.
Step 7: Allow the Concrete to Cure
After smoothing and finishing the surface of your concrete steps, it is crucial to allow the concrete to cure properly. Curing is a vital step in the construction process as it helps the concrete gain strength, durability, and resistance to cracking. Follow these guidelines to ensure proper curing of your concrete steps:
- Cover the steps: Immediately after finishing, cover the concrete steps with a plastic sheet or tarp. This will create a moist environment and prevent rapid moisture loss, which is essential for proper curing.
- Spray the steps: To maintain the moisture level, lightly spray the steps with water several times a day, especially during warmer days. The goal is to keep the concrete damp, but not saturated, for a minimum of 7 days.
- Protect from direct sunlight: During the curing process, it is important to protect the concrete steps from direct sunlight. Extreme heat and sunlight can cause the concrete to dry too quickly, leading to cracking or surface imperfections. Use shade cloth or an umbrella to shade the steps if necessary.
- Avoid heavy traffic: While the steps are curing, minimize foot traffic and avoid placing heavy objects on the surface. Continuous stress on the curing concrete can affect its strength and lead to damage. It is best to wait at least 7 days before allowing regular use of the steps.
- Monitor the curing process: Keep a close eye on the curing process. Check for any signs of cracking, temperature fluctuations, or other issues that could compromise the integrity of the steps. If any problems arise, consult with a professional for guidance and appropriate remedies.
Proper curing is essential for ensuring the long-term durability and strength of your concrete steps. It is important to be patient during this stage of the construction process and allow sufficient time for the concrete to cure fully. Rushing the curing process can lead to inferior results and potentially costly repairs down the line.
Once the curing period is complete, you can move on to the next step: removing the formwork and revealing your beautifully crafted concrete steps. In the following section, we will guide you through the process of removing the formwork and adding finishing touches to the steps.
Step 8: Remove the Formwork
After allowing sufficient time for the concrete to cure, it’s time to remove the formwork and reveal the finished look of your concrete steps. Properly removing the formwork is crucial to ensure that the steps maintain their shape and integrity. Follow these steps to safely remove the formwork:
- Inspect the concrete: Before you begin removing the formwork, carefully inspect the concrete steps for any signs of damage or weakness. Look for cracks, uneven surfaces, or areas that may need touch-ups or repairs.
- Loosen the formwork: Use a hammer or a rubber mallet to gently tap the form boards and loosen them from the cured concrete. Start at one end and work your way along the length of the steps, ensuring that each board is free from the concrete.
- Remove the form boards: Once the formwork is sufficiently loosened, carefully lift each board away from the concrete steps. Take your time to avoid damaging the edges or surface of the steps. If the boards are stuck, use a pry bar or a piece of wood to carefully pry them away.
- Remove the stakes: After removing the form boards, proceed to remove the stakes that were used to secure the formwork. Use a shovel or a pry bar to gently pull the stakes out of the ground, being careful not to damage the steps or the surrounding area.
As you remove the formwork, take the opportunity to inspect the surface of the steps for any imperfections or blemishes that may need to be addressed. If you notice any cracks or uneven areas, consult with a professional to determine the best course of action for repairs or refinishing.
With the formwork removed, you can now enjoy the sight of your beautifully constructed concrete steps. However, there are a few finishing touches you can add to further enhance their appearance and functionality. In the next step, we will discuss these finishing touches and provide recommendations for adding those final details to your concrete steps.
Read more: How To Pour A Concrete Slab For A Shed
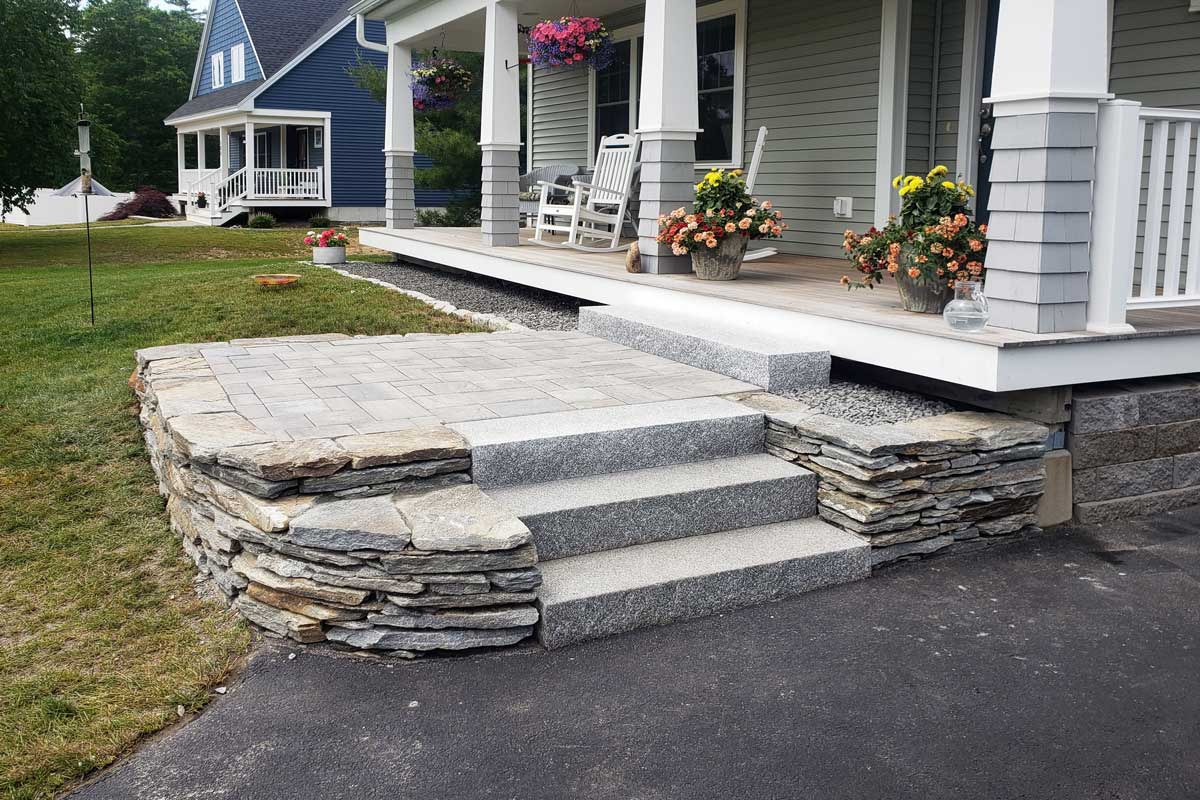
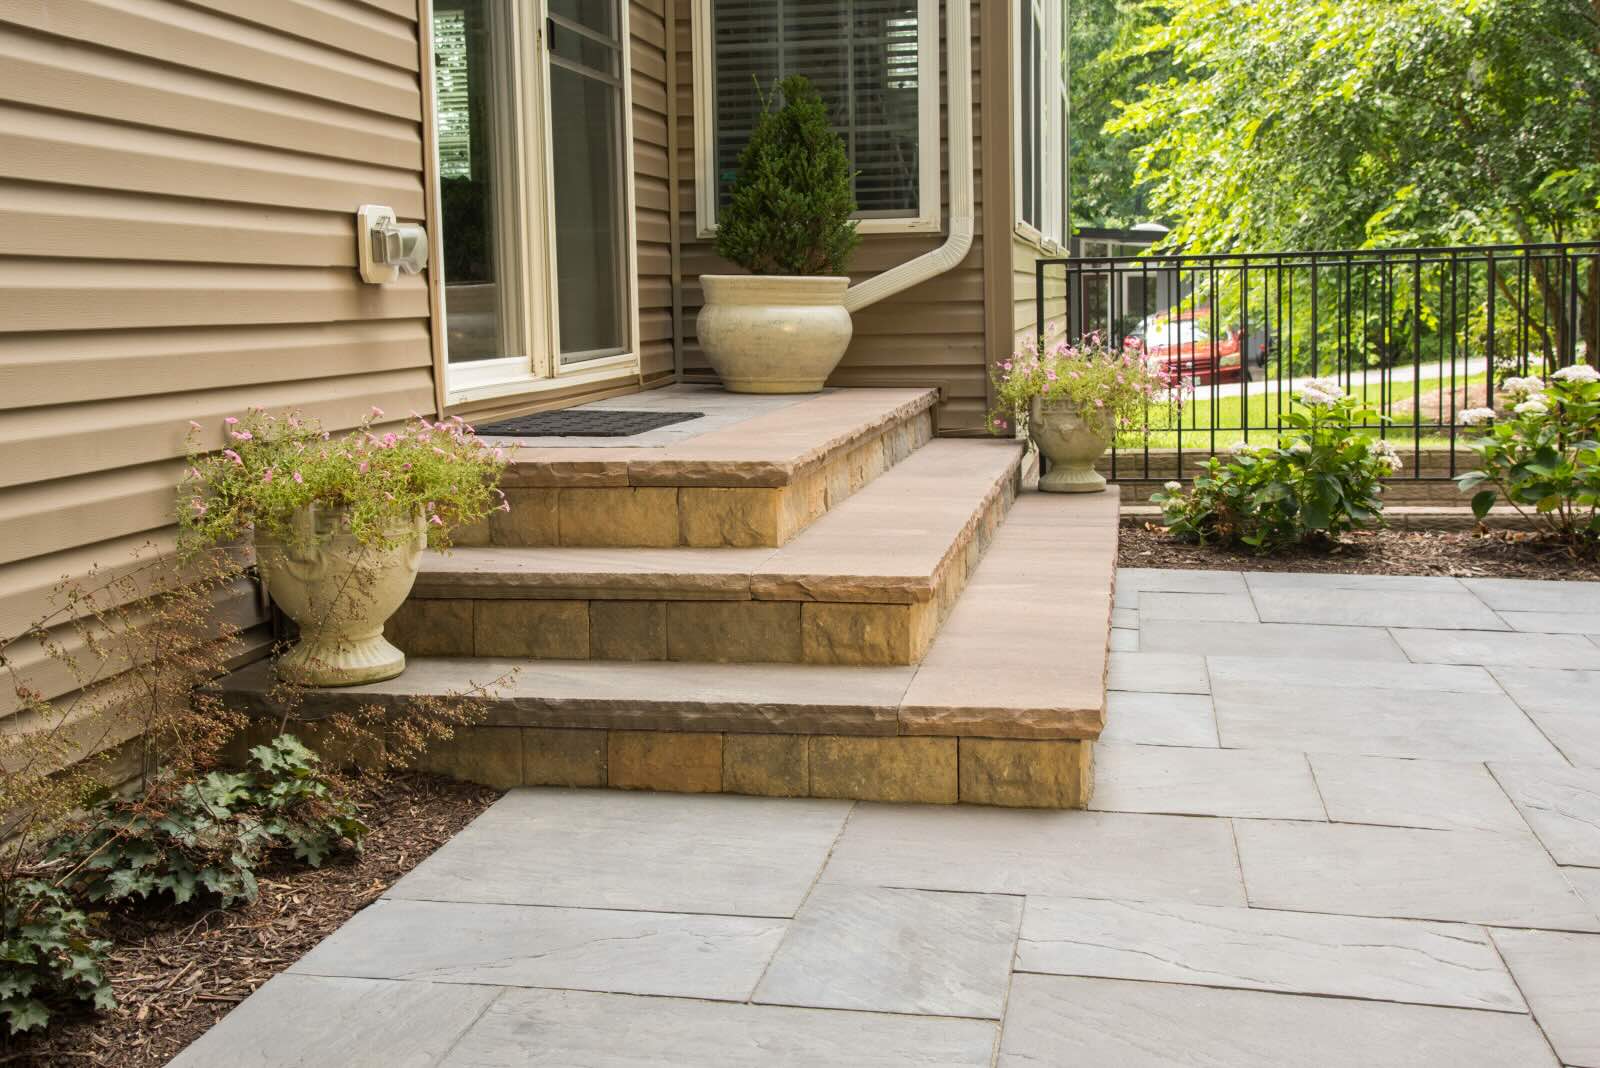
Step 9: Add Finishing Touches
To truly complete the look and functionality of your concrete steps, it’s time to add some finishing touches. These final details will enhance the overall appearance and make your steps safer and more inviting. Consider the following options for adding those perfect finishing touches:
- Seal the surface: Applying a sealer to the surface of your concrete steps can protect them from stains, moisture, and general wear and tear. Choose a sealer that is specifically formulated for outdoor use and follow the manufacturer’s instructions for application.
- Add color: If you want to add some color or texture to your steps, consider using concrete stains or dyes. These products are available in a variety of colors and can be applied to the surface of the steps to achieve the desired effect.
- Add a non-slip surface: To improve the safety of your steps, especially in wet or icy conditions, consider adding a non-slip surface. You can achieve this by using an anti-slip additive in the sealer or applying non-slip adhesive strips to the surface of the steps.
- Install handrails: If your steps are taller or located in an area where extra support is needed, installing handrails can provide added safety and convenience. Choose handrails that complement the style of your steps and ensure they are securely anchored to the steps and/or supporting structure.
- Illuminate the steps: Adding lighting to your concrete steps can enhance their visibility and safety, especially at night. Install low-voltage LED lights along the edges or underneath the steps to provide a warm and inviting glow.
- Landscape around the steps: To further enhance the aesthetic appeal of your steps, consider landscaping the area around them. Plant flowers, shrubs, or other greenery to create a visually appealing and welcoming entryway.
These finishing touches will not only improve the overall look of your concrete steps but also enhance their usability and safety. Consider the specific needs and style of your outdoor space when deciding which finishing touches to incorporate.
By following each of these steps, from gathering materials to adding finishing touches, you have successfully poured and created beautiful concrete steps for your porch or outdoor entryway. Enjoy the fruits of your labor and appreciate the functional and aesthetic value that these steps bring to your home.
Congratulations on completing this project, and we hope this comprehensive guide has been helpful in your concrete step construction journey!
Conclusion
Building and pouring concrete steps for your porch or outdoor entryway can be a rewarding and satisfying project. By following the step-by-step instructions outlined in this comprehensive guide, you can create sturdy, durable, and visually appealing steps that will enhance the functionality and curb appeal of your home.
We began by emphasizing the importance of gathering the necessary materials and tools before embarking on the project. By being well-prepared, you can ensure a smooth workflow and avoid any unnecessary delays. We then discussed the crucial steps of preparing the area, setting up the formwork, and mixing the concrete. These foundational steps are critical for creating a solid and structurally sound set of steps.
Next, we covered the process of pouring the concrete and smoothing and finishing the surface. These steps require attention to detail and the use of the right tools to achieve a professional-looking result. We also emphasized the significance of allowing the concrete to cure properly, as this contributes to the long-term strength and durability of the steps.
Lastly, we discussed the importance of removing the formwork and adding the finishing touches. These final steps enhance the overall appearance and functionality of the concrete steps, providing the perfect finishing touches for your project.
Remember to consult with local building codes and regulations, as well as professionals in the field, to ensure that your concrete steps meet all safety and construction standards. Taking the time to properly plan and execute this project will result in a beautiful and functional addition to your home.
We hope that this comprehensive guide has provided you with valuable insights and instructions for pouring and constructing concrete steps. Enjoy the process and the results, knowing that you have created a lasting and valuable improvement to your home.
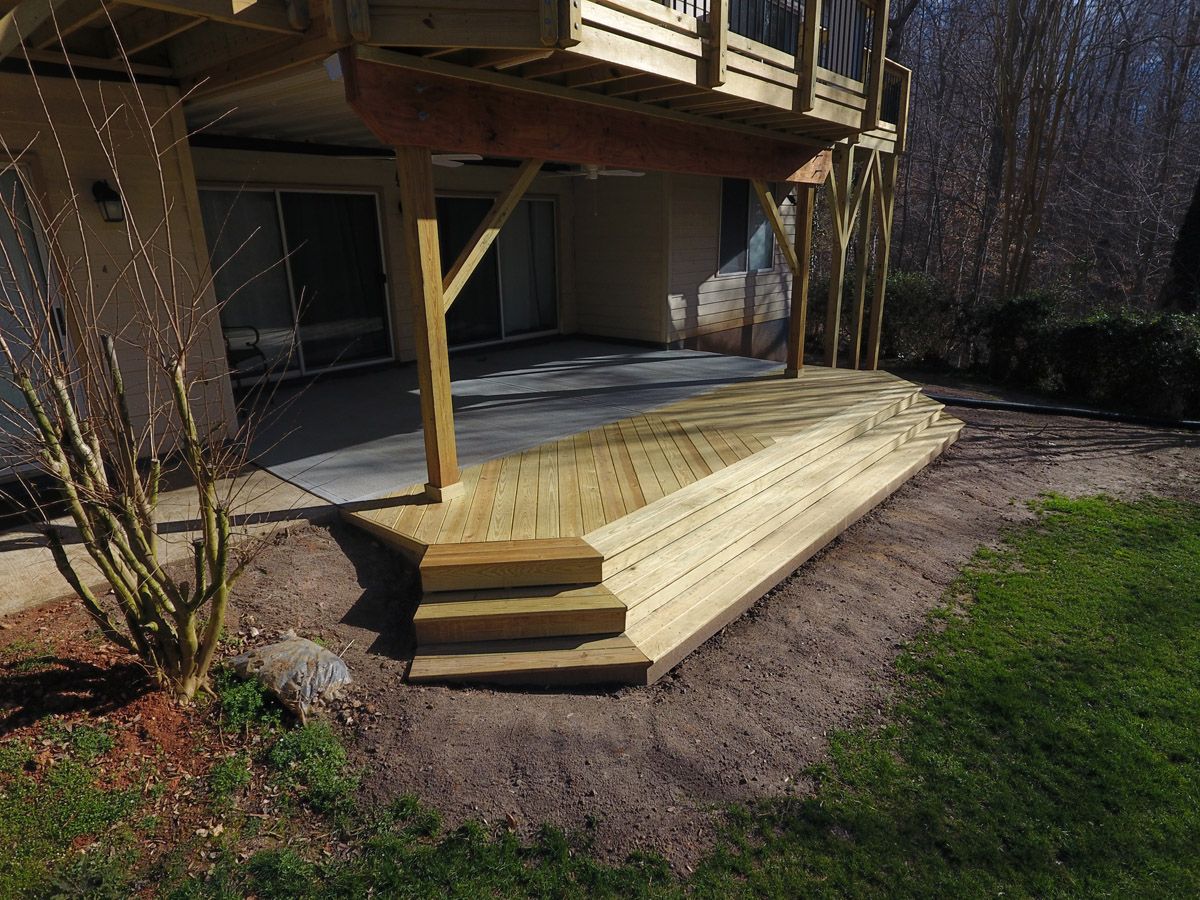
Ready to switch up your outdoor space even more? After mastering concrete steps, why not try building outdoor wooden steps to spruce up your entry? These additions not only enhance curb appeal but also create a warm, inviting path to your door. With practical tips and straightforward guidance, you'll be setting up these charming features in no time. Don't miss out on making your entryway stand out!
Frequently Asked Questions about How To Pour Concrete Steps For A Porch Or Outdoor Entryway
Was this page helpful?
At Storables.com, we guarantee accurate and reliable information. Our content, validated by Expert Board Contributors, is crafted following stringent Editorial Policies. We're committed to providing you with well-researched, expert-backed insights for all your informational needs.


0 thoughts on “How To Pour Concrete Steps For A Porch Or Outdoor Entryway”