Home>Construction & Tools>Building Materials>How To Make A Patio With Brick Pavers
Building Materials
How To Make A Patio With Brick Pavers
Modified: March 23, 2024
Learn how to make a patio with brick pavers using high-quality building materials. Create a durable and beautiful outdoor space with our step-by-step guide.
(Many of the links in this article redirect to a specific reviewed product. Your purchase of these products through affiliate links helps to generate commission for Storables.com, at no extra cost. Learn more)
Introduction
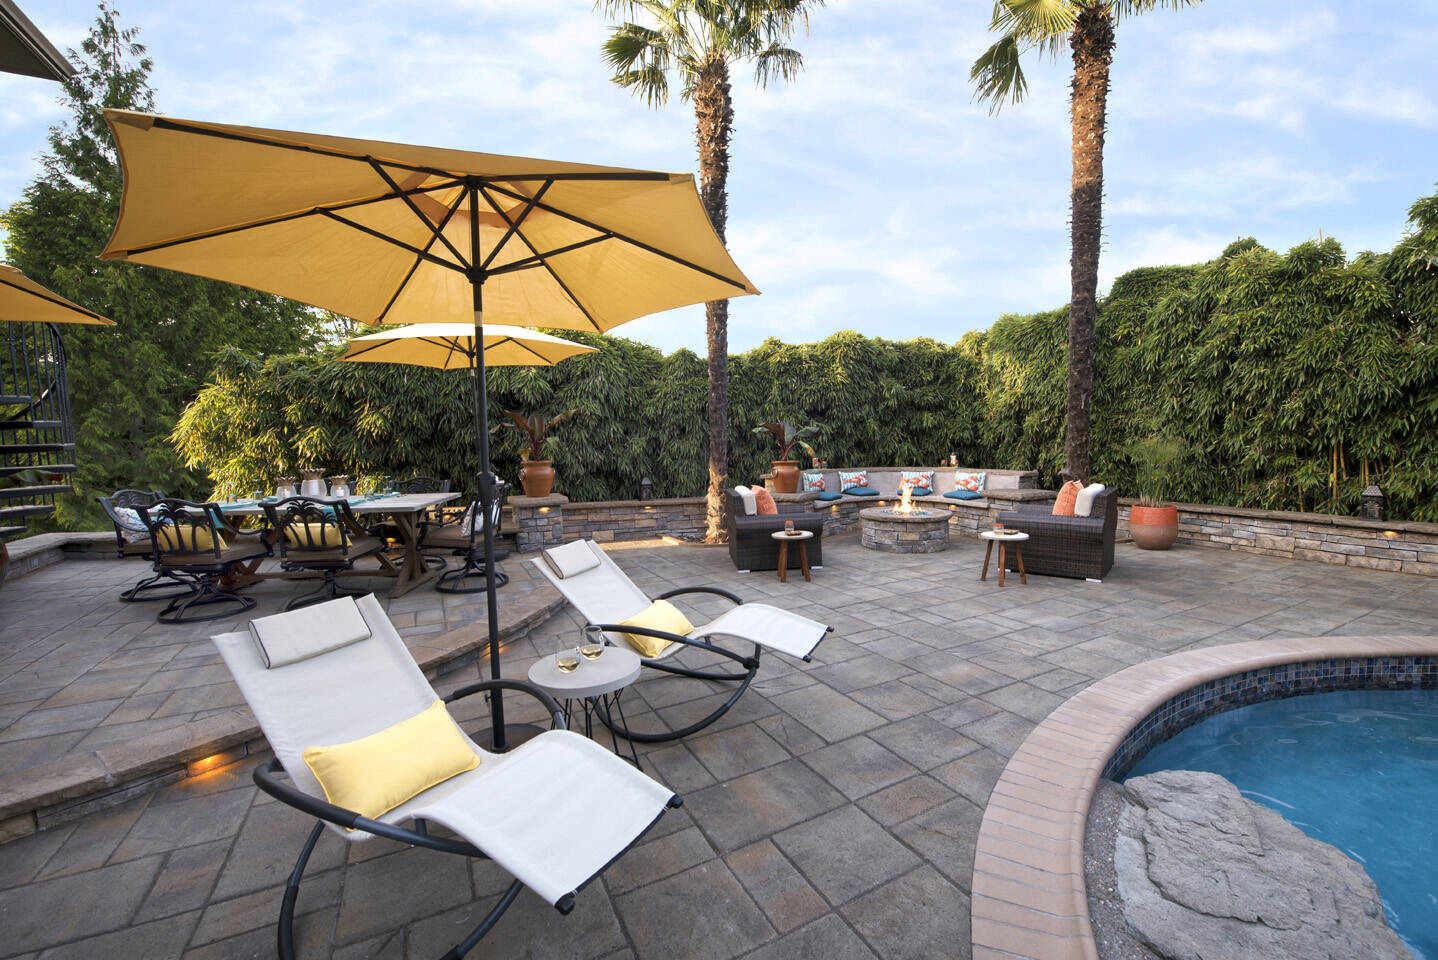
Welcome to the world of outdoor living, where the beauty of nature meets the craftsmanship of human hands. Building a patio with brick pavers is a rewarding and creative endeavor that not only enhances the aesthetic appeal of your outdoor space but also adds value to your home. Whether you envision a cozy nook for morning coffee or a vibrant entertainment area for gatherings with family and friends, a brick paver patio can transform your backyard into a charming oasis.
In this comprehensive guide, we will walk you through the step-by-step process of creating a stunning patio with brick pavers. From meticulous planning and precise installation to adding those final flourishes, you will gain the knowledge and confidence to embark on this fulfilling project. So, roll up your sleeves, unleash your inner artisan, and let’s dive into the art of crafting a captivating brick paver patio that will be the envy of the neighborhood.
Key Takeaways:
- Planning and preparation are crucial for creating a beautiful brick paver patio. Consider the patio’s purpose, size, and layout, and ensure proper drainage and compliance with local building codes.
- Laying brick pavers requires patience and precision. Choose a pattern, maintain consistent spacing, and secure the pavers with jointing sand for a stunning and durable patio surface.
Read more: How To Clean Brick Pavers Patio
Step 1: Planning and Preparation
Before you start laying a single brick, it’s essential to map out your vision and lay the groundwork for a successful project. Begin by envisioning the size, shape, and purpose of your patio. Will it be a tranquil retreat for relaxation, a spacious area for outdoor dining, or a versatile space for various activities? Consider factors such as sunlight exposure, proximity to the house, and any landscaping features you want to incorporate.
Next, grab a measuring tape, some graph paper, and a pencil to sketch out the dimensions of your desired patio. This step is crucial for accurately estimating the quantity of materials needed. Once you have a clear idea of the patio’s layout, calculate the square footage to determine the number of brick pavers, edge restraints, and base materials required for the project.
With the plan in hand, it’s time to prepare the site. Clear the area of any vegetation, debris, or obstacles, and mark the perimeter of the patio using stakes and string. This boundary will serve as a guide during excavation and installation. Additionally, consider the slope and drainage of the site to prevent water accumulation on the patio surface. If necessary, make provisions for proper water runoff by adjusting the grade or incorporating drainage solutions.
Lastly, check local building codes and obtain any necessary permits before proceeding. Some areas have regulations regarding the construction of outdoor structures, and it’s important to ensure compliance to avoid potential issues down the road. By taking the time to plan meticulously and prepare the site thoughtfully, you set the stage for a smooth and successful patio construction journey.
Step 2: Excavation and Base Preparation
With the planning phase complete, it’s time to roll up your sleeves and dive into the physical groundwork for your patio. The first task at hand is excavation. Using a shovel, excavator, or a rented skid-steer loader, remove the top layer of soil and dig to a depth that accommodates the base materials and the thickness of the brick pavers. Typically, a depth of 6 to 8 inches is suitable, but this may vary based on the specific requirements of your project.
Once the area is excavated, it’s crucial to ensure a solid and stable foundation for your patio. Begin by compacting the soil with a plate compactor to create a firm base. Following this, add a layer of gravel or crushed stone to provide proper drainage and prevent the pavers from shifting over time. For optimal results, compact each layer of base material thoroughly to eliminate air pockets and achieve a level surface.
After the gravel layer is in place and compacted, add a layer of coarse sand to create a smooth bedding surface for the brick pavers. Screed the sand to an even thickness using a straight board or specialized screeding tool. This step is essential for ensuring uniform paver height and a level finished surface. Take your time during this process, as the accuracy of the sand bed directly impacts the quality and longevity of your patio.
As you progress through the excavation and base preparation phase, periodically check the slope of the patio to facilitate proper water drainage. Ideally, the patio should slope away from the house at a rate of approximately 1/8 inch per foot. This slight slope encourages water runoff and helps prevent pooling or drainage issues during inclement weather.
By meticulously excavating the site and meticulously preparing the base, you establish a solid foundation for the patio that will ensure durability and structural integrity for years to come.
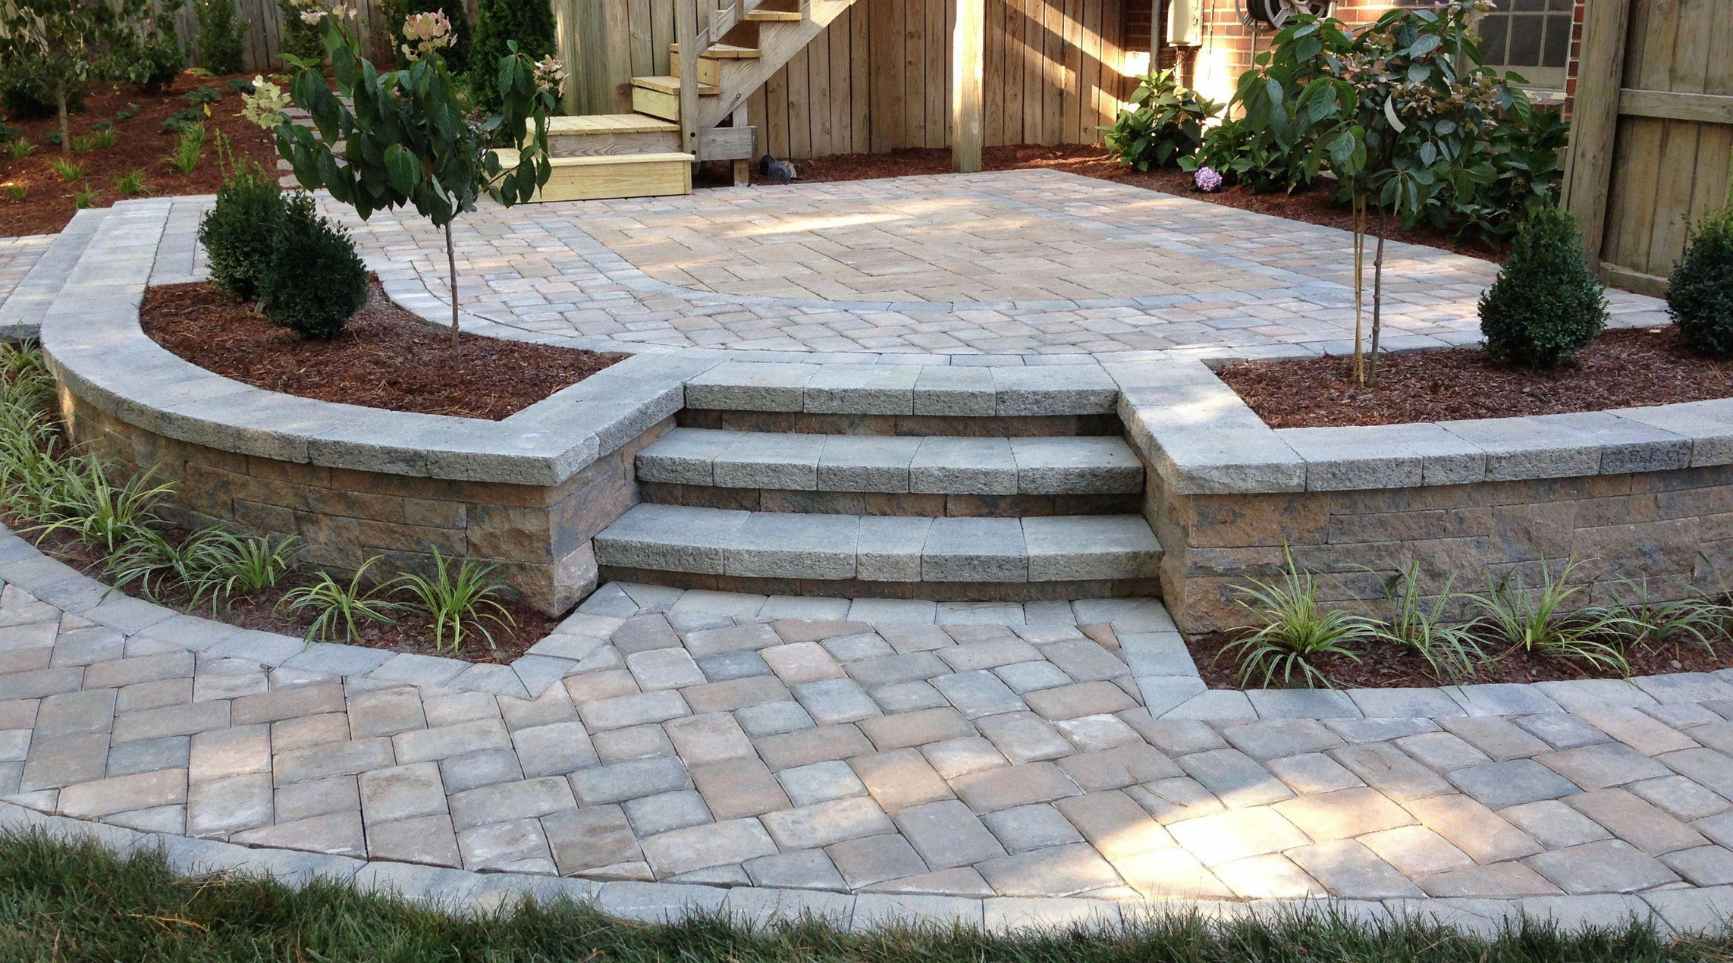
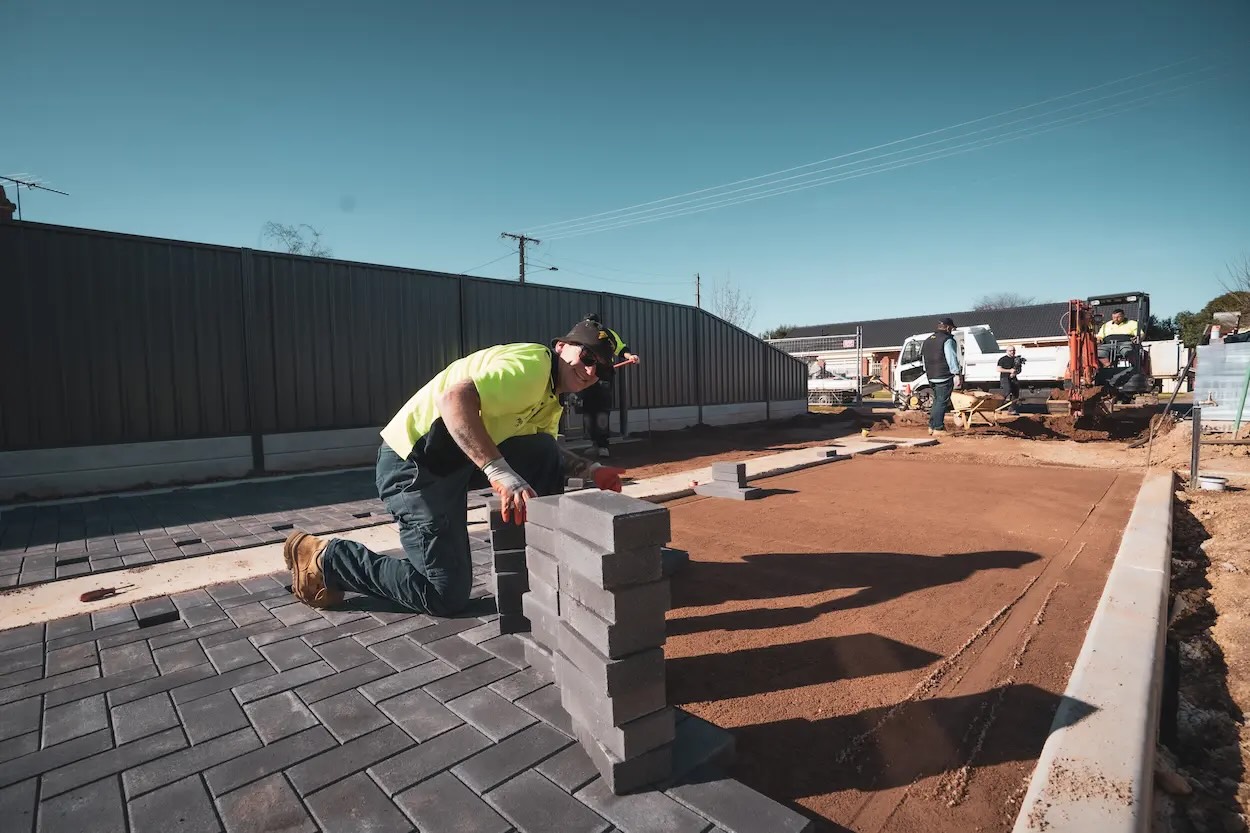
Step 3: Installing the Edge Restraints
With the foundation in place, it’s time to introduce the essential element that will define and secure your brick paver patio: the edge restraints. These sturdy barriers serve as the perimeter framework, preventing the pavers from shifting or spreading outward over time. Additionally, they contribute to the structural stability and aesthetic appeal of the patio.
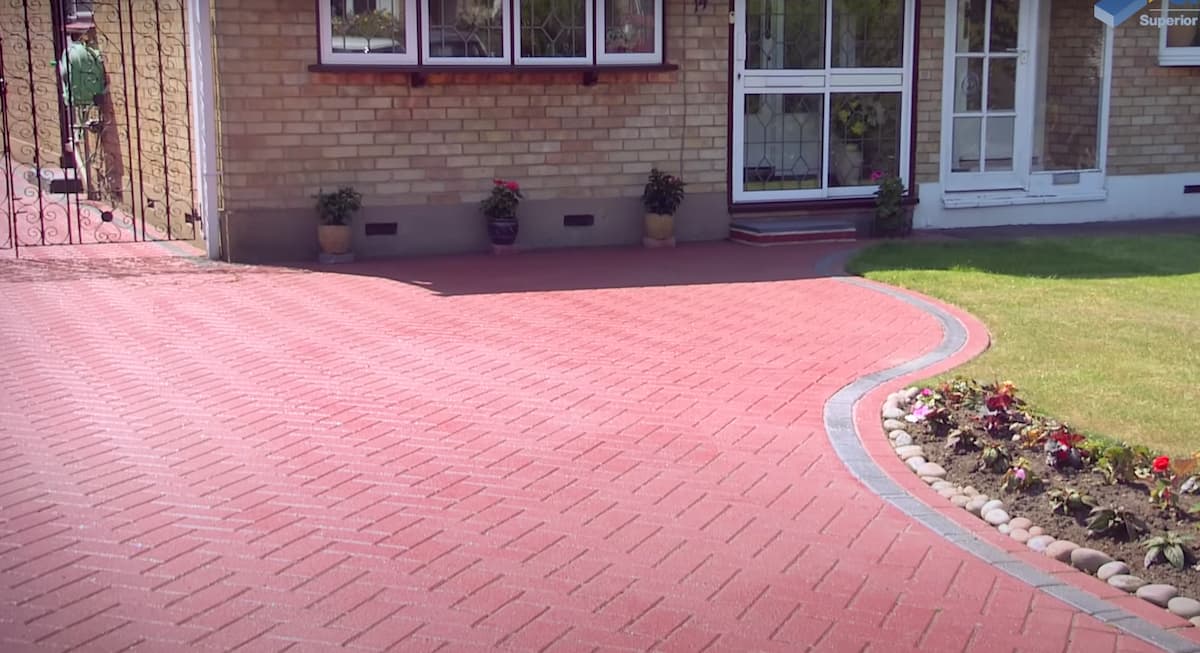
Begin by selecting the type of edge restraints that best suits your design and functional needs. Common options include plastic or metal paver edging, concrete or brick soldier course, and even natural stone. Carefully measure and cut the edge restraints to fit the patio’s perimeter, ensuring a precise and snug installation. If using flexible plastic edging, bend it to conform to the curves of the patio layout, securing it in place with stakes or anchoring spikes.
Once the edge restraints are positioned along the patio’s boundary, use a mallet to ensure they are firmly seated in the base material. Pay close attention to the alignment and levelness of the restraints, as they will dictate the straightness and uniformity of the paver installation. Additionally, verify that the top edge of the restraints aligns with the planned height of the brick pavers to facilitate a seamless transition from the patio surface to the surrounding landscape.
For added reinforcement, consider securing the edge restraints to the base material using construction adhesive or concrete. This extra step can significantly enhance the stability and longevity of the patio’s perimeter, especially in areas subject to heavy foot traffic or vehicular loads.
By meticulously installing the edge restraints, you create a solid framework that not only contains the pavers but also adds a polished and professional finish to your brick paver patio.
Before starting to lay brick pavers for a patio, make sure to properly prepare the base by leveling and compacting the soil, adding a layer of gravel, and then sand. This will ensure a stable and long-lasting patio surface.
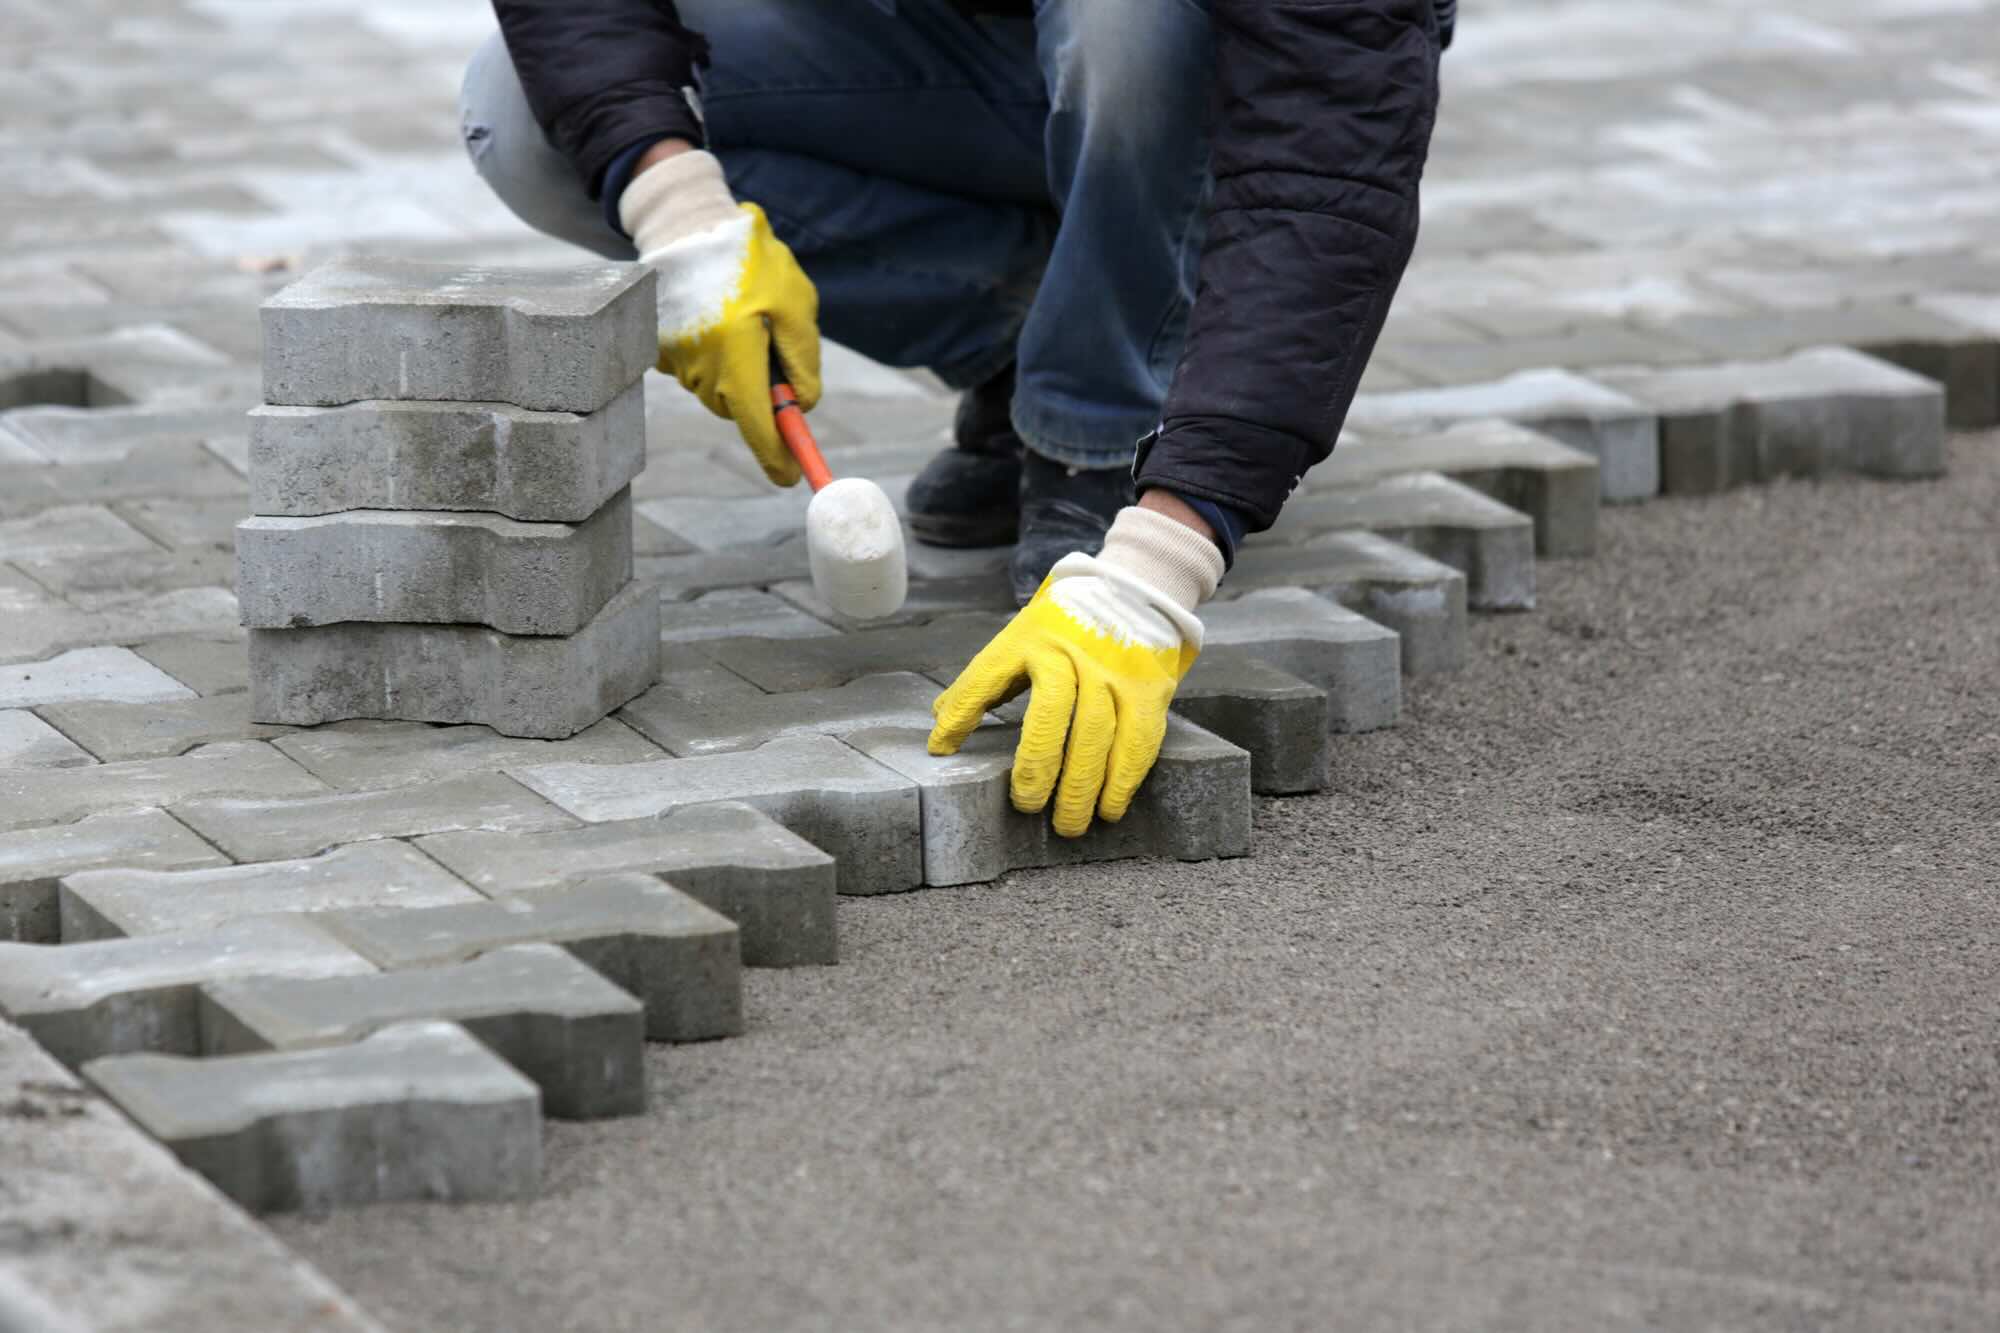
Step 4: Laying the Brick Pavers
Now comes the exciting phase of bringing your patio to life as you embark on the meticulous process of laying the brick pavers. This step requires patience, precision, and a keen eye for detail to ensure a visually stunning and structurally sound patio surface.
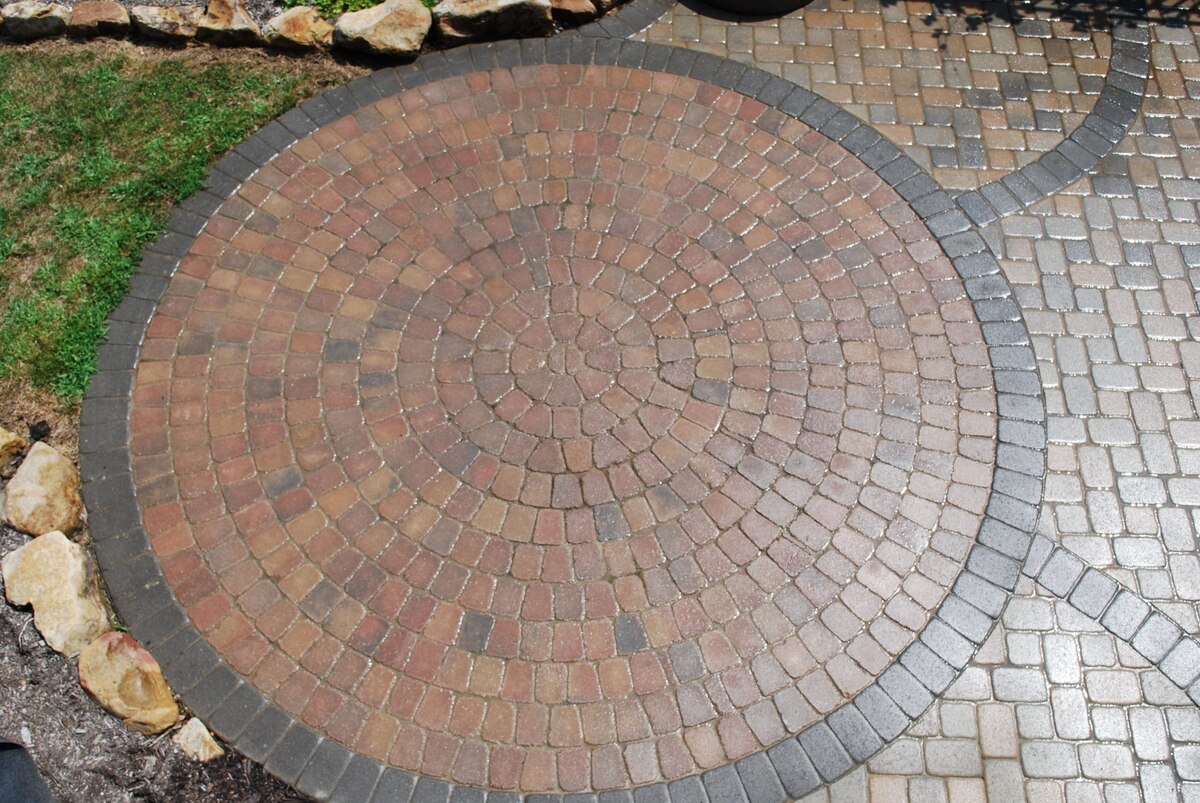
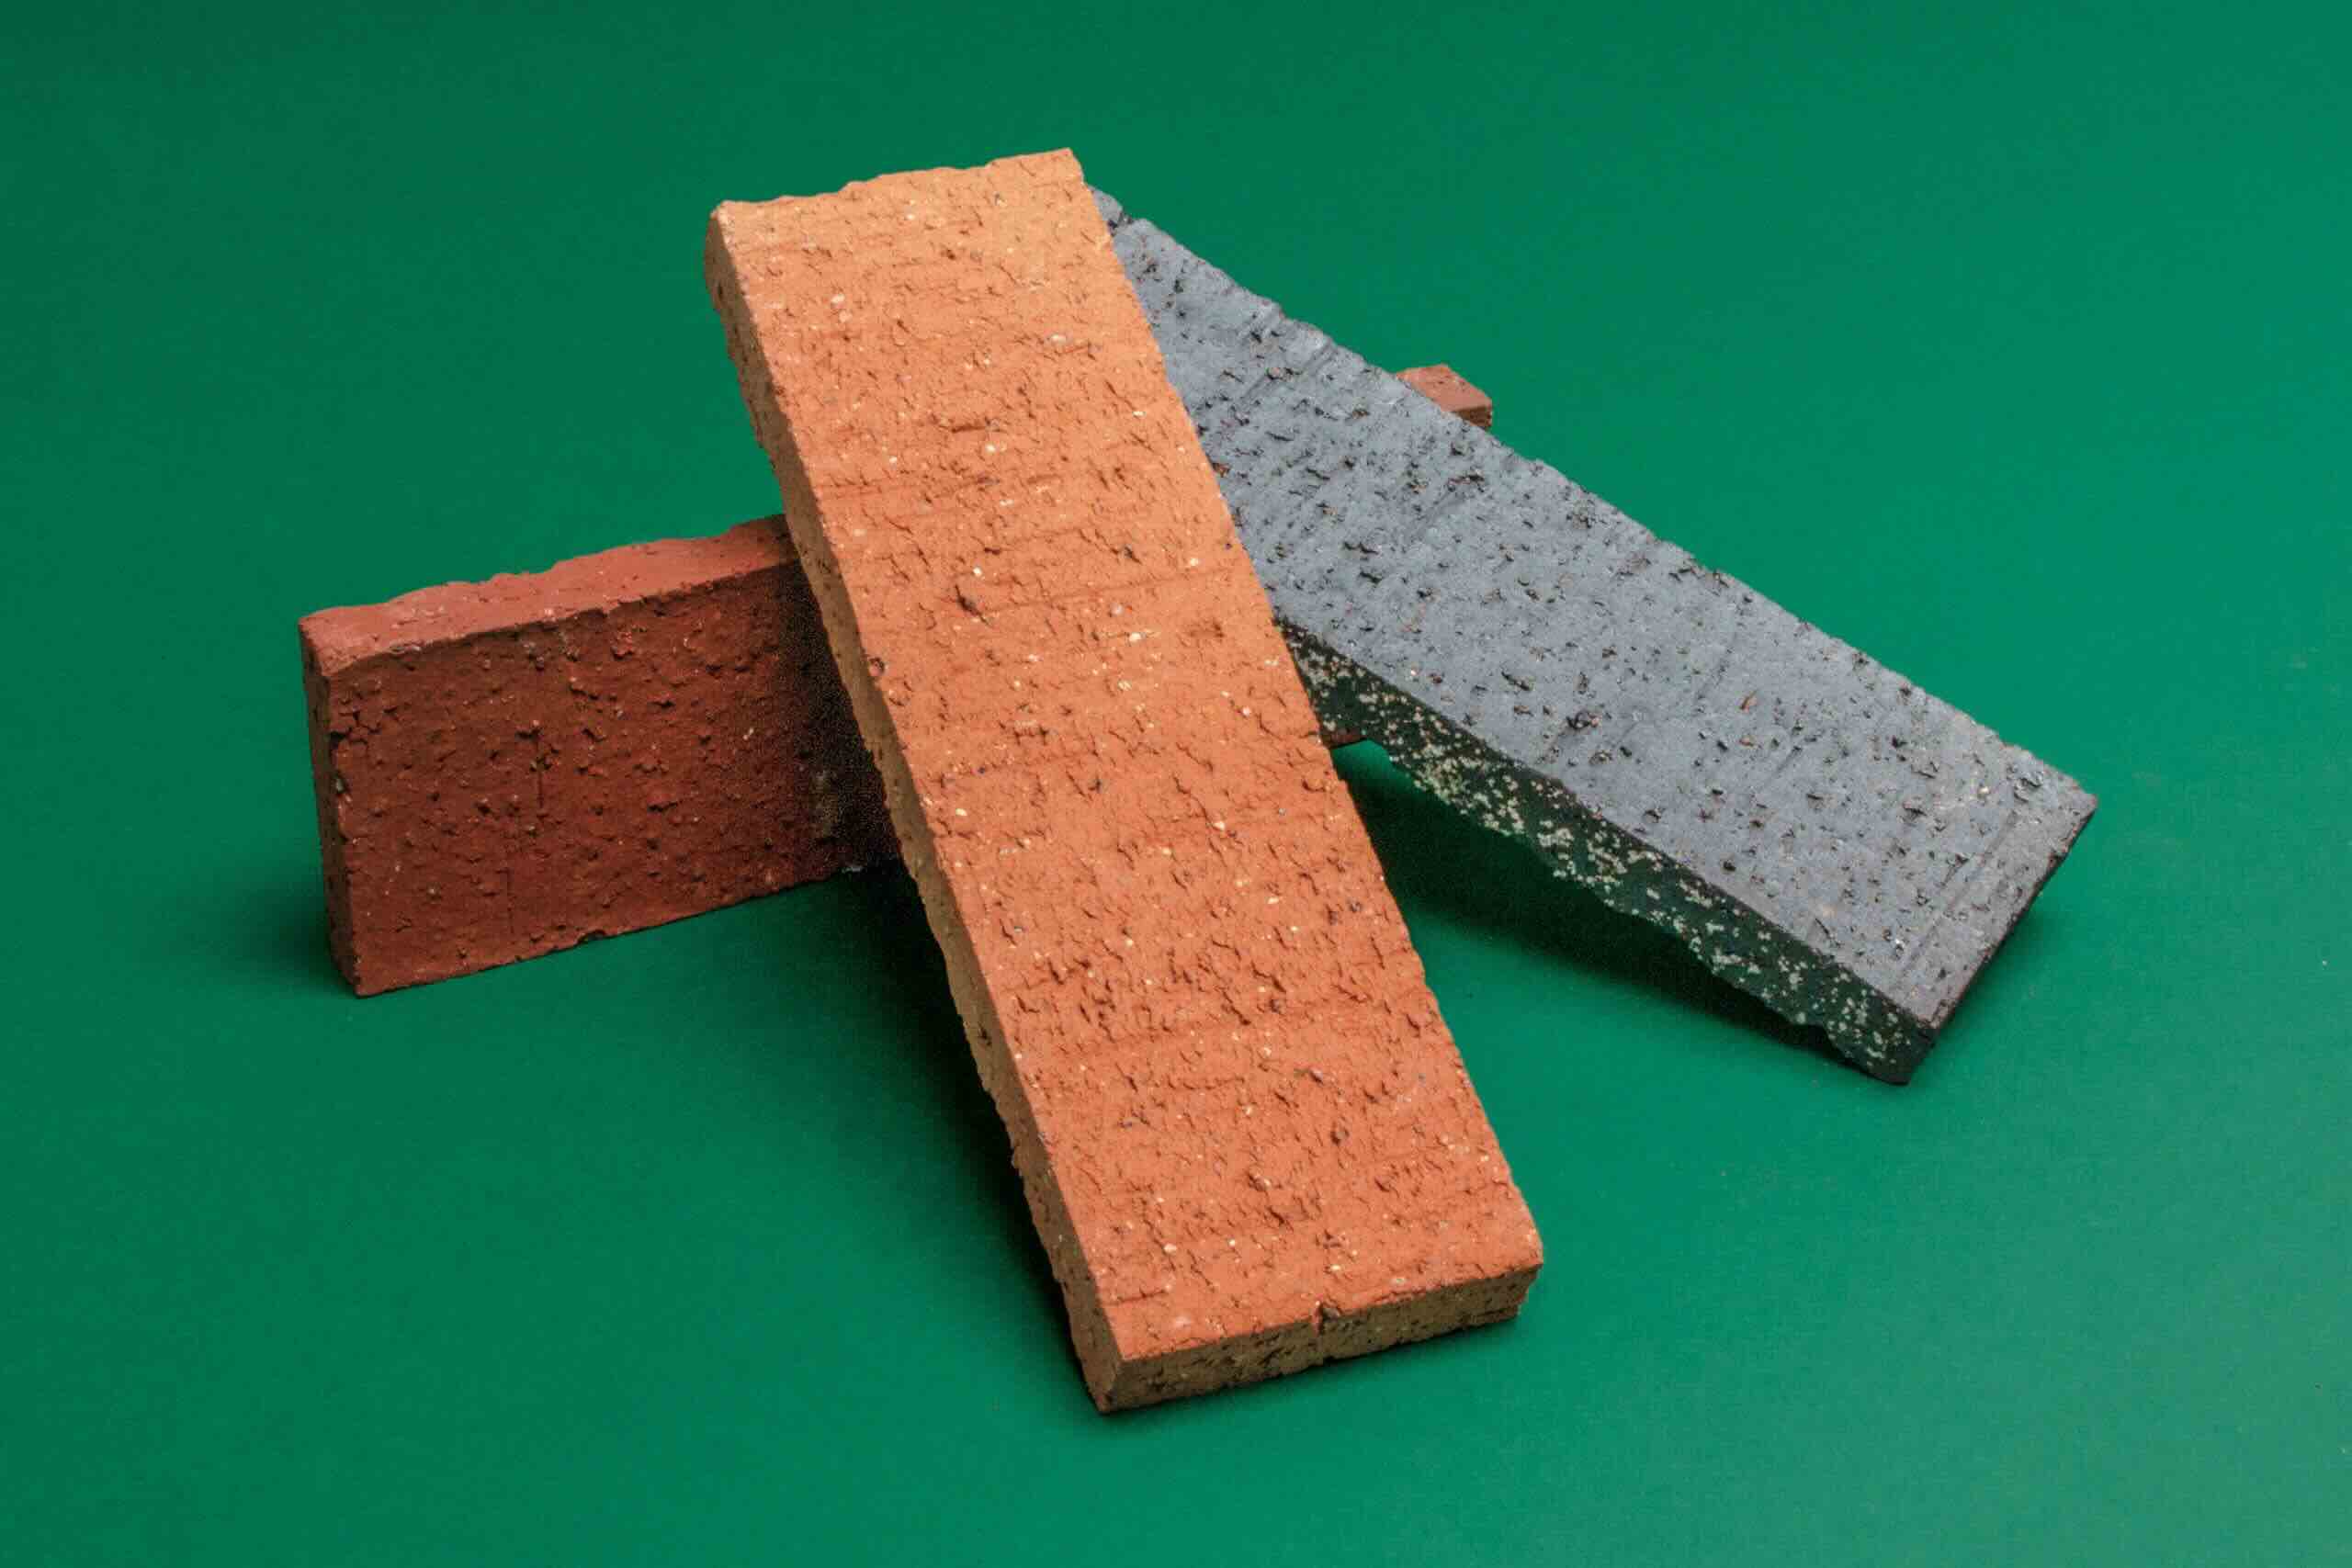
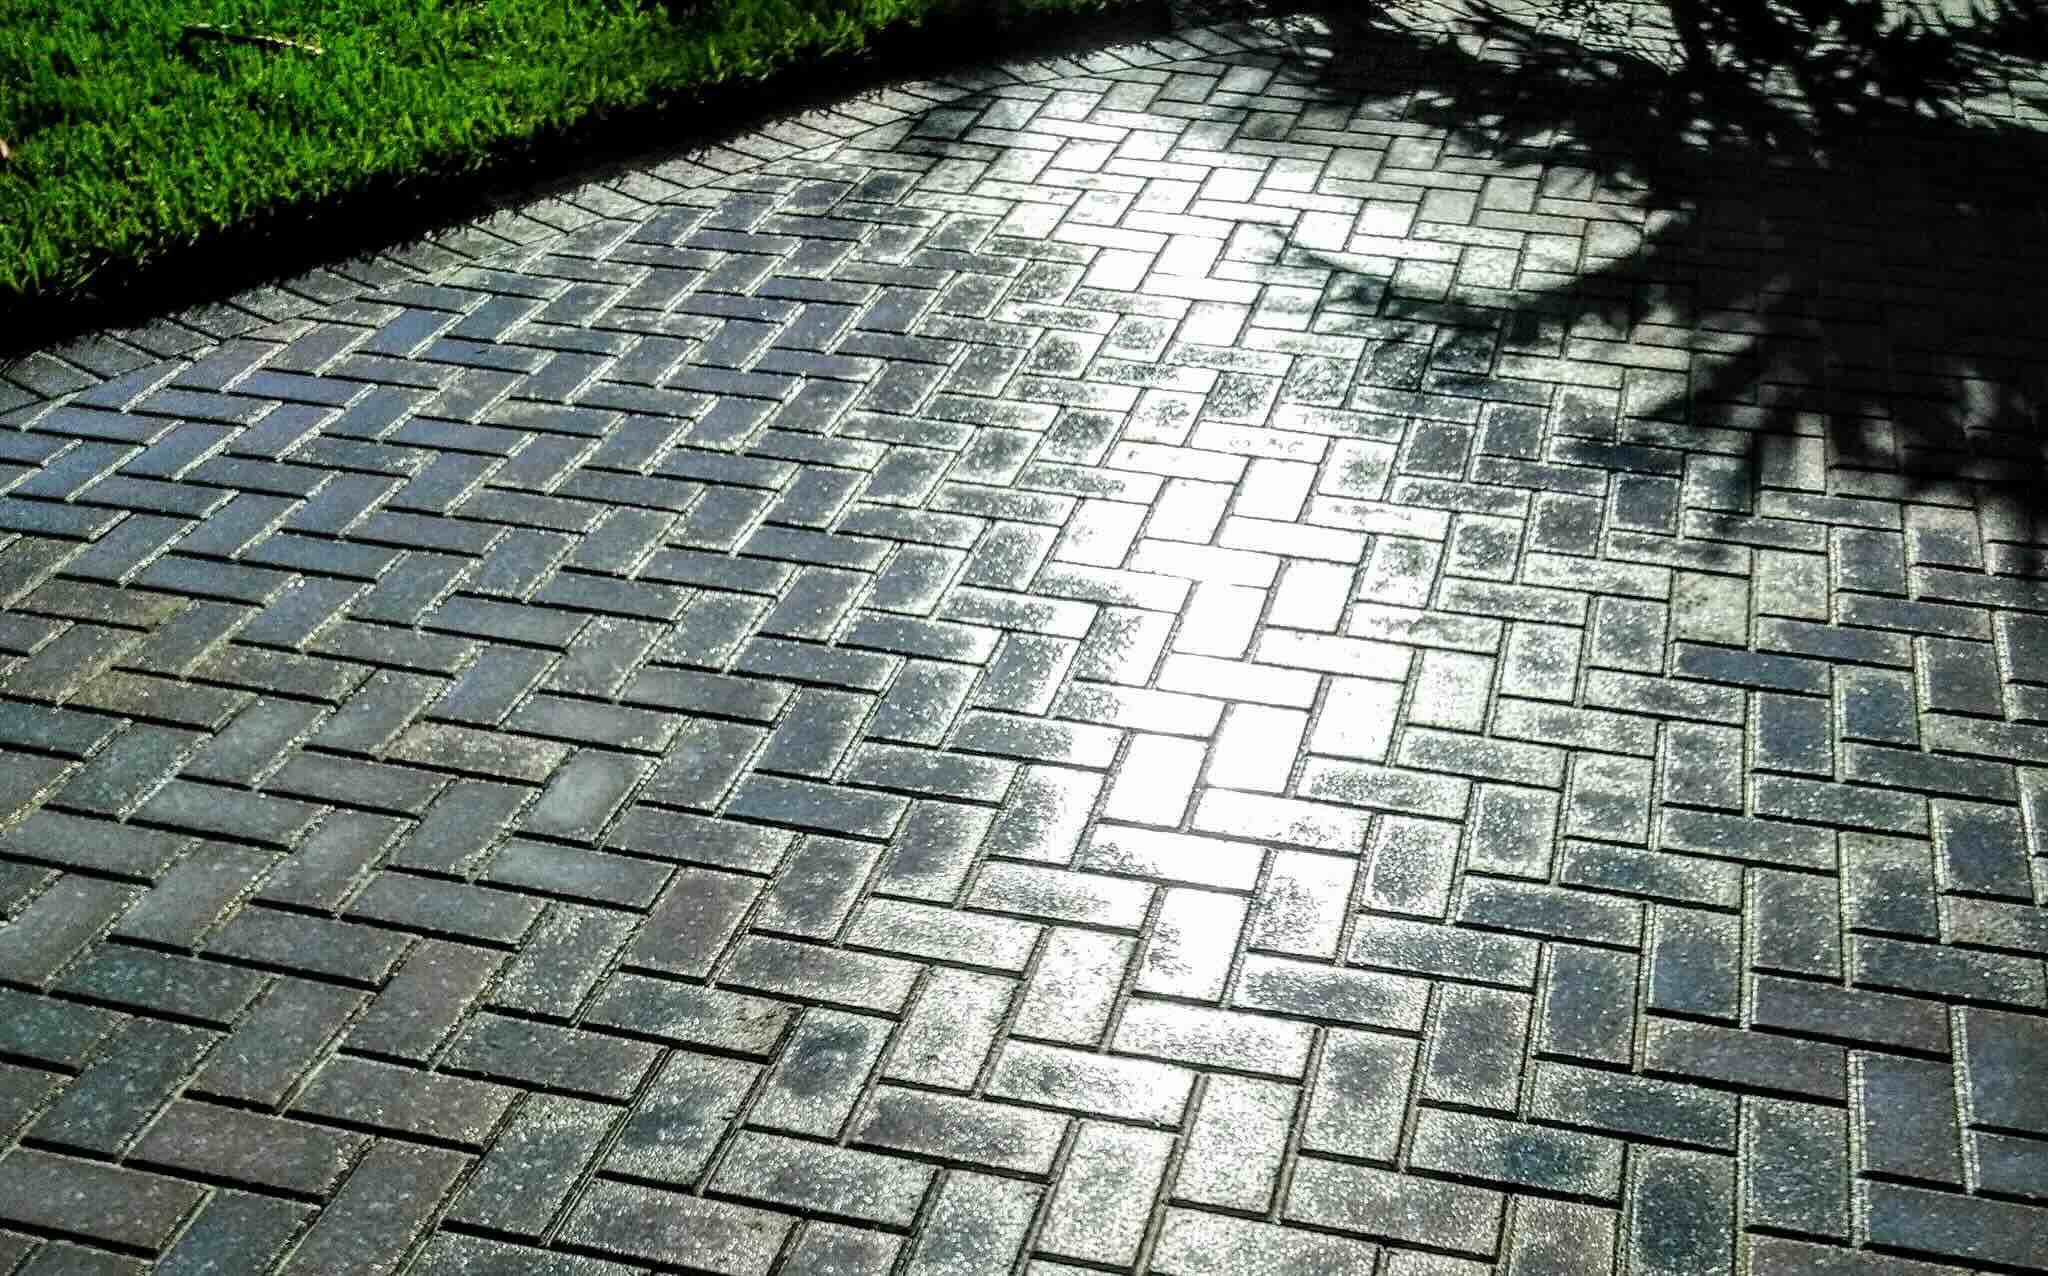
Begin by selecting the pattern in which you want to lay the pavers. Popular options include herringbone, basket weave, running bond, and circular designs, each offering a distinct aesthetic appeal. Carefully plan the layout to minimize cutting and achieve a symmetrical and balanced appearance. Consider dry-fitting the pavers without mortar or sand to experiment with different patterns and ensure a cohesive visual flow.
Once the pattern is determined, start laying the pavers from one corner of the patio, working toward the opposite end. Use a string line or straight edge to maintain straight, parallel rows, ensuring that the pavers are snugly butted against each other. To maintain consistent spacing between the pavers, use plastic spacers or wooden dowels as temporary guides during the installation process.
As you progress, periodically step back and assess the alignment, levelness, and overall appearance of the patio surface. Make necessary adjustments to ensure uniformity and visual harmony. If you encounter areas that require smaller paver pieces, use a masonry saw or paver splitter to cut the bricks to the desired size, ensuring precise and clean edges.
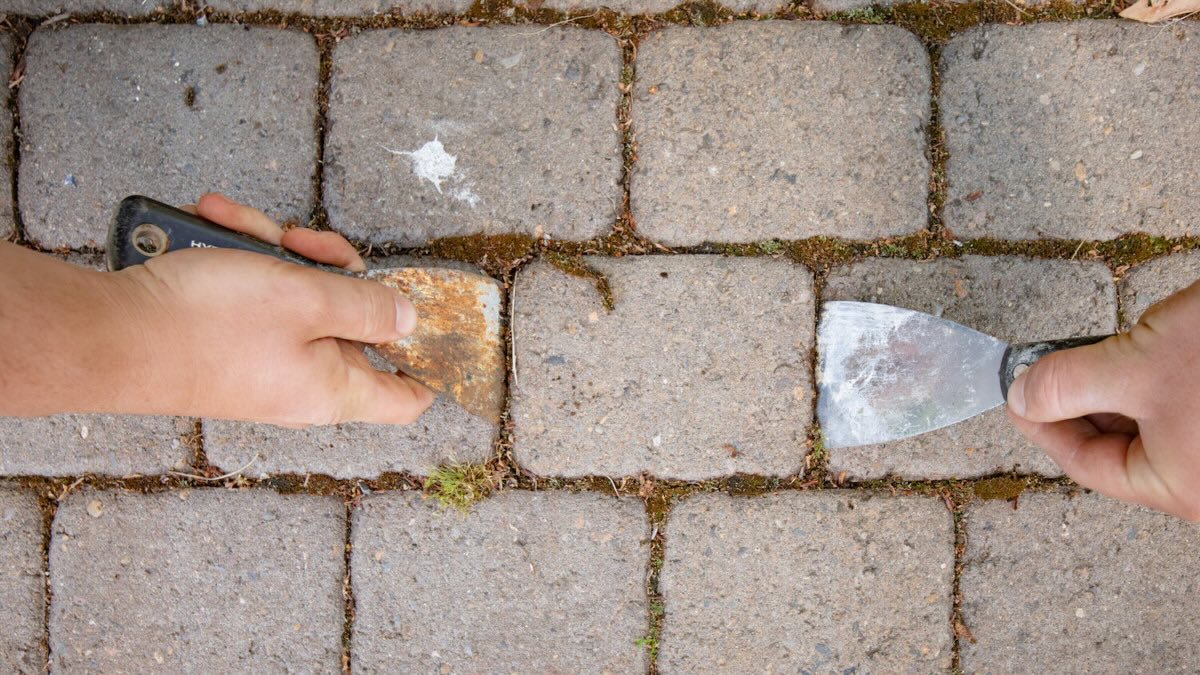
Once the pavers are in place, it’s time to secure them to the sand bed. This is typically achieved by sweeping fine sand or polymeric jointing sand into the joints between the pavers, filling the spaces and locking the bricks in position. Use a compactor or tamper to vibrate the pavers and settle the sand into the joints, creating a stable and cohesive surface.
By methodically laying the brick pavers, you transform the patio space into a captivating and inviting area that reflects your creativity and attention to detail.
Read more: How To Make A Patio With Pavers
Step 5: Cutting and Fitting Pavers
As you near the completion of your brick paver patio, you may encounter areas that require custom-sized paver pieces to fit the layout perfectly. This is where the art of cutting and fitting pavers comes into play, allowing you to achieve a seamless and professional finish for your outdoor oasis.
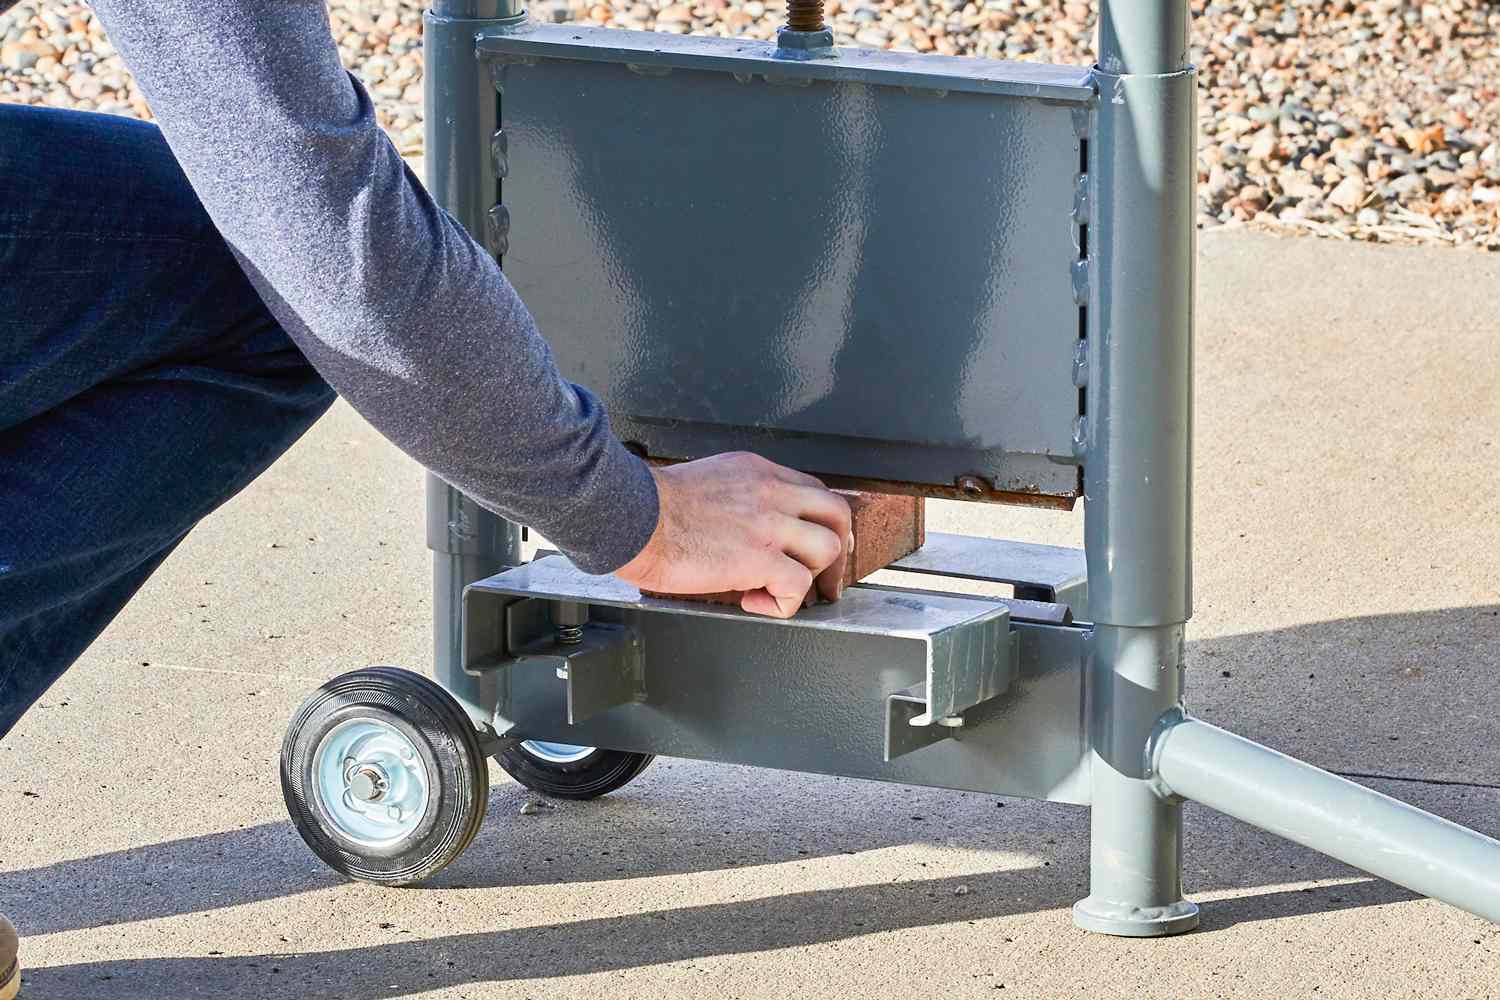
Begin by assessing the areas where full-sized pavers cannot be accommodated due to curves, corners, or intricate design elements. Using a chalk or pencil, mark the pavers that need to be trimmed to fit the specific dimensions of these areas. For straight cuts, a masonry saw equipped with a diamond blade offers precise and efficient results. Alternatively, a paver splitter can be used for straight cuts on thinner pavers, providing a manual cutting option without the need for power tools.
For curved or irregular cuts, a wet saw with a diamond blade or a specialized paver cutting tool can be employed to create intricate shapes that seamlessly integrate into the overall design. Exercise caution and wear appropriate safety gear when operating cutting tools, and always follow the manufacturer’s guidelines for safe usage.
Once the pavers are cut to the required dimensions, test-fit them into the designated areas, ensuring a snug and uniform appearance. Make any necessary adjustments to achieve a seamless blend between the custom-fitted pavers and the surrounding layout. Pay close attention to the spacing and alignment of the fitted pavers to maintain the overall symmetry and visual appeal of the patio surface.
After the custom-fitted pavers are in place, fill any gaps or joints with sand to secure the pieces and maintain the structural integrity of the patio surface. Use a brush to sweep the sand into the joints, ensuring a consistent and professional finish.
By skillfully cutting and fitting the pavers, you elevate the visual cohesiveness and precision of your brick paver patio, showcasing your dedication to creating a stunning outdoor space.
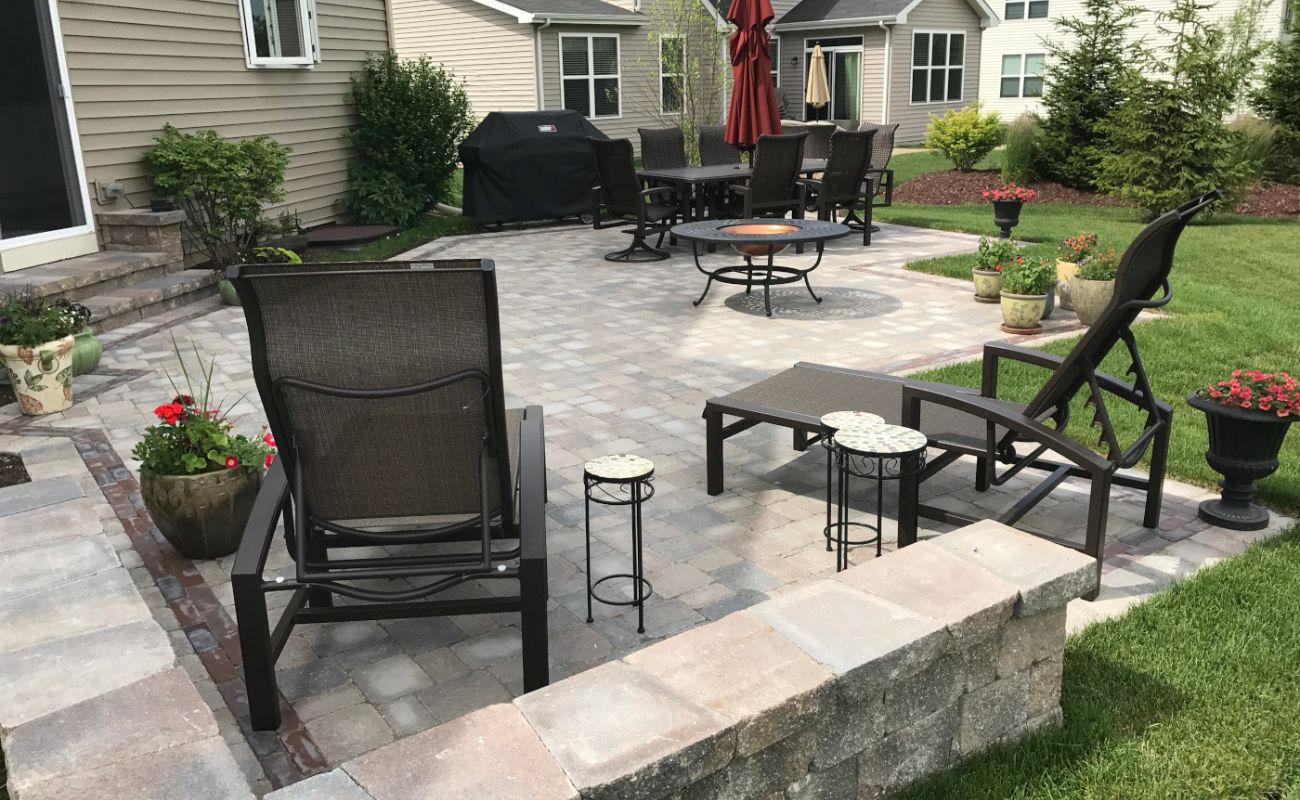
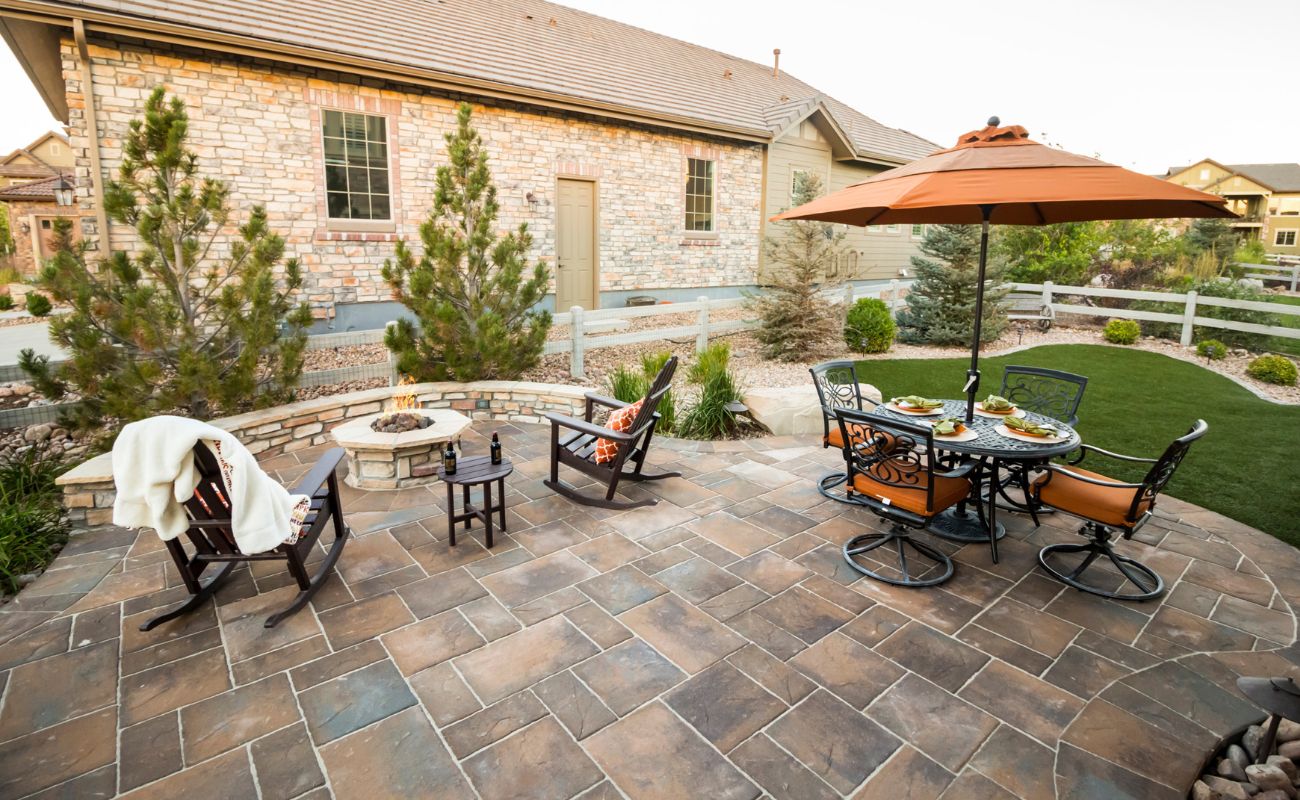
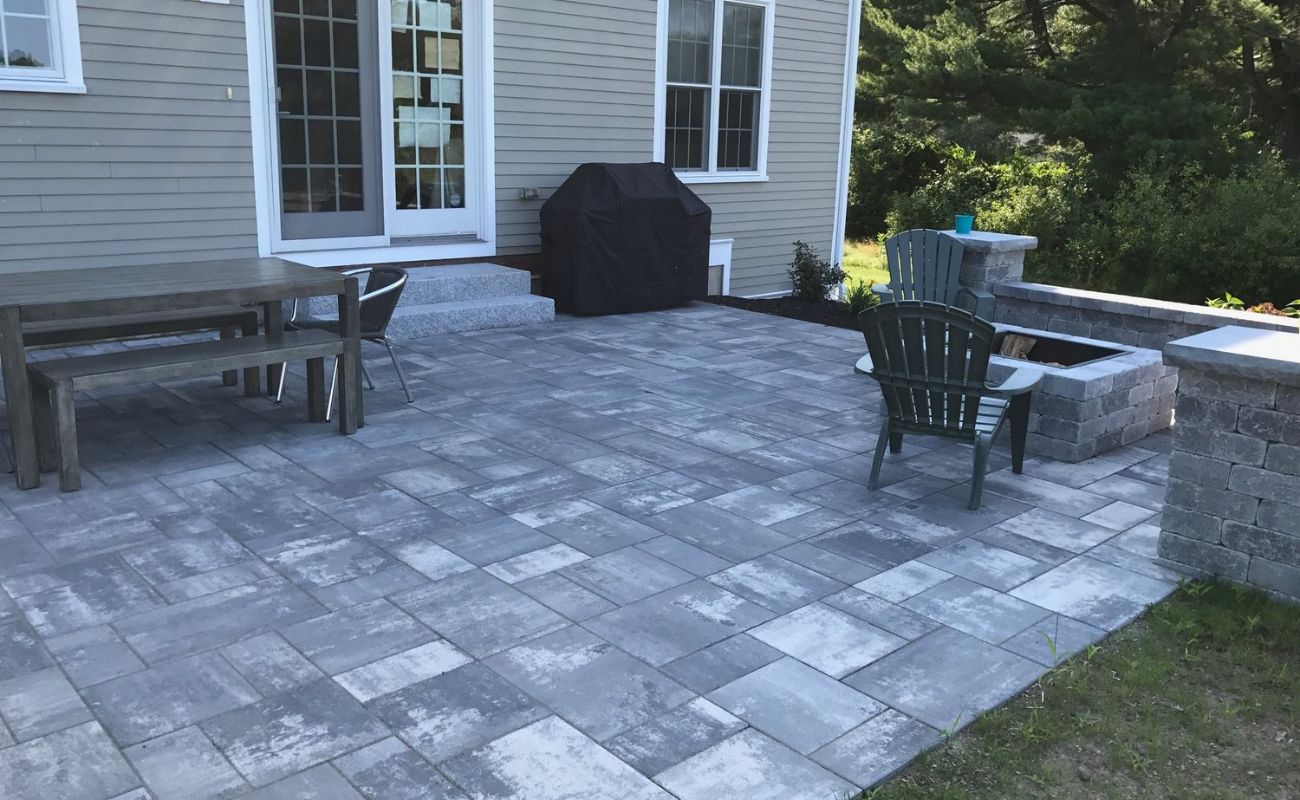
Step 6: Adding Finishing Touches
With the brick pavers meticulously laid and the foundation of your patio firmly established, it’s time to add the final touches that will elevate the aesthetic appeal and functionality of your outdoor oasis.
One essential finishing touch is the application of jointing sand or polymeric sand to fill the gaps between the pavers. This not only secures the pavers in place but also prevents weed growth and enhances the overall stability of the patio surface. Use a broom to sweep the sand into the joints, ensuring complete coverage and a seamless finish.
Consider incorporating edge restraints that complement the style of your patio, such as low-profile metal or decorative concrete edging, to add a polished and cohesive border to the design. Additionally, integrating landscape lighting along the perimeter or within the patio itself can create a captivating ambiance for evening gatherings and enhance the safety and visual allure of the space.
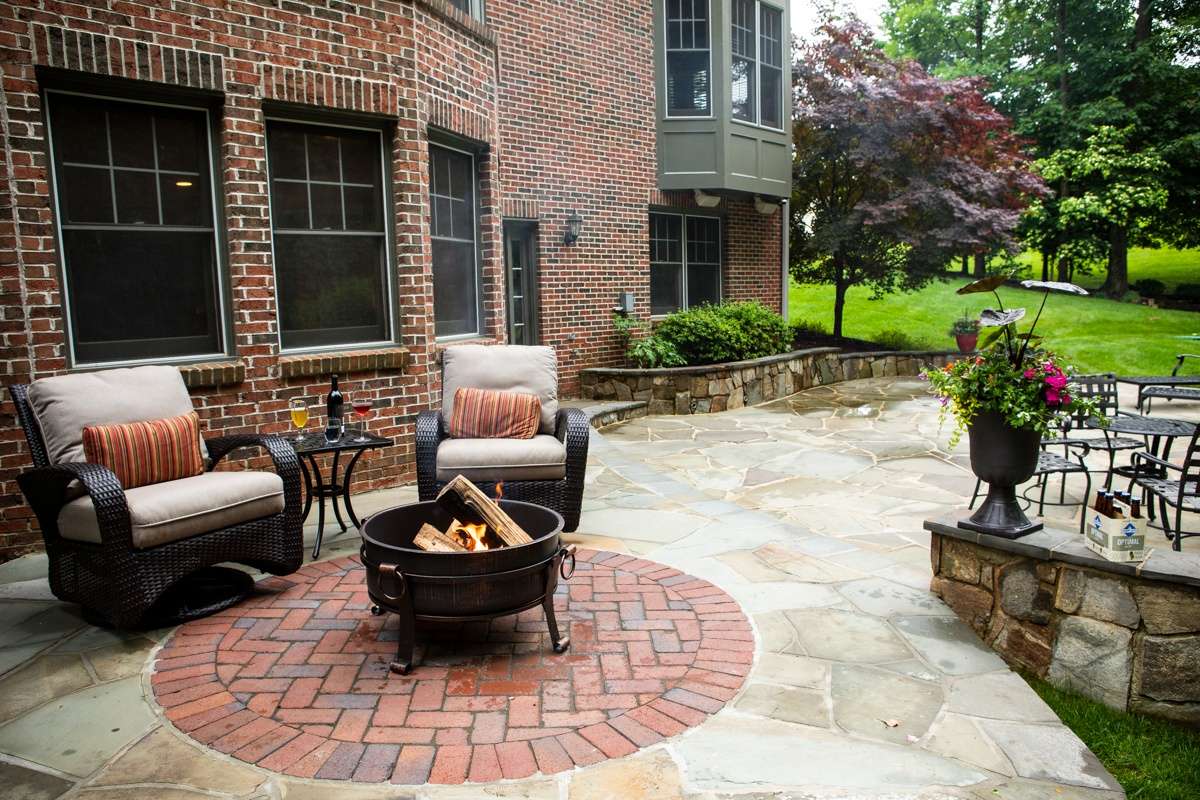
To further enhance the functionality and allure of your patio, explore the addition of outdoor furniture, planters, and decorative elements that harmonize with your design aesthetic. Whether it’s a cozy seating area with weather-resistant cushions, vibrant planters bursting with greenery, or a stylish fire pit for cool evenings, these elements infuse personality and warmth into your outdoor retreat.
For a touch of greenery and natural beauty, consider incorporating landscaping features around the patio, such as flower beds, shrubs, or ornamental trees. These elements not only soften the hardscape of the patio but also create a harmonious transition between the built environment and the surrounding landscape.
Finally, take a moment to step back and admire your handiwork. Revel in the transformation of a once bare outdoor space into a captivating and inviting patio that reflects your creativity and dedication. Whether it’s a serene sanctuary for solitary moments or a vibrant hub for social gatherings, your brick paver patio stands as a testament to your craftsmanship and vision.
With the finishing touches in place, your brick paver patio is ready to be enjoyed, providing a tranquil retreat and a focal point for cherished moments with family and friends.
Conclusion
Congratulations on completing the journey of crafting a captivating brick paver patio! From the initial vision and meticulous planning to the hands-on construction and thoughtful finishing touches, you have transformed a simple outdoor space into a stunning and functional extension of your home.
As you bask in the satisfaction of your completed project, take a moment to appreciate the artistry and dedication that went into every step of the process. Your attention to detail, precision in laying the pavers, and thoughtful selection of finishing elements have culminated in a space that exudes charm and warmth.
Not only does your new patio enhance the visual appeal of your outdoor environment, but it also adds value to your home and provides a versatile setting for relaxation, entertainment, and connection with nature. It stands as a testament to your creativity and craftsmanship, inviting you and your loved ones to create lasting memories in its inviting embrace.
As you enjoy the fruits of your labor, remember that proper maintenance and care will ensure the longevity and enduring beauty of your brick paver patio. Regularly sweep and clean the surface, inspect and refill the jointing sand as needed, and address any issues promptly to preserve the integrity of the installation.
With your newfound expertise in creating a brick paver patio, you may find yourself inspired to embark on additional outdoor projects, further enhancing your home and outdoor living experience. Whether it’s adding complementary features, expanding the patio space, or venturing into other landscaping endeavors, your skills and creativity are poised to continue shaping your outdoor environment.
Embrace the joy and tranquility that your new patio brings, and relish in the pride of a project well executed. Your brick paver patio stands as a testament to your ingenuity and dedication, a testament to the transformative power of craftsmanship and the enduring allure of outdoor living.
May your patio be a source of joy, relaxation, and cherished moments for years to come, serving as a reminder of the beauty that unfolds when nature and human artistry intertwine.
Frequently Asked Questions about How To Make A Patio With Brick Pavers
Was this page helpful?
At Storables.com, we guarantee accurate and reliable information. Our content, validated by Expert Board Contributors, is crafted following stringent Editorial Policies. We're committed to providing you with well-researched, expert-backed insights for all your informational needs.

0 thoughts on “How To Make A Patio With Brick Pavers”