Home>diy>Architecture & Design>How To Make A House Design With Sketchup
Architecture & Design
How To Make A House Design With Sketchup
Modified: October 21, 2024
Learn how to create stunning house designs with Sketchup. Get expert tips, tutorials, and inspiration for your architecture design projects.
(Many of the links in this article redirect to a specific reviewed product. Your purchase of these products through affiliate links helps to generate commission for Storables.com, at no extra cost. Learn more)
Introduction
Welcome to the world of architectural design! Creating a house design from scratch can be an exciting and rewarding endeavor. Whether you’re a professional architect or a homeowner looking to design your dream home, having the right tools and knowledge can make all the difference.
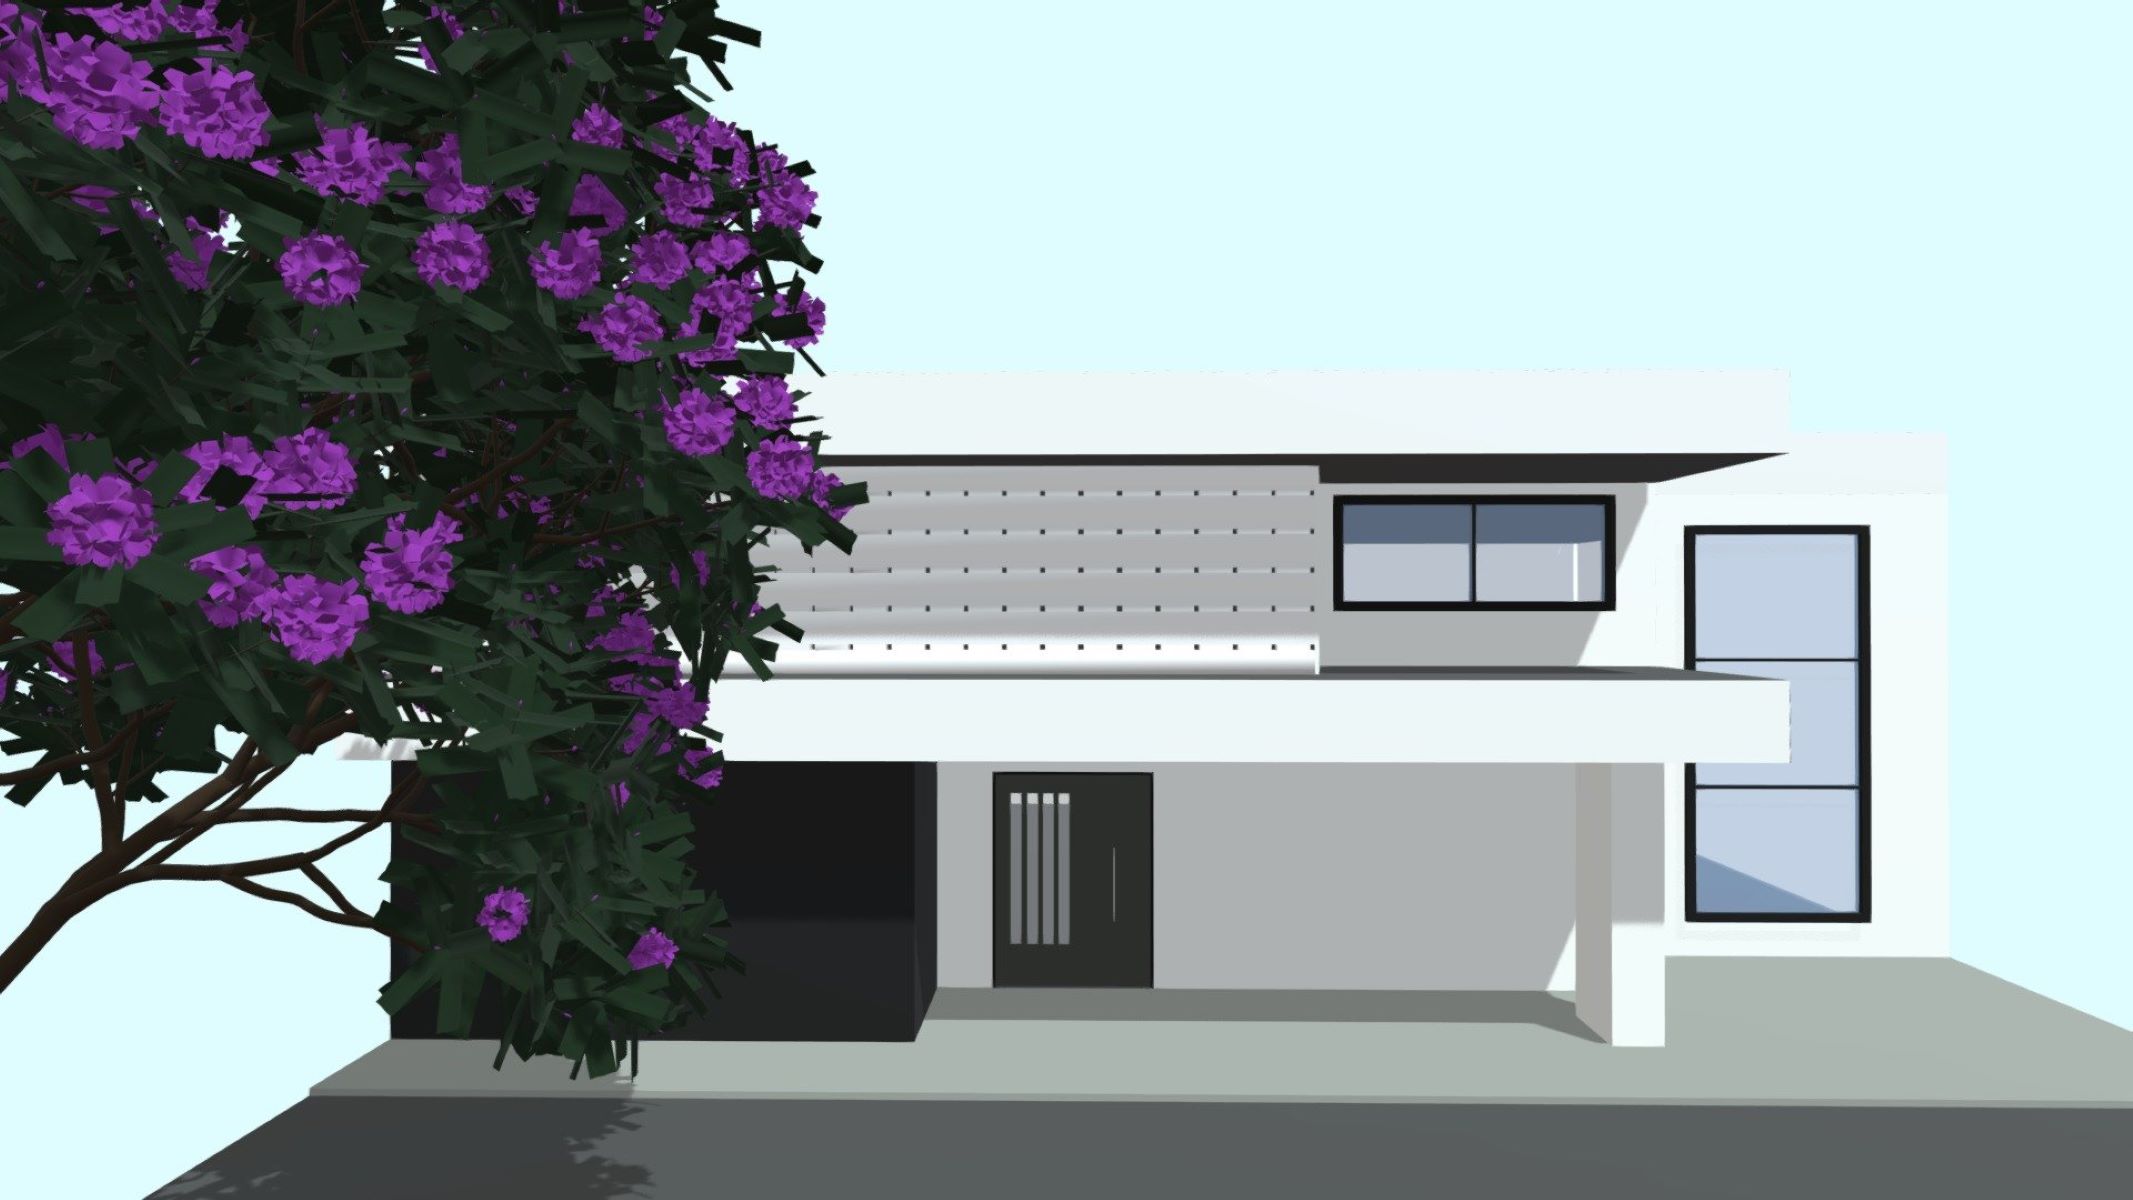
In this article, we will explore how to make a house design using SketchUp, a powerful and user-friendly 3D modeling software. SketchUp allows you to bring your creative vision to life, enabling you to design and visualize every aspect of your house, from its layout and structure to its interior and exterior elements.

SketchUp provides a wide range of features and tools that make the process of house design more efficient and intuitive. Whether you’re a beginner or an experienced designer, SketchUp offers a flexible and intuitive platform to unleash your creativity.
In this article, we will guide you through the process of creating a house design using SketchUp. We will cover the basics of using the software, understanding the fundamentals of house design, and taking you step by step through the process of creating a detailed and visually stunning house design.
By the end of this article, you will be equipped with the skills and knowledge to confidently create your own house design using SketchUp. So, let’s get started!
Key Takeaways:
- SketchUp empowers users to create comprehensive house designs by providing intuitive tools for planning, visualizing, and customizing every aspect of the design, from the foundation and walls to interior elements and landscaping.
- The house design process, when guided by fundamental architectural principles and supported by SketchUp’s features, allows for the seamless integration of functionality, aesthetics, sustainability, and personalization, resulting in a well-balanced and unique living space.
Read more: How To Use Sketchup To Design A Tiny House
Getting Started with SketchUp
Before diving into house design, it’s important to familiarize yourself with the SketchUp interface and basic navigation controls. Here are a few steps to help you get started:
- Download and install SketchUp: Visit the official SketchUp website and download the appropriate version of the software for your operating system. Follow the installation instructions to set up SketchUp on your computer.
- Explore the interface: Once SketchUp is installed, take some time to explore the different components of the interface. The main window consists of the drawing area, toolbars, and various panels. Familiarize yourself with the different tools and options available.
- Understand the navigation controls: SketchUp offers several navigation controls to help you navigate the 3D space. Use the Orbit tool to rotate the camera view, the Pan tool to move the view around, and the Zoom tool to zoom in and out of the model. These controls are essential for manipulating your house design.
- Learn the basic drawing tools: SketchUp provides a variety of drawing tools to create shapes and geometries. The Line tool allows you to draw straight lines, the Rectangle tool creates rectangles and squares, and the Circle tool lets you draw circles. Experiment with these tools to get a feel for creating basic shapes.
- Practice with the Push/Pull tool: One of the most powerful tools in SketchUp is the Push/Pull tool. This tool allows you to extrude 2D shapes into 3D forms. Simply select a face and use the tool to push or pull it in or out. Practice using the Push/Pull tool to create simple 3D objects.
These are just a few of the basic steps to help you get started with SketchUp. As you become more familiar with the software, you can explore the more advanced features and tools that SketchUp has to offer.
Now that you have a basic understanding of SketchUp, let’s move on to understanding the fundamentals of house design.
Understanding the Basics of House Design
House design is more than just creating a structure—it’s about creating a space that reflects your lifestyle, meets your needs, and evokes a sense of comfort and style. Before diving into the details of your house design, it’s important to understand the fundamental principles of architectural design:
- Functionality: The layout of your house should prioritize functionality. Consider how each room will be used, the flow between spaces, and the practicality of the design. A well-designed house should provide comfort and convenience for its inhabitants.
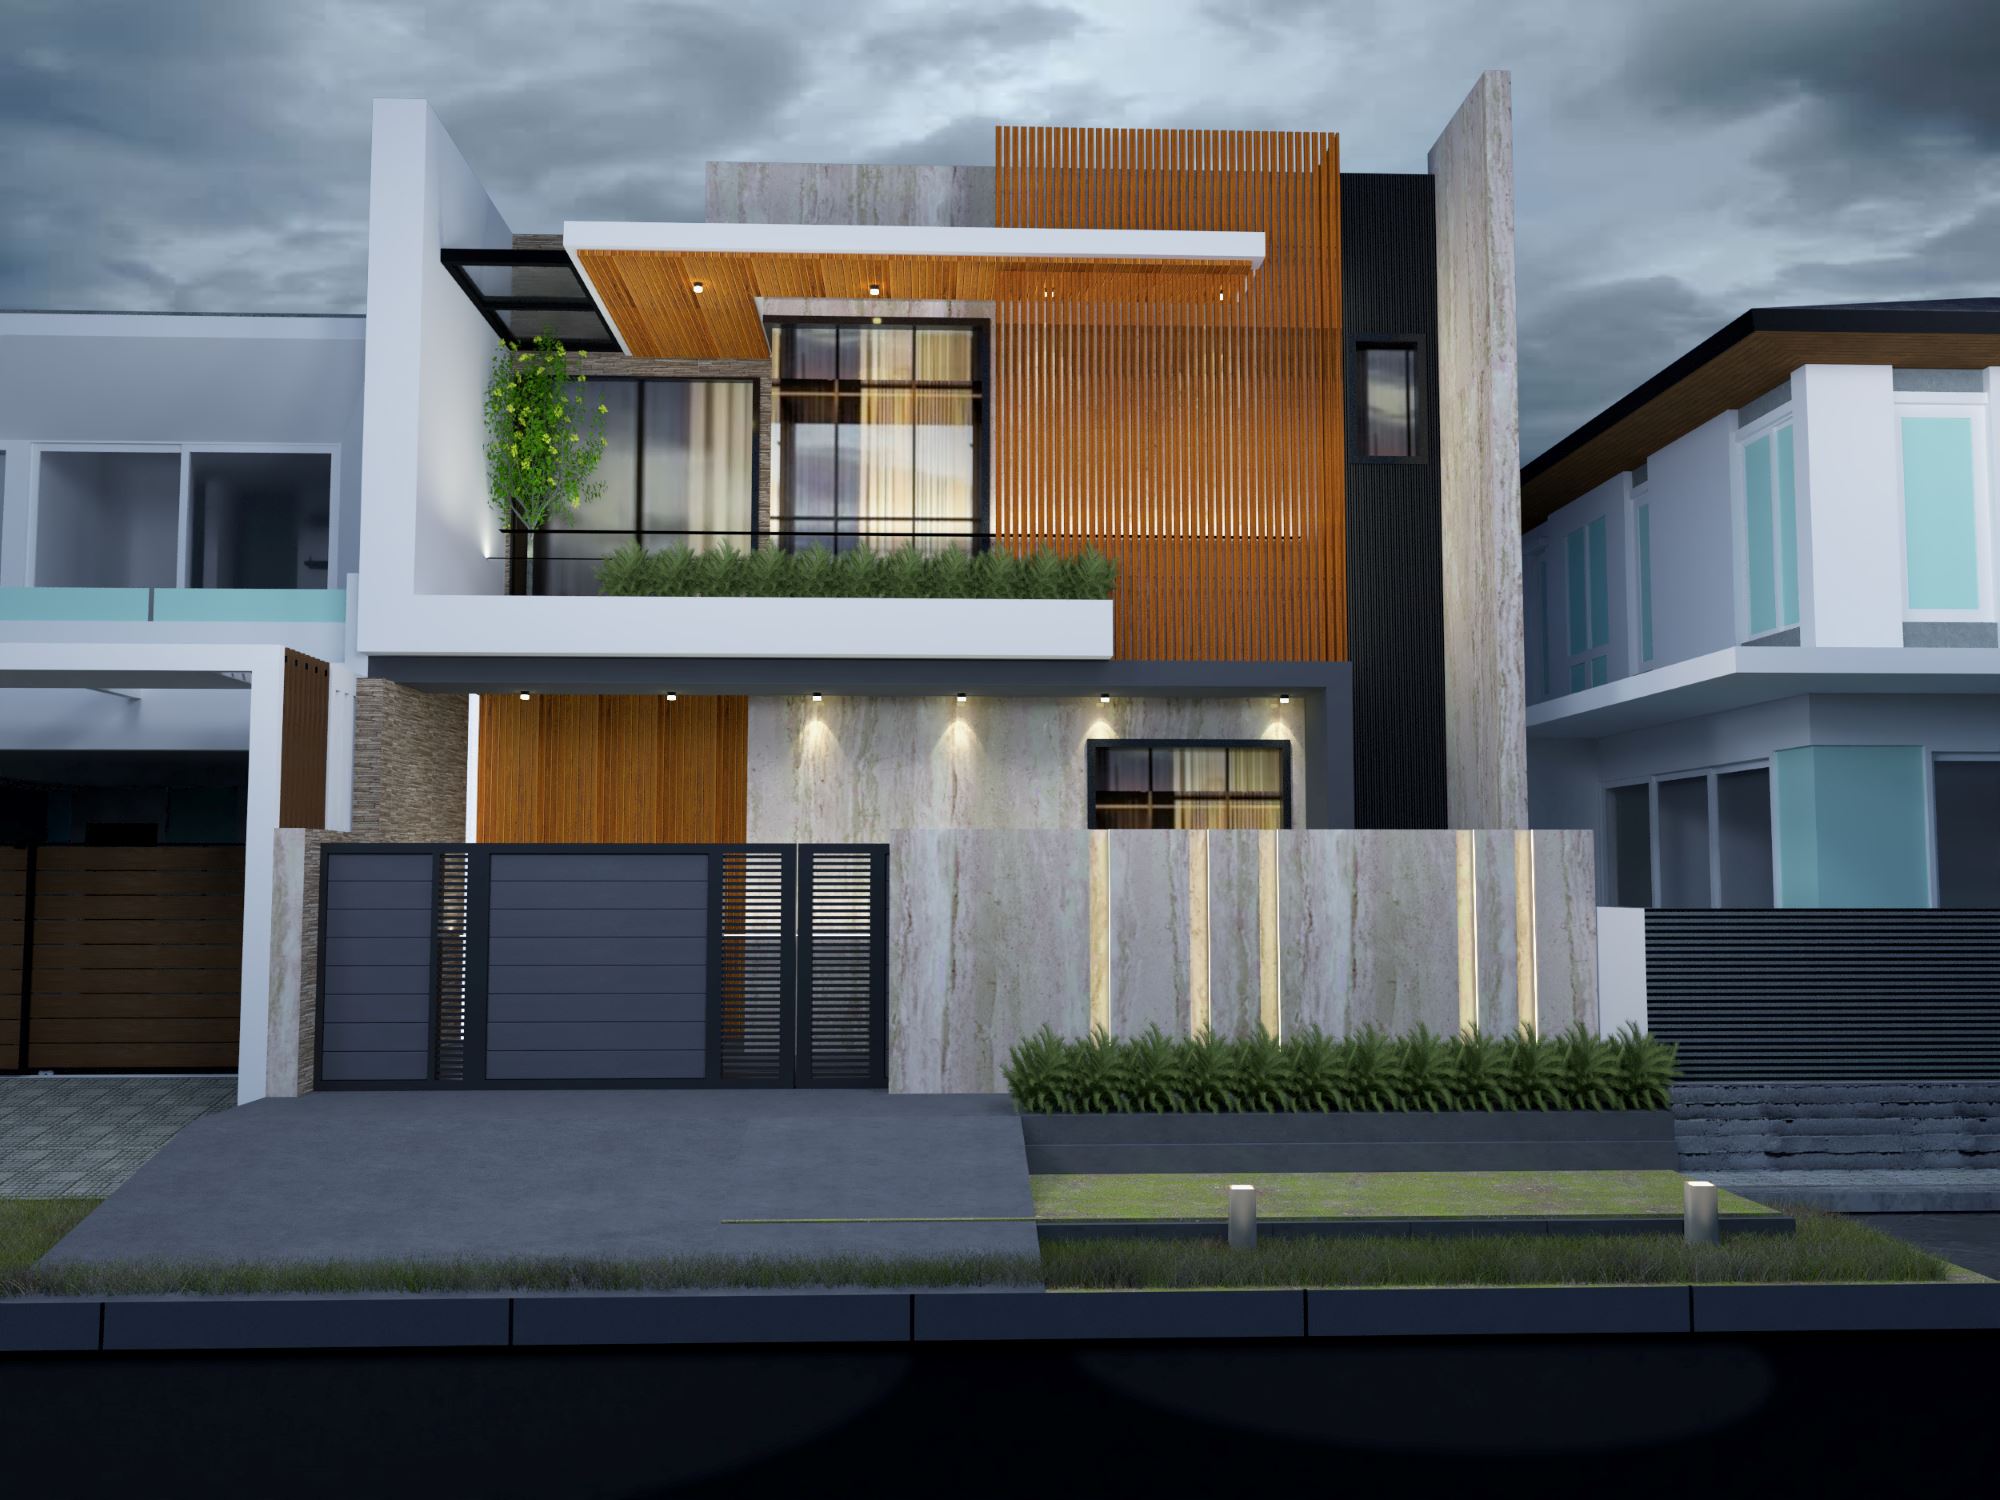
- Aesthetics: Aesthetics play a crucial role in house design. Think about the overall style and visual appeal you want to achieve. Consider architectural styles, materials, color schemes, and finishes that will enhance the beauty of your home.
- Sustainability: With increasing environmental concerns, sustainable design is gaining popularity. Incorporating energy-efficient systems, using eco-friendly materials, and optimizing natural light and ventilation are all important aspects of sustainable house design.
- Space planning: Efficient space planning is crucial for a well-designed house. Consider the size and proportion of each room, the functionality of furniture placement, and the flow between spaces. Pay attention to the balance between public and private areas of the house.
- Accessibility: A house should be accessible to people of all ages and abilities. Consider including features such as wide doorways, ramps, grab bars, and other universal design elements to ensure that your home is accessible and accommodating for everyone.
As you dive deeper into the world of house design, it’s essential to remember that every design decision should be guided by these fundamental principles. Creating a harmonious balance between functionality, aesthetics, sustainability, space planning, and accessibility will result in a well-designed house that encompasses both form and function.
Now that you have a solid understanding of the basics of house design, let’s move on to planning your house design using SketchUp.
Planning Your House Design
Planning is a crucial step in the house design process. Before you start creating your design in SketchUp, take the time to plan and visualize your ideas. Here are some key steps to help you plan your house design:
- Define your goals and requirements: Start by establishing your goals for the house design. Consider factors such as the number of bedrooms, bathrooms, and living spaces you need. Think about your lifestyle, future needs, and any specific requirements or preferences you have.
- Create a rough sketch: Begin by sketching a rough layout of the house. This will give you a basic idea of the overall shape and structure. You can use pencil and paper or digital tools to create your sketch.
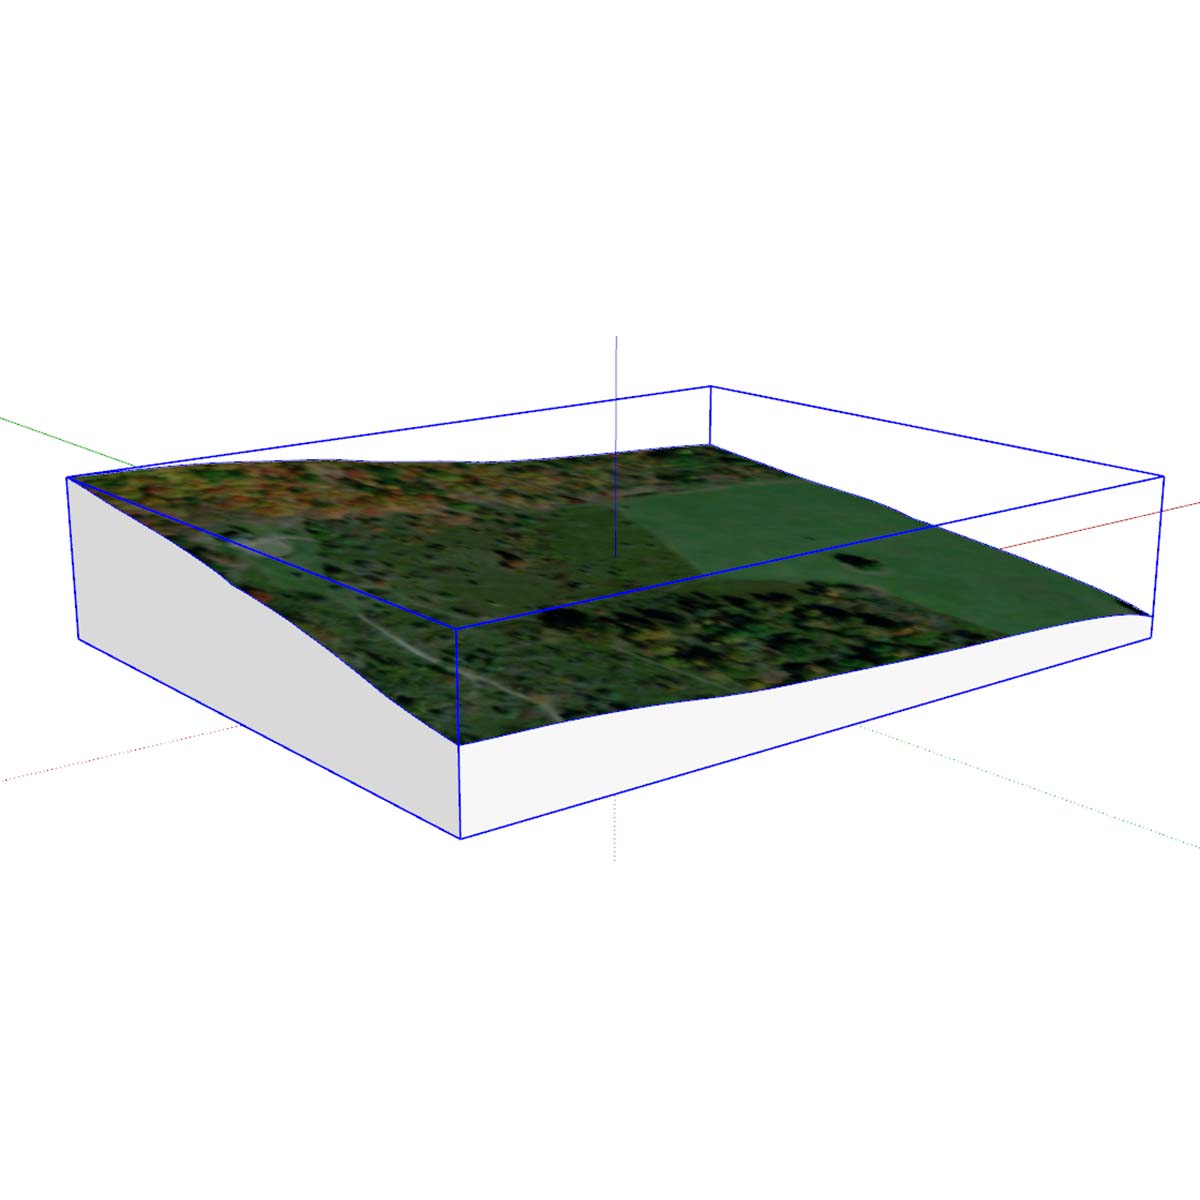
- Consider the site and surroundings: Assess the site where your house will be constructed. Take into account factors such as the topography, orientation, views, and existing vegetation. These elements will influence the placement and orientation of your house on the site.
- Design the flow and functionality: Think about how you want your house to flow and the functionality of each space. Consider the relationship between spaces and how they will be used. Plan for private areas like bedrooms and bathrooms, as well as social spaces like the living room, kitchen, and outdoor areas.
- Research architectural styles: Explore different architectural styles to find inspiration for your house design. Consider elements such as roof styles, window shapes, and exterior materials that align with your aesthetic preferences.
- Take inspiration from existing designs: Look for existing house designs that resonate with your vision. Browse through magazines, websites, and architectural books to gather ideas and inspiration. Create a mood board or collage of images that capture the style and features you want to incorporate into your design.
By investing time and effort into the planning stage, you can ensure that your house design meets your needs and aspirations. Planning also helps you save time and avoid costly mistakes during the construction phase.
Once you have a clear plan in place, you’re ready to bring your house design to life in SketchUp. In the next section, we’ll guide you through the process of creating the foundation and walls of your house.
Creating the Foundation and Walls
Now that you have a solid plan for your house design, it’s time to start building the foundation and walls in SketchUp. The foundation provides a stable base for your house, while the walls define the shape and structure. Here are the steps to create the foundation and walls:
- Set the dimensions: Start by setting the overall dimensions of your house. Use the Rectangle tool to draw a shape that represents the footprint of your house. Enter the precise dimensions in the measurements toolbar.
- Extrude the foundation: Once you have the shape of your house, use the Push/Pull tool to extrude the foundation to the desired height. Consider the local building codes and the type of foundation you want to use, whether it’s a slab, crawl space, or basement.
- Add interior walls: Use the Line tool or the Rectangle tool to create the interior walls of your house. Position them according to your floor plan, taking into account factors like room sizes and flow. Use the Push/Pull tool to extrude the walls to the desired height.
- Create openings for doors and windows: Use the Rectangle or Circle tool to create openings for doors and windows within the walls. Position them accurately according to your floor plan. Consider the thickness of the walls and the standard sizes of doors and windows.
- Assign materials: Give your foundation and walls realistic textures and materials. With the Paint Bucket tool, choose appropriate materials for different elements. Select materials for the floor, walls, and any exterior finishes you plan to use.
- Group and organize: Group different components together to keep your model organized. Use the Group tool to create groups for the foundation, walls, doors, and windows. This will make it easier to navigate and manipulate your model later on.
By following these steps, you can create the foundation and walls of your house design in SketchUp. Take your time to ensure accuracy and attention to detail. Remember, the foundation and walls form the backbone of your house, so precision is key.
In the next section, we will explore how to add doors and windows to your house design, bringing it one step closer to completion.
Read more: How To Make A 2D Floor Plan In Sketchup
Adding Doors and Windows
Doors and windows are essential elements of any house design. They provide access, natural light, and ventilation, while also enhancing the overall aesthetic appeal. Here’s how to add doors and windows to your house design in SketchUp:
- Select the appropriate tool: SketchUp offers dedicated tools for creating doors and windows. For doors, use the Rectangle tool and create a rectangle to represent the door opening. For windows, use the Rectangle tool or the Circle tool to create the desired window shape.
- Position and size the openings: Place the door and window openings in the appropriate locations on your walls. Ensure that they align with your floor plan and meet your functional requirements. Adjust the sizes of the openings to match the standard dimensions of doors and windows or your custom specifications.
- Add details and dimensions: Use the Line tool to add any necessary details to the doors and windows, such as panels or grilles. You can also add dimensions to ensure accuracy in the placement and size of the openings.
- Assign materials: Apply appropriate materials to the doors and windows to differentiate them from the walls. Use the Paint Bucket tool to select materials for the frame, glass, and any other elements of the doors and windows.
- Ensure functionality: Consider the functionality of the doors and windows. Use SketchUp’s Component Options window to set attributes such as opening direction, swing, and operation for doors. For windows, you can adjust the position, rotation, and opening type.
- Group and organize: As you add doors and windows to your house design, group them together to keep your model organized. Use the Group tool to create groups for each door and window. This will make it easier to manage and manipulate them during the design process.
Adding doors and windows to your house design in SketchUp brings it one step closer to reality. It helps you visualize how the spaces will be accessed and allows for the integration of natural light and ventilation.
In the next section, we will delve into designing the roof of your house, which adds a defining element to the overall look and style of the design.
When designing a house with Sketchup, start by creating a basic floor plan and then use the push/pull tool to extrude walls and create 3D shapes. Use components for repetitive elements like windows and doors to save time and maintain consistency.
Designing the Roof
The roof is a major architectural feature that defines the style and character of a house design. It provides protection from the elements and plays a crucial role in shaping the overall aesthetic appeal. Here’s how to design the roof of your house using SketchUp:
- Choose the roof style: Consider different roof styles that align with your house design and personal preferences. Options include gable, hip, shed, mansard, and many more. Research various roof styles and choose the one that complements the overall design concept.
- Create the roof outline: Use the Line or Rectangle tool to draw the basic outline of the roof on top of your house walls. Ensure that the roof is properly aligned with the walls and accurately represents the desired shape.
- Add roof pitches: Determine the pitch or slope of your roof. Use the Protractor tool to set the angle and create the desired pitch on each side of the roof. Ensure that the pitch is consistent and appropriate for your chosen roof style.
- Use the Push/Pull tool: Highlight the roof outline, then use the Push/Pull tool to extrude the roof upwards, creating its overall height. Consider the local building codes and regulations to ensure compliance with height restrictions.
- Implement roof features: SketchUp offers additional tools and options to incorporate various roof features. For example, you can use the Follow Me tool to create eaves, overhangs, or architectural details. Explore different options to add complexity and visual interest to your roof design.
- Assign roof materials: Use the Paint Bucket tool to apply appropriate materials to the roof. Choose textures that resemble the roofing material you plan to use, such as shingles, tiles, or metal. Experiment with different materials to find the one that suits your vision.
- Review and refine: Take a step back and review your roof design. Make any necessary adjustments to ensure that it aligns with the overall aesthetic and proportions of your house design. Refine the details until you are satisfied with the final result.
Designing the roof of your house is a crucial step in creating a complete and cohesive design. The roof style and details can greatly impact the overall appearance and character of your house.
In the next section, we will explore how to incorporate interior design elements into your house design using SketchUp.
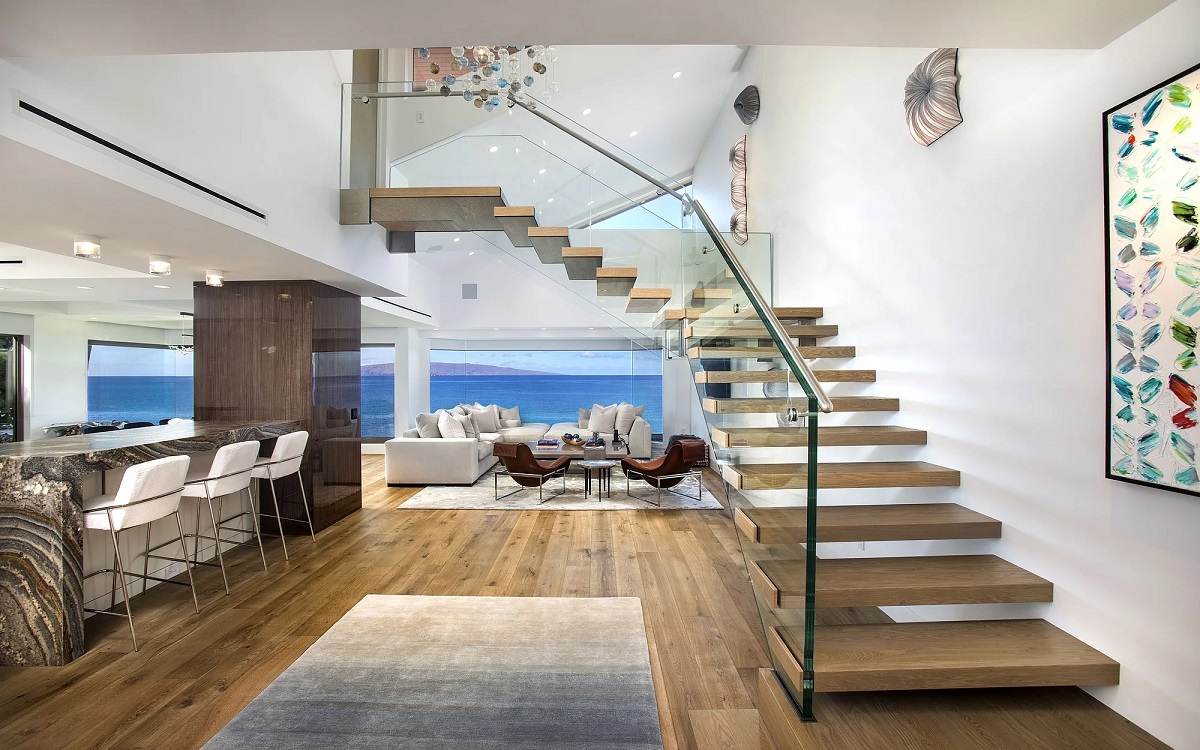
Incorporating Interior Design Elements
When designing a house, it’s important to consider not only the overall structure and exterior aesthetics but also the interior design elements that will make the space functional and visually appealing. Here are some key steps to incorporate interior design elements into your house design using SketchUp:
- Space planning: Begin by planning the layout and organization of each room. Consider the function of each space and how furniture will be arranged. Use the Line and Rectangle tools to create walls, and the Push/Pull tool to give them height. Experiment with different room sizes and configurations until you find the most efficient and pleasing layout.
- Add furniture: Use SketchUp’s 3D Warehouse or create your own furniture models to populate the rooms. Place and adjust furniture within each room to create a realistic representation of how the space will be utilized. Consider factors like ergonomics, traffic flow, and the overall aesthetic you wish to achieve.
- Utilize textures and materials: Apply appropriate textures and materials to the floors, walls, and furniture to make the interior design come alive. SketchUp offers a variety of preloaded materials, or you can customize them to suit your preferences. Use the Paint Bucket tool to apply materials, ensuring that they align with your desired style and color scheme.
- Focus on lighting: Lighting is a crucial aspect of interior design. Use SketchUp’s lighting feature to add artificial lighting fixtures like ceiling lights, lamps, or sconces. Consider the different types of lighting (ambient, task, accent) and experiment with positioning and intensity to achieve the desired atmosphere in each room.
- Accessorize and add details: Pay attention to the smaller details that contribute to the overall ambiance and character of the space. Incorporate decor items such as artwork, plants, rugs, and curtains. These accessories add personality and warmth to the interior design.
- Visualize with realistic rendering: Take advantage of SketchUp’s rendering plugins or software to create realistic visualizations of your interior design. This will help you evaluate the overall look and feel of the space and make any necessary adjustments before moving forward.
By incorporating these interior design elements into your house design, you can create a space that is functional, visually appealing, and reflective of your personal style. Take your time to experiment and refine the interior design until you are satisfied with the final result.
In the next section, we will explore how to enhance your house design with landscaping to create an inviting outdoor space.
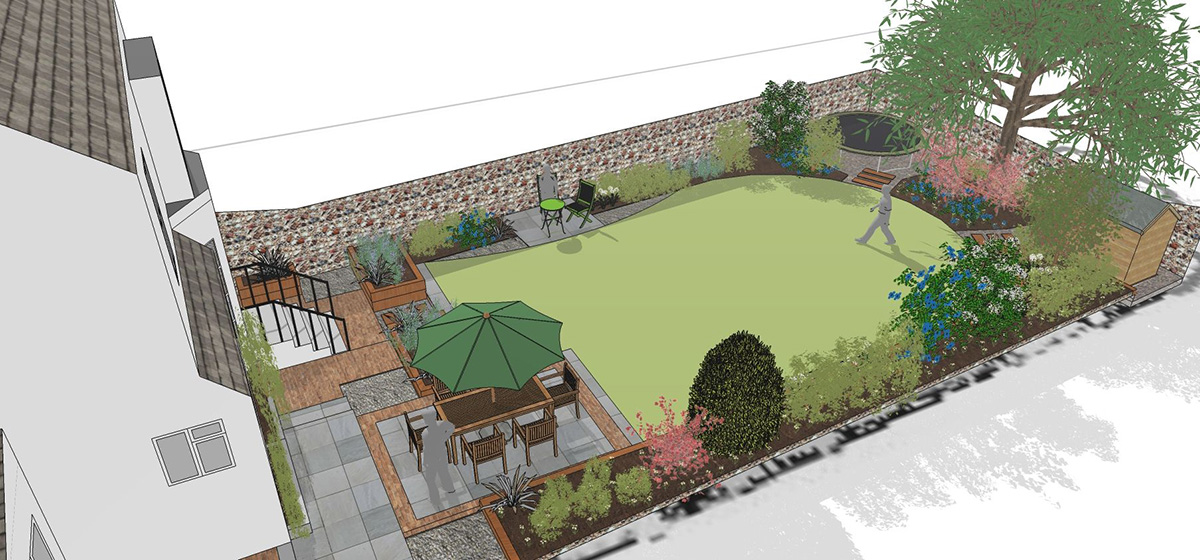
Enhancing Your House Design with Landscaping
Landscaping plays a vital role in enhancing the overall appeal and functionality of your house design. Well-designed outdoor spaces can create a seamless connection between your home and the natural surroundings. Here are some steps to incorporate landscaping into your house design using SketchUp:
- Analyze the site: Study the natural elements of your site, such as the terrain, existing vegetation, and sunlight exposure. Analyze any potential challenges or opportunities for landscaping, such as slopes, drainage, or views.
- Define outdoor areas: Plan and designate different outdoor areas, such as patios, decks, and pathways. Use SketchUp’s Line tool to draw the boundaries of these areas and the Push/Pull tool to extrude them to the desired height.
- Add plantings: SketchUp offers a wide range of 3D plant models that can be incorporated into your design. Use the 3D Warehouse or import your own plant models to populate your outdoor spaces. Position plants strategically to create privacy, provide shade, or enhance visual interest.
- Include hardscape elements: Incorporate hardscaping elements such as pathways, retaining walls, gazebos, and water features. Use SketchUp’s tools to create these features and apply appropriate textures and materials to ensure a realistic representation.
- Consider outdoor furniture and accessories: Create seating areas and outdoor living spaces by adding furniture like tables, chairs, and lounges. Use SketchUp’s components or import your own models to furnish these areas. Include accessories like outdoor lighting fixtures, fire pits, or grills to enhance functionality and ambiance.
- Balance function and aesthetics: Ensure that your landscaping design balances functionality and aesthetics. Consider factors like circulation, views, and the overall theme of your house design. Create a harmonious and cohesive outdoor space that complements the architecture and interior design.
- Use textures and materials: Apply appropriate textures and materials to the outdoor elements. Use SketchUp’s Paint Bucket tool to select materials like pavers, stones, or wood for pathways, patios, and other hardscape features. Choose materials that suit your desired style and blend well with the natural surroundings.
- Add lighting and irrigation: Include outdoor lighting fixtures to illuminate your landscaping at night and create a warm and inviting ambiance. Install an irrigation system to ensure proper water supply to plants and maintain a healthy landscape.
By incorporating landscaping into your house design, you can create an outdoor space that seamlessly transitions from the interior, enhancing the overall aesthetic appeal of your home. It provides an opportunity to connect with nature and enjoy the beauty of the outdoors.
In the next section, we will explore how to customize and fine-tune your house design, adding personalized touches to make it truly unique.
Customizing and Fine-tuning Your Design
Customizing and fine-tuning your house design allows you to add personalized touches and make it uniquely yours. Whether it’s adding architectural details, selecting finishes, or incorporating special features, these steps will help you bring your vision to life using SketchUp:
- Add architectural details: Consider architectural elements that can enhance the aesthetics of your house design. This can include decorative moldings, columns, arches, or unique roof features. Use SketchUp’s tools and plugins to create these details and ensure they are visually appealing and proportionate.
- Select finishes and materials: Choose finishes and materials that will be used throughout your house design. Consider flooring options, wall finishes, and cabinetry materials. Use SketchUp’s Paint Bucket tool to apply realistic textures and colors to the different elements of your design.
- Experiment with color schemes: Play around with various color schemes to find the one that best suits your style. Use SketchUp’s Material Editor or import custom textures and colors to create unique combinations. Visualize how different colors will look together and how they will impact the overall mood of your house.
- Add special features: Think about any special features you want to incorporate into your house design. This could include a fireplace, a home office, a media room, or a wine cellar. Use SketchUp’s modeling tools to create these features, ensuring they are properly scaled and integrated into the overall design.
- Consider sustainability: Incorporate sustainable design principles into your house design. Research energy-efficient systems, eco-friendly materials, and sustainable practices that can be implemented. SketchUp offers plugins and tools to help you analyze energy performance and make informed decisions.
- Seek feedback and make adjustments: Share your design with others and seek feedback to gain different perspectives. This will help you identify areas that may need improvement or refinement. Make necessary adjustments to ensure your design meets your expectations while taking into account practical considerations.
- Create visualizations and walkthroughs: Use SketchUp’s rendering capabilities to create realistic visualizations and walkthroughs of your design. This will allow you to experience your design as if you were walking through it, helping you fine-tune the details and make any necessary changes before construction begins.
By customizing and fine-tuning your house design, you can create a space that reflects your personality, preferences, and lifestyle. Pay attention to the details, experiment with different options, and refine your design until you are completely satisfied with the result.
In the final section, we will discuss the importance of finalizing your house design and preparing it for the next steps in the construction process.
Finalizing Your House Design
Finalizing your house design is the last crucial step before moving forward with the construction process. It involves reviewing and refining your design to ensure it meets your requirements, aligns with your vision, and is ready to be translated into reality. Here are the key steps to finalize your house design using SketchUp:
- Review the overall design: Take a step back and examine your house design as a whole. Assess the layout, proportions, and flow of the spaces to ensure they meet your functional and aesthetic goals. Make any necessary adjustments to optimize the design.
- Check for accuracy and compliance: Double-check all measurements, dimensions, and specifications to ensure accuracy. Review your design against local building codes and regulations to ensure compliance with the necessary standards. This will help prevent any issues or delays during the construction process.
- Collaborate with professionals: Consult with professionals, such as architects or engineers, to get their input and advice on your design. They can offer valuable insights, identify potential challenges, and provide guidance to further refine your design.
- Prepare construction documents: Use SketchUp to generate detailed construction documents or blueprints of your house design. These documents will serve as a guide for the construction team and help ensure that your design is implemented accurately and efficiently.
- Consider costing and budgeting: Evaluate the cost implications of your design and ensure it aligns with your budget. Review your materials, finishes, and special features to make any necessary adjustments if cost becomes a concern. It’s important to strike a balance between your ideal design and practical considerations.
- Get feedback and make final revisions: Share your final design with trusted advisors or professionals and solicit their feedback. Consider their input to make any final revisions or refinements to your design. This collaborative approach can help ensure that your design is both functional and aesthetically pleasing.
- Save and archive your design: Once you are satisfied with your final design, make sure to save and archive all the necessary files. This will not only serve as a reference for future modifications but also keep a record of your design process.
Finalizing your house design is a critical step in ensuring that your vision is successfully translated into a tangible reality. Take the time to evaluate and refine every aspect of your design in order to achieve a design that meets your needs and aspirations.
Congratulations! You have completed the journey of designing your dream house using SketchUp. Now it’s time to move forward with the construction process and see your vision come to life.
Conclusion
Designing a house is an exciting and creative process that allows you to shape your living space according to your unique vision and needs. With SketchUp, you have a powerful tool at your disposal to bring your house design to life. Throughout this article, we have explored the various steps involved in designing a house using SketchUp, from getting started with the software to finalizing your design.
We began by familiarizing ourselves with SketchUp’s interface and navigation controls, ensuring a solid foundation for our design journey. Understanding the basics of house design, including functionality, aesthetics, and sustainability, provided us with the necessary framework to create a well-designed and harmonious space.
Through careful planning, we were able to define our goals, sketch out our ideas, and analyze the site to make informed decisions. By incorporating the foundation, walls, doors, and windows, our house design started taking shape. We then moved on to the roof, which added a key architectural feature to the design, followed by the integration of interior design elements to create functional and visually appealing spaces.
Enhancing our house design with landscaping not only provided an inviting outdoor space but also connected our design with the natural surroundings. Customizing and fine-tuning the design allowed us to personalize our vision, while finalizing the design ensured accuracy, compliance, and readiness for the construction process.
By following these steps and utilizing SketchUp’s features and tools, we have created a comprehensive house design that reflects our aspirations and meets our needs. Designing a house is a dynamic and iterative process, and it’s important to remain open to feedback, collaborate with professionals, and make necessary revisions to ensure the best possible outcome.
Now that you have gained the knowledge and skills to design your own house using SketchUp, you can embark on your own design journey with confidence. Remember to let your creativity and imagination guide you, while also considering the practicalities and functionality of your design.
Designing a house is an opportunity to create a space that truly reflects your personality, lifestyle, and aspirations. Embrace the process, explore different possibilities, and enjoy the journey of turning your dream house into a reality.
Frequently Asked Questions about How To Make A House Design With Sketchup
Was this page helpful?
At Storables.com, we guarantee accurate and reliable information. Our content, validated by Expert Board Contributors, is crafted following stringent Editorial Policies. We're committed to providing you with well-researched, expert-backed insights for all your informational needs.


0 thoughts on “How To Make A House Design With Sketchup”