Home>diy>Building & Construction>How To Publish A Revit Model To BIM 360
Building & Construction
How To Publish A Revit Model To BIM 360
Modified: February 25, 2024
Learn how to seamlessly publish your Revit model to BIM 360 for efficient collaboration and project management in the building construction industry.
(Many of the links in this article redirect to a specific reviewed product. Your purchase of these products through affiliate links helps to generate commission for Storables.com, at no extra cost. Learn more)
Introduction
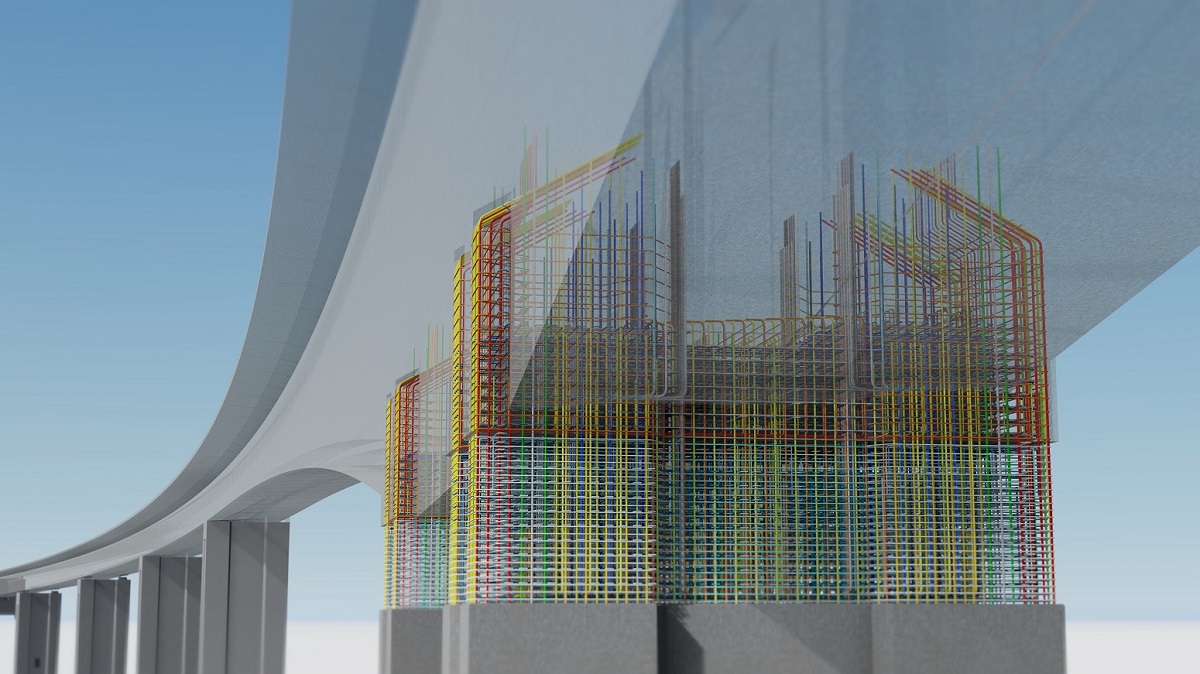
Welcome to the world of Building Information Modeling (BIM) and the powerful collaboration platform of BIM 360. BIM has transformed the construction industry, providing architects, engineers, and construction professionals with a more efficient and streamlined process for designing, constructing, and managing buildings. One of the key benefits of BIM is the ability to share and collaborate on project models in real-time, ensuring that all stakeholders have access to the most up-to-date information.
In this article, we will guide you through the process of publishing a Revit model to BIM 360, a popular cloud-based platform for BIM collaboration. Whether you are a seasoned BIM user or new to the world of BIM, this step-by-step guide will help you navigate through the process and optimize your collaboration experience.
Before we begin, it’s important to ensure that you have a BIM 360 account set up. If you don’t have an account yet, you can sign up for a free trial or contact your Autodesk representative to get started.
Once you have your BIM 360 account ready, we can proceed to the next steps, where we will prepare your Revit model and link it to the BIM 360 platform. Let’s get started!
Key Takeaways:
- Streamline your construction project collaboration by publishing your Revit model to BIM 360, ensuring real-time access to the most up-to-date information for all stakeholders.
- Leverage BIM 360’s collaborative features to enhance communication, track changes, and share your Revit model with project stakeholders, revolutionizing your construction project experience.
Read more: How To Consume A Revit Model In BIM 360
Step 1: Set up BIM 360 account
Before you can publish your Revit model to BIM 360, you need to have a BIM 360 account. Here’s how you can set it up:
- Go to the Autodesk BIM 360 website and click on the “Get Started” or “Sign Up” button.
- You will be prompted to sign in with your Autodesk account. If you don’t have one, you can create a new account by clicking on the “Create Account” button.
- Follow the instructions to provide the necessary information and complete the account creation process. Make sure to choose the appropriate subscription type based on your needs.
- Once your account is created, you will be redirected to the BIM 360 dashboard. Here, you can access various project management and collaboration features.
- Take some time to explore the dashboard and familiarize yourself with the different modules and tools available. This will help you make the most of your BIM 360 experience.
Now that you have set up your BIM 360 account, you are ready to move on to the next step: preparing your Revit model for publishing. We’ll cover this in the next section.
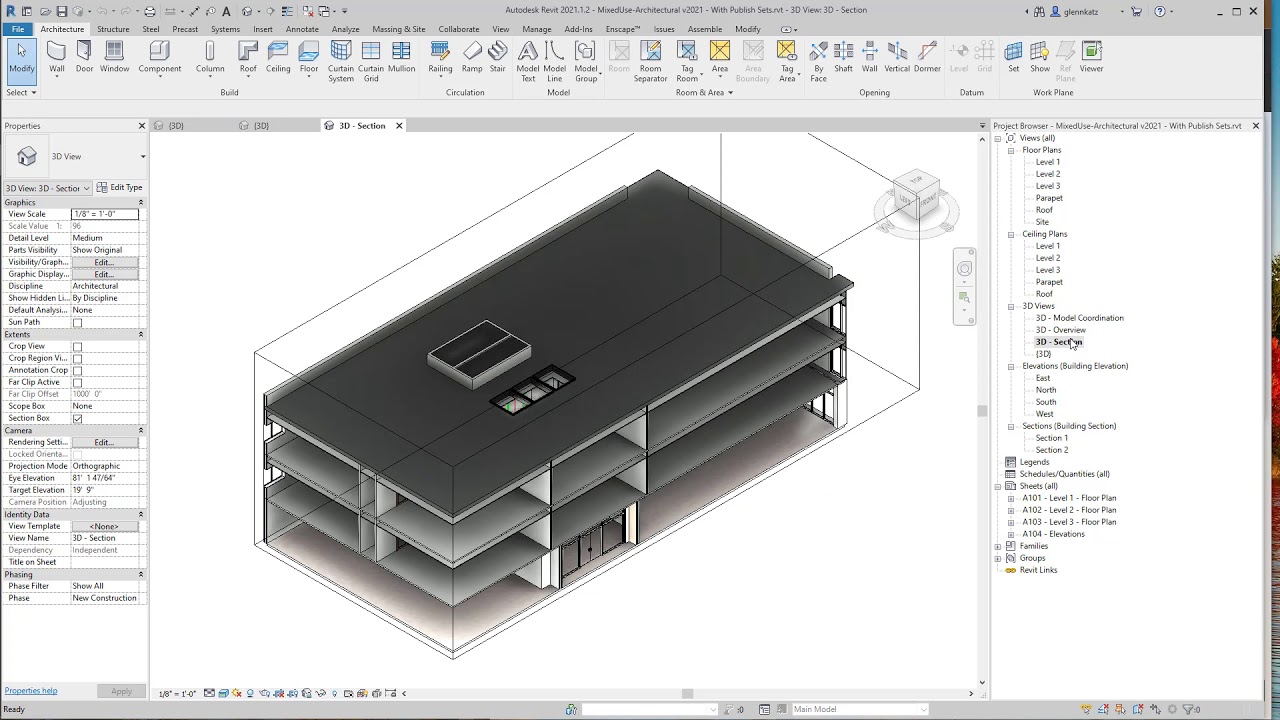
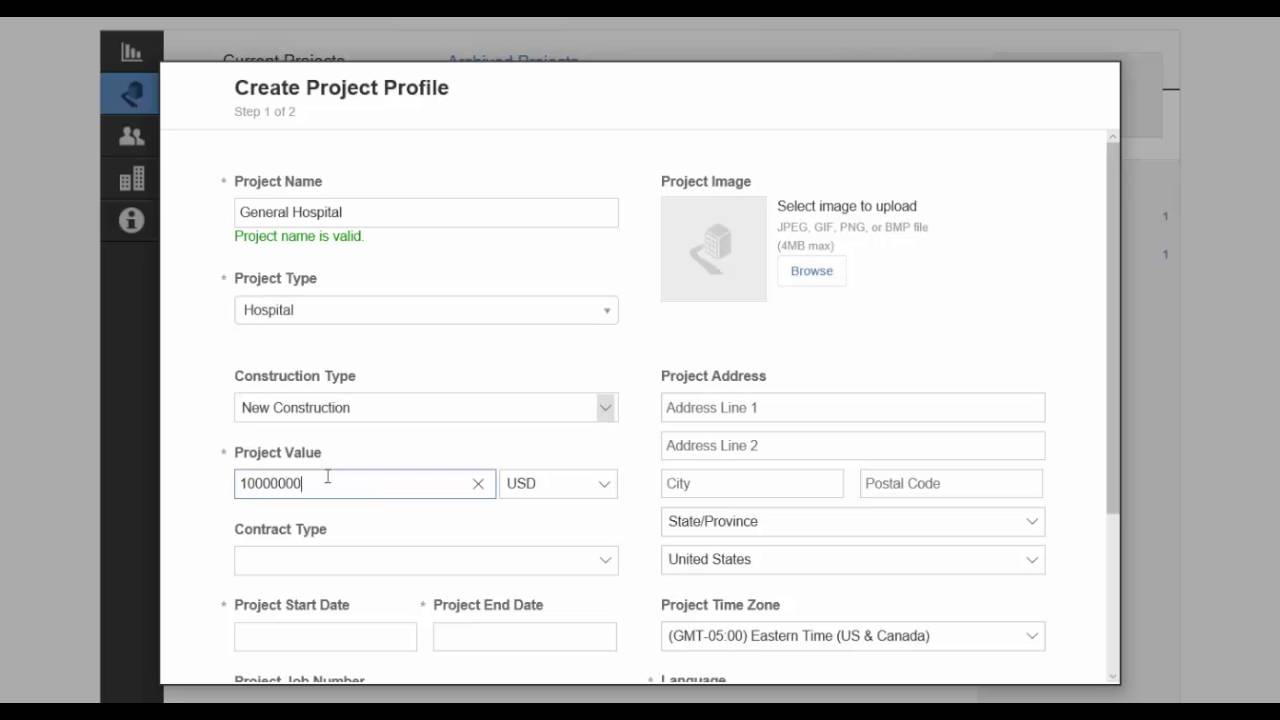
Step 2: Prepare your Revit model for publishing
Before you can publish your Revit model to BIM 360, it’s important to ensure that it is properly prepared. Here are some steps to follow:
- Review your model: Begin by reviewing your Revit model for any errors, inconsistencies, or missing information. Make sure that all elements are properly modeled and that there are no unresolved issues.
- Clean up and optimize: Remove any unnecessary elements, such as unused families or views, to reduce the file size and improve performance. Consider using the “Purge Unused” and “Audit” tools in Revit to clean up your model.
- Organize your model: Arrange your model in a logical and organized manner. Use appropriate levels, views, and sheets to ensure that the information is well-structured and easy to navigate.
- Set up view templates: Create and apply view templates to control the visibility and appearance of different views in your model. This will help ensure consistency and enhance the overall presentation of your model.
- Create 3D views: Set up 3D views in your model to showcase the design from different perspectives. Consider creating views that highlight specific areas or features of the building to provide more context to collaborators.
- Check for clash detection: Run clash detection tests to identify potential clashes between different building components. Resolve any clashes or conflicts to minimize errors during construction.
- Ensure proper naming conventions: Use consistent and descriptive naming conventions for elements and families in your model. This will make it easier for others to understand and navigate the model.
By following these steps and properly preparing your Revit model, you will ensure a smoother publishing process and enhance collaboration on the BIM 360 platform. Once your model is ready, you can move on to the next step: linking your Revit model to BIM 360.
Step 3: Link your Revit model to BIM 360
Now that your Revit model is prepared, it’s time to link it to the BIM 360 platform for seamless collaboration. Follow these steps to link your Revit model to BIM 360:
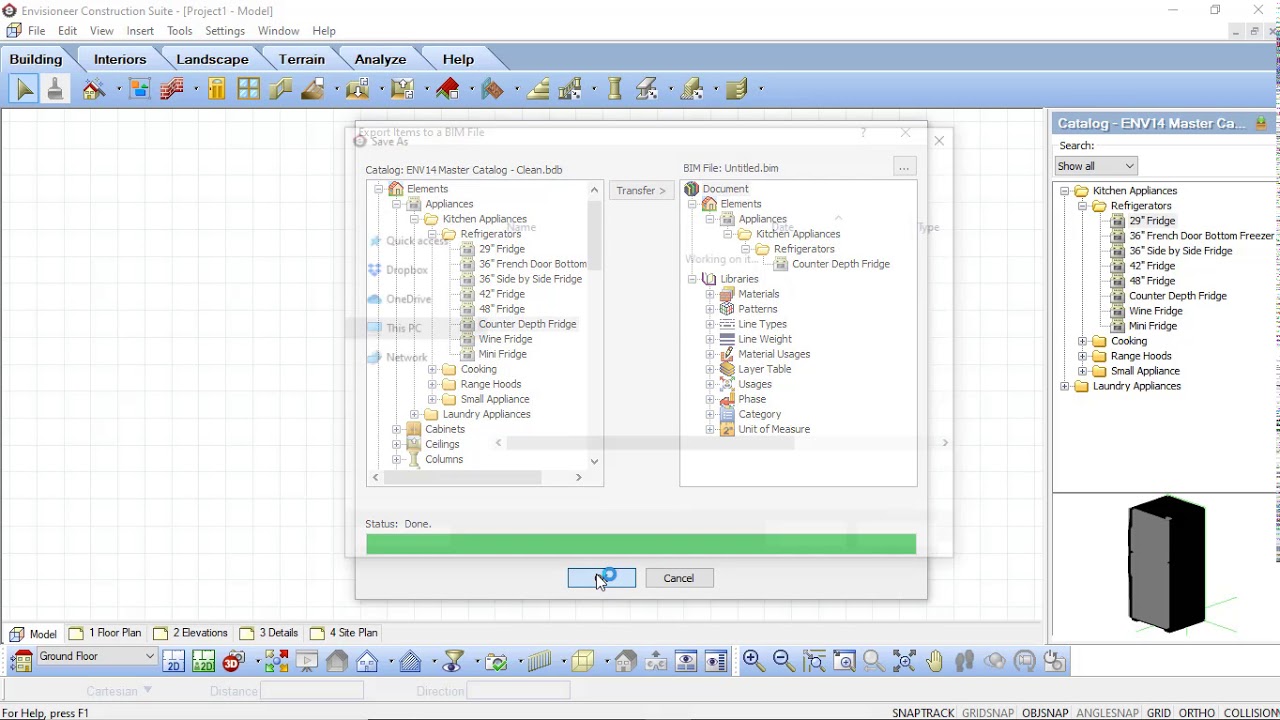
- Launch Revit: Open Revit and ensure that you have the latest version installed. It’s recommended to update to the latest version to take advantage of all the BIM 360 integration features.
- Open your Revit model: Open the Revit model that you want to link to BIM 360. Make sure that all the necessary updates and changes have been saved before proceeding.
- Enable the BIM 360 add-in: In Revit, go to the “Add-Ins” tab and click on the “BIM 360” button. This will enable the BIM 360 add-in and allow you to access the BIM 360 functionality directly within Revit.
- Sign in to your BIM 360 account: Once the BIM 360 add-in is enabled, you will be prompted to sign in to your BIM 360 account. Enter your credentials and sign in to proceed further.
- Select the BIM 360 project: After signing in, Revit will display a list of the BIM 360 projects associated with your account. Select the project that you want to link your Revit model to.
- Choose a workset: BIM 360 allows for collaborative work on a shared model. Choose a workset that you want to work on or create a new one. This will help in organizing the work and delegating responsibilities to team members.
- Sync with BIM 360: Once you have selected the project and workset, click on the “Sync with BIM 360” button. This will upload your Revit model to BIM 360 and create a live link between the model in Revit and the model on the BIM 360 platform.
By linking your Revit model to BIM 360, you and your team members can access and collaborate on the model in real-time. Any changes made to the model in Revit will be synced with the BIM 360 platform, ensuring everyone has the most up-to-date information.
In the next step, we will explore how to publish your Revit model to BIM 360, making it accessible to all project stakeholders.
When publishing a Revit model to BIM 360, ensure that all linked files are properly coordinated and up to date to avoid any issues with the model integration.
Step 4: Publish your Revit model to BIM 360
After linking your Revit model to BIM 360, the next step is to publish your model, making it accessible to all project stakeholders. Here’s how you can publish your Revit model to BIM 360:
- Open your linked Revit model: Open the linked Revit model that you want to publish to BIM 360. Ensure that all the necessary updates and changes have been saved.
- Go to the BIM 360 panel: In Revit, navigate to the BIM 360 panel, which is located in the Add-Ins tab. This panel contains various BIM 360 tools and functionalities.
- Select “Publish to BIM 360”: Within the BIM 360 panel, click on the “Publish to BIM 360” button. This will initiate the publishing process and prepare your model for upload to the BIM 360 platform.
- Choose the project and folder: Revit will prompt you to select the BIM 360 project and folder where you want to publish your model. Choose the appropriate project and select the desired folder for your model.
- Review and set publishing options: Before publishing, review the publishing options available. You can choose to include any linked models or sheets in the published model, set the visibility and access settings, and specify the permissions for project collaborators.
- Start publishing: Once you have reviewed and set the publishing options, click on the “Publish” button to start the publishing process. Revit will upload your model to the selected project and folder on the BIM 360 platform.
- Monitor the publishing progress: Revit will display the progress of the publishing process, showing you the status and the upload progress of your model. This may take some time depending on the size of your model and your internet connection speed.
- Confirm successful publishing: Once the publishing process is complete, Revit will display a confirmation message stating that your model has been successfully published to BIM 360. You can now access and collaborate on your model within the BIM 360 environment.
By following these steps, you can easily publish your Revit model to BIM 360, making it available to all project stakeholders. Your model will be accessible in the BIM 360 platform, allowing team members to view, review, and collaborate on the latest version of the model.
In the next step, we will explore how to collaborate and share your model on BIM 360, maximizing the benefits of the platform for your construction project.
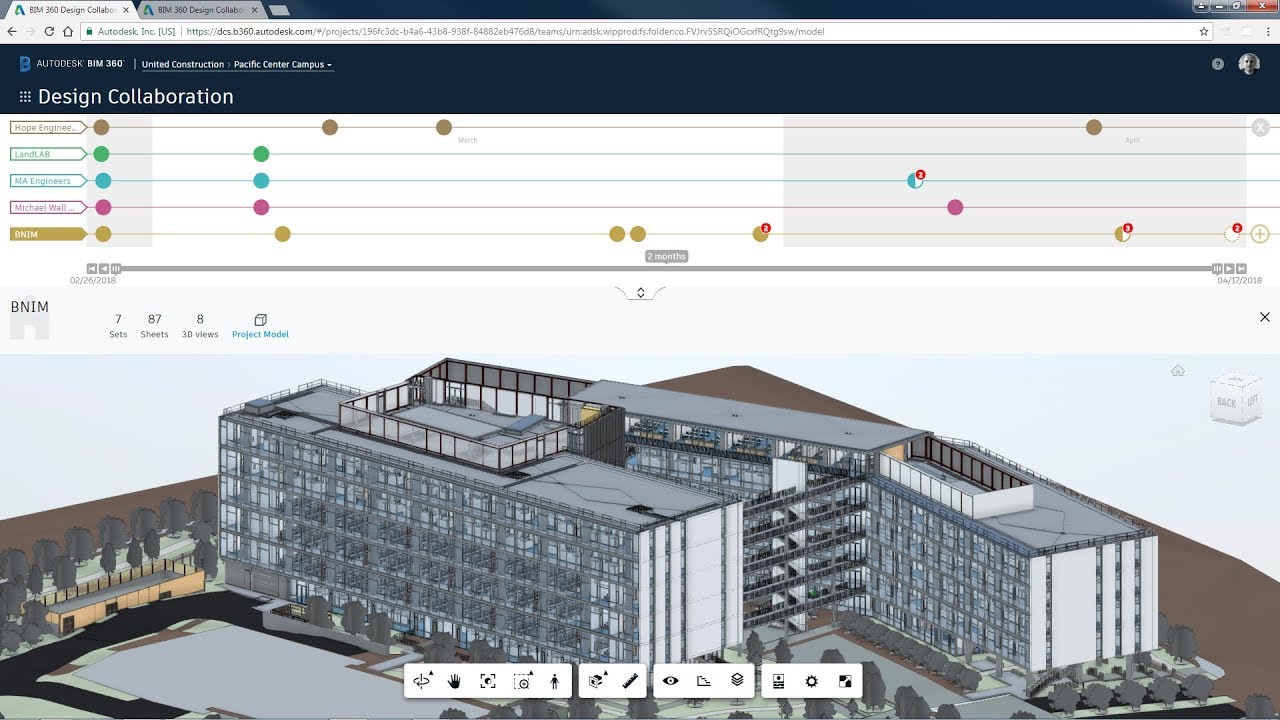
Step 5: Collaborate and share your model on BIM 360
Now that your Revit model has been published to BIM 360, it’s time to leverage the collaborative features of the platform and share your model with project stakeholders. Here’s how you can collaborate and share your model on BIM 360:
- Access the BIM 360 project: Open your web browser and navigate to the BIM 360 website. Sign in with your BIM 360 account and select the project where you have published your Revit model.
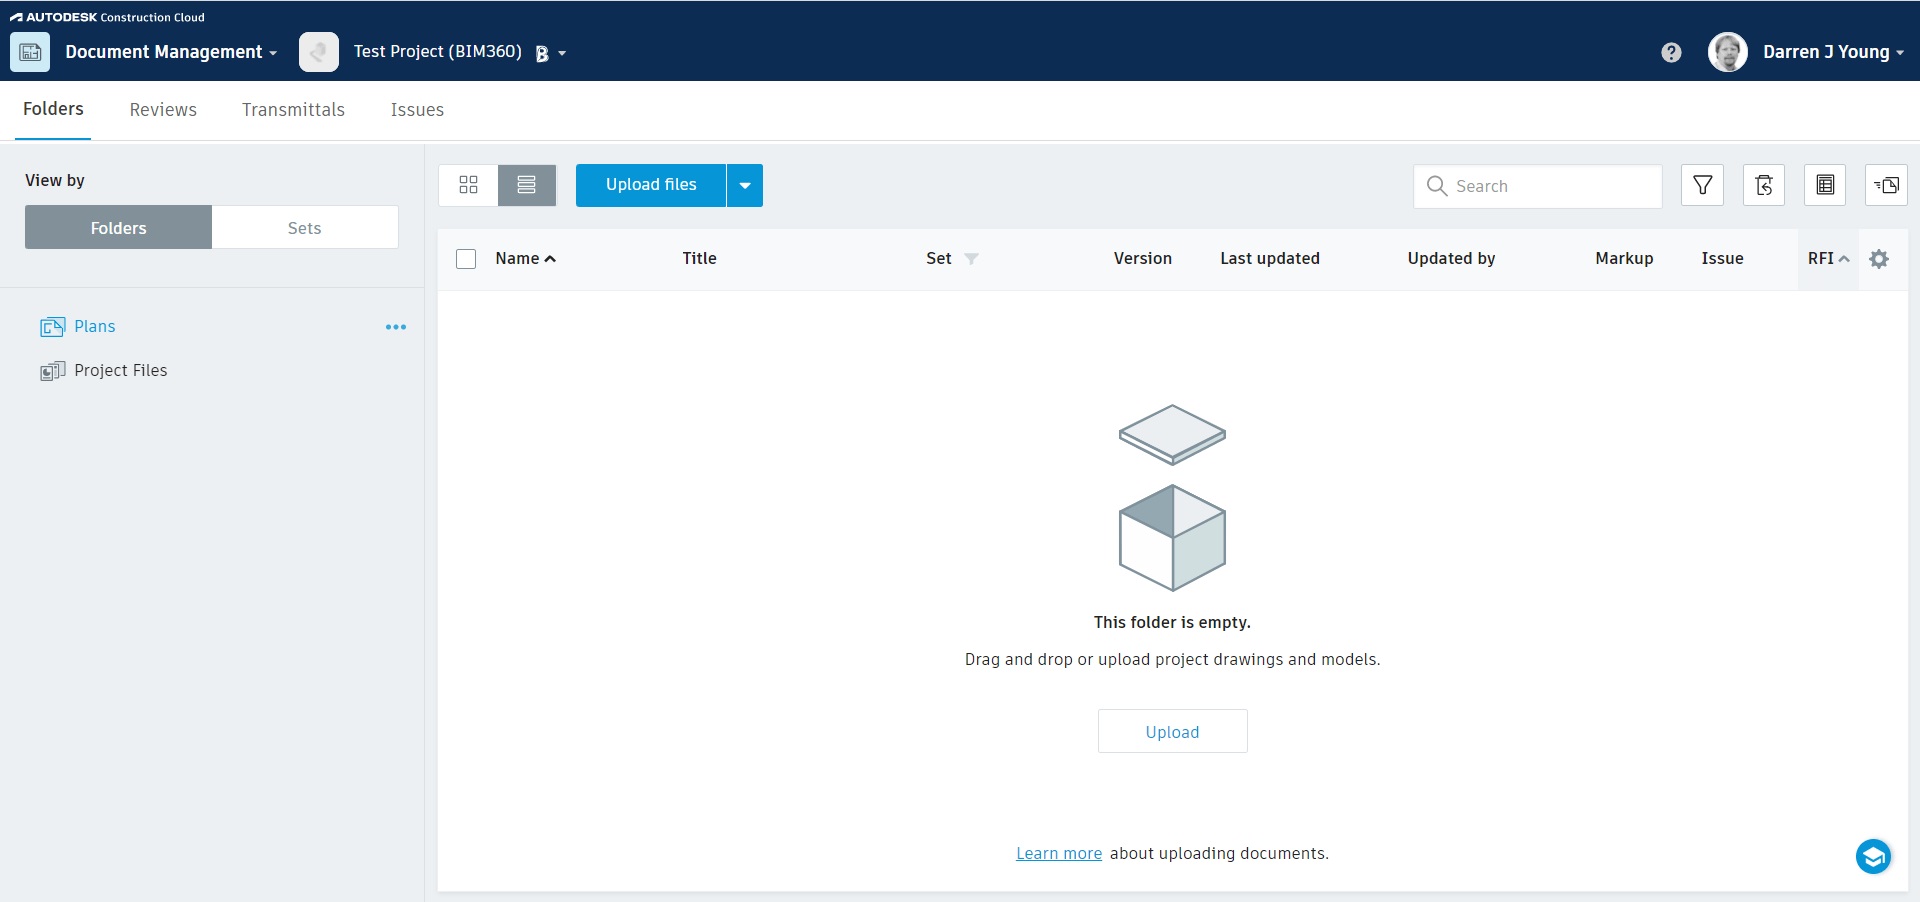
- Navigate to the Document Management module: In the BIM 360 project, go to the Document Management module. This is where all the project files, including your Revit model, are stored and organized.
- Find your Revit model: Locate your published Revit model in the Document Management module. You can use the search feature or navigate through folders to find it.
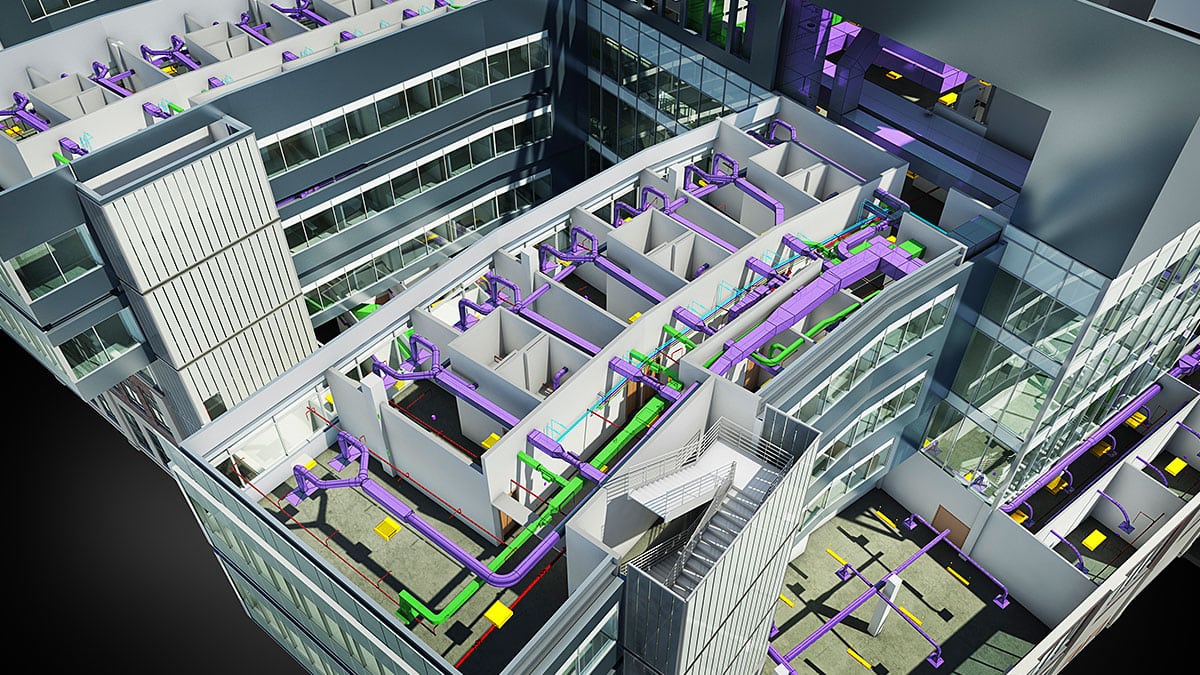
- View and interact with the model: Click on your Revit model to open it in the BIM 360 viewer. Here, you can view the model in 2D or 3D, zoom, pan, rotate, and interact with different elements of the model.
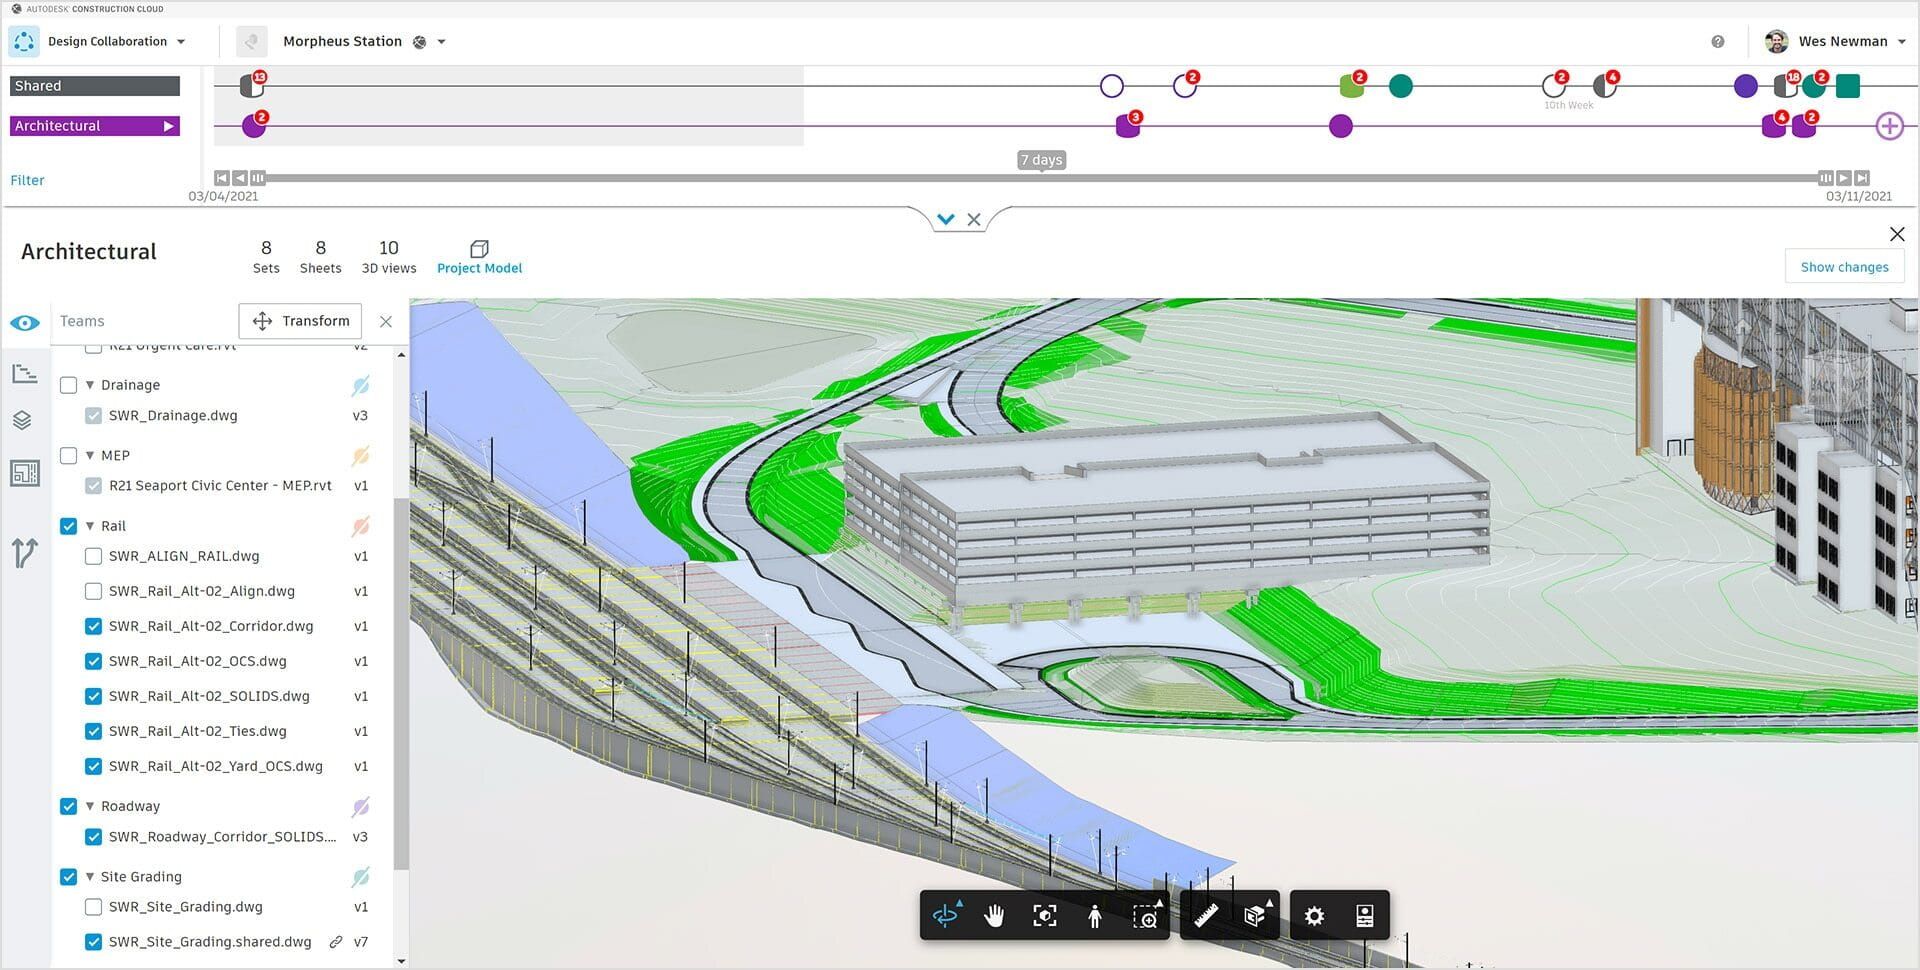
- Collaborate with team members: BIM 360 allows for seamless collaboration with project stakeholders. You can invite team members to access and review the model, assign tasks, and track project progress. Use the “People” tab in BIM 360 to manage project members and their access permissions.
- Track changes and revisions: BIM 360 keeps track of all changes made to the Revit model. You can view the revision history, compare different versions, and track who made the changes. This ensures transparency and accountability in the collaboration process.
- Create markups and annotations: BIM 360 provides tools for creating markups and annotations on the model. You and your team members can add comments, highlight issues, and provide feedback directly on the model. This streamlines the communication and review process.
- Share the model with external stakeholders: BIM 360 allows you to easily share the model with external stakeholders, such as clients or consultants. You can provide them with access to view and review the model, ensuring everyone is on the same page.
- Monitor project progress: BIM 360 provides real-time project insights and analytics. You can track project progress, view metrics, and generate reports to gain better visibility into the project’s status and make informed decisions.
By collaborating and sharing your model on BIM 360, you can enhance communication, streamline workflows, and improve overall project coordination. The platform offers a robust set of features to facilitate collaboration and ensure that the model remains the central source of truth throughout the construction project.
As a final note, remember to regularly update and sync your Revit model with BIM 360 to ensure that all stakeholders have access to the latest version. This will help maintain data integrity and avoid discrepancies.
With these steps completed, you are now equipped to successfully publish, collaborate, and share your Revit model on BIM 360. Happy collaborating!
Conclusion
In the world of building construction, collaboration and efficient information management are key to successful project delivery. With the power of Building Information Modeling (BIM) and the collaboration capabilities of BIM 360, construction professionals can streamline their workflows, improve communication, and deliver projects more effectively.
In this article, we have walked through the process of publishing a Revit model to BIM 360. Starting with setting up a BIM 360 account, we moved on to preparing the Revit model for publishing, linking it to the BIM 360 platform, publishing the model, and finally collaborating and sharing the model with project stakeholders.
By following these steps, you can harness the full potential of BIM 360 and optimize your construction project collaboration. BIM 360 allows all project stakeholders to access, review, and collaborate on the most up-to-date version of the Revit model, ensuring a shared understanding and reducing errors or misunderstandings.
With BIM 360’s collaboration features, you can leave comments, create markups, and track changes, making communication and issue resolution seamless. The platform also provides valuable project insights and analytics, allowing you to monitor progress, track milestones, and make data-driven decisions.
Remember, to make the most of BIM 360, it’s important to properly prepare your Revit model, ensure it is up to date, and regularly sync it with the BIM 360 platform. This will help maintain data integrity and avoid discrepancies.
Whether you are an architect, engineer, contractor, or owner, leveraging the power of BIM 360 will revolutionize your collaboration experience and drive project success. By utilizing the steps outlined in this article, you are armed with the knowledge to confidently publish, collaborate, and share your Revit model on the BIM 360 platform.
Embrace the digital transformation of the construction industry and unlock the potentials of BIM 360. Start enjoying the benefits of enhanced collaboration, improved communication, and efficient project management. Take the leap and bring your construction projects to new heights with BIM 360 and Revit. Happy collaborating!
Frequently Asked Questions about How To Publish A Revit Model To BIM 360
Was this page helpful?
At Storables.com, we guarantee accurate and reliable information. Our content, validated by Expert Board Contributors, is crafted following stringent Editorial Policies. We're committed to providing you with well-researched, expert-backed insights for all your informational needs.


0 thoughts on “How To Publish A Revit Model To BIM 360”