Articles
How To Remove Old Toilet Flange
Modified: October 19, 2024
Learn how to remove an old toilet flange easily with our informative articles. Get step-by-step instructions and expert tips to complete the task efficiently.
(Many of the links in this article redirect to a specific reviewed product. Your purchase of these products through affiliate links helps to generate commission for Storables.com, at no extra cost. Learn more)
Introduction
When it comes to maintaining your bathroom, there are certain tasks that you may encounter over time. One such task is removing an old toilet flange. The toilet flange is an essential component that connects the toilet to the drain pipe and ensures a tight seal. However, over time, due to wear and tear or improper installation, the toilet flange can become damaged or corroded.
In this article, we will guide you through the step-by-step process of removing an old toilet flange and replacing it with a new one. By following these instructions, you can ensure that your toilet remains properly connected to the drain pipe, preventing leaks and ensuring optimal functionality.
Before we dive into the details of removing an old toilet flange, let’s take a closer look at what a toilet flange is and understand the signs that indicate the need for its replacement.
Key Takeaways:
- Proper maintenance of the toilet flange is crucial for preventing leaks and ensuring a secure connection between the toilet and the drain pipe. Regular inspection and timely replacement can help maintain a functional bathroom.
- Safety precautions, thorough cleaning, and careful installation are essential when removing and replacing an old toilet flange. Prioritizing safety and attention to detail can lead to a successful and leak-free bathroom.
Read more: What Is A Toilet Flange
What is a Toilet Flange?
A toilet flange, also known as a closet flange, is an essential plumbing component that connects the toilet to the drain pipe in the bathroom floor. It is usually made of PVC or ABS plastic or sometimes even cast iron. The flange is anchored to the floor and provides a secure base for the toilet to rest on.
The main purpose of a toilet flange is to create a watertight seal between the toilet and the sewer drain pipe. It ensures that wastewater and gases cannot escape from the drain pipe and enter your bathroom. The flange also supports the weight of the toilet and prevents it from shifting or rocking.
A toilet flange typically has a circular or oval-shaped ring that fits over the drain pipe opening. It has mounting holes to attach the toilet bowl to the flange using bolts. The flange is designed in such a way that the bottom part is flush with the bathroom floor, allowing the toilet to sit level and stable.
There are various types of toilet flanges available, depending on the installation and construction of the bathroom. These include:
- Standard Flange: This is the most common type of flange that is used for regular toilets.
- Offset Flange: An offset flange is used when the toilet drain pipe is not aligned properly with the floor flange. It allows for adjustments to ensure a proper connection.
- PVC Flange: PVC flanges are commonly used in residential bathrooms. They are lightweight, easy to install, and resistant to corrosion.
- Cast Iron Flange: Cast iron flanges are known for their durability and strength. They are commonly used in commercial or industrial settings.
Now that we have a better understanding of what a toilet flange is, let’s explore some signs that indicate the need for its replacement.
Signs of a Damaged Toilet Flange
A damaged toilet flange can cause numerous issues in your bathroom, including leaks, instability, and potential water damage. It’s crucial to identify the signs of a damaged flange so that you can take prompt action and prevent further problems. Here are some common signs that indicate the need for a flange replacement:
- Leaking around the base of the toilet: If you notice water pooling around the base of the toilet or see water stains on the floor, it could be a sign of a damaged flange. A damaged flange may cause water to seep out when the toilet is flushed or when pressure is applied.
- Toilet movement or rocking: A loose or damaged flange can cause the toilet to shift or rock when you sit on it. This not only affects comfort but can also lead to leaks and damage to the wax seal.
- Foul odor: If you detect a persistent sewer odor coming from your bathroom, it could be a sign that the toilet flange is not properly sealed. The flange ensures a tight connection to prevent the escape of sewer gases, so any odor indicates a problem.
- Cracked or corroded flange: Inspect the flange for any visible signs of damage, such as cracks or corrosion. A cracked flange cannot provide a secure base for the toilet, leading to instability and potential leaks.
- Worn-out wax seal: The wax seal sits between the toilet flange and the base of the toilet, creating a watertight seal. If the wax seal is worn out or damaged, it may cause water to leak or seep out when the toilet is flushed. This can be an indication that the flange needs replacement.
If you notice any of these signs, it’s important to take immediate action to address the issue. Continuing to use a damaged toilet flange can lead to further damage and costly repairs. Now that we are familiar with the signs of a damaged flange, let’s move on to the tools and materials you will need for the replacement process.
Tools and Materials Needed
Before you begin the process of removing an old toilet flange, it’s important to gather all the necessary tools and materials. Having everything on hand will ensure a smooth and efficient replacement process. Here are the tools and materials you will need:
Tools:
- Adjustable wrench
- Socket wrench
- Hacksaw
- Screwdriver
- Putty knife
- Plunger
- Bucket
- Plumbers tape
- Plumbers putty
- Measuring tape
Read more: How To Remove Bathtub Drain Flange
Materials:
- New toilet flange
- New wax ring
- Toilet bowl bolts
- Plastic flange repair kit (optional, in case you need to repair the flange rather than replacing it entirely)
- Cloths or rags
- Cleaners (such as bleach or mildew remover)
- Waterproof sealant (such as silicone caulk)
Having these tools and materials handy will make the process of removing an old toilet flange much easier and efficient. Once you’ve gathered everything, you can proceed with the next steps that involve safety precautions and shutting off the water supply.
Before we continue, it’s important to note that if you’re not confident in your ability to remove and replace a toilet flange, it’s best to consult a professional plumber. They have the necessary expertise and experience to handle the job safely and effectively.
Now that we are fully equipped with the necessary tools and materials, let’s move on to the first step: safety precautions.
Step 1: Safety Precautions
Before you begin the process of removing an old toilet flange, it’s important to take some safety precautions to ensure your well-being and protect your bathroom. Follow these steps to ensure a safe working environment:
- Turn off the water supply: Locate the water shut-off valve behind the toilet, usually located near the floor or on the wall. Turn the valve clockwise to shut off the water supply to the toilet. Flush the toilet to drain as much water as possible from the tank and bowl.
- Protect the floor: Use old towels or rags to cover the bathroom floor around the toilet. This will help catch any spills or leaks that may occur during the removal process, preventing water damage or staining.
- Open windows or use ventilation: To prevent the buildup of potentially harmful sewer gases, ensure that there is proper ventilation in the bathroom. Open windows or use exhaust fans if available.
- Wear protective gear: It’s a good idea to wear gloves and safety glasses to protect your hands and eyes during the removal process. This will help prevent any injuries or exposure to harmful substances.
- Keep children and pets away: Make sure to keep children and pets away from the bathroom while you are working on removing the toilet flange. This will prevent any accidents or injuries.
Taking these safety precautions will help create a safe working environment and minimize any potential risks. Once you have taken these steps, you can proceed with the next step: shutting off the water supply.
In the next step, we’ll guide you through the process of shutting off the water supply to the toilet. This is an important step to prevent any water leaks or spills during the removal process. Let’s move on to step 2: shutting off the water supply.
Step 2: Shut off the Water Supply
Before you can begin removing the old toilet flange, you need to shut off the water supply to the toilet. This will prevent any water flow and allow you to safely disconnect the toilet from the plumbing system. Follow these steps to shut off the water supply:
- Locate the water shut-off valve: The water shut-off valve is usually located behind or near the toilet, either on the wall or the floor. It is a small valve with a handle or wheel that you can turn to control the water flow.
- Turn off the water supply: Turn the valve clockwise (to the right) to shut off the water supply. This will stop the flow of water to the toilet. If the valve is difficult to turn, you may need to use an adjustable wrench to assist you.
- Flush the toilet: After shutting off the water supply, flush the toilet to drain the tank and bowl as much as possible. This will help minimize any water remaining in the toilet and reduce the risk of spills during the removal process.
- Check for any remaining water: Use a plunger or a sponge to soak up any remaining water in the bowl or tank. Wring out the sponge or dispose of the water in a bucket. It’s important to remove as much water as possible to avoid any water spills or leaks while removing the toilet.
Once you have shut off the water supply and drained the toilet, you can proceed to the next step: draining the toilet. This step is crucial to prepare the toilet for removal and ensure a smooth process. Let’s move on to step 3: draining the toilet.
Note: If you’re unsure about shutting off the water supply or encounter any difficulties, it’s recommended to consult a professional plumber for assistance.
Step 3: Drain the Toilet
In order to safely remove the old toilet flange, it’s important to drain the toilet completely. This will minimize any water spills or leaks during the removal process. Follow these steps to drain the toilet:
- Remove the tank lid: Carefully lift the lid of the toilet tank and set it aside in a safe place. Be cautious as the lid can be heavy and fragile.
- Turn off the water supply to the toilet: If you have not already done so, refer to the previous step on how to shut off the water supply to the toilet.
- Flush the toilet: Press and hold the lever or button to flush the toilet. This will empty the tank and most of the water in the bowl.
- Remove any remaining water: Use a plunger to push any remaining water in the bowl into the drain. Alternatively, use a sponge or a towel to soak up the water. Wring out the sponge or dispose of the water in a bucket.
- Disconnect the water supply line: Locate the water supply line connected to the bottom of the toilet tank. Using an adjustable wrench, loosen the nut connecting the supply line to the fill valve. Once loose, carefully unscrew the nut by hand to disconnect the supply line.
Now that you have successfully drained the toilet, it’s time to move on to the next step: removing the toilet itself. Removing the toilet will give you access to the old flange and allow for its removal. Let’s proceed to step 4: remove the toilet.
Note: It’s important to handle the toilet with care as it can be heavy and fragile. If you’re unsure or uncomfortable with removing the toilet, consider hiring a professional plumber to assist you.
Read also: 9 Amazing Toilet Flange for 2025
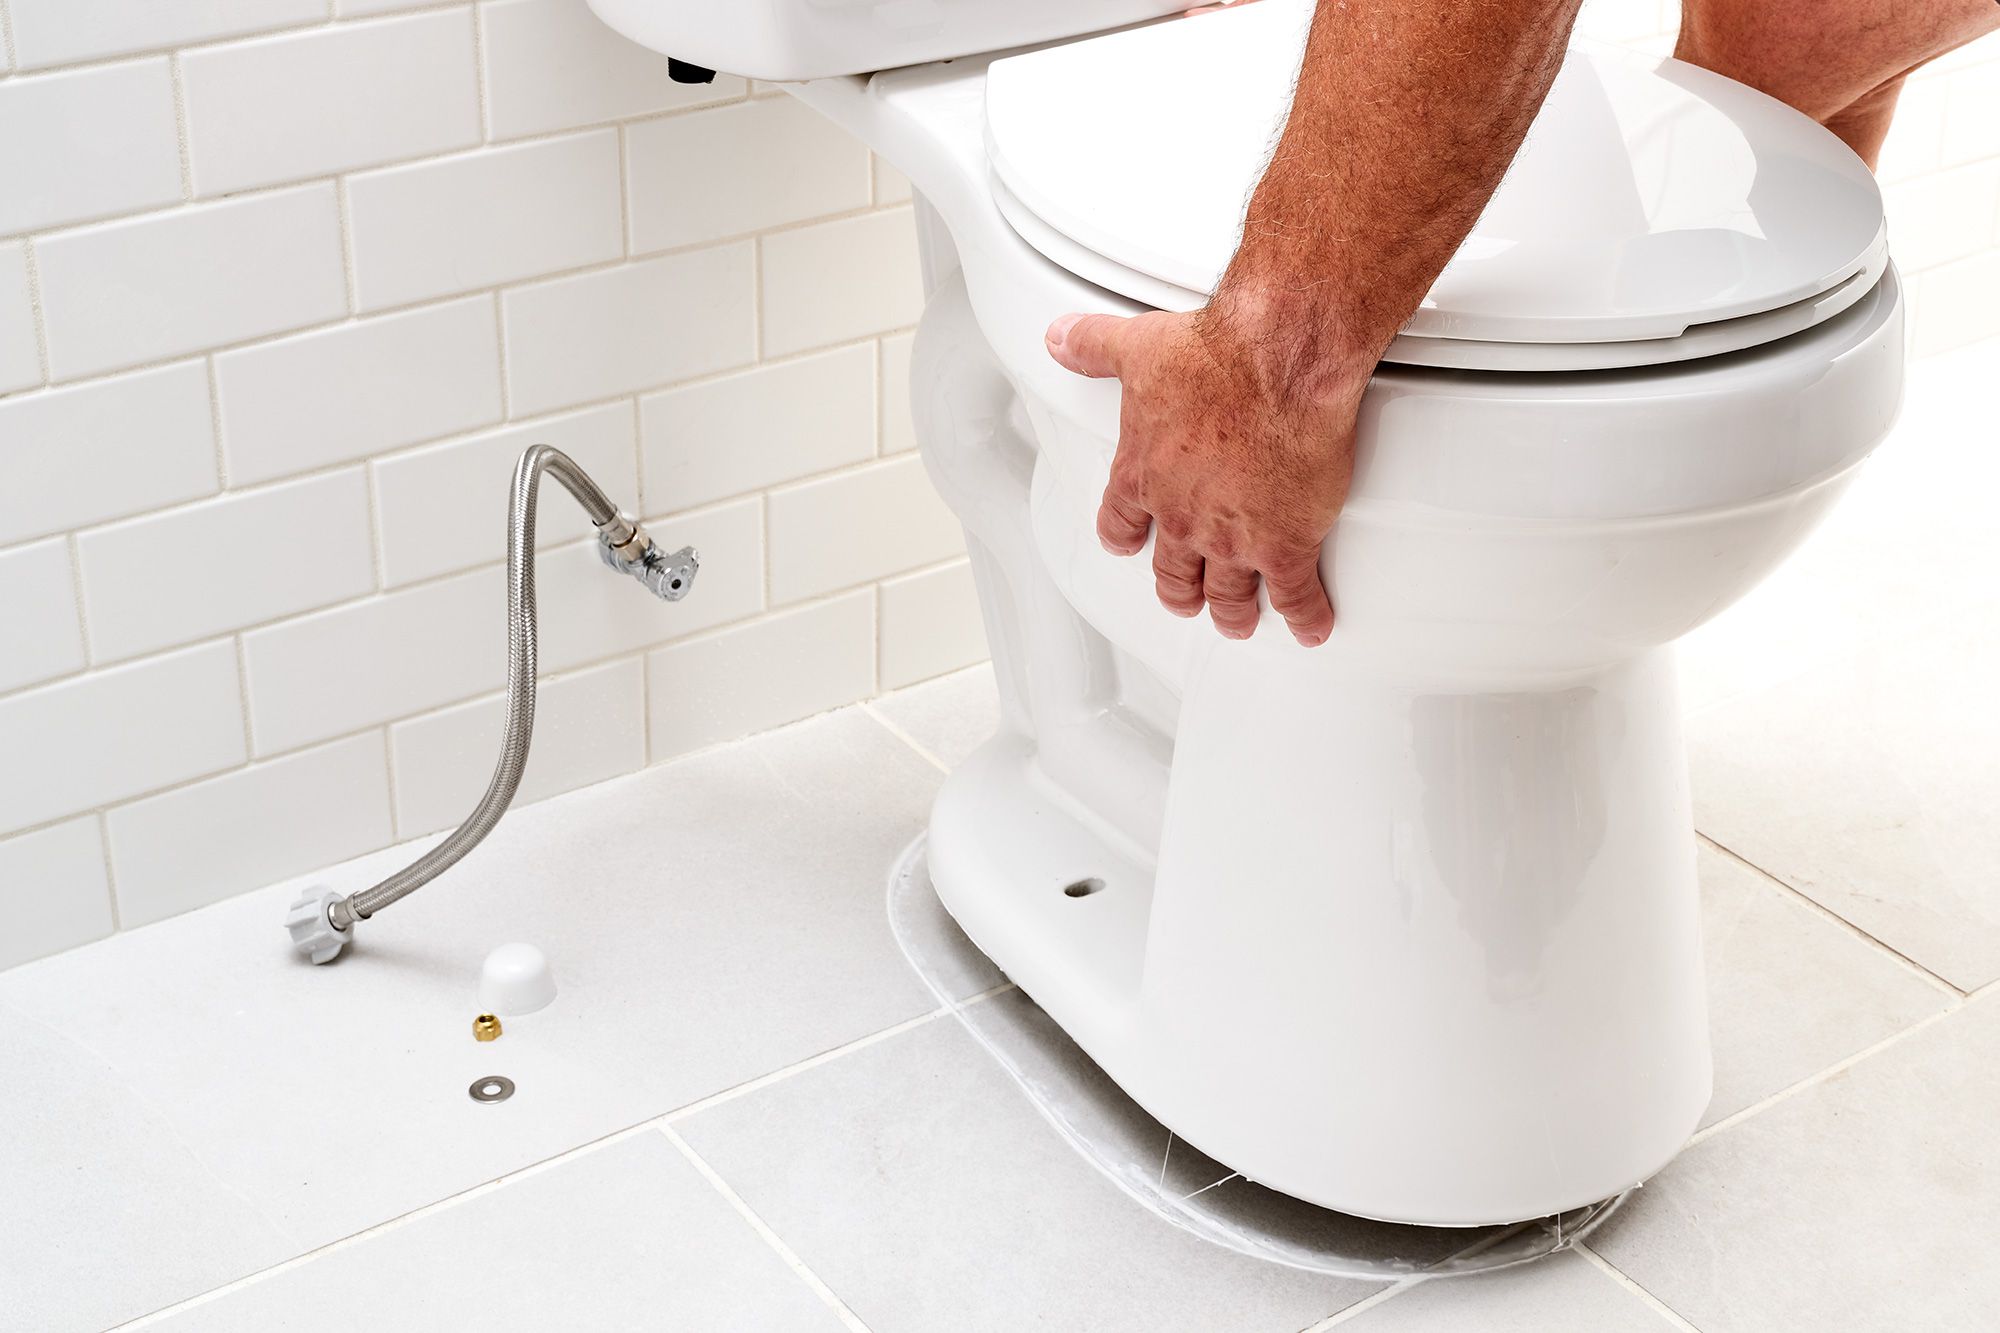
Step 4: Remove the Toilet
Now that the toilet is drained and the water supply is disconnected, it’s time to remove the toilet from the bathroom floor. Follow these steps to remove the toilet:
- Remove the caps from the base: Look for plastic caps or covers located at the base of the toilet where it meets the floor. Use a flathead screwdriver or a putty knife to pry off these caps and expose the bolts underneath.
- Loosen and remove the nuts: Using an adjustable wrench or a socket wrench, loosen the nuts that secure the toilet to the floor bolts. Turn the nuts counterclockwise (to the left) to loosen them. Once loosened, you can usually remove them by hand.
- Lift the toilet: With the nuts removed, gently lift the toilet straight up to detach it from the floor. Be careful as the toilet can be heavy. If the toilet feels stuck, gently rock it back and forth to break the seal with the wax ring.
- Place the toilet on a towel or cardboard: Once removed, place the toilet on a towel or a piece of cardboard to protect the floor and prevent any debris or water from spreading.
- Inspect the wax ring: With the toilet removed, take a look at the wax ring that was sealing the toilet flange. If it appears worn out or damaged, it is recommended to replace it with a new wax ring.
Removing the toilet may require some physical strength and caution. It’s important to lift the toilet carefully to avoid any injuries. If you’re having difficulty removing the toilet or if you’re unsure, it’s best to seek the assistance of a professional plumber.
Once you have successfully removed the toilet, we can proceed to the next step: inspecting the flange. This step will help determine the condition of the old flange and if it needs replacement. Let’s move on to step 5: inspect the flange.
Step 5: Inspect the Flange
Now that the toilet has been removed, it’s time to inspect the condition of the old flange. This step will help determine if the flange is damaged or needs to be replaced. Follow these steps to inspect the flange:
- Clear any debris: Use a putty knife or a cloth to clean off any residue or debris around the area where the flange is located. This will allow for a clearer view of the flange.
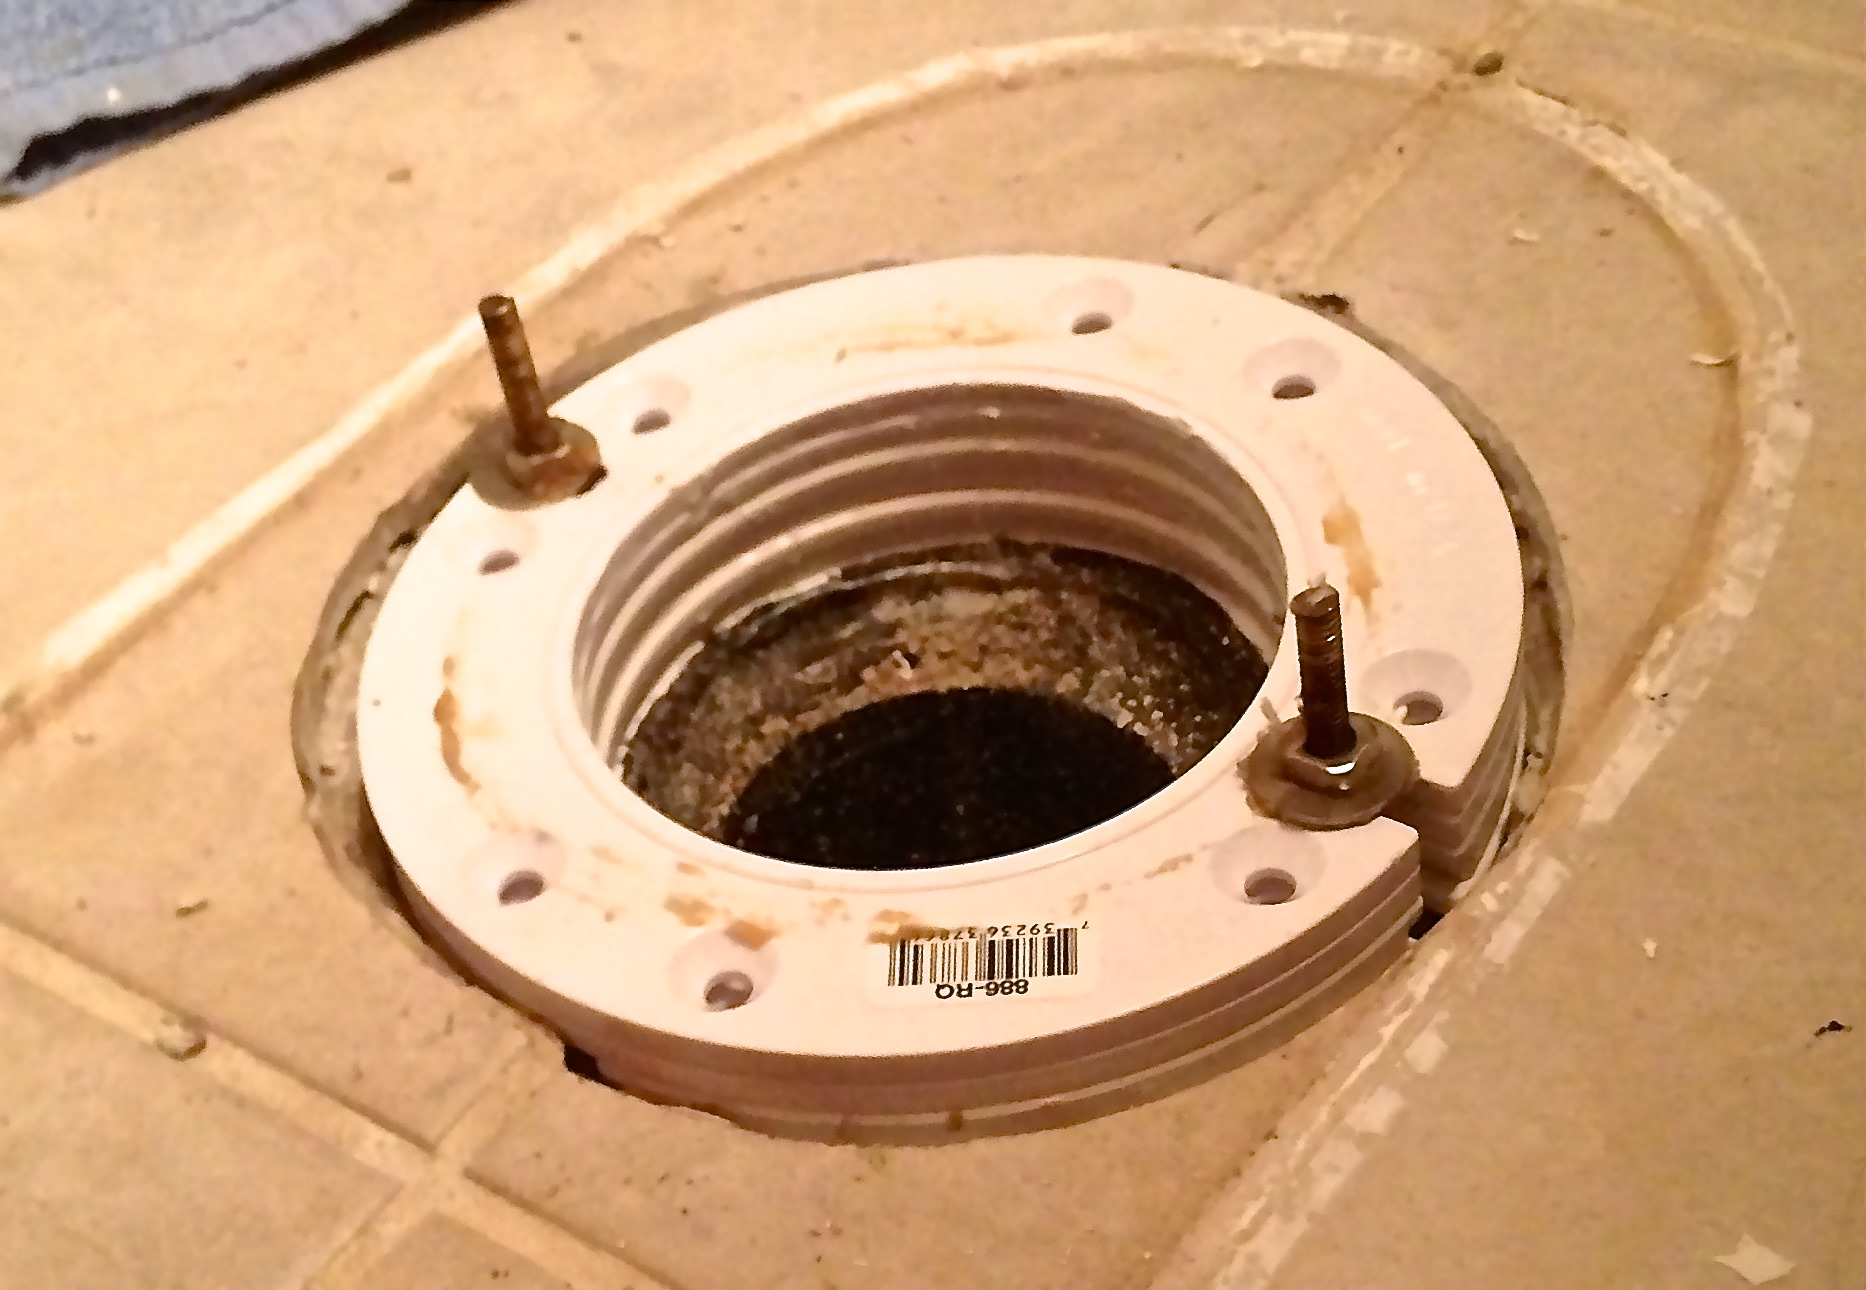
- Examine the flange for damage: Take a close look at the flange to check for any signs of damage or deterioration. Look for cracks, corrosion, or any other visible issues that may affect its functionality.
- Check the flange height: Ensure that the flange is level with or slightly above the finished floor surface. If the flange is too low, it may need to be raised using a flange extender or a repair kit.
- Inspect the flange bolts: Examine the bolts that secure the toilet to the flange. Check if they are rusted, bent, or damaged in any way. If the bolts are in poor condition, it’s recommended to replace them with new ones.
Based on the inspection of the flange, you can determine whether it needs to be replaced or repaired. If the flange is severely damaged, corroded, or if it is not level with the floor surface, it’s best to replace it with a new flange. On the other hand, if the flange appears to be in good condition, you may be able to proceed with repairs or use a flange repair kit.
At this stage, you can prepare for either replacing the old flange or repairing it. The next step will guide you through the process of removing the nuts that secure the flange to the floor. Let’s move on to step 6: loosen and remove the nuts.
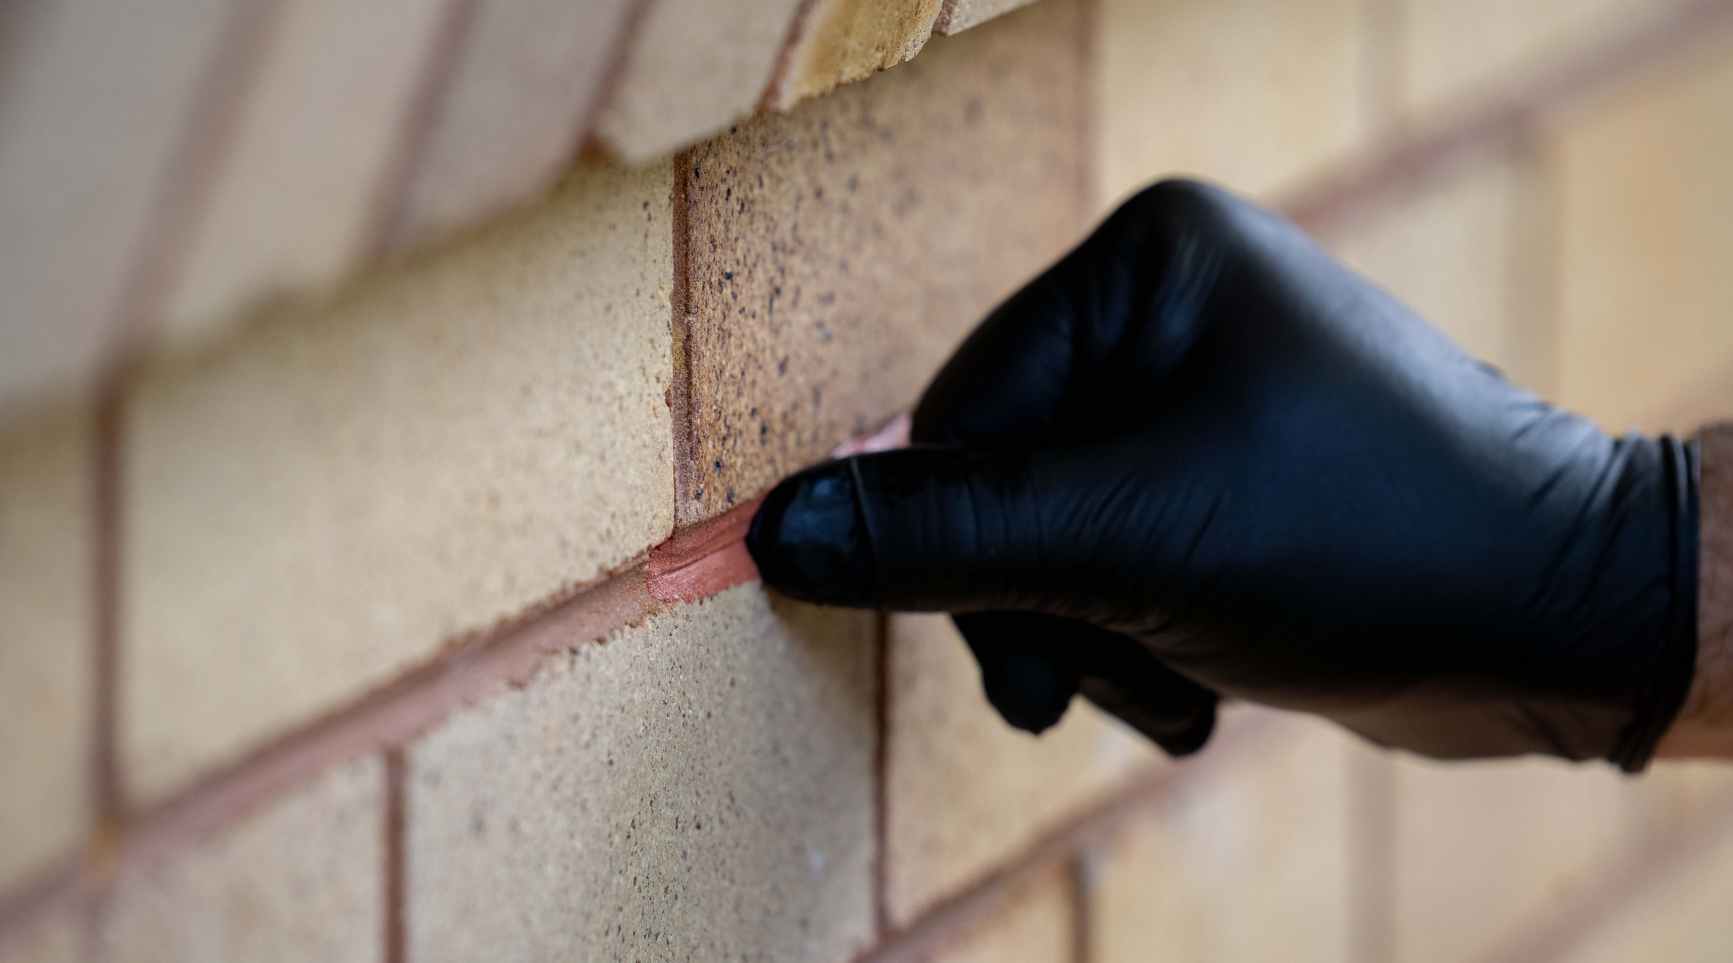
Use a hammer and chisel to carefully break up the old toilet flange. Once broken, use a screwdriver to remove the pieces from the floor. Be sure to clean the area thoroughly before installing a new flange.
Step 6: Loosen and Remove the Nuts
With the toilet removed and the flange inspected, it’s time to loosen and remove the nuts that secure the flange to the floor. Follow these steps to complete this task:
- Locate the flange bolts: The flange bolts are the metal bolts that pass through the flange and hold it in place. They are usually located at opposite sides of the flange.
- Loosen the nuts: Using an adjustable wrench or a socket wrench, loosen the nuts that are securing the flange bolts. Turn the nuts counterclockwise (to the left) to loosen them. If the nuts are tight or difficult to loosen, you can try spraying some penetrating oil to help loosen them.
- Remove the bolts and nuts: Once the nuts are loosened, they can usually be removed by hand. Hold the top of the bolt with pliers or a wrench while unscrewing the nuts from the bottom. Keep the nuts and bolts in a safe place as you may need them for the installation of the new flange.
- Inspect the flange for any remaining attachments: After removing the nuts and bolts, check the flange for any remaining attachments or obstructions. Remove any clips, adhesive, or other materials that may be holding the flange in place.
By loosening and removing the nuts, you have successfully detached the old flange from the floor. The next step will guide you through the process of removing the old flange itself. Let’s move on to step 7: remove the old flange.
Note: If you encounter any difficulties or if the flange is not easily removable, it’s recommended to consult a professional plumber for assistance.
Step 7: Remove the Old Flange
Now that the nuts securing the flange have been removed, it’s time to remove the old flange itself. Follow these steps to successfully remove the old flange:
- Inspect the condition of the old flange: Before removing the old flange, take a moment to inspect its condition. Look for any signs of damage, deterioration, or corrosion. This will help you determine if the flange needs to be replaced entirely or if it is in a condition that allows for repairs.
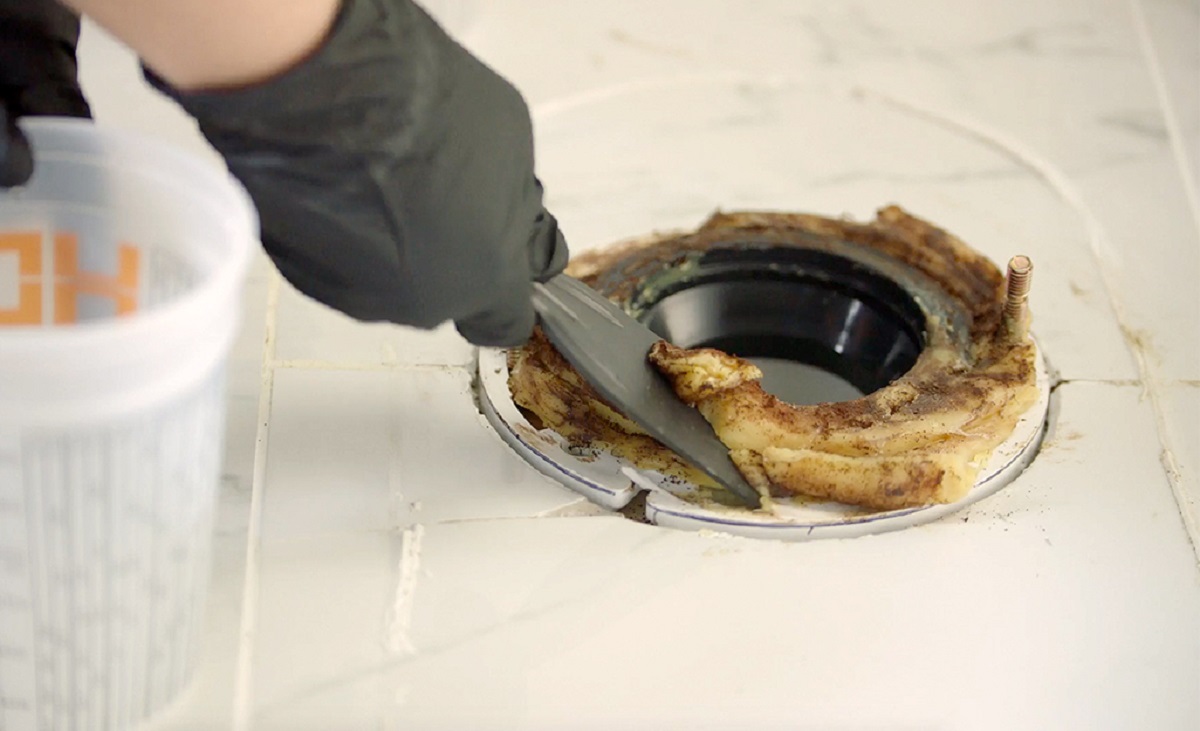
- Detach the old flange from the floor: Start by carefully lifting the old flange away from the floor. Use a putty knife or a flathead screwdriver to gently pry it loose if necessary. Be cautious not to damage the surrounding flooring.
- Clear any debris: Once the old flange is detached, clear away any debris or residue from the floor and the area around the flange. This will ensure a clean surface for the installation of the new flange.
- Inspect the waste pipe: While the flange is removed, take a moment to inspect the waste pipe that connects to the drain. Look for any signs of damage, blockages, or corrosion. If necessary, clean or repair the waste pipe before proceeding.
Removing the old flange is a crucial step in the process of replacing it with a new one. By carefully detaching the old flange and clearing away any debris, you are preparing the area for the installation of the new flange.
Now that the old flange has been removed, the next step is to clean the area thoroughly before proceeding with the installation of the new flange. Let’s move on to step 8: clean the area.
Note: If you’re uncertain about removing the old flange or encounter any difficulties, it’s advisable to seek assistance from a professional plumber.
Step 8: Clean the Area
After removing the old flange, it’s important to thoroughly clean the area before installing the new flange. This will ensure a clean and smooth surface for the new flange to be properly installed. Follow these steps to clean the area:
- Remove any leftover debris: Use a putty knife or a cloth to remove any leftover debris, residue, or caulking from the area where the flange was previously attached. Make sure to remove any old wax ring remnants as well.
- Clean the surrounding flooring: Use a mild cleanser or a mixture of warm water and soap to clean the surrounding flooring. Scrub gently to remove any stains or dirt. Rinse the area thoroughly with clean water and allow it to dry completely.
- Inspect for any damages: While cleaning, take the opportunity to inspect the flooring for any damages, such as cracks, unevenness, or rot. If any issues are identified, it’s best to address them before proceeding with the installation of the new flange.
- Apply a waterproof sealant (optional): If desired, you can apply a thin layer of waterproof sealant, such as silicone caulk, around the area where the new flange will be placed. This can further help create a watertight seal and prevent any future leaks.
Ensuring that the area is clean and in good condition will contribute to a successful installation of the new flange and help prevent any issues in the future. Once the area is thoroughly cleaned and prepared, you can move on to the next step: installing the new flange.
Note: It’s important to follow the instructions provided by the manufacturer when using any cleaning products or sealants. Always ventilate the area properly and wear gloves or protective gear if necessary.
Step 9: Install the New Flange
With the area cleaned and prepared, it’s time to install the new toilet flange. Follow these steps to ensure a proper installation:
- Choose the right type of flange: Select a new toilet flange that matches the specifications of your existing plumbing system. Consider factors such as the size and material of the flange to ensure compatibility.
- Position the new flange: Carefully position the new flange over the drain pipe, aligning it with the mounting holes in the floor. Ensure that the flange sits flush with the floor surface.
- Secure the flange: Insert new bolts into the mounting holes of the flange and through the holes in the floor. Use washers and nuts to secure the bolts tightly. Ensure that the flange is stable and securely attached to the floor.
- Apply plumber’s tape: Wrap plumber’s tape (also known as Teflon tape) around the threads of the bolts to create a watertight seal.
- Apply plumber’s putty (if necessary): If you are using a flange repair kit or if the flange is uneven or damaged, you may need to apply a layer of plumber’s putty around the base of the flange. This will help create a solid seal and provide stability.
It’s important to follow the manufacturer’s instructions for the specific flange you are using. Different types of flanges may have slightly different installation methods, so refer to the provided guidelines or packaging for any specific requirements.
Once the new flange is securely installed, you are ready to proceed with the final step: reinstalling the toilet. This step will complete the process of replacing the old toilet flange. Let’s move on to step 10: reinstall the toilet.
Note: If you are unfamiliar with plumbing work or are unsure about installing the new flange, it’s recommended to seek assistance from a professional plumber.
Step 10: Reinstall the Toilet
Now that the new flange is installed, it’s time to reinstall the toilet onto the flange. Follow these steps to ensure a proper and secure reinstallation:
- Position the new wax ring: Place a new wax ring onto the flange, ensuring that it is centered and properly aligned with the flange opening. The wax ring will create a watertight seal between the toilet and the flange.
- Lower the toilet onto the wax ring: Carefully lower the toilet bowl onto the wax ring, aligning the mounting bolts with the corresponding holes on the base of the toilet. Make sure the toilet sits evenly and securely on the flange.
- Press down on the toilet: Apply gentle pressure and evenly distribute your weight on the toilet to compress the wax ring and create a secure seal. Use caution not to rock or shift the toilet too forcefully.
- Install the toilet bolts: Place washers and nuts onto the mounting bolts, ensuring they are threaded securely. Avoid over-tightening as it may crack the toilet bowl. Use an adjustable wrench or a socket wrench to tighten the nuts snugly.
- Reconnect the water supply line: Reconnect the water supply line to the fill valve located at the bottom of the toilet tank. Use an adjustable wrench to tighten the nut, ensuring a secure connection.
- Attach the toilet tank: If you removed the toilet tank during the process, reattach it to the bowl using bolts or screws provided. Follow the manufacturer’s instructions for proper installation.
- Tighten all the connections: Double-check all connections, including the water supply line and the tank bolts. Ensure they are tight and secure, but be careful not to overtighten and risk damaging the fixtures.
- Test for leaks: Turn on the water supply and flush the toilet. Look for any signs of leaks around the base of the toilet or at the connection points. If any leaks are detected, tighten the connections or replace any faulty parts as necessary.
Once you have reinstalled the toilet and confirmed that there are no leaks, you have completed the process of replacing the old toilet flange. It’s important to take your time and ensure all connections are secure to prevent any future issues.
Congratulations! You have successfully removed and replaced the old toilet flange, ensuring a proper connection and preventing potential leaks. Enjoy your fully functional bathroom!
Conclusion
Removing and replacing an old toilet flange may seem like a challenging task, but with the right knowledge and tools, it can be accomplished successfully. By following the step-by-step process outlined in this article, you have learned how to safely remove an old toilet flange and install a new one, ensuring a proper connection between the toilet and the drain pipe.
Remember to prioritize safety precautions throughout the entire process. Shutting off the water supply, wearing protective gear, and keeping children and pets away from the work area are essential for a smooth and safe experience. If you ever feel uncertain or uncomfortable about any step, it’s always best to consult with a professional plumber.
Inspecting the flange for damage, cleaning the area thoroughly, and choosing the right type of flange are all crucial steps to ensure a successful installation. Keeping an eye out for signs of damage or wear in the flange, such as cracks or corrosion, will help you determine if a replacement is needed.
Once the new flange is installed and the toilet has been securely reattached, the final step of testing for leaks is crucial. Checking for any signs of water leaks around the base and connections of the toilet will help ensure a tight and watertight seal.
By following these steps, you have accomplished the task of removing and replacing an old toilet flange, contributing to the overall functionality and integrity of your bathroom. Regular maintenance and care of your toilet flange will help prevent future issues and ensure the longevity of your plumbing system.
Remember, if you ever feel unsure or encounter difficulties along the way, it is always recommended to seek the assistance of a professional plumber. They have the expertise and experience to handle any challenges that may arise.
With your newly installed toilet flange, you can now enjoy a leak-free and properly functioning bathroom for years to come. Congratulations on a job well done!
Frequently Asked Questions about How To Remove Old Toilet Flange
Was this page helpful?
At Storables.com, we guarantee accurate and reliable information. Our content, validated by Expert Board Contributors, is crafted following stringent Editorial Policies. We're committed to providing you with well-researched, expert-backed insights for all your informational needs.


0 thoughts on “How To Remove Old Toilet Flange”