Home>Furniture & Design>Interior Design Trends>How To Seal Water Slide Decals On Glass
Interior Design Trends
How To Seal Water Slide Decals On Glass
Published: February 8, 2024
Learn how to seal water slide decals on glass to create stunning interior design trends. Follow our step-by-step guide for a flawless finish.
(Many of the links in this article redirect to a specific reviewed product. Your purchase of these products through affiliate links helps to generate commission for Storables.com, at no extra cost. Learn more)
Introduction
Water slide decals are a fantastic way to add intricate designs, logos, or decorative elements to glass surfaces. Whether you're embellishing glassware, windows, or mirrors, water slide decals offer a versatile and visually appealing option for personalizing your space. However, to ensure the longevity and durability of these decals, it's crucial to seal them properly. In this guide, we'll walk you through the process of sealing water slide decals on glass, providing you with the necessary steps and materials to achieve a professional and long-lasting finish.
Sealing water slide decals not only enhances their appearance but also protects them from wear and tear, moisture, and fading. By following the steps outlined in this tutorial, you'll be able to preserve the beauty and integrity of your decals, allowing them to withstand regular use and cleaning without losing their vibrancy.
Whether you're a seasoned crafter or a DIY enthusiast looking to elevate your glass decor, mastering the art of sealing water slide decals will open up a world of creative possibilities. With the right techniques and materials at your disposal, you can transform ordinary glass surfaces into stunning, personalized works of art that reflect your unique style and personality.
So, gather your materials and prepare to embark on a journey of creativity and craftsmanship as we delve into the process of sealing water slide decals on glass. With a few simple steps, you'll be able to achieve professional-looking results that will leave a lasting impression. Let's dive in and discover the art of preserving and showcasing water slide decals on glass surfaces.
Key Takeaways:
- Personalize glass decor with water slide decals by cleaning the surface, applying the decal with precision, and sealing it with a clear sealant for vibrant, long-lasting results.
- Transform ordinary glass surfaces into stunning works of art with sealed water slide decals, infusing living spaces with individuality and creativity for a lasting impression.
Read more: How To Seal Waterslide Decals On Glass
Materials Needed
Before embarking on the process of sealing water slide decals on glass, it's essential to gather the necessary materials to ensure a smooth and successful application. Here's a comprehensive list of the items you'll need to complete this project:
-
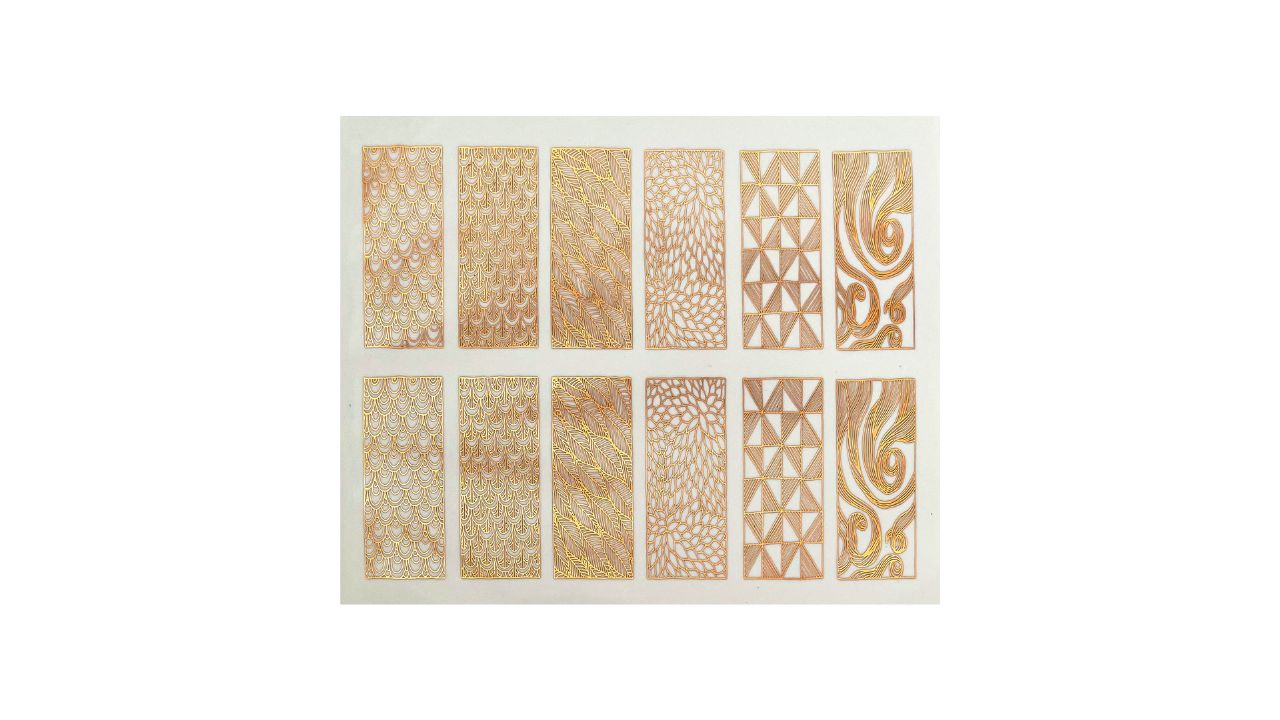
Water Slide Decals: Select high-quality water slide decals featuring the designs or patterns you wish to apply to the glass surface. Ensure that the decals are compatible with glass and can withstand the sealing process.
-
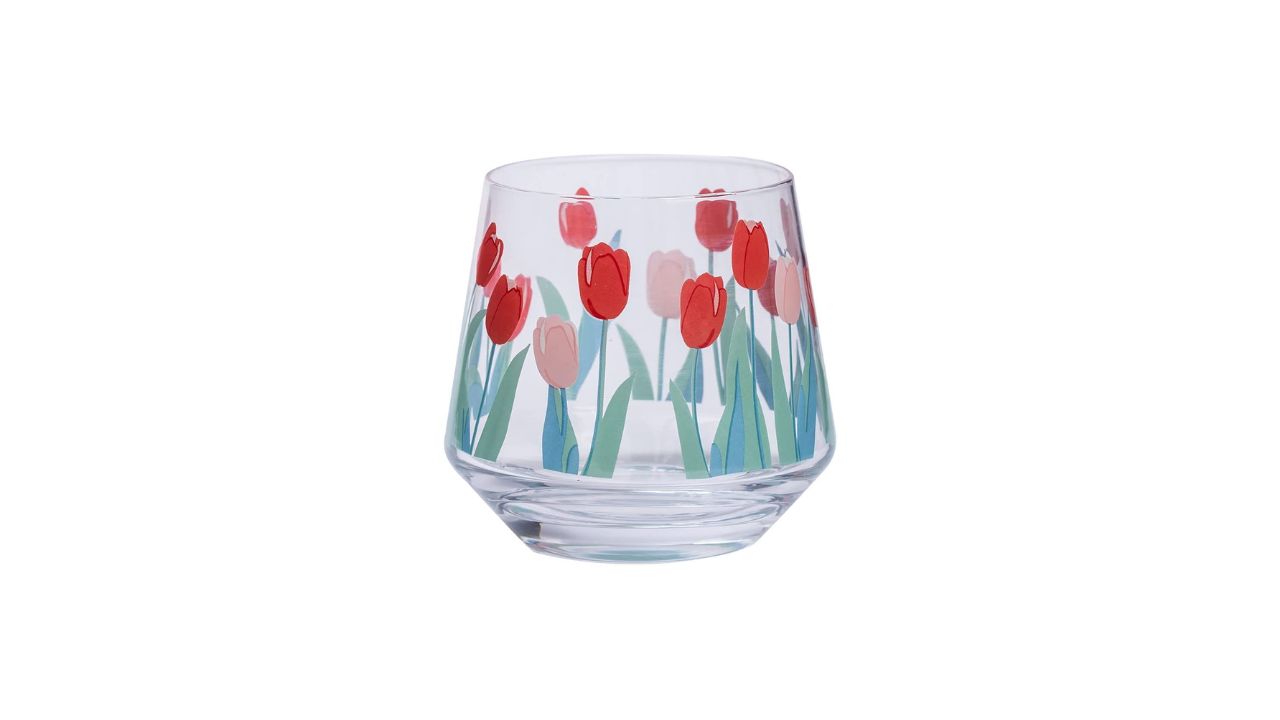
Glass Surface: Prepare the glass item or surface where you intend to apply the water slide decals. This could be glassware, mirrors, windows, or any other glass surface that you want to embellish.
-
Clean Cloth or Microfiber Towel: Use a soft, lint-free cloth or microfiber towel to clean the glass surface thoroughly before applying the decals. This will ensure that the surface is free from dust, dirt, and any residues that could affect the adhesion of the decals.
-
Water: Have a small container of clean water ready for activating the water slide decals. The water will be used to soak the decals and release them from their backing paper.
-
Tweezers or Craft Knife: Prepare a pair of tweezers or a craft knife to handle the water slide decals during the application process. These tools will help you position the decals accurately and smooth out any air bubbles for a seamless finish.
-
Clear Sealant: Select a high-quality clear sealant specifically designed for glass surfaces. Ensure that the sealant is compatible with water slide decals and will provide a durable and protective finish once applied.
-
Paintbrush or Foam Brush: Choose a small paintbrush or foam brush suitable for applying the clear sealant to the glass surface. The brush should allow for precise application and smooth coverage of the decals.
-
Protective Gloves: Consider wearing protective gloves to prevent direct contact with the sealant and ensure the cleanliness of the glass surface during the application process.
By gathering these essential materials, you'll be well-equipped to proceed with the subsequent steps of cleaning, applying, and sealing the water slide decals on the glass surface. With careful preparation and the right tools at your disposal, you can achieve professional-looking results and enhance the visual appeal of your glass decor with sealed water slide decals.
Step 1: Clean the Glass Surface
Properly cleaning the glass surface is a crucial first step in preparing for the application of water slide decals. Any dust, dirt, or residues present on the glass can interfere with the adhesion of the decals and affect the overall finish. Follow these detailed steps to ensure that the glass surface is impeccably clean before proceeding with the application process:
-
Gather Cleaning Materials: Begin by assembling a clean cloth or microfiber towel, glass cleaner, and rubbing alcohol. These items will help you achieve a thorough and effective cleaning of the glass surface.
-
Remove Surface Debris: Use the clean cloth or microfiber towel to gently remove any surface debris, such as dust or loose particles, from the glass. This initial step will prevent the debris from being spread around during the cleaning process.
-
Apply Glass Cleaner: Spray a small amount of glass cleaner onto the glass surface. Ensure that the cleaner is suitable for glass and does not leave streaks or residues. Alternatively, you can create a homemade glass cleaner using a solution of water and white vinegar for an eco-friendly approach.
-
Wipe the Surface: Use the clean cloth to wipe the glass surface thoroughly, removing any smudges, fingerprints, or grime. Work in a systematic manner, covering the entire surface to ensure uniform cleanliness.
-
Use Rubbing Alcohol: Dampen a corner of the cloth with rubbing alcohol and carefully go over the glass surface once more. This step helps to eliminate any remaining residues or oils, leaving the glass impeccably clean and ready for the application of water slide decals.
-
Inspect for Residues: After cleaning, inspect the glass surface under adequate lighting to ensure that no residues or streaks are visible. Address any remaining imperfections by repeating the cleaning process if necessary.
By meticulously cleaning the glass surface using the outlined steps, you'll create an optimal foundation for applying water slide decals. A pristine and debris-free surface will facilitate the smooth adhesion of the decals, ensuring a professional and polished result. With the glass surface now immaculately clean, you're ready to proceed to the next step of applying the water slide decals with precision and care.
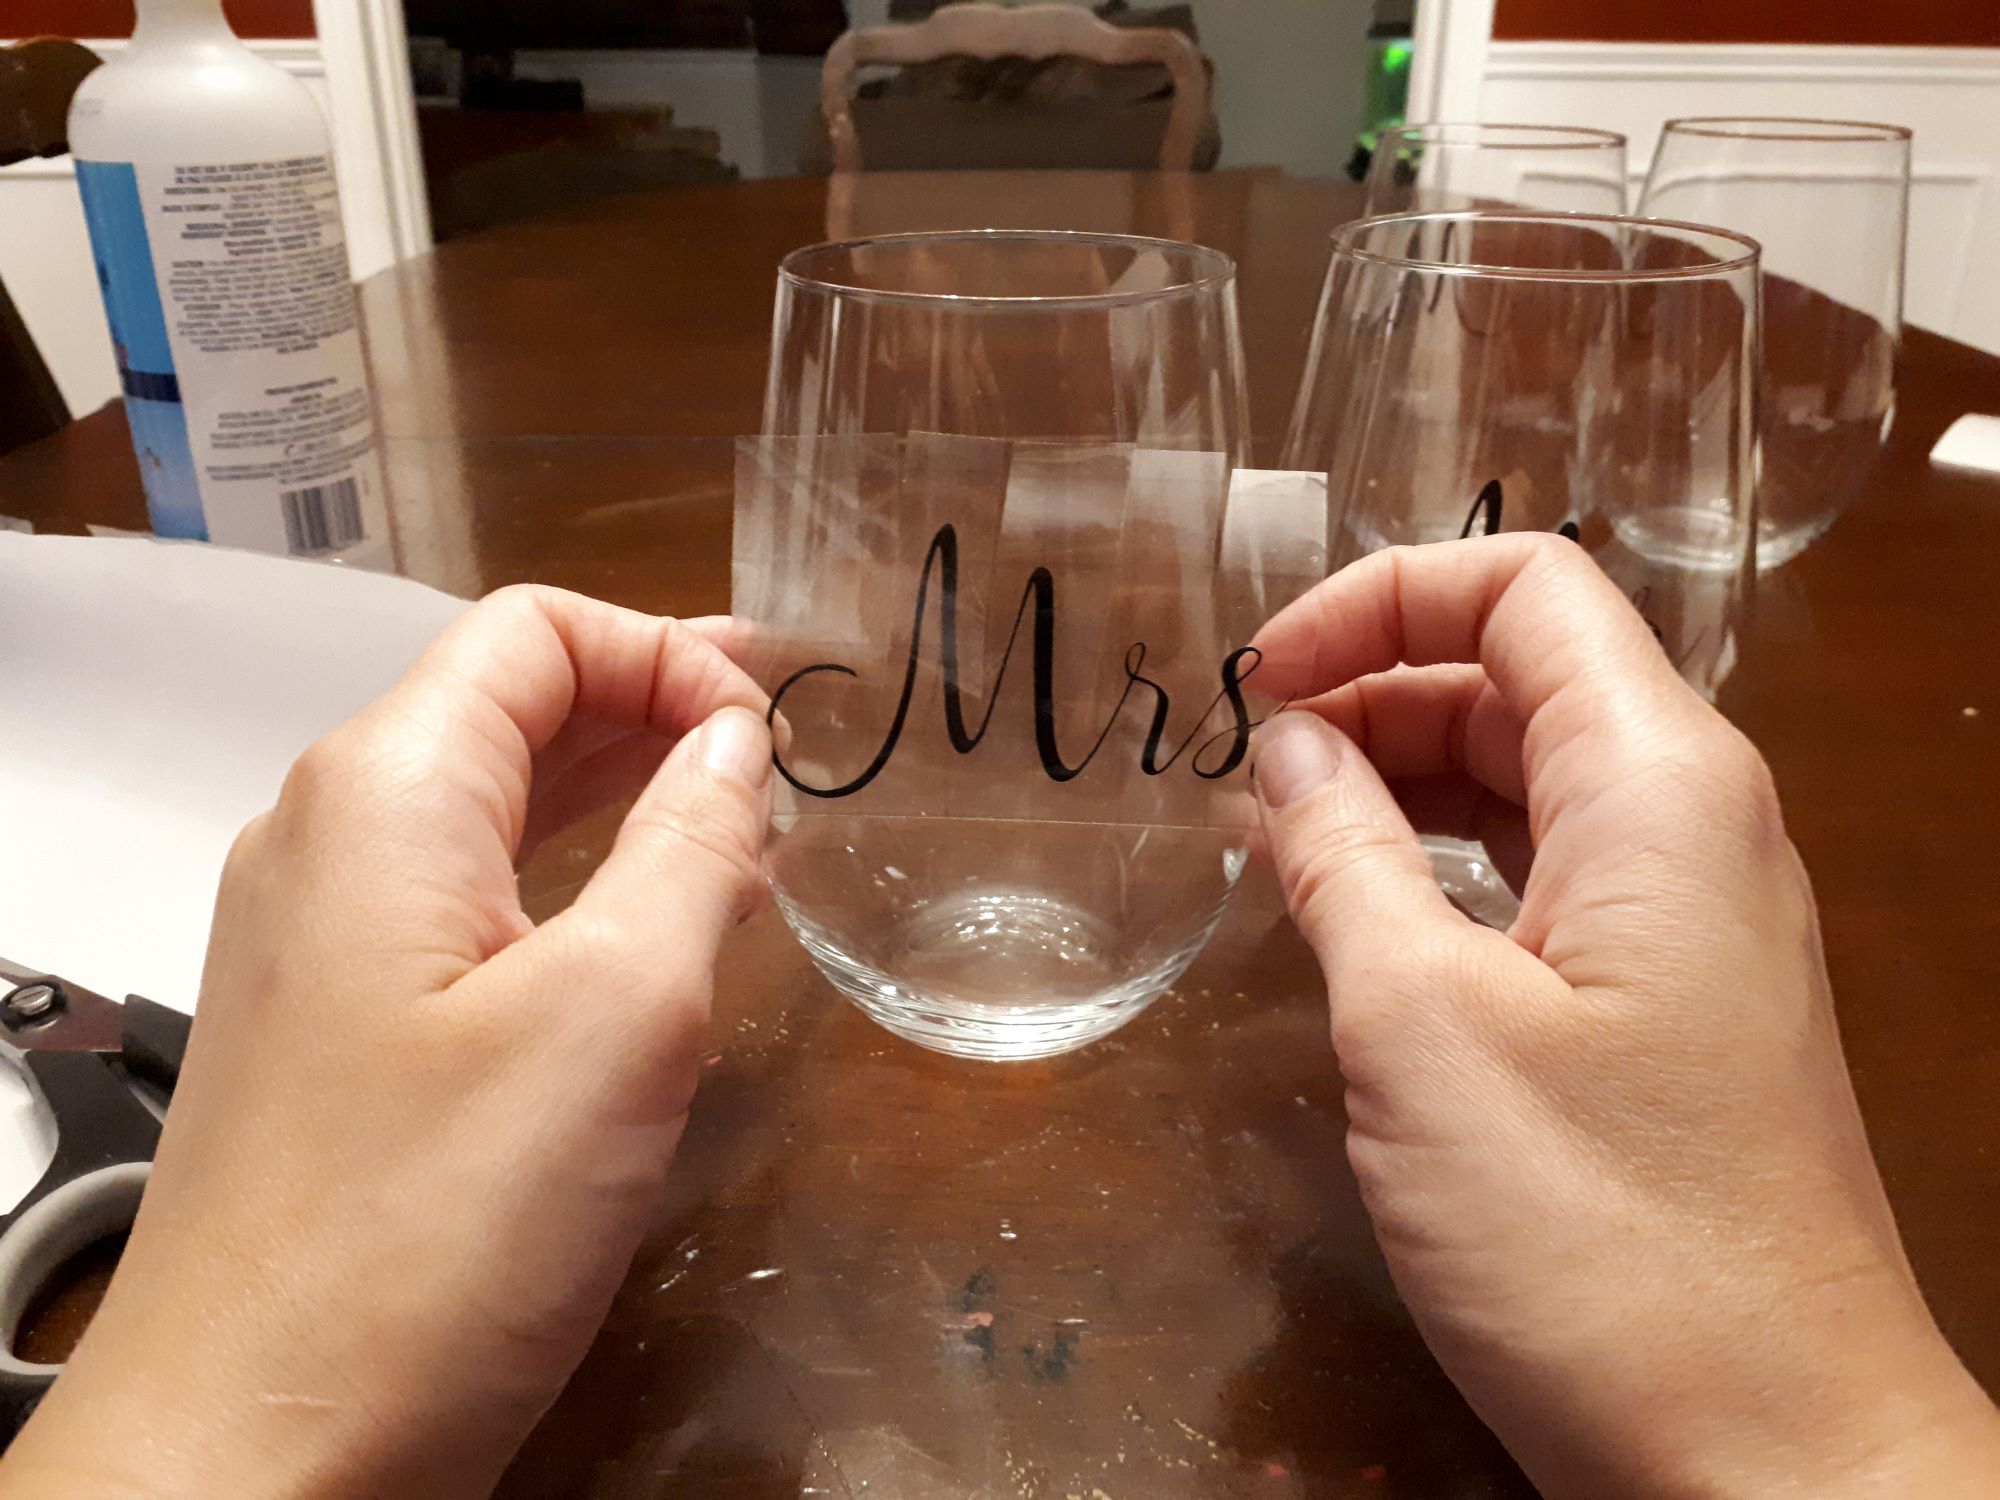
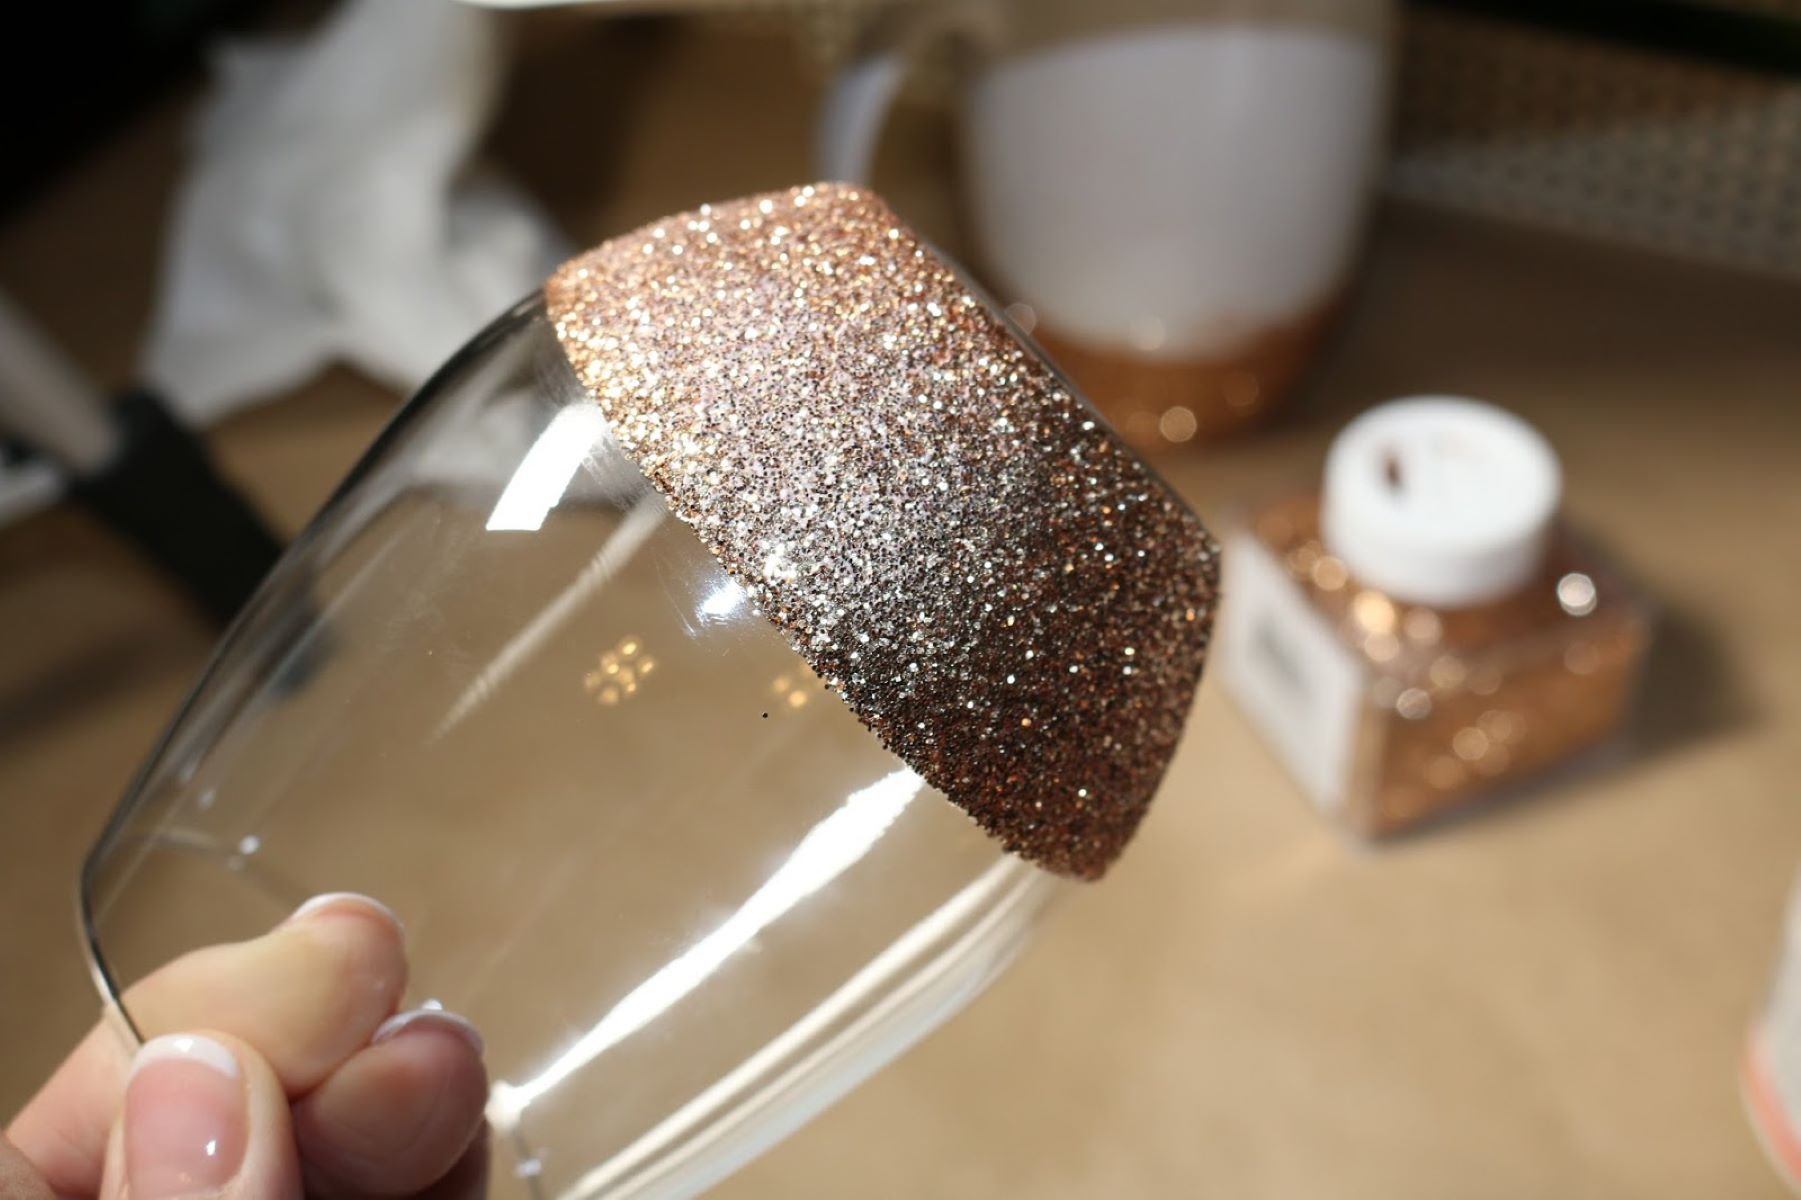
Step 2: Apply the Water Slide Decal
With the glass surface meticulously cleaned and prepared, it's time to proceed with the application of the water slide decal. This step requires precision and attention to detail to ensure that the decal adheres smoothly and accurately to the glass surface, creating a seamless and professional-looking result. Follow these detailed instructions to apply the water slide decal with care and precision:
-
Prepare the Water Slide Decal: Carefully cut out the desired water slide decal from the sheet, leaving a small margin around the design to facilitate handling. If the decal is intricate or delicate, use sharp, precision scissors to achieve clean and precise edges.
-
Soak the Decal: Fill a small container with room-temperature water and gently submerge the water slide decal in the water. Allow the decal to soak for the recommended duration, typically around 30-60 seconds, or as specified by the manufacturer. The soaking process activates the adhesive backing of the decal, preparing it for application.
-
Remove the Decal: After the soaking period, carefully slide the water slide decal from its backing paper. Use caution to avoid tearing or damaging the decal during this process. The decal should easily slide off the backing paper once the adhesive is activated.
-
Position the Decal: Using tweezers or your fingertips, carefully position the water slide decal onto the desired area of the glass surface. Take your time to align the decal precisely, ensuring that it is centered and level according to your design preferences. The decal should glide smoothly into place on the wet glass surface.
-
Smooth Out Air Bubbles: Gently smooth out any air bubbles or wrinkles that may appear beneath the decal using a clean, soft cloth or a squeegee designed for delicate surfaces. Start from the center of the decal and work outward to eliminate any trapped air and achieve a seamless adhesion.
-
Blot Excess Water: Lightly blot the surface of the decal with a clean, dry cloth to remove any excess water and ensure that the decal adheres firmly to the glass. Take care not to shift or displace the decal during this process, maintaining its precise positioning.
By following these detailed steps, you can successfully apply the water slide decal to the glass surface with precision and care. The meticulous application process sets the stage for the next crucial step: sealing the decal with a clear sealant to protect and preserve its appearance for the long term. With the decal now in place, you're ready to proceed to the subsequent step of sealing the decal to ensure its durability and longevity on the glass surface.
Step 3: Let the Decal Dry
After successfully applying the water slide decal to the glass surface, it's crucial to allow sufficient time for the decal to dry thoroughly. This step is essential for ensuring that the decal adheres securely to the glass and that any residual moisture evaporates, leaving behind a seamless and polished finish. Properly drying the decal is a critical precursor to the subsequent step of sealing it with a clear sealant to protect and preserve its appearance.
The drying process for water slide decals typically varies based on environmental factors such as temperature, humidity, and air circulation. However, as a general guideline, it's recommended to allow the decal to air dry undisturbed for a minimum of 1-2 hours. During this time, the water used to activate the decal's adhesive will gradually evaporate, allowing the decal to bond firmly with the glass surface.
To facilitate the drying process and ensure optimal results, consider the following tips:
-
Avoid Disturbance: Once the water slide decal is in place on the glass surface, refrain from touching or disturbing it during the drying period. Any movement or manipulation of the decal could disrupt its positioning and adhesion, potentially compromising the final result.
-
Optimal Drying Environment: Place the glass item in a well-ventilated area with moderate room temperature. Adequate air circulation will aid in the evaporation of moisture, expediting the drying process and promoting a smooth and secure bond between the decal and the glass.
-
Patience is Key: While it may be tempting to proceed to the sealing step immediately, exercising patience during the drying phase is crucial. Allowing the decal to dry completely will contribute to a flawless and durable finish, ensuring that the subsequent application of the clear sealant yields optimal results.
By allowing the water slide decal to dry thoroughly, you set the stage for the final step of sealing the decal with a clear sealant, thereby safeguarding its appearance and longevity. With the drying process complete, you're now prepared to proceed to the pivotal step of sealing the decal to preserve its visual appeal and protect it from external elements.
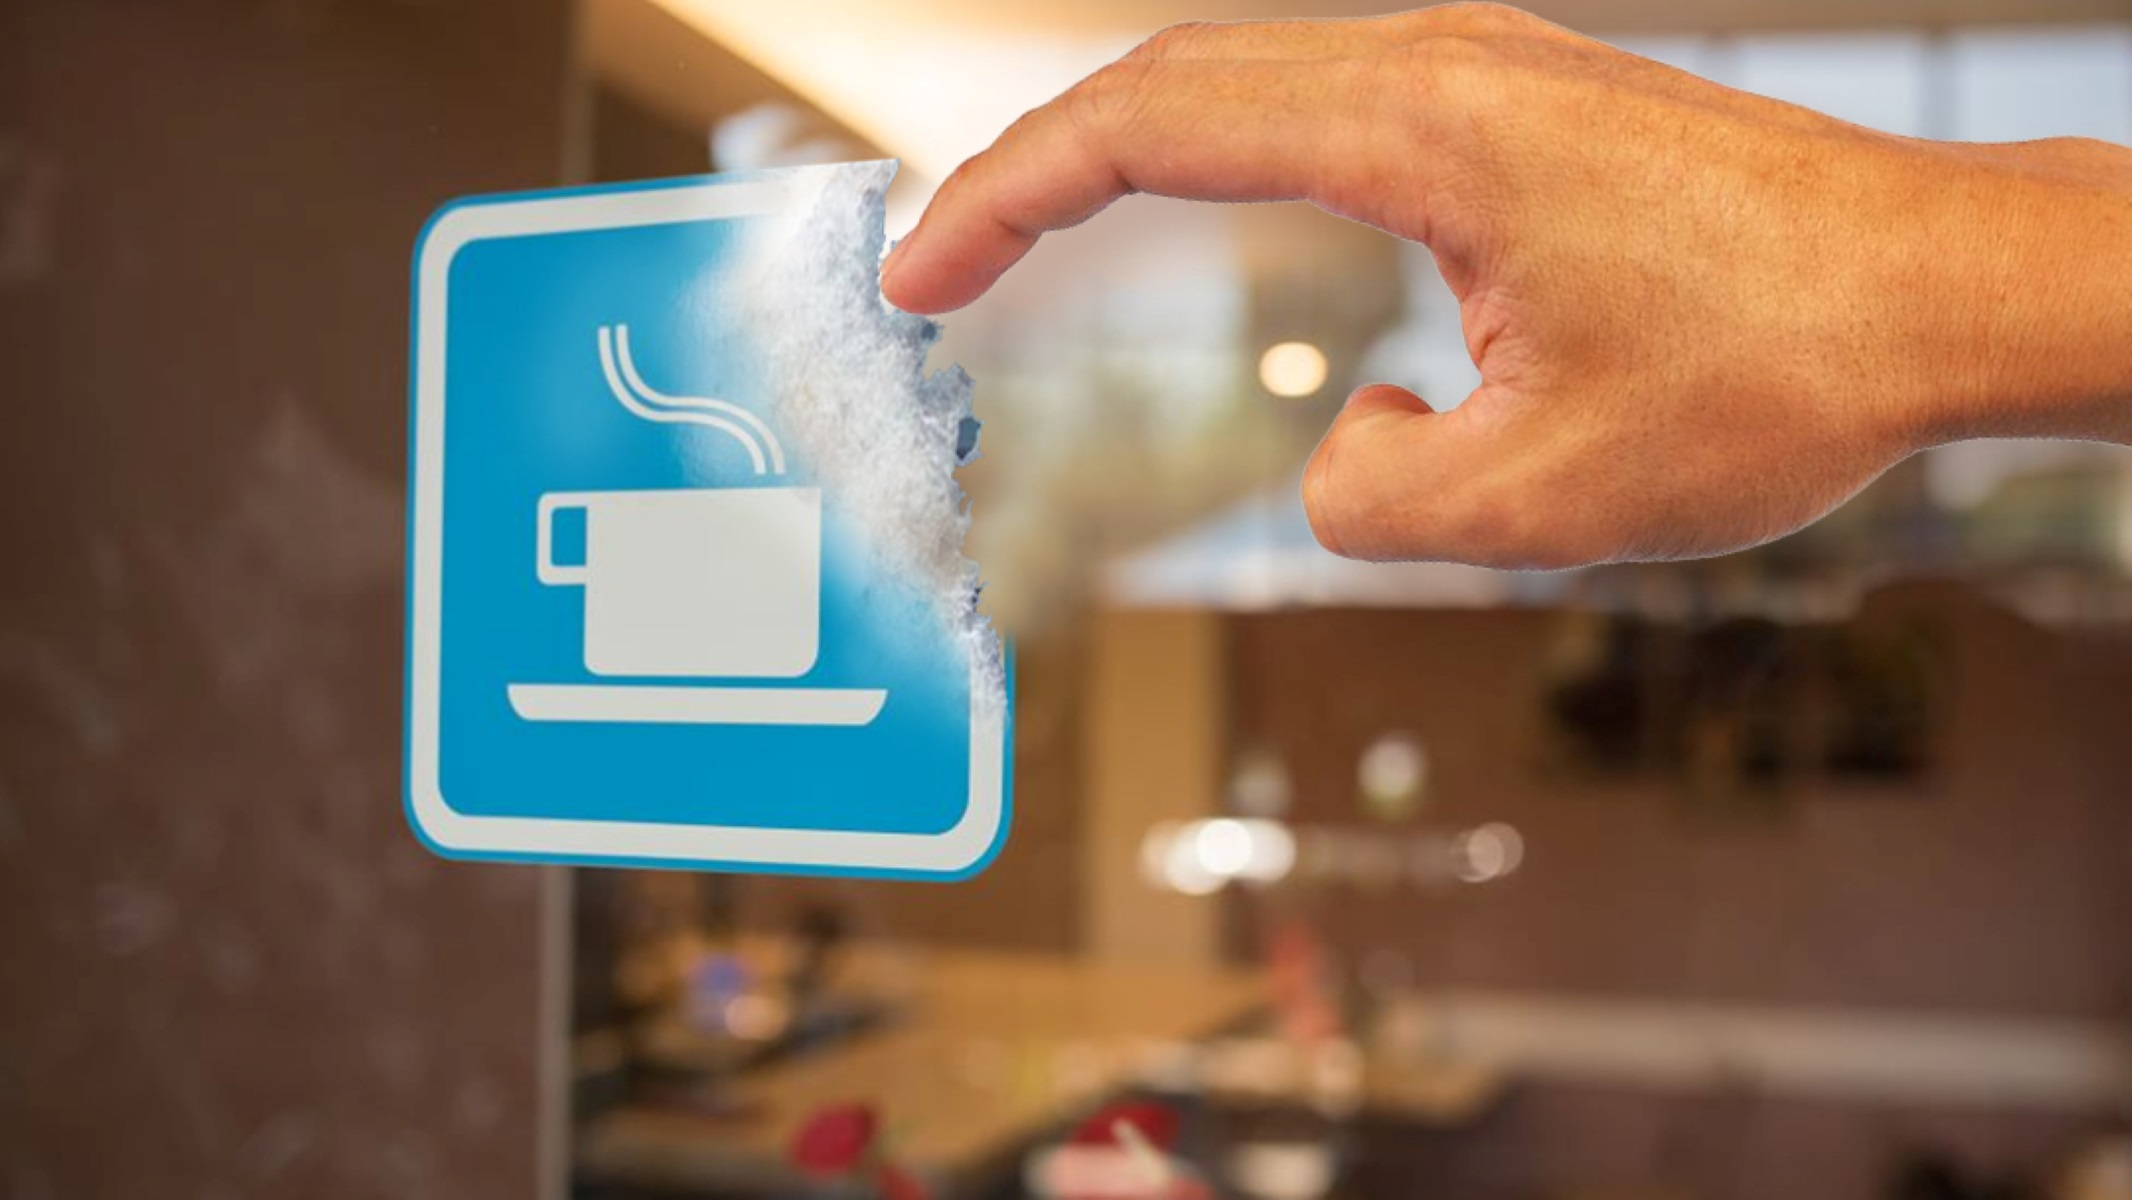
After applying water slide decals on glass, seal them with a clear acrylic sealer spray. This will protect the decals from water and wear, and give them a smooth finish.
Read more: How To Seal Sliding Glass Door
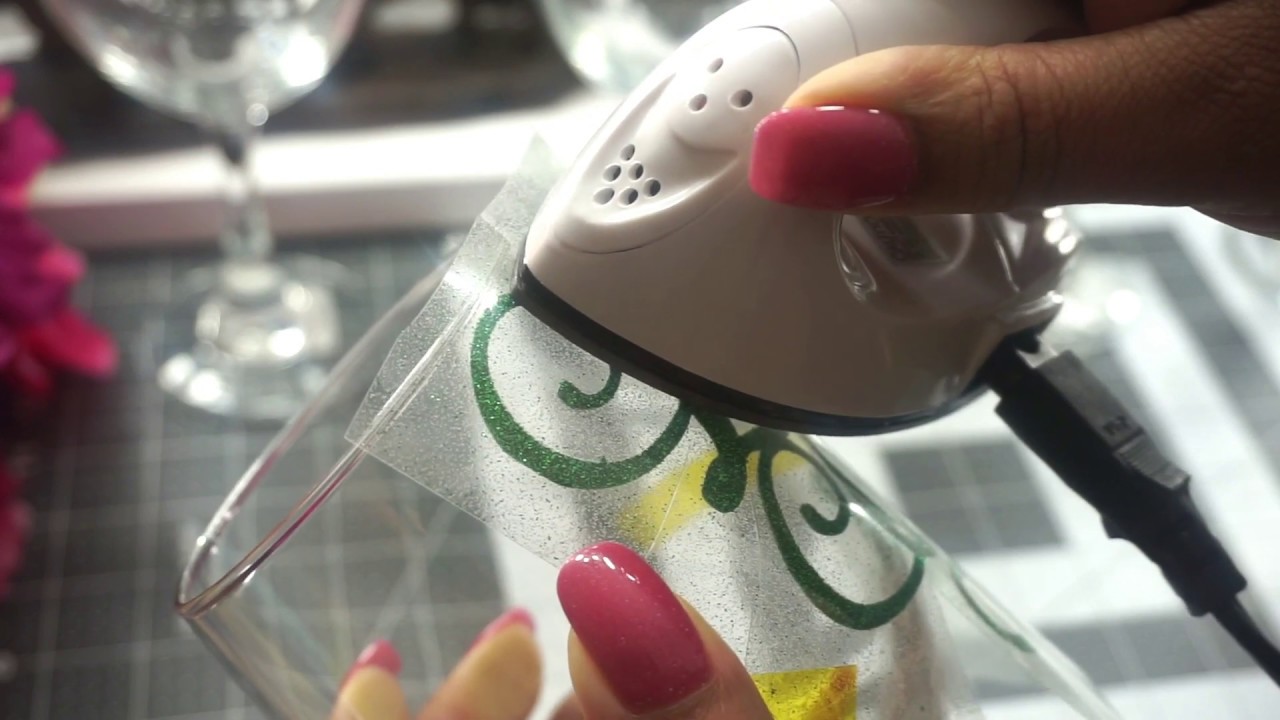
Step 4: Seal the Decal with Clear Sealant
Sealing the water slide decal with a clear sealant is a critical step in preserving its appearance and ensuring long-term durability on the glass surface. The clear sealant acts as a protective barrier, shielding the decal from moisture, abrasion, and fading, while also enhancing its visual impact. By following the detailed instructions outlined below, you can effectively seal the water slide decal, safeguarding its beauty and integrity for years to come.
Application of Clear Sealant
-
Select a High-Quality Sealant: Choose a clear sealant specifically formulated for glass surfaces. Ensure that the sealant is compatible with water slide decals and offers durable protection against environmental factors.
-
Prepare the Sealant: Shake the clear sealant container well to ensure proper mixing of the formula. If using a brush-on sealant, stir it gently to achieve a uniform consistency before application.
-
Apply the Sealant: Using a small paintbrush or foam brush, carefully apply a thin, even layer of clear sealant over the entire surface of the water slide decal. Work methodically to cover the decal completely, ensuring that the sealant extends slightly beyond the edges of the decal for comprehensive protection.
-
Smooth Application: Maintain a steady hand and smooth, consistent strokes while applying the sealant to avoid streaks or uneven coverage. Take care to prevent the formation of air bubbles or excess pooling of the sealant, which could affect the final finish.
-
Allow Drying Time: After applying the clear sealant, allow the glass item to dry undisturbed in a dust-free environment. Follow the manufacturer's recommendations regarding the drying time, typically ranging from 1-2 hours, to ensure that the sealant sets and cures effectively.
Additional Considerations
-
Multiple Coats: For enhanced protection, consider applying multiple thin coats of clear sealant, allowing each layer to dry completely before adding the next. This approach builds a resilient barrier and reinforces the longevity of the water slide decal on the glass surface.
-
Protective Measures: While applying the clear sealant, wear protective gloves to prevent direct contact with the sealant and maintain the cleanliness of the glass surface. Additionally, work in a well-ventilated area to ensure proper air circulation during the application process.
By meticulously sealing the water slide decal with a clear sealant, you fortify its resilience and visual allure, ensuring that it withstands the test of time and usage. The clear sealant not only enhances the vibrancy of the decal but also provides a protective shield against external elements, allowing you to enjoy your personalized glass decor with confidence and pride. With the decal now securely sealed, the final step involves allowing the sealant to dry completely, culminating in a professional and enduring finish.
Step 5: Let the Sealant Dry
After meticulously applying the clear sealant to the water slide decal on the glass surface, it is imperative to allow the sealant to dry thoroughly. This crucial step ensures that the sealant sets and cures effectively, creating a resilient and protective barrier over the decal. Proper drying is essential for achieving a flawless and enduring finish that will withstand regular use and cleaning without compromising the decal's appearance.
To facilitate the drying process, it is recommended to place the glass item in a well-ventilated area with minimal dust exposure. Adequate air circulation contributes to the evaporation of moisture within the sealant, allowing it to solidify and form a durable coating over the decal. While the specific drying time may vary based on environmental factors such as temperature and humidity, it is advisable to allow the sealant to dry undisturbed for a minimum of 24 hours.
During the drying period, it is crucial to avoid any contact with the sealed decal to prevent smudges, imprints, or disruptions to the sealant's surface. Patience is key during this phase, as allowing the sealant to dry completely will ensure optimal adhesion and protection for the water slide decal. Additionally, maintaining a dust-free environment is essential to prevent particles from adhering to the drying sealant, which could compromise its smooth and uniform finish.
As the sealant dries, it undergoes a curing process, gradually forming a robust and transparent shield over the water slide decal. This protective layer not only enhances the visual impact of the decal but also safeguards it from moisture, scratches, and fading, ensuring its longevity and resilience. Once the sealant has dried completely, the water slide decal will be securely encapsulated, ready to adorn the glass surface with enduring beauty and personalized charm.
By allowing the sealant to dry thoroughly, you ensure that the water slide decal is effectively preserved and protected, ready to enrich your glass decor with its vibrant and enduring presence. With the sealant now dried and the decal securely shielded, you can admire the professional and long-lasting results of your meticulous craftsmanship, elevating the visual appeal of your glass surfaces with personalized and sealed water slide decals.
Conclusion
In conclusion, the art of sealing water slide decals on glass surfaces offers a captivating avenue for personalizing and enhancing the visual appeal of various glass items, from glassware and mirrors to windows and decorative accents. By following the comprehensive process outlined in this guide, you have gained valuable insights into the meticulous steps required to achieve professional and enduring results when applying and sealing water slide decals.
Through the careful cleaning of the glass surface, precise application of the water slide decal, and the meticulous sealing process using a clear sealant, you have embarked on a journey of creativity and craftsmanship. Each step was designed to ensure that the water slide decal adheres seamlessly, preserving its intricate design and vibrant colors while fortifying its resilience against external elements.
The thorough cleaning of the glass surface served as the foundation for the successful application of the water slide decal, ensuring that the decal adhered smoothly and securely. The precision and care exercised during the application process facilitated the seamless integration of the decal onto the glass surface, creating a visually striking and personalized embellishment.
Sealing the water slide decal with a clear sealant represented the pivotal step in safeguarding its appearance and longevity. The application of the sealant not only enhanced the vibrancy of the decal but also provided a protective shield against moisture, abrasion, and fading. By allowing the sealant to dry thoroughly, you have ensured that the water slide decal is securely encapsulated, ready to adorn your glass surfaces with enduring beauty and personalized charm.
As you reflect on the journey of sealing water slide decals on glass, you have acquired the knowledge and skills to transform ordinary glass items into captivating works of art. The personalized touch and enduring allure of sealed water slide decals offer a unique opportunity to infuse your living spaces with individuality and creativity, making a lasting impression on both residents and guests.
With the completion of the sealing process, you can now admire the professional and long-lasting results of your meticulous craftsmanship, elevating the visual appeal of your glass surfaces with personalized and sealed water slide decals. Embrace the art of preserving and showcasing water slide decals on glass, and let your creativity shine through every meticulously sealed decal, adding a touch of elegance and personality to your living spaces.
Frequently Asked Questions about How To Seal Water Slide Decals On Glass
Was this page helpful?
At Storables.com, we guarantee accurate and reliable information. Our content, validated by Expert Board Contributors, is crafted following stringent Editorial Policies. We're committed to providing you with well-researched, expert-backed insights for all your informational needs.


0 thoughts on “How To Seal Water Slide Decals On Glass”