Home>Furniture & Design>Outdoor Furniture>How To Make Outdoor Shutters For Windows
Outdoor Furniture
How To Make Outdoor Shutters For Windows
Published: January 13, 2024
Learn how to make custom outdoor shutters for windows with our expert guide. Create stylish and functional outdoor furniture with our design tips. Ideal for enhancing your outdoor space.
(Many of the links in this article redirect to a specific reviewed product. Your purchase of these products through affiliate links helps to generate commission for Storables.com, at no extra cost. Learn more)
Introduction
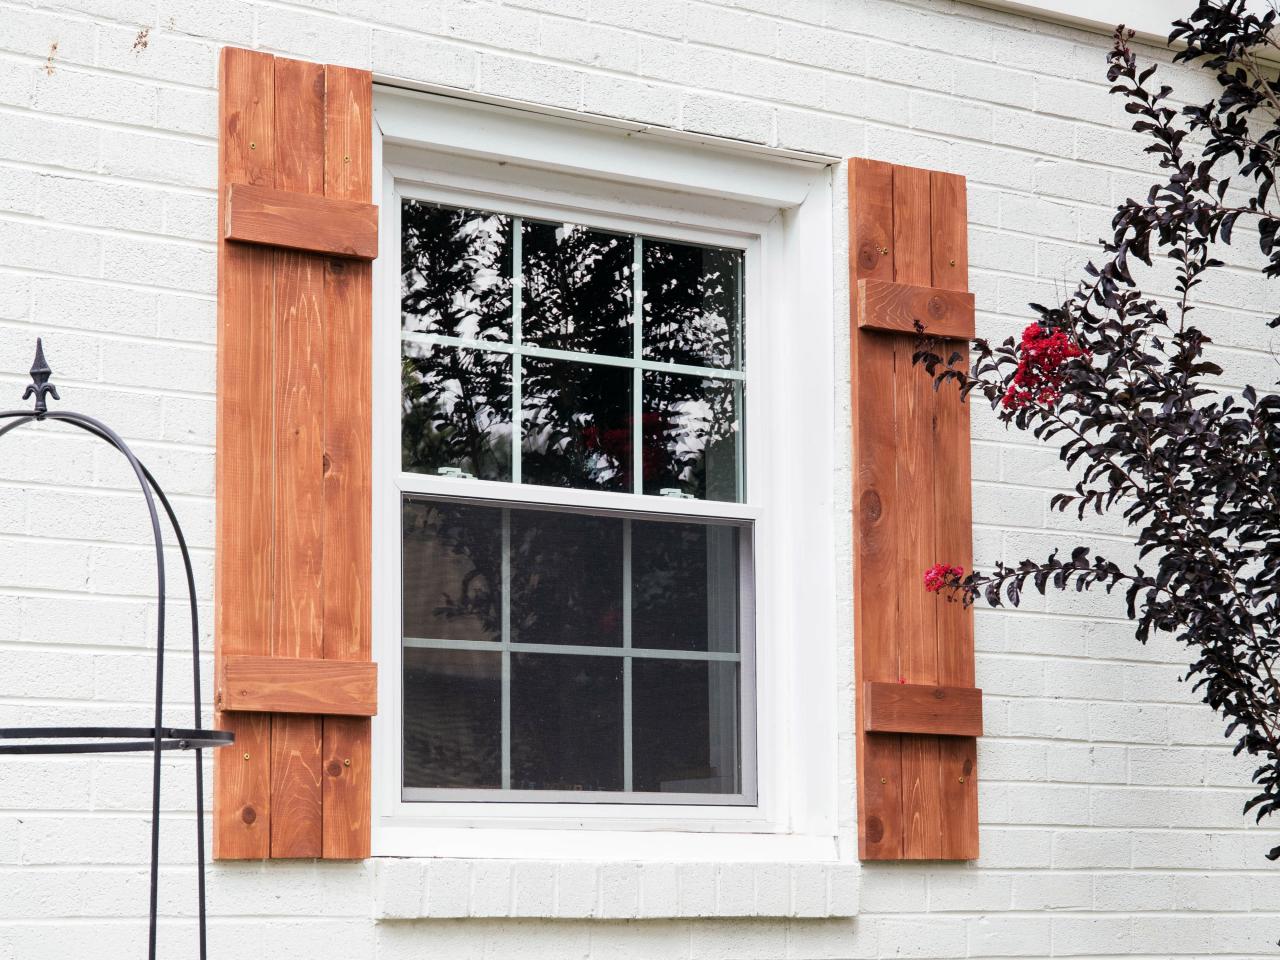
Welcome to the world of outdoor shutters! If you're looking to enhance the charm and functionality of your home's exterior, crafting your own outdoor shutters can be a rewarding and cost-effective endeavor. Whether you're a seasoned DIY enthusiast or a novice looking to delve into the realm of home improvement, this guide will equip you with the knowledge and inspiration to create stunning and functional outdoor shutters for your windows.
Outdoor shutters serve as more than just decorative elements; they also provide practical benefits such as privacy, light control, and protection from the elements. By customizing your shutters to complement your home's architectural style and color scheme, you can elevate its curb appeal and make a lasting impression on visitors and passersby.
In this comprehensive guide, we'll walk you through the process of making outdoor shutters from scratch. From gathering the necessary materials and tools to precise measuring, cutting, assembling, and installation, each step is essential to achieving professional-looking results. Whether you're aiming for a rustic, farmhouse-inspired look or a sleek and modern aesthetic, the versatility of outdoor shutters allows for endless customization possibilities.
So, roll up your sleeves, unleash your creativity, and let's embark on this fulfilling journey of crafting outdoor shutters that will not only enhance the beauty of your home but also reflect your unique style and personality. Let's dive in and discover the art of creating stunning outdoor shutters for your windows!
Key Takeaways:
- Crafting outdoor shutters is a rewarding DIY project that enhances your home’s charm and functionality. From precise measuring to thoughtful assembly, creating custom shutters allows for endless customization possibilities.
- By embarking on the journey of crafting and installing outdoor shutters, you not only enhance your home’s exterior but also gain woodworking skills and a deeper appreciation for the art of home improvement.
Materials Needed
Before diving into the construction of outdoor shutters, it’s crucial to gather all the essential materials to ensure a smooth and efficient crafting process. Here’s a comprehensive list of the materials you’ll need:
- Wood: Select high-quality, weather-resistant wood such as cedar, redwood, or composite materials designed for outdoor use. The wood should be thick enough to provide sturdiness and durability.
- Outdoor Wood Screws: Choose corrosion-resistant screws specifically designed for outdoor applications to ensure longevity and structural integrity.
- Hinges: Opt for durable, rust-resistant hinges that can withstand outdoor conditions. The size and quantity of hinges will depend on the dimensions and weight of your shutters.
- Latches or Locks (Optional): If you prefer functional shutters that can be secured, consider including latches or locks in your materials list.
- Primer: Invest in a high-quality outdoor primer suitable for the type of wood you’re using. The primer will help protect the wood from moisture and prolong its lifespan.
- Exterior Paint or Stain: Choose a UV-resistant exterior paint or stain in your preferred color to add personality and protection to your shutters.
- Wood Filler: To achieve a seamless, professional finish, have wood filler on hand to fill any gaps or imperfections in the wood.
- Sandpaper: Select various grits of sandpaper to smooth the wood and prepare it for painting or staining.
- Wood Sealer (Optional): If you opt for a natural wood finish, consider using a high-quality wood sealer to protect the shutters from moisture and UV damage.
- Weatherproofing Sealant: To ensure the shutters are well-protected from the elements, have weatherproofing sealant available for the final touches.
By acquiring these materials, you’ll be well-equipped to commence the construction of your outdoor shutters with confidence, knowing that you have everything needed to create durable, visually appealing additions to your home’s exterior.
Tools Needed
Equipping yourself with the right tools is essential for ensuring precision and efficiency throughout the process of crafting outdoor shutters. Here’s a comprehensive list of the tools you’ll need to bring your shutter-making project to life:
- Measuring Tape: A reliable measuring tape is crucial for accurately determining the dimensions of the shutters and ensuring a precise fit.
- Saw: Depending on your preference and the materials used, you may need a circular saw, miter saw, or hand saw for cutting the wood to the desired sizes and angles.
- Drill and Bits: A power drill with appropriate drill bits is essential for creating pilot holes and driving screws into the wood with ease.
- Screwdriver: Have a screwdriver on hand for tasks that require manual screwdriving, particularly for attaching hinges and hardware.
- Sanding Block or Orbital Sander: To achieve smooth and uniform surfaces, a sanding block or orbital sander will expedite the sanding process and ensure professional results.
- Clamps: Sturdy clamps are indispensable for securing wood pieces during cutting, assembly, and gluing, facilitating precise and stable construction.
- Paintbrushes or Sprayer: Depending on your chosen finishing method, have suitable paintbrushes or a paint sprayer for applying primer, paint, stain, or sealer.
- Safety Gear: Prioritize safety by wearing protective gear, including goggles, a dust mask, and work gloves, to safeguard yourself during cutting, sanding, and painting.
- Carpenter’s Square: A carpenter’s square is invaluable for ensuring that corners are perfectly square and angles are precise during the construction process.
- Pencil and Notepad: Keeping a pencil and notepad handy for jotting down measurements and notes will help you stay organized and minimize errors.
By having these essential tools at your disposal, you’ll be well-prepared to tackle each step of the shutter-making process with confidence and precision. With the right materials and tools in hand, you’re ready to embark on the fulfilling journey of crafting your own outdoor shutters.
Measuring and Cutting
Precision is paramount when it comes to measuring and cutting the components of your outdoor shutters. By following these steps, you can ensure that your shutters will fit seamlessly and function flawlessly:
1. Measure the Windows:
Begin by measuring the height and width of each window where the shutters will be installed. Take accurate measurements, accounting for any obstructions such as window sills or trim. It’s advisable to measure each window individually, as slight variations in dimensions may exist.
Read more: How To Make Wooden Shutter Blinds
2. Determine the Shutter Dimensions:
Based on your preferences and the architectural style of your home, decide on the desired dimensions of the shutters. Typically, outdoor shutters are designed to cover approximately half the height of the window when closed, but this can vary based on personal taste and regional design traditions.
3. Mark and Cut the Wood:
Transfer the measurements to the wood and mark the cutting lines using a pencil and a straight edge. If you’re creating decorative cutouts or angled tops for your shutters, use a template or carefully measure and mark these design elements before cutting.
4. Cut the Wood to Size:
Using a saw appropriate for the thickness of the wood, carefully cut along the marked lines to create the individual components of the shutters, including the stiles (vertical pieces), rails (horizontal pieces), and louvers (if applicable). Take your time to ensure clean, straight cuts that align with your measurements.
5. Sand the Edges and Surfaces:
After cutting the wood, use sandpaper or a sander to smooth the edges and surfaces of the shutter components. This step is crucial for achieving a professional finish and ensuring that the shutters fit together seamlessly during assembly.
By meticulously measuring and cutting the wood for your outdoor shutters, you’ll lay the foundation for a successful and visually appealing construction process. Attention to detail at this stage will contribute to the overall quality and functionality of the finished shutters.
Assembling the Shutters
With the individual components of your outdoor shutters cut to precise dimensions, it’s time to embark on the assembly process. This stage is where the separate pieces come together to form functional and visually striking shutters that will adorn your windows. Follow these steps to ensure a seamless and sturdy assembly:
1. Lay Out the Components:
Organize the stiles, rails, and any additional design elements such as louvers or decorative cutouts in the configuration that corresponds to each shutter. This will allow you to visualize the assembly process and ensure that all necessary components are accounted for.
2. Attach the Rails to the Stiles:
Position the rails between the stiles, aligning them evenly to create the framework of the shutter. Use clamps to hold the pieces together securely, and then pre-drill pilot holes to prevent the wood from splitting. Subsequently, drive screws through the pilot holes to firmly attach the rails to the stiles.
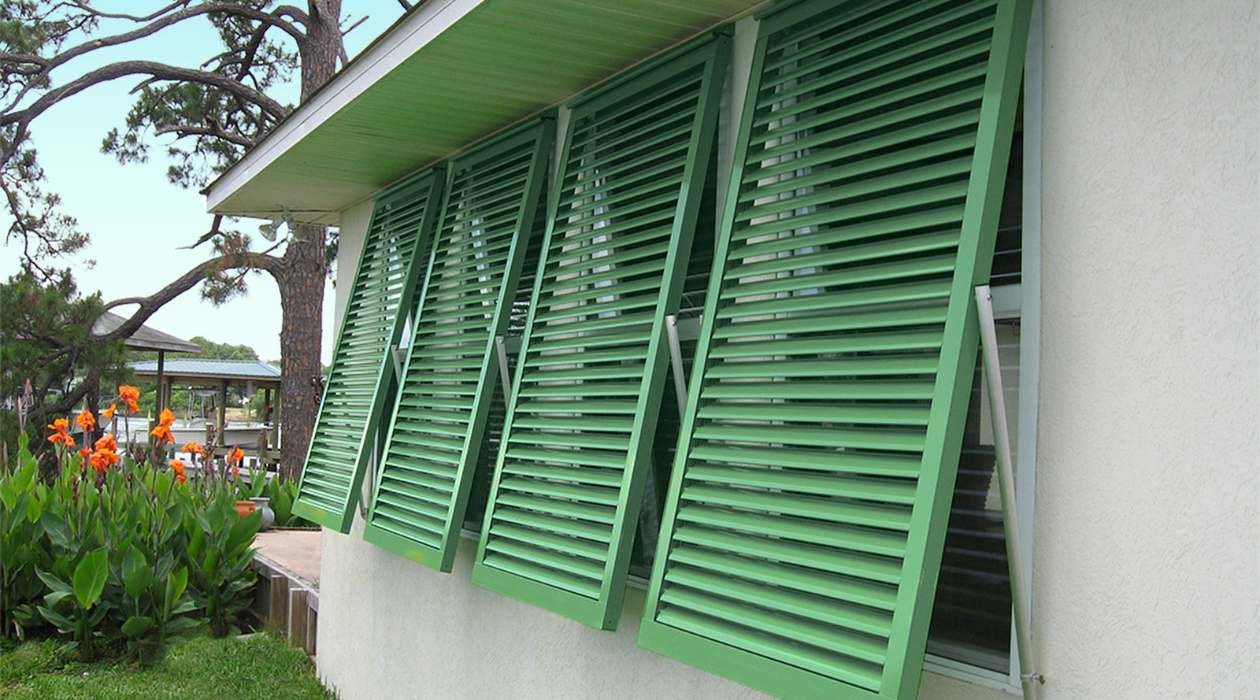
3. Add Louvers or Panels (If Applicable):
If your design incorporates louvers or panels, carefully install them within the assembled frame, ensuring consistent spacing and alignment. Secure them in place using appropriate fasteners, taking care to maintain uniformity across all shutters.
4. Test the Movement and Fit:
Before proceeding further, test the movement of the louvers or panels to ensure that they open and close smoothly without obstruction. Additionally, verify that the assembled shutters align with the dimensions of the windows and make any necessary adjustments to guarantee a proper fit.
5. Apply Wood Glue (Optional):
If you desire additional reinforcement, consider applying wood glue at the joints of the assembled components before securing them with screws. This step can enhance the structural integrity of the shutters, particularly for long-term durability.
6. Allow for Drying and Curing (If Using Glue):
If you’ve applied wood glue during the assembly process, allow the shutters to dry and cure according to the manufacturer’s recommendations. This will ensure that the adhesive forms a strong bond, contributing to the overall stability of the shutters.
By following these steps, you’ll transform individual pieces of wood into fully assembled outdoor shutters that exude craftsmanship and character. The assembly stage is where your vision takes shape, culminating in functional and aesthetically pleasing additions to your home’s exterior.
Installing the Shutters
As the assembly of your outdoor shutters nears completion, the next crucial step is their installation. Proper installation ensures that the shutters not only enhance the visual appeal of your home but also function effectively. Here’s a comprehensive guide to installing your newly crafted shutters with precision and confidence:
1. Position the Shutters:
With the help of a partner or assistant, hold each shutter in place against the corresponding window to determine the ideal positioning. Take into account factors such as clearance from the window frame, alignment with adjacent shutters, and overall aesthetic balance.
2. Mark the Mounting Holes:
Using a pencil, mark the locations for the mounting holes on the window frame or siding. These marks will guide the placement of screws or hardware to secure the shutters in position. Ensure that the marks are level and evenly spaced to maintain symmetry and stability.
3. Pre-Drill Mounting Holes:
Prior to attaching the shutters, pre-drill pilot holes at the marked locations to facilitate the insertion of screws or other fasteners. This precautionary step helps prevent the wood from splitting and ensures a secure and professional installation.
4. Attach the Hinges:
Position the hinges along the outer edges of the shutters, ensuring that they are evenly spaced and aligned with the corresponding mounting holes on the window frame. Secure the hinges in place using corrosion-resistant screws, driving them into the pre-drilled pilot holes for a robust connection.
Read more: How To Clean Shutter Blinds
5. Test the Movement and Alignment:
After attaching the hinges, open and close the shutters to verify that they move smoothly and align properly with the windows. Make any necessary adjustments to the hinge placement or mounting holes to achieve optimal functionality and aesthetic appeal.
6. Secure Latches or Locks (If Applicable):
If your design includes latches or locks for securing the shutters when closed, install them according to the manufacturer’s instructions. Ensure that the latches engage securely and that the shutters remain firmly in place when locked.
7. Apply Weatherproofing Sealant (Optional):
For added protection against the elements, consider applying a high-quality weatherproofing sealant around the edges and mounting points of the shutters. This step helps prevent moisture infiltration and prolongs the lifespan of the shutters and the surrounding surfaces.
By following these steps, you’ll complete the transformation of your home’s exterior with the installation of beautifully crafted outdoor shutters. The installation process not only enhances the functionality of your shutters but also contributes to the overall charm and character of your home.
Conclusion
Congratulations on successfully crafting and installing your own outdoor shutters! As you stand back and admire the transformation they bring to your home’s exterior, take pride in the craftsmanship and personal touch that these custom additions embody. By embarking on this DIY journey, you’ve not only enhanced the visual appeal of your home but also imbued it with character and individuality.
Through meticulous measuring, precise cutting, thoughtful assembly, and careful installation, you’ve created functional and visually striking shutters that harmonize with your home’s architectural style and reflect your unique aesthetic preferences. The versatility of outdoor shutters allows you to tailor them to your exact specifications, whether you opt for a classic, rustic look or a contemporary, sleek design.
Furthermore, the satisfaction derived from crafting your own shutters extends beyond their visual impact. You’ve honed your woodworking skills, exercised creativity, and gained a deeper appreciation for the art of home improvement. The process of transforming raw materials into a finished product that enhances your living space is a truly rewarding experience.
As your shutters stand proudly against the backdrop of your windows, they serve as a testament to your dedication and ingenuity. They not only provide practical benefits such as privacy and light control but also contribute to the overall curb appeal of your home, leaving a lasting impression on visitors and passersby.
With your newfound expertise in outdoor shutter construction, you may find inspiration to embark on additional DIY projects, further enriching your living environment and nurturing your passion for creativity and craftsmanship. Whether it’s enhancing other areas of your home or exploring new woodworking endeavors, the skills and satisfaction gained from this project will continue to resonate in your future endeavors.
As you enjoy the beauty and functionality of your handcrafted outdoor shutters, take pride in the knowledge that your efforts have not only elevated your home’s exterior but have also enriched your own DIY journey. Your custom shutters stand as a testament to your creativity, perseverance, and the joy of transforming raw materials into a cherished and functional addition to your home.
Frequently Asked Questions about How To Make Outdoor Shutters For Windows
Was this page helpful?
At Storables.com, we guarantee accurate and reliable information. Our content, validated by Expert Board Contributors, is crafted following stringent Editorial Policies. We're committed to providing you with well-researched, expert-backed insights for all your informational needs.


0 thoughts on “How To Make Outdoor Shutters For Windows”