
Furniture
How To Install A Heat Lamp In The Bathroom
Modified: October 20, 2024
Learn how to easily install a heat lamp in your bathroom to create a cozy and comfortable environment. Upgrade your furniture with this simple DIY project.
(Many of the links in this article redirect to a specific reviewed product. Your purchase of these products through affiliate links helps to generate commission for Storables.com, at no extra cost. Learn more)
Introduction
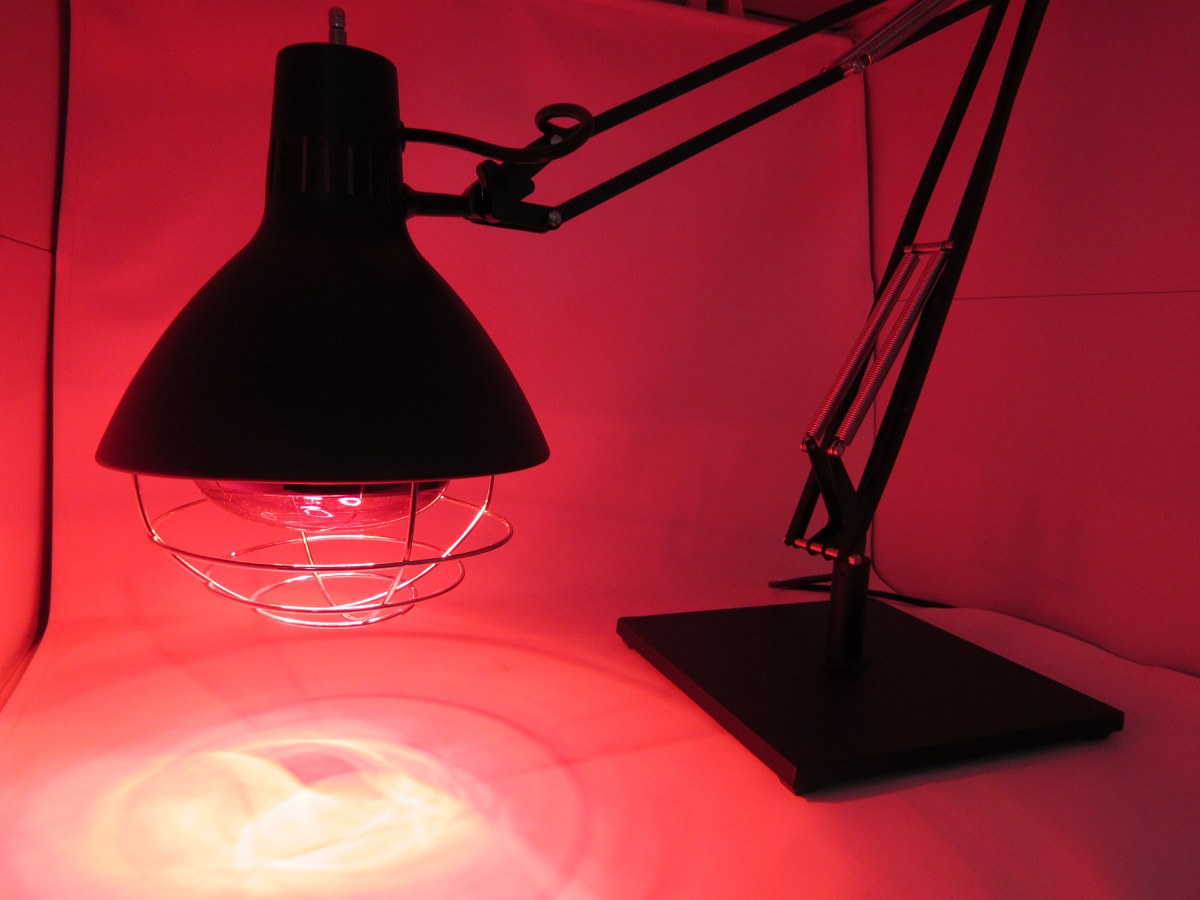
Welcome to the ultimate guide on how to install a heat lamp in the bathroom! A heat lamp is a fantastic addition to any bathroom, providing warmth and comfort especially during those cold winter months. Whether you enjoy stepping out of a hot shower into a cozy space or simply want to enhance the overall ambience of your bathroom, a heat lamp can make a significant difference.
This step-by-step guide will walk you through the process of installing a heat lamp in your bathroom, ensuring that you can enjoy the soothing heat without any trouble. From gathering the necessary tools to testing the effectiveness of the heat lamp, we will cover every aspect to guarantee a successful installation.
But before we dive into the installation process, let’s understand a bit more about heat lamps and how they work. Heat lamps, also known as infrared lamps, emit infrared radiation to generate heat. These lamps are commonly used in various applications, including bathroom heating, as they provide a quick and efficient way to warm up a targeted area. They are particularly effective in bathrooms where the moisture can make it feel colder than it actually is.
With that in mind, let’s get started on this exciting project of installing a heat lamp in your bathroom! By the end of this guide, you’ll be able to enjoy the luxurious warmth and comfort whenever you step foot in your newly upgraded bathroom.
Key Takeaways:
- Enjoy a cozy and luxurious bathroom experience by installing a heat lamp. Follow the step-by-step guide for a safe and efficient installation, and bask in the soothing warmth during chilly winter months.
- Prioritize safety and comfort when installing a heat lamp in your bathroom. Gather the right tools, choose the perfect lamp, and ensure secure wiring for a delightful and relaxing ambiance.
Read more: 10 Best Bathroom Heat Lamps Of 2022
Step 1: Gather necessary tools and materials
Before you begin the installation process, it’s crucial to gather all the necessary tools and materials. Having everything prepared and within reach will make the installation process much smoother and more efficient. Here’s a list of what you’ll need:
- Heat lamp fixture
- Wire strippers
- Screwdriver (Phillips and flathead)
- Electrical tape
- Wire connectors
- Circuit tester
- Step ladder
- Protective gloves
- Eye protection goggles
- Pencil
- Measuring tape
Make sure to choose a heat lamp fixture that is suitable for bathroom use and meets all safety requirements. Additionally, check the wattage and sizing specifications to ensure compatibility with your bathroom space.
It’s also important to prioritize safety throughout the installation process. Always wear protective gloves and eye protection goggles to prevent any potential injury. If you’re unsure about any electrical work, it’s best to consult a professional electrician.
Once you have gathered all the necessary tools and materials, you’ll be ready to move on to the next step – choosing the right heat lamp for your bathroom.
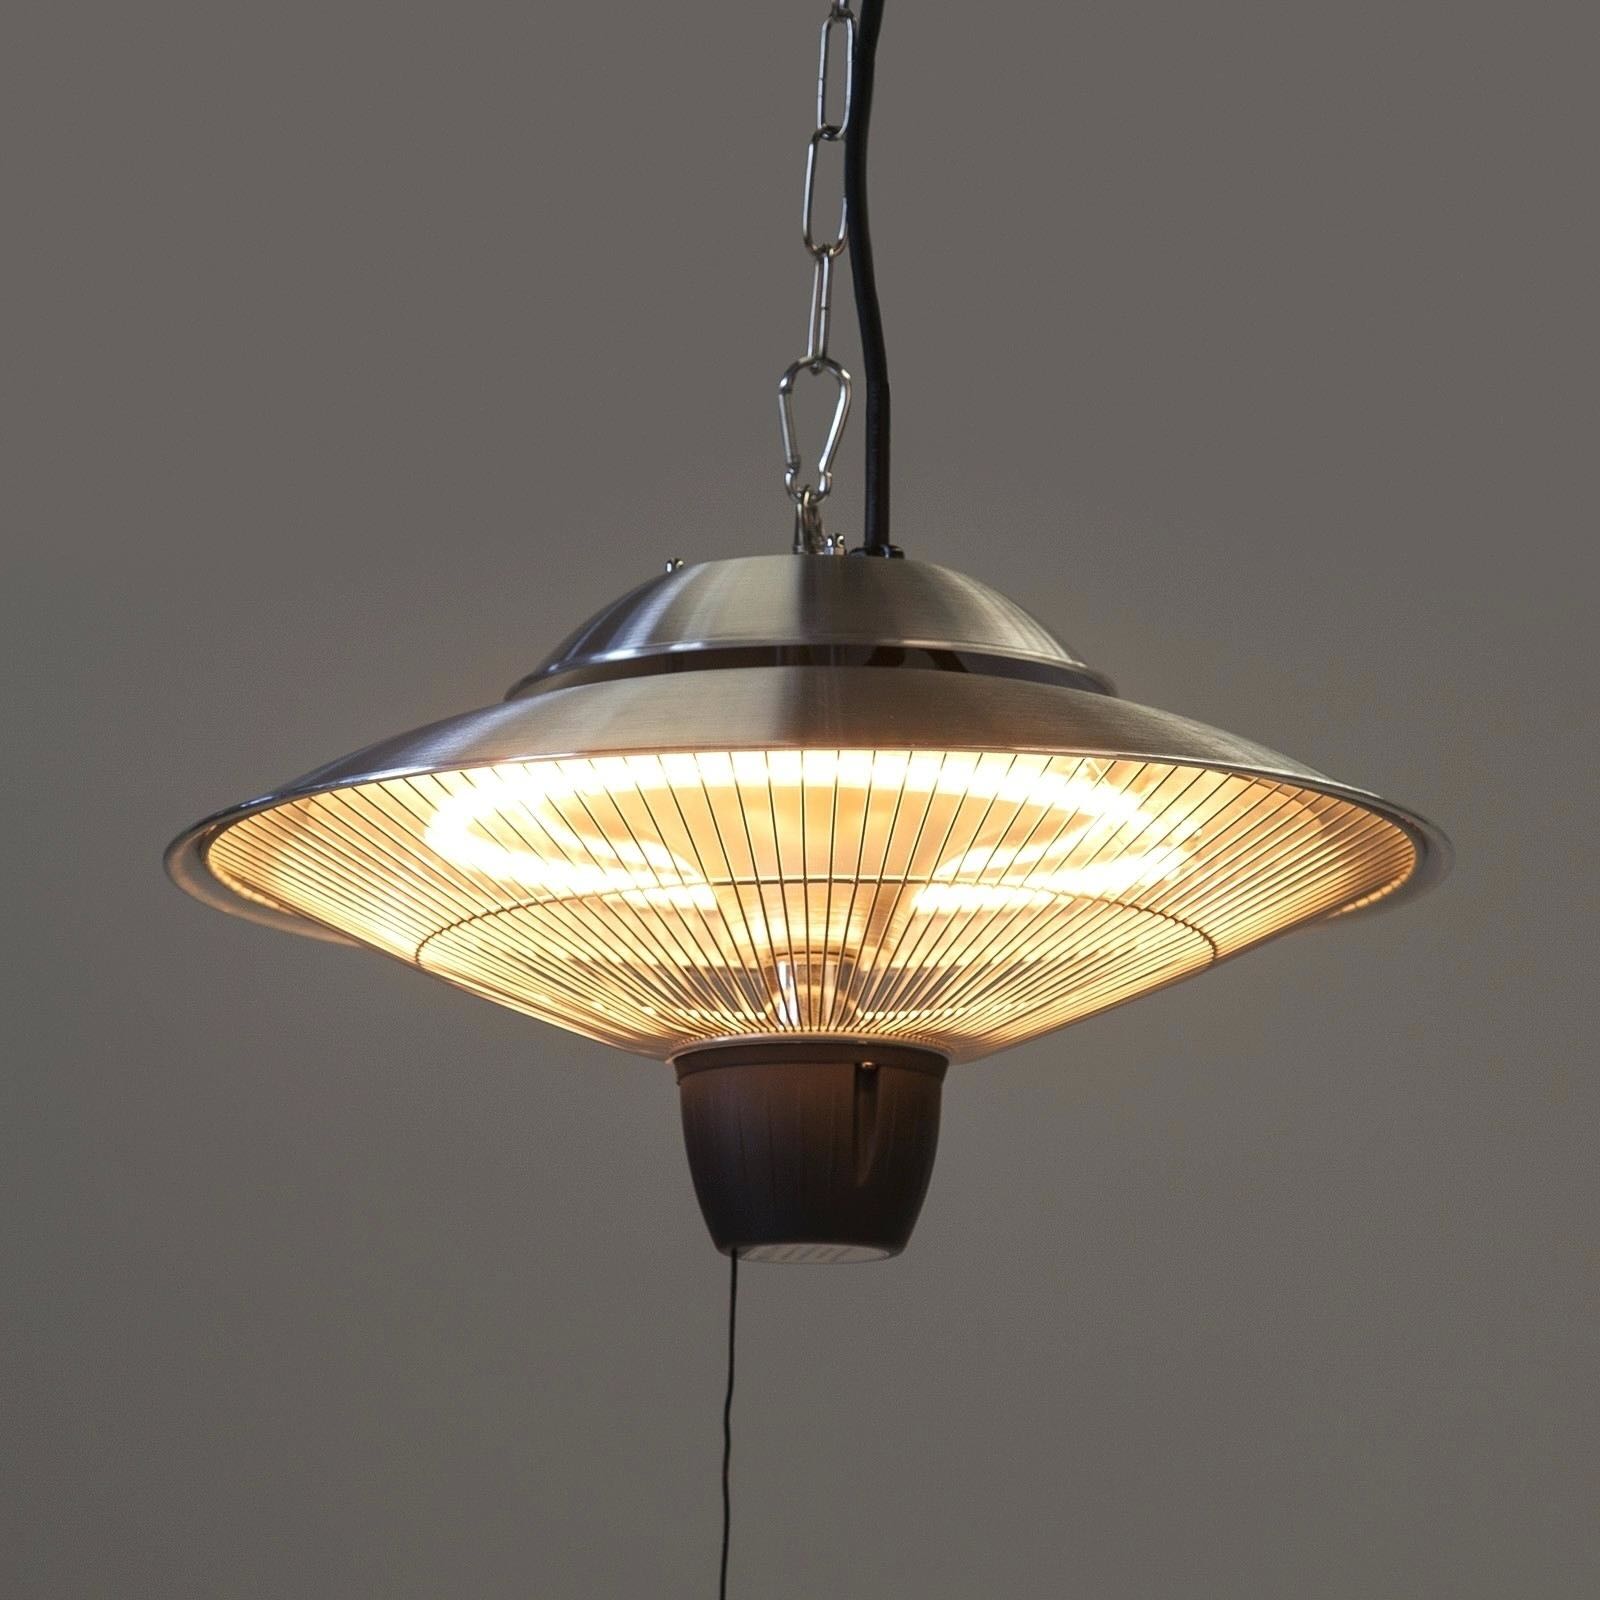
Step 2: Choose the right heat lamp
Choosing the right heat lamp for your bathroom is crucial to ensure optimal performance and safety. Here are a few factors to consider when selecting a heat lamp:
- Wattage: Determine the appropriate wattage based on the size of your bathroom. Higher wattage lamps produce more heat, but it’s essential to choose one that won’t overpower the space.
- Type of lamp: Heat lamps come in various types, including incandescent, halogen, and LED. Each type has its own set of benefits and considerations. Incandescent lamps are the most common and affordable, while halogen lamps provide more intense heat. LED lamps are energy-efficient but might not emit as much heat as other types.
- Features: Consider additional features that may enhance your experience, such as adjustable heat settings or built-in timers.
- Safety certifications: Ensure that the heat lamp you choose meets all relevant safety certifications and standards.
Research different brands and read reviews to help you make an informed decision. It’s also a good idea to consult with a professional if you have any specific concerns or questions.
Once you have selected the right heat lamp, you’re ready to move on to the next step – turning off the power.
Step 3: Turn off the power
Before you start any electrical work, it is crucial to turn off the power to the bathroom. This step is essential to ensure your safety and prevent any accidents or electrical shock.
Follow these steps to turn off the power:
- Locate your home’s electrical panel or circuit breaker box.
- Open the panel or box cover.
- Look for the circuit breaker labeled “Bathroom” or “Bath Heat Lamp”.
- Flip the corresponding circuit breaker to the “Off” position.
- Use a circuit tester to double-check that the power is indeed turned off.
Remember to exercise caution and treat all wires and electrical components as if they are live until you can confirm that the power is off.
Once the power is safely turned off, you can proceed with the next step – removing the existing fixtures from the bathroom.
Step 4: Remove existing fixtures
Now that the power is safely turned off, it’s time to remove the existing fixtures in your bathroom. Follow these steps:
- Start by removing any lightbulbs or shades from the existing fixtures. Set them aside in a safe place for now.
- Using a screwdriver, carefully remove the screws or fasteners that hold the fixtures in place. Take note of the location of these screws as you will need them later.
- Gently pull the fixtures away from the wall or ceiling. Be careful not to damage any wiring or electrical connections behind them.
- If there are any wires connected to the fixtures, use wire strippers to remove the insulation from the ends of the wires.
- Once the fixtures and wires are disconnected, set them aside for disposal or future use if they are still in good condition.
Removing the existing fixtures might reveal a junction box or electrical wiring. Take a moment to inspect the wiring and ensure there are no signs of damage or wear. If you notice any issues, it’s best to consult a professional electrician before proceeding further.
With the existing fixtures removed, you’re now ready to move on to the next step – installing the heat lamp itself.
Step 5: Install the heat lamp
Now that you have removed the existing fixtures, it’s time to install the heat lamp in your bathroom. Follow these steps:
- First, read the instructions provided with your heat lamp fixture. Familiarize yourself with the installation process and any specific guidelines or precautions.
- Position the heat lamp fixture in the desired location on your wall or ceiling. Use a pencil to mark the spots where you will need to attach it.
- Using a screwdriver, secure the fixture to the wall or ceiling using the screws or fasteners provided. Ensure that it is firmly and securely attached.
- Double-check that the heat lamp is installed at a safe distance from any combustible materials, such as curtains or towels.
- If your heat lamp fixture has an adjustable arm or swivel feature, adjust it to your preferred angle or direction. This will allow you to direct the heat where you need it most.
During the installation process, it is important to handle the heat lamp fixture with care and avoid placing any unnecessary strain on the wiring or connectors.
Once the heat lamp is securely installed, you can move on to the next step – connecting the wiring.
When installing a heat lamp in the bathroom, make sure to choose a location that is at least 3 feet away from water sources to prevent any potential hazards. Always follow the manufacturer’s instructions for proper installation.
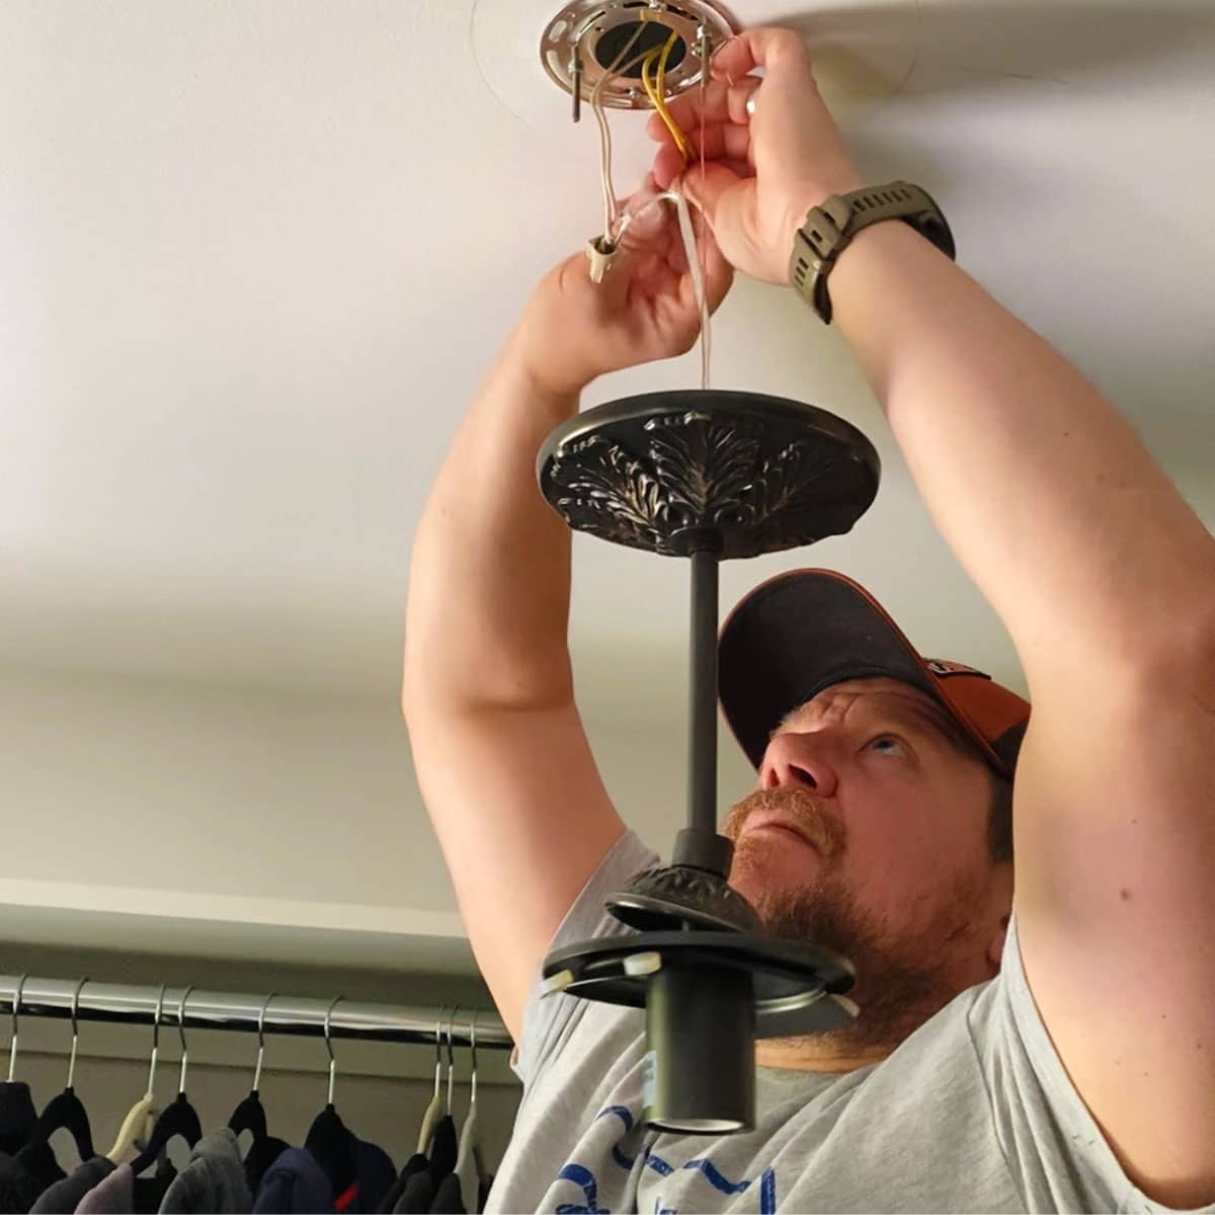
Step 6: Connect the wiring
Before connecting the wiring for your heat lamp, ensure that the power to the bathroom is still turned off. Safety should always be your top priority.
Follow these steps to connect the wiring:
- Locate the electrical junction box behind the heat lamp fixture. It is usually located in the wall or ceiling.
- Identify the black (hot), white (neutral), and green or copper (ground) wires inside the junction box.
- Using wire connectors, connect the black wire from the heat lamp fixture to the black wire inside the junction box.
- Similarly, connect the white wire from the heat lamp fixture to the white wire inside the junction box.
- If your heat lamp fixture has a ground wire, connect it to the green or copper wire inside the junction box.
- Once all the wires are securely connected, use electrical tape to cover the wire connectors and provide additional protection.
- Gently tuck the connected wires back into the junction box, ensuring that they are not pinched or strained.
It’s important to ensure that the connections are tight and secure to avoid any potential electrical hazards. If you’re unsure about the wiring or feel uncomfortable with this step, it’s best to consult a professional electrician.
With the wiring complete, you’re now ready to move on to the next step – testing the heat lamp.
Step 7: Test the heat lamp
Before fully completing the installation, it is essential to test the heat lamp to ensure that it is functioning properly. Follow these steps:
- Turn the power back on to the bathroom by flipping the corresponding circuit breaker to the “On” position.
- Return to the heat lamp fixture and switch it on. Most heat lamps have a switch or pull cord for easy operation.
- Observe the heat lamp closely to ensure that it is emitting heat and functioning as expected.
- Check for any unusual noises or smells that may indicate a problem with the heat lamp.
- If the heat lamp is not working or there are any issues, turn off the power again and check the connections and wiring. Ensure that everything is properly connected and secure.
If you encounter persistent issues with the heat lamp, it’s best to consult a professional electrician for further assistance.
Once you have confirmed that the heat lamp is working correctly, you can proceed to the next step – securing the heat lamp.
Step 8: Secure the heat lamp
Now that you have tested the heat lamp and ensured that it is functioning properly, it’s time to secure it in its final position. Properly securing the heat lamp will prevent any accidental dislodging or damage. Follow these steps:
- Inspect the heat lamp fixture and check for any adjustable brackets or screws that can be tightened to secure the lamp.
- Using a screwdriver, tighten any screws or brackets to ensure that the heat lamp is held firmly in place.
- Make sure that the heat lamp is aligned correctly and positioned at the desired angle for optimal heat distribution.
- Double-check that all connections and wiring are tightly secured and properly insulated. Use electrical tape if necessary.
Securing the heat lamp is essential to prevent any accidents or damage caused by accidental falls or misalignment. Take your time to ensure that everything is securely in place before proceeding to the next step.
With the heat lamp securely installed and adjusted, you’re now ready to move on to the final step – restoring power to the bathroom.
Step 9: Restore power
Now that you have successfully installed and secured the heat lamp, it’s time to restore power to the bathroom. Follow these steps to safely restore the power:
- Return to the electrical panel or circuit breaker box in your home.
- Locate the circuit breaker labeled “Bathroom” or “Bath Heat Lamp” that you previously turned off.
- Slowly and firmly flip the circuit breaker back to the “On” position.
- Once the circuit breaker is in the “On” position, the power will be restored to the bathroom.
- Test the heat lamp once again to ensure it is functioning properly now that the power is back on.
It’s important to confirm that the heat lamp is working correctly and there are no issues after restoring the power. If you notice any problems, immediately switch off the power and thoroughly inspect the connections and wiring or consider seeking professional assistance.
With the power successfully restored and the heat lamp in full operation, you have completed the installation process! Take a moment to bask in the warmth and ambiance of your newly installed heat lamp in the bathroom.
Congratulations on a job well done!
Before concluding, remember to clean up your work area and dispose of any packaging materials properly. If you have any remaining questions or concerns, reach out to a professional electrician for guidance and assistance.
Thank you for following along with this comprehensive guide on how to install a heat lamp in the bathroom. We hope you enjoy the extra warmth and comfort it brings to your daily grooming routine and relaxation moments!
Conclusion
Installing a heat lamp in your bathroom can bring both functional benefits and added comfort to your space. With this comprehensive guide, you have learned the step-by-step process to successfully install a heat lamp and enjoy its warmth and ambiance.
From gathering the necessary materials and tools to choosing the right heat lamp for your bathroom, each step in the installation process was covered in detail. Additionally, taking precautions such as turning off the power, removing existing fixtures, connecting the wiring, testing the heat lamp, and securing it in place are essential for a safe and effective installation.
Throughout this guide, we emphasized the importance of safety. It’s crucial to prioritize your well-being by wearing protective gear, consulting professionals when in doubt, and ensuring that the wiring and connections are properly installed.
Now that you have successfully installed your heat lamp, it’s time to enjoy its benefits. Picture yourself stepping out of a shower or bath into a warm, inviting space, especially during those chilly winter months. The radiant heat from the lamp will provide a soothing and comforting experience, making your bathroom a cozy sanctuary.
Remember, if you encounter any difficulties or are unsure about any step in the installation process, it is always recommended to consult a professional electrician. They have the expertise and knowledge to ensure a safe and efficient installation.
Thank you for following this guide and taking the initiative to enhance your bathroom with a heat lamp. We hope that this installation brings you years of comfort and enjoyment in your daily routine.
Now, go ahead and enjoy your warm and relaxing bathroom experience!
Frequently Asked Questions about How To Install A Heat Lamp In The Bathroom
Was this page helpful?
At Storables.com, we guarantee accurate and reliable information. Our content, validated by Expert Board Contributors, is crafted following stringent Editorial Policies. We're committed to providing you with well-researched, expert-backed insights for all your informational needs.


0 thoughts on “How To Install A Heat Lamp In The Bathroom”