Furniture
How To Install A Lamp Post
Modified: August 27, 2024
Learn how to install a lamp post with our step-by-step guide. Transform your outdoor space with this lovely furniture piece.
(Many of the links in this article redirect to a specific reviewed product. Your purchase of these products through affiliate links helps to generate commission for Storables.com, at no extra cost. Learn more)
Introduction
Adding a lamp post to your outdoor space can not only enhance the aesthetics of your property but also provide much-needed lighting. Whether you want to illuminate your driveway, garden, or patio, installing a lamp post is a practical and stylish solution. In this article, we will guide you through the step-by-step process of installing a lamp post, from gathering the necessary tools and materials to testing the final product.
Before you begin the installation, it is important to ensure that you have the right tools and materials on hand. This will help you complete the project smoothly and efficiently. Additionally, you should always prioritize safety when working with electrical components. If you are uncomfortable or unsure about any part of the installation process, it is recommended to consult a professional electrician to ensure the proper installation and wiring of the lamp post.
Now that we’ve covered the basics, let’s jump into the step-by-step guide on how to install a lamp post.
Key Takeaways:
- Enhance your outdoor space with a stylish and functional lamp post by following a step-by-step installation guide. Prioritize safety, choose the right location, and test the lamp post for optimal results.
- Transform your outdoor area with a well-lit and visually appealing lamp post. From gathering tools to testing the final product, ensure proper installation, prioritize safety, and enjoy the benefits of functional lighting.
Read more: How To Decorate A Lamp Post
Step 1: Gather necessary tools and materials
Before you can begin installing a lamp post, you’ll need to gather the necessary tools and materials. Having everything ready beforehand will streamline the installation process and prevent unnecessary delays. Here’s a list of the tools and materials you’ll need:
- Lamp post fixture
- Lamp post base or anchor
- Concrete mix
- Shovel or post hole digger
- Trowel
- Screwdriver or wrench
- Electrical wire
- Wire connectors
- Outdoor electrical box
- Light fixture
- Bulb
- Waterproof sealant or silicone glue
- Safety goggles
- Work gloves
Once you have all the necessary tools and materials, inspect each item to ensure they’re in good working condition. You don’t want any surprises during the installation process. If any component is damaged or faulty, it’s best to replace it before proceeding.
Additionally, make sure to double-check the measurements and specifications of the lamp post and the light fixture. This will ensure that they are compatible and can be properly installed together.
By gathering the tools and materials in advance, you’ll have everything you need at your fingertips when it’s time to install the lamp post. This will save you time and make the process much more efficient.
Step 2: Choose a location for the lamp post
Choosing the right location for your lamp post is crucial for both functionality and aesthetics. Here are some key factors to consider when selecting the perfect spot:
- Accessibility: Ensure that the location is easily accessible for maintenance and repairs. You don’t want to struggle reaching the lamp post when changing bulbs or fixing any electrical issues.
- Lighting needs: Identify the areas that require adequate lighting. Whether it’s illuminating a pathway, driveway, or garden, choose a location that will provide optimal visibility and enhance safety.
- Power source: Determine the proximity to a power source, such as an exterior electrical outlet or junction box. This will determine the length and routing of the electrical wiring.
- Aesthetic appeal: Consider the overall aesthetics of your outdoor space. Choose a location that complements the architectural style and landscaping. The lamp post should enhance the visual appeal of your property.
Once you have considered these factors, take some time to visualize the lamp post in different locations. Experiment with different areas and angles to see which placement works best for your needs. Mark the chosen spot using stakes or spray paint to give you a clear reference point during the installation process.
Remember, the location you choose will have a significant impact on the functionality and overall look of your lamp post. So, take your time to find the perfect spot that meets your lighting needs and enhances the beauty of your outdoor space.
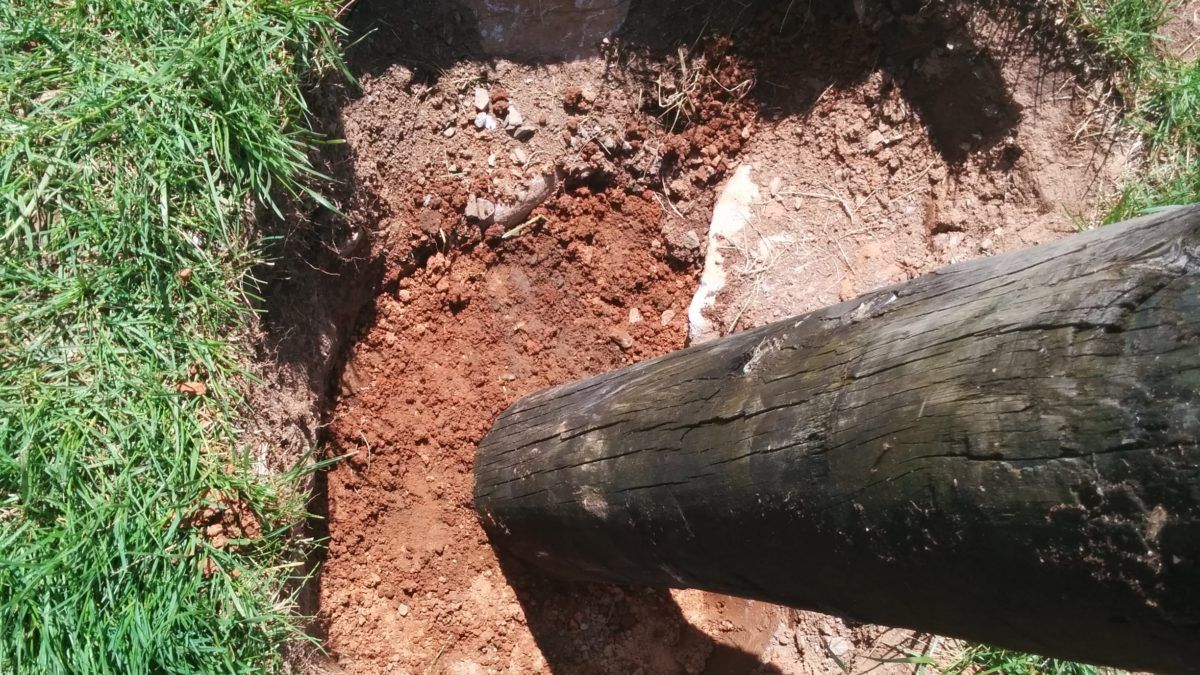
Step 3: Dig the hole for the lamp post
With the location chosen, it’s time to prepare the ground for the lamp post installation. Digging the hole is a critical step that ensures stability and ensures proper positioning of the lamp post. Follow these steps to dig the hole:
- Measure the dimensions: Refer to the lamp post manufacturer’s instructions to determine the recommended hole size for your particular lamp post. Typically, the hole should be dug to a depth of around 18 inches and a width of about 12 inches.
- Prepare the tools: Use a shovel or a post hole digger to dig the hole. Make sure the tool you choose is appropriate for the soil type and is sturdy enough to handle the digging process.
- Start digging: Begin by removing the top layer of grass or any other vegetation in the marked area. Then, start digging the hole, gradually working your way down to the desired depth. Use the shovel or post hole digger to loosen the soil and remove it from the hole.
- Check the depth: Periodically check the depth of the hole using a tape measure or a ruler. Make sure you achieve the recommended depth for your lamp post. It’s crucial to have the right depth to ensure stability and proper installation.
- Smooth the sides: Once you’ve reached the desired depth, use the shovel or post hole digger to smooth out the sides of the hole. This will help the lamp post base or anchor fit properly and securely.
While digging the hole, keep in mind any underground utilities, such as water or gas lines, that may be present in your yard. It’s vital to avoid damaging these utilities during the digging process. If you’re unsure about the location of underground utilities, contact your local utility providers before digging.
By carefully digging the hole to the appropriate size and depth, you’ll create a solid foundation for your lamp post. This will ensure that the lamp post remains stable and securely installed for years to come.
Step 4: Set the lamp post in place
After digging the hole for the lamp post, it’s time to set the post in place. This step involves positioning the lamp post base or anchor in the hole and securing it properly. Follow these steps to set the lamp post:
- Place the lamp post base or anchor: Carefully lower the lamp post base or anchor into the hole, ensuring that it sits securely and level. Use a level tool to check the alignment and make any necessary adjustments.
- Stabilize the post: To stabilize the lamp post, temporarily brace it with wooden stakes or support beams. Attach them firmly to the lamp post and drive them into the ground around the base. This will prevent the post from shifting or tilting during the next steps of the installation process.
- Check the alignment: Double-check the alignment of the lamp post by standing back and observing it from different angles. Make any adjustments as needed to ensure it is straight and visually appealing.
- Secure the base: Once you are satisfied with the alignment, use a shovel to fill the space around the lamp post base or anchor with soil. Pack the soil tightly to provide stability to the post. Take care to avoid damaging any underground utilities in the process.
It is important to ensure that the lamp post is securely positioned and straight before proceeding to the next steps. A stable and aligned lamp post not only enhances the appearance of your outdoor space but also ensures the functionality and longevity of the installation.
Once the lamp post is properly set in place, you can remove the temporary braces that were used to stabilize it. This will give you a clear working space to proceed with the further installation process.
Before installing a lamp post, make sure to check local regulations and obtain any necessary permits. It’s important to also call 811 to have underground utilities marked before digging.
Read more: How Tall Is A Lamp Post
Step 5: Secure the lamp post with concrete
Securing the lamp post with concrete is an essential step to ensure stability and durability. Concrete provides a solid foundation that prevents the lamp post from shifting or toppling over due to external forces. Follow these steps to secure the lamp post with concrete:
- Prepare the concrete mix: Follow the manufacturer’s instructions to prepare the concrete mix. Typically, you’ll need to mix the concrete with water in a wheelbarrow or mixing container until it reaches a thick consistency.
- Pour the concrete into the hole: Carefully pour the concrete mixture into the hole around the lamp post base or anchor. Fill the hole completely, ensuring that the concrete reaches the top.
- Smooth the surface: Use a trowel or a wooden plank to smooth the surface of the concrete. This will create a level and neat finish that enhances the aesthetic appeal of the lamp post installation.
- Check the alignment: Once the concrete has been poured and smoothed, check the alignment of the lamp post one final time. Use a level tool to ensure it is still straight and adjust if necessary. It’s easier to make any necessary adjustments before the concrete sets.
- Allow the concrete to cure: The concrete will take some time to cure and fully harden. Follow the manufacturer’s instructions regarding the curing time, which is typically around 24 to 48 hours. During this time, avoid any significant movement or disturbance around the lamp post.
Securing the lamp post with concrete provides a strong and stable foundation, allowing it to withstand various weather conditions and external pressures. This step is crucial for ensuring the long-term durability and functionality of the lamp post installation.
Remember to exercise caution when working with concrete. Wear safety goggles and work gloves to protect yourself from any potential splashes or skin irritation.
Once the concrete has fully cured, you can proceed to the next steps of the lamp post installation process.
Step 6: Connect the electrical wiring
Connecting the electrical wiring is a crucial step in installing a lamp post. This will ensure that the post is properly powered and can provide the desired lighting. Here’s how you can connect the electrical wiring:
- Locate the power source: Identify the nearest outdoor electrical outlet or junction box that will serve as the power source for your lamp post. Ensure that the power is turned off at the main breaker before proceeding.
- Measure and cut the electrical wire: Measure the distance from the power source to the lamp post and cut the electrical wire to the appropriate length. Allow for some extra length to provide flexibility during the installation process.
- Run the wire underground: Dig a trench from the power source to the base of the lamp post. This trench should be deep enough to bury the electrical wire, typically around 18 inches. Carefully lay the wire in the trench, ensuring that it is securely placed.
- Connect the wire: Strip the ends of the electrical wire to expose the conductors. Connect the wires to the corresponding terminals in the outdoor electrical box and the lamp post fixture. Use wire connectors to secure the connections and prevent any loose wiring.
- Test the connections: Once the connections are made, it’s important to test the electrical wiring before completing the installation. Turn the power back on at the main breaker and check if the lamp post is receiving power. If there are any issues, double-check the connections and consult a professional if needed.
When running the electrical wire, make sure to follow local building codes and regulations. Use conduit or direct burial cable to protect the wire and ensure its safety.
Always prioritize safety when working with electrical components. If you are unsure about any part of the wiring process, it is recommended to consult a professional electrician to ensure a proper and safe installation.
Once the electrical wiring is connected and tested, you can proceed to the final steps of installing the lamp post.
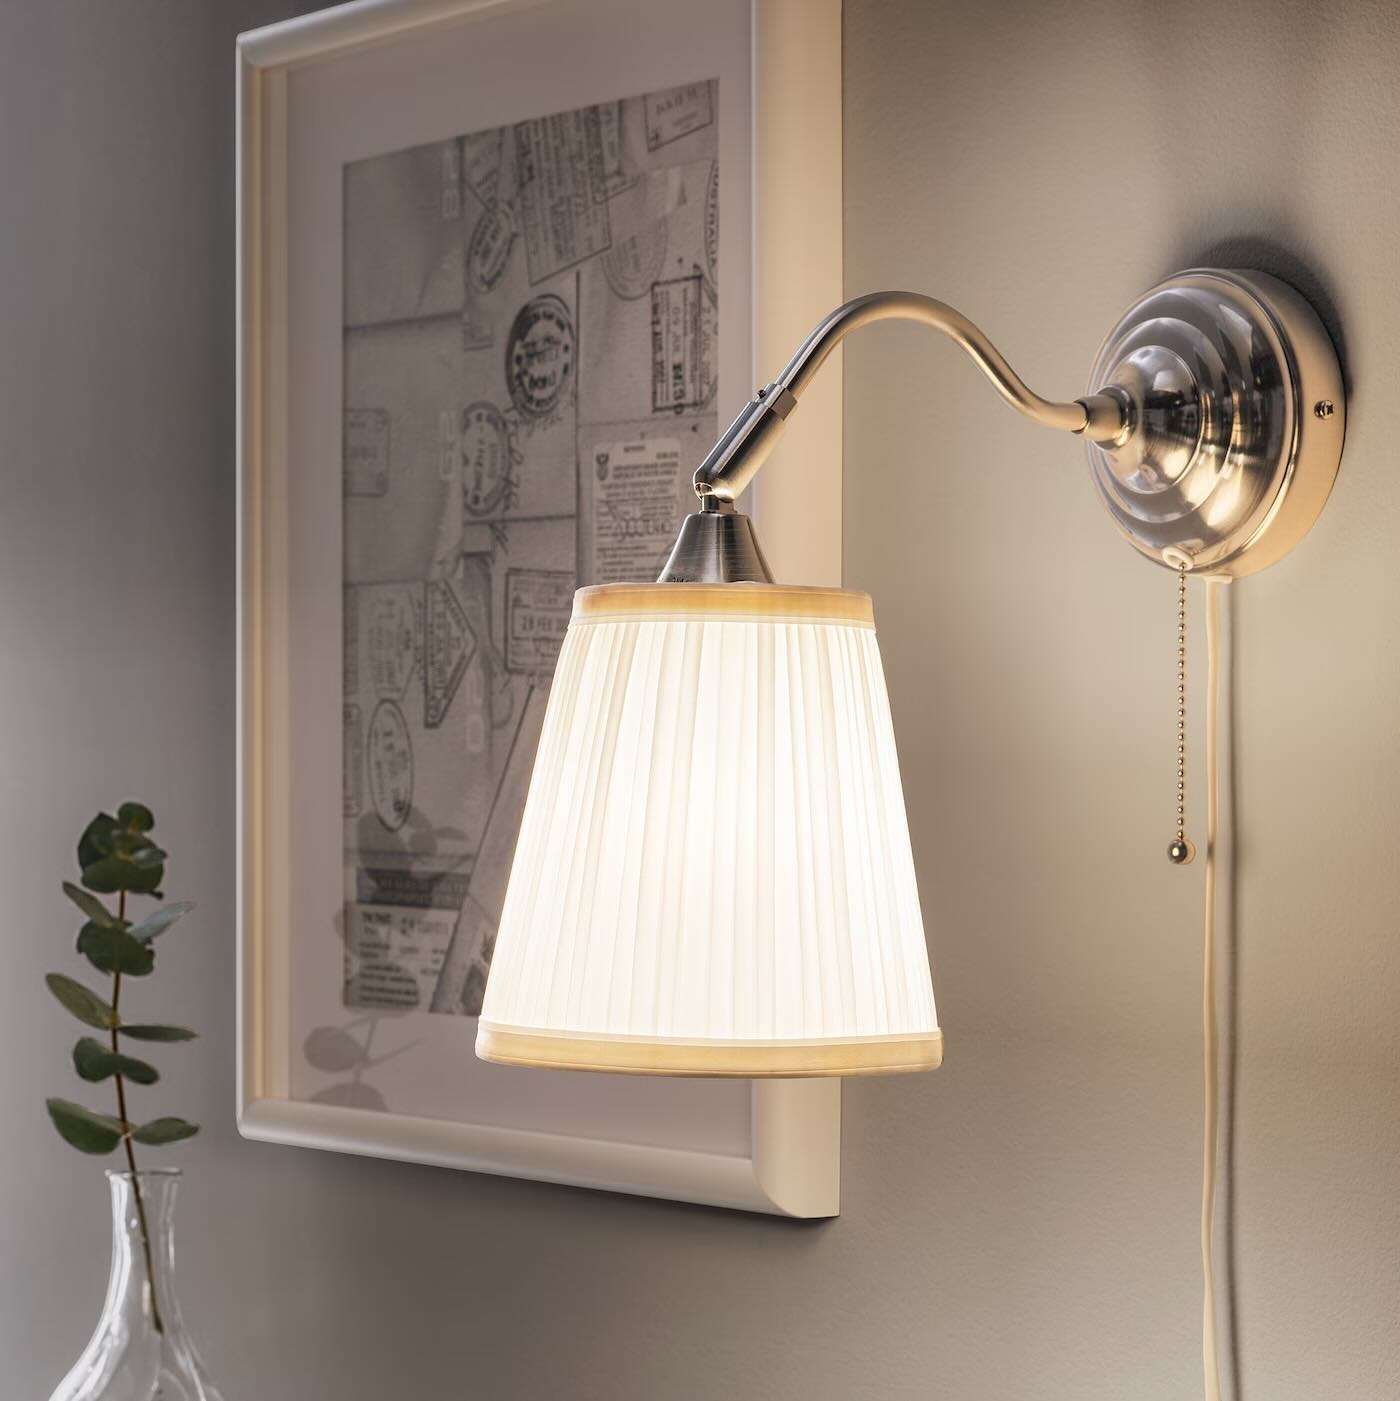
Step 7: Install the light fixture
With the electrical wiring connected, it’s time to install the light fixture onto the lamp post. This step will bring your lamp post to life and provide the desired illumination for your outdoor space. Follow these steps to install the light fixture:
- Inspect the light fixture: Before installing the light fixture, carefully inspect it to ensure it is in good condition and free from any defects or damages. Check all the components, including the bulb socket, mounting bracket, and wiring connections.
- Attach the light fixture: Depending on the type of light fixture you have, there may be specific instructions for attaching it to the lamp post. Follow these instructions and use the appropriate screws or mounting hardware to secure the fixture in place.
- Connect the wiring: Once the light fixture is attached, connect the wiring from the fixture to the electrical wire coming out of the lamp post. Use wire connectors to make secure and properly insulated connections. Follow the manufacturer’s instructions for connecting the wires.
- Secure the light fixture: Once the wiring is connected, make sure to securely fasten the light fixture to the lamp post. This will ensure that it remains stable and does not move or sway in windy conditions.
- Install the bulb: Depending on the type of bulb required, carefully install it into the socket of the light fixture. Follow any specific instructions for handling and inserting the bulb to avoid breakage or damage.
- Check the operation: After installing the light fixture and bulb, turn on the power at the main breaker and test the operation of the lamp post. Ensure that the light fixture turns on and illuminates as expected.
During the installation process, refer to the manufacturer’s instructions and follow any specific guidelines provided. This will ensure proper installation and maximize the performance of your light fixture.
Remember to exercise caution when working with electrical components and turn off the power at the main breaker whenever handling or making any adjustments to the light fixture.
Once the light fixture is installed and functioning properly, you’re almost finished with the lamp post installation process. There’s just one more step remaining.
Step 8: Test the lamp post
Before you conclude the lamp post installation, it’s crucial to test the functionality and performance of the post. This step ensures that everything is in proper working order and allows you to make any necessary adjustments or fixes. Here’s how you can test the lamp post:
- Turn on the power: Make sure the power is turned on at the main breaker to supply electricity to the lamp post. This will enable the light fixture to receive power and illuminate.
- Check the lighting: Stand back and observe the lamp post to verify that the light fixture is working correctly. Ensure that the bulb is properly lit and emitting the desired amount of light. If there are any issues, double-check the wiring connections and bulb installation.
- Adjust the direction: If your light fixture has an adjustable head or arm, you may need to adjust its direction to achieve the desired lighting effect. Move the light fixture to different angles to test its range and coverage. This will help you determine the optimal positioning for optimal lighting in your outdoor space.
- Observe the surroundings: Take a moment to assess the illumination provided by the lamp post. Walk around the area it is intended to light up and ensure there are no dark spots or areas that need additional lighting. Adjust the lamp post height or angle if needed to improve the overall coverage.
- Test the controls: If your lamp post has any additional controls or features, such as a motion sensor or timer, test them to ensure they are functioning properly. Adjust the settings according to your preferences and needs.
By testing the lamp post, you can identify and address any issues or deficiencies before finalizing the installation. This step helps ensure that the lamp post is providing the desired illumination and functionality for your outdoor space.
If you encounter any difficulties during the testing process or notice any problems with the lamp post’s performance, consult a professional electrician for assistance. They can help troubleshoot and resolve any issues to ensure a safe and reliable lamp post installation.
Once the lamp post has been tested and meets your requirements, you can consider the installation process complete. Enjoy the beauty and functionality that the lamp post brings to your outdoor space!
Read more: How To Replace An Outdoor Lamp Post
Conclusion
Installing a lamp post in your outdoor space not only enhances the aesthetics but also provides functional lighting that can improve safety and security. By following the step-by-step guide provided in this article, you can successfully install a lamp post and transform your outdoor area. From gathering the necessary tools and materials to testing the final product, each step plays a vital role in ensuring a successful installation.
Throughout the installation process, it’s important to prioritize safety and follow any local building codes or regulations. If you are unfamiliar or uncomfortable with any of the steps involved, it is always recommended to seek assistance from a professional electrician who can ensure a proper and safe installation.
Remember to carefully choose the location for the lamp post, considering factors such as accessibility, lighting needs, and aesthetic appeal. Dig the hole to the appropriate size and depth, secure the lamp post with concrete for stability, and connect the electrical wiring accurately to ensure proper functionality.
With the lamp post securely installed, you can then proceed to attach the light fixture, install the bulb, and test the lamp post’s performance. Adjust the direction of the light fixture as needed to achieve the desired lighting effect, and ensure that all controls and features are functioning correctly.
By taking the time to properly install and test the lamp post, you can enjoy the benefits of a well-lit outdoor space, creating a welcoming and visually appealing atmosphere for yourself and your guests.
Keep in mind that regular maintenance and inspections are essential to ensure the longevity and efficiency of your lamp post. Clean the fixture, replace any damaged bulbs, and periodically check the wiring connections to prevent any potential hazards.
Now that you have the knowledge and guidance to install a lamp post, it’s time to get started and brighten up your outdoor space with beautiful and functional lighting!
Frequently Asked Questions about How To Install A Lamp Post
Was this page helpful?
At Storables.com, we guarantee accurate and reliable information. Our content, validated by Expert Board Contributors, is crafted following stringent Editorial Policies. We're committed to providing you with well-researched, expert-backed insights for all your informational needs.


0 thoughts on “How To Install A Lamp Post”