Furniture
What Is A Tiffany Lamp
Modified: October 19, 2024
Discover the beauty of Tiffany lamps and how they can enhance your furniture collection. Explore the history and craftsmanship behind these iconic lighting fixtures.
(Many of the links in this article redirect to a specific reviewed product. Your purchase of these products through affiliate links helps to generate commission for Storables.com, at no extra cost. Learn more)
Introduction
Welcome to the world of Tiffany lamps! These iconic pieces of lighting have been captivating both interior design enthusiasts and collectors for over a century. Known for their intricate stained glass designs and exquisite craftsmanship, Tiffany lamps add a touch of elegance and charm to any space. In this article, we will explore the fascinating history of Tiffany lamps, delve into their unique characteristics, learn about the process of making them, discover popular styles, and gain insights into collecting and valuing these timeless treasures.
Named after their creator, Louis Comfort Tiffany, Tiffany lamps emerged during the late 19th and early 20th centuries as a result of the Art Nouveau movement. Tiffany, a renowned American artist and designer, revolutionized the world of decorative arts with his innovative techniques and distinctive designs.
Initially inspired by the colorful glasswork found in medieval stained glass windows, Tiffany developed a method for creating intricate lampshades using small pieces of colored glass soldered together. This technique, known as the copper foil method, allowed him to achieve a level of detail and complexity not possible with traditional stained glass techniques.
The stained glass used in Tiffany lamps was carefully selected to create a harmonious blend of colors and textures. Each piece of glass was hand-cut and shaped, then wrapped in copper foil and soldered to create a sturdy and beautiful lampshade.
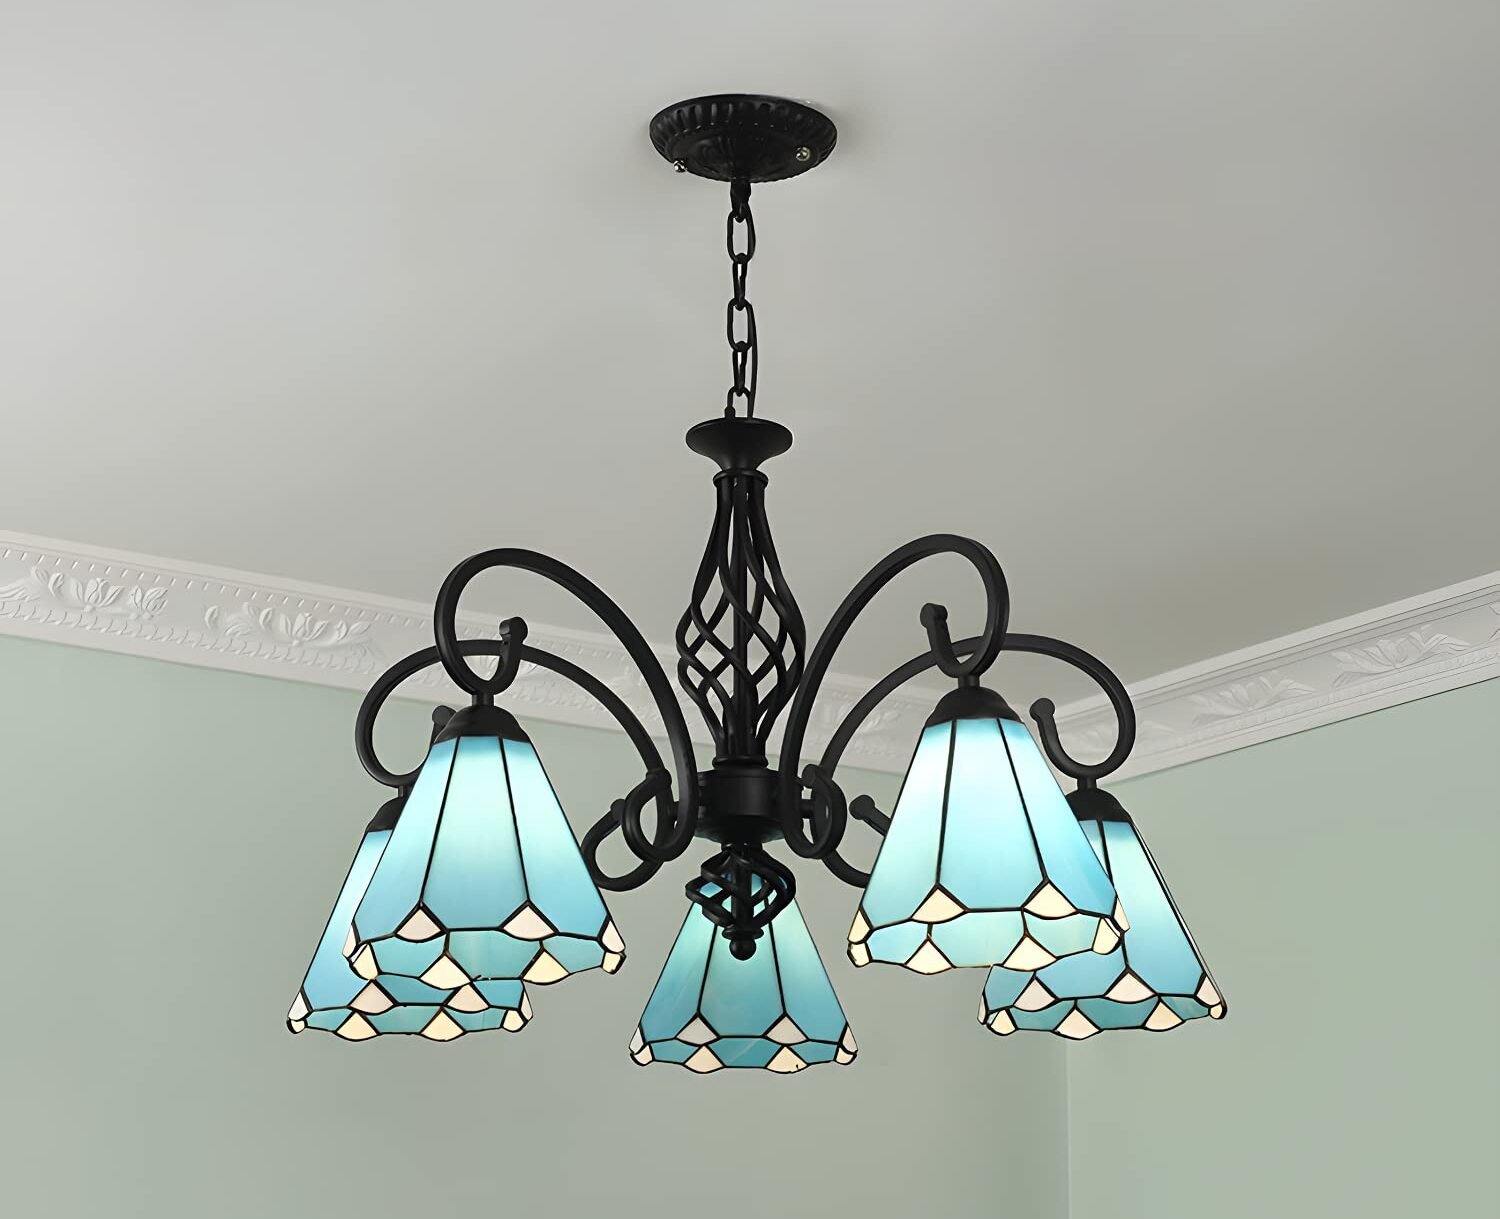
Tiffany lamps are characterized by their vibrant and intricate designs, featuring nature-inspired motifs such as flowers, dragonflies, and peacock feathers. The use of opalescent glass adds a mesmerizing glow when illuminated, creating a warm and inviting ambiance in any room.
Not only are Tiffany lamps aesthetically pleasing, but they also possess practical features that make them functional and versatile. The glass shades are designed to diffuse the light evenly, casting a soft and warm glow in all directions. Additionally, the bases of Tiffany lamps often feature decorative details, such as metalwork or mosaic patterns, further enhancing their visual appeal.
Over the years, different styles of Tiffany lamps have emerged, each with its own unique characteristics and design elements. From the iconic Dragonfly and Wisteria lamps to the more minimalist geometric designs, there is a Tiffany lamp to suit every taste and interior style.
Collecting Tiffany lamps has become a passion for many enthusiasts. The rarity, craftsmanship, and historical significance of these lamps make them highly sought after by collectors around the world. However, it is important to have a discerning eye and knowledge of authentic Tiffany lamps to avoid falling victim to reproductions or replicas.
In this article, we will explore the different styles of Tiffany lamps, delve into the intricate process of making them, discuss the value and authenticity of these lamps, and provide tips on how to start and grow your own Tiffany lamp collection.
Join us on this journey as we uncover the magic and allure of Tiffany lamps, and discover what makes them such cherished and timeless pieces of art.
Key Takeaways:
- Tiffany lamps are timeless works of art, characterized by vibrant stained glass shades, nature-inspired motifs, and meticulous craftsmanship. Their allure and historical significance make them highly sought after by collectors worldwide.
- Collecting Tiffany lamps requires knowledge of authenticity, condition, and provenance. Engaging with the collecting community, educating oneself, and seeking professional guidance are essential for building a valuable and genuine collection.
Read more: How To Tell If It’s A Tiffany Lamp
History of Tiffany Lamps
The history of Tiffany lamps begins with the visionary artist and designer, Louis Comfort Tiffany. Born in 1848 to a prominent family in New York, Tiffany was exposed to art and creativity from an early age. He initially dabbled in painting and studied at the National Academy of Design, but it was his fascination with glasswork that would shape his artistic career and leave a lasting impact on the world of decorative arts.
Tiffany’s interest in glasswork was sparked during a trip to Europe in the 1860s, where he was captivated by the beautifully crafted stained glass windows found in ancient churches and cathedrals. Inspired by the vibrant colors and intricate designs, Tiffany set out to explore new methods of glasswork that would allow him to create similar breathtaking effects.
After years of experimentation and refining his techniques, Tiffany patented the innovative copper foil method in 1885. This technique involved wrapping individual pieces of glass with copper foil and soldering them together to form a solid and intricate lampshade. Unlike the traditional leaded techniques used in stained glass, Tiffany’s method allowed for greater flexibility and the creation of intricate designs.
With his newfound technique, Tiffany established the Tiffany Glass Company in 1885 and later renamed it to Tiffany Studios. The company quickly gained recognition and acclaim for its exceptional craftsmanship and unique designs.
During the late 19th and early 20th centuries, Art Nouveau was a prominent artistic movement characterized by its emphasis on organic forms, flowing lines, and natural motifs. Tiffany’s designs perfectly embodied the spirit of Art Nouveau, with his lampshades featuring intricate patterns inspired by nature, such as flowers, dragonflies, peacock feathers, and landscapes.
Tiffany lamps became highly sought after by wealthy individuals and prominent figures of the time. They adorned the homes of affluent families, hotels, and even public spaces, adding a touch of elegance and sophistication to any environment.
Although Tiffany lamps gained popularity during their heyday, the decline of the Art Nouveau movement and the advent of modernism in the early 20th century led to a shift in tastes and a decline in demand for Tiffany’s work.
However, in the 1960s, there was a resurgence of interest in Tiffany lamps, sparked in part by their inclusion in museum exhibitions and the growing appreciation for Art Nouveau. Collectors and enthusiasts began recognizing the historical significance and artistic value of these unique pieces and started actively acquiring and preserving them.
Today, Tiffany lamps are highly sought after by collectors around the world. Each lamp represents a piece of history, a testament to Tiffany’s genius, and a work of art that continues to captivate and inspire generations.
The legacy of Louis Comfort Tiffany lives on through his timeless creations, and his influence can be seen in the works of modern-day artists and designers who draw inspiration from his innovative techniques and captivating designs.
As we continue our journey through the world of Tiffany lamps, let us now delve deeper into their unique characteristics that make them such remarkable and cherished pieces of art.
Characteristics of Tiffany Lamps
Tiffany lamps are renowned for their distinctive characteristics that set them apart from other forms of decorative lighting. From their vibrant colors to their intricate designs, these lamps possess a unique charm that enchants viewers. Let’s explore the key characteristics that define Tiffany lamps:
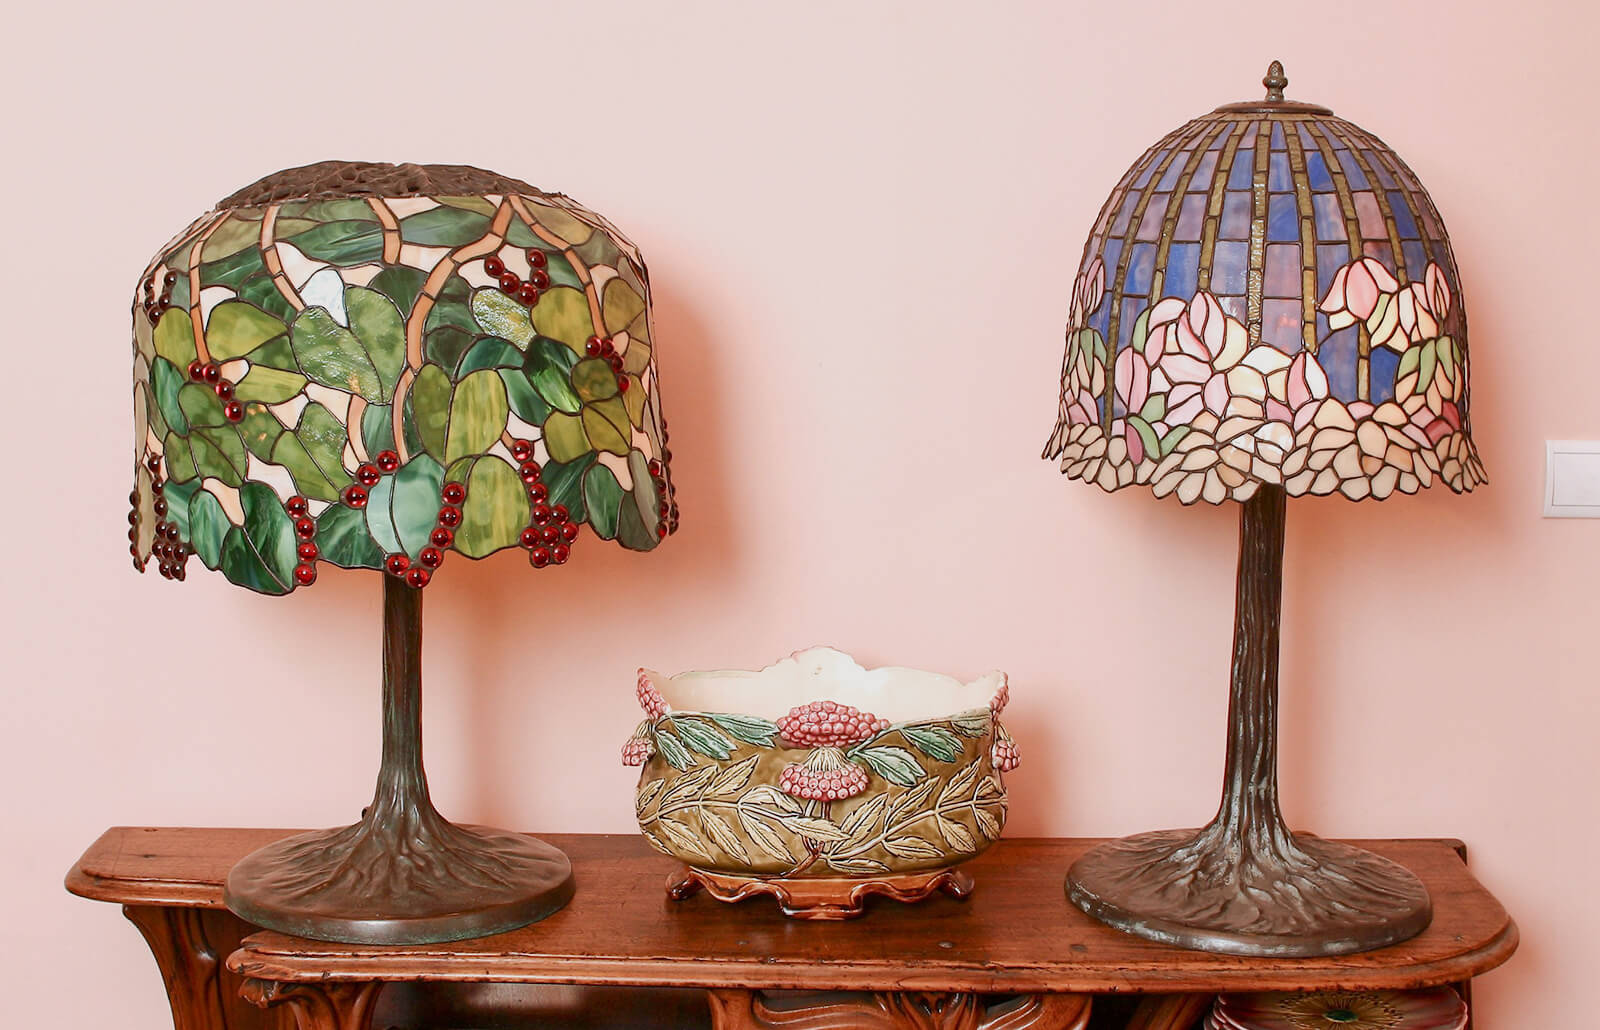
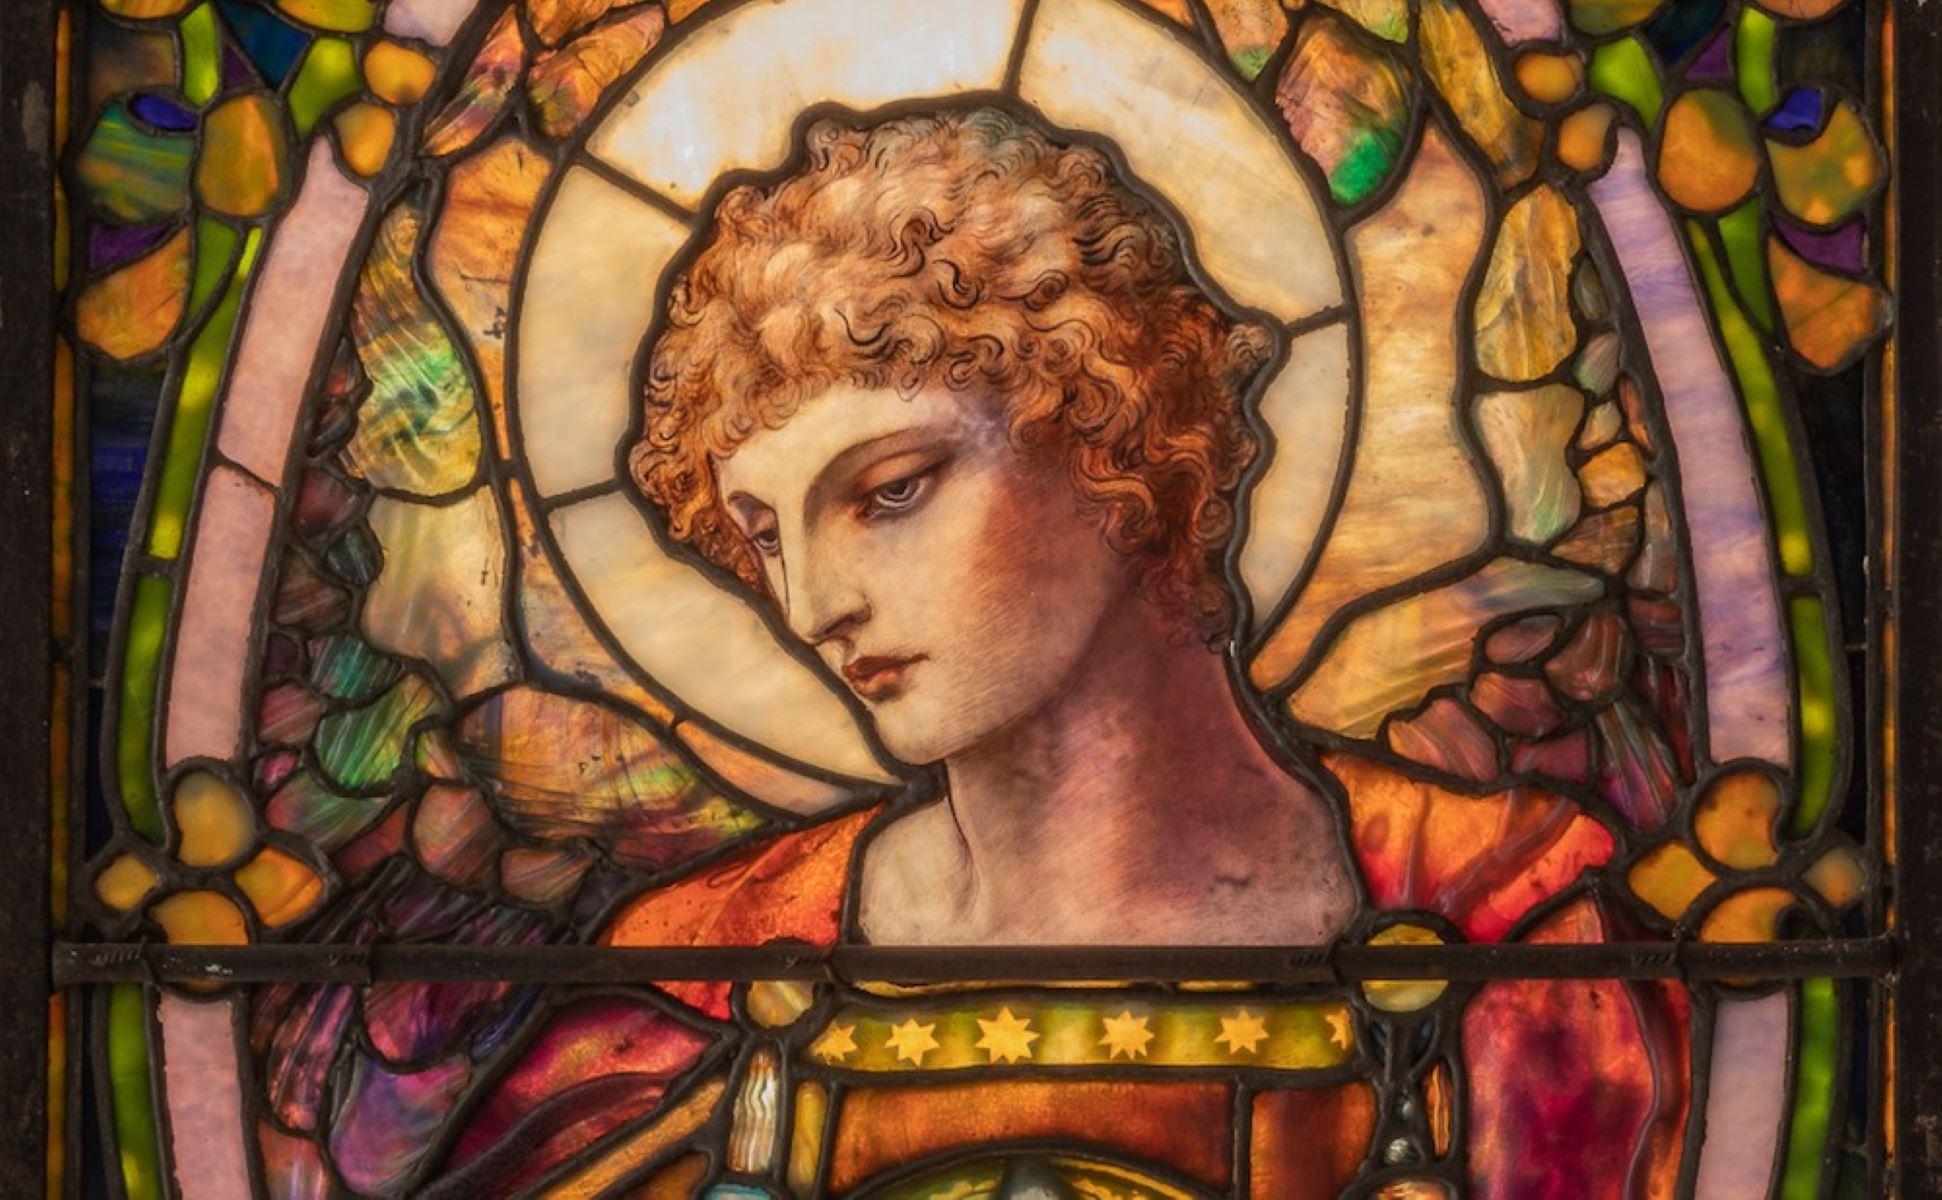
- Stained Glass Shades: The most prominent feature of Tiffany lamps is their stained glass shades. These shades are meticulously crafted using small pieces of colored glass that are cut, shaped, and soldered together. The glass pieces are carefully chosen to create a harmonious blend of colors and textures. The use of opalescent glass adds depth and dimension to the design, creating a mesmerizing effect when illuminated.
- Nature-Inspired Motifs: Tiffany lamps often feature intricate nature-inspired motifs. Flowers, dragonflies, butterflies, and peacock feathers are popular themes found in the designs. These motifs reflect the influence of the Art Nouveau movement, which celebrated the beauty of the natural world.
- Organic and Curved Lines: Tiffany lamps embrace the flowing and organic lines that are characteristic of the Art Nouveau style. The lampshades are adorned with curved forms that mimic the graceful shapes found in nature. These curved lines create a sense of movement and add a touch of elegance to the lamps.
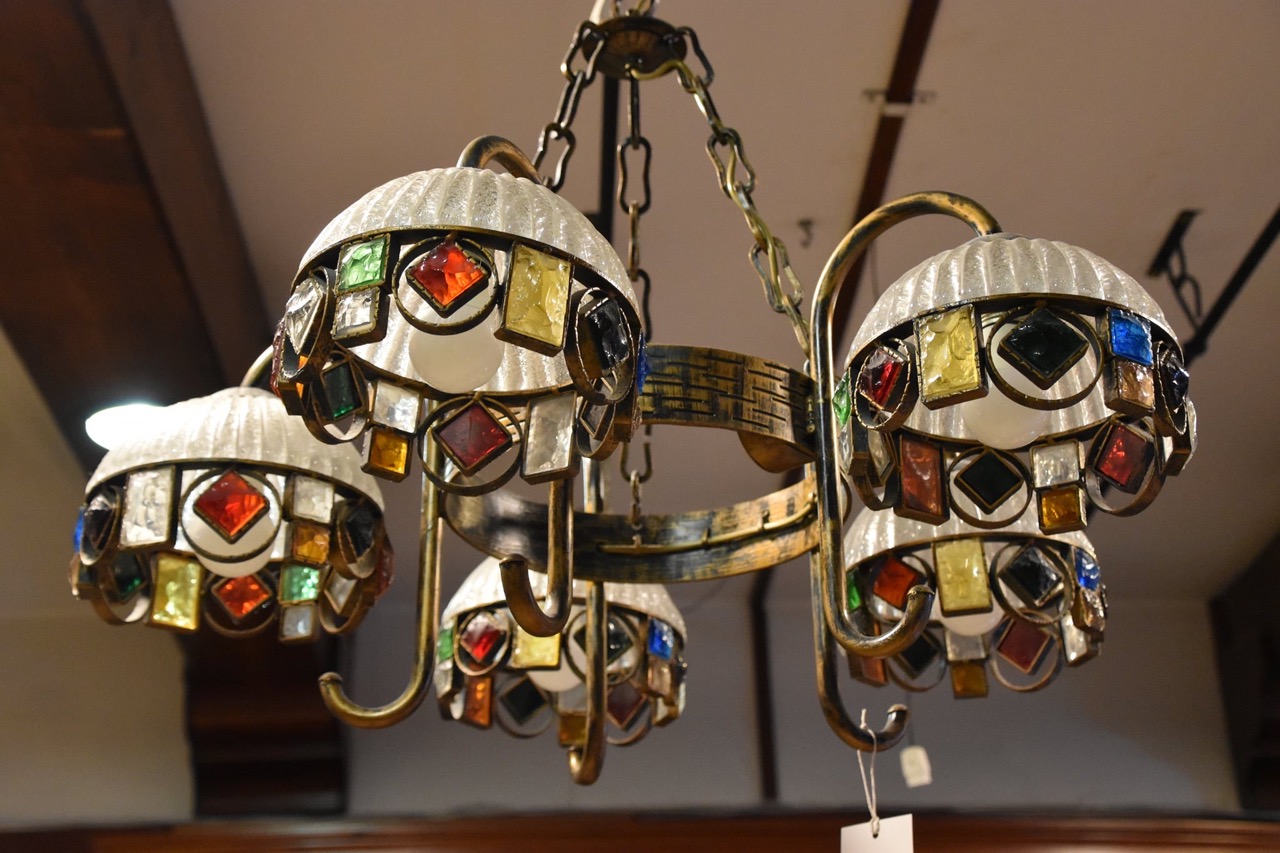
- Ornate Bases: The bases of Tiffany lamps are often as decorative as the lampshades themselves. Made from various materials such as metal or mosaic, the bases feature intricate details and designs. They can be simple and minimalistic or elaborately adorned with patterns, adding to the overall aesthetic appeal of the lamp.
- Diffused and Warm Lighting: Tiffany lamps are designed to diffuse light in a soft and warm manner. The stained glass shades create a gentle glow that casts a warm ambiance in the room. The carefully arranged pieces of glass allow light to pass through in a diffused manner, providing a gentle and comforting illumination.
- Variety of Sizes and Shapes: Tiffany lamps come in a variety of sizes and shapes to suit different spaces and preferences. From small accent lamps to large floor lamps, there is a size for every need. The lampshades can be conical, dome-shaped, or even inverted, providing versatility in their design.
- Attention to Detail: One of the hallmarks of Tiffany lamps is the meticulous attention to detail. Each piece of glass is carefully selected and cut to fit precisely in the design. The soldering is done with precision to ensure the durability and stability of the lampshade. This commitment to craftsmanship is what gives Tiffany lamps their exceptional quality.
These characteristics collectively contribute to the allure and timeless beauty of Tiffany lamps. They are not only functional lighting fixtures but also works of art that elevate the aesthetic appeal of any space. As we continue our exploration, let’s delve into the fascinating process of making Tiffany lamps.
Making of Tiffany Lamps
The creation of Tiffany lamps is a labor-intensive process that requires skill, precision, and an eye for detail. From selecting the right glass to soldering each individual piece, let’s delve into the fascinating process of making these exquisite pieces of art.
Glass Selection: The first step in making a Tiffany lamp is selecting the appropriate glass. Tiffany used a variety of glass types, including opalescent glass, semi-translucent glass, and textured glass. Each piece of glass is chosen for its specific color and texture to achieve the desired effect in the finished lampshade.
Glass Cutting and Shaping: Once the glass is selected, it is carefully cut into the desired shapes using a glass cutter. The glass pieces are then shaped by grinding the edges to ensure a perfect fit. This step requires precision and attention to detail to create the intricate patterns and curves found in Tiffany lamp designs.
Copper Foiling: After the glass pieces are cut and shaped, they are wrapped with thin strips of copper foil. The foil is carefully applied to the edges of each glass piece, creating a frame and allowing for soldering later on. The copper foil also adds strength and stability to the lampshade.
Soldering: Soldering is a crucial step in the making of Tiffany lamps. A soldering iron is used to melt and fuse the solder, a metal alloy, onto the copper foil, joining the glass pieces together. This process requires skill and precision to ensure that each solder joint is strong and secure. The soldering lines also contribute to the visual appeal of the lampshade, adding an additional decorative element.
Assembling the Lampshade: Once the glass pieces are soldered together, the lampshade is assembled. This involves carefully fitting and connecting the various sections of the lampshade to create the desired shape and design. The craftsmanship and attention to detail during this step are crucial to achieve a seamless and visually stunning lampshade.
Base Construction: While the lampshade is the focal point of a Tiffany lamp, the base is equally important. The base provides stability and complements the overall design of the lamp. Tiffany bases can be made of various materials, including metal, wood, or even mosaic. These bases are often ornately designed, featuring decorative elements such as metalwork, sculptural figures, or mosaic patterns.
Final Touches: Once the lampshade is attached to the base, final touches are added to complete the lamp. These may include attaching a finial, a decorative top piece that adds a finishing touch to the lamp, adjusting the balance of the lampshade, and ensuring that all electrical components are in place for functional lighting.
The process of making a Tiffany lamp is a labor of love, with each lamp requiring hours of meticulous craftsmanship. The result is a stunning piece of art, crafted with precision and attention to detail. The combination of the vibrant stained glass, intricate designs, and ornate bases creates a truly enchanting and timeless masterpiece.
Now that we have explored the intricate process of making Tiffany lamps, let’s delve into some of the popular styles that have emerged over the years.
When identifying a Tiffany lamp, look for the signature leaded glass shade with intricate designs, often depicting nature or geometric patterns. The base is typically made of bronze and may feature a decorative motif.
Popular Styles of Tiffany Lamps
Throughout its history, a variety of styles and designs have emerged in the world of Tiffany lamps. From the iconic nature-inspired motifs to geometric patterns, there is a Tiffany lamp style to suit every taste and interior aesthetic. Let’s explore some of the most popular styles:
- Dragonfly: The Dragonfly style is one of the most recognizable and celebrated designs in the world of Tiffany lamps. Inspired by the delicate wings of dragonflies, these lamps feature intricately designed stained glass lampshades adorned with vibrant colors and detailed dragonfly motifs. The Dragonfly lamps often showcase an array of green hues, with pops of red, orange, and yellow.
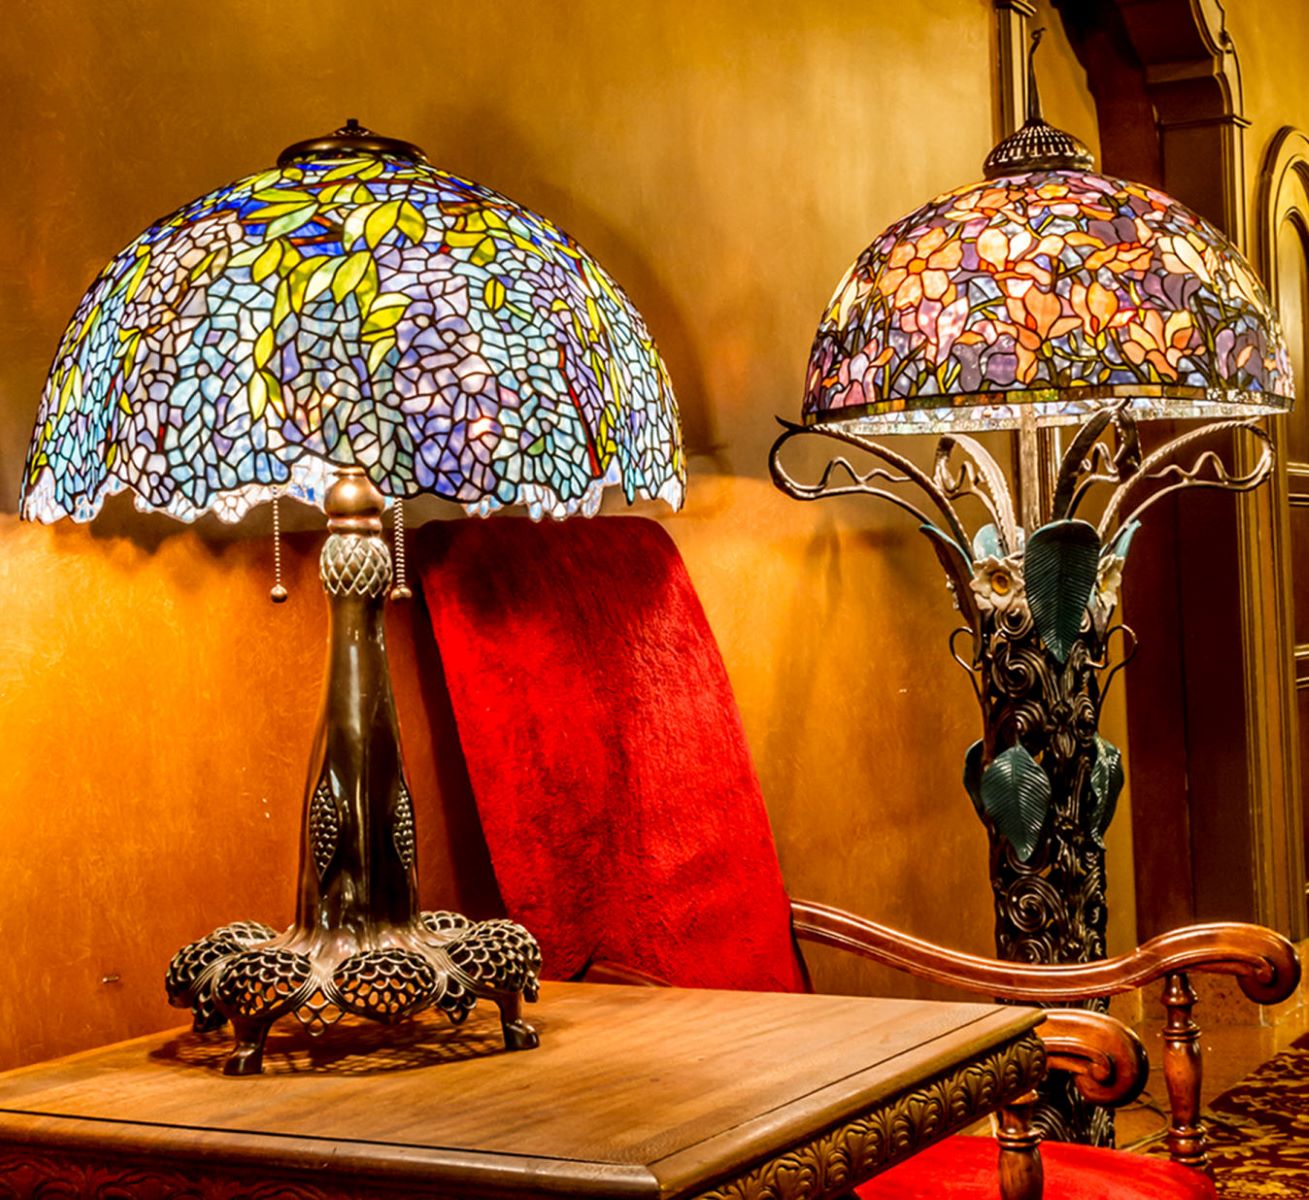
- Wisteria: Another beloved style, the Wisteria lamps showcase cascading clusters of wisteria flowers in various shades of purple and lilac. These lamps create a whimsical and romantic ambiance with their flowing, vine-like designs and beautifully layered glass petals. Wisteria lamps often have a graceful inverted cone or dome-shaped lampshade.
- Turtleback: Characterized by the use of small, iridescent glass tiles known as “Turtlebacks,” this style of Tiffany lamp showcases a mosaic-like pattern. The Turtleback lamps feature a range of colors, including earthy shades of greens, browns, and oranges, which create a warm and inviting atmosphere when illuminated.
- Peacock: As the name suggests, the Peacock style draws inspiration from the majestic peacock, known for its vibrant plumage. These lamps often feature intricate peacock feather designs, with the use of rich blues, greens, and purples. The Peacock lamps create a striking visual impact and add a touch of elegance to any space.
- Geometric: Geometric-style Tiffany lamps embrace bold lines, angular shapes, and symmetrical patterns. This style deviates from the organic and nature-inspired motifs, focusing instead on the interplay of geometry and color. The geometric designs often feature repetitive patterns, such as squares, triangles, and diamonds, and make use of contrasting colors to create a visually dynamic effect.
- Floral: Floral-style Tiffany lamps showcase the beauty of various flowers in intricate detail. Each lampshade is adorned with delicate and vibrant blossoms, from roses and lilies to daffodils and tulips. The Floral lamps bring a touch of nature indoors, adding a sense of freshness and beauty to any space.
- Art Deco: While not as prevalent as the other styles, Tiffany lamps with Art Deco influences emerged during the 1920s and 1930s. This style features sleek and streamlined designs, often incorporating geometric shapes, clean lines, and bold colors. Art Deco Tiffany lamps are a reflection of the roaring twenties, characterized by elegance and sophistication.
These popular styles of Tiffany lamps continue to captivate collectors and enthusiasts alike. Whether you prefer the whimsy of Dragonfly, the elegance of Wisteria, or the boldness of geometric designs, each Tiffany lamp style brings its own unique charm and beauty to any space.
Now that we have explored the different styles of Tiffany lamps, let’s delve into the fascinating world of collecting these timeless treasures.
Read also: 10 Incredible Tiffany Lamp for 2025
Collecting Tiffany Lamps
Collecting Tiffany lamps has become a passion for many art and antique enthusiasts. The unique beauty, historical significance, and craftsmanship of these lamps make them highly sought after by collectors around the world. If you’re interested in starting your own collection, here are some key points to consider:
Educate Yourself: Before diving into the world of Tiffany lamps, it’s essential to educate yourself about the different styles, designs, and features. Familiarize yourself with the various motifs, the manufacturing process, and the historical context of Tiffany lamps. This knowledge will empower you to make informed decisions and identify authentic pieces.
Authenticity: Tiffany lamps are highly valuable, which unfortunately makes them a target for reproductions and counterfeits. When collecting Tiffany lamps, it’s crucial to ensure their authenticity. Study the details of genuine Tiffany lamps, such as the texture of the glass, the design elements, and the signature markings. Consulting with reputable experts or appraisers can also provide valuable guidance.
Condition: The condition of a Tiffany lamp greatly influences its value and appeal. Look for lamps that are in good condition, with minimal damage or repairs. Small imperfections may be acceptable depending on the age and rarity of the lamp. It’s essential to thoroughly inspect a lamp, paying attention to the glass, soldering, and the base. Signs of restoration should be carefully considered, as they can affect both the monetary value and historical integrity of the lamp.
Provenance: The provenance of a Tiffany lamp adds to its allure and can significantly impact its value. Research the history of the lamp, if possible, to determine its origin and previous ownership. Lamps with well-documented histories, especially those associated with notable individuals or events, often hold greater value and desirability among collectors.
Collecting within Your Budget: Tiffany lamps vary greatly in price, depending on factors such as rarity, style, size, and condition. Consider your budget and collect within your means. It’s not necessary to own the most expensive or rarest pieces to appreciate and enjoy the beauty of Tiffany lamps. Building a collection gradually over time allows you to acquire pieces that truly resonate with you.
Display and Preservation: Once you start collecting Tiffany lamps, it’s important to display and preserve them appropriately. Ensure that the lamps are displayed in a safe environment away from direct sunlight and extreme temperatures, which can damage the glass. Regular dusting and gentle cleaning help maintain the lamps’ beauty and longevity. Research proper care techniques and seek professional advice if needed.
Connections and Community: Engage with the Tiffany lamp collecting community to expand your knowledge and network. Attend art and antique shows, visit museums showcasing Tiffany lamps, and join online forums and groups dedicated to Tiffany lamp collectors. Sharing experiences, insights, and discoveries with fellow enthusiasts can enhance your collecting journey.
A collection of Tiffany lamps is not just an investment; it’s a testament to the artistry and craftsmanship of a bygone era. By building a collection of these timeless treasures, you become a custodian of history, ensuring their preservation for future generations to appreciate and admire.
As we conclude our exploration of collecting Tiffany lamps, let’s turn our attention to the value and authenticity of these remarkable pieces of art.
Value and Authenticity of Tiffany Lamps
Tiffany lamps hold both artistic and monetary value, making them highly coveted by collectors and enthusiasts. However, due to their desirability, it’s crucial to understand how to determine the value and authenticity of these exquisite pieces of art.
Authenticity: Authentic Tiffany lamps are marked by superior craftsmanship, attention to detail, and the use of high-quality materials. When assessing the authenticity of a Tiffany lamp, there are several key factors to consider:
- Signature: Genuine Tiffany lamps often bear a signature on the base or inside the lampshade. The signature may vary, including etched text, a stamped mark, or even a paper label. Familiarize yourself with Louis Comfort Tiffany’s distinctive signature, as well as the various marks used by Tiffany Studios during different time periods.
- Glass Quality and Workmanship: Authentic Tiffany lamps feature high-quality glass that exhibits intricate patterns and vibrant colors. The glass should be carefully cut, shaped, and soldered together, displaying expert craftsmanship. Look for variations in glass texture and opalescence, which contribute to the lamp’s charm and authenticity.
- Design Elements: Pay attention to the design elements of the lamp, including the choice of motifs and patterns. Tiffany lamps often feature nature-inspired themes, such as flowers, dragonflies, and landscapes. The designs should be consistent with the style and period when the lamp was created. Deviations from established designs may indicate a reproduction.
- Construction Techniques: Tiffany lamps were handcrafted using the copper foil method, with each glass piece wrapped in copper foil and soldered together. Carefully examine the solder lines for signs of age and authenticity. Look for subtle irregularities and variations in the soldering, as machine-made reproductions tend to have smoother and more uniform solder lines.
Value: The value of a Tiffany lamp is determined by a combination of factors, including its rarity, condition, design, and provenance. Rarer lamp styles or those from specific time periods can command higher prices. The condition of the lamp, including the quality of the glass, soldering, and base, also affects its value. Lamps with documented provenance or those associated with notable collections may have enhanced value.
It’s important to note that the value of Tiffany lamps can vary significantly, from a few thousand dollars for smaller and less intricate pieces to millions for rare and exceptional examples. Working with reputable art dealers, appraisers, or auction houses specializing in Tiffany lamps can provide valuable insights and help determine accurate values.
When purchasing a Tiffany lamp, it’s crucial to buy from reputable sources. Authenticating a lamp can be a complex process, and it’s advisable to consult experts who have extensive knowledge and experience with Tiffany lamps.
Collecting Tiffany lamps is a journey that involves not only appreciating their artistic beauty but also understanding their historical context and authenticity. By investing time in research, building connections within the Tiffany lamp community, and seeking professional guidance, you can navigate the world of Tiffany lamp collecting with confidence and ensure the acquisition of genuine and valuable pieces.
As we conclude our exploration of Tiffany lamps, we hope that this article has shed light on their allure and provided useful insights for both enthusiasts and collectors.
Conclusion
Tiffany lamps are more than just sources of illumination; they are exquisite works of art that have stood the test of time. The intricate craftsmanship, vibrant colors, and unique designs of Tiffany lamps continue to captivate collectors and enthusiasts around the world.
In this article, we embarked on a journey through the history of Tiffany lamps, exploring their origins in the Art Nouveau movement and the visionary genius of Louis Comfort Tiffany. We learned about the distinctive characteristics of Tiffany lamps, from their stained glass shades and nature-inspired motifs to their diffused and warm lighting.
We delved into the fascinating process of making Tiffany lamps, from the careful selection and cutting of glass to the intricate copper foiling and soldering techniques. We discovered the various popular styles of Tiffany lamps, including the iconic Dragonfly and Wisteria designs, as well as the geometric and floral motifs that have become synonymous with Tiffany’s artistic legacy.
Aspiring collectors were provided with valuable insights on starting and growing their Tiffany lamp collections, including the importance of educating oneself, considering authenticity, and finding connections within the collecting community. We also touched on the value and authenticity of Tiffany lamps, emphasizing the significance of factors such as signature markings, glass quality, design elements, and construction techniques.
It is our hope that this article has shed light on the enchanting world of Tiffany lamps, their timeless beauty, and the appreciation of their historical significance. Whether you are a collector, an enthusiast, or simply an admirer of art and design, Tiffany lamps offer a glimpse into a bygone era of craftsmanship and artistry.
As you embark on your journey through the world of Tiffany lamps, remember to cherish the authenticity and value of these remarkable pieces. Take the time to appreciate their intricate details, their vibrant colors, and the stories they carry within their glass and metal.
May your exploration of Tiffany lamps bring you joy, inspiration, and a deeper appreciation for the art forms that enrich our lives. Happy collecting!
Frequently Asked Questions about What Is A Tiffany Lamp
Was this page helpful?
At Storables.com, we guarantee accurate and reliable information. Our content, validated by Expert Board Contributors, is crafted following stringent Editorial Policies. We're committed to providing you with well-researched, expert-backed insights for all your informational needs.


0 thoughts on “What Is A Tiffany Lamp”