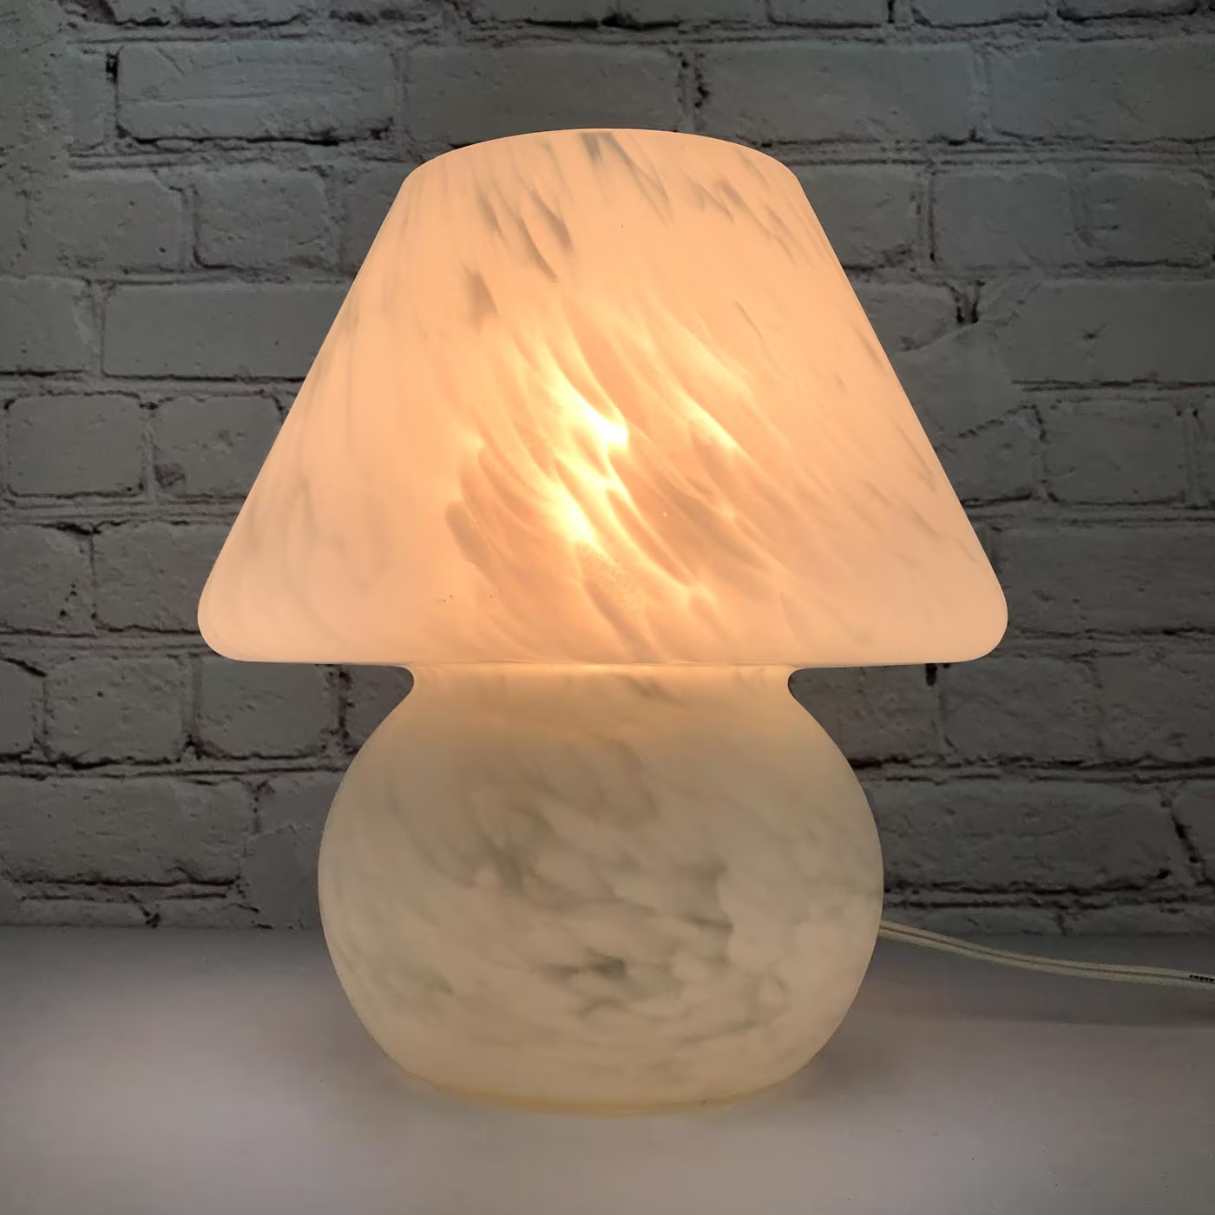
Furniture
How To Make A Cloud Lamp
Modified: March 1, 2024
Learn how to make a stunning cloud lamp for your home with this step-by-step guide. Create a unique piece of furniture that will give your space a dreamy, ethereal ambiance.
(Many of the links in this article redirect to a specific reviewed product. Your purchase of these products through affiliate links helps to generate commission for Storables.com, at no extra cost. Learn more)
Introduction
Welcome to our comprehensive guide on how to make a stunning cloud lamp! Creating a cloud lamp is not only a brilliant way to add a unique and whimsical touch to your home decor, but it also allows you to unleash your creativity while staying within your budget. Whether you’re a DIY enthusiast or someone looking for a fun project to do with friends or family, this step-by-step guide will help you create a mesmerizing cloud lamp that will surely be a statement piece in any room.
Cloud lamps have gained popularity in recent years due to their dreamy and ethereal aesthetic. They mimic the appearance of fluffy clouds floating in the sky, emitting a soft and warm glow that instantly transforms the ambiance of any space. With just a few simple materials and some creativity, you can bring the magic of clouds into your home.
In this guide, we will walk you through all the necessary steps, from gathering the supplies to hanging the finished cloud lamp. You don’t need to have any prior DIY experience to follow along—just a passion for crafting and a desire to create something beautiful.
So, let’s gather our materials and get ready to embark on this captivating journey of creating your very own cloud lamp!
Key Takeaways:
- Create a mesmerizing cloud lamp with just a few materials and unleash your creativity. Transform any space with a dreamy, ethereal ambiance that captivates and enchants all who encounter it.
- Experience the joy of crafting your very own cloud lamp and bring the magic of the sky into your home. Revel in the soothing glow and whimsical charm of this DIY masterpiece, adding a touch of enchantment to your living space.
Read more: How To Make A Cloud Ceiling
Materials Needed
Before we dive into the process of creating your cloud lamp, let’s take a look at the materials you’ll need. Don’t worry—it’s a relatively short list, and you may even have some of these items lying around at home already:
- A paper lantern: You can find these at many craft stores or online. Choose a size that suits your preference and the space where you plan to hang the cloud lamp.
- White cotton batting or stuffing: This will be used to create the fluffy cloud cover. Make sure to choose a material that is soft and lightweight.
- LED string lights: These will be the main source of illumination for your cloud lamp. Opt for warm white lights to create a cozy and inviting atmosphere.
- Hot glue gun and glue sticks: You’ll need these to securely attach the LED lights and cotton batting to the paper lantern.
- Fishing line or string: This will be used to hang the cloud lamp, so ensure you have enough to support the weight of the lantern.
- Scissors: You’ll need a pair of sharp scissors to cut and trim the cotton batting.
- Optional: Remote-controlled LED light strip: This can be used to add customizable lighting effects to your cloud lamp. It’s not essential, but it can enhance the overall visual appeal.
With these materials in hand, you’ll be well-prepared to create a stunning cloud lamp that will bring an enchanting ambiance to any room. Now, let’s move on to the step-by-step process of crafting your very own cloud lamp!
Step 1: Gathering the Supplies
The first step in creating your cloud lamp is to gather all the necessary supplies. This ensures that you have everything on hand before you begin the project, saving you time and hassle later on. Here’s what you need to do:
- Make sure you have all the materials listed in the previous section. Double-check your inventory to ensure nothing is missing.
- If you need to purchase any supplies, make a shopping list and head to your local craft store or order online. This way, you’ll have everything ready to go when you’re ready to start the project.
- Set up your workspace in a well-lit and well-ventilated area. Lay down a protective sheet or newspapers to prevent any messes.
- Plug in your hot glue gun and allow it to heat up. This will save you time once you start attaching the cotton batting and LED lights.
By gathering all the supplies and preparing your workspace beforehand, you’ll be able to work efficiently and smoothly throughout the project. It’s always a good idea to be organized and have everything in place before you begin your creative journey.
Now that you’re ready, let’s move on to the next step: preparing the paper lantern for your cloud lamp.
Step 2: Preparing the Paper Lantern
Once you have all your supplies gathered, it’s time to prepare the paper lantern that will serve as the foundation for your cloud lamp. Follow these steps to ensure your paper lantern is ready for the next stages of the project:
- Unfold the paper lantern and carefully examine it for any tears or damaged areas. If you notice any, use a small piece of clear tape to mend them. It’s important to start with a lantern that is in good condition.
- If your paper lantern has a metal frame, gently expand it to its full shape. Be cautious not to apply too much force to avoid any breakage.
- Ensure that the lantern is completely open and symmetrical. Adjust the wire frame if necessary to achieve the desired shape.
- Take a moment to visualize how you want your cloud lamp to look. Consider where you want the light source to be positioned and how you want the cloud cover to drape over the lantern. This will help guide you in the upcoming steps.
By taking the time to prepare your paper lantern, you’ll set the stage for a successful cloud lamp creation. A properly prepared lantern will provide a sturdy and reliable base for attaching the LED lights and creating the cloud cover. With that done, let’s move on to the next step: attaching the LED lights.
Step 3: Attaching the LED Lights
Now that your paper lantern is ready, it’s time to add the magical glow to your cloud lamp by attaching the LED lights. Follow these steps to ensure a secure and beautiful lighting effect:
- Start by placing the end of the LED string lights inside the paper lantern. Gently feed the lights through the opening at the bottom, making sure the plug is accessible from the outside.
- Using a hot glue gun, carefully secure the end of the lights to the inside of the lantern. This will prevent them from sliding out as you work on the project.
- Continue feeding the LED lights through the paper lantern, guiding them in a spiral or crisscross pattern. This will evenly distribute the lights and create a uniform illumination once the cloud cover is added.
- Secure the LED lights to the inside of the lantern using small dabs of hot glue. Be cautious not to apply too much glue, as it may interfere with the overall appearance of the cloud lamp.
- Once you reach the top of the lantern, secure the remaining lights with hot glue and carefully thread the plug through one of the openings so it’s accessible from the outside.
By properly attaching the LED lights, you’ll ensure that they are securely in place and will provide a stunning glow once the cloud cover is added. Take your time during this step to achieve the desired lighting effect, and be careful not to apply too much heat from the glue gun to avoid damaging the lights.
With the LED lights securely in place, it’s time to move on to the exciting part: creating the cloud cover for your lamp. This is where the true magic starts to happen!
When making a cloud lamp, use cotton batting to create the fluffy cloud effect. Stretch and shape the batting to achieve the desired cloud shape before adding the LED lights.
Read more: How To Make A Floor Lamp
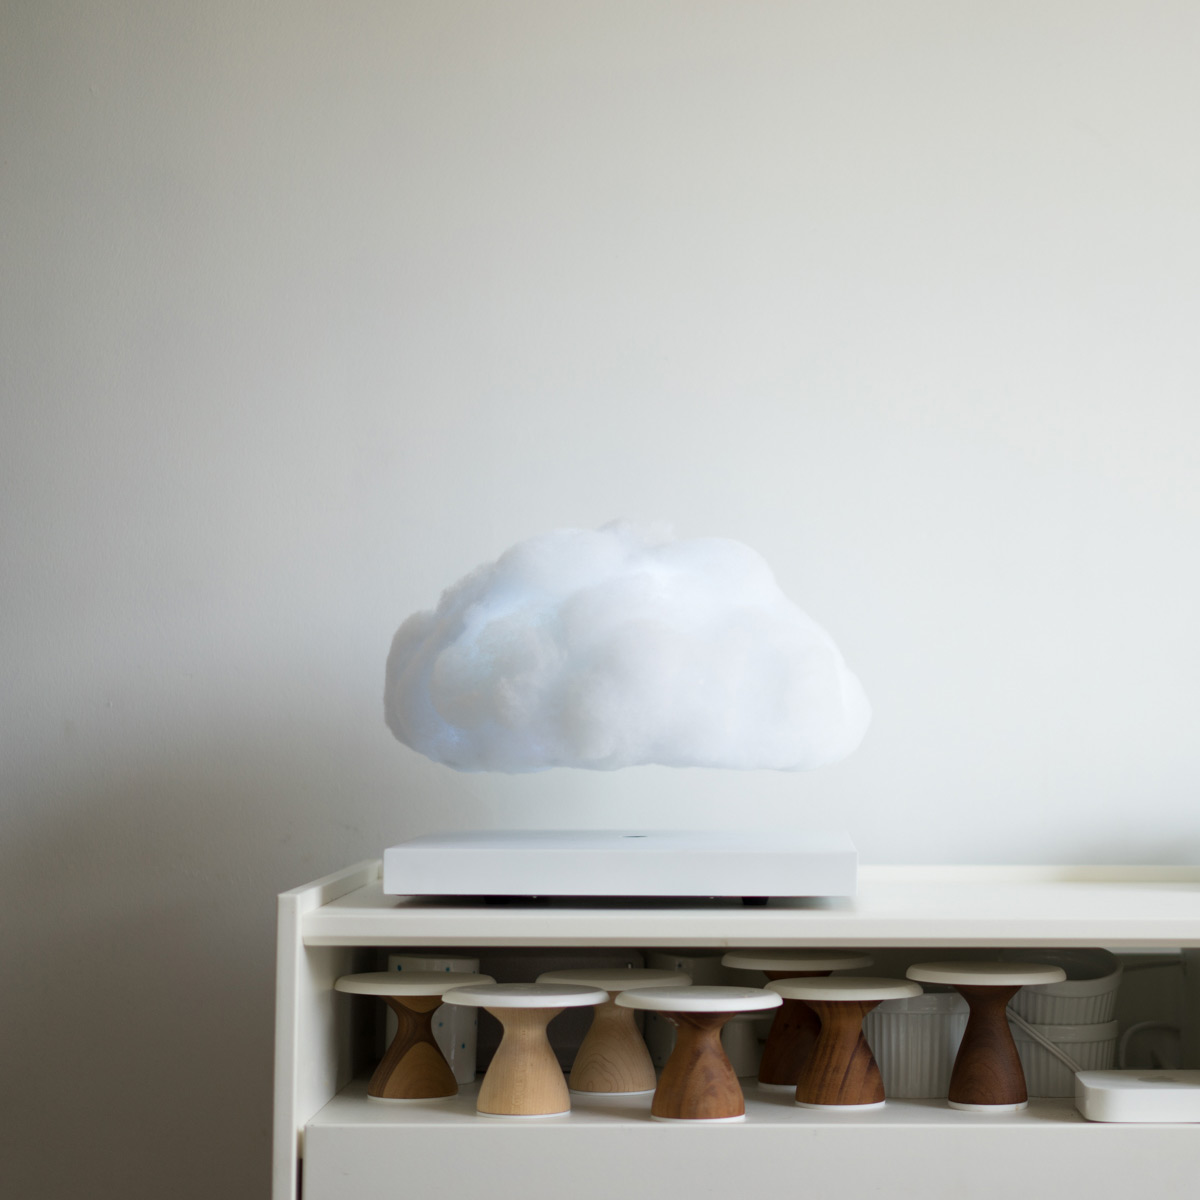
Step 4: Creating the Cloud Cover
Now that the LED lights are attached to the paper lantern, it’s time to bring the cloud-like beauty to your lamp by creating the cloud cover. Follow these steps to create a fluffy and dreamy cloud effect:
- Take your white cotton batting or stuffing and begin tearing it into small, fluffy pieces. The size of the pieces can vary, as this will add texture to the cloud cover.
- Once you have a pile of torn batting, start attaching it to the paper lantern using the hot glue gun. Apply a small amount of glue to the inside of the lantern and press the batting onto it, creating a cloud-like shape.
- Continue attaching the torn batting to the paper lantern in a layered fashion. Be creative and vary the placement and density of the batting to achieve a natural and cloud-like appearance.
- Ensure that the entire surface of the lantern is covered with the cotton batting, leaving no visible gaps. Feel free to add more batting if you want a denser and more opaque cloud cover.
- While attaching the batting, you can shape it into billowy forms to enhance the cloud effect. Fluff up the batting with your fingers or use scissors to trim any excess and create a smooth and cohesive look.
- Take a step back and admire your cloud cover. Make any adjustments as needed to achieve the desired cloud-like appearance.
By meticulously attaching the torn batting, you’ll transform your paper lantern into a stunning cloud-like structure. The layers of batting will create depth and dimension, giving the cloud lamp a realistic and ethereal look.
Now that the cloud cover is complete, it’s time to move on to the next step: testing and adjusting the lighting to ensure the perfect ambiance for your cloud lamp.
Step 5: Testing and Adjusting the Lighting
With the cloud cover in place, it’s time to test and adjust the lighting of your cloud lamp to create the perfect ambiance. Follow these steps to ensure your cloud lamp emits a soft and enchanting glow:
- Plug in the LED lights and turn them on to test the illumination. Take note of any areas that may be too bright or too dim.
- If necessary, adjust the placement of the LED lights within the cloud cover. Gently push the lights further into the batting to diffuse the light and create a softer glow.
- Examine the overall lighting effect and make adjustments as needed. You can add more batting in certain areas to create a dimmer effect or trim excess batting to allow more light to shine through.
- Consider adding a remote-controlled LED light strip for additional lighting effects. This can be attached along the perimeter of the paper lantern to enhance the overall ambiance.
- Experiment with different lighting settings and colors to find the perfect combination for your cloud lamp. Create a cozy and warm atmosphere with soft, warm white lights or add a touch of whimsy with colored lights.
By testing and adjusting the lighting, you’ll be able to create the desired mood and ambiance for your cloud lamp. Don’t be afraid to experiment and find the perfect balance between illumination and softness. The lighting will truly bring your cloud lamp to life.
Now that the lighting is perfected, it’s time to move on to the final step: hanging your cloud lamp and enjoying its mesmerizing beauty in your living space. Let’s bring the enchantment to your room!
Step 6: Hanging the Cloud Lamp
Congratulations! You’re in the final step of creating your cloud lamp. Now it’s time to hang it up and bask in the soft and captivating glow. Follow these steps to securely hang your cloud lamp:
- Decide on the perfect location for your cloud lamp. Consider the height, placement, and the availability of an electrical outlet nearby.
- Measure the length of the fishing line or string you’ll need to hang the lamp at your desired height. Make sure to leave enough slack for adjustment and knotting.
- Tie one end of the fishing line or string securely to the wire frame of the paper lantern.
- With the help of a friend or family member, hold the cloud lamp in position and adjust the height until it’s perfectly aligned with your vision.
- Securely tie the other end of the fishing line or string to a hook or nail on the ceiling. Ensure that the cloud lamp is level and secure before letting go.
- Carefully adjust the positioning and angles of the cloud lamp to create the desired aesthetic. Step back and admire the beauty of your finished cloud lamp.
- Plug in the LED lights and enjoy the mesmerizing glow that emanates from the cloud-like structure.
With your cloud lamp hanging gracefully in its designated spot, you can now sit back, relax, and immerse yourself in the dreamy and enchanting atmosphere it creates. Whether it’s in your bedroom, living room, or any other area of your home, your cloud lamp will be a conversation starter and a beautiful focal point.
Now that you’ve completed all the steps, take a moment to appreciate your creativity and craftsmanship. You’ve successfully brought a piece of the sky into your home with your very own handmade cloud lamp.
Enjoy the magical ambiance created by your cloud lamp, and don’t be surprised if you find yourself getting lost in the soothing and ethereal glow it emits. Let the beauty of the clouds inspire and uplift you as you revel in the wonder of your creation.
Congratulations again on your beautiful cloud lamp!
Conclusion
Congratulations on completing your journey to create a stunning cloud lamp! Through the careful steps of gathering supplies, preparing the paper lantern, attaching the LED lights, creating the cloud cover, testing and adjusting the lighting, and finally, hanging the lamp, you’ve transformed ordinary materials into a captivating piece of decor that adds warmth and enchantment to any space.
The process of making a cloud lamp not only allows you to showcase your creativity and DIY skills but also brings a touch of the ethereal and whimsical into your home. The soft glow emitted from the LED lights within the fluffy cloud cover creates a magical, dream-like atmosphere that is sure to charm anyone who encounters it.
Remember, the beauty of creating your cloud lamp lies not only in the final result but also in the journey itself. As you carefully tear the cotton batting, attach it to the paper lantern, and adjust the lighting, you are engaging in a therapeutic and rewarding experience that allows you to express your artistic vision in a tangible way.
Now that your cloud lamp hangs overhead, casting its gentle radiance, take a moment to appreciate your craftsmanship and creativity. Bask in the soothing ambiance it creates and let it transport you to a world of tranquility and imagination.
We hope that this comprehensive guide has empowered you to bring the magic of the sky into your living space. The joy of crafting something with your own hands, along with the beauty and wonder it adds to your home, is truly priceless.
So, create a cozy nook underneath your cloud lamp, curl up with a good book, or simply take a moment to relax and enjoy the ethereal glow. Let your cloud lamp become a cherished piece of decor that brings a serene and enchanting touch to your surroundings.
Thank you for joining us on this journey of creating a beautiful cloud lamp. May it continue to inspire your creativity and fill your space with a touch of magic.
Frequently Asked Questions about How To Make A Cloud Lamp
Was this page helpful?
At Storables.com, we guarantee accurate and reliable information. Our content, validated by Expert Board Contributors, is crafted following stringent Editorial Policies. We're committed to providing you with well-researched, expert-backed insights for all your informational needs.