Home>Furniture>Outdoor Furniture>How To Build A Pea Gravel Patio
Outdoor Furniture
How To Build A Pea Gravel Patio
Modified: March 7, 2024
Discover the step-by-step guide on how to build a stunning outdoor-furniture-friendly pea gravel patio. Enhance your outdoor space with this affordable and stylish DIY project.
(Many of the links in this article redirect to a specific reviewed product. Your purchase of these products through affiliate links helps to generate commission for Storables.com, at no extra cost. Learn more)
Introduction
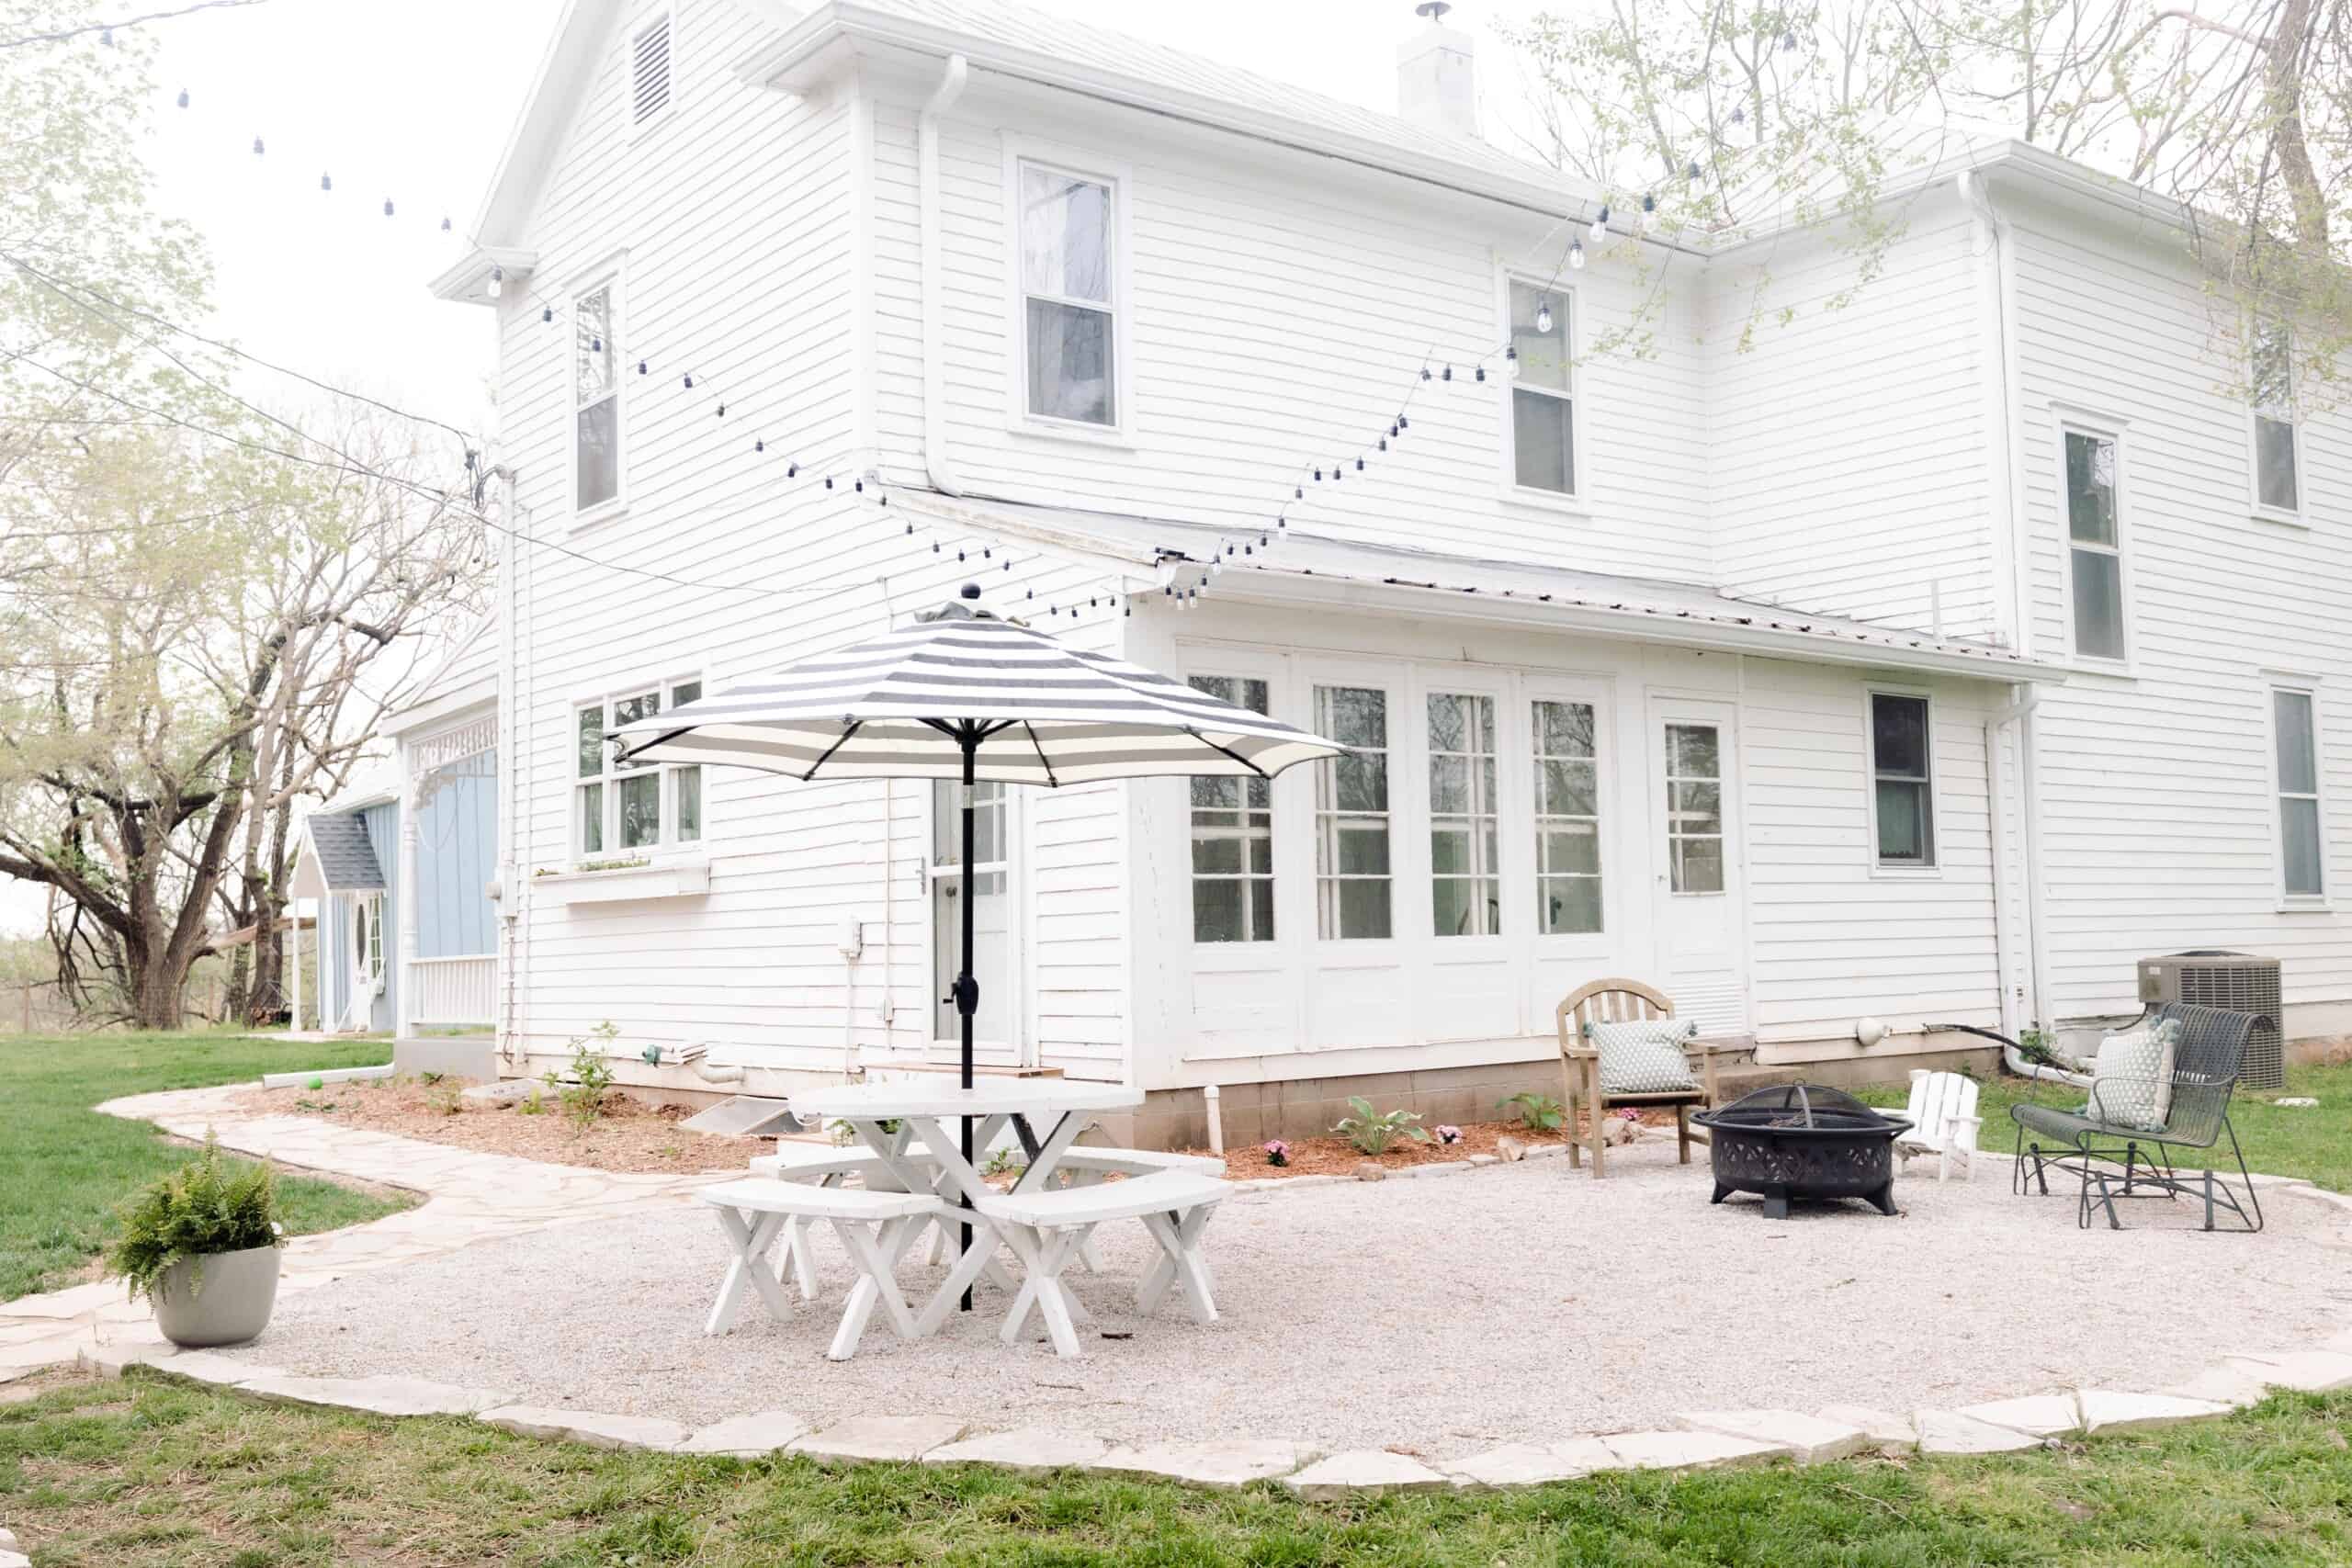
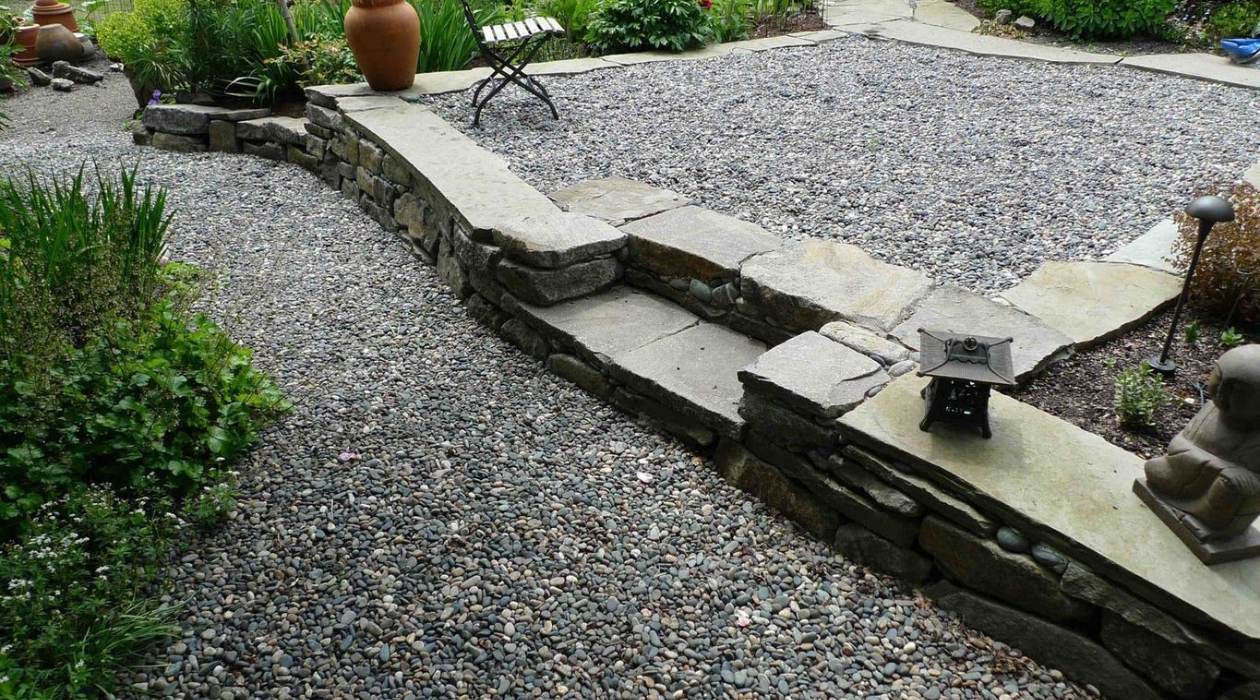
Welcome to our comprehensive guide on how to build a stunning pea gravel patio. If you’re looking to create a beautiful outdoor space that combines both functionality and aesthetic appeal, a pea gravel patio is an excellent choice. This low-maintenance and budget-friendly option can transform your backyard into a stylish oasis for entertaining, relaxation, and enjoying the great outdoors.
Pea gravel is a type of small, rounded stone that is commonly used in landscaping projects. It is versatile, durable, and provides excellent drainage, making it an ideal material for patio construction. Whether you’re a seasoned DIY enthusiast or a beginner looking to take on a new project, building a pea gravel patio is relatively straightforward and can be completed with just a few basic tools and materials.
In this guide, we will take you through the step-by-step process of planning, measuring, preparing, and installing a pea gravel patio. We’ll also provide tips for maintenance and care to ensure your patio remains in pristine condition for years to come. So, grab your work gloves and let’s get started on creating your perfect outdoor retreat!
Before we dive into the steps, it’s important to note that building a pea gravel patio may require obtaining any necessary permits or checking with local authorities for any building regulations. It’s also a good idea to call utility companies to locate any underground cables or pipes to avoid any accidents or damage during the construction process.
Now, let’s move on to step one, where we’ll discuss the planning process for your pea gravel patio.
Key Takeaways:
- Building a pea gravel patio is a fun and rewarding DIY project that can transform your outdoor space into a stylish and functional area for relaxation and entertainment. From planning to maintenance, each step is crucial for creating a durable and beautiful patio.
- Regular maintenance, such as inspecting drainage, addressing weed growth, and keeping the surface clean, is essential for preserving the beauty and functionality of your pea gravel patio. With proper care, your patio will remain a welcoming and enjoyable outdoor space for years to come.
Read more: How Deep Should A Pea Gravel Patio Be
Step 1: Planning your pea gravel patio
The first step in building a pea gravel patio is careful planning. Taking the time to consider your design preferences, the layout of your backyard, and any specific needs or features you want to incorporate will help ensure a successful and functional end result.
Here are some important factors to consider during the planning stage:
- Design: Think about the overall design and style you want to achieve with your patio. Consider aspects such as the shape, size, and layout that will best complement your outdoor space. Look for inspiration in magazines, online platforms, or even neighboring homes that catch your eye.
- Functionality: Determine how you plan to use your pea gravel patio. Will it primarily serve as a space for dining and entertaining? Do you want to incorporate seating areas or perhaps a fire pit or barbecue station? Understanding the intended use of the patio will help guide your design decisions.
- Location: Identify the best location in your backyard for the patio. Consider factors such as sun exposure, privacy, and accessibility. Take note of any existing features or obstacles that may impact the placement and layout of your patio.
- Materials: Besides the pea gravel itself, think about the materials and elements you want to incorporate into your patio. This may include edging, pavers, seating, or decorative features. Research different options and choose materials that align with your design vision and budget.
- Budget: Determine your budget for the project. This will help guide your decisions when it comes to materials, size, and any additional features you want to include in your patio. It’s essential to establish a realistic budget and stick to it throughout the project to avoid overspending.
Once you have a clear understanding of your design preferences, functionality requirements, and budget, it’s time to move on to step two, where we’ll discuss measuring and marking the area for your pea gravel patio.
Step 2: Measuring and marking the patio area
With your design plan in place, it’s time to measure and mark the area where your pea gravel patio will be located. Accurate measurements are crucial to ensure you have the correct amount of materials and to create a well-proportioned patio.
Here’s how to measure and mark your patio area:
- Gather your tools: You’ll need a measuring tape, wooden stakes, string or twine, and spray paint or marking chalk.
- Clear the area: Remove any existing vegetation, rocks, or debris from the designated patio area. This will give you a clean and level surface to work with.
- Establish the patio dimensions: Use the measuring tape to determine the desired length and width of the patio. Use the wooden stakes and twine to mark the corners of the patio, ensuring that the dimensions are accurate.
- Check for squareness: To ensure a square patio, measure the diagonals of the marked area. The diagonals should be of equal length. Adjust the stakes and twine as necessary to achieve a perfect square.
- Mark the perimeter: Once you’re satisfied with the dimensions and squareness, use the spray paint or marking chalk to create a visible line along the perimeter of the patio. This will serve as a guide during the construction process.
It’s always a good idea to double-check your measurements and make any necessary adjustments before proceeding to the next step. This will help avoid any potential issues or complications down the line.
With the patio area properly marked, it’s time to move on to step three, where we’ll discuss preparing the site for your pea gravel patio.
Step 3: Preparing the patio site
Once you have measured and marked your patio area, the next step is to prepare the site for construction. Proper site preparation is essential to ensure a stable and long-lasting pea gravel patio. This includes clearing the area, grading the soil, and addressing any drainage issues.
Follow these steps to prepare the patio site:
- Clear the area: Remove any vegetation, rocks, roots, or other debris from the marked patio area. Use a shovel and rake to create a clean and level surface.
- Grade the soil: Check the grade or slope of the area to ensure proper drainage away from your home and other structures. A slight slope away from the house is typically recommended to prevent water accumulation. Use a level and a long 2×4 board to check the slope and make any necessary adjustments by adding or removing soil.
- Address drainage issues: If you notice any areas with poor drainage, it’s important to address them before proceeding. Consider installing a French drain or adding a layer of gravel or drainage pipe to help redirect water away from the patio area.
- Compact the soil: Use a hand tamper or a rented plate compactor to firmly compact the soil. This will provide a solid and stable base for your patio. Pay extra attention to areas with soft or loose soil, ensuring that they are properly compacted.
- Install weed barrier: Consider laying a weed barrier fabric over the compacted soil to prevent the growth of weeds and vegetation. This will help to maintain the appearance and cleanliness of your pea gravel patio.
Properly preparing the patio site will ensure a solid foundation for your pea gravel patio and help prevent issues such as shifting, sinking, or the intrusion of unwanted vegetation. With the site prepared, you’re now ready to move on to step four, where we’ll discuss installing the edging for your patio.
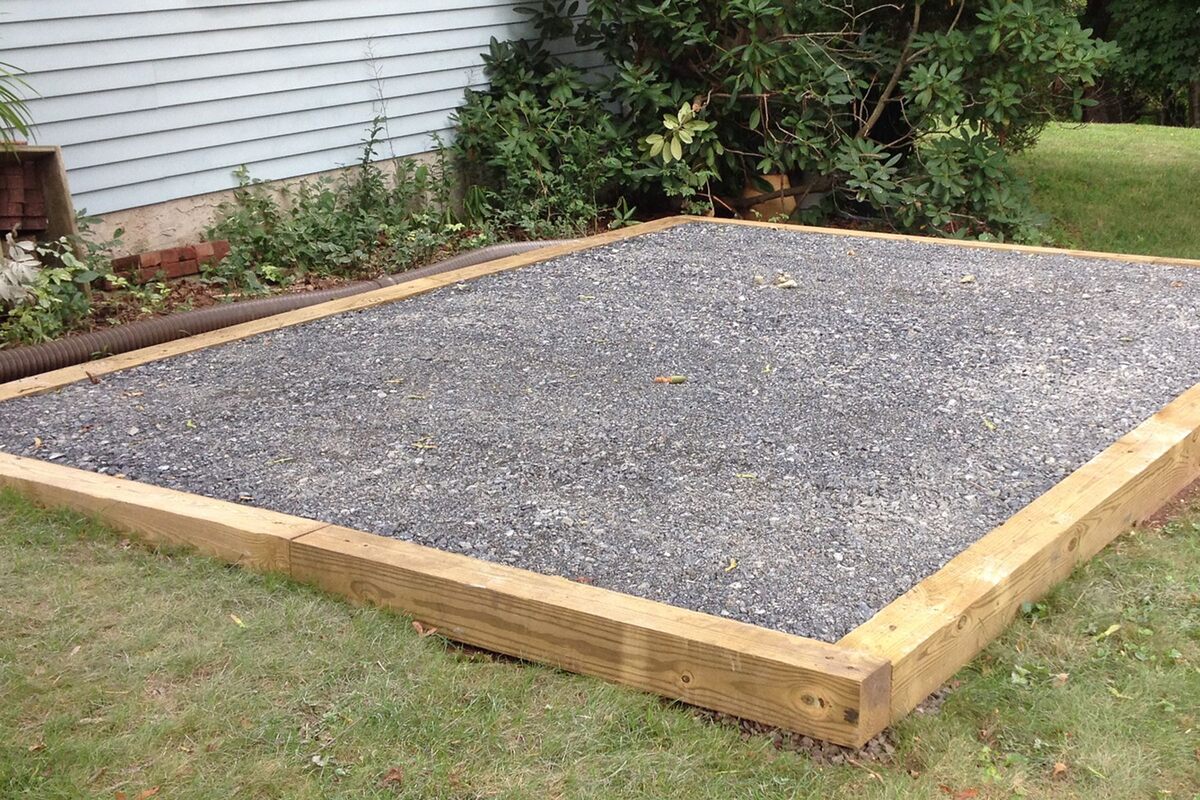
Step 4: Installing the edging
Installing edging is an important step in creating a well-defined and visually pleasing pea gravel patio. Edging helps to contain the pea gravel, preventing it from spreading out and maintaining a clean and organized appearance.
Here’s how to install the edging for your pea gravel patio:
- Select the edging material: There are various options for edging, including plastic, metal, or stone. Choose a material that complements your overall design and meets your budget and aesthetic preferences.
- Measure and cut: Using the dimensions of your marked patio area, measure and cut the edging material accordingly. If necessary, use a hacksaw or a power saw to achieve the desired size.
- Place the edging: Lay the edging material along the perimeter of the patio area, ensuring that it is aligned with the marked line. Use stakes or anchor pins to secure the edging in place. If using multiple pieces of edging, overlap the ends for a seamless appearance.
- Level the edging: Use a level to ensure that the edging is even and straight. Adjust the position as needed, adding or removing soil beneath the edging to achieve a level surface.
- Secure the edging: Once the edging is properly positioned and leveled, secure it in place by hammering stakes or anchor pins through the pre-drilled holes in the edging. Place the stakes or pins every few feet to provide stability.
Installing edging will not only enhance the overall look of your pea gravel patio but also help maintain its integrity over time. The edging will prevent the gravel from shifting or spreading, creating a neat and defined space for your outdoor enjoyment.
With the edging securely in place, it’s time to move on to step five, where we’ll discuss spreading the landscaping fabric as an additional layer of protection for your patio.
Read more: How To Use Pea Gravel In Landscaping
Step 5: Spreading the landscaping fabric
Spreading landscaping fabric is an important step in building a pea gravel patio as it helps prevent the growth of weeds and ensures a clean and long-lasting surface. The fabric acts as a barrier between the soil and pea gravel, keeping the gravel in place while allowing water to seep through and maintain proper drainage.
Follow these steps to spread the landscaping fabric:
- Select the fabric: Choose a high-quality landscaping fabric specifically designed for weed control. Look for a fabric that is durable, permeable, and UV-resistant.
- Prepare the area: Ensure that the patio site is clear of any debris or obstructions. Make sure the soil is smooth and level before proceeding.
- Unroll the fabric: Start at one end of the patio area and unroll the landscaping fabric along the entire surface. Overlap the edges of the fabric by a few inches to ensure complete coverage.
- Trim the fabric: Use scissors or a utility knife to trim any excess fabric along the edges of the patio area. Ensure that the fabric fits snugly within the edging, but is not pulled too tightly.
- Secure the fabric: Use landscape staples or anchor pins to secure the fabric in place. Place the staples or pins every few feet along the edges and throughout the fabric to prevent it from shifting.
The landscaping fabric will serve as an effective weed barrier, preventing unwanted vegetation from growing through the pea gravel and making it easier to maintain your patio. It also helps to stabilize the gravel, reducing the chances of it shifting or becoming uneven over time.
With the landscaping fabric in place, you’re now ready to move on to step six, where we’ll discuss adding a base layer to provide additional stability for your pea gravel patio.
Before laying down the pea gravel, make sure to properly prepare the area by leveling the ground, adding a weed barrier, and edging to keep the gravel in place. This will help create a stable and long-lasting patio.
Step 6: Adding a base layer
Adding a base layer is a crucial step in the construction of a pea gravel patio. The base layer provides stability, improves drainage, and helps prevent the pea gravel from sinking into the soil over time. It acts as a solid foundation for the patio and ensures a level surface for the pea gravel.
Follow these steps to add a base layer:
- Select the base material: Choose a suitable base material such as crushed stone or gravel that is compactable and provides good drainage. Aim for a thickness of about 2 to 4 inches for the base layer.
- Spread the base material: Start at one end of the patio area and spread the base material evenly. Use a shovel or rake to distribute the material and create a uniform layer. Take care to maintain a consistent thickness throughout the patio.
- Compact the base material: Use a hand tamper or a rented plate compactor to compact the base material. Start from one end of the patio and work your way to the other, applying even pressure to achieve a solid and stable base. Compact the base layer thoroughly to ensure proper stability.
- Check for evenness: Use a level or a straight edge to check the evenness of the base layer. Look for any low or high spots and make necessary adjustments by adding or removing material. The base layer should be level and provide a smooth surface for the pea gravel.
Adding a base layer will significantly improve the longevity and stability of your pea gravel patio. It creates a strong foundation that will support foot traffic, furniture, and other elements, ensuring that your patio remains solid and safe.
With the base layer in place, it’s time to move on to step seven, where we’ll discuss spreading the pea gravel, the final layer that will complete your beautiful patio.
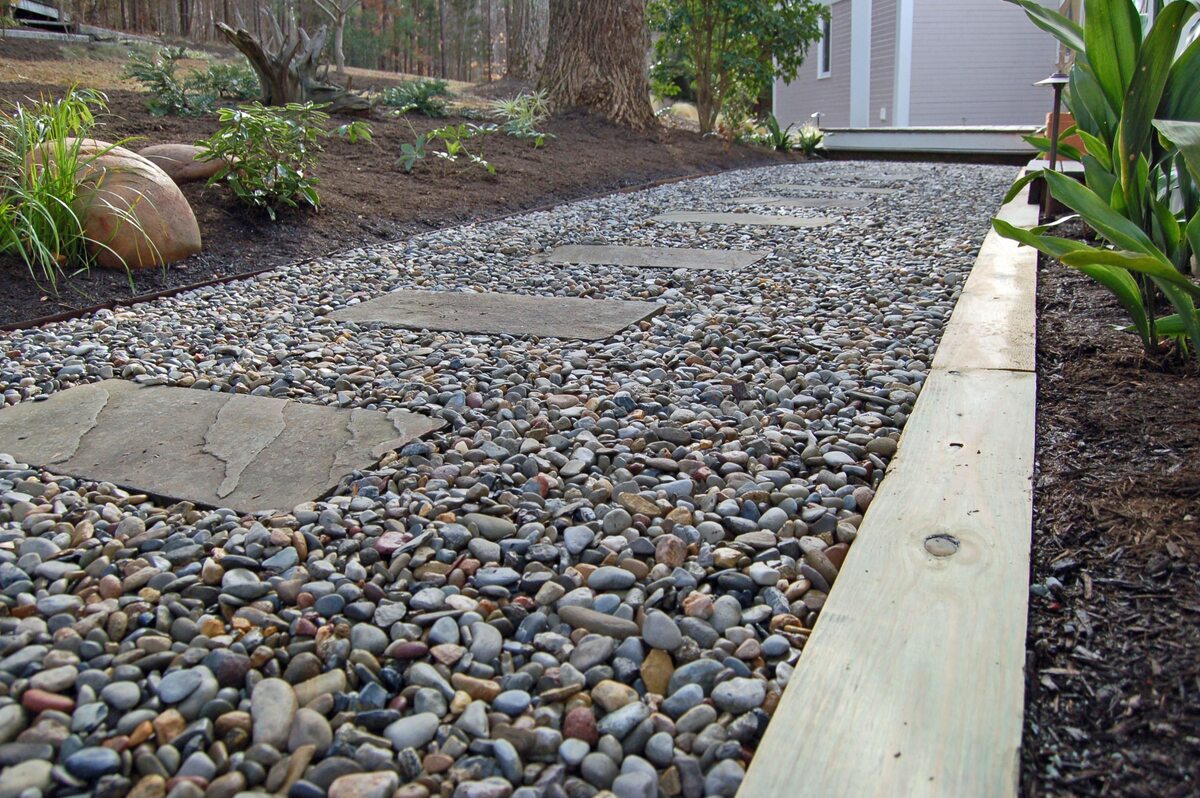
Step 7: Spreading the pea gravel
Spreading the pea gravel is an exciting step in the construction of your patio, as it is the final layer that will give your space its unique and charming aesthetic. The pea gravel adds texture, color, and a natural feel to your outdoor area.
Here’s how to spread the pea gravel:
- Choose the pea gravel: Select high-quality pea gravel that matches your desired aesthetic. Consider factors such as color, size, and texture. Pea gravel typically ranges in size from about 1/8 to 3/8 inches in diameter.
- Calculate the amount needed: Measure the area of your patio to determine the amount of pea gravel you will need. Calculate the cubic footage by multiplying the length, width, and depth of the patio. Take into account the desired thickness of the gravel layer, typically around 2 to 3 inches.
- Spread the pea gravel: Start at one end of the patio and pour the pea gravel onto the base layer. Use a rake or shovel to evenly spread the gravel across the patio surface. Take your time to ensure a uniform layer that covers the entire area.
- Manage the thickness: Pay attention to the thickness of the pea gravel layer as you spread it. Aim for a consistent thickness throughout the patio. Use a rake or shovel to adjust the level of the gravel as needed, adding or removing gravel to achieve the desired thickness.
- Smooth and level the gravel: After spreading the gravel, use a rake to smooth and level the surface. Rake the gravel in different directions to create an even and visually appealing texture. Ensure that the surface is level by using a straight edge or a level tool.
Spreading the pea gravel requires patience and attention to detail. Take your time to ensure that the gravel layer is spread evenly and is of the desired thickness. This will result in a beautifully finished patio that adds charm and functionality to your outdoor space.
With the pea gravel spread, it’s time to move on to step eight, where we’ll discuss raking and leveling the gravel for a polished final look.
Step 8: Raking and leveling the gravel
After spreading the pea gravel, the next step is to rake and level the gravel to create a smooth and polished surface. Raking and leveling the gravel will help distribute the material evenly, remove any excess gravel, and ensure a cohesive and visually pleasing appearance.
Follow these steps to rake and level the gravel:
- Choose the right tools: Use a sturdy garden rake, a bow rake, or a gravel rake for this step. These tools are designed to effectively move and manipulate the gravel.
- Rake the gravel: Start by raking the gravel in long, sweeping motions. This will help distribute the pea gravel evenly across the patio area and fill in any low spots or uneven areas.
- Level the gravel: Use the rake to level the surface of the gravel. Pay attention to any high or low spots and rake the gravel accordingly to achieve a uniform layer with a smooth finish.
- Check for drainage: As you rake and level the gravel, make sure that there is proper drainage. Ensure that the patio slopes slightly away from your home or any structures to prevent water accumulation.
- Smooth out footprints or imprints: If you notice any footprints or imprints in the gravel, use the rake to smooth them out and blend them with the surrounding area. This will help maintain the overall appearance of the patio.
Raking and leveling the gravel is an important step in achieving a polished final look for your pea gravel patio. It not only enhances the aesthetics but also improves the functionality and ensures a comfortable and enjoyable outdoor space.
With the gravel raked and leveled, it’s time to move on to step nine, where we’ll discuss compacting the pea gravel to provide additional stability and longevity to your patio.
Step 9: Compact the pea gravel
Compact the pea gravel to provide additional stability and longevity to your patio. Compacting the gravel helps to lock the individual stones together, reducing shifting and creating a firm surface. This step is especially important for areas with heavy foot traffic or where furniture and other objects will be placed.
Follow these steps to compact the pea gravel:
- Choose the right equipment: Rent a plate compactor from your local home improvement store. Plate compactors are specifically designed for compacting surfaces and will provide the best results.
- Prepare the compactor: Read the manufacturer’s instructions carefully and ensure that the compactor is fueled and in proper working condition. It’s important to follow all safety guidelines during operation.
- Start compacting: Begin compacting the pea gravel by slowly moving the plate compactor over the surface of the patio. Start at one end and work your way to the other, making multiple passes to ensure thorough compaction.
- Overlap each pass: As you compact, overlap each pass slightly to ensure consistent compaction across the entire patio. This helps to minimize any unevenness and creates a more uniform surface.
- Check for compaction: After each pass, check the surface of the pea gravel for signs of compaction. It should feel firm and stable beneath your feet. If necessary, make additional passes with the compactor until you achieve the desired compaction level.
Compacting the pea gravel helps to create a solid and stable surface for your patio. This step is especially important if you anticipate heavy use or if you want to prevent the gravel from shifting or becoming uneven over time.
With the pea gravel compacted, it’s time to move on to step ten, where we’ll discuss evaluating and maintaining your pea gravel patio to ensure its longevity and beauty.
Step 10: Evaluating and maintaining your pea gravel patio
Once you have completed the construction of your pea gravel patio, it’s essential to evaluate its condition and implement proper maintenance practices. Regular maintenance will keep your patio looking beautiful and ensure its longevity for years to come.
Here are some steps to evaluate and maintain your pea gravel patio:
- Inspect for drainage: Periodically check the patio for proper drainage. Ensure that water is flowing away from the patio and not pooling or accumulating. If you notice any areas with poor drainage, consider making improvements to redirect water away from these spots.
- Address weed growth: Despite the landscaping fabric, it’s possible for some weeds or grass to find their way through the pea gravel. Regularly inspect and remove any unwanted vegetation to prevent it from taking over your patio. Consider using a pet-friendly herbicide for weed control, if needed.
- Fill in any depressions: Over time, the pea gravel may settle or shift, resulting in depressions or uneven areas. Use a rake or shovel to redistribute the gravel and level any low spots. Add additional gravel as needed to maintain a smooth and even surface.
- Keep the surface clean: Use a leaf blower, broom, or a stiff bristle brush to remove debris, leaves, and dirt from the surface of the pea gravel. Regularly sweeping the patio will help prevent buildup and keep the area looking tidy.
- Address erosion: If you notice any signs of erosion along the edges or corners of your patio, take immediate action. Add additional gravel and compact it to reinforce these vulnerable areas and prevent further erosion.
- Consider top-dressing: Over time, the pea gravel may become discolored or lose its vibrancy. Consider top-dressing the patio by adding a fresh layer of pea gravel on top. This can help restore its appearance and maintain its visual appeal.
Regular evaluation and maintenance of your pea gravel patio will help preserve its beauty and functionality. By implementing these steps, you can ensure that your patio remains a welcoming and enjoyable outdoor space for you, your family, and your guests.
Congratulations! You have completed all ten steps of building and maintaining a beautiful pea gravel patio. Enjoy your newly created outdoor haven and make lasting memories in your delightful and inviting space!
Conclusion
Building a pea gravel patio is a rewarding and satisfying project that can transform your outdoor space into a stylish and functional area for relaxation and entertainment. By following the ten steps outlined in this comprehensive guide, you can create a beautiful and durable patio that will be the envy of your friends and neighbors.
From planning and measuring to spreading pea gravel and maintaining your patio, each step plays a crucial role in ensuring the success and longevity of your project. Taking the time to properly prepare the site, install edging, spread landscaping fabric, and compact the pea gravel will result in a stable and well-constructed patio that withstands the test of time.
Be sure to regularly evaluate and maintain your pea gravel patio to keep it in pristine condition. By inspecting drainage, addressing weed growth, filling in depressions, keeping the surface clean, and addressing any erosion, you can keep your patio looking its best for years to come.
Remember, a well-maintained pea gravel patio not only enhances the beauty of your outdoor space but also provides a comfortable and enjoyable area for gatherings, relaxation, and making lasting memories with loved ones.
So, gather your tools, get creative with the design, and embark on the journey of building your dream pea gravel patio. With careful planning, attention to detail, and some elbow grease, you’ll have a stunning outdoor retreat that you can proudly call your own. Cheers to your new pea gravel patio and the many joyous moments it will bring!
Frequently Asked Questions about How To Build A Pea Gravel Patio
Was this page helpful?
At Storables.com, we guarantee accurate and reliable information. Our content, validated by Expert Board Contributors, is crafted following stringent Editorial Policies. We're committed to providing you with well-researched, expert-backed insights for all your informational needs.


0 thoughts on “How To Build A Pea Gravel Patio”