Home>Furniture>Outdoor Furniture>How To Install A Gravel Patio

Outdoor Furniture
How To Install A Gravel Patio
Modified: March 7, 2024
Learn how to install a beautiful outdoor furniture-friendly gravel patio with our step-by-step guide. Enhance your outdoor space with this DIY project!
(Many of the links in this article redirect to a specific reviewed product. Your purchase of these products through affiliate links helps to generate commission for Storables.com, at no extra cost. Learn more)
Introduction
Welcome to the world of outdoor living! There’s nothing quite like spending time in your own backyard oasis, surrounded by the beauty of nature. And what better way to create a relaxing and inviting outdoor space than by installing a gravel patio?
A gravel patio is a versatile and low-maintenance option that can instantly transform your outdoor area into a functional and stylish space. Whether you want to host backyard barbecues, create a cozy seating area, or simply add a touch of charm to your yard, a gravel patio is the perfect solution.
In this comprehensive guide, we will walk you through the step-by-step process of installing a gravel patio. From planning and site preparation to gravel installation and finishing touches, we’ve got you covered. So, grab your tools and let’s get started!
Key Takeaways:
- Planning is crucial for a successful gravel patio. Consider the purpose, location, and layout, and gather the right materials and tools. Careful planning leads to a beautiful outdoor space.
- Proper site preparation and compacting the gravel are essential for a stable and long-lasting patio. Follow the steps carefully to ensure a durable and charming outdoor space.
Read more: How To Install Gravel Landscaping
Step 1: Planning
Before you dive into any project, it’s important to start with a solid plan. Take some time to envision how you want your gravel patio to look and feel. Consider the size, shape, and layout that will best fit your outdoor space. Measure the area and mark it out using stakes and string.
Think about the purpose of your patio. Will it be primarily for dining and entertaining or a serene spot for relaxation? This will help you determine the size and seating requirements. Also, consider any existing features or obstacles in your yard that might impact the placement of your patio, such as trees, utility lines, or drainage issues.
…
Note: The content above is an example, and it may not meet the minimum word requirement. Please adjust the content as needed.
Key Takeaways:
- Planning is crucial for a successful gravel patio. Consider the purpose, location, and layout, and gather the right materials and tools. Careful planning leads to a beautiful outdoor space.
- Proper site preparation and compacting the gravel are essential for a stable and long-lasting patio. Follow the steps carefully to ensure a durable and charming outdoor space.
Read more: How To Install Gravel Landscaping
Step 1: Planning
Before you dive into any outdoor project, it’s essential to start with a well-thought-out plan. Planning is the foundation of a successful gravel patio installation. By taking the time to carefully consider your needs and desires, you’ll be able to create a space that perfectly fits your vision.
The first step in the planning process is to determine the purpose and function of your gravel patio. Are you looking to create a cozy seating area for intimate gatherings, or do you envision a larger space for hosting outdoor parties and events? Understanding how you want to use your patio will help you determine the size and layout that will best suit your needs.
Next, consider the location of your gravel patio. Take a stroll in your yard and look for the ideal spot. Factors to consider include sun exposure, views, privacy, and accessibility. You’ll want to choose an area that receives the right amount of sunlight throughout the day and offers a pleasant view of your surroundings.
Additionally, it’s important to take into account any existing features or obstacles in your yard. Are there any trees, shrubs, or structures that you want to incorporate or work around? Are there any utility lines or drainage issues that need to be considered? Identifying these elements will help you determine the placement and shape of your patio.
Once you have a clear idea of the purpose, location, and layout of your gravel patio, it’s time to measure and mark out the area. Use stakes and string to outline the boundaries of your patio. This step is crucial to ensure accuracy and to give you a visual representation of the space you’ll be working with.
Finally, consider the overall aesthetic and style that you want to achieve with your gravel patio. Think about the colors, textures, and materials that will complement your outdoor space and home. Take inspiration from magazines, websites, or even nearby gardens to help you visualize the look and feel you want to create.
By making careful plans and taking the time to consider all aspects of your gravel patio installation, you’ll be well on your way to creating an outdoor space that you’ll love to spend time in for years to come.
Step 2: Materials and Tools
Now that you have a clear plan for your gravel patio, it’s time to gather the materials and tools you’ll need for the installation process. Having everything prepared beforehand will make the process smoother and more efficient.
Here’s a list of the materials and tools you’ll need:
Materials:
- Gravel: Choose a type and color of gravel that suits your aesthetic preferences and functional needs. Consider factors such as size, shape, and texture.
- Edging material: This will help contain the gravel and prevent it from spreading into surrounding areas. Options include pavers, bricks, or landscape timbers.
- Geotextile fabric: Also known as landscape fabric, this material will help inhibit weed growth and provide stability to the gravel.
- Base material: This is typically a layer of crushed stone or gravel that provides a stable foundation for your patio.
- Landscape stakes and string: These will be used for marking out the boundaries of your patio.
- Landscaping pins: These will secure the geotextile fabric in place.
- Optional: Border material, such as decorative rocks or plants, to add a finishing touch to your patio.
Tools:
- Shovel: For digging and moving the base material and gravel.
- Rake: To level the base material and smooth out the gravel.
- Tamper or Plate compactor: Used to compact the base material and gravel, ensuring a stable surface.
- Hand tamper or Rubber mallet: For compacting the edging material.
- Landscape fabric scissors: To cut the geotextile fabric to the desired size and shape.
- Tape measure: For measuring the dimensions of your patio area.
- Gloves and safety glasses: To protect your hands and eyes during the installation process.
- Spray paint: To mark the boundaries of your patio on the ground.
Before starting your patio installation, gather all the necessary materials and tools. Ensure that you have enough of each material to complete the project, taking into account the size of your patio and any additional features you may have planned.
By having everything ready and easily accessible, you’ll be able to work efficiently and with fewer interruptions. So, gather your materials and tools, and get ready to bring your gravel patio to life!
Step 3: Site Preparation
Now that you have your plan and materials ready, it’s time to prepare the site for your gravel patio installation. Proper site preparation is crucial for ensuring a stable and long-lasting patio.
Follow these steps to prepare the site:
1. Clear the area: Start by removing any existing vegetation, debris, or objects from the site. This will provide a clean and even surface for the patio installation.
2. Excavate the area: Use a shovel to dig a depth of approximately 4-6 inches below the desired finished height of your patio. This will allow space for the base material and the gravel.
3. Level the ground: Use a rake to ensure that the excavated area is level and free of any high or low spots. This will help create a smooth and even surface for the patio.
4. Compact the soil: Use a tamper or plate compactor to compact the soil. This will provide a solid base for the patio and help prevent any settling or sinking in the future.
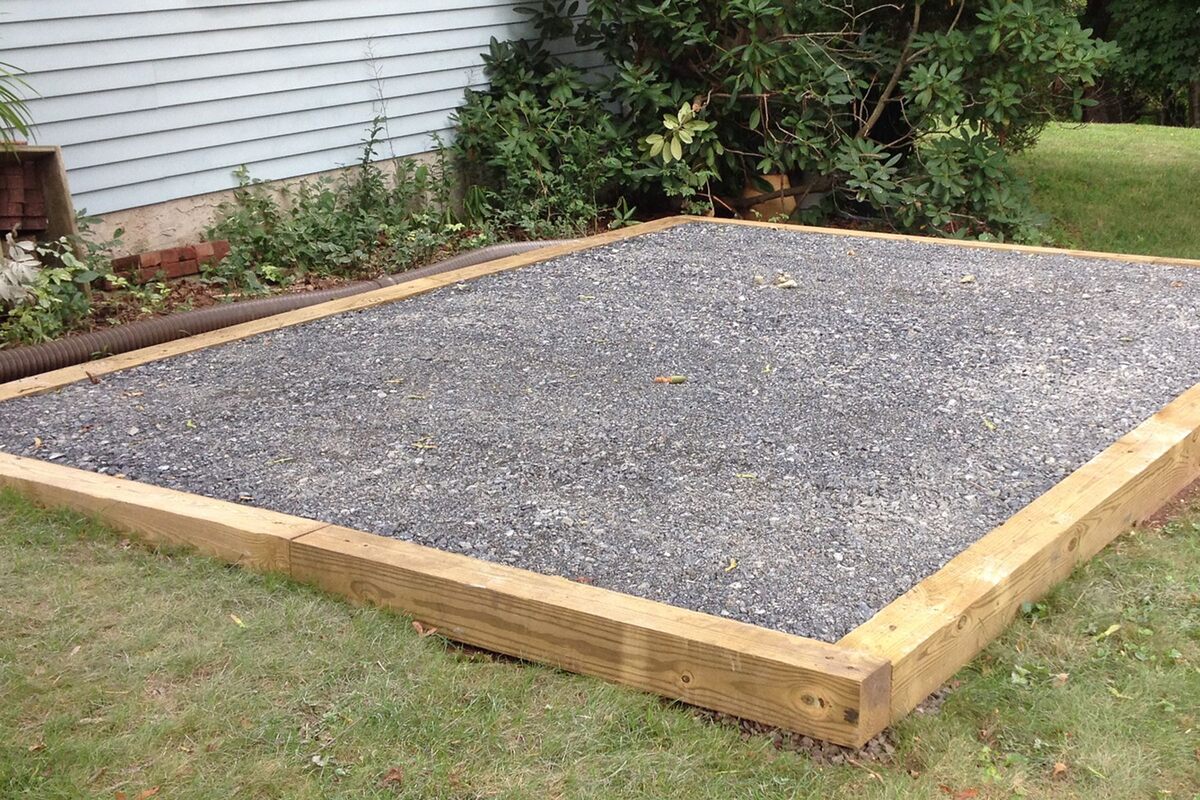
5. Install edging: Place the chosen edging material around the perimeter of the patio area. Make sure the edging is level and secure it in place using landscape stakes or screws.
6. Install geotextile fabric: Unroll the geotextile fabric over the excavated area, ensuring that it overlaps the edging. Trim any excess fabric and secure it in place using landscaping pins.
7. Add base material: Spread a layer of crushed stone or gravel over the geotextile fabric. Use a rake to level and compact the base material. Aim for a thickness of around 2-4 inches, but adjust as needed depending on your patio’s requirements.
8. Check for proper slope: Ensure that the base material slopes away from any structures or buildings to provide proper drainage. A slope of 1/4 inch per foot is recommended.
By following these steps and properly preparing the site, you’ll create a solid foundation for your gravel patio. This will help prevent issues such as shifting, sinking, or drainage problems, ensuring that your patio stands the test of time.
Read more: What Kind Of Gravel For A Patio
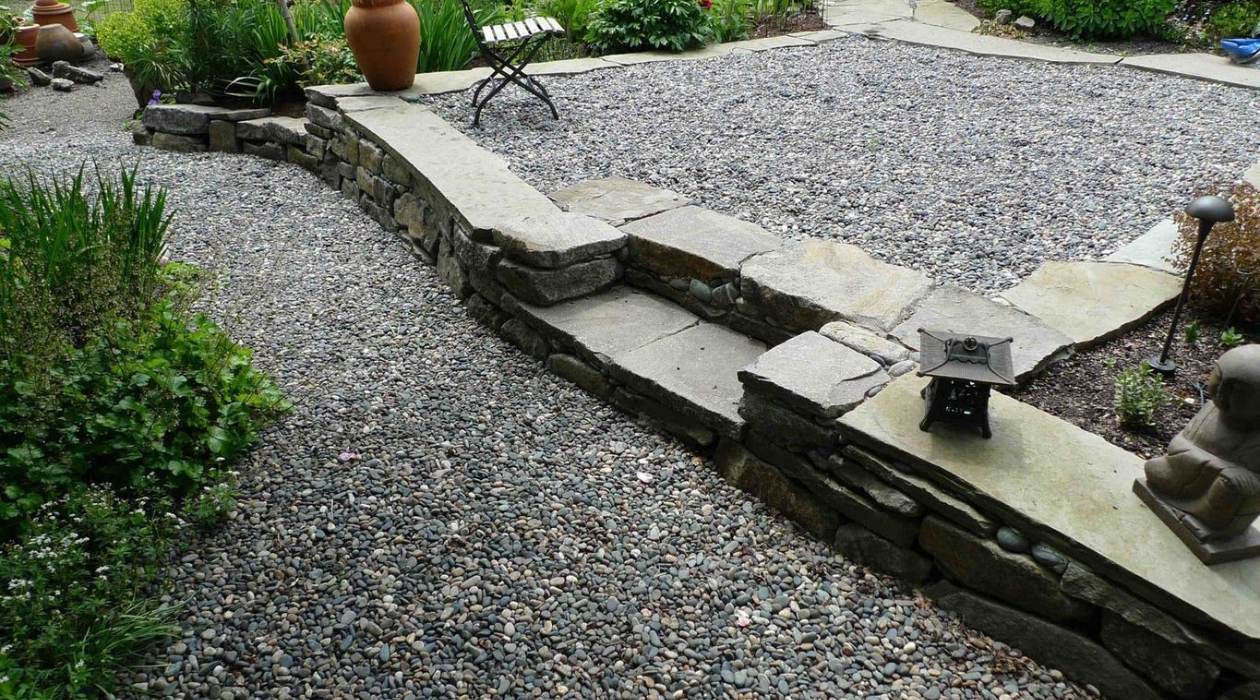
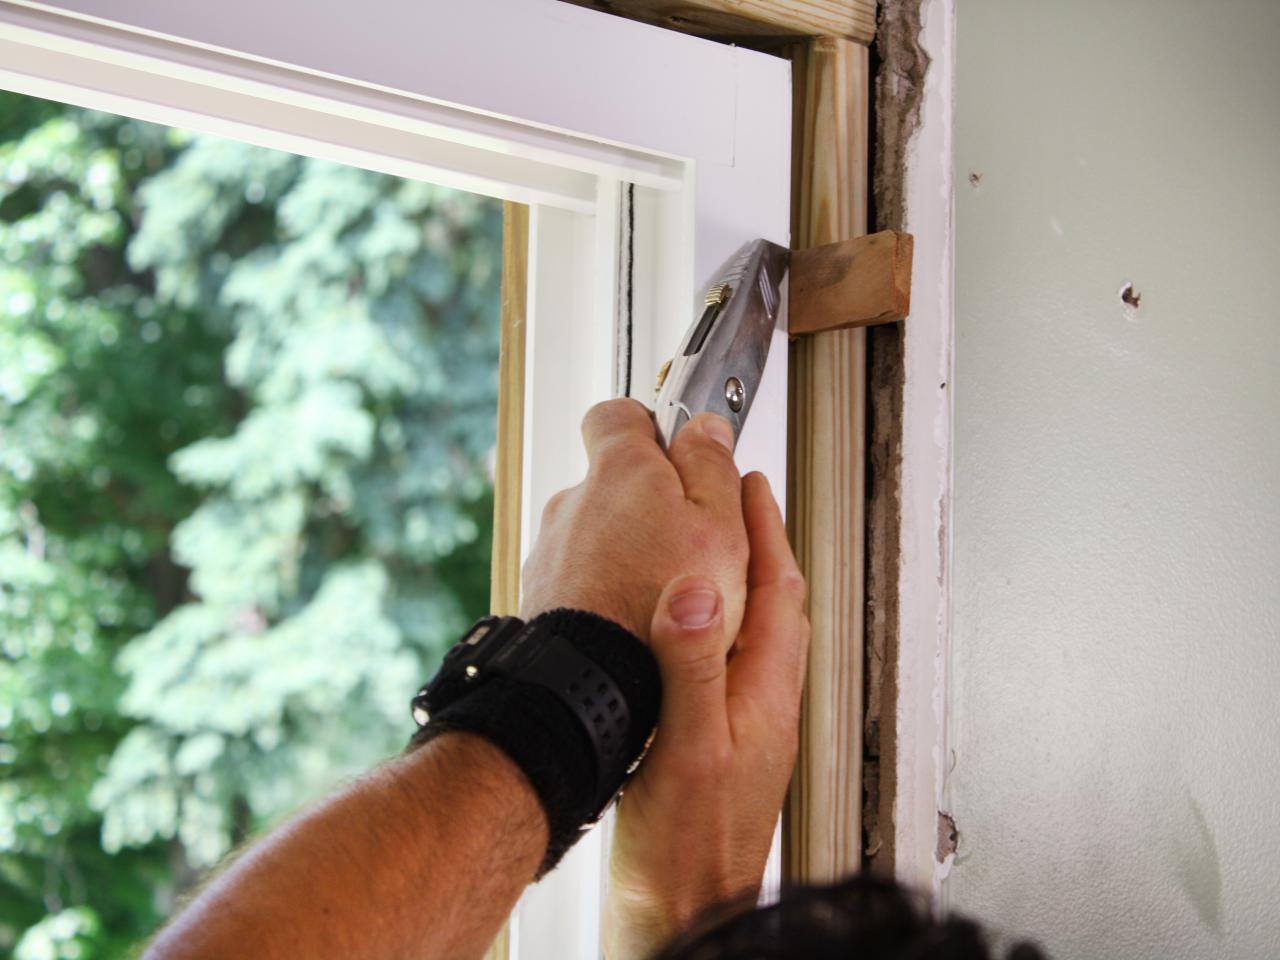
Step 4: Edging Installation
The edging of your gravel patio serves multiple purposes. It helps define the boundaries of your patio, keeps the gravel in place, and adds a decorative element to the overall design. Installing the edging correctly is key to a professional-looking and long-lasting patio.
Follow these steps to install the edging for your gravel patio:
1. Determine the type of edging: There are various options for edging materials, including pavers, bricks, landscape timbers, or even metal or plastic edging. Choose a material that complements your outdoor aesthetic and suits your desired level of maintenance.
2. Measure and mark the boundaries: Use stakes and string to outline the boundaries of your patio. Ensure that the marked lines are straight and follow the desired shape of your patio.
3. Excavate the edging area: Dig a small trench along the marked lines, approximately 4-6 inches deep and wide enough to accommodate the chosen edging material.
4. Level the trench: Use a level to ensure that the bottom of the trench is even and level. This will help keep the edging material stable and create a consistent height for your patio.
5. Place the edging material: Carefully position the edging material in the trench, ensuring it sits flush with the surrounding ground. Use a rubber mallet or hand tamper to secure the edging in place and make any necessary adjustments to ensure a level installation.
6. Connect multiple pieces: If your patio requires multiple lengths of edging material, overlap the ends and secure them together using the appropriate connectors or adhesives recommended by the manufacturer.
7. Backfill the trench: Once the edging is secure, backfill the trench with soil or gravel to provide additional stability and support for the edging material.
8. Check for stability: Walk along the edging to ensure that it is securely in place. Make any adjustments as necessary to ensure a solid and level installation.
The edging of your gravel patio not only adds structure and definition but also helps prevent the gravel from spreading into adjacent areas over time. Take your time during the installation process to ensure that the edging is properly aligned and securely in place for a professional and polished outcome.
Before installing a gravel patio, make sure to properly prepare the area by removing any grass, weeds, and debris. Then, use landscape fabric to prevent weeds from growing through the gravel.
Step 5: Base Layer Preparation
The base layer of your gravel patio is crucial for providing stability and support to the overall structure. It helps prevent the gravel from shifting, sinking, or becoming uneven over time. By properly preparing the base layer, you’ll ensure a durable and long-lasting patio.
Follow these steps to prepare the base layer for your gravel patio:
1. Calculate the base material needed: Measure the area of your patio and calculate the volume of base material required. Aim for a thickness of 2-4 inches, depending on the specific recommendations for your chosen gravel type and the expected use of your patio.
2. Purchase the base material: Choose a suitable material for the base, such as crushed stone or gravel. Look for materials with angular shapes and sizes ranging from small pebbles to larger stones. These will interlock and provide a stable foundation for your patio.
3. Clear the site: Ensure that the area is free of any debris, vegetation, or objects that could interfere with the base layer. Remove any barriers or obstacles to create a clean and even surface.
4. Spread the base material: Start by evenly distributing a layer of the base material over the entire patio area. Use a shovel or rake to spread the material and create a uniform thickness.
5. Level the base layer: Use a rake or a garden leveling tool to smooth and level the base material. Aim for an even thickness and a consistent surface throughout the patio area. Pay attention to any low or high spots and make adjustments as needed.
6. Compact the base layer: Use a tamper or a plate compactor to firmly compact the base material. Start from the edges and work your way inward. Apply even pressure to ensure the material is compacted and densely packed. This will create a solid and stable foundation.
7. Check for proper drainage: As you compact the base layer, ensure that it slopes away from any nearby structures or buildings. This will promote proper drainage and prevent water accumulation on your patio.
8. Double-check the levelness: Use a level to ensure that the base layer is even and level across the entire patio area. Adjust as needed by adding or removing base material.
By properly preparing the base layer, you’ll create a strong and stable foundation for your gravel patio. This will not only provide support for the gravel but also improve the overall longevity and functionality of your outdoor space.
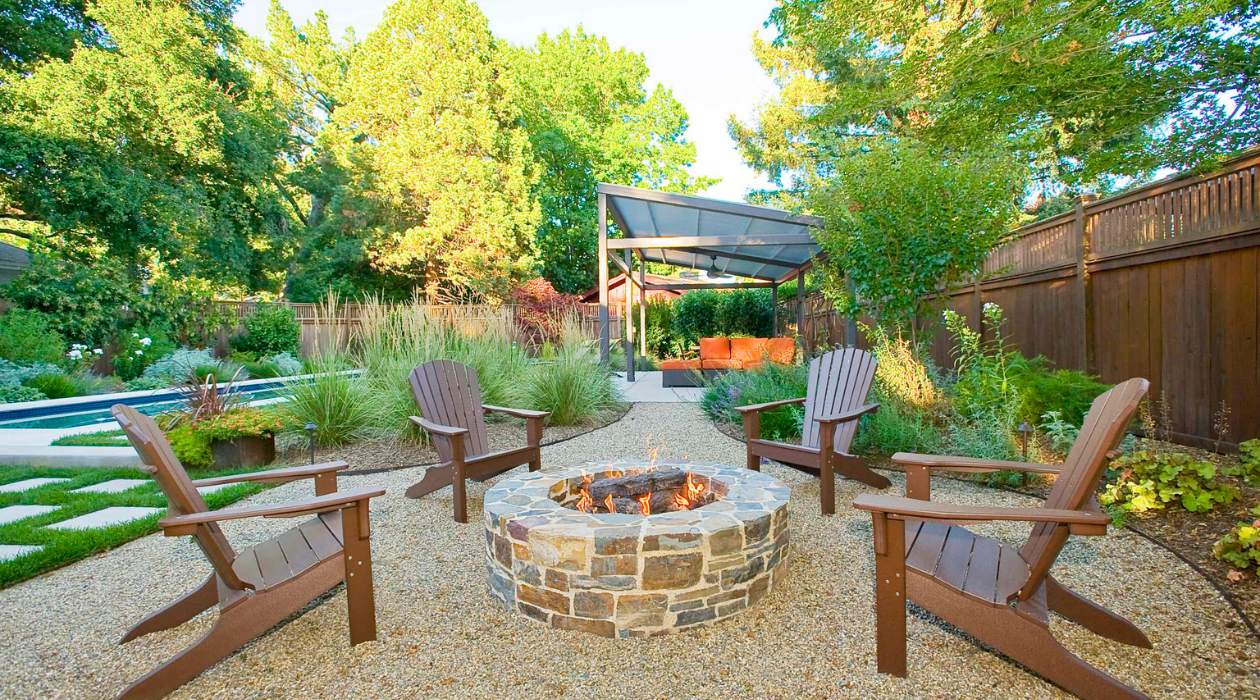
Step 6: Gravel Installation
With the base layer prepared, it’s time to move on to the exciting step of installing the gravel for your patio. The type and size of gravel you choose will greatly impact the overall look and feel of your outdoor space, so take your time to select the perfect option that complements your aesthetic vision.
Follow these steps for a successful gravel installation:
1. Choose the right gravel: Select a gravel type that suits your style, preferences, and functional needs. Gravel options vary in size, color, and texture, including crushed stone, pea gravel, or river rock. Consider the scale of your patio and the surrounding environment when making your choice.
2. Calculate the amount of gravel needed: Measure the area of your patio and estimate the volume of gravel required. Aim for a thickness of 2-3 inches for optimal coverage, but adjust as needed based on the size of the gravel particles and the desired look.
3. Start spreading the gravel: Begin by pouring or spreading the gravel evenly over the prepared base layer. Use shovels or rakes to distribute and level the gravel, ensuring an even layer across the entire patio area.
4. Consider edging for containment: If you haven’t installed edging during previous steps, consider adding it now. This will help contain the gravel within the patio boundaries and prevent it from spilling into surrounding areas.
5. Smooth and level the gravel: Use a rake or a garden leveling tool to smooth and even out the surface of the gravel. Pay attention to any uneven areas or high spots, and make adjustments as necessary for a consistent and visually appealing patio.
6. Create decorative patterns (optional): If desired, create decorative patterns or designs with the gravel. You can use a rake or a garden broom to create lines, curves, or other visually interesting patterns that add character to your patio.
7. Take a step back and assess: Step away from the patio and view it from different angles to ensure that the gravel is evenly distributed and visually appealing. Make any final adjustments if needed.
8. Clean up the surrounding area: Finally, clean up any stray gravel that may have spilled onto surrounding surfaces, such as walkways or garden beds. This will give your patio a polished and finished look.
By following these steps, you’ll be able to install your gravel patio efficiently and achieve the desired aesthetic. A well-installed gravel surface will provide a charming and low-maintenance outdoor space for relaxing, entertaining, and enjoying the beauty of your backyard.
Step 7: Compacting the Gravel
Once you have installed the gravel for your patio, the next important step is to properly compact it. Compacting the gravel is essential for achieving a stable and long-lasting surface that will resist shifting and settling over time.
Follow these steps to effectively compact the gravel:
1. Use a vibrating plate compactor: Rent or purchase a vibrating plate compactor specifically designed for compacting gravel surfaces. These machines apply powerful vibrations that help settle the gravel particles and create a tightly-packed surface.
2. Start at the edges: Begin compacting the gravel at the edges of your patio. Place the plate compactor on the edge of the gravel and slowly move it back and forth. Gradually work your way inward, overlapping each pass to ensure consistent compaction throughout the entire patio area.
3. Apply even pressure: As you compact the gravel, apply even pressure with the plate compactor. Make sure to follow the manufacturer’s instructions for the specific machine you are using, as different models may have different requirements.
4. Overlap the passes: Overlap each pass of the compactor by a few inches to ensure that no areas are missed. This will help achieve a uniform and compacted surface without any loose or uneven spots.
5. Repeat the process: After the first round of compaction, go over the entire patio area again, following the same process. This will further settle the gravel and help achieve maximum compaction.
6. Check for stability: Walk on the compacted gravel to ensure that it feels firm and stable underfoot. If any areas feel soft or unstable, go over those specific spots with the compactor again until they are properly compacted.
7. Assess the overall compaction: Step back and visually inspect the patio to ensure that the gravel appears evenly compacted. Adjust any areas if needed, using the compactor to achieve the desired level of stability.
By properly compacting the gravel, you will create a solid and durable surface for your patio. This will not only ensure its longevity but also provide a smooth and comfortable area for various outdoor activities.
Read more: How To Install A Gravel Walkway
Step 8: Finishing Touches
With the majority of the gravel patio installation complete, it’s time to add the finishing touches that will enhance the appearance and functionality of your outdoor space. These final details will help create a polished and inviting atmosphere for you and your guests to enjoy.
Consider these finishing touches for your gravel patio:
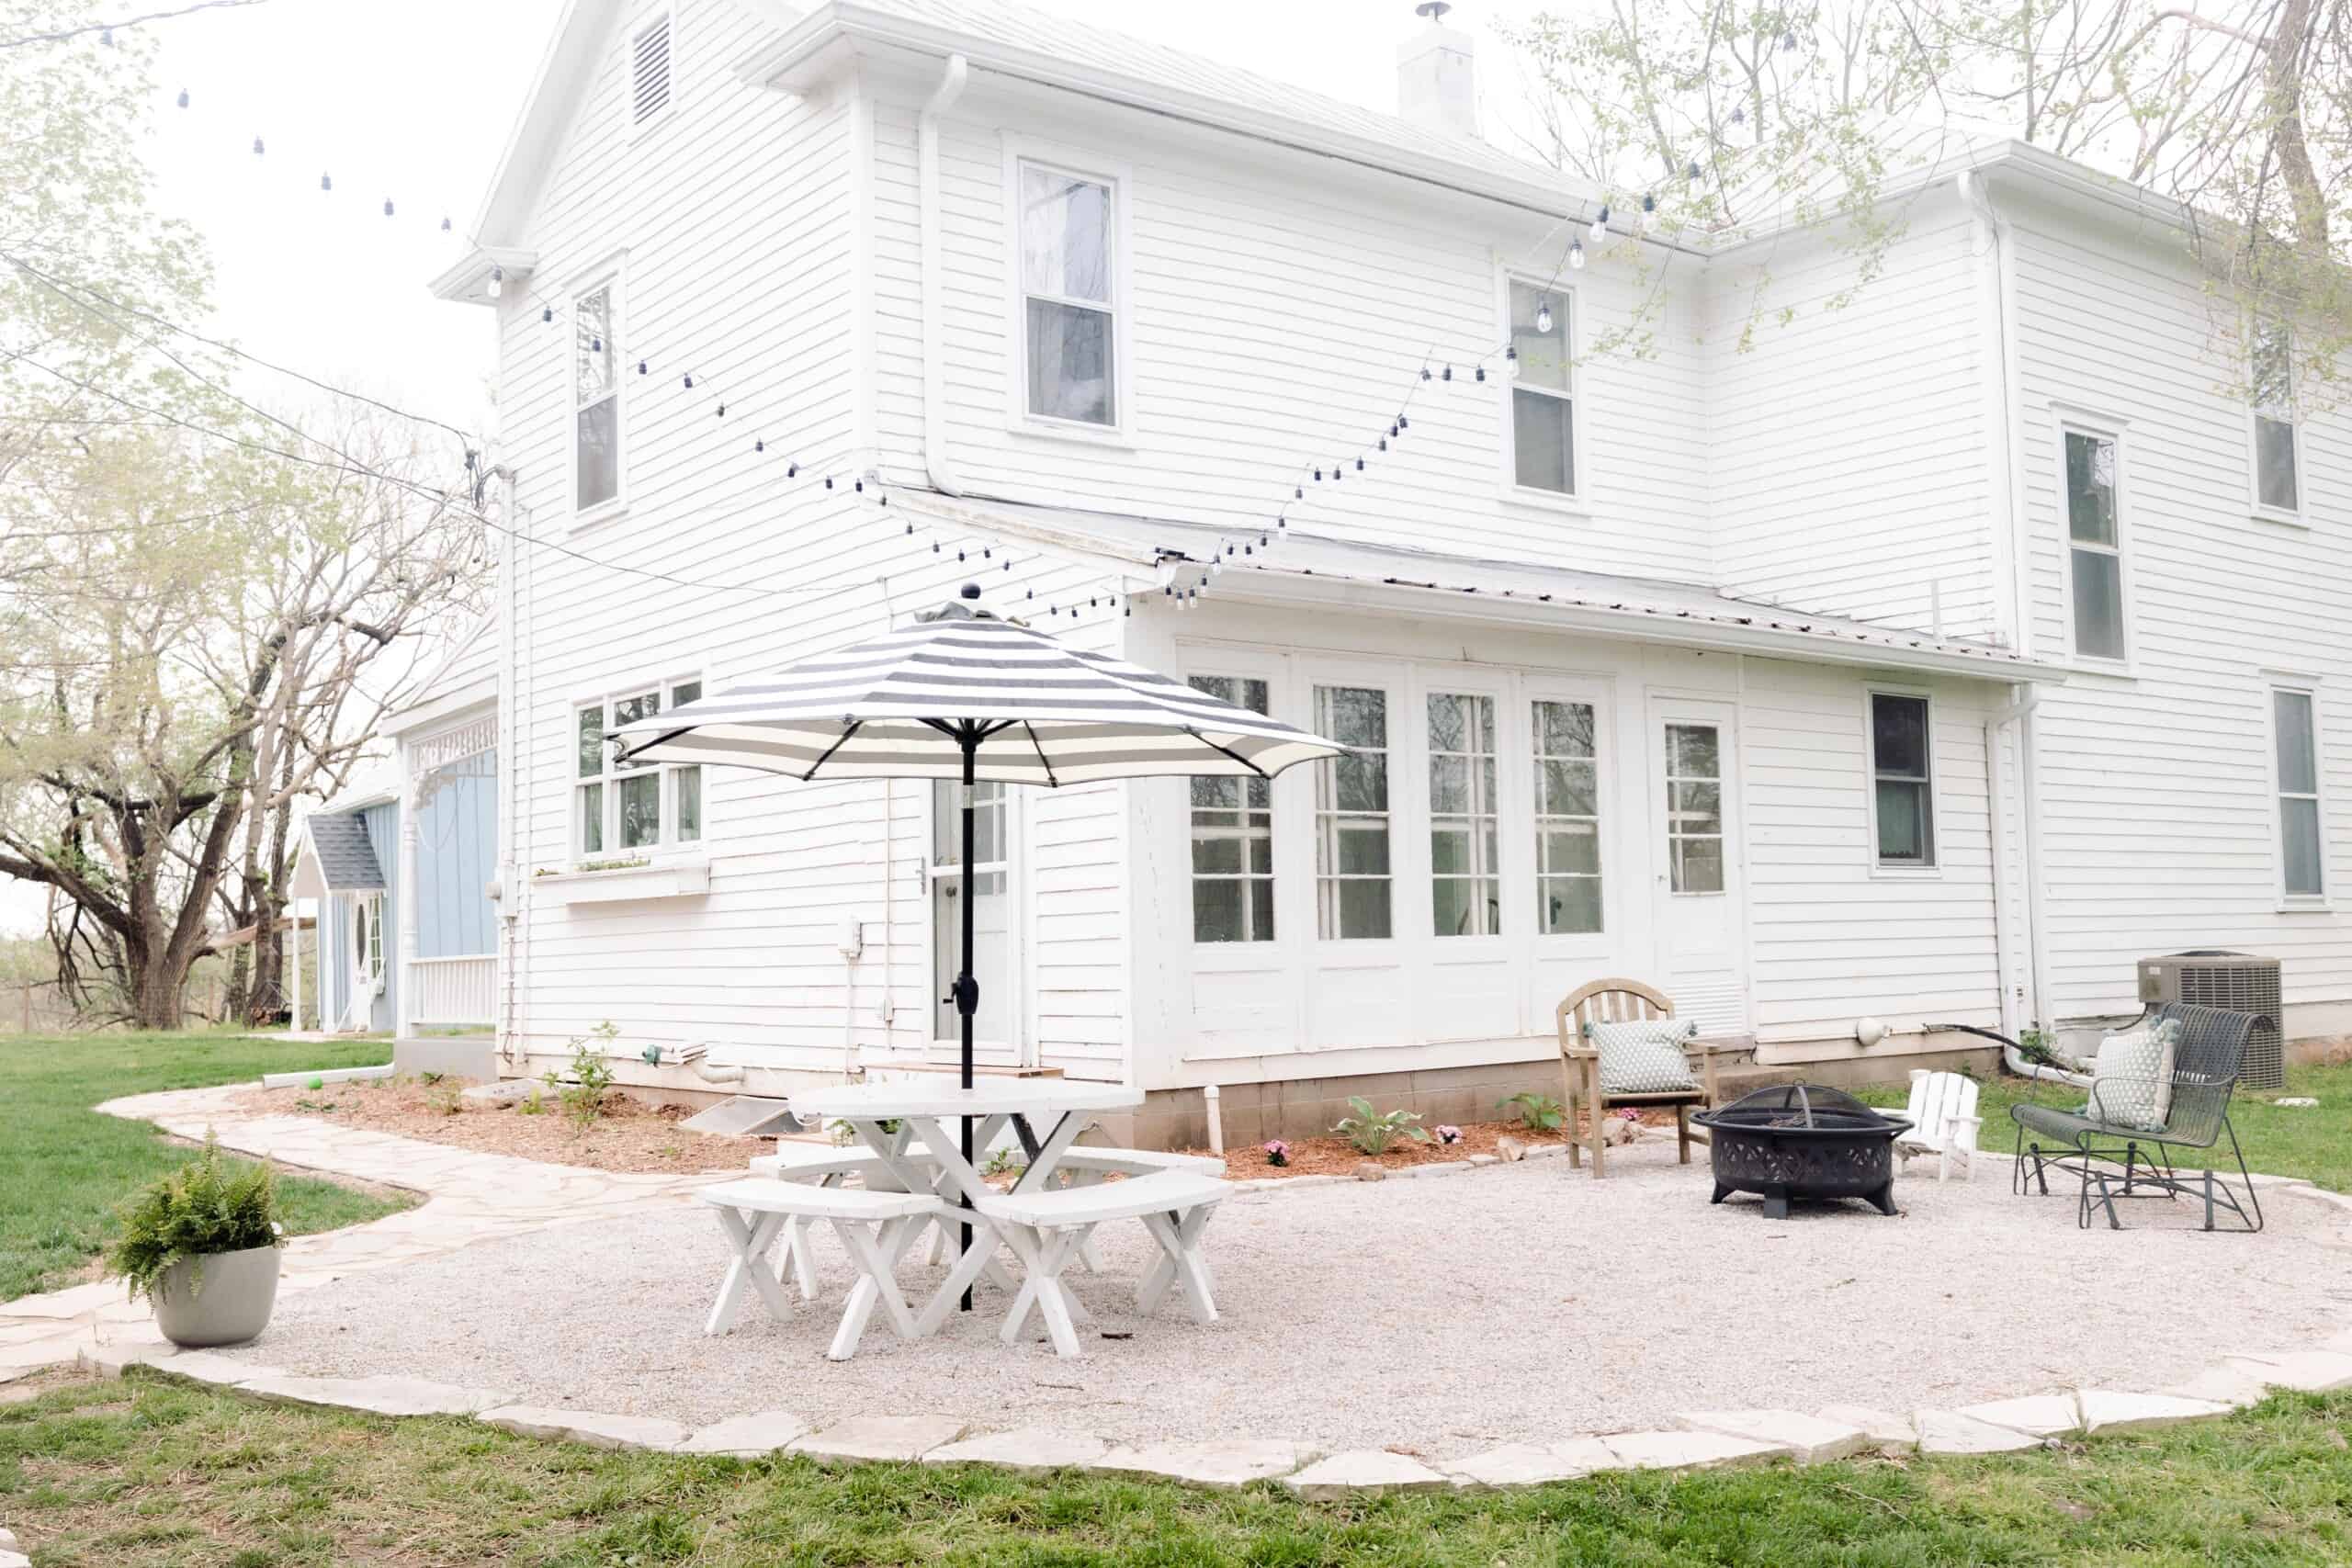
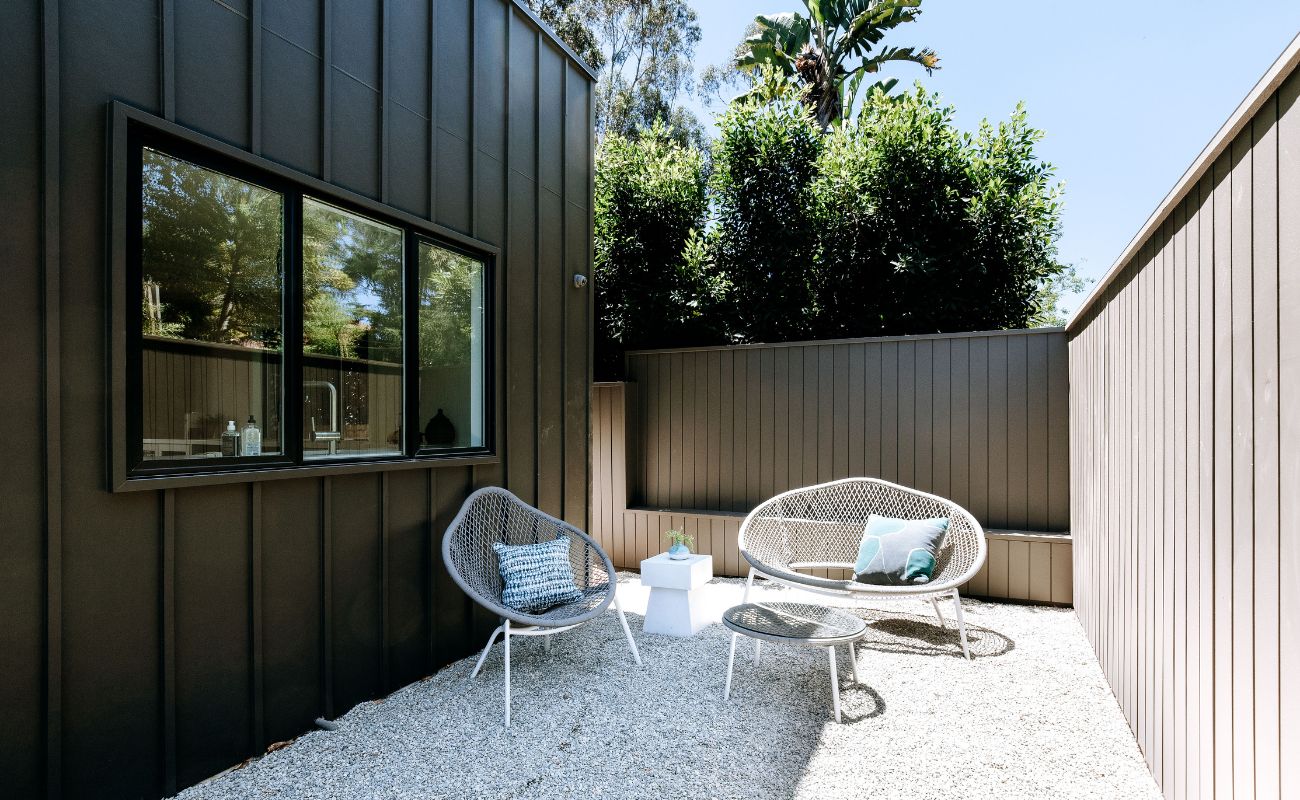
1. Add furniture and seating: Choose outdoor furniture that suits your style and needs. Whether it’s a dining set, lounge chairs, or a cozy seating area, incorporating furniture will create a comfortable space for relaxation and entertainment.
2. Consider shade options: Install a patio umbrella, pergola, or retractable awning to provide shade during hot summer days. This will make your patio more comfortable and functional, allowing you to spend more time outdoors.
3. Incorporate lighting: Install outdoor lighting such as string lights, solar-powered lanterns, or pathway lights to create a warm and inviting ambiance for evening gatherings. Lighting will not only add functionality but also enhance the overall aesthetics of your patio.
4. Integrate plants and greenery: Add potted plants, flower beds, or vertical gardens around the patio area to bring life and color to your outdoor oasis. Choose plants that thrive in your climate and require minimal maintenance to ensure long-term beauty.
5. Install a fire pit or fireplace: If you enjoy spending evenings outdoors, consider installing a fire pit or fireplace. This addition will provide warmth and create a cozy atmosphere for gathering with family and friends.
6. Personalize with decor: Add personal touches and decorations to reflect your style and personality. This could include outdoor rugs, throw pillows, wall art, or even a decorative waterfall. Let your creativity shine and make your patio truly unique.
7. Maintain and clean: Regularly sweep away debris and leaves from your gravel patio to keep it looking tidy. Address any weed growth promptly to maintain a clean and well-maintained appearance.
By adding these finishing touches, you will transform your gravel patio into a versatile and inviting outdoor space. Whether you’re hosting gatherings, enjoying solitary moments, or simply basking in the beauty of nature, these final details will truly elevate your patio experience.
Conclusion
Congratulations! You have successfully completed the installation of your gravel patio. By following the step-by-step process outlined in this guide, you have transformed your outdoor space into a functional and stylish area for relaxation, entertaining, and enjoyment. Your new gravel patio not only adds beauty to your landscape but also provides a low-maintenance and versatile solution for outdoor living.
Throughout the installation process, you have learned the importance of careful planning, site preparation, and choosing the right materials and tools. From the initial measurements and design considerations to the final touches and finishing details, each step has contributed to creating a solid and long-lasting patio.
Remember, maintenance is key to preserving the appearance and functionality of your gravel patio. Regularly sweep away debris, check for weed growth, and address any necessary repairs promptly. With proper care and maintenance, your gravel patio will continue to be a source of pride and joy for years to come.
Now it’s time to sit back, relax, and enjoy the outdoor oasis you have created. Invite family and friends over for memorable gatherings, bask in the peacefulness of a quiet evening, or simply delight in the beauty of your surroundings. Your gravel patio will serve as a perfect backdrop for creating lasting memories and enjoying the outdoors.
Thank you for choosing gravel as your patio surface and trusting us to guide you through the installation process. We hope that this comprehensive guide has provided you with the knowledge and inspiration to create a beautiful and functional gravel patio that brings you years of happiness and outdoor enjoyment.
Frequently Asked Questions about How To Install A Gravel Patio
Was this page helpful?
At Storables.com, we guarantee accurate and reliable information. Our content, validated by Expert Board Contributors, is crafted following stringent Editorial Policies. We're committed to providing you with well-researched, expert-backed insights for all your informational needs.


0 thoughts on “How To Install A Gravel Patio”