Home>Furniture>Outdoor Furniture>How To Install Exterior Patio Tile
Outdoor Furniture
How To Install Exterior Patio Tile
Modified: August 26, 2024
Learn how to install exterior patio tile to transform your outdoor space with beautiful and durable flooring. Enhance your outdoor furniture experience with these easy-to-follow installation steps.
(Many of the links in this article redirect to a specific reviewed product. Your purchase of these products through affiliate links helps to generate commission for Storables.com, at no extra cost. Learn more)
Introduction
Welcome to the ultimate guide on how to install exterior patio tile! Adding tile to your outdoor space not only enhances its visual appeal but also provides durability and functionality. Whether you’re renovating your existing patio or starting from scratch, this step-by-step guide will help you navigate through the installation process with ease.
Installing exterior patio tile can seem like a daunting task, but with the right tools, materials, and a little bit of patience, you can achieve professional-looking results. This guide will walk you through the necessary steps, from preparing the patio surface to applying grout and sealing the tiles. So, let’s dive in and get started!
Key Takeaways:
- Transform your outdoor space by installing exterior patio tile! Follow the step-by-step guide to create a durable, visually appealing patio for relaxation and entertaining.
- Maintain your newly tiled patio with regular cleaning and sealing. Personalize the space with furniture and decor to create an inviting outdoor oasis for gatherings and relaxation.
Read more: How To Install Wood Patio Tiles
Step 1: Prepare the Patio
Before you start installing exterior patio tile, it’s crucial to prepare the patio surface to ensure a smooth and long-lasting result. Here are the steps you need to follow:
- Clean the area: Remove any debris, leaves, or loose dirt from the patio. Use a broom or leaf blower to clear the surface thoroughly.
- Repair any damage: Inspect the patio for any cracks, holes, or uneven areas. If you find any, make the necessary repairs to guarantee a level surface. Fill in cracks with a concrete crack filler and smooth it out with a trowel. For small holes or divots, use a patching compound and allow it to dry completely.
- Check for drainage: Ensure that your patio has proper drainage to prevent water pooling. If necessary, create a slight slope by adding or removing soil. This will help prevent water from accumulating on the surface of the tile.
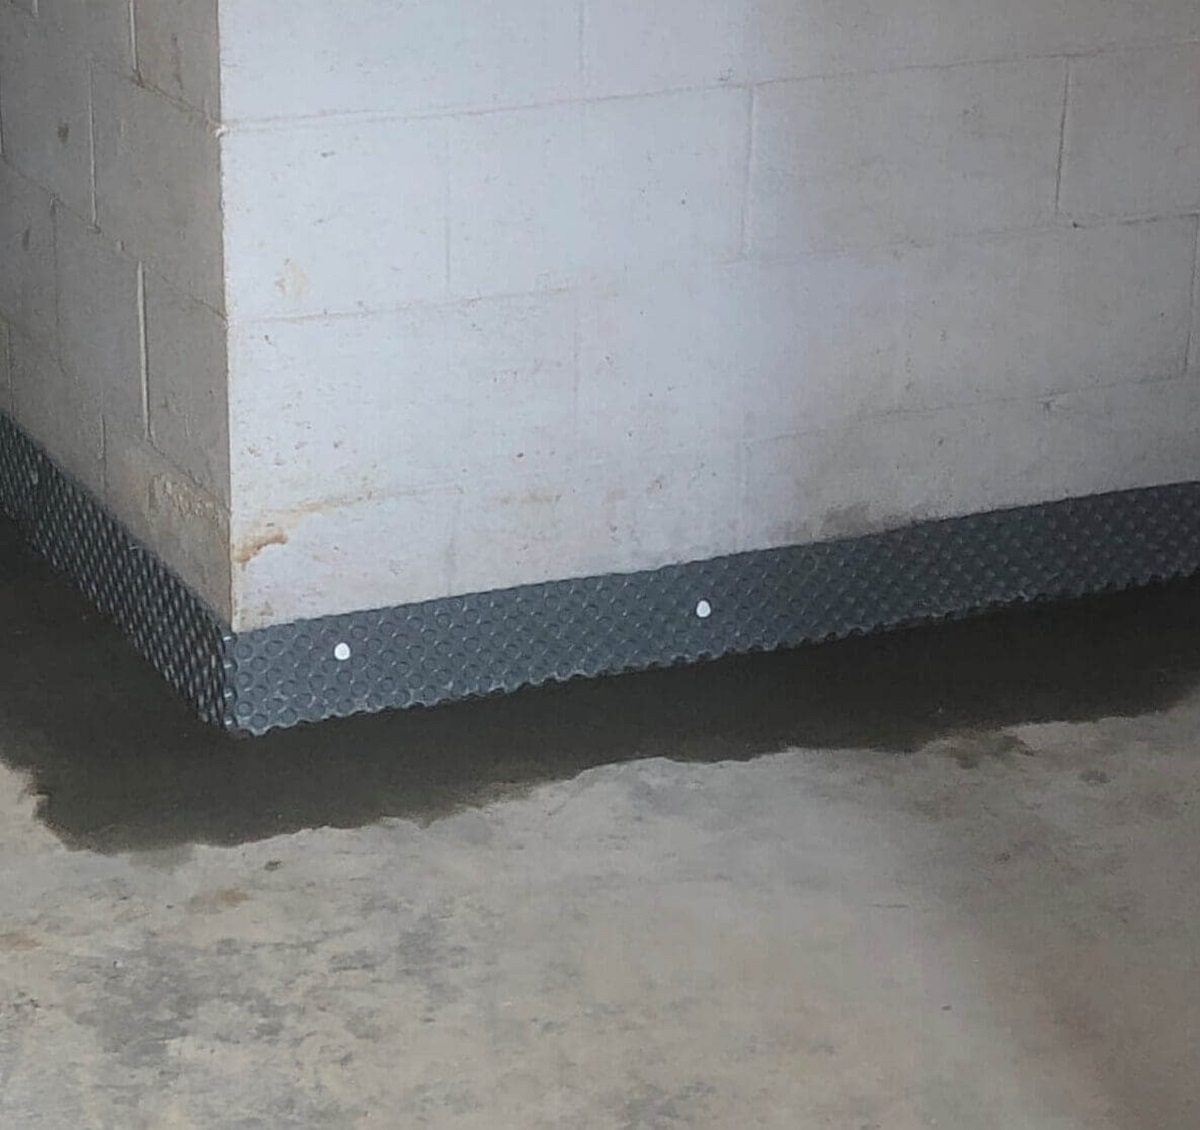
- Consider a waterproof membrane: If your patio is located above a living space or you want extra protection against water penetration, consider installing a waterproof membrane before proceeding with the tile installation. This additional layer will prevent water from seeping into the underlying structure.
By preparing your patio before installing the tiles, you’ll create a solid foundation for the tile installation. In the next step, we’ll gather the necessary tools and materials to get started.
Step 2: Gather the Tools and Materials
Before you begin the installation process, it’s essential to gather all the necessary tools and materials. Having everything on hand will ensure a smooth and efficient installation. Here’s a list of what you’ll need:
- Tile: Choose high-quality porcelain, ceramic, or natural stone tiles specifically designed for outdoor use. Consider the size, pattern, and color that will complement your patio’s aesthetics.
- Thinset Mortar: This adhesive is used to bond the tiles to the patio surface. Make sure to select a thinset mortar suitable for exterior applications and compatible with your tile material.
- Grout: Select a grout color that complements your tile and outdoor space. Opt for a stain-resistant and waterproof grout specifically designed for outdoor use.
- Trowel: Use a notched trowel to apply the thinset mortar onto the patio surface. The size of the notches on the trowel will depend on the size and type of tile you’re using.
- Tile Spacers: These small plastic wedges are placed between tiles to ensure even spacing and consistent grout lines. Choose spacers that are the appropriate size for your desired grout lines.
- Tile Cutter/Wet Saw: Depending on the complexity of your patio’s layout, you may need a tile cutter or a wet saw to make precise cuts. Ensure you have the necessary cutting tools to trim tiles to fit around edges, corners, and obstacles.
- Grout Float: A grout float is used to apply and spread the grout over the tile surface. Look for a durable float with a rubber or foam bottom that allows for easy grout application.
- Sponge and Bucket: These will be used to clean the tiles and remove any excess grout during the grouting process.
- Sealer: Consider applying a sealer to the tiles after they’ve been installed and grouted. Check the manufacturer’s recommendations for the appropriate sealer for your tile material.
- Protective Gear: Don’t forget to wear safety goggles, gloves, and a dust mask when handling mortar, grout, or using cutting tools.
Once you have gathered all the tools and materials, you’re ready to move on to the next step: measuring and planning the tile layout.
Step 3: Measure and Plan Tile Layout
Before you start laying the tiles, it’s crucial to measure the patio area and plan the tile layout carefully. This step will help you determine the number of tiles you need and ensure a visually pleasing arrangement. Follow these steps to measure and plan the tile layout:
- Measure the patio: Use a measuring tape to determine the dimensions of your patio. Measure the length and width of the entire area, taking into account any irregularities or curved edges. It’s important to be as accurate as possible to avoid running out of tiles or having too many leftover.
- Lay out the tiles: Place the tiles without adhesive on the patio surface to get a visual representation of how they will fit. Start from one corner and work your way across, considering the spacing between tiles and the overall pattern. Take into account any focal points or specific tile configurations you want.
- Consider tile cuts: Take note of any areas that require tile cuts, such as corners, edges, or obstacles like columns or steps. Plan the layout in a way that minimizes the number and size of cuts needed, while maintaining a balanced and aesthetically pleasing design.
- Account for grout lines: Remember to account for the width of the grout lines when planning your tile layout. Tile spacers will create consistent spacing between the tiles, and the grout lines will enhance the overall appearance of the patio.
- Adjust the layout: If necessary, make adjustments to the layout by shifting or rotating tiles. This will help create symmetry, balance, and a visually pleasing pattern. Step back and assess the layout from different angles to ensure you’re satisfied with the overall design.
By measuring and planning the tile layout in advance, you’ll save time and effort during the installation process. Once you’re satisfied with the layout, it’s time to move on to the next step: cleaning and leveling the patio surface.
Step 4: Clean and Level the Surface
Once you have measured and planned your tile layout, it’s time to clean and level the patio surface. This step is crucial to ensure a smooth and even installation. Follow these steps to clean and level the surface:
- Sweep or blow away debris: Begin by removing any dirt, leaves, or debris from the patio surface. Use a broom or leaf blower to thoroughly clean the area. This will help prevent any particles from interfering with the adhesion of the tiles.
- Inspect for uneven areas: Carefully examine the patio for any uneven or raised spots. Use a level or straight edge to identify any high or low points. Mark these areas with a pencil or tape for later attention.
- Fill in low spots: If you find any low spots on the patio surface, fill them in with a self-leveling compound. Follow the manufacturer’s instructions to mix and apply the compound properly. Use a trowel to spread the compound evenly and level it off. Allow the compound to dry completely before proceeding.
- Sand down high spots: If you encounter any high spots on the patio surface, use a grinder or sander to carefully smooth them down. Be sure to wear protective gear and follow the manufacturer’s safety instructions. Once the high spots have been sanded down, clean the area to remove any dust or debris.
- Check for proper drainage: It’s essential to ensure that your patio has proper drainage to prevent water from pooling. Assess the slope of the patio and make any necessary adjustments to ensure water flows away from the house or designated drainage areas.
By cleaning and leveling the patio surface, you’ll create a sturdy foundation for the tile installation. This will help prevent tiles from cracking or shifting over time. Once the surface is clean and level, you’re ready to move on to the next step: applying thinset mortar.
Read more: How To Tile A Patio
Step 5: Apply Thinset Mortar
With the patio surface clean and level, it’s time to apply thinset mortar. Thinset mortar is a specially formulated adhesive that bonds the tiles to the patio surface. Follow these steps to apply thinset mortar:
- Mix the thinset: Follow the manufacturer’s instructions to mix the thinset mortar. Use a clean bucket and a mixing paddle attached to a power drill. Add water gradually, and mix until you achieve a smooth, peanut butter-like consistency.
- Apply the thinset: Use a notched trowel to spread a layer of thinset mortar onto the patio surface. Begin in one corner and work in small sections. Use the flat side of the trowel to spread the mortar evenly, and then use the notched side to create ridges in the thinset.
- Work in small areas: It’s essential to work in manageable sections to prevent the mortar from drying out before you lay the tiles. Only spread as much thinset as you can cover with tiles within a reasonable time frame.
- Hold the trowel at an angle: When applying the thinset, hold the trowel at a 45-degree angle to achieve consistent ridges. This will help ensure proper adhesion of the tiles to the mortar.
- Place the tiles: Press each tile firmly into the mortar, making sure it is level and aligns with the adjacent tiles. Use spacers to maintain consistent spacing between tiles. Periodically check for levelness using a level or straight edge.
- Remove excess mortar: As you lay the tiles, be mindful of any excess mortar that oozes up between the tiles. Use a damp sponge or cloth to clean it up before it sets. This will prevent it from interfering with the grouting process.
- Let the thinset dry: Allow the thinset mortar to dry for the amount of time specified by the manufacturer, usually 24 to 48 hours. Avoid walking on the tiles during this time to prevent shifting or damage.
By applying thinset mortar correctly, you’ll ensure strong adhesion and a solid base for your patio tiles. Once the mortar has dried, you can proceed to the next step: cutting tiles to fit.
Before installing exterior patio tile, make sure the surface is clean, level, and free of any cracks. Use a waterproofing membrane to protect the substrate from water damage.
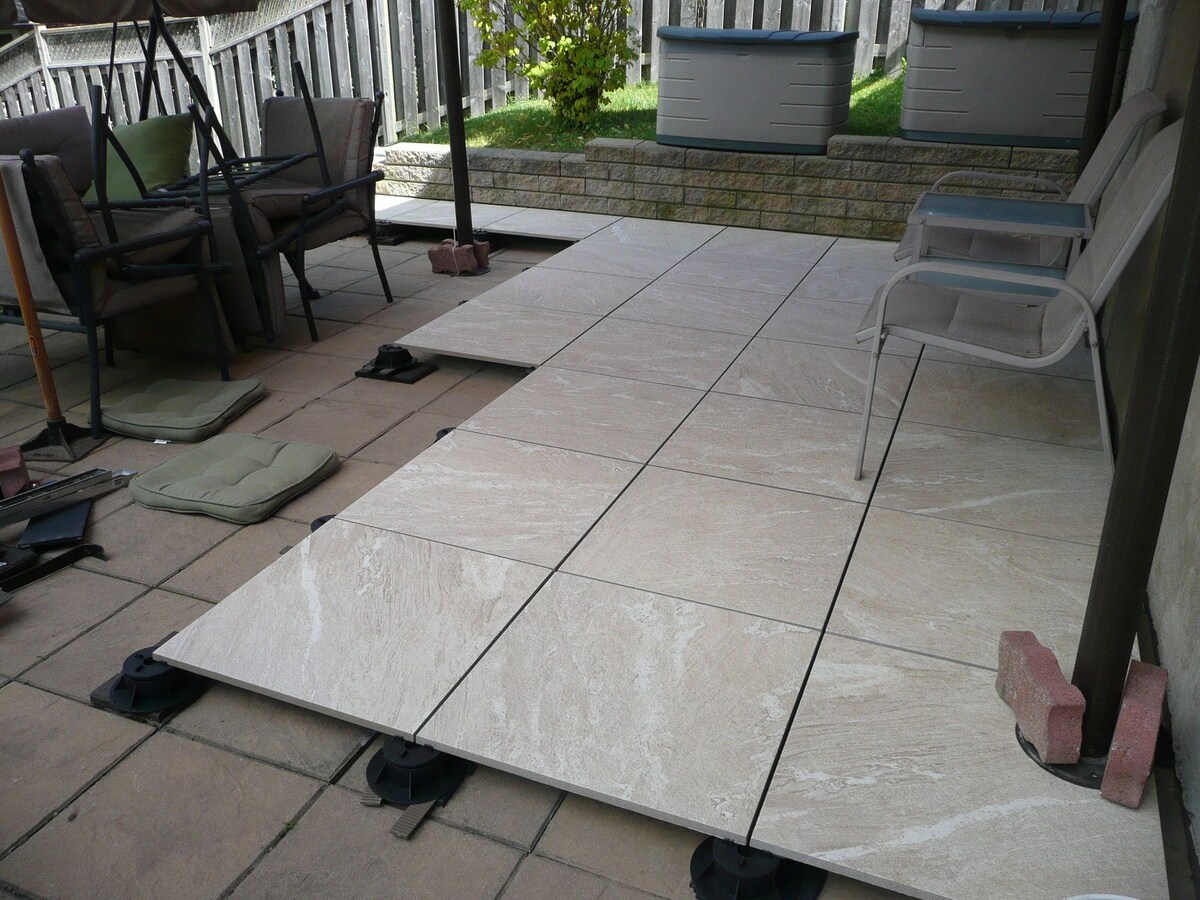
Step 6: Lay the Tiles
With the thinset mortar dried and ready, it’s time to lay the tiles on your patio surface. This step brings your patio transformation one step closer to completion. Follow these steps to lay the tiles:
- Starting point: Begin laying the tiles in a corner of your patio. This will allow you to work your way out towards the edge, ensuring a neat and uniform layout.
- Apply mortar on the back of the tile: Using a trowel, apply a thin layer of mortar to the back of the tile. This will enhance the bond between the tile and the thinset on the patio surface.
- Press the tile into place: Carefully place the tile onto the patio surface. Press it firmly, ensuring it is level and aligns with the adjacent tiles. Use a slight twisting motion to set the tile and ensure proper adhesion.
- Continue laying tiles: Repeat the process, applying mortar to the back of each tile and aligning them with the previous ones. Use tile spacers to maintain consistent spacing between tiles.
- Check for levelness: Periodically check for levelness using a level or straight edge as you lay the tiles. Adjust as needed to ensure a flat and even surface.
- Trim tiles: As you reach edges, corners, or obstacles, you may need to trim tiles to fit. Use a tile cutter or wet saw to make precise cuts, ensuring a snug fit. Take the necessary safety precautions and wear goggles, gloves, and a dust mask.
- Continue the pattern: Maintain the desired pattern as you lay the tiles. Keep an eye on the overall design and ensure a cohesive look.
- Work in small sections: To prevent the mortar from drying out, work in small sections at a time. Only apply mortar to an area that you can cover with tiles within a reasonable timeframe.
- Clean as you go: Remove any excess mortar or grout from the tiles as you work. Use a damp sponge or cloth to wipe away the residue before it sets, ensuring a clean and professional finish.
- Allow tiles to set: Once all the tiles are laid, allow them to set and cure according to the manufacturer’s instructions. This typically takes around 24 to 48 hours. Avoid walking on the tiles during this time to prevent shifting or damage.
By following these steps, you’ll successfully lay the tiles on your patio, creating a beautiful and functional outdoor space. Next, we’ll move on to cutting tiles to fit in step 7.
Step 7: Cut Tiles to Fit
As you approach edges, corners, or obstacles on your patio, you’ll likely need to cut tiles to fit the specific dimensions. Cutting tiles allows for a precise and seamless installation. Here’s how to cut tiles to fit:
- Measure and mark: Measure the area where the tile needs to be cut and mark it with a pencil or tile marker. Double-check your measurements to ensure accuracy.
- Use a tile cutter: For straight cuts, such as trimming tiles to fit along edges or walls, a tile cutter is the most common tool to use. Line up the mark with the cutter’s guide, apply pressure, and score the tile’s surface with a single swift motion.
- Break the tile: Once scored, use the tile cutter’s handle or a pair of tile nippers to snap the tile along the scored line. Apply even pressure to avoid uneven breaks.
- Use a wet saw: In cases where you need more intricate cuts or curves, a wet saw becomes necessary. A wet saw uses a diamond-tipped blade and water cooling system to smoothly cut through tiles. Follow the saw’s instructions and wear protective gear when using it.
- Make angled cuts: For angled cuts, like those needed for corner pieces or diagonal lines, adjust the tile cutter or wet saw accordingly. Take your time to ensure precise cutting and a proper fit.
- Smooth rough edges: After cutting the tiles, check for any rough or sharp edges. Use a tile file or sandpaper to smooth them down and ensure a clean finish.
- Test the fit: Once the tile is cut, test its fit in the designated area to ensure it aligns properly. Make any adjustments as needed to achieve a snug fit.
- Continue with the installation: Once you have cut the necessary tiles and ensured their fit, continue with the installation process, laying the cut pieces in their respective places and maintaining the desired pattern.
By cutting tiles to fit, you’ll be able to achieve a seamless and professional look for your patio. Take your time and use the appropriate tools to ensure accurate cuts. In the next step, we’ll move on to applying grout.
Step 8: Apply Grout
Once the tiles are in place on your patio, it’s time to apply grout to fill in the gaps and give your installation a finished look. Grout not only enhances the aesthetic appeal but also provides stability and helps prevent water penetration. Follow these steps to apply grout:
- Mix the grout: Follow the manufacturer’s instructions to mix the grout. Use a clean bucket and a mixing paddle attached to a power drill. Add water gradually and mix until you achieve a smooth, paste-like consistency.
- Apply the grout: Use a grout float to scoop a generous amount of grout onto the tile surface. Hold the float at a 45-degree angle and spread the grout diagonally, forcing it into the gaps between the tiles.
- Work in small areas: Grout a small area at a time to prevent the grout from drying too quickly. Working in small sections will give you more control and allow you to clean off excess grout before it hardens.
- Pack the grout: Use the grout float to pack the grout firmly into the gaps. Hold the float at a 90-degree angle and sweep it diagonally across the tile surface, removing any excess grout as you go.
- Clean off excess grout: Once the grout has set for a short while (usually around 15-30 minutes), use a damp sponge or cloth to wipe away the excess grout from the tile surface. Rinse the sponge or cloth frequently and wring it out well to ensure effective cleaning.
- Smooth the grout lines: After cleaning off the excess grout, use a grout finishing tool or your finger to smooth out the grout lines. This will give your installation a professional and polished appearance.
- Let the grout cure: Allow the grout to cure according to the manufacturer’s instructions. This can take anywhere from 24 to 48 hours. Avoid walking on the tiles or getting them wet during this time to ensure a strong and durable grout.
- Seal the grout: Consider applying a grout sealer to protect the grout from staining and water damage. Follow the manufacturer’s instructions for the application process and ensure proper ventilation while applying the sealer.
By applying grout correctly, you’ll achieve a solid and visually appealing patio tile installation. Next, we’ll move on to Step 9: cleaning and sealing the tiles to maintain their beauty and longevity.
Read more: How To Install Exterior Brick Veneer
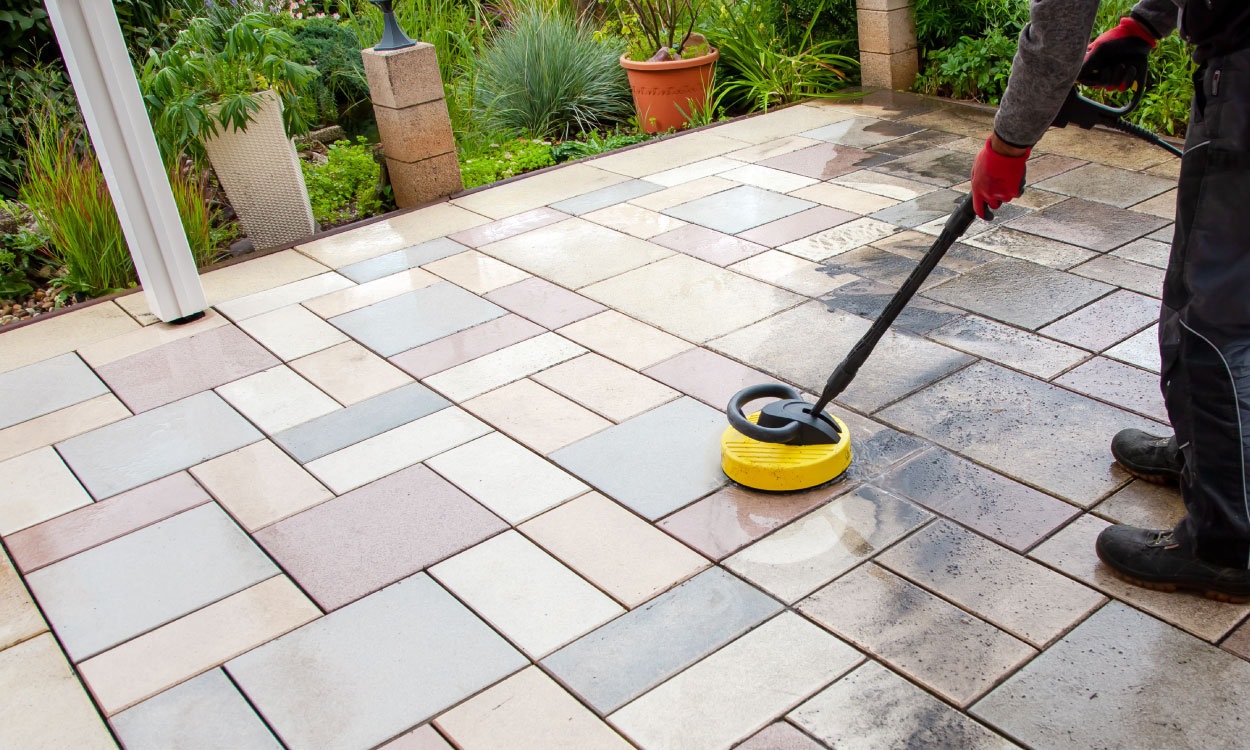
Step 9: Clean and Seal the Tiles
After the grout has cured, it’s time to clean the tiles and apply a sealer to protect and enhance their appearance. Cleaning and sealing your patio tiles will help maintain their beauty and extend their lifespan. Follow these steps to clean and seal the tiles:
- Clean the tiles: Start by sweeping or using a leaf blower to remove any loose dirt or debris from the surface of the tiles. Use a mild detergent mixed with water to scrub away any stains or marks. Avoid using harsh chemicals that could damage the tiles.
- Rinse thoroughly: Once you’ve scrubbed the tiles, thoroughly rinse them with clean water to remove any residual detergent or dirt. Allow the tiles to dry completely before proceeding.
- Choose the appropriate sealer: Select a sealer that is specifically designed for your type of tile. There are different sealers for stone, ceramic, and porcelain tiles. Consider whether you want a natural-look sealer or one that enhances the color and sheen of the tiles.
- Read and follow the instructions: Before applying the sealer, carefully read the manufacturer’s instructions and follow them accordingly. Some sealers may require dilution, while others can be applied directly. Ensure proper ventilation in the area where you’re working.
- Apply the sealer: Use a paintbrush or roller to apply the sealer evenly over the surface of the tiles. Work in small sections and avoid overlapping. Make sure to cover the entire area, including the grout lines. Remove any excess sealer before it dries.
- Allow the sealer to dry: Let the sealer dry completely according to the manufacturer’s instructions. This can take a few hours or longer. Avoid walking on the tiles or getting them wet during this time.
- Reapply if necessary: In some cases, multiple coats of sealer may be required. Read the manufacturer’s instructions to determine if a second or third coat is recommended. Allow sufficient drying time between each coat.
- Maintain the tiles: Regularly clean and maintain your patio tiles to preserve their beauty and longevity. Sweep or rinse off debris regularly and clean up any spills promptly.
By properly cleaning and sealing your patio tiles, you’ll protect them from stains, moisture, and wear, ensuring their long-lasting beauty. Now that you have completed step 9, it’s time for the final step: enjoy your newly transformed exterior patio space.
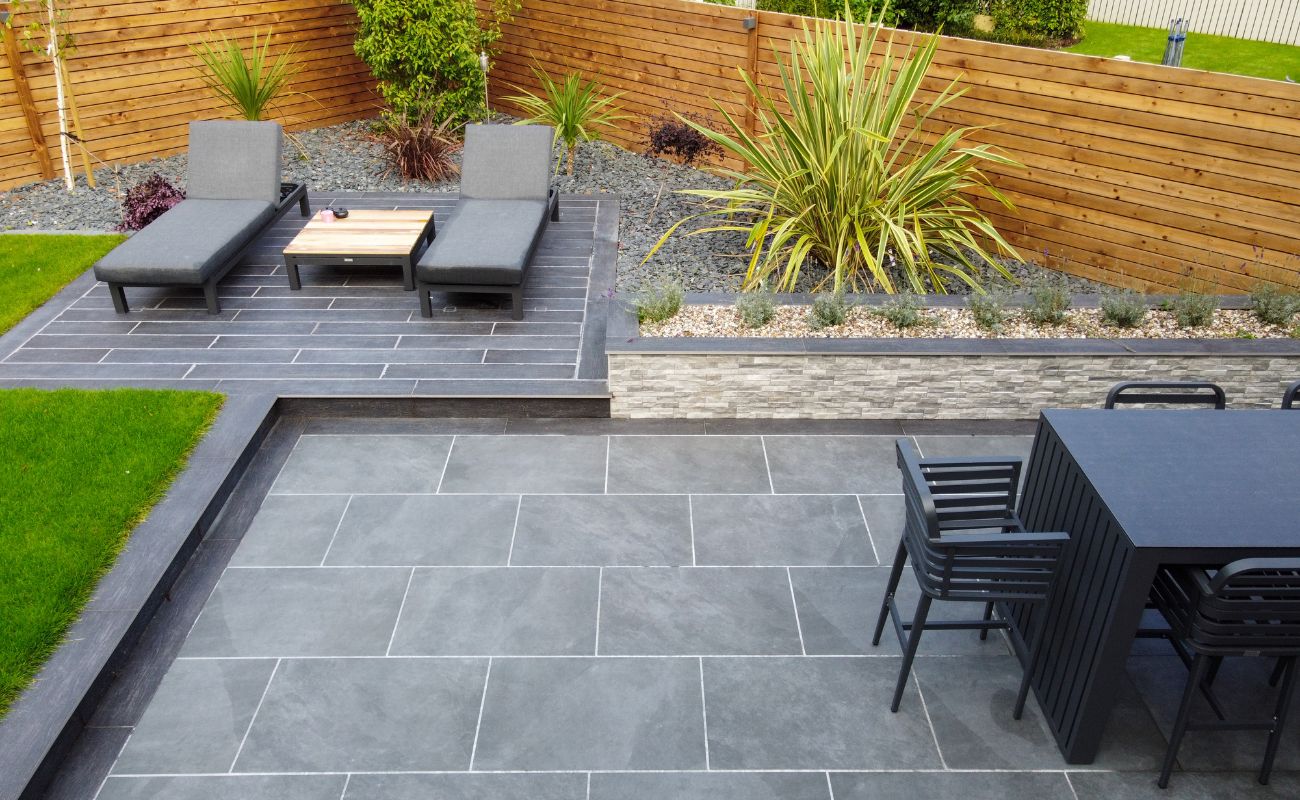
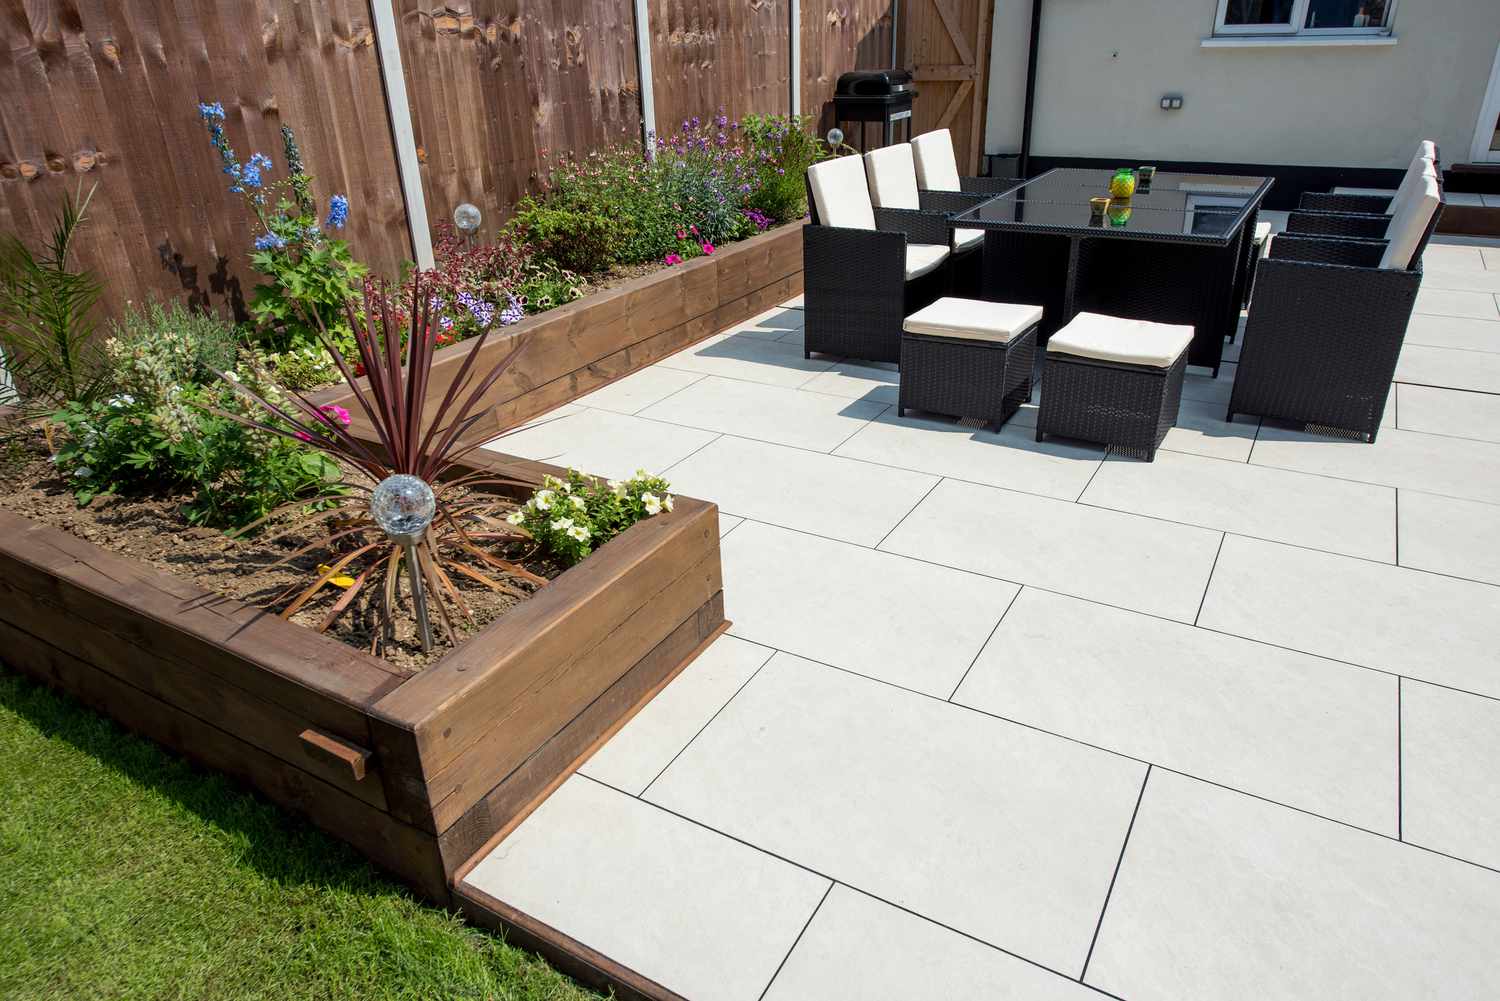
Step 10: Enjoy Your New Exterior Patio Tile
Congratulations! You have completed the installation of your exterior patio tile, and now it’s time to sit back, relax, and enjoy your newly transformed outdoor space. Here are a few tips to make the most of your patio:
- Furnish your patio: Add outdoor furniture, such as comfortable seating, dining sets, or lounge chairs, to create a welcoming and functional outdoor living area. Consider adding cushions, umbrellas, or other accessories to enhance comfort and style.
- Personalize the space: Add your personal touch to the patio by incorporating plants, decorative accents, or outdoor lighting. Create a cozy ambiance by adding lanterns, string lights, or torches to enjoy your patio during the evening hours.
- Maintain your patio tiles: Regularly clean and maintain your patio tiles to keep them looking their best. Sweep or use a leaf blower to remove debris, and periodically wash the tiles with a gentle detergent and water. Avoid using abrasive cleaners or harsh chemicals that could damage the tiles.
- Protect the tiles during harsh weather: Depending on your location, you may need to take additional measures to protect your patio tiles during extreme weather conditions. Consider covering the patio or using furniture covers to shield the tiles from excessive rain, snow, or sunlight.
- Reapply sealer as needed: Over time, the protective sealer on your patio tiles will wear off. Monitor the condition of the tiles and reapply sealer as recommended by the manufacturer or whenever water stops beading on the surface.
- Show off your new patio: Invite friends and family over to showcase your new patio space. Host outdoor gatherings, barbecues, or simply enjoy a relaxing afternoon in the fresh air. Your beautifully tiled patio will become the center of attention.
Remember, your exterior patio tile installation is an investment in your outdoor living space. With proper care and maintenance, your patio will continue to provide you with years of enjoyment and create lasting memories. So, go ahead, step outside, and bask in the beauty of your newly transformed patio!
Conclusion
Congratulations on completing the installation of your exterior patio tile! You have learned the step-by-step process of preparing the patio, gathering the necessary tools and materials, measuring and planning the tile layout, cleaning and leveling the surface, applying thinset mortar, laying the tiles, cutting them to fit, applying grout, and finally, cleaning and sealing the tiles. By following these steps and taking the time to ensure proper installation, you have created a beautiful and functional outdoor space.
Your newly transformed patio will not only enhance the visual appeal of your outdoor area but also provide durability and longevity. The patio tile installation will withstand the elements and provide an enjoyable space for relaxation, entertaining, and creating memories with loved ones.
Remember to maintain your patio by regularly cleaning and sealing the tiles, protecting them during harsh weather, and refreshing the sealer as needed. By doing so, you will preserve the beauty and longevity of your patio tiles for years to come.
Now that your exterior patio tile installation is complete, it’s time to enjoy the fruits of your labor. Furnish it with comfortable seating, personalize the space with plants and decorative accents, and make it your own outdoor oasis. Host gatherings, enjoy meals al fresco, or simply unwind and soak up the serene atmosphere.
Thank you for embarking on this journey of installing exterior patio tile with us. We hope it has been a rewarding experience, and that your new patio brings you endless joy and relaxation. So sit back, sip your favorite drink, and savor the moments in your beautifully tiled outdoor retreat!
Frequently Asked Questions about How To Install Exterior Patio Tile
Was this page helpful?
At Storables.com, we guarantee accurate and reliable information. Our content, validated by Expert Board Contributors, is crafted following stringent Editorial Policies. We're committed to providing you with well-researched, expert-backed insights for all your informational needs.


0 thoughts on “How To Install Exterior Patio Tile”