Home>Furniture & Design>Bathroom Fixtures>How To Clean An Old Shower Tile
Bathroom Fixtures
How To Clean An Old Shower Tile
Published: January 16, 2024
Learn effective techniques for cleaning old shower tile in your bathroom. Discover the best products and methods to restore your bathroom fixtures to their former glory.
(Many of the links in this article redirect to a specific reviewed product. Your purchase of these products through affiliate links helps to generate commission for Storables.com, at no extra cost. Learn more)
Introduction
Welcome to the ultimate guide on how to clean old shower tiles. Over time, shower tiles can accumulate dirt, grime, and soap scum, leading to a lackluster appearance and potentially compromising the hygiene of your bathroom. However, with the right techniques and supplies, you can restore the tiles to their former glory and create a sparkling, inviting shower space.
In this comprehensive guide, we will walk you through the step-by-step process of assessing the condition of the shower tiles, gathering the necessary supplies, preparing the shower area, applying the cleaning solution, scrubbing the tiles, rinsing and drying them, and optionally applying a sealant. Additionally, we will provide tips on maintaining the cleanliness of the shower tiles to ensure long-lasting results.
Whether you are dealing with mild surface stains or deeply embedded grime, this guide is designed to equip you with the knowledge and techniques needed to tackle the task effectively. By the end of this journey, you will not only have a beautifully clean shower, but also the satisfaction of knowing that you have revitalized an essential part of your bathroom.
Key Takeaways:
- Revitalize old shower tiles by assessing, gathering supplies, and applying a cleaning solution. Scrub, rinse, and dry thoroughly for a sparkling shower. Optional sealant and maintenance tips for long-lasting results.
- Transform your shower with a step-by-step cleaning process. Gather supplies, scrub, rinse, and dry for a fresh, inviting space. Consider a sealant and simple maintenance to preserve the tiles’ beauty.
Read more: How To Clean A Porcelain Shower Tile
Assessing the Condition of the Shower Tiles
Before diving into the cleaning process, it’s crucial to assess the condition of the shower tiles. This step will help you determine the extent of the cleaning required and identify any specific areas of concern.
Start by closely examining the tiles and grout for visible signs of dirt, discoloration, mold, or mildew. Pay attention to the grout lines, as they are particularly susceptible to staining and mildew growth. Additionally, check for any soap scum buildup on the tile surfaces, especially in areas that are frequently exposed to water.
If the tiles appear dull, discolored, or have a visibly grimy texture, it’s likely that they are in need of a thorough cleaning. In cases where mold or mildew is present, it’s important to address these issues promptly to prevent them from spreading and causing further damage.
Take note of any areas where the grout has become cracked or damaged, as these areas may require special attention during the cleaning process. Cracked grout can provide an entry point for moisture, potentially leading to water damage behind the tiles if left unaddressed.
By conducting a thorough assessment of the shower tiles, you will be better equipped to tailor your cleaning approach to address the specific issues at hand. Whether it’s tackling stubborn stains, removing mold and mildew, or restoring the luster of the tiles, understanding the condition of the tiles is the first step towards achieving a beautifully clean shower.
Gathering the Necessary Supplies
Before embarking on the journey to clean your old shower tiles, it’s essential to gather the necessary supplies. Having the right tools and cleaning agents at your disposal will streamline the process and ensure that you are well-prepared to tackle the task effectively.
Here’s a comprehensive list of supplies you’ll need to gather:
- Cleaning Solution: Select a suitable cleaning solution based on the type of tiles and grout in your shower. For ceramic or porcelain tiles, a mild all-purpose cleaner or a solution of water and vinegar can be effective. For natural stone tiles, it’s important to use a pH-neutral cleaner specifically formulated for stone surfaces to avoid causing damage.
- Baking Soda: This versatile household staple can be used as a gentle abrasive to help lift stubborn stains and grime from the tiles and grout.
- Grout Brush: A small, stiff-bristled brush is essential for effectively scrubbing the grout lines and targeting hard-to-reach areas where dirt and mildew can accumulate.
- Sponge or Microfiber Cloth: These tools are ideal for applying the cleaning solution to the tiles and wiping away dirt and residue.
- Bucket: Use a bucket to mix the cleaning solution and water, and for rinsing the tiles during the cleaning process.
- Gloves: Protect your hands with rubber or latex gloves while handling cleaning agents to prevent skin irritation.
- Protective Eyewear: Safety goggles or glasses can shield your eyes from splashes of cleaning solution and debris while scrubbing the tiles.
- Sealant (Optional): If you plan to apply a sealant to the tiles after cleaning, ensure that you have the appropriate sealant product based on the type of tiles in your shower.
By gathering these supplies, you will be well-equipped to embark on the cleaning journey with confidence, knowing that you have everything you need to achieve a thorough and effective cleaning of your old shower tiles.
Preparing the Shower Area
Before delving into the cleaning process, it’s crucial to prepare the shower area to create an optimal environment for tackling the task at hand. Proper preparation will not only enhance the effectiveness of the cleaning process but also contribute to a smoother and more efficient experience.
Here are the essential steps to prepare the shower area for cleaning:
- Clear the Shower: Remove any bottles, soap dishes, or other items from the shower area to provide unobstructed access to the tiles and grout.
- Ventilate the Space: Ensure that the bathroom is well-ventilated by opening windows and using a fan if available. Adequate ventilation will help dissipate fumes from cleaning agents and accelerate the drying process.
- Protect Surrounding Surfaces: If there are any adjacent surfaces or fixtures that could be exposed to splashes of cleaning solution, consider covering them with a protective barrier such as plastic sheeting or towels to prevent potential damage or staining.
- Pre-Wet the Tiles: Before applying the cleaning solution, lightly wet the tiles with water. Pre-wetting the tiles can help prime the surfaces for the cleaning process and enhance the effectiveness of the cleaning solution.
- Test the Cleaning Solution: If you are using a new cleaning solution or product, perform a small patch test on a discreet area of the tiles to ensure that it does not cause any adverse reactions or damage to the surfaces.
By taking these preparatory steps, you will create an environment that is conducive to a successful cleaning endeavor. Clearing the shower, ventilating the space, protecting surrounding surfaces, pre-wetting the tiles, and testing the cleaning solution will set the stage for a thorough and efficient cleaning process, ultimately leading to revitalized and sparkling shower tiles.
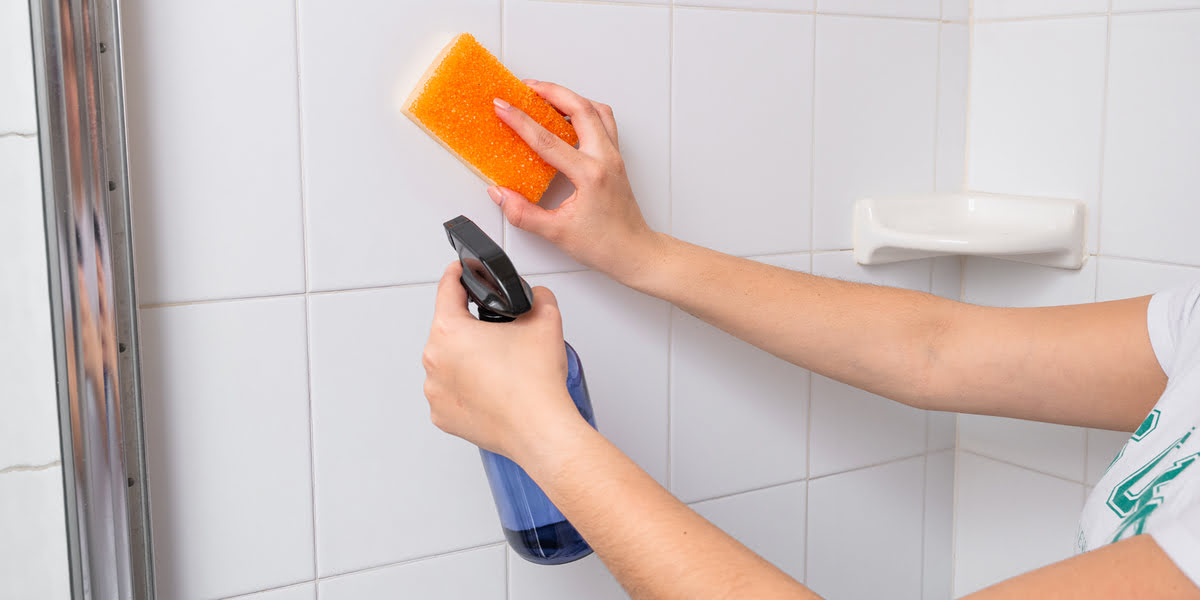
Applying the Cleaning Solution
With the shower area prepared and the necessary supplies at the ready, it’s time to apply the cleaning solution to the old shower tiles. This pivotal step sets the foundation for effectively lifting dirt, grime, and stains from the surfaces, paving the way for a thorough cleaning process.
Here’s how to apply the cleaning solution to the shower tiles:
- Mix the Cleaning Solution: Follow the manufacturer’s instructions if you are using a commercial cleaning product. If you are using a DIY solution such as water and vinegar, mix the appropriate ratios in a bucket.
- Apply the Solution: Using a sponge or microfiber cloth, apply the cleaning solution to the tiles and grout, ensuring thorough coverage. Work in manageable sections to prevent the solution from drying on the surfaces before you have a chance to scrub.
- Allow Dwell Time: Depending on the severity of the stains and grime, allow the cleaning solution to dwell on the tiles for a few minutes. This dwell time helps to loosen and dissolve the buildup, making it easier to remove during the scrubbing phase.
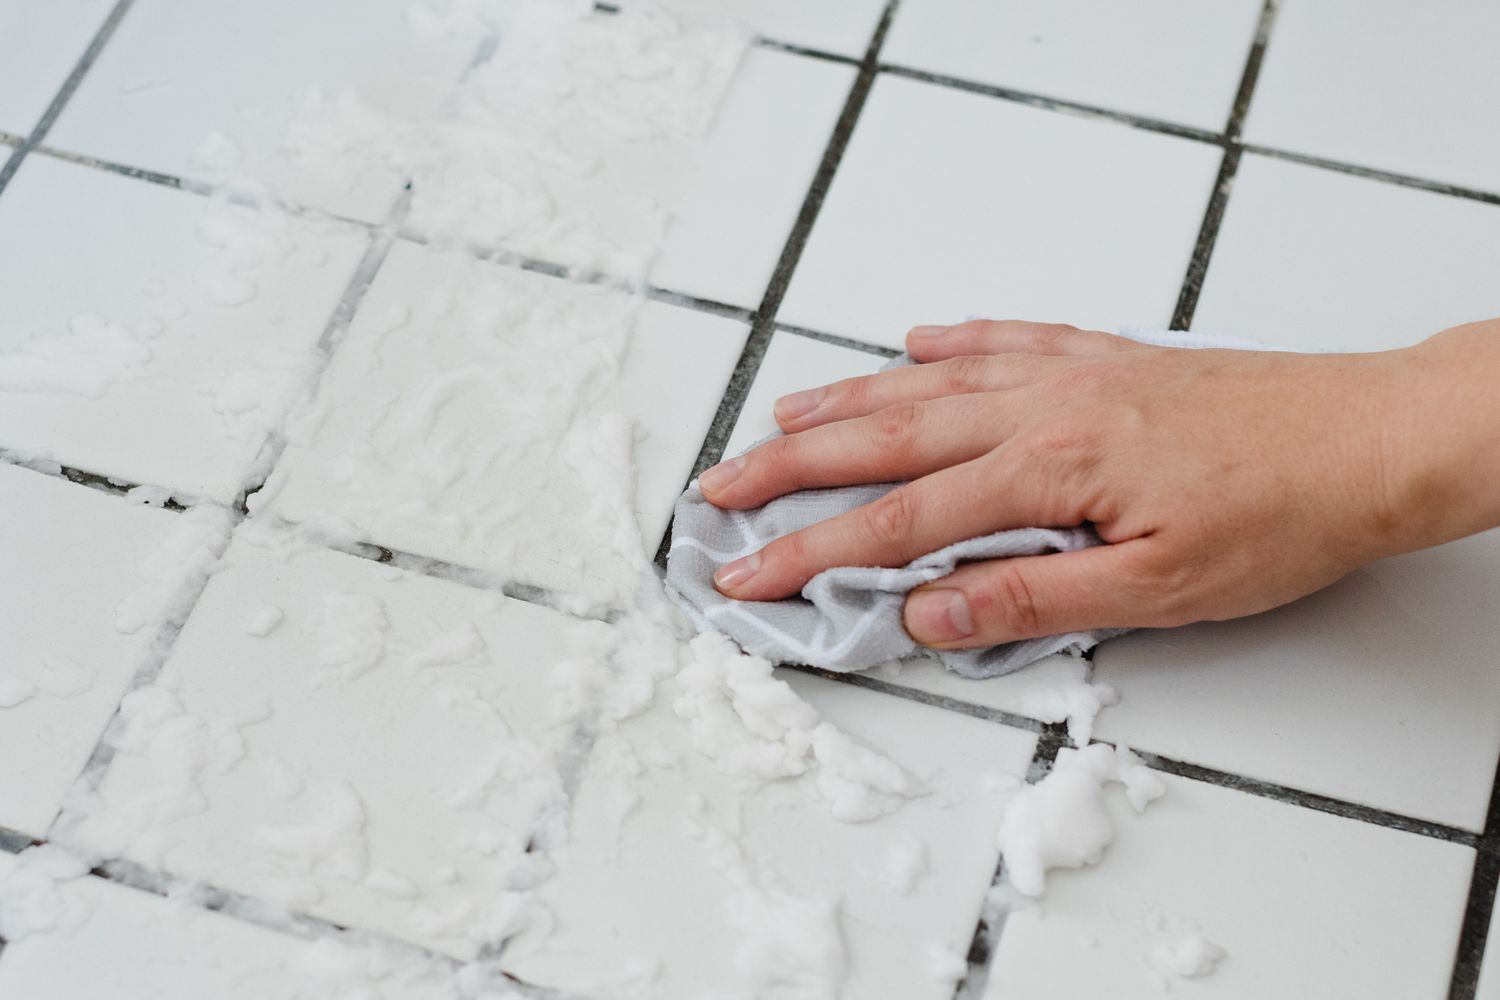
- Focused Attention on Grout: Pay special attention to the grout lines, as they are prone to trapping dirt and mildew. Use a grout brush to apply the cleaning solution directly to the grout, working it in with a circular motion to penetrate deeply and lift embedded grime.
- Address Stubborn Stains: For particularly stubborn stains or discoloration, create a paste using baking soda and water, and apply it to the affected areas. Allow the paste to sit for a few minutes before gently scrubbing with the grout brush.
By methodically applying the cleaning solution and allowing it to work its magic, you are laying the groundwork for a successful cleaning outcome. This step sets the stage for the subsequent scrubbing process, where the combination of the cleaning solution and physical agitation will work together to restore the tiles to their pristine condition.
Use a mixture of equal parts water and white vinegar to scrub the shower tiles with a sponge or brush. Let it sit for 15 minutes, then rinse with water. For tougher stains, make a paste with baking soda and water and scrub the tiles.
Read more: How To Clean A Shower Tile Mold
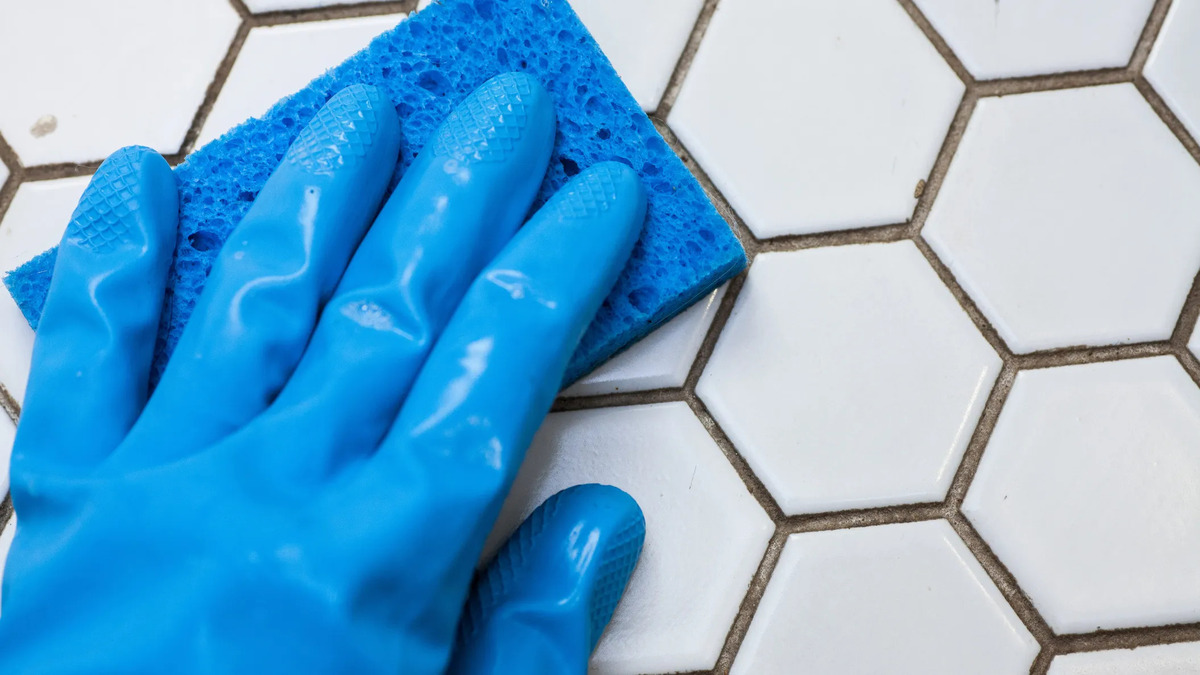
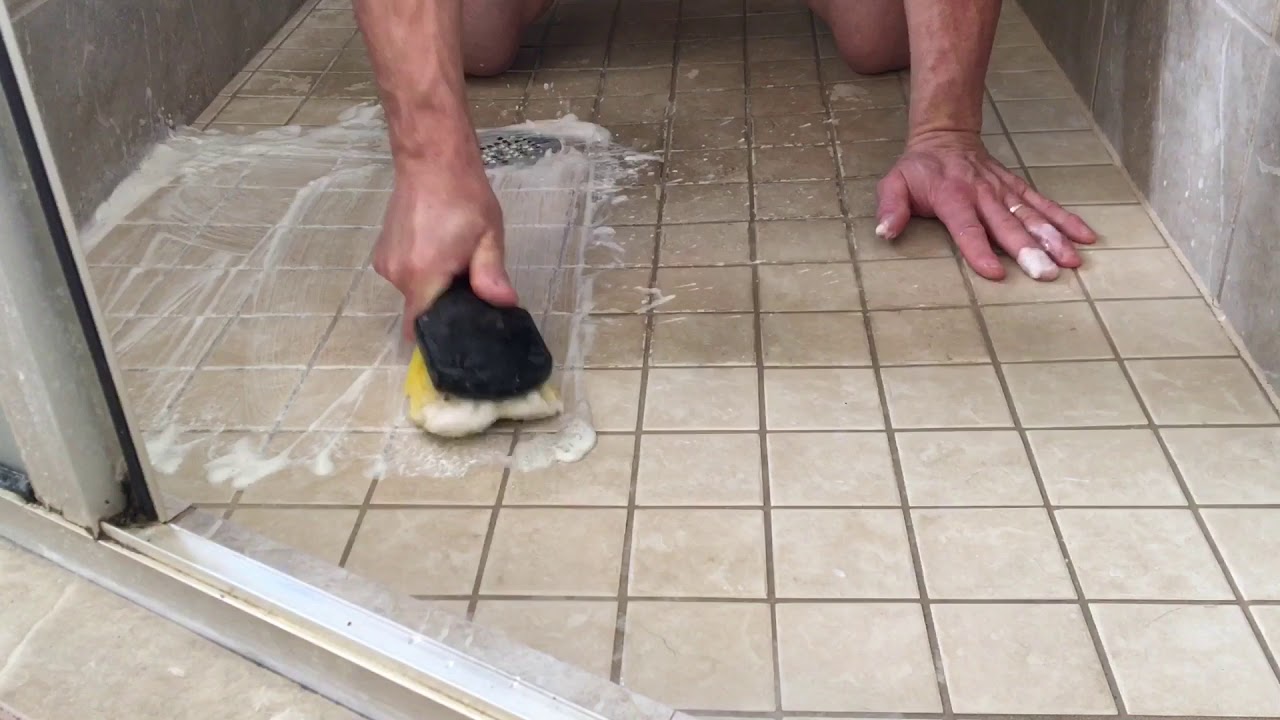
Scrubbing the Tiles
Once the cleaning solution has had time to work its magic on the old shower tiles, it’s time to roll up your sleeves and engage in the essential step of scrubbing. This hands-on process is where the transformative power of elbow grease meets the cleaning solution, effectively lifting away dirt, grime, and stains to reveal the refreshed surfaces beneath.
Here’s how to approach the scrubbing process for your shower tiles:
- Focus on Small Sections: Divide the tiled surfaces into manageable sections to ensure thorough and methodical cleaning. Working in smaller areas allows you to concentrate your efforts and prevent the cleaning solution from drying prematurely.
- Use the Grout Brush: Employ the small, stiff-bristled grout brush to scrub the grout lines vigorously. The brush’s bristles are designed to penetrate the porous grout, dislodging embedded dirt and mildew for a revitalized appearance.
- Circular Motion for Tiles: For the tile surfaces, use a circular motion with the grout brush or a sponge to agitate the cleaning solution and lift away grime. Apply firm but controlled pressure to effectively target stubborn areas without causing damage to the tiles.
- Address Stubborn Stains: For persistent stains or discoloration, focus additional attention on these areas, using the appropriate tools and a bit of extra cleaning solution if needed. The goal is to gradually diminish or eliminate the appearance of stubborn stains through diligent scrubbing.
- Rinse and Inspect: Periodically rinse the scrubbed sections with clean water to remove the loosened dirt and residual cleaning solution. Take the opportunity to inspect the tiles and grout, ensuring that the cleaning process is effectively restoring their original appearance.
By approaching the scrubbing process with patience, determination, and a methodical approach, you are harnessing the power to revitalize your old shower tiles. The physical action of scrubbing, combined with the cleaning solution’s efficacy, will yield noticeable improvements as you work your way through the tiled surfaces.
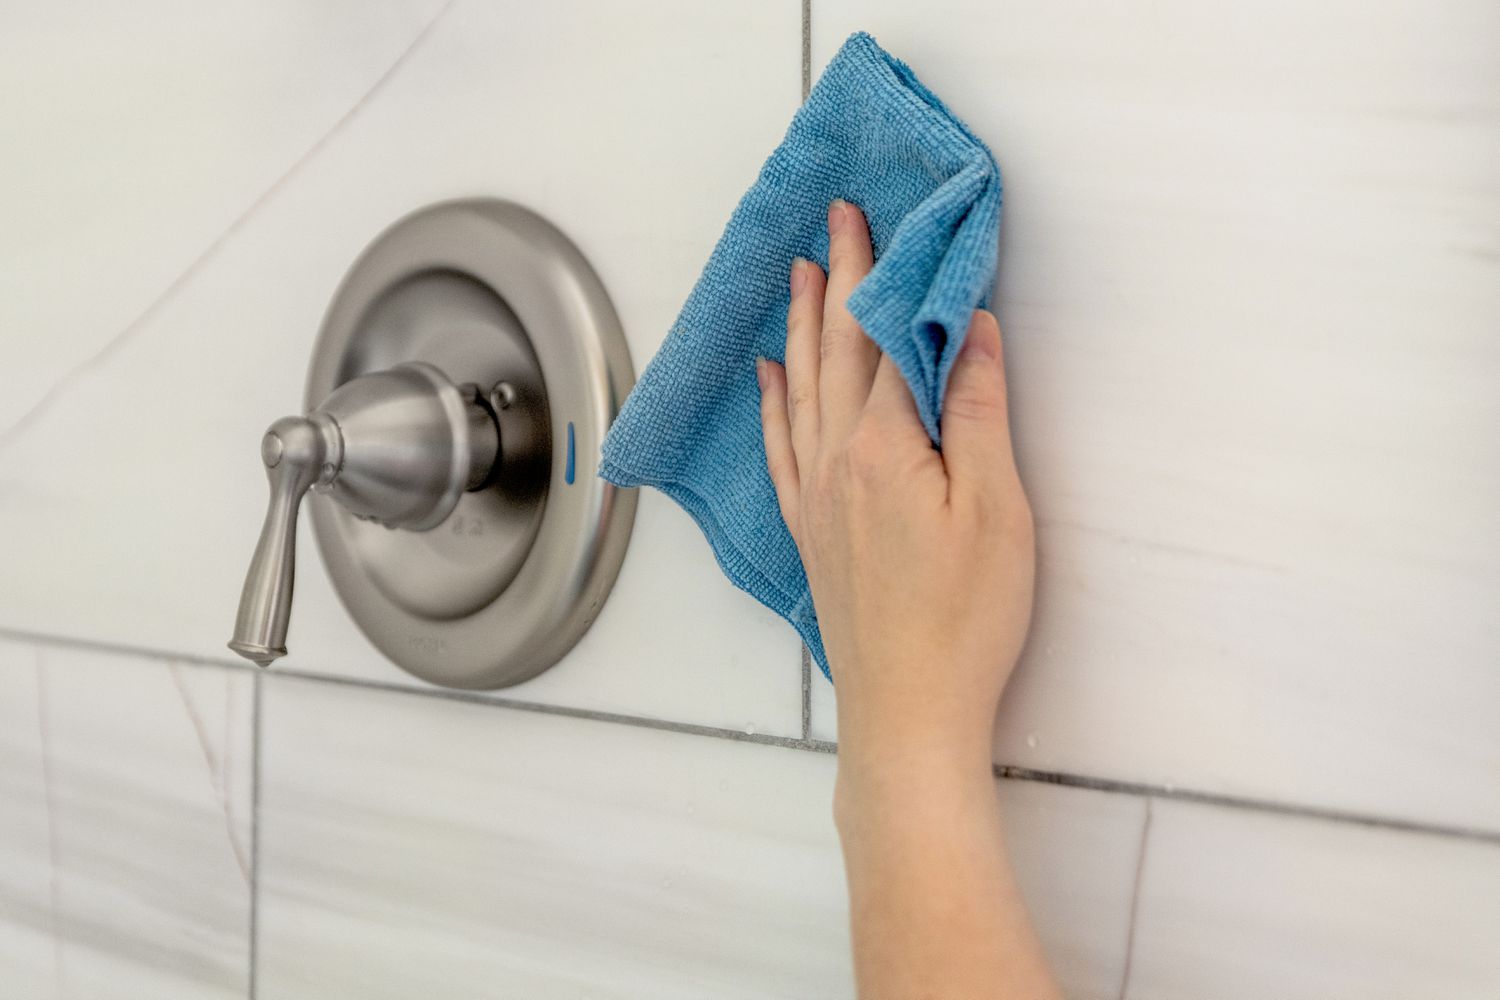
Rinsing and Drying the Tiles
As the scrubbing phase draws to a close, it’s crucial to transition to the rinsing and drying stage to complete the cleaning process for your old shower tiles. This step ensures that any residual cleaning solution, dirt, and grime are thoroughly removed, leaving behind sparkling, refreshed surfaces ready to reclaim their role as the focal point of your shower.
Here’s how to effectively rinse and dry the tiles after scrubbing:
- Rinse with Clean Water: Using a handheld showerhead or a bucket of clean water, thoroughly rinse the tiles and grout to remove the loosened dirt and residual cleaning solution. Ensure that all traces of the cleaning solution are washed away to prevent streaking or residue.
- Inspect for Residual Grime: After rinsing, inspect the tiles and grout for any lingering grime or areas that may require additional attention. Address any remaining spots by gently scrubbing with a clean brush or sponge and rinsing again as needed.
- Dry the Surfaces: Use a clean, dry microfiber cloth or towel to dry the tiles and grout. Thoroughly pat and wipe the surfaces to remove excess moisture and prevent water spots from forming as the tiles dry.
- Ventilate the Area: Open windows and use a fan to promote air circulation and accelerate the drying process. Adequate ventilation will help prevent moisture buildup and ensure that the tiles and grout dry completely.
- Final Inspection: Once the tiles are dry, conduct a final inspection to admire the revitalized appearance of your shower tiles. Take pride in the transformation and revel in the satisfaction of knowing that your efforts have restored the beauty and cleanliness of this essential space.
By diligently rinsing and drying the tiles, you are putting the finishing touches on a comprehensive cleaning process that has breathed new life into your old shower tiles. The combined efforts of thorough rinsing and meticulous drying will preserve the cleanliness and luster of the tiles, allowing them to shine once more in your shower space.
Applying a Sealant (Optional)
After the thorough cleaning and revitalization of your old shower tiles, you may consider applying a sealant to further protect and enhance the surfaces. While optional, a sealant can provide an additional layer of defense against dirt, moisture, and stains, ultimately prolonging the pristine appearance of the tiles and grout.
Here’s how to approach the application of a sealant, should you choose to do so:
- Choose the Right Sealant: Select a high-quality sealant that is appropriate for the type of tiles in your shower. For natural stone tiles, opt for a sealant specifically formulated for stone surfaces to ensure compatibility and optimal protection.
- Prepare the Surfaces: Ensure that the tiles and grout are clean, dry, and free of any residual cleaning solution or debris before applying the sealant. This preparation sets the stage for the sealant to adhere effectively and deliver the intended protective benefits.
- Apply the Sealant: Follow the manufacturer’s instructions for the application of the sealant. Use a clean, dry cloth or applicator recommended for the specific sealant product to evenly apply a thin, uniform layer across the tiles and grout. Take care to avoid excess buildup or pooling of the sealant.
- Allow for Proper Curing: After applying the sealant, allow it to cure for the recommended duration as specified by the manufacturer. This curing period is essential for the sealant to form a durable, protective barrier that enhances the resilience of the tiles and grout.
- Buff and Polish (if applicable): Depending on the type of sealant used, you may need to buff or polish the tiles and grout to achieve the desired finish. Follow the sealant manufacturer’s guidelines to complete this step effectively.
By opting to apply a sealant, you are taking proactive measures to safeguard the cleanliness and appearance of your shower tiles. The sealant’s protective properties can help repel water, prevent staining, and simplify future cleaning efforts, contributing to the long-term maintenance of your revitalized shower space.
Maintaining the Cleanliness of the Shower Tiles
Having invested time and effort into restoring the cleanliness and luster of your old shower tiles, it’s essential to implement effective maintenance practices to preserve their pristine condition and extend their longevity. By incorporating simple yet impactful strategies into your routine, you can ensure that your revitalized shower tiles continue to exude a fresh and inviting appeal.
Here are key maintenance tips to uphold the cleanliness of your shower tiles:
- Regular Cleaning: Establish a regular cleaning schedule to prevent the buildup of dirt, soap scum, and grime. A weekly wipe-down with a mild, pH-neutral cleaner can help maintain the tiles’ cleanliness and minimize the need for intensive cleaning sessions.
- Prompt Spill Cleanup: Address spills and splashes promptly to prevent staining and moisture absorption. By promptly wiping away water and spilled products, you can mitigate the risk of discoloration and maintain the tiles’ pristine appearance.
- Grout Maintenance: Periodically inspect the grout lines for signs of wear, cracking, or discoloration. Address any issues promptly by repairing or resealing the grout to prevent water intrusion and maintain its cleanliness and integrity.
- Ventilation: Ensure adequate ventilation in the bathroom to minimize moisture accumulation, which can contribute to mold and mildew growth. Use exhaust fans and open windows to promote air circulation and expedite the drying of shower surfaces.
- Use of Squeegee: After showering, use a squeegee to remove excess water from the tiles and glass surfaces. This simple practice can help prevent water spots and mineral deposits, preserving the tiles’ cleanliness and shine.
- Periodic Deep Cleaning: Schedule periodic deep cleaning sessions to address any accumulated grime or stains. This proactive approach can prevent the gradual buildup of dirt and maintain the tiles’ original brilliance.
By integrating these maintenance practices into your regular routine, you can uphold the cleanliness and allure of your revitalized shower tiles. Consistent care and attention will not only preserve the tiles’ aesthetic appeal but also contribute to a hygienic and inviting shower space for years to come.
Frequently Asked Questions about How To Clean An Old Shower Tile
Was this page helpful?
At Storables.com, we guarantee accurate and reliable information. Our content, validated by Expert Board Contributors, is crafted following stringent Editorial Policies. We're committed to providing you with well-researched, expert-backed insights for all your informational needs.


0 thoughts on “How To Clean An Old Shower Tile”