Home>Furniture>Outdoor Furniture>How To Install Wood Patio Tiles
Outdoor Furniture
How To Install Wood Patio Tiles
Modified: August 23, 2024
Learn how to install wood patio tiles for your outdoor furniture. Create a stunning outdoor space with these easy installation steps.
(Many of the links in this article redirect to a specific reviewed product. Your purchase of these products through affiliate links helps to generate commission for Storables.com, at no extra cost. Learn more)
Introduction
Welcome to our comprehensive guide on how to install wood patio tiles! If you’re looking to enhance the outdoor appeal of your patio space, wood patio tiles are an excellent choice. Not only do they add beauty and warmth to your outdoor area, but they also provide a durable and versatile flooring option.
Installing wood patio tiles is a relatively simple process that can be accomplished with a few basic tools and some patience. Whether you’re a seasoned DIY enthusiast or a beginner looking to tackle your first outdoor project, this guide will walk you through the step-by-step process of installing wood patio tiles.
Before we dive into the installation process, let’s take a moment to discuss the benefits of wood patio tiles. One of the primary advantages of using wood tiles is their natural aesthetic appeal. Wood instantly adds a touch of elegance and warmth to any outdoor space. Additionally, wood tiles come in a variety of finishes and styles, allowing you to choose the perfect look for your patio.
Not only are wood patio tiles aesthetically pleasing, but they are also highly durable. Wood is a resilient material that can withstand the elements and maintain its beauty for years to come. With proper care and maintenance, your wood patio tiles can continue to enhance your outdoor space for many seasons.
Furthermore, wood patio tiles are easy to clean and maintain. Unlike other patio flooring options, such as concrete or stone, wood tiles can be quickly swept or rinsed off to remove any dirt or debris. This makes them an ideal choice for those seeking a low-maintenance outdoor flooring solution.
Now that we’ve explored the benefits of wood patio tiles, let’s move on to the first step of the installation process – gathering the necessary materials and tools. By being well-prepared, you can ensure a smooth and successful installation of your wood patio tiles.
Key Takeaways:
- Installing wood patio tiles is a simple DIY project that adds beauty and durability to your outdoor space. With the right materials and tools, you can transform your patio into a warm and inviting oasis.
- Wood patio tiles offer aesthetic appeal, easy maintenance, and resilience to the elements. By following the step-by-step guide, you can create a cozy and functional outdoor area to enjoy for years to come.
Read more: How To Install Exterior Patio Tile
Step 1: Gathering Materials and Tools
Before you begin the installation process, it’s important to gather all the necessary materials and tools. Having everything you need on hand will ensure a seamless and efficient installation. Here’s a list of what you’ll need:
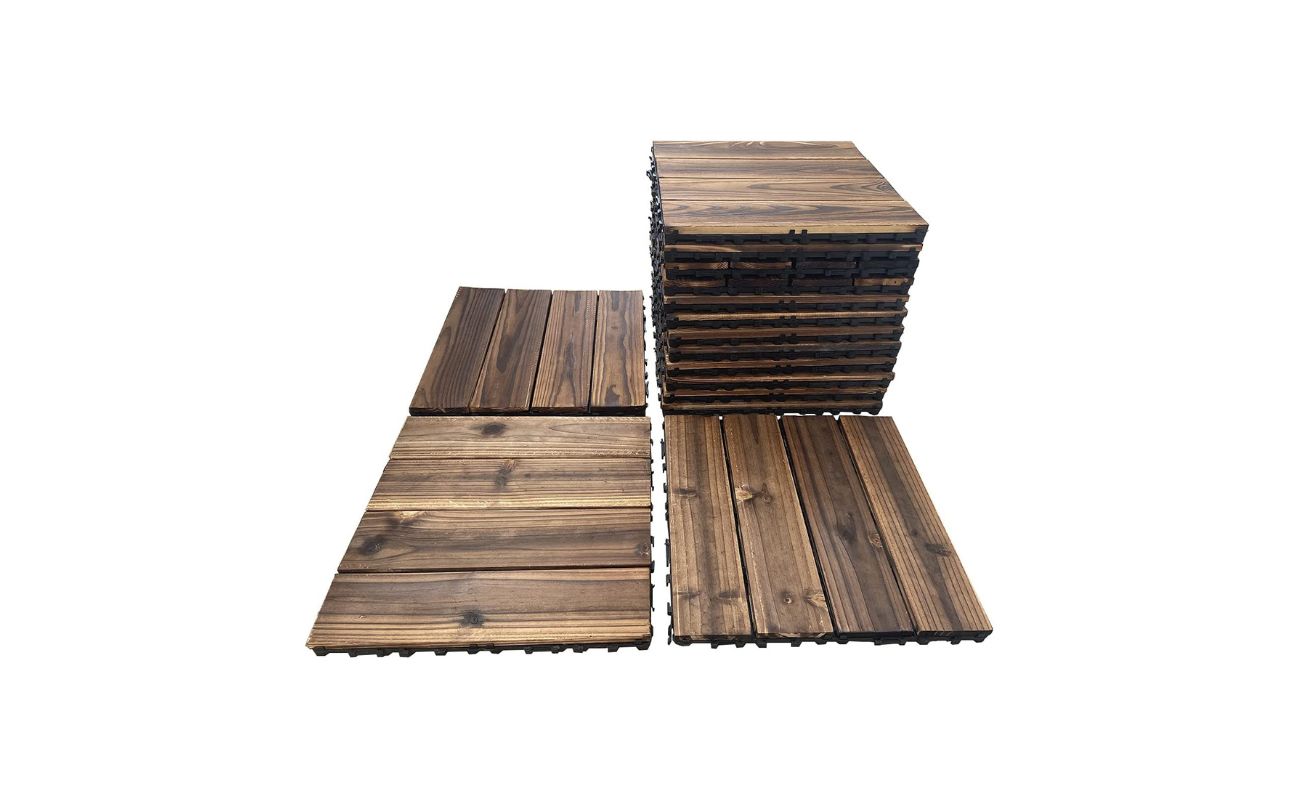
- Wood patio tiles: Measure your patio area and calculate the number of tiles required. Choose tiles that suit your design preferences and are suitable for outdoor use.
- Adhesive: Select a high-quality adhesive that is specifically designed for outdoor use and suitable for the type of wood tiles you have chosen.
- Measuring tape: Accurate measurements are essential for a precise installation. Make sure you have a measuring tape on hand to measure the dimensions of your patio and the tiles.
- Saw: Depending on the layout of your patio, you may need to cut some tiles to fit. A saw, such as a circular saw or a jigsaw, will come in handy for this task.
- Trowel: You’ll need a trowel to spread the adhesive evenly on the patio surface.
- Level: To ensure that your patio tiles are installed flat and even, use a level to check for any slopes or uneven surfaces.
- Rubber mallet: A rubber mallet will help you tap the tiles into place without damaging them.
- Grout and grout float (optional): If you prefer a grouted look between your patio tiles, make sure to have grout and a grout float on hand.
- Sealant: To protect your wood patio tiles from moisture and weathering, consider using a sealant designed for outdoor wood surfaces.
Once you have gathered all the necessary materials and tools, you’ll be ready to move on to the next step: preparing the patio surface. Proper preparation is essential for a successful installation, so let’s dive into the details of this crucial step.
Step 2: Preparing the Patio Surface
Before you can install the wood patio tiles, it’s crucial to prepare the surface properly. This step ensures a smooth and stable foundation for the tiles. Follow these steps to prepare your patio surface:
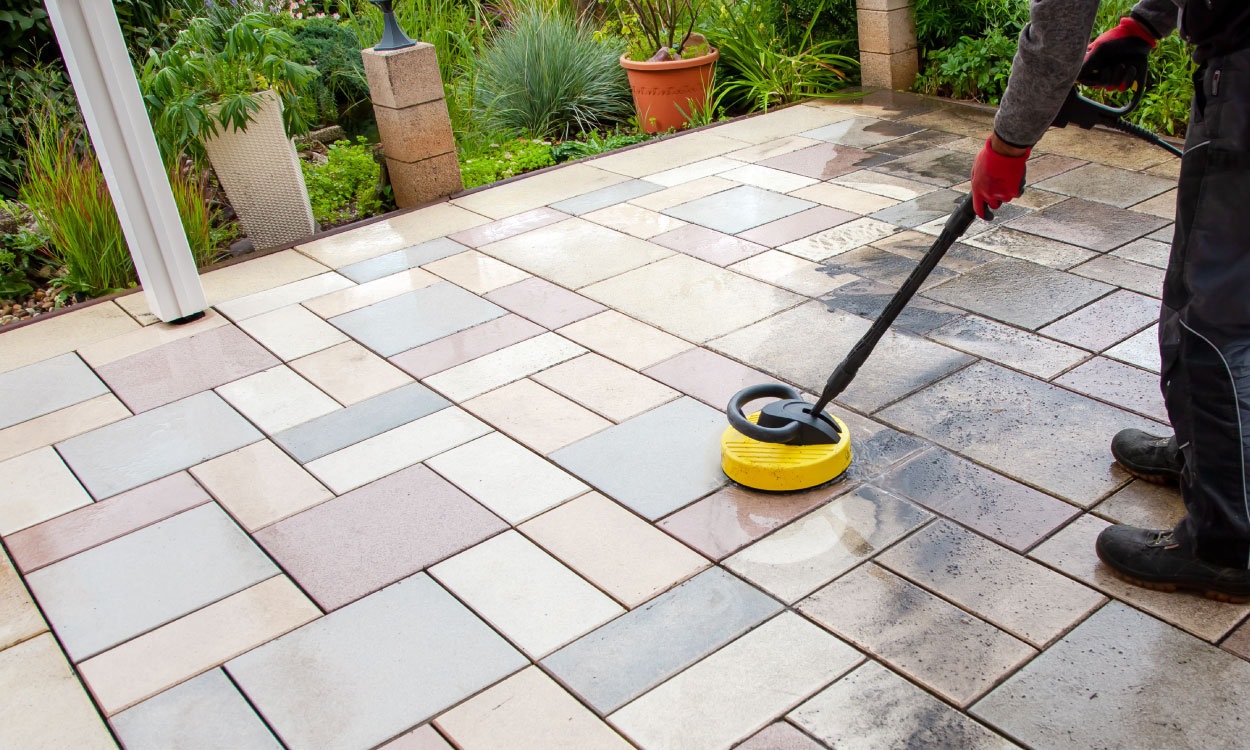
- Clean the patio: Start by thoroughly cleaning the patio surface. Remove any debris, dirt, or vegetation that may be present. Use a broom, leaf blower, or pressure washer to clean the area.
- Inspect for damage: Check the patio surface for any cracks, uneven areas, or damage. Repair or replace any damaged sections to ensure a level and stable surface.
- Smooth out rough spots: If there are any rough spots or imperfections on the patio, use a concrete grinder or sandpaper to smooth them out. This will prevent these areas from affecting the installation or causing the tiles to become uneven.
- Check for drainage: Ensure that your patio has proper drainage to prevent water accumulation. If necessary, make adjustments to the slope of the patio to allow for effective water drainage.
- Apply primer (if needed): Depending on the type of patio surface you have, you may need to apply a primer. This step helps the adhesive bond properly with the surface. Refer to the manufacturer’s instructions for the appropriate primer to use.
By properly preparing the patio surface, you are setting the stage for a successful installation of the wood patio tiles. With a clean, level, and stable surface, you can be confident that your tiles will be securely and evenly installed.
Now that your patio surface is prepared, it’s time to move on to the next step: planning the tile layout. This step is crucial for achieving the desired look and ensuring the tiles fit perfectly on your patio. Stay tuned!
Step 3: Planning the Tile Layout
Planning the tile layout is a crucial step in the installation process to ensure a visually appealing and functional result. Here are the key steps to follow when planning the tile layout for your wood patio:
- Measure and mark: Use a measuring tape to measure the dimensions of your patio. Mark the outline of the patio on the surface using chalk or another temporary marking tool.
- Dry-fit the tiles: Lay out the wood patio tiles within the marked area without applying adhesive. This “dry-fit” method allows you to visualize the final look and make any necessary adjustments.
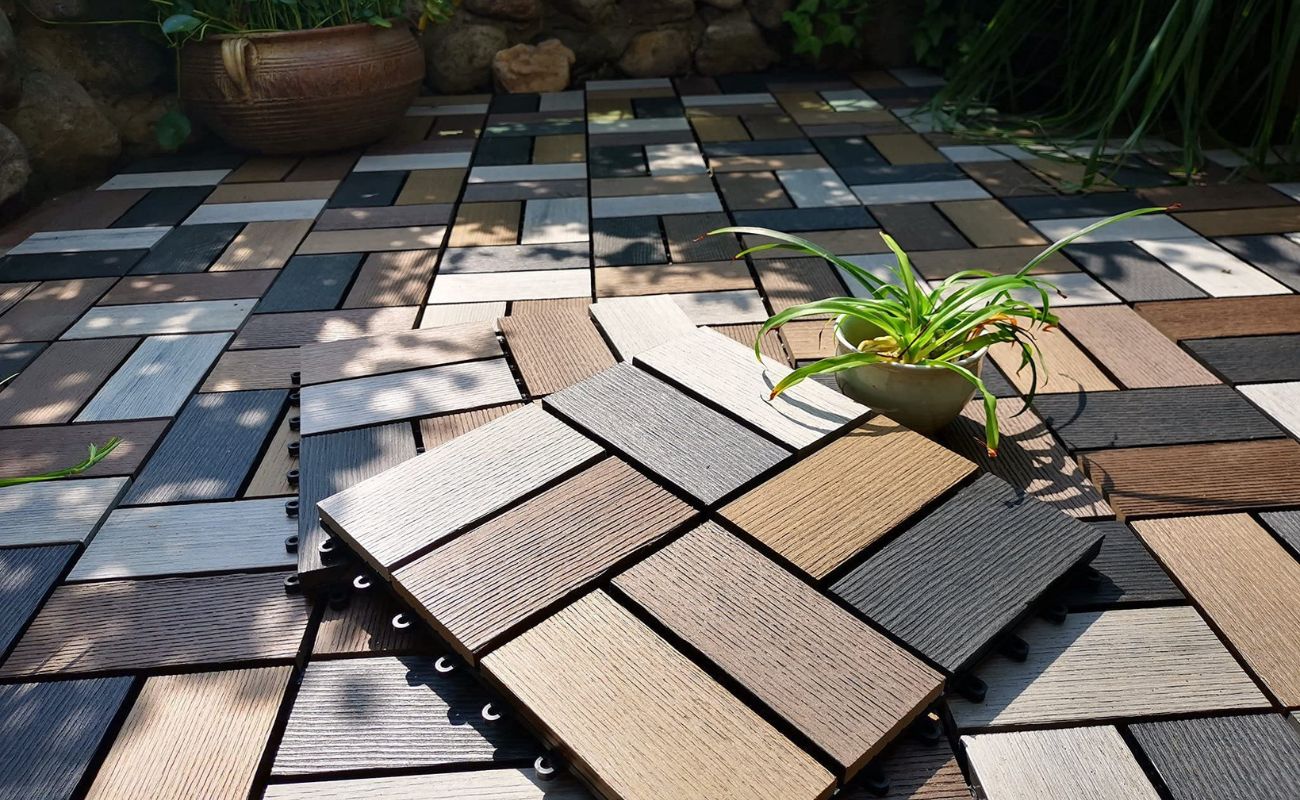
- Consider tile orientation: Determine the orientation of the tiles. You can opt for a traditional horizontal layout, or for a more unique look, consider a diagonal or herringbone pattern.
- Account for expansion gaps: Leave a small gap, typically around 1/4 inch, between each tile to allow for expansion due to temperature and moisture changes.
- Ensure symmetry: Strive for symmetry and balance in your layout. Adjust the placement of the tiles to ensure that the outer edges have an equal and aesthetically pleasing appearance.
- Cut tiles if necessary: If you need to fit tiles around corners or obstacles, use a saw to make accurate and precise cuts. Ensure that the cut tiles fit snugly in place.
During the planning stage, it’s helpful to take into account any existing features on your patio, such as furniture, plants, or structures. Consider how the tile layout will interact and harmonize with these elements to create a cohesive outdoor space.
Once you are satisfied with the tile layout and have made any necessary adjustments, you’re ready to move on to the next step: applying adhesive to secure the wood patio tiles in place. Stay tuned for the detailed instructions on applying adhesive.
Before installing wood patio tiles, make sure the surface is clean, level, and free of any debris. This will ensure a smooth and even installation, and prevent any damage to the tiles.
Step 4: Applying Adhesive
Now that you have planned the layout of your wood patio tiles, it’s time to apply adhesive to secure them in place. The adhesive creates a strong bond between the tiles and the patio surface, ensuring a long-lasting and stable installation. Follow these steps to apply the adhesive:
- Read the instructions: Start by carefully reading and following the manufacturer’s instructions for the adhesive. Each adhesive may have specific requirements and application methods.
- Prepare the adhesive: Mix the adhesive according to the manufacturer’s instructions. Use a clean bucket and a stirring stick to ensure proper consistency.
- Apply the adhesive: Use a trowel to spread an even layer of adhesive on a small section of the patio surface. Make sure to apply the adhesive only in an area that you can work on within the recommended drying time.
- Comb the adhesive: Use the notched edge of the trowel to comb through the adhesive, creating ridges. This helps maximize the adhesive’s bond strength and ensures a level surface for the tiles.
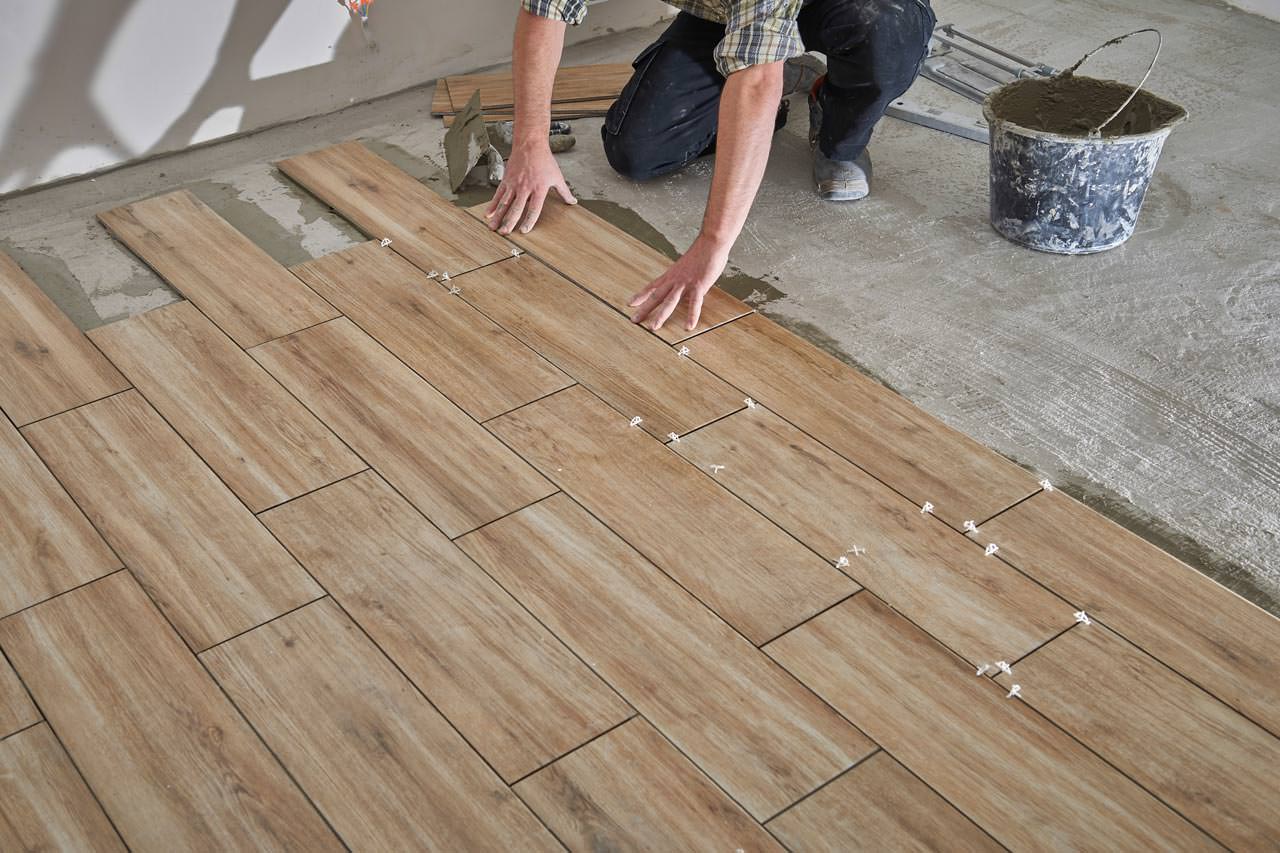
- Place the tiles: Carefully place the wood patio tiles onto the adhesive, following the planned layout. Press down firmly to ensure proper adhesion. Use a rubber mallet to gently tap the tiles into place, ensuring they are level and aligned.
- Work in small sections: Repeat the process of applying adhesive, combing through it, and placing the tiles in small sections. This allows you to work efficiently and ensures that the adhesive doesn’t dry out before the tiles are installed.
- Check for levelness: Use a level to periodically check the tiles for any unevenness. Adjust the tiles as needed to achieve a level surface.
- Wipe off excess adhesive: As you work, be mindful of any excess adhesive that may squeeze out between the tiles. Use a damp cloth or sponge to immediately wipe off the excess before it dries.
Continue the process of applying adhesive and placing the tiles until the entire patio surface is covered. Take breaks as needed, but aim to complete the installation within the recommended drying time specified by the adhesive manufacturer.
With the wood patio tiles securely adhered to the surface, you’re one step closer to enjoying your transformed outdoor space. In the next step, we will guide you through the process of installing the wood patio tiles. Stay tuned!
Read more: How To Tile A Patio
Step 5: Installing the Wood Patio Tiles
Now that the adhesive has been applied, it’s time to install the wood patio tiles onto the prepared surface. This step will bring your vision to life as you see your outdoor space transform. Follow these steps to install the wood patio tiles:
- Start from a corner: Begin the installation from one corner of the patio. This will give you a reference point to work from and ensure a neat and organized installation.
- Place the first tile: Carefully place the first wood patio tile onto the adhesive, aligning it with the planned layout. Press down firmly to secure it in place.
- Check for levelness: Use a level to ensure that the first tile is level and aligned with the surrounding tiles. Make any necessary adjustments to achieve a uniform surface.
- Add spacers (optional): If you prefer a grouted look or want to ensure consistent spacing between the tiles, insert tile spacers between them. These spacers will create even gaps for grout or to allow for expansion and contraction.
- Continue installing the tiles: Place the remaining tiles one by one, following the planned layout. Press down firmly and use a rubber mallet to ensure they are properly seated and level. As you work, periodically check for levelness and make any needed adjustments.
- Cut tiles if necessary: If you come across areas where full tiles won’t fit, use a saw to make precise cuts. Measure carefully, and ensure the cut tiles fit nicely into place.
- Work in small sections: To maintain control and prevent the adhesive from drying out, work in small sections at a time. Apply adhesive, place the tiles, and continue the process until the entire patio surface is covered.
- Allow the tiles to set: Once all the tiles are installed, allow them to set and bond with the adhesive according to the manufacturer’s instructions. This typically involves a drying period of at least 24 to 48 hours.
During the installation process, it’s crucial to maintain a clean and tidy workspace. Remove any excess adhesive or debris as you go to ensure a professional and polished outcome.
As the wood patio tiles are properly installed, you’re nearing the final stages of the project. In the next step, we will explore sealing and finishing techniques to protect and enhance the beauty of your newly installed patio tiles. Stay tuned!
Step 6: Sealing and Finishing
After the wood patio tiles have been installed, it’s important to take the necessary steps to protect and enhance their appearance. Sealing the tiles will help prevent moisture damage, reduce staining, and extend their lifespan. Follow these steps to seal and finish your wood patio tiles:
- Clean the tiles: Before applying the sealer, ensure that the tiles are clean and free of any dust or debris. Use a broom, brush, or vacuum to remove any dirt or particles.
- Choose the right sealer: Select a sealer specifically designed for outdoor wood surfaces. Look for a product that is suitable for the type of wood used in your tiles and provides protection against UV rays and water damage.
- Apply the sealer: Follow the manufacturer’s instructions for the sealer application. Typically, this involves using a brush, roller, or sprayer to evenly coat the surface of the tiles. Make sure to cover each tile thoroughly.
- Allow drying time: After applying the sealer, allow it to dry completely according to the manufacturer’s instructions. This may take a few hours or up to a day, depending on the product.
- Apply additional coats (optional): Depending on the durability and specific requirements of the sealer, you may choose to apply multiple coats for added protection. Follow the recommended drying time between each coat.
- Finish with a topcoat (optional): For added durability and aesthetic appeal, consider applying a topcoat to the sealed patio tiles. This can enhance the color, add a subtle sheen, or provide a non-slip finish, depending on the type of topcoat chosen.
- Allow final curing time: Once the sealing and finishing process is complete, allow the tiles to fully cure before using the patio area. This can take several days, so be patient and avoid placing heavy furniture or traffic on the tiles until they are fully cured.
Sealing and finishing your wood patio tiles not only protects them from the elements but also enhances their natural beauty. The sealer will help keep your tiles looking fresh and vibrant for years to come, with minimal maintenance required.
Congratulations! You have successfully completed the installation, sealing, and finishing of your wood patio tiles. It’s time to step back and admire your transformed outdoor space. Enjoy your new patio, created with your own hands and filled with cozy and inviting ambiance!
Remember to follow any specific care and maintenance instructions provided by the manufacturer to ensure the longevity and beauty of your wood patio tiles. Now, go ahead and start making memories in your beautiful outdoor oasis!
Conclusion
Congratulations on completing the installation of your wood patio tiles! By following the step-by-step guide laid out in this article, you have transformed your outdoor space into a beautiful and functional area that you can enjoy for years to come.
Throughout the process, you have learned how to gather the necessary materials and tools, prepare the patio surface, plan the tile layout, apply adhesive, install the wood patio tiles, and seal and finish the project. Each step was carefully explained to help you achieve a professional and long-lasting result.
Wood patio tiles offer numerous benefits, such as aesthetic appeal, durability, and easy maintenance. They provide a warm and inviting atmosphere, as well as a solid and resilient flooring option for outdoor areas. With proper care and maintenance, your wood patio tiles will continue to enhance your outdoor space and withstand the elements.
As you enjoy your newly installed wood patio tiles, remember to regularly clean and maintain them according to the manufacturer’s instructions. This will ensure their longevity and preserve their beauty over time.
We hope this comprehensive guide has been helpful in your wood patio tile installation journey. Bringing your outdoor vision to life is a rewarding experience, and we’re thrilled to have assisted you along the way.
Now, take a step back and relish in the transformation you have accomplished. Whether you use your patio for entertaining guests, relaxation, or simply a quiet retreat, your newly installed wood patio tiles will add charm and functionality to your outdoor space.
Thank you for joining us on this journey, and we wish you many enjoyable moments on your beautiful new patio!
Frequently Asked Questions about How To Install Wood Patio Tiles
Was this page helpful?
At Storables.com, we guarantee accurate and reliable information. Our content, validated by Expert Board Contributors, is crafted following stringent Editorial Policies. We're committed to providing you with well-researched, expert-backed insights for all your informational needs.


0 thoughts on “How To Install Wood Patio Tiles”