Home>Furniture>Outdoor Furniture>How To Create A Paver Patio
Outdoor Furniture
How To Create A Paver Patio
Modified: March 7, 2024
Learn how to create a stunning paver patio for your outdoor space and elevate it even further with the perfect outdoor furniture. Transform your backyard into a dreamy oasis today!
(Many of the links in this article redirect to a specific reviewed product. Your purchase of these products through affiliate links helps to generate commission for Storables.com, at no extra cost. Learn more)
Introduction
Welcome to the world of outdoor furniture! Whether you have a sprawling backyard, a cozy balcony, or a compact patio area, creating an inviting and functional outdoor space is essential for enjoying the great outdoors. One of the fundamental elements of any outdoor space is a paver patio. A paver patio not only adds aesthetic appeal to your outdoor area but also provides a solid and durable foundation for your outdoor furniture. In this article, we will guide you through the process of creating a paver patio, from planning and designing to the final touches.
Creating a paver patio may seem like a daunting task, but with careful planning and the right knowledge, it can be a fun and rewarding project. Whether you are a seasoned DIY enthusiast or a beginner, we will break down each step and provide you with the information you need to successfully complete your paver patio project.
Before we dive into the steps, it’s important to note that proper preparation and attention to detail are the keys to a successful paver patio installation. Take your time and follow the steps diligently to ensure a durable and long-lasting patio that will withstand the elements and provide you with years of enjoyment.
So, let’s get started on creating your dream outdoor space with a beautiful and functional paver patio!
Key Takeaways:
- Planning and designing your paver patio is crucial for creating a functional and beautiful outdoor space. Careful consideration of layout, size, and paver material ensures a successful and enjoyable patio project.
- Adding finishing touches such as furniture, shading, lighting, and greenery enhances the ambiance of your paver patio, creating a welcoming and inviting outdoor oasis for relaxation and entertainment. Regular maintenance ensures long-lasting beauty and enjoyment.
Read more: How To Create A Patio From Brick Pavers
Step 1: Planning and Designing Your Paver Patio
The first step in creating a paver patio is to plan and design your outdoor space. This involves considering the layout, size, and style of your patio, as well as any additional features you may want to incorporate, such as a fire pit or seating area.
Start by assessing the available space and determining the purpose of your patio. Will it be primarily used for dining and entertaining, or will it serve as a relaxing oasis? Consider the number of people you expect to accommodate and any specific activities you want to enjoy on your patio.
Next, think about the shape and size of your patio. Consider factors such as the shape and dimensions of your outdoor space, as well as how the patio will complement the existing architecture of your home. Take measurements and mark out the area where you plan to install the patio using stakes and string or spray paint.
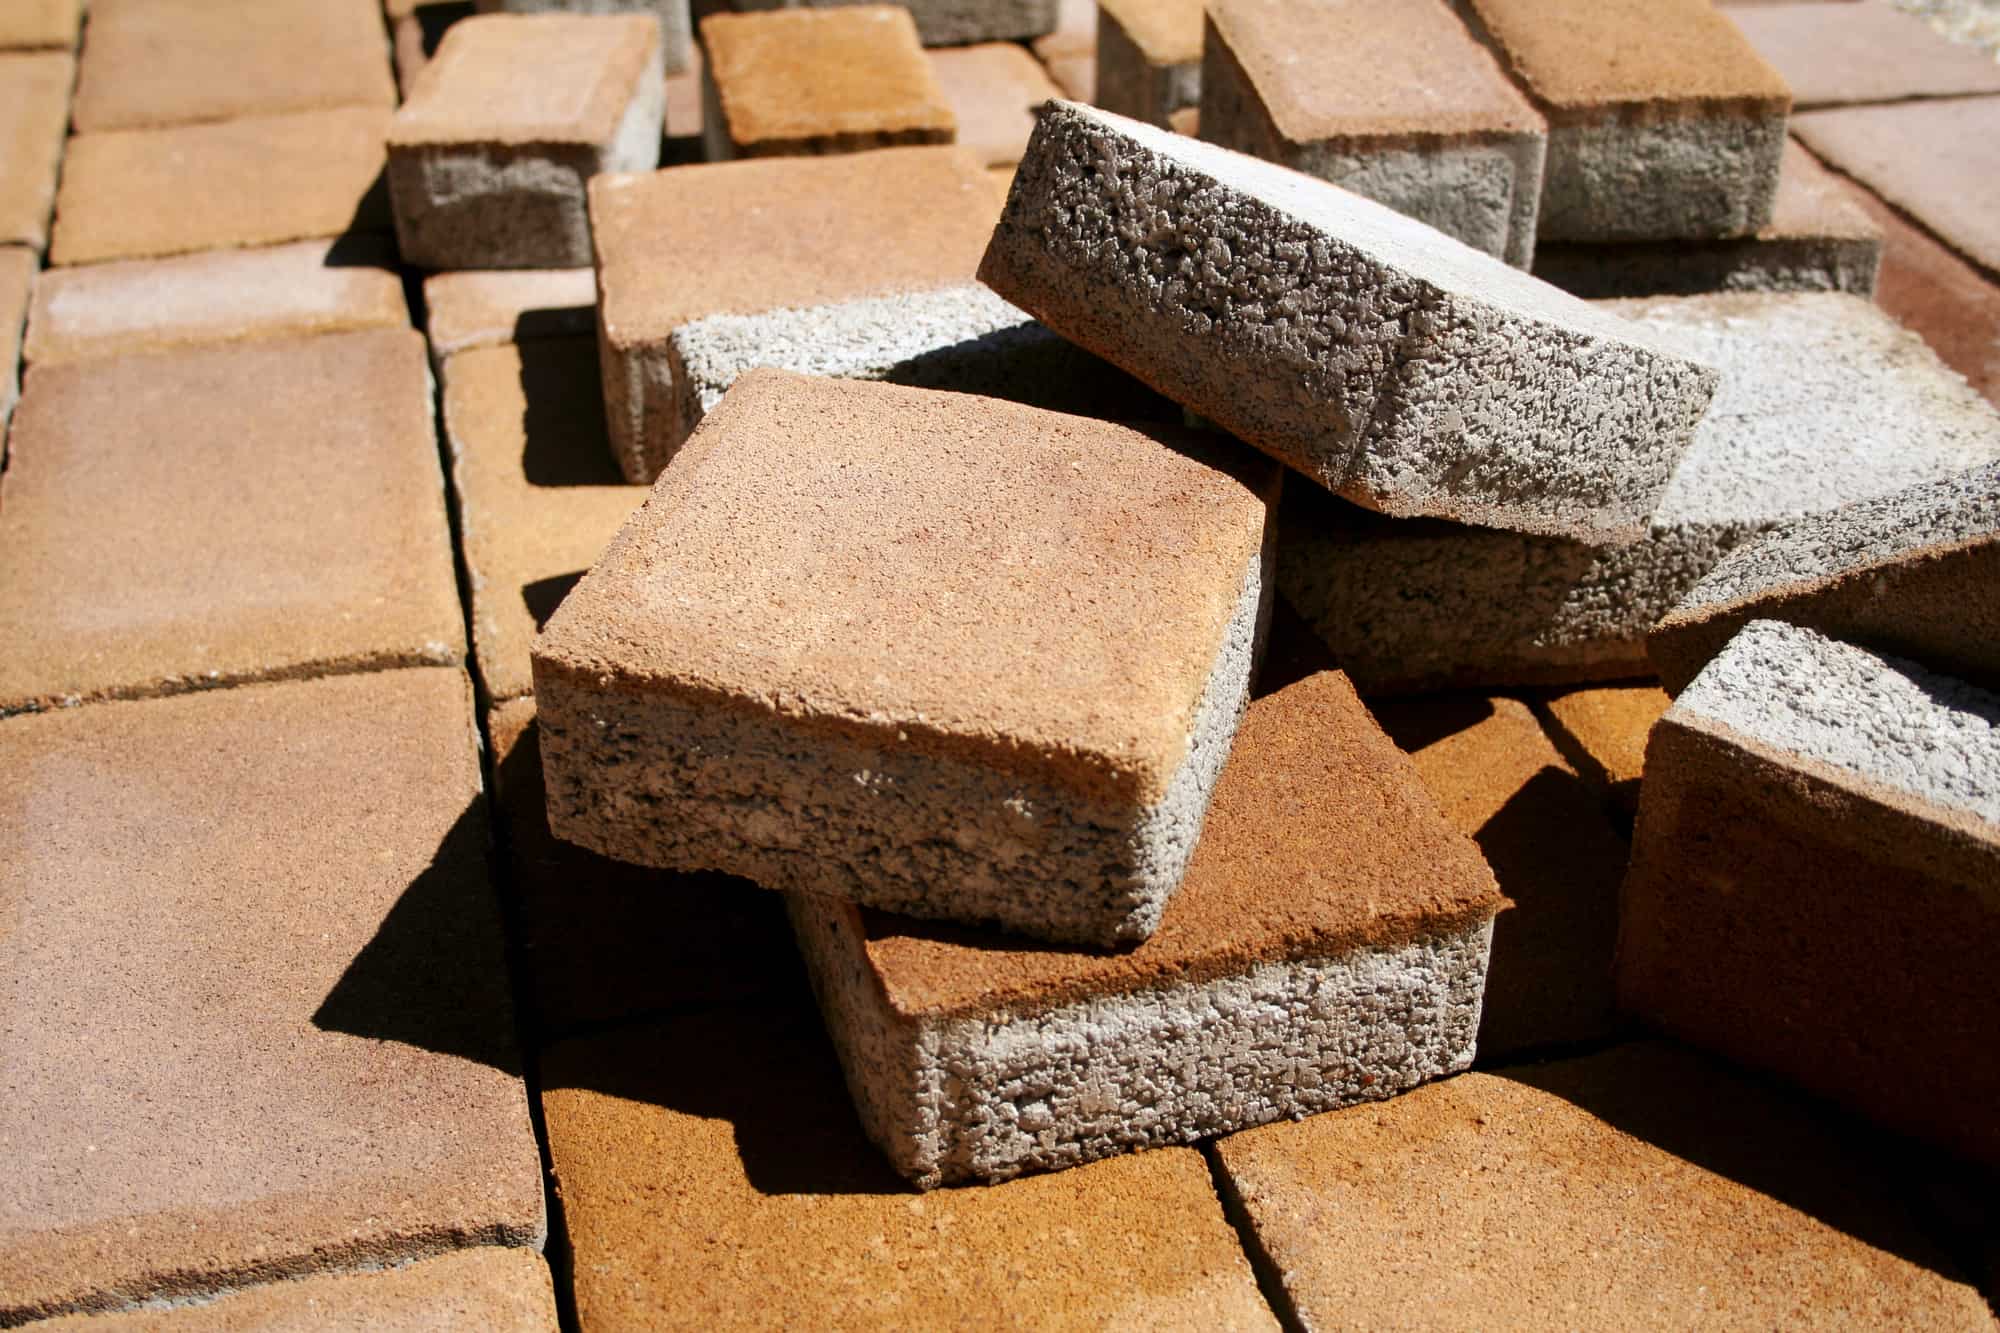
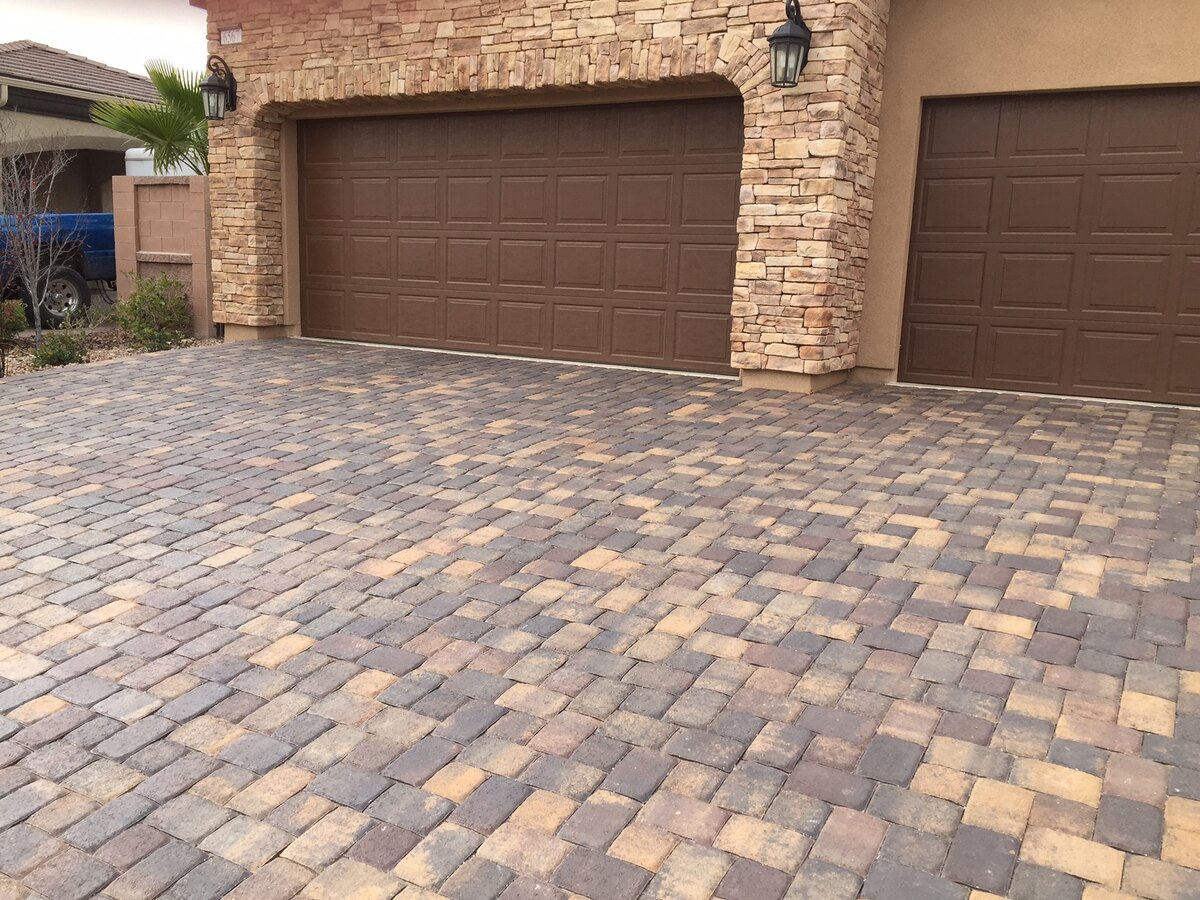
Once you have a general idea of the layout, it’s time to choose the type and style of pavers you want to use. There are a wide variety of paver options available, including concrete, brick, and natural stone. Each material offers its own unique advantages in terms of durability, aesthetics, and maintenance requirements.
Consider the overall style and aesthetic of your outdoor space when selecting the paver material. For example, if you have a modern and contemporary home, sleek and uniform concrete pavers might be the perfect choice. Alternatively, if you’re going for a more rustic and natural look, consider using irregularly shaped natural stone pavers.
Before finalizing your design, it’s a good idea to create a scaled drawing or use a design software tool to visualize your patio layout. This will help you make any necessary adjustments and ensure that your patio fits well within your outdoor space.
Once the planning and design phase is complete, you can move on to the next step: preparing the area for your paver patio.
Step 2: Preparing the Area
Now that you have a clear plan and design for your paver patio, it’s time to prepare the area where it will be installed. Proper preparation is crucial to ensure a stable and long-lasting patio.
The first step is to clear the site of any existing vegetation, debris, or obstacles. Remove any plants, grass, or weeds from the area and trim back any nearby trees or shrubs that could interfere with the patio installation.
Next, dig out the area to a depth of about 6-8 inches. This will allow enough space for the base materials and pavers. Use a shovel, pickaxe, or a rented excavator to remove the soil. Ensure that the excavated area is level and free from any high or low spots.
After clearing and leveling the area, you will need to create a solid and stable base for your paver patio. Start by laying a geotextile fabric over the entire excavated area. This fabric serves as a weed barrier and helps prevent the base materials from mixing with the underlying soil.
Next, add a layer of crushed stone or gravel to the excavated area. This base material provides stability, drainage, and support for the pavers. Spread the crushed stone evenly and compact it using a vibrating plate compactor or a hand tamper. Ensure that the base is firm and even by checking it with a level.
Once the base material is in place, it’s time to add a layer of sand. This layer will act as a cushion and allow for minor adjustments during the paver installation. Spread a thin layer of sand over the entire area and use a 2×4 board or a screed to level the sand. This will ensure an even and smooth surface for laying the pavers.
With the area properly prepared, your paver patio is now ready for the next step: excavating and leveling the ground.
Step 3: Excavating and Leveling the Ground
Now that you have prepared the area for your paver patio, it’s time to focus on excavating and leveling the ground. This step is essential to ensure a stable and even surface for the pavers.
Start by excavating the area further to create a slight slope away from your home. This slope will promote proper drainage and prevent water from pooling on your patio. Aim for a slope of approximately 1/4 inch per foot, which means that for every foot of patio, the ground should slope down by about 1/4 inch.
Use a level or a string level attached to stakes to ensure that you are achieving the desired slope. Continuously check the slope as you excavate to make any necessary adjustments.
As you excavate, remove any roots, rocks, or debris that may interfere with the leveling process. It’s crucial to have a clean and smooth base to provide a solid foundation for the paver installation.
Once the area is properly excavated, it’s time to start leveling the ground. Start by spreading a layer of crushed stone or gravel over the excavated area. This layer will provide a stable base and help with drainage. Spread the crushed stone evenly and compact it using a vibrating plate compactor or a hand tamper.
After compacting the crushed stone, add a layer of sand over the top. Use a screed or a 2×4 board to evenly distribute the sand and create a smooth and level surface. This step is crucial to ensure that the pavers lay flat and securely once installed.
Continue to check the levelness of the area as you work, using a long straightedge or a level. Make any necessary adjustments by adding or removing sand in areas that are uneven. Taking the time to properly level the ground will result in a professional-looking and durable paver patio.
With the ground excavated and leveled, your paver patio is now ready for the next step: installing the base.
Step 4: Installing the Base
Now that you have excavated and leveled the ground for your paver patio, it’s time to install the base materials. The base serves as a sturdy foundation for the pavers and helps distribute weight evenly, ensuring a long-lasting and stable patio.
Start by adding a layer of gravel or crushed rock as the first layer of the base. This layer provides excellent drainage and prevents the pavers from shifting or sinking over time. Spread the gravel evenly and use a rake to level it, ensuring a consistent thickness of around 2-4 inches.
Next, use a compactor or hand tamper to compact the gravel layer. This step is crucial in creating a solid base that can withstand the weight of the pavers and any foot traffic. Compact the gravel in layers, making sure to pass over each section multiple times to achieve maximum compaction.
After compacting the gravel, add a second layer of finer base material such as sand or stone dust. This layer will act as a leveling agent and provide a smooth surface for laying the pavers. Spread the material evenly and use a rake or a screed to ensure a consistent thickness of around 1 inch.
Once the second layer is in place, use a 2×4 board or a screed to level the material. Slide the board across the surface in a back-and-forth motion, removing excess material and filling in any low spots. Check the level using a long straightedge or a level, and make adjustments as needed.
With the base properly installed and leveled, your paver patio is now ready for the next step: laying the pavers.
Note: The thickness and composition of the base material can vary depending on factors such as soil type, climate, and the size and weight of the pavers. It’s always best to consult the manufacturer’s guidelines or seek professional advice to ensure the correct base specifications for your specific project.
Read more: What Is A Paver Patio
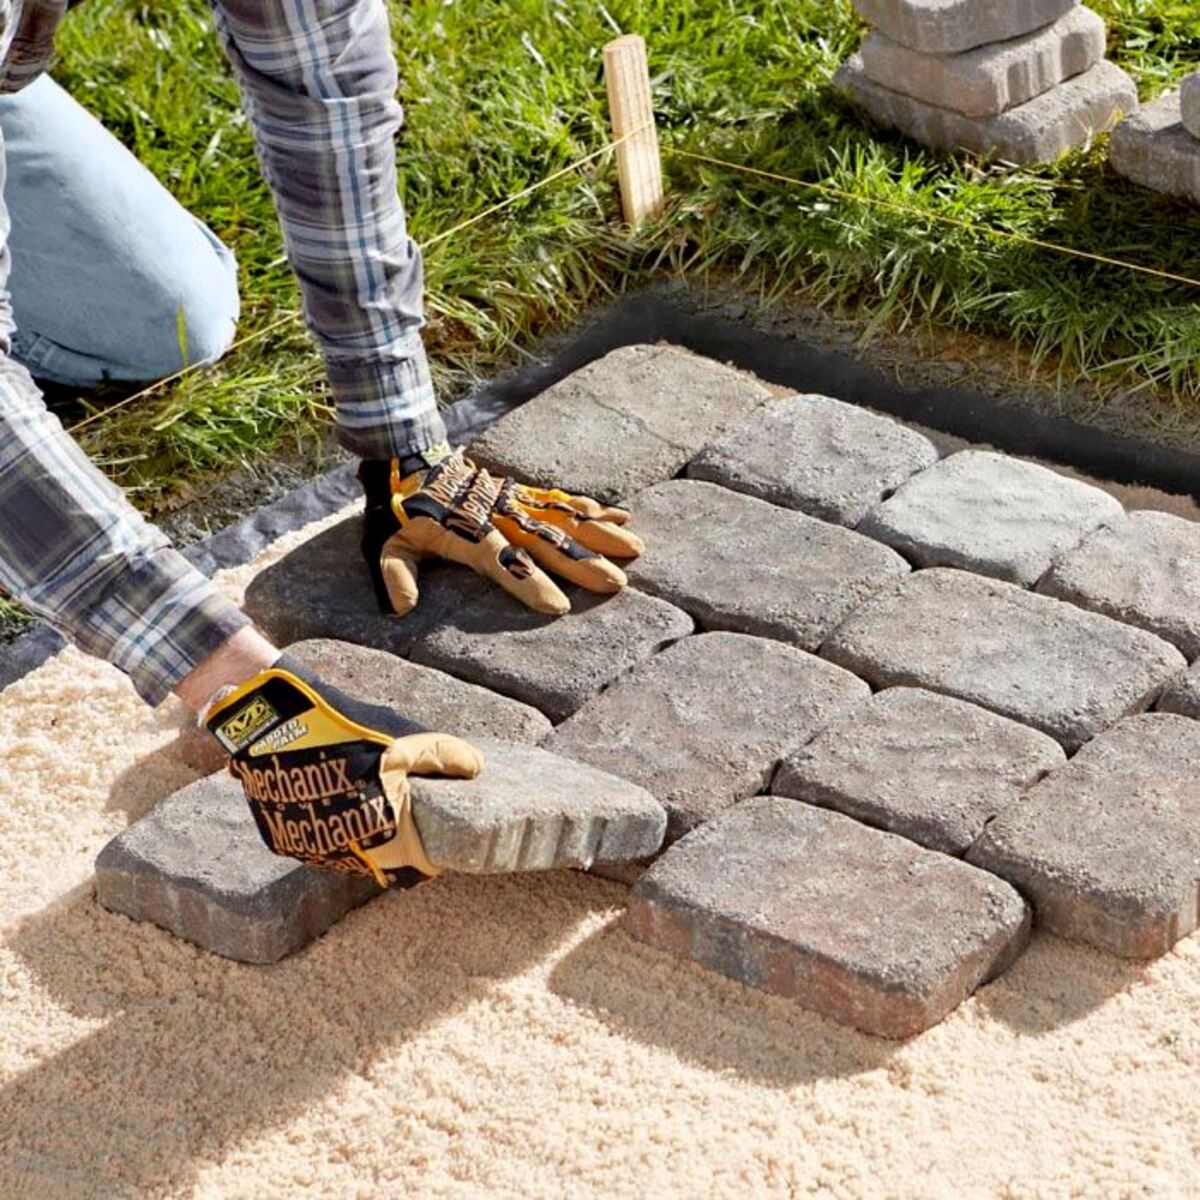
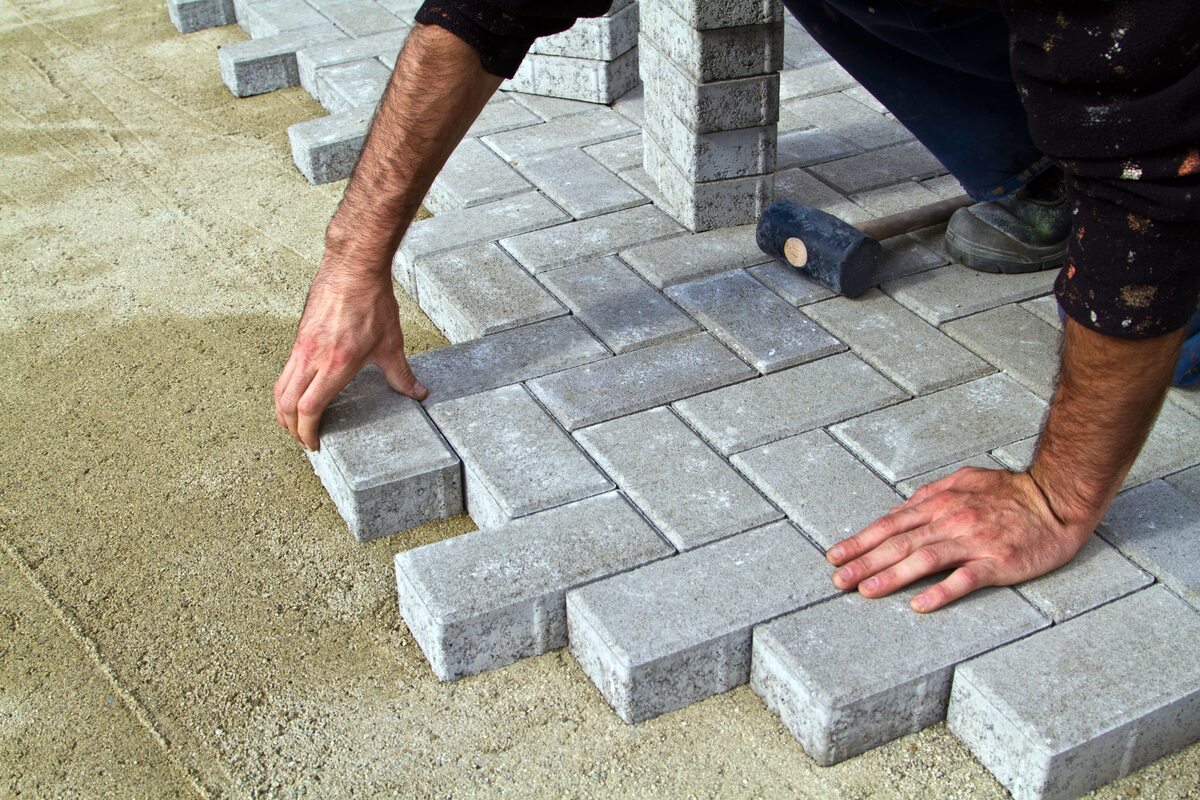
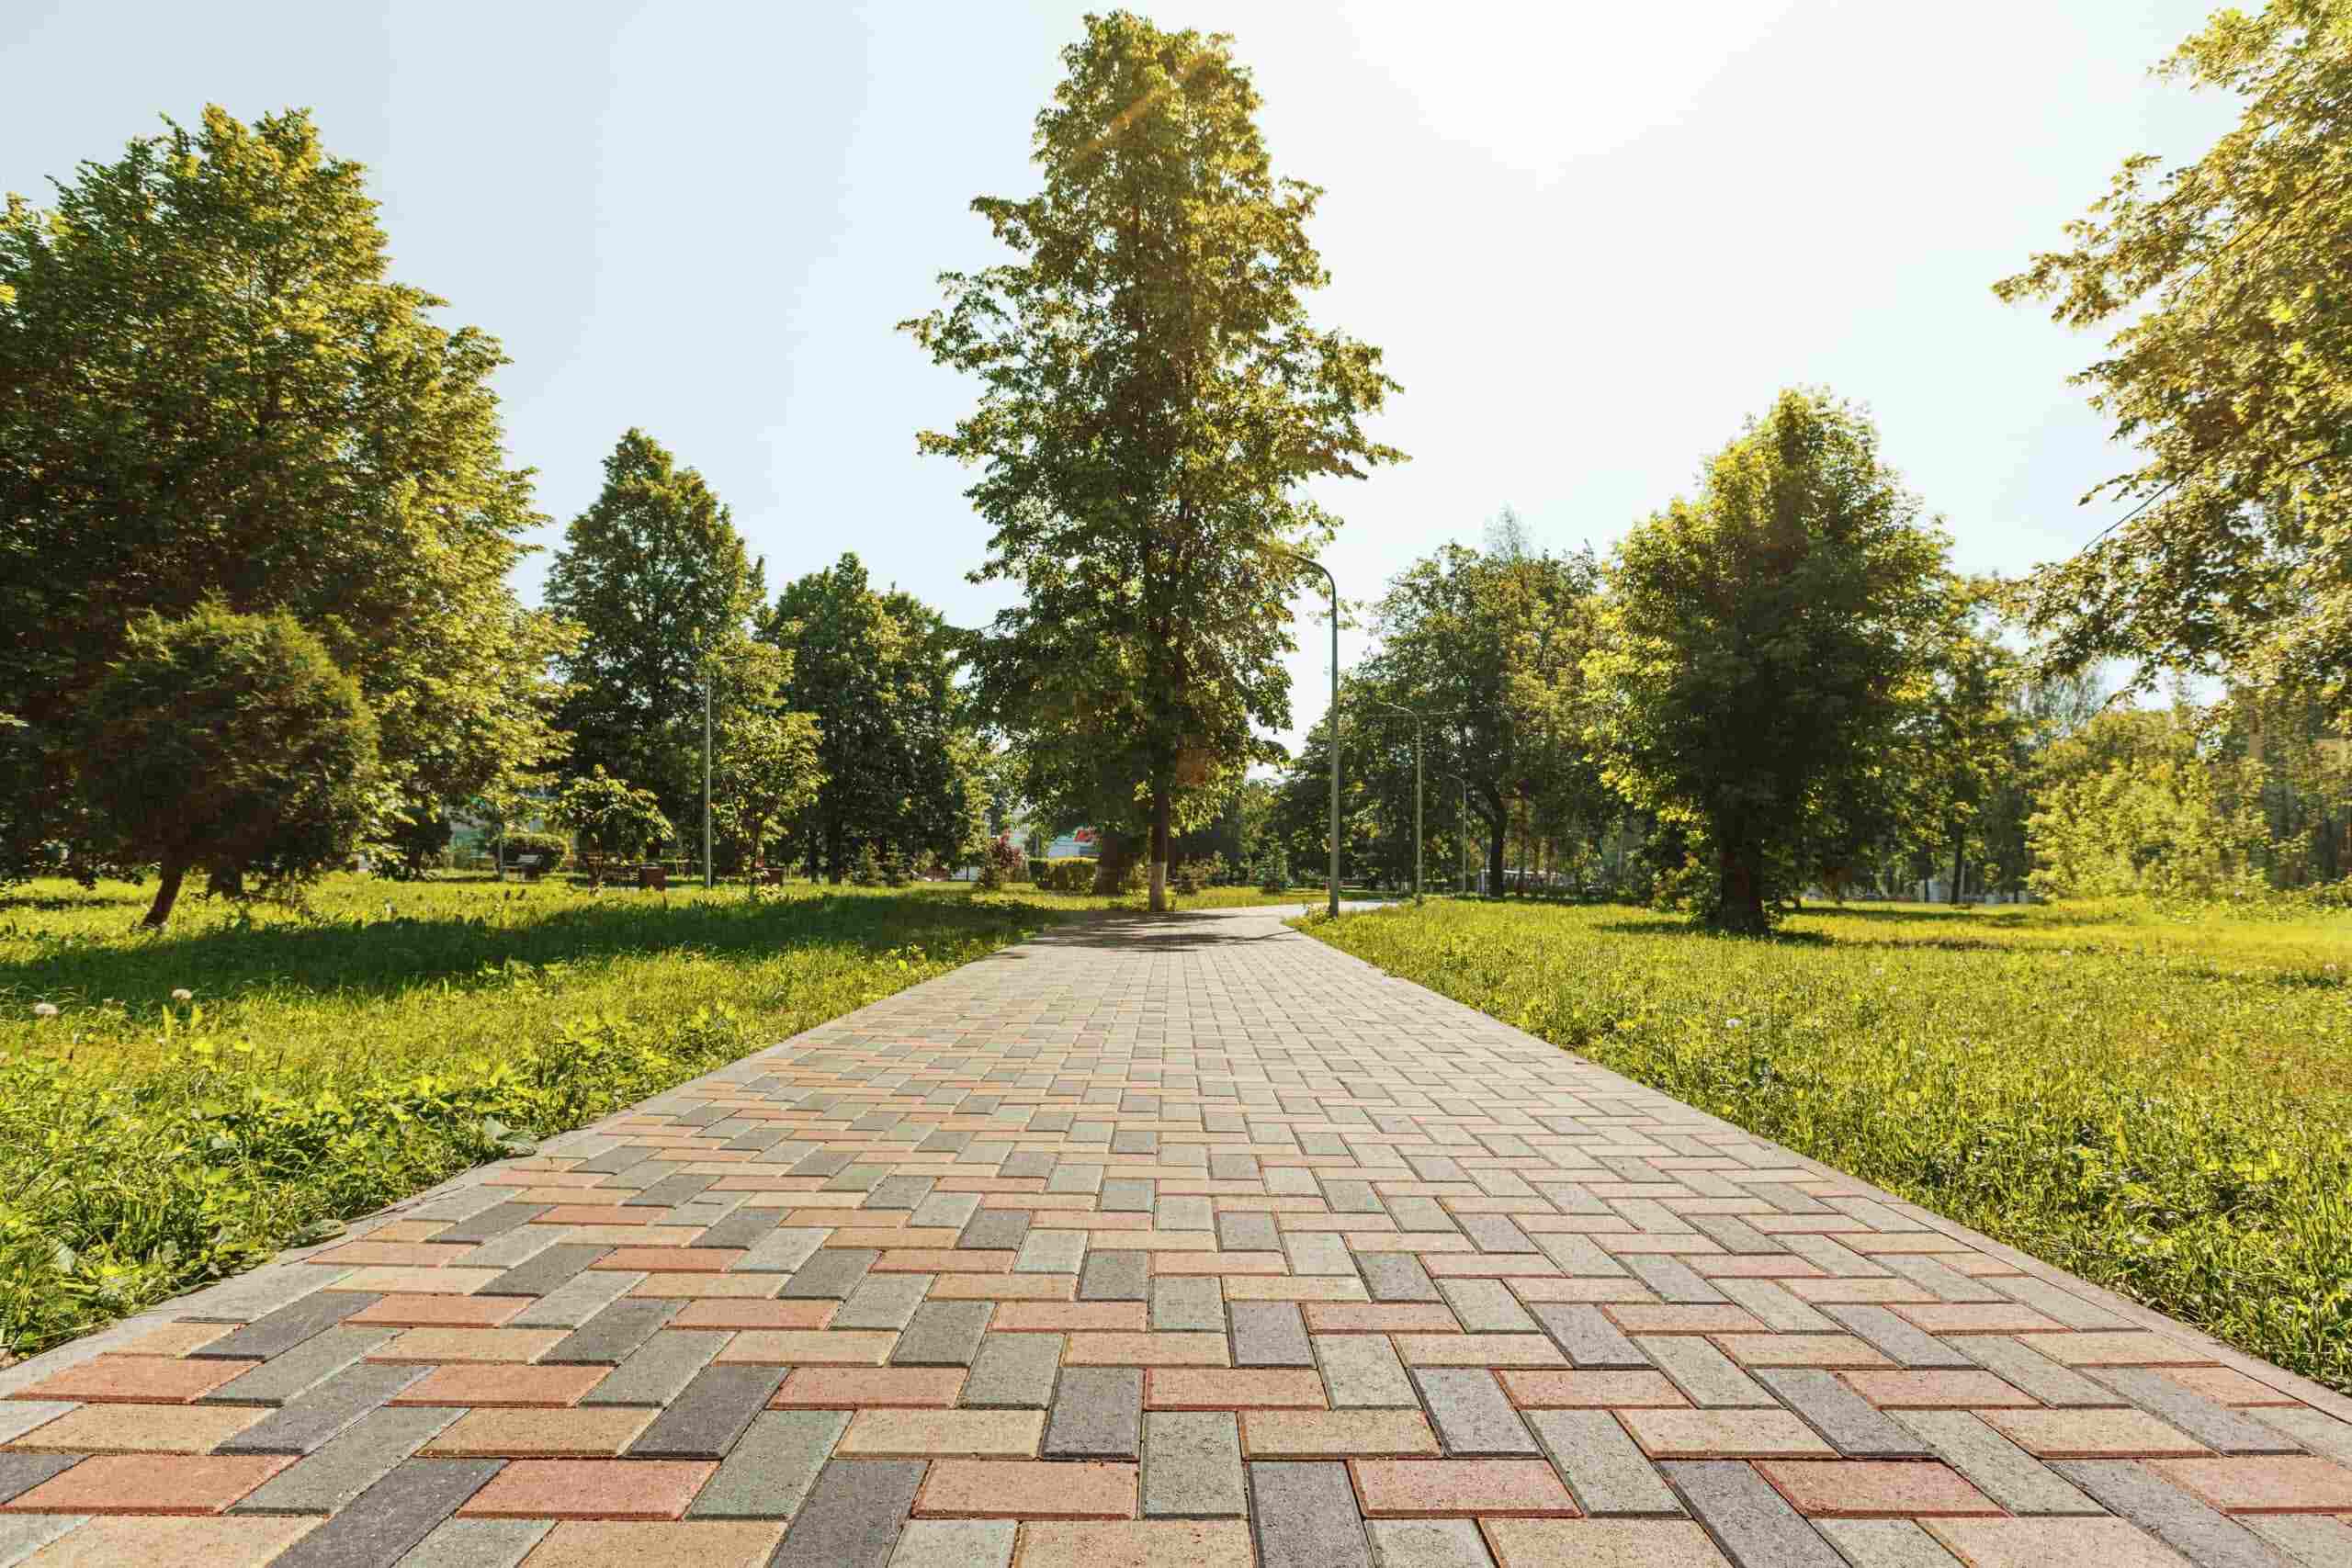
Step 5: Laying the Pavers
With the base materials in place, it’s time to start laying the pavers for your patio. This step requires careful attention to detail to ensure a beautiful and even surface.
Start by selecting a corner of your patio as a starting point. This will serve as your reference point for laying the pavers. It’s important to work from one end to the other, rather than starting in the middle, to ensure a consistent pattern and alignment.
Begin by laying the first row of pavers along the edge of the patio, ensuring they are snug against each other. Use a rubber mallet or a dead-blow hammer to gently tap the pavers into place, ensuring they are level and aligned.
As you lay each paver, use a level to check for both horizontal and vertical alignment. Adjust the sand underneath as necessary to achieve a level surface. It’s important to take your time and ensure that each paver is properly aligned before moving on to the next.
Continue laying the pavers row by row, working your way across the patio. Use plastic or rubber spacers to maintain an even gap between each paver, typically around 1/8 to 1/4 inch. This gap allows for proper drainage and allows the pavers to expand and contract with temperature changes.
If necessary, cut the pavers to fit around any obstructions such as posts, corners, or curves. Use a wet or dry saw with a diamond blade to make precise cuts. Take measurements and mark the pavers before cutting to ensure accuracy and a seamless fit.
As you lay the pavers, periodically step back and check the overall alignment and pattern. Make any adjustments as needed. It’s important to maintain a consistent pattern and a straight edge along the perimeter of the patio.
Once all the pavers are laid, use a plate compactor or a hand tamper to gently compact the entire surface. This will help settle the pavers into the sand and ensure a stable patio. Be sure to apply even pressure and make multiple passes to achieve optimal compaction.
With the pavers laid and compacted, your patio is now ready for the next step: cutting pavers to fit.
When creating a paver patio, make sure to properly prepare the base by compacting the soil and adding a layer of gravel for drainage. This will help prevent shifting and settling of the pavers over time.
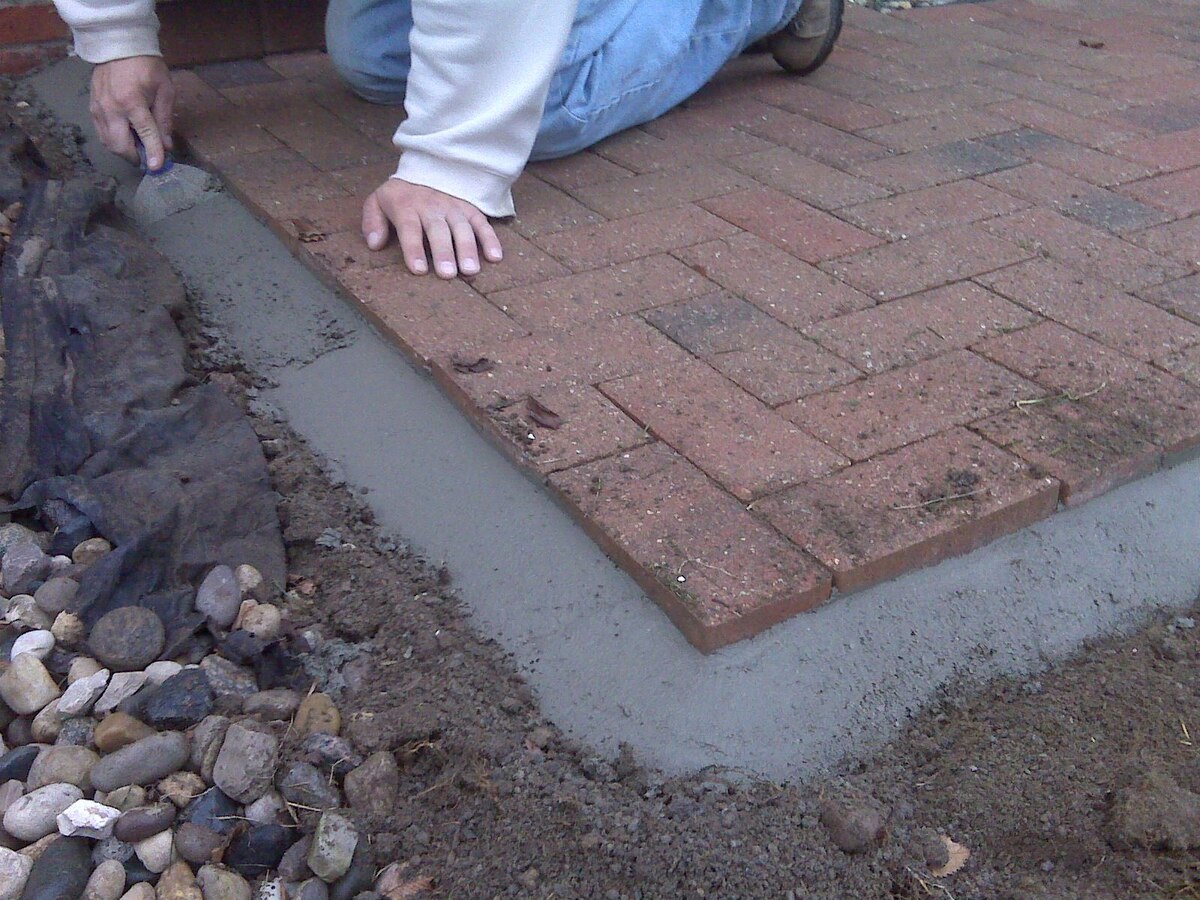
Step 6: Cutting Pavers to Fit
At this stage of the project, you may encounter areas where the standard-sized pavers won’t fit perfectly. These areas might include corners, curves, or edges that require custom-sized pavers. Step 6 involves cutting pavers to fit these specific areas and ensuring a seamless and professional looking finish.
Before you begin cutting pavers, take accurate measurements of the spaces that require a custom fit. Use a tape measure or a ruler to measure the dimensions precisely. Mark the pavers accordingly with a pencil or chalk, indicating the cutting lines.
There are several tools you can use to cut pavers, including a wet saw, a dry saw, or a handheld brick saw. Wet saws equipped with diamond blades provide the cleanest cuts, but they can be expensive and may require professional assistance. For smaller, less intricate cuts, a handheld brick saw may suffice.
Follow the manufacturer’s instructions carefully when using any cutting tools, ensuring you wear protective gear such as safety glasses and earplugs. Take your time and make slow, steady cuts along the marked lines, applying gentle pressure to avoid damaging the paver.
After cutting the pavers to fit, carefully clean any dust or debris from the cut edges to ensure a proper fit and to prevent any interference with the neighboring pavers.
Once you have cut the pavers to the desired size, place them into the designated spaces. Ensure that they fit snugly and align with the surrounding pavers. Use a rubber mallet or a dead-blow hammer to gently tap the cut pavers into place, ensuring they are level and align with the rest of the patio.
Continue this process until all the necessary custom-sized pavers are in place. Step back and inspect the entire patio to ensure a uniform and seamless appearance. Make any necessary adjustments or tweaks to ensure the finished look you desire.
With the pavers cut and fitted to perfection, your patio is now ready for the next step: filling the gaps with sand.
Step 7: Filling the Gaps with Sand
Nearly there! Now that all the pavers are laid and cut to fit, it’s time to fill the gaps between them with sand. This step not only enhances the stability of your patio but also helps to prevent weed growth and preserve the overall appearance of your outdoor space.
Start by choosing the right type of sand for the job. Polymeric sand is a popular choice as it contains binders and polymers that help lock the sand particles together, creating a firm and stable surface. This sand is resistant to erosion and weed growth, ensuring a long-lasting solution for your patio.
Begin by pouring the polymeric sand onto the paver surface, ensuring that it reaches the gaps between the pavers. Use a broom or a stiff brush to sweep the sand into the gaps, ensuring that it fills each one completely. Be thorough in this process, as any gaps left unfilled can result in instability and potentially cause the pavers to shift.
After the sand is evenly distributed, use a vibrating plate compactor or a hand tamper to gently compact the sand and settle it into the gaps. This helps to create a solid and stable base, ensuring that the pavers are secured in place.
With the sand compacted, sweep off any excess sand from the surface of the pavers. This can be done using a broom or a leaf blower. Be careful not to disturb the sand in the gaps as you remove the excess.
Once the excess sand is removed, lightly mist the entire patio with water. This activates the binders and polymers in the polymeric sand, causing it to harden and create a strong bond between the pavers. Follow the manufacturer’s instructions for the specific curing time required.
After the sand has fully cured, inspect the patio and fill in any remaining gaps if necessary. Add more sand as needed and repeat the compaction and misting process to ensure a solid and stable surface.
With the gaps filled and the sand hardened, your patio is now ready for the final step: compacting and sealing the patio.
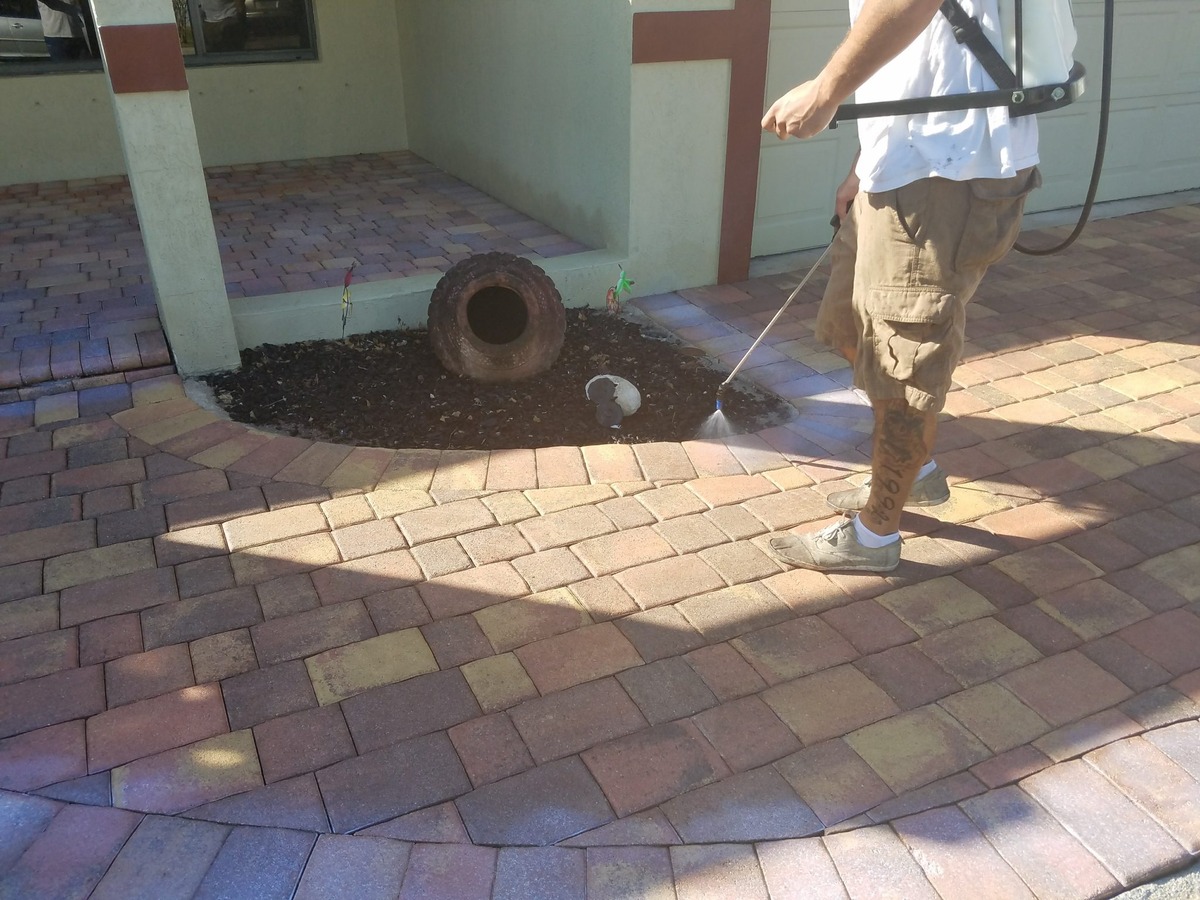
Step 8: Compact and Seal the Patio
As you near the end of your paver patio project, it’s time to focus on compacting the pavers and applying a sealant. These final steps will enhance the durability, longevity, and overall appearance of your patio.
Start by using a vibrating plate compactor or a hand tamper to compact the entire surface of the patio. This step helps to ensure that the pavers are firmly set in place and helps to prevent shifting or settling over time. Make multiple passes over the patio, applying even pressure and focusing on any areas that may feel less stable.
After compacting the patio, it’s time to apply a sealant for added protection. There are various types of sealants available, including solvent-based, water-based, and breathable sealants. Choose a sealant that is specifically designed for paver surfaces.
Before applying the sealant, ensure that the surface is clean and dry. Sweep away any debris or loose sand from the patio. Follow the manufacturer’s instructions on the sealant container for application guidelines.
Apply the sealant using a brush or a roller, ensuring an even coat over the entire surface. Pay extra attention to the joints between the pavers, as these are vulnerable areas that may require additional sealant. Allow the sealant to dry completely according to the manufacturer’s instructions.
Sealing the patio not only helps to protect the pavers from stains, fading, and weathering but also enhances the overall color and appearance of your outdoor space. It also makes future cleaning and maintenance easier, as the sealant acts as a barrier against dirt and debris.
Once the sealant has dried, take a step back and admire your beautiful and newly completed paver patio. Congratulations!
With the patio compacted and sealed, your project is almost complete. All that’s left is to add the finishing touches.
Read more: What Are Pavers For Patio
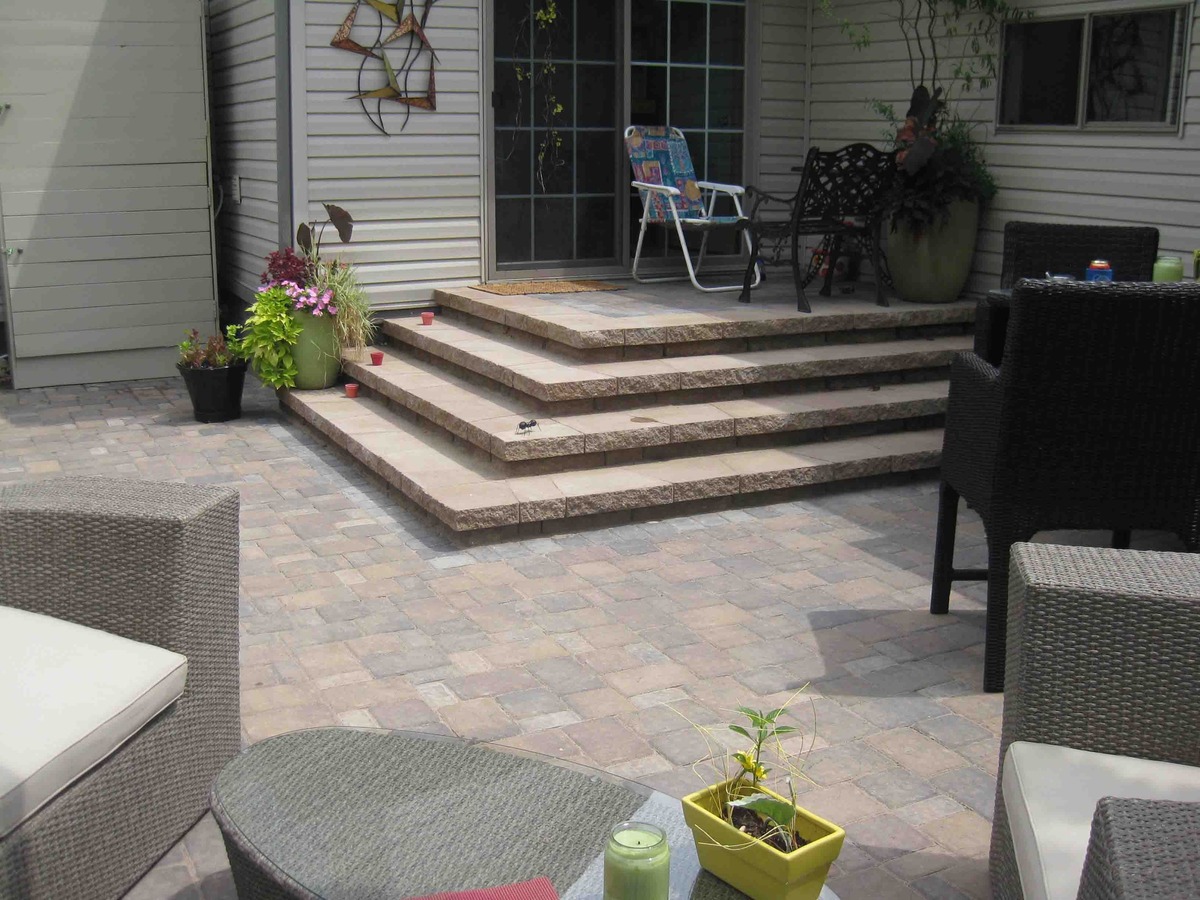
Step 9: Add Finishing Touches
Congratulations on reaching the final step of your paver patio project! Step 9 focuses on adding those finishing touches that will truly bring your outdoor space to life.
First, consider adding some additional elements to enhance the functionality and aesthetics of your patio. This could include seating options such as outdoor furniture, benches, or even a built-in seating area. Choose furniture that suits your personal style and complements the overall design of your patio.
Next, think about incorporating some shading options to provide comfort during sunny days. This could be in the form of a pergola, an umbrella, or a retractable awning. Not only will this provide relief from the sun’s rays, but it will also add a touch of elegance to your outdoor space.
Don’t forget about lighting! Incorporating outdoor lighting will extend the usability of your patio into the evening hours. Consider installing string lights, stake lights, or even built-in lighting fixtures to create a warm and inviting atmosphere.
To add a touch of greenery and natural beauty, consider adding plants and flowers to your patio. Choose plants that are suitable for the outdoor conditions and complement the overall aesthetic of your space. Container gardens, hanging baskets, or raised planters are great options if you have limited space.
Finally, to further enhance the ambiance of your patio, consider adding decorative elements such as outdoor rugs, pillows, cushions, and even artwork. These items will add a personal touch and create a cozy and inviting environment for you and your guests.
Remember to regularly maintain and clean your paver patio to keep it looking its best. This includes sweeping away debris, removing any stains or spills, and periodically reapplying a sealant to protect the pavers.
By adding these finishing touches, your paver patio will be transformed into an outdoor oasis where you can relax, entertain, and enjoy the beauty of your surroundings.
Congratulations once again on completing your paver patio project! Now it’s time to sit back, relax, and enjoy your new outdoor space to its fullest.
Conclusion
Creating a paver patio is a rewarding project that can transform your outdoor space into a functional and beautiful area for relaxation and enjoyment. By following the steps outlined in this guide, you can confidently tackle the task of planning, designing, and installing your paver patio.
Starting with careful planning and design, you laid the groundwork by preparing the area and creating a solid base. With attention to detail, you carefully laid the pavers, ensuring alignment and proper spacing. By cutting pavers to fit where needed, you achieved a seamless and professional finish. Filling the gaps with sand and compacting the patio provided stability and durability.
Sealing the patio and adding finishing touches such as furniture, shading, lighting, and greenery helped create a welcoming and inviting outdoor space that reflects your personal style.
Remember that proper maintenance is key to the longevity and beauty of your paver patio. Regular cleaning, resealing, and occasional repairs will ensure that your patio withstands the test of time and continues to be a source of joy and relaxation.
Now, it’s time to invite friends and family over, fire up the grill, and enjoy the comfort and beauty of your newly completed paver patio. Embrace the moments spent outdoors, creating memories and cherishing the tranquility that your patio provides.
So, go ahead, step outside, and experience the pleasure of your own outdoor oasis. Your paver patio is ready to be enjoyed to the fullest.
Frequently Asked Questions about How To Create A Paver Patio
Was this page helpful?
At Storables.com, we guarantee accurate and reliable information. Our content, validated by Expert Board Contributors, is crafted following stringent Editorial Policies. We're committed to providing you with well-researched, expert-backed insights for all your informational needs.


0 thoughts on “How To Create A Paver Patio”