Home>Furniture>Outdoor Furniture>How To Paint Patio Furniture With Vinyl Straps
Outdoor Furniture
How To Paint Patio Furniture With Vinyl Straps
Modified: August 28, 2024
Learn how to transform your outdoor furniture with vinyl straps with our step-by-step guide. Perfect for updating your patio for the upcoming season.
(Many of the links in this article redirect to a specific reviewed product. Your purchase of these products through affiliate links helps to generate commission for Storables.com, at no extra cost. Learn more)
Introduction
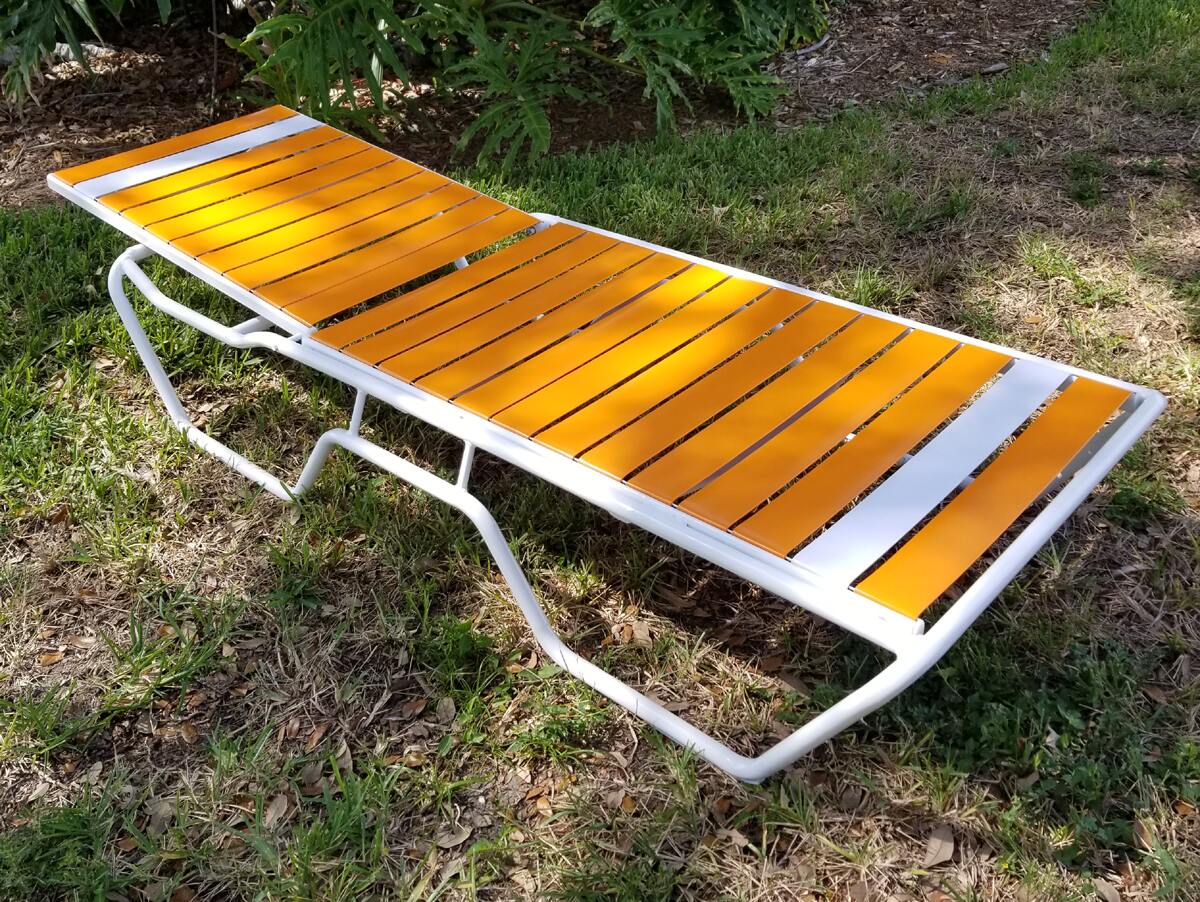
Welcome to our comprehensive guide on how to repaint patio furniture with vinyl straps! Updating the look of your outdoor furniture can be a fun and rewarding project that not only adds a fresh and stylish touch to your space but also extends the lifespan of your beloved patio pieces. Vinyl straps are commonly used on outdoor furniture because they are durable, weather-resistant, and easy to maintain. However, over time, they can become faded, worn, or damaged. Repainting the vinyl straps is a cost-effective way to restore their appearance and give your patio furniture a new lease on life.
In this guide, we will walk you through the step-by-step process of repainting patio furniture with vinyl straps. We will cover everything from preparing the furniture and removing old straps to measuring, cutting, and attaching new straps. Whether you have a full set of chairs or just a couple of lounge chairs, this guide will provide you with all the information you need to successfully complete this project.
Before we dive into the details, let’s go over the materials you will need for this project.
Key Takeaways:
- Revive your outdoor furniture by repainting vinyl straps for a fresh and stylish look. Follow the step-by-step guide for a rewarding DIY project that extends the lifespan of your patio pieces.
- Ensure a long-lasting finish by properly preparing, measuring, and attaching new vinyl straps. Maintain your revamped patio furniture with regular cleaning and enjoy your outdoor oasis for years to come.
Necessary Materials
Before you begin repainting your patio furniture with vinyl straps, gather the following materials:
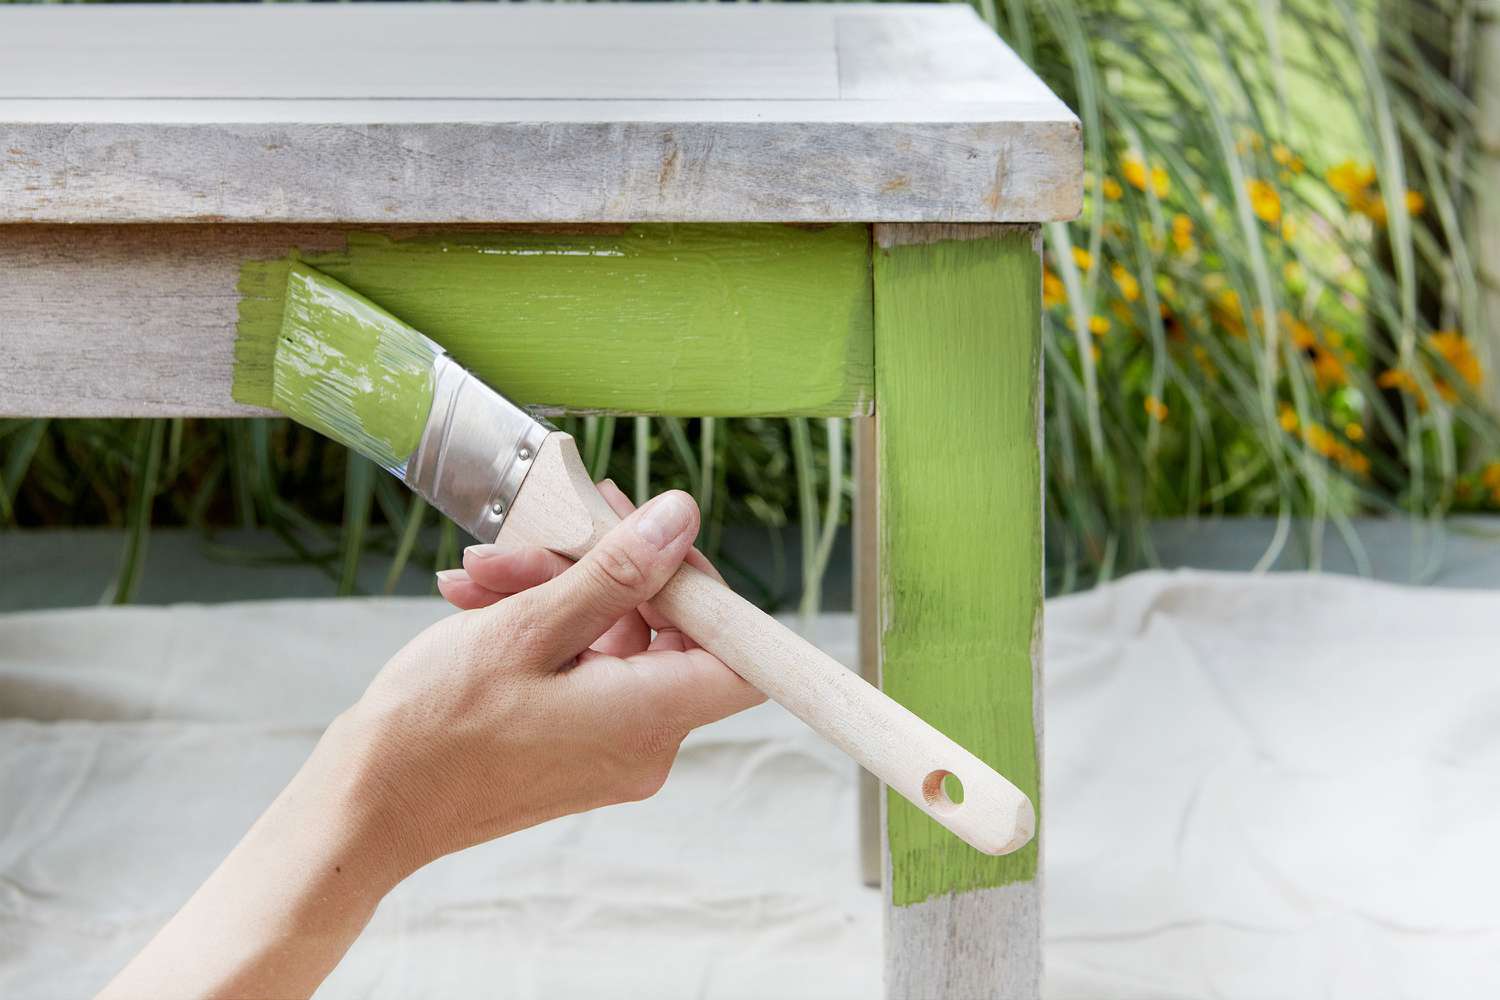
- Paint or Spray Paint: Choose a high-quality paint specifically designed for outdoor use. Look for a paint that adheres well to vinyl surfaces and provides UV protection to prevent fading.
- Paintbrushes or Roller: Depending on your preference, have a selection of paintbrushes or a roller on hand. Opt for brushes with synthetic bristles that are suitable for use with the type of paint you have chosen.
- Drop Cloths or Plastic Sheets: Protect your outdoor area from paint splatters and spills by covering the surrounding surfaces with drop cloths or plastic sheets.
- Sandpaper or Sanding Block: Prepare the surface of the furniture by using sandpaper or a sanding block to smooth out any rough areas or peeling paint. Choose a grit that is suitable for the level of roughness you need to remove.
- Primer (if necessary): If your vinyl straps are heavily damaged or have a glossy finish, you may need to apply a primer before painting. This will help the paint adhere better and ensure a longer-lasting finish.
- Vinyl Strap Replacement Kit: If you are planning to replace the vinyl straps, make sure to purchase a vinyl strap replacement kit. These kits typically include new straps, rivets or screws for attaching them, and any necessary tools for the installation.
- Screwdriver or Rivet Gun: Depending on the type of fasteners used on your furniture, have a screwdriver or rivet gun ready to help attach the new vinyl straps securely.
- Cleaning Solution: Use a mild detergent or specially formulated vinyl cleaner to thoroughly clean the furniture before starting the painting process.
- Cloth or Sponge: Have a cloth or sponge available for cleaning and applying the cleaning solution to the furniture.
- Protective Gear: It is essential to protect yourself while working on this project. Wear gloves, safety glasses, and a mask to shield your skin, eyes, and respiratory system from paint fumes and debris.
Now that you have gathered all the necessary materials, it’s time to prepare your patio furniture for repainting.
Preparing the Furniture
Proper preparation is the key to achieving a smooth and long-lasting finish when repainting patio furniture with vinyl straps. Follow these steps to prepare your furniture:
- Clear the Area: If possible, move the furniture to an open and well-ventilated area. This will make the painting process more convenient and prevent paint fumes from building up in enclosed spaces.
- Remove Cushions and Accessories: Take off any cushions, umbrellas, or other accessories from the furniture. This will give you full access to the vinyl straps and make the painting process easier.
- Inspect the Furniture: Carefully examine the furniture for any signs of damage or loose parts. Tighten any loose screws or rivets and repair any structural issues before proceeding.
- Clean the Surface: Thoroughly clean the furniture using a mild detergent or specially formulated vinyl cleaner. Use a cloth or sponge to apply the cleaner and remove any dirt, grime, or mold. Rinse the furniture with water and allow it to dry completely.
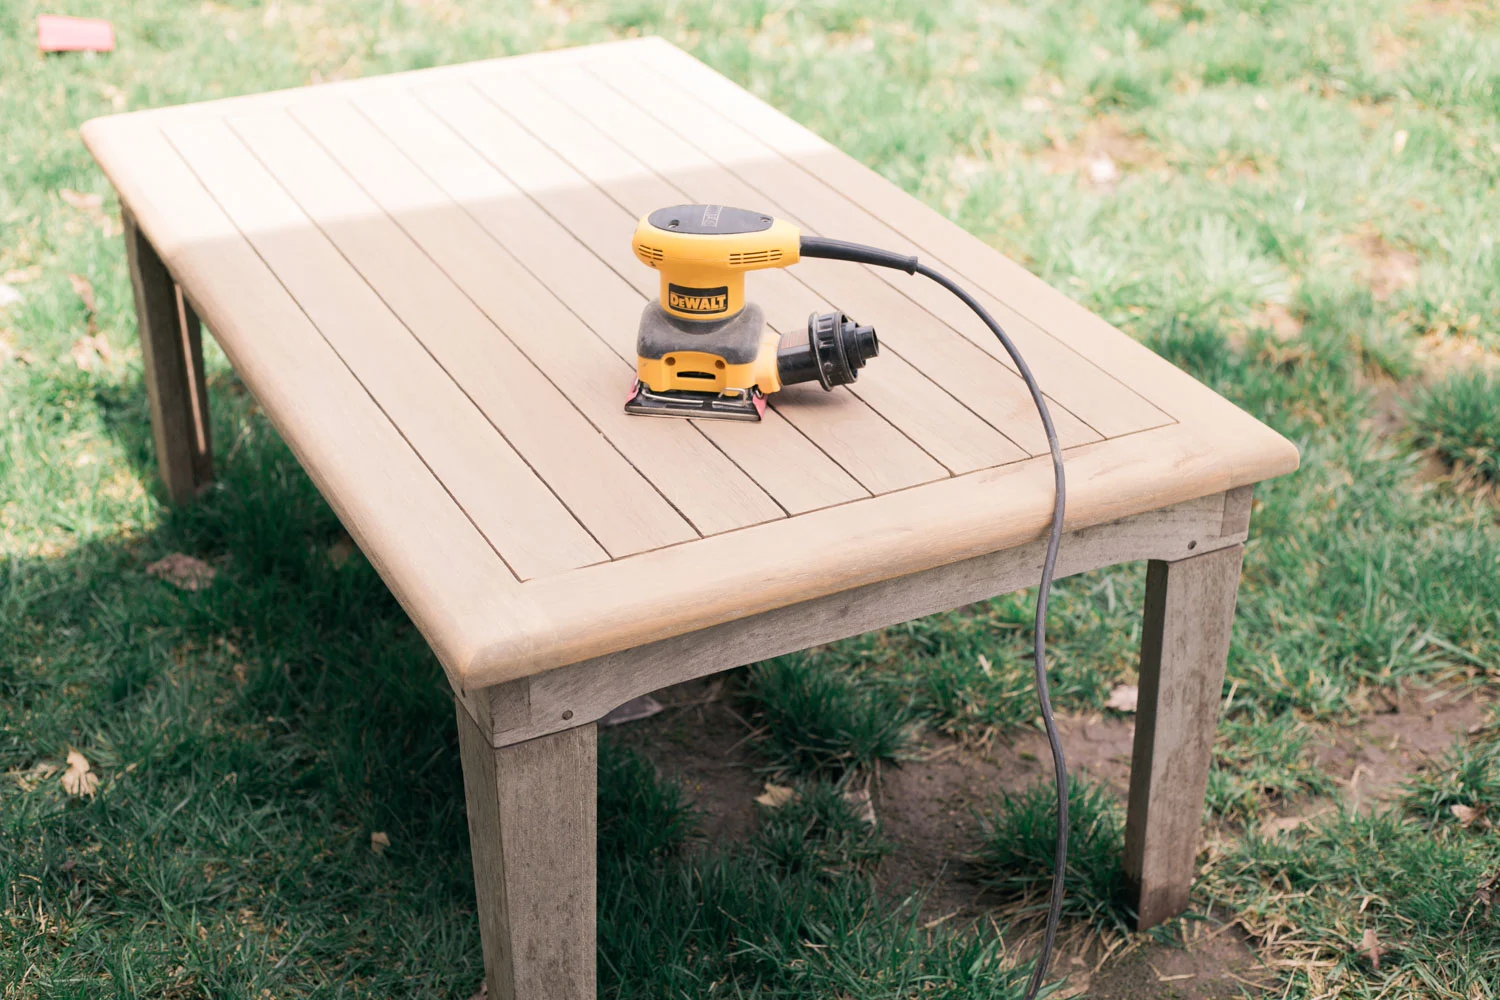
- Sand the Surface: If there are any rough areas or peeling paint on the furniture, use sandpaper or a sanding block to smooth them out. This will create a smooth surface for the new paint to adhere to. Wipe away any dust or debris with a damp cloth.
- Mask Off Areas: Use masking tape or painter’s tape to protect any parts of the furniture that you do not want to paint, such as metal frames or non-vinyl surfaces. This will help ensure clean lines and prevent paint from accidentally getting on unwanted areas.
- Apply Primer (if necessary): If your vinyl straps are heavily damaged or have a glossy finish, applying a primer may be necessary. Consult the manufacturer’s instructions on the specific primer to use and apply it according to the recommended guidelines. Allow the primer to dry completely before proceeding.
Once you have finished preparing the furniture, it is time to remove the old vinyl straps.
Removing Old Vinyl Straps
Before you can replace the vinyl straps on your patio furniture, you will need to remove the old ones. Follow these steps to remove the old vinyl straps:
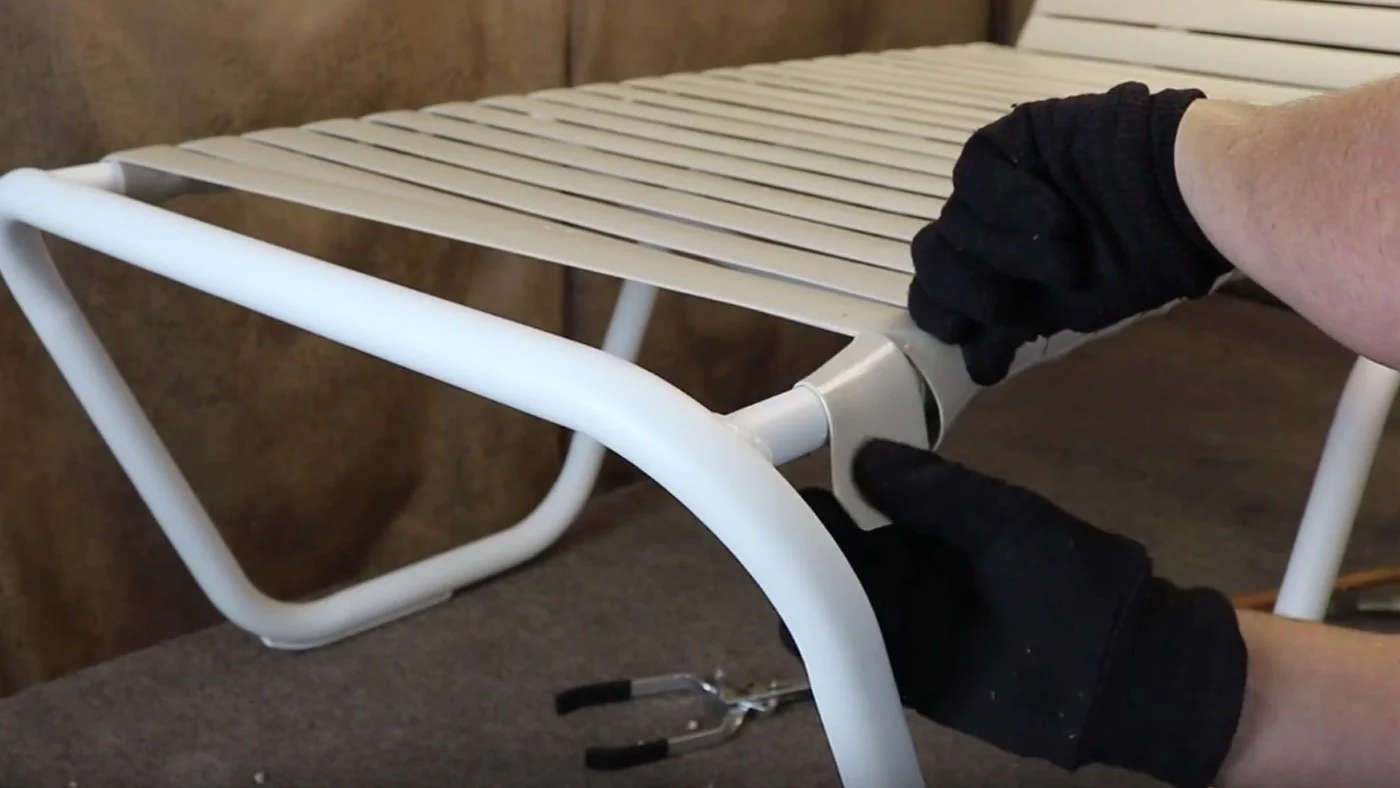
- Identify the Fasteners: Take a close look at the fasteners that secure the vinyl straps to the furniture. They are typically screws, rivets, or clips. Determine the type of fasteners used on your furniture so you can use the appropriate tool for removal.
- Prepare the Tools: Depending on the fasteners, you may need a screwdriver, rivet removal tool, or pliers. Have the necessary tools ready to facilitate the removal process.
- Remove the Fasteners: Begin removing the fasteners one by one, starting from one end of the strap. Use the appropriate tool to unscrew the screws or remove the rivets. If the fasteners are clips, carefully unclip them using pliers.
- Pull out the Strap: Once you have removed the fastener, gently pull out the old vinyl strap from the furniture. Be careful not to damage the furniture or the surrounding straps during this process.
- Repeat the Process: Continue removing the fasteners and pulling out the old straps until all the vinyl straps have been removed. Make sure to keep track of the fasteners for later use or replacement.
- Clean the Surface: After removing the old vinyl straps, clean the surface where the straps were attached. Use a mild detergent or vinyl cleaner and a cloth or sponge to remove any residue or dirt. Allow the surface to dry completely before moving on to the next step.
Congratulations! You have successfully removed the old vinyl straps from your patio furniture. Now it’s time to clean the surface and get ready for the next phase of the project.
Cleaning the Surface
Once you have removed the old vinyl straps from your patio furniture, it’s crucial to thoroughly clean the surface before attaching the new straps. Follow these steps to clean the surface effectively:
- Prepare the Cleaning Solution: Mix a mild detergent or specially formulated vinyl cleaner with water according to the manufacturer’s instructions. Alternatively, you can use a vinegar and water solution for a natural cleaning option.
- Apply the Cleaning Solution: Use a cloth or sponge to apply the cleaning solution to the surface of the furniture. Make sure to cover all areas that were previously covered by the vinyl straps.
- Scrub Gently: Use a gentle scrubbing motion to remove any dirt, grime, or residue from the surface. Avoid applying too much pressure, as it may damage the furniture or the underlying material.
- Pay Attention to Crevices: Pay special attention to crevices or hard-to-reach areas where dirt or debris may have accumulated. Use a soft brush or toothbrush to clean these areas thoroughly.
- Rinse with Water: After scrubbing, rinse the surface of the furniture with clean water. This will remove any remaining cleaning solution and ensure a fresh and clean surface.
- Dry Completely: Allow the furniture to air dry completely before proceeding. Make sure there is no moisture left on the surface, as it can interfere with the paint’s adhesion.
By properly cleaning the surface of your patio furniture, you are creating an ideal canvas for the new vinyl straps. This step helps to ensure a strong bond between the straps and the furniture and promotes a professional-looking finish.
Now that the surface is clean and dry, it’s time to measure and cut the new vinyl straps.
Before painting vinyl straps on patio furniture, make sure to clean them thoroughly with soap and water to remove any dirt or debris. This will help the paint adhere better and last longer.
Read more: How To Paint Metal Patio Furniture
Measuring and Cutting New Straps
Now that your patio furniture surface is clean and prepared, it’s time to measure and cut the new vinyl straps. Follow these steps for an accurate and precise fit:
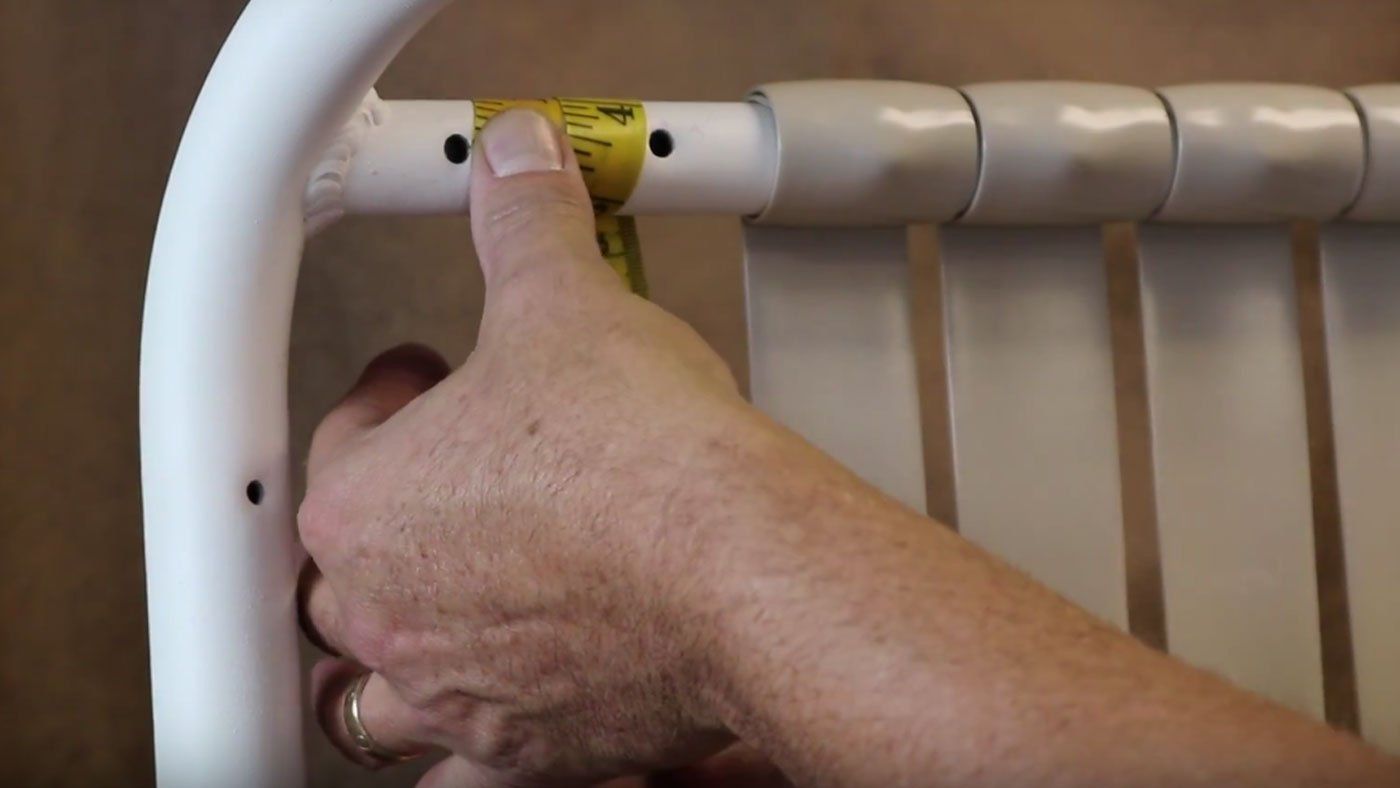
- Measure the Length: Use a measuring tape to determine the length of each vinyl strap you need to replace. Measure from one end of the furniture to the other, following the same path as the original straps. Make sure to measure both the length and width of the straps.
- Add Extra Length: When measuring, add a few inches to the length of each vinyl strap. This will ensure that you have enough material to properly attach the straps to the furniture.
- Mark and Cut: Once you have determined the measurements, use a pencil or marker to mark the length on the new vinyl strap material. Use a sharp pair of scissors or a utility knife to cut the straps along the marked lines. Take your time and make clean, straight cuts.
- Trim Edges: After cutting the straps to the appropriate length, check the edges for any rough or uneven areas. Use sandpaper or a file to smooth out any imperfections and create neat, finished edges.
It’s important to note that some vinyl strap replacement kits may come pre-cut to specific lengths, in which case you can skip the measuring and cutting steps. However, if you prefer a custom fit or if the kits do not match the dimensions of your furniture, measuring and cutting your own straps is necessary.
With the new vinyl straps cut and trimmed, you are ready to attach them to your patio furniture. Let’s move on to the next step: attaching the new vinyl straps.
Attaching New Vinyl Straps
With the new vinyl straps measured, cut, and ready to go, it’s time to attach them to your patio furniture. Follow these steps for a secure and professional installation:
- Prepare the Fasteners: Depending on the type of fasteners used on your furniture, gather the appropriate tools, such as a screwdriver or rivet gun. This will ensure that you have everything you need for the installation.
- Align the Straps: Position the first vinyl strap in its designated location on the furniture. Make sure it is aligned correctly and covers the fastener holes or attachment points from the old straps.
- Attach the Fasteners: Using the appropriate tool, secure the strap by attaching the fasteners. If using screws, insert them through the pre-drilled holes in the vinyl strap and into the corresponding holes in the furniture. If using rivets, use a rivet gun to secure them. Follow the manufacturer’s instructions for each type of fastener.
- Tighten and Secure: Once the fasteners are in place, tighten them securely. Ensure that the vinyl strap is taut and properly aligned with the furniture. Check for any visible gaps or irregularities and make any necessary adjustments.
- Repeat the Process: Continue attaching the remaining vinyl straps in the same manner, one at a time. Follow the original pattern of the old straps to maintain a consistent and cohesive look.
- Double-Check the Installation: Once all the new straps are attached, double-check the installation to ensure that everything is tight and secure. Give each strap a gentle tug to test its strength and stability.
By following these steps, you’ll have a set of securely attached vinyl straps that will enhance the appearance and functionality of your patio furniture. With the new straps in place, it’s time to add the finishing touches.
Finishing Touches
Now that you have successfully attached the new vinyl straps to your patio furniture, it’s time to add some finishing touches to complete the transformation:
- Inspect and Clean: Take a final look at your furniture to ensure that everything is in place and properly secured. Remove any tape or masking that was applied during the painting or strap installation process. Wipe down the entire surface of the furniture to remove any dust or debris that may have accumulated.
- Apply a Clear Coat (Optional): For added protection and longevity, you may choose to apply a clear coat or sealant over the freshly painted and installed vinyl straps. This will provide an extra layer of protection against the elements and help to preserve the new finish.
- Reassemble and Decorate: Once the clear coat has dried (if applied), it’s time to reassemble your patio furniture. Replace the cushions, umbrellas, or any other accessories that were removed during the painting process. Give the furniture a final touch by adding decorative elements such as outdoor pillows, lighting, or potted plants.
- Maintain Regular Cleaning and Maintenance: To keep your newly refurbished patio furniture looking its best, establish a regular cleaning and maintenance routine. Clean the vinyl straps periodically using a mild detergent or vinyl cleaner. Remove any stains or dirt promptly to prevent them from setting in. Inspect the straps and fasteners annually for any signs of wear or damage and repair or replace as needed.
Congratulations! You have completed the process of repainting patio furniture with vinyl straps. By investing time and effort into this project, you have revived your outdoor furniture and added years of enjoyment to your outdoor space.
Remember to always follow the manufacturer’s instructions for your specific vinyl straps and paint products for optimal results and durability. Enjoy your refreshed patio furniture and make many lasting memories in your outdoor oasis!
If you are not comfortable with DIY projects or prefer professional assistance, consider contacting a local furniture restoration expert who specializes in patio furniture refurbishment.
Should you have any questions or concerns, always consult with experts in the field for personalized guidance. Happy revamping!
Conclusion
Repainting patio furniture with vinyl straps is a rewarding project that can give your outdoor space a fresh and updated look. By following the step-by-step process outlined in this guide, you can transform worn and faded furniture into vibrant, stylish pieces that will enhance your outdoor living experience.
Throughout this guide, we’ve covered the necessary materials, preparation steps, removal of old vinyl straps, cleaning the surface, measuring and cutting new straps, attaching the new vinyl straps, and adding the finishing touches. Each of these steps is crucial in achieving a professional and long-lasting result.
Remember to select high-quality paint or spray paint designed for outdoor use and choose vinyl replacement straps that are durable and weather-resistant. Take the time to thoroughly clean the furniture surface and properly measure and cut the new straps for a secure and custom fit.
With the new vinyl straps attached and the furniture reassembled, be sure to maintain regular cleaning and maintenance to keep your patio furniture looking its best. Periodic cleaning and inspections for wear or damage will help preserve the longevity of the vinyl straps and the overall appearance of your furniture.
Whether you choose to tackle this project as a DIY endeavor or seek the assistance of a professional furniture restoration expert, the result will be a refreshed outdoor space that you can enjoy for years to come. So, get ready to relax and entertain in style with your newly repainted and revamped patio furniture.
We hope that this comprehensive guide has provided you with the knowledge and confidence to take on the task of repainting patio furniture with vinyl straps. Enjoy the process and the transformation of your outdoor oasis!
Frequently Asked Questions about How To Paint Patio Furniture With Vinyl Straps
Was this page helpful?
At Storables.com, we guarantee accurate and reliable information. Our content, validated by Expert Board Contributors, is crafted following stringent Editorial Policies. We're committed to providing you with well-researched, expert-backed insights for all your informational needs.


0 thoughts on “How To Paint Patio Furniture With Vinyl Straps”