Articles
How To Paint Veneer Furniture
Modified: October 20, 2024
Learn expert tips on how to transform your veneer furniture with a fresh coat of paint. Enhance the look and durability of your furniture with our step-by-step guide. Ideal for all types of furniture, including chairs, tables, and cabinets.
(Many of the links in this article redirect to a specific reviewed product. Your purchase of these products through affiliate links helps to generate commission for Storables.com, at no extra cost. Learn more)
Introduction
Painting veneer furniture can be a great way to revitalize old or worn-out pieces and give them a fresh new look. Whether you have a thrift store find or a piece that has been in your family for years, painting can breathe new life into it and make it a centerpiece in your home. In this article, we will guide you through the process of painting veneer furniture, from preparing the surface to choosing the right paint and applying it correctly.
Veneer is a thin layer of wood that is often applied to furniture to give it a polished and finished appearance. While veneer furniture is beautiful, it can be tricky to paint because the smooth surface doesn’t always hold paint well. However, with the right preparation and techniques, you can achieve a flawless painted finish that will last for years.
Before you begin the painting process, it’s important to assess the condition of the veneer furniture. Check for any damage, such as loose veneer or chipped edges, and make any necessary repairs before proceeding. Once you have prepared the furniture, you can move on to choosing the right paint.
When it comes to painting veneer furniture, not all paints are created equal. It’s important to choose a paint that is specifically designed for furniture and has good adhesion properties. Look for paints labeled as “furniture paint” or “cabinet paint” that are suitable for use on smooth surfaces like veneer. These paints are formulated to adhere well to the surface and provide a durable finish.
Before you start painting, it’s crucial to clean and sand the veneer surface to ensure proper adhesion of the paint. Use a gentle cleaner to remove any dirt, grease, or stains from the furniture. Once clean, lightly sand the surface using a fine-grit sandpaper. This helps to roughen up the veneer slightly, allowing the paint to bond better.
After sanding, it’s time to apply a primer. Primer is essential for creating a smooth and even base for the paint. Choose a high-quality primer that is specifically designed for use on smooth surfaces like veneer. Apply the primer in thin, even coats, following the manufacturer’s instructions. Allow the primer to dry completely before moving on to the next step.
Choosing the right paint technique is crucial for achieving a professional-looking finish on veneer furniture. There are several techniques you can use, including brush painting, spray painting, or using a paint sprayer. The best technique for your project will depend on the size and shape of the furniture, as well as your personal preference and skill level.
Key Takeaways:
- Revitalize old veneer furniture by carefully preparing the surface, choosing the right paint, and applying it with care to achieve a professional-looking finish that reflects your personal style and creativity.
- Sealing the painted veneer furniture with the right sealant adds an extra layer of protection, enhancing durability and making the furniture easier to clean and maintain for long-lasting beauty.
Read more: How To Repair Veneer Furniture
Preparing the Veneer Furniture
Before you begin painting veneer furniture, it’s important to properly prepare the surface to ensure optimal paint adhesion and longevity of the finish. Here are the steps you should follow to prepare your veneer furniture:
- Inspect the furniture: Start by carefully inspecting the furniture for any loose veneer, chips, or other damage. If you find any issues, repair them before proceeding with the painting process. Glue down loose veneer, fill in any chips with wood putty, and sand the repaired areas smooth.
- Remove hardware: If your furniture has any hardware such as knobs or handles, it’s best to remove them before painting. This will make the painting process easier and ensure a more professional-looking finish. Keep the hardware in a safe place, and you can reinstall them once the paint has dried.
- Clean the furniture: Before applying any paint, it’s crucial to clean the veneer thoroughly. Use a mild detergent mixed with warm water and a soft cloth or sponge to gently clean the surface. Make sure to remove any dirt, grease, or residue that may prevent the paint from adhering properly. Rinse the furniture with clean water and allow it to dry completely before moving on to the next step.
- Sand the surface: Sanding the veneer is an important step to create a rougher surface for the paint to adhere to. Use a fine-grit sandpaper and sand the entire surface of the furniture in a circular motion. This will help remove any existing finish and rough up the veneer slightly. Be careful not to sand too aggressively, as you don’t want to sand through the veneer. After sanding, wipe away any dust with a clean, damp cloth.
- Fill in imperfections: If you have any dents, scratches, or imperfections on the furniture, you can use wood filler to fill them in. Choose a wood filler that matches the color of the veneer or opt for a clear filler. Apply the filler to the imperfections using a putty knife and smooth it out. Allow the filler to dry completely and sand it lightly to make it flush with the surface of the furniture.
- Mask off areas: If there are parts of the furniture that you don’t want to paint, such as decorative trim or certain sections, use painter’s tape to mask off these areas. Apply the tape carefully to ensure clean lines and protect those parts from getting painted.
By thoroughly preparing your veneer furniture before painting, you are setting the foundation for a successful and long-lasting finish. Taking the time to inspect, clean, and properly sand the surface will ensure that the paint adheres well and the final result is smooth and professional-looking.
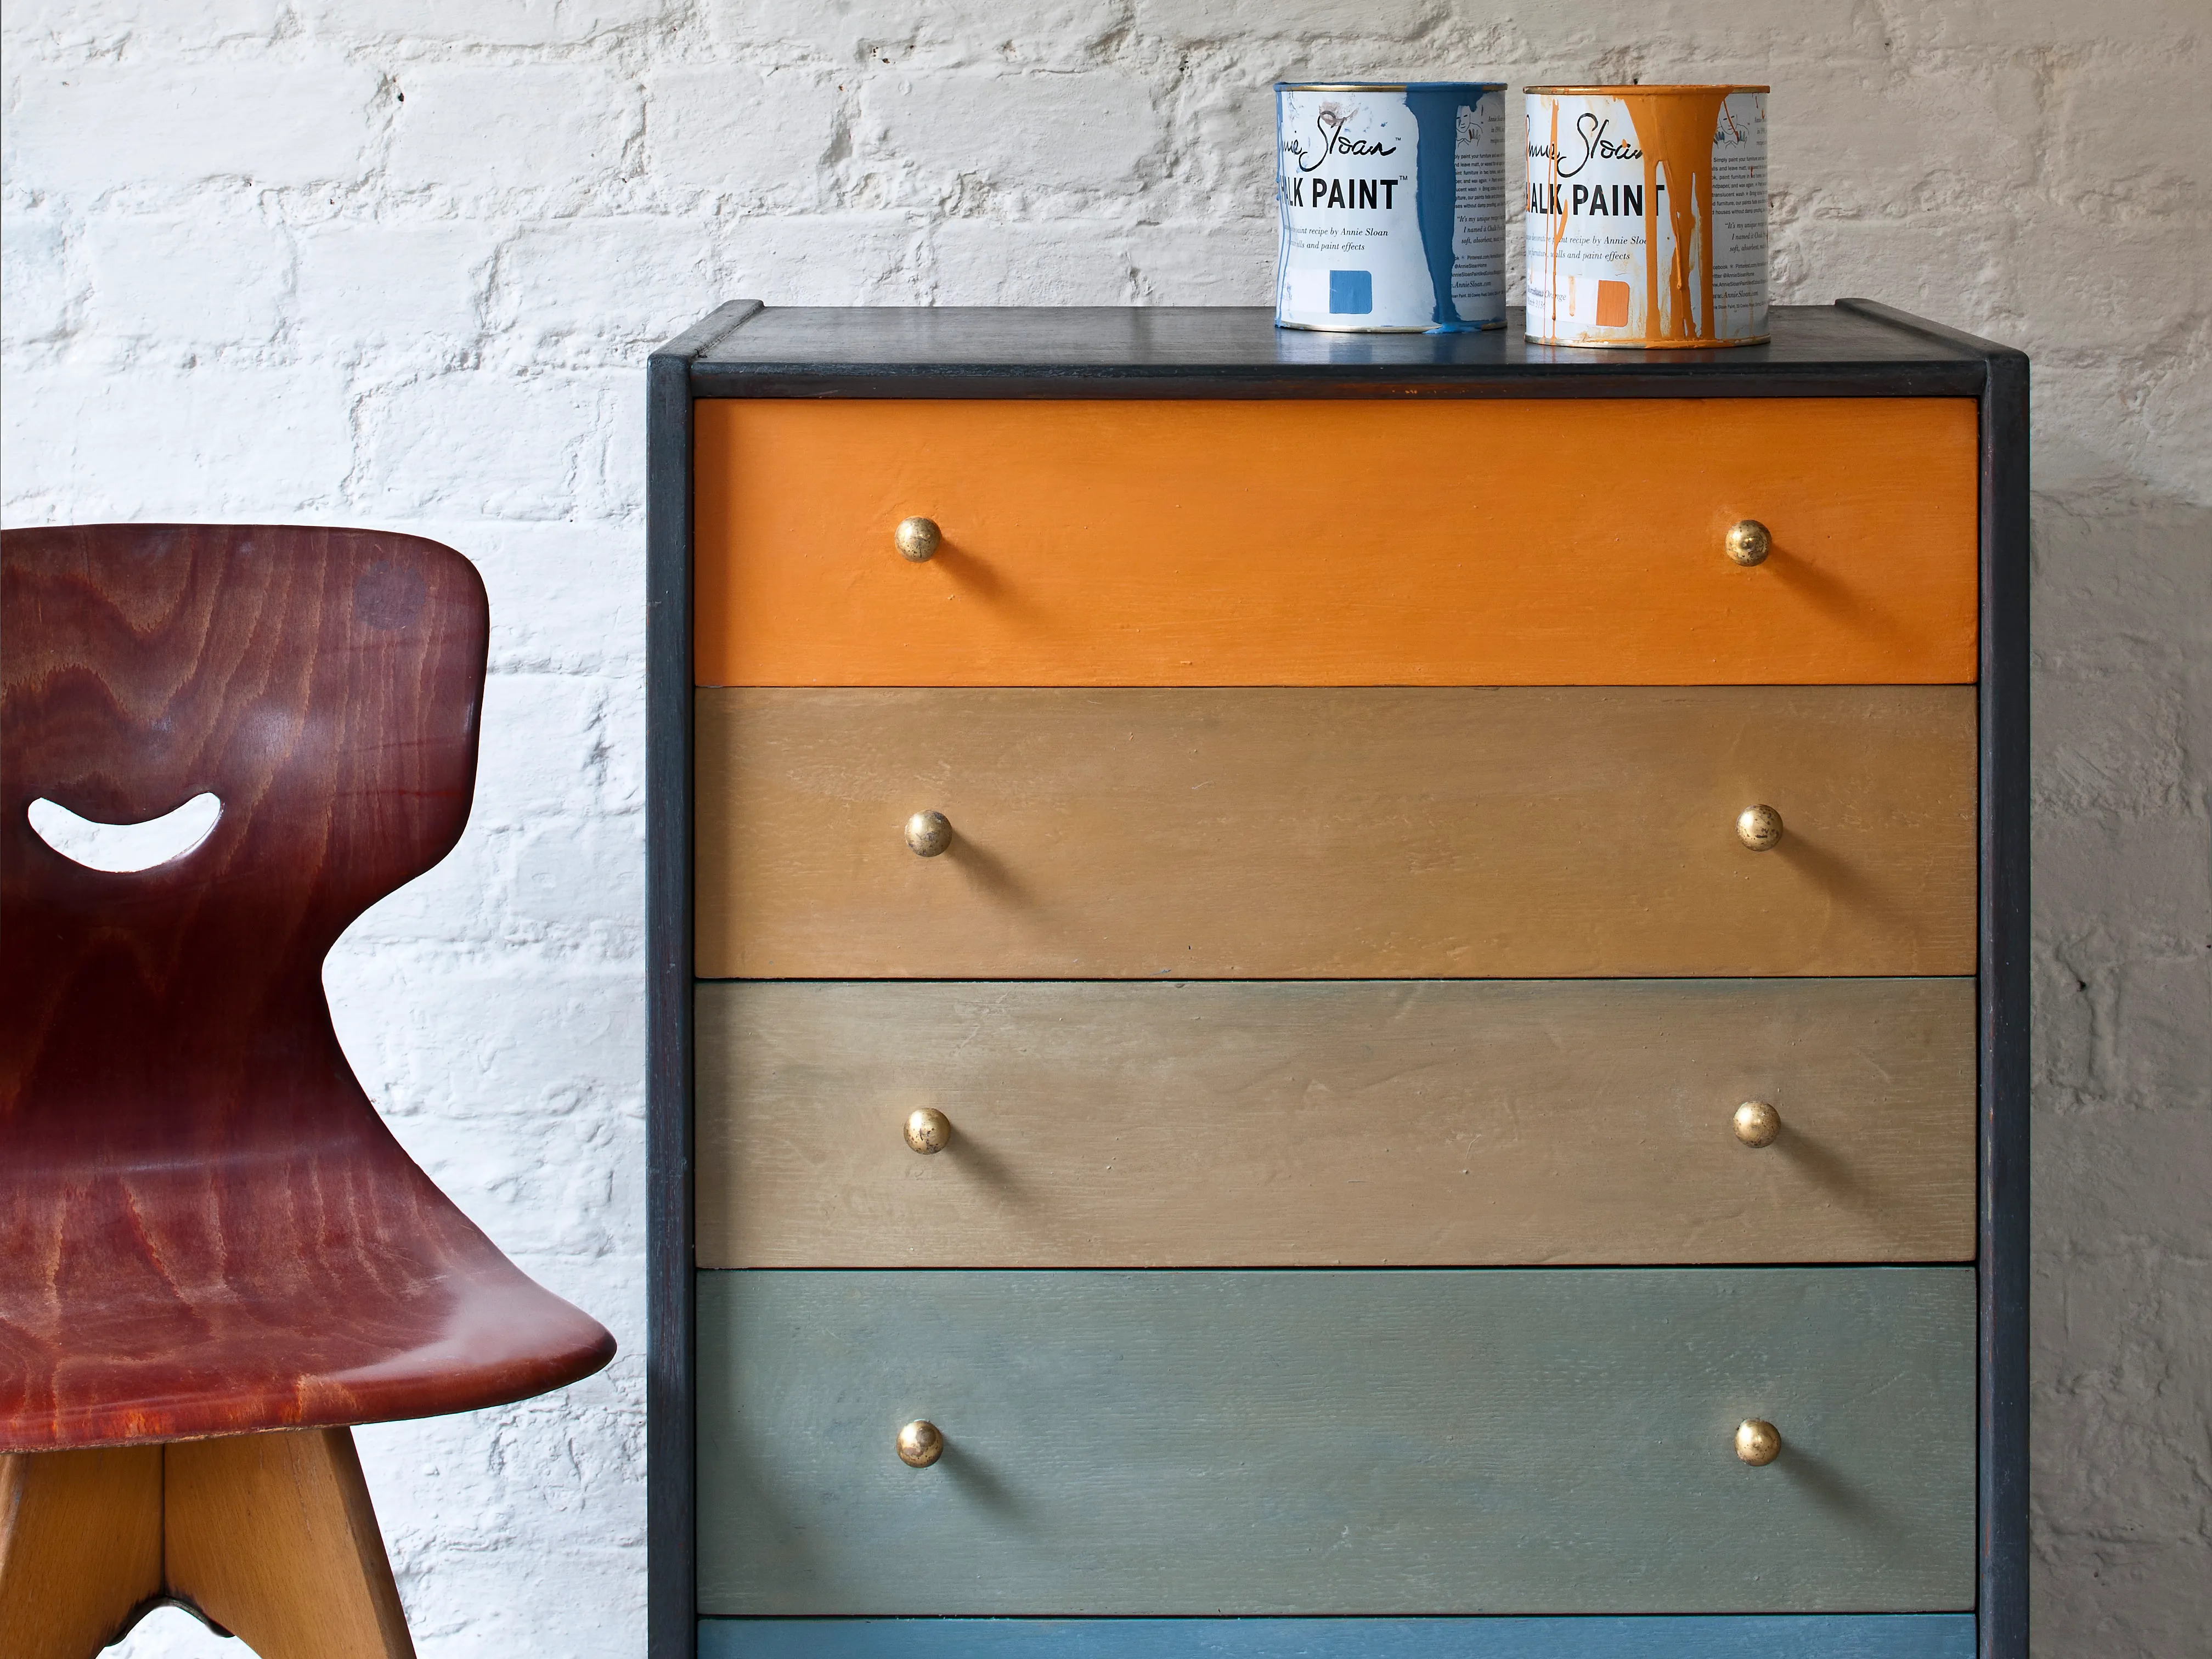
Choosing the Right Paint
When it comes to painting veneer furniture, selecting the right paint is crucial for achieving a high-quality and long-lasting finish. Not all paints are suitable for veneer surfaces, so it’s important to choose a paint that is specifically designed for furniture and has good adhesion properties. Here are some factors to consider when choosing the right paint for your veneer furniture:
- Type of paint: Look for paints that are labeled as “furniture paint” or “cabinet paint.” These types of paints are formulated to adhere well to smooth surfaces like veneer and provide excellent coverage.
- Water-based vs. oil-based: Water-based paints are popular choices for painting veneer furniture because they are low in VOCs (volatile organic compounds) and have a quick drying time. They are also easier to clean up with soap and water. On the other hand, oil-based paints offer a more durable finish and have better adhesion properties. However, they have a longer drying time and require mineral spirits for clean-up.
- Finish: Consider the finish you want for your furniture. Matt or flat finishes are great for hiding imperfections and creating a velvety appearance, while satin and semi-gloss finishes offer more durability and are easier to clean. Choose the finish that matches your desired look and functionality.
- Color: The color of your paint is a personal choice and depends on the overall aesthetic you are trying to achieve. Consider the color scheme of your room and the style of your furniture when selecting the paint color. It’s always a good idea to test a small area or use paint swatches to see how the color looks on your veneer before committing to a large-scale painting project.
- Brand and quality: Investing in high-quality paint from reputable brands can make a significant difference in the final result. These paints are often formulated with better adhesion properties and provide a more durable finish. Read reviews and seek recommendations to ensure you choose a paint brand known for its quality and longevity.
It’s important to carefully read the labels and product descriptions of the paints you are considering to ensure they are suitable for use on veneer surfaces. Following the manufacturer’s instructions regarding application and drying times is essential to achieve the desired results.
By choosing the right paint for your veneer furniture, you are setting the stage for a successful painting project. Quality paint will adhere well to the veneer surface, provide great coverage, and create a beautiful and durable finish that will last for years to come. Take your time to research and select the paint that best meets your needs and preferences, and you’ll be on your way to transforming your veneer furniture into a stunning focal point in your home.
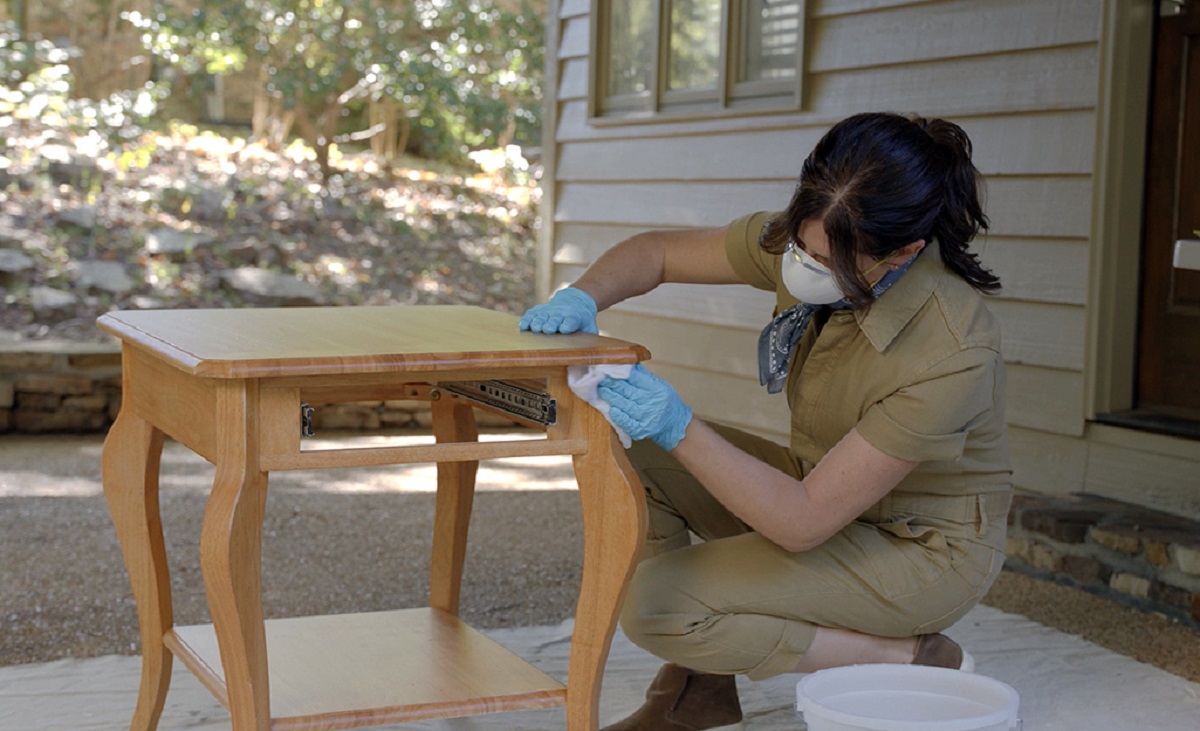
Cleaning and Sanding the Surface
Before you can start painting your veneer furniture, it’s essential to thoroughly clean and sand the surface. Properly prepping the surface ensures that the paint adheres well and creates a smooth and professional-looking finish. Here are the steps to clean and sand the surface of your veneer furniture:
- Clean the surface: Start by cleaning the furniture with a gentle cleanser and warm water. Avoid using harsh chemicals that can damage the veneer. Use a soft cloth or sponge to gently wipe down the surface, removing any dirt, dust, or residue. Pay extra attention to areas that are prone to build-up, such as corners and edges. Rinse the furniture with clean water and allow it to dry completely before proceeding.
- Remove any stubborn stains: If there are stubborn stains on the surface of the veneer, you can use a mild detergent or a mixture of water and vinegar to remove them. Apply the cleaning solution to a soft cloth or sponge and gently scrub the stained area. Rinse the furniture with clean water and dry it thoroughly.
- Sand the surface: Sanding the veneer is crucial for creating a rougher texture that allows the paint to adhere better. Use a fine-grit sandpaper (around 220-grit) and sand the entire surface in a circular motion. This will help remove any existing finish, smooth out imperfections, and create tiny scratches that enhance paint adhesion. Be gentle and avoid applying too much pressure to prevent damaging the veneer.
- Pay attention to edges and corners: Be sure to sand the edges and corners of the furniture as well. These areas tend to have a thin layer of veneer and may require extra attention. Use a sanding block or your fingers to carefully sand these areas, ensuring they are smooth and free of any roughness.
- Wipe away dust: After sanding, wipe away the dust and debris using a clean, dry cloth or a tack cloth. Make sure to remove all traces of sanding residue, as they can affect the paint finish.
- Inspect the surface: Take a moment to inspect the sanded surface for any rough patches, scratches, or remaining blemishes. If you notice any imperfections, you can gently sand those areas again to achieve a smooth and even surface.
Cleaning and sanding the surface of your veneer furniture is a vital part of the preparation process. It ensures that the paint adheres properly and creates a flawless and long-lasting finish. By taking the time to clean and sand your furniture’s surface, you’ll be on your way to achieving professional-looking results with your painted veneer furniture.
Applying Primer
After cleaning and sanding the surface of your veneer furniture, the next crucial step is to apply a primer. Primer creates a smooth and even base for the paint, helps the paint adhere better, and enhances the durability of the finished surface. Here’s how to properly apply primer to your veneer furniture:
- Choose the right primer: Look for a high-quality primer that is specifically designed for use on smooth surfaces like veneer. There are primers available that are specifically formulated to promote adhesion to challenging surfaces such as laminate or veneer. These primers are often labelled as “bonding primers” or “adhesion primers.” Selecting the right primer will ensure that it bonds well to the surface and provides optimal results.
- Prepare your workspace: Before you start priming your furniture, make sure your workspace is well-ventilated. Open windows or use fans to ensure proper airflow, especially if you’re working indoors. Lay down a drop cloth or old sheets to protect the surrounding area from any accidental spills or drips. Place your furniture on top of the protective covering.
- Stir the primer: Before applying the primer, stir it thoroughly using a stirring stick or a paint mixing tool. This will help to ensure that the primer is well-mixed and ready for application.
- Apply the primer: Start by using a high-quality brush or a foam roller to apply the primer to the veneer surface. Begin with smaller sections and work your way across the furniture, ensuring even coverage. Apply the primer in thin, even coats, following the grain of the veneer. Avoid applying the primer too thickly, as it may result in a less smooth finish. Allow the primer to dry according to the manufacturer’s instructions.
- Sand between coats: If your primer requires multiple coats for optimal coverage, lightly sand the surface between each coat. Use a fine-grit sandpaper or sanding block and gently sand the dried primer to smooth out any imperfections and create a smooth surface for the next coat. Wipe away any dust with a clean, dry cloth or a tack cloth before applying the next coat.
- Inspect for complete coverage: Once you have applied the desired number of primer coats, allow the final coat to dry completely. Inspect the surface for complete coverage and make any necessary touch-ups if you notice any areas that need additional primer. Take your time to ensure that the entire veneer surface is evenly coated.
Priming your veneer furniture is an essential step that helps to ensure a successful painting project. The primer creates a smooth and durable base for the paint, providing better adhesion and promoting a long-lasting finish. By following these steps, you’ll be on your way to achieving a professional-looking result with your painted veneer furniture.
Choosing the Right Paint Technique
When it comes to painting veneer furniture, selecting the right paint technique is essential for achieving a smooth and professional finish. Different techniques can yield different results, so it’s important to consider the size, shape, and design of your furniture, as well as your personal preference. Here are some popular paint techniques to consider:
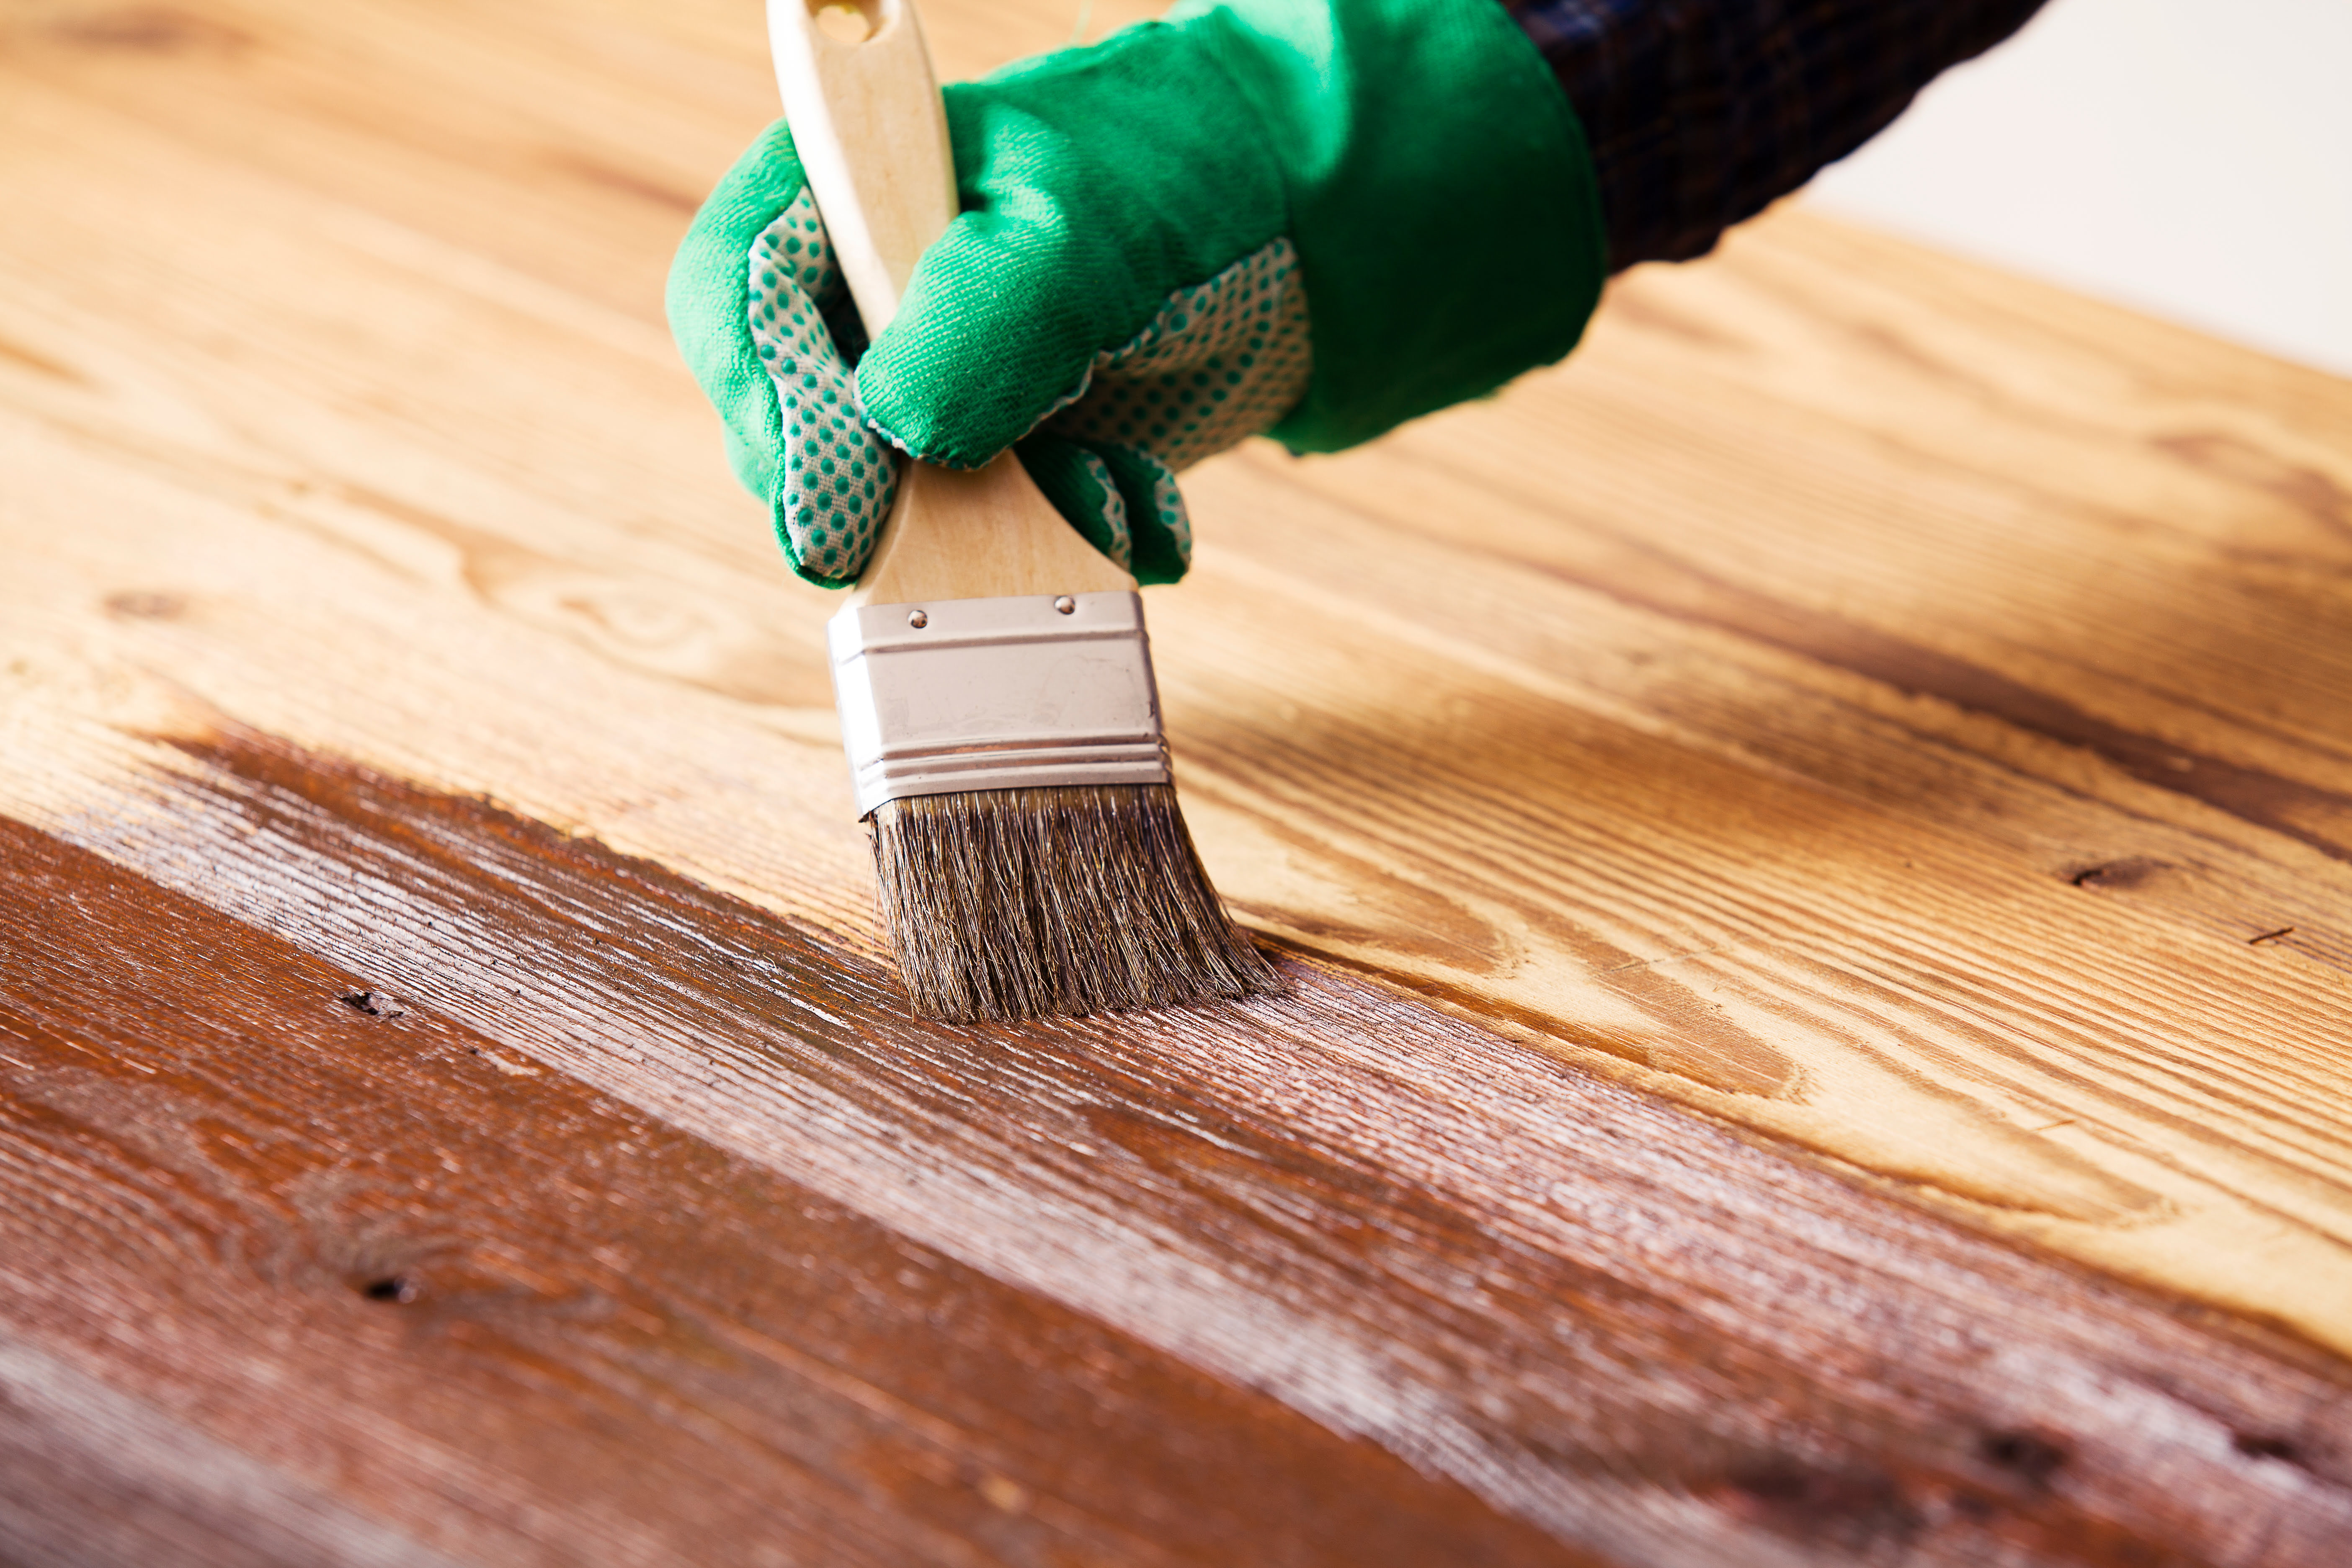
- Brush Painting: Brush painting is a traditional and versatile technique that allows for greater control over the paint application. Use a high-quality synthetic brush with a smooth bristle to ensure even coverage. Begin by applying the paint in the direction of the wood grain with long, smooth strokes. Work in small sections, and ensure that there are no visible brush marks or streaks. If you notice any imperfections or brush marks, lightly sand the area and apply an additional coat of paint.
- Spray Painting: Spray painting is a popular technique for larger pieces of veneer furniture or items with intricate designs. It provides a smooth and even finish and allows for quick application. When using a spray paint, make sure to select one specifically designed for furniture and follow the manufacturer’s instructions for optimal coverage. Spray in a well-ventilated area or outdoors, using even and overlapping strokes to achieve an even coat. Be mindful of overspray and protect surrounding surfaces or areas you don’t wish to paint.
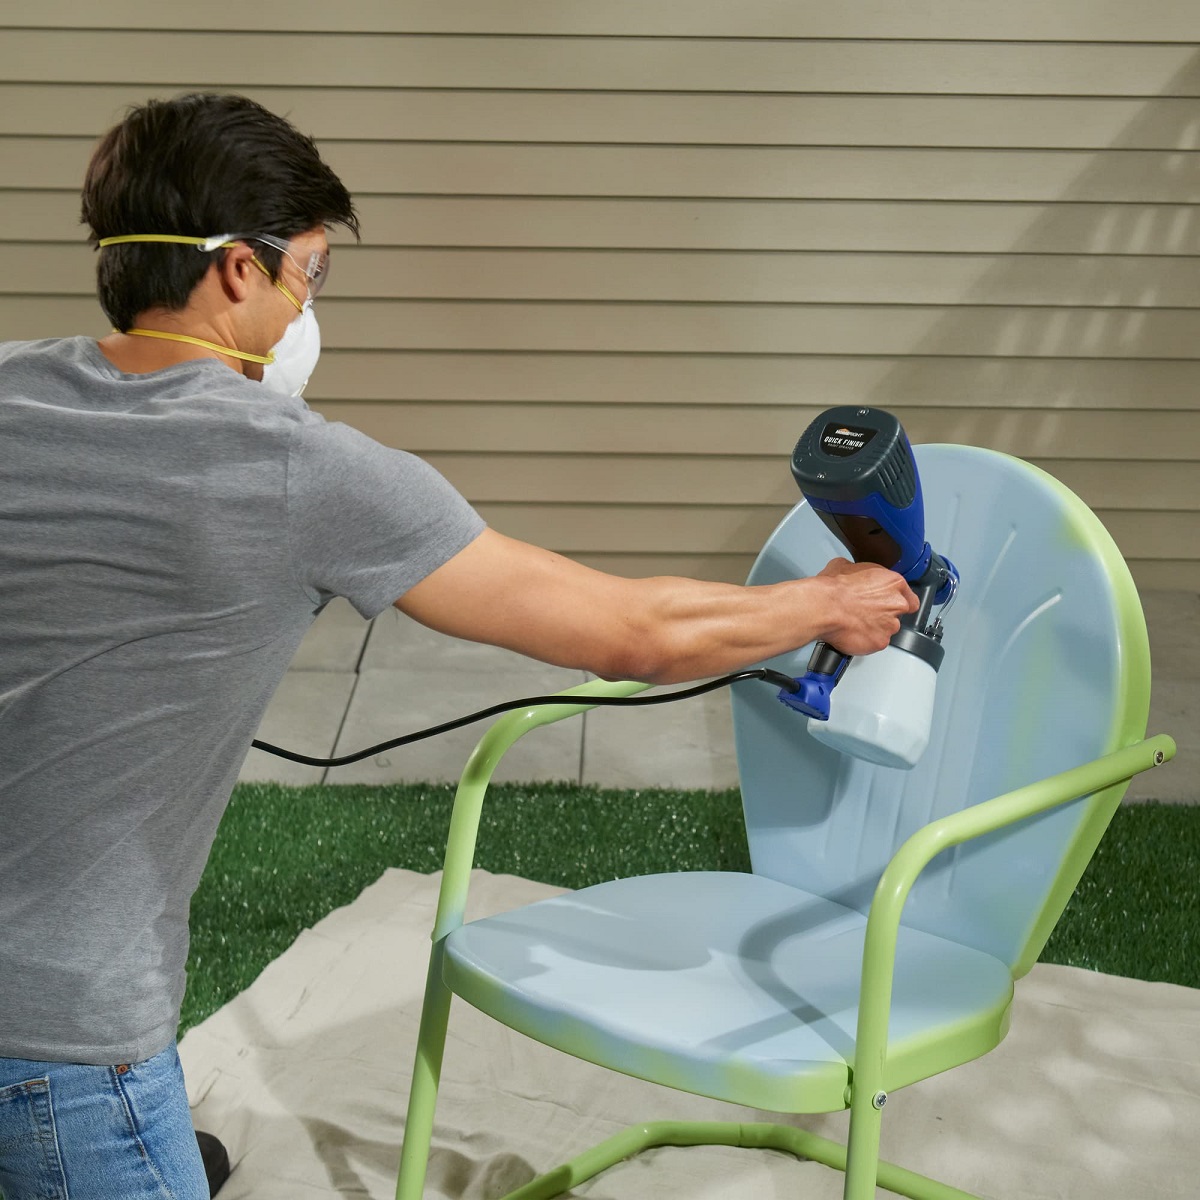
- Using a Paint Sprayer: If you have access to a paint sprayer, it can be a time-saving and efficient option for painting veneer furniture. Paint sprayers provide a smooth and professional finish without the need for brushing or rolling. Make sure to choose a sprayer that is suitable for furniture painting and follow the manufacturer’s instructions for setup and application. It’s important to practice using the sprayer on a test surface before applying it to your furniture to ensure you achieve the desired results.
- Ragging or Sponging Technique: For a more textured or distressed look, you can consider using the ragging or sponging technique. This technique involves applying paint with a rag or sponge, creating a unique and textured finish. Dip a clean rag or sponge into the paint and gently dab or roll it onto the surface in a random pattern. This technique adds depth and character to your furniture and can be especially effective if you want to achieve a vintage or rustic look.
- Combining Techniques: Don’t be afraid to mix and match paint techniques to achieve the desired effect. For example, you can use brush painting for larger areas and then use a sponge or ragging technique to add texture or accents. Experimenting with different techniques can give your furniture a unique and personalized look.
Each technique has its benefits and can create different effects on veneer furniture. Consider the size and style of your furniture, as well as the look you want to achieve, to determine the best paint technique for your project. Remember to practice and test the technique on a small area before applying it to the entire surface.
Choosing the right paint technique is key to achieving a beautiful, professional result with your painted veneer furniture. Whether you opt for brush painting, spray painting, using a paint sprayer, or experimenting with textured techniques, with a little practice and attention to detail, you can transform your veneer furniture into a stunning and customized piece that enhances your living space.
Before painting veneer furniture, make sure to clean and sand the surface thoroughly to ensure the paint adheres properly. Use a high-quality primer to prevent the veneer from showing through the paint.
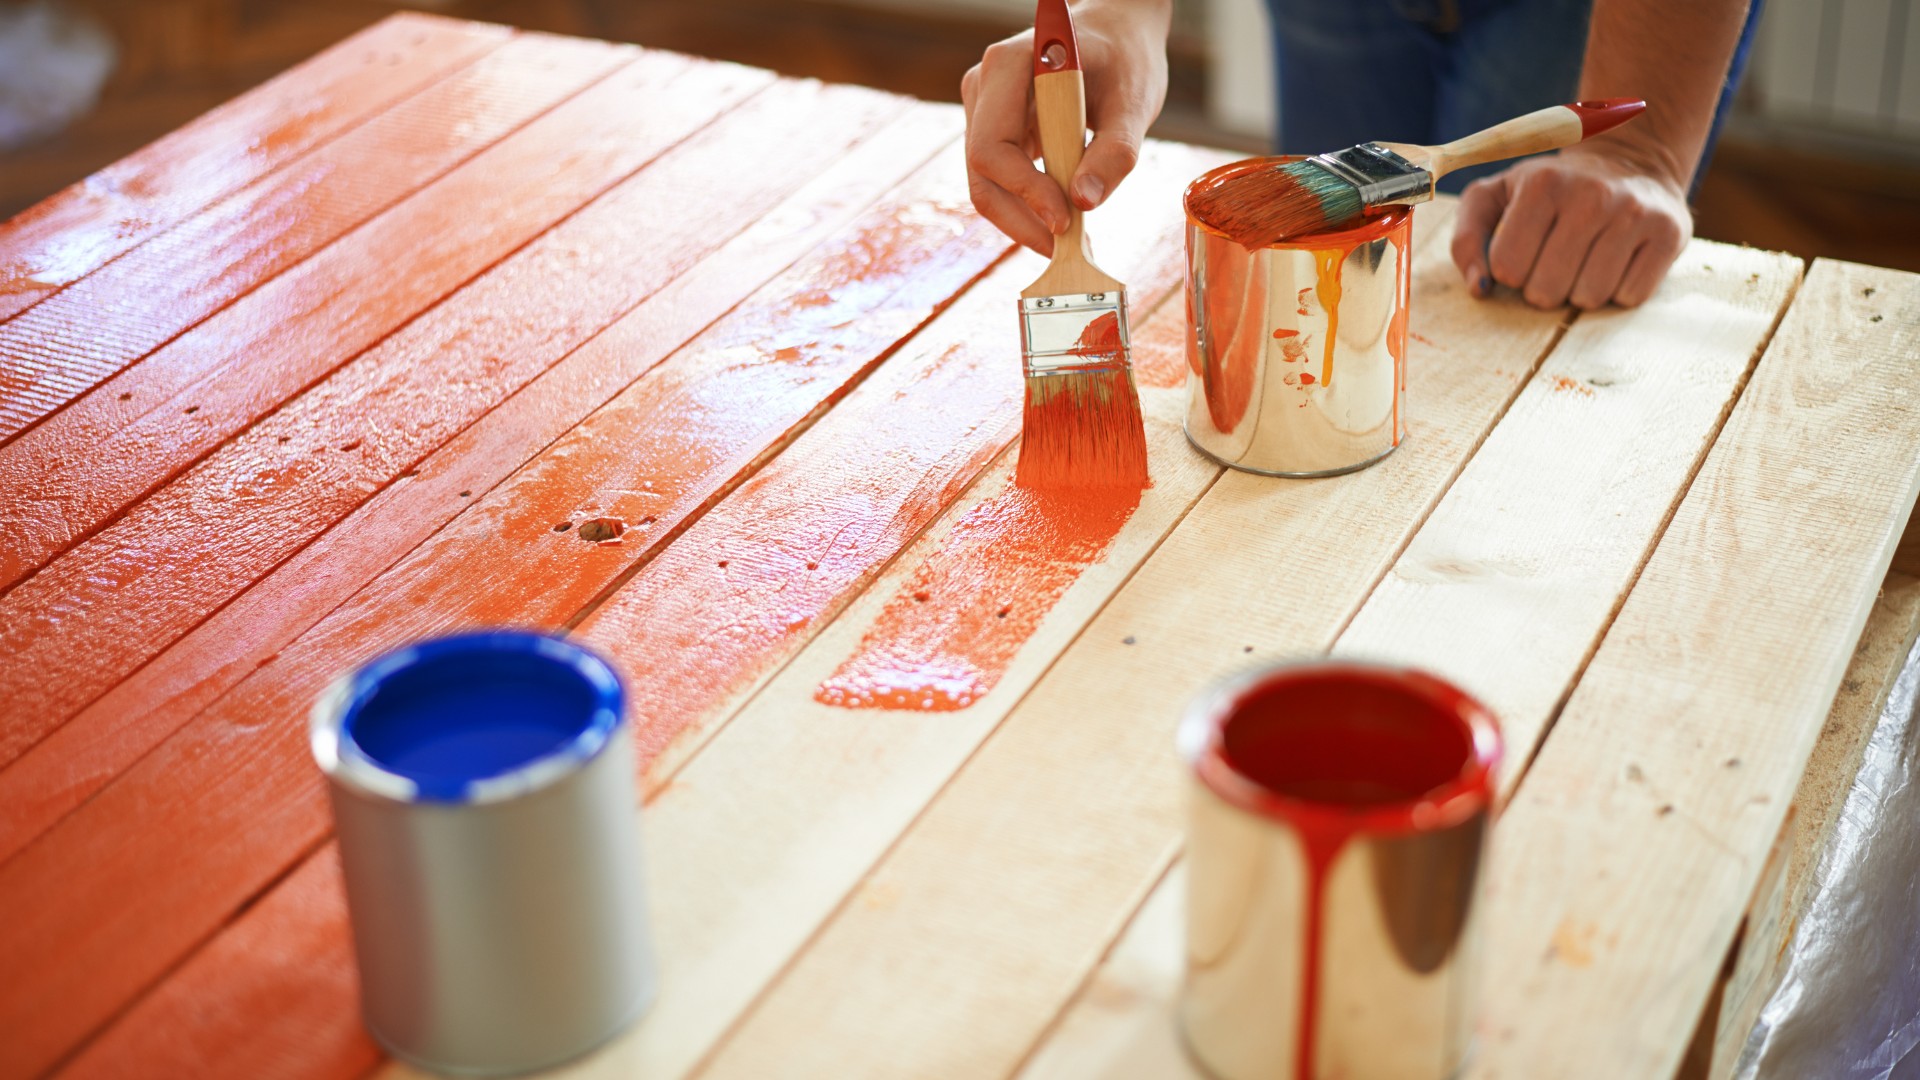
Applying the Paint
After properly preparing the surface and choosing the right paint technique, it’s time to apply the paint to your veneer furniture. Applying the paint correctly is crucial for achieving a smooth and professional-looking finish. Here are some steps to follow when applying the paint to your veneer furniture:
- Prepare your workspace: Set up a clean and well-ventilated area for painting. Lay down a drop cloth or old sheets to protect the surrounding area from any paint drips or spills. Make sure you have all your materials, including the paint, brushes, or other tools, easily accessible.
- Stir the paint: Before you begin, stir the paint thoroughly using a stirring stick or a paint mixing tool. This ensures that the color is evenly distributed throughout the paint and helps to achieve consistent results.
- Start with a primer coat: If you have already applied a primer to your veneer furniture, you can skip this step. However, if you haven’t, it’s recommended to apply a thin and even coat of primer to ensure better paint adhesion and a more durable finish. Allow the primer to dry completely before moving on to the paint application.
- Apply the paint in thin coats: Start by applying a thin coat of paint to the veneer surface. Use a high-quality brush, foam roller, or paint sprayer, depending on the technique you chose. Begin at one end of the furniture and work your way across, following the grain of the veneer. Apply the paint evenly and smoothly, avoiding heavy brushstrokes or drips. If using a roller or paint sprayer, maintain a consistent speed to ensure an even application.
- Work in sections: Depending on the size of your furniture, it’s often best to work in smaller sections to maintain better control and achieve thorough coverage. Paint one area at a time, completing it before moving on to the next. This helps to prevent the paint from drying too quickly and allows you to focus on achieving an even finish on each section.
- Smooth out any brush marks: If you notice any brush marks or imperfections in the paint coat, use a brush with a light touch or a foam roller to gently smooth them out. Work quickly and lightly to avoid removing too much paint or creating new marks. Pay attention to any decorative details or corners that may require extra care.
- Allow the paint to dry: Follow the drying time instructions provided by the paint manufacturer. Typically, water-based paints dry faster than oil-based paints. It’s essential to allow each coat to dry fully before applying additional coats or completing any touch-ups. This ensures a durable and professional-looking finish.
Remember to take your time and work patiently when applying the paint to your veneer furniture. Applying thin coats and allowing each coat to dry before proceeding will help you achieve a smoother and more even finish. With proper technique and attention to detail, you can create a beautiful and professional-looking painted surface on your veneer furniture.
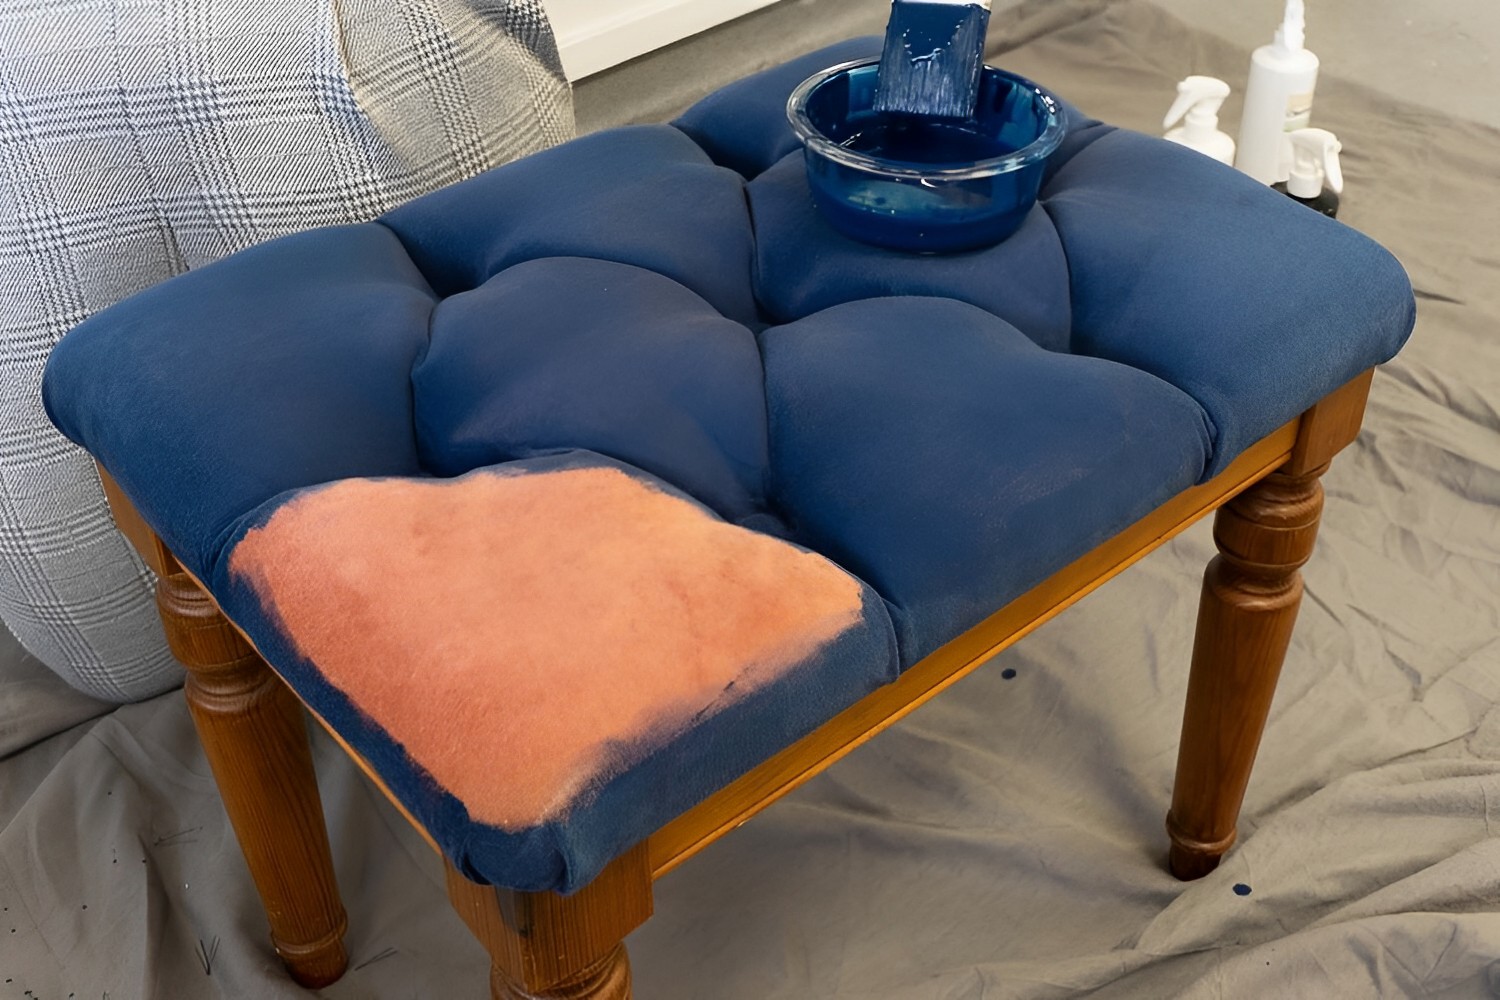
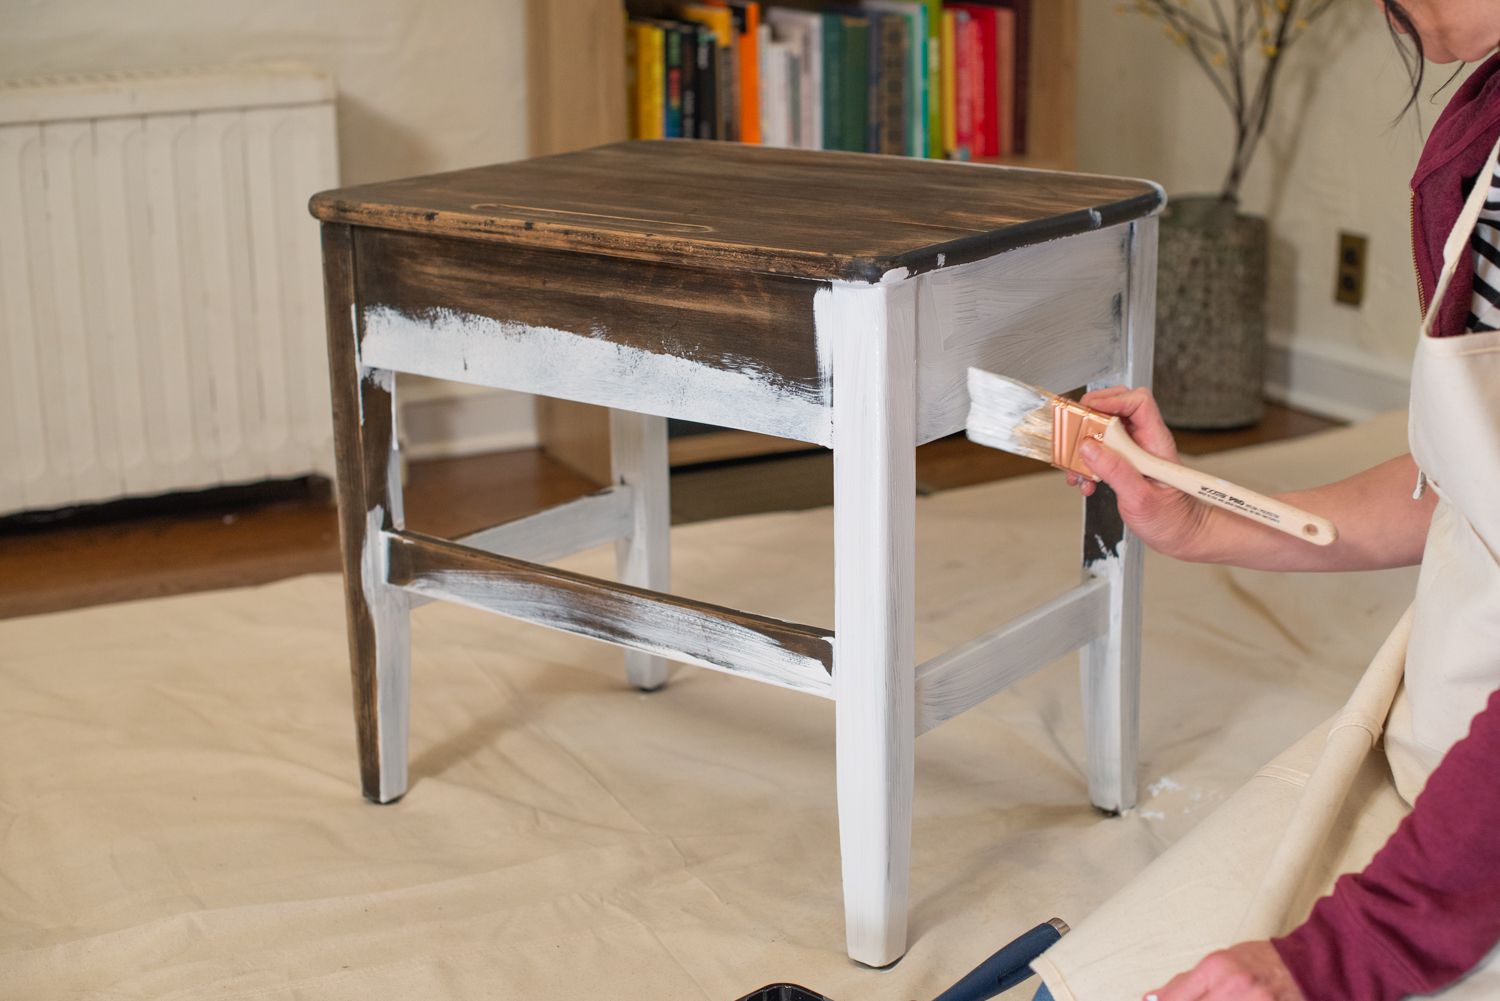
Applying a Second Coat
After the first coat of paint has dried completely, applying a second coat is an important step to ensure full coverage and a more durable finish on your veneer furniture. Adding a second coat of paint helps to enhance the color, hide any imperfections or streaks, and create a more professional-looking result. Here’s how to apply a second coat of paint to your veneer furniture:
- Inspect the first coat: Before applying the second coat, take a close look at the first coat of paint. Look for any areas where the coverage may be uneven or where you can see the underlying surface. Take note of any imperfections or brush marks that you may want to address before proceeding.
- Prepare the surface: If you notice any rough spots or imperfections from the first coat, lightly sand those areas using a fine-grit sandpaper. Wipe away any dust with a clean, dry cloth or a tack cloth. This step helps to create a smoother surface and allows the second coat of paint to adhere better.
- Apply the second coat: Using the same painting technique as before, apply the second coat of paint to your veneer furniture. Start at one end and work your way across, ensuring even coverage and following the grain of the veneer. Use a high-quality brush, foam roller, or paint sprayer, depending on the technique you chose. Apply the paint in thin, even coats, avoiding heavy brushstrokes or drips.
- Cover any remaining imperfections: As you apply the second coat, pay special attention to any areas where the first coat may have left streaks or uneven coverage. Use a light touch to smooth out any brush marks or imperfections that you notice. Blend the second coat seamlessly with the first to create a consistent and flawless finish.
- Allow the paint to dry: Once you have applied the second coat, allow it to dry completely according to the drying time instructions provided by the paint manufacturer. It’s important to be patient and give the paint ample time to dry before adding any further coats or performing any touch-ups. This ensures that the paint cures properly and the finish is long-lasting.
Applying a second coat of paint to your veneer furniture helps to improve the overall appearance and durability of the painted surface. By closely inspecting and addressing any imperfections from the first coat and ensuring even coverage with the second coat, you’ll achieve a professional-looking finish that enhances the beauty of your furniture.
Remember to follow the drying time instructions provided by the paint manufacturer between coats and allow the paint to cure fully before using or handling your furniture. Taking the time to apply a second coat of paint will significantly enhance the final result and ensure that your veneer furniture looks stunning for years to come.
Allowing the Paint to Dry
After applying the final coat of paint to your veneer furniture, it’s crucial to allow the paint to dry fully before using or handling the piece. Proper drying time ensures that the paint cures properly, resulting in a durable and long-lasting finish. Here are some important considerations when it comes to allowing the paint to dry on your veneer furniture:
- Follow the manufacturer’s instructions: Different paints have varying drying times, so it’s important to follow the specific drying time recommendations provided by the paint manufacturer. Read the label or product description carefully to determine the recommended drying time for the paint you’re using.
- Create a well-ventilated area: To aid in the drying process, it’s crucial to provide proper ventilation. Open windows or use fans to increase air circulation in the room. This helps to speed up drying time and prevent any lingering moisture that could affect the paint’s integrity.
- Avoid touching or moving the furniture: While it may be tempting to touch or move the furniture to check if the paint is dry, it’s important to resist the urge. Touching the paint too soon can leave marks or impressions, resulting in an imperfect finish. Even if the paint appears dry to the touch, it’s best to wait until the recommended drying time has elapsed to ensure that the paint has fully cured.
- Consider temperature and humidity: Temperature and humidity can affect the drying time of paint. Warmer temperatures and lower humidity levels generally promote faster drying. If the weather is cold or humid, it may take longer for the paint to dry. It’s best to paint in moderate temperature and humidity conditions to ensure optimal drying.
- Patience is key: Waiting for paint to dry can be an exercise in patience, but it is crucial for achieving a flawless finish. Rushing the drying process can lead to smudging, smearing, or other imperfections. Give the paint ample time to dry according to the manufacturer’s instructions, and you’ll be rewarded with a beautifully dry and cured surface.
Keep in mind that drying times can vary depending on different factors such as paint type, thickness of paint layers, and environmental conditions. It’s always better to allow for slightly longer drying times to ensure that the paint has fully cured before using or handling the furniture.
By allowing the paint to dry properly, you give your veneer furniture the best chance at achieving a durable and flawless finish. Take the time to be patient, follow the manufacturer’s instructions, and create the ideal drying environment. Your patience will pay off when you can enjoy a beautifully painted and fully dried veneer piece that adds charm and character to your home.
Read more: How To Paint Furniture With Chalk Paint
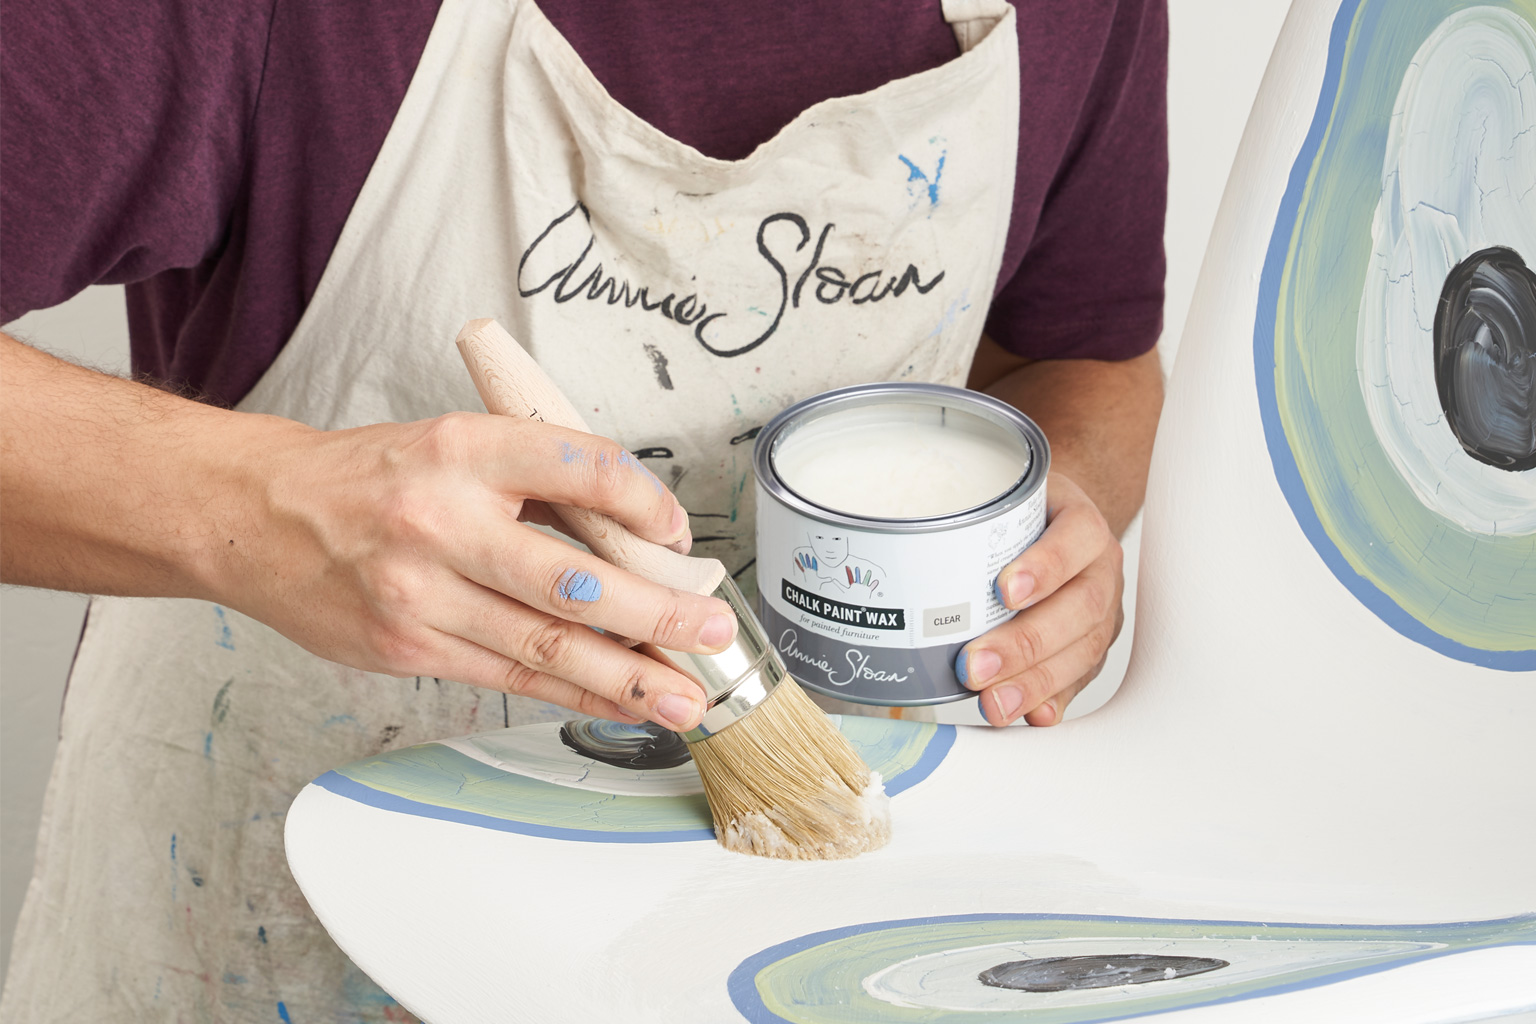
Sealing the Paint
Sealing the paint on your veneer furniture is an important step to protect the painted surface and enhance its durability. A topcoat or sealant adds an extra layer of protection, making the paint more resistant to scratches, stains, and everyday wear and tear. Here’s what you need to know about sealing the paint on your veneer furniture:
- Choose the right sealant: There are various options for sealants, including polyurethane, polycrylic, and wax. Polyurethane and polycrylic are clear, protective coatings that provide a hard, durable finish. Wax, on the other hand, creates a softer finish and adds a slight sheen. Consider your desired level of gloss, the type of wear your furniture will endure, and your personal preference when selecting a sealant.
- Test on a small area: Before applying the sealant to the entire piece of furniture, it’s important to test it on a small, inconspicuous area first. This allows you to ensure that the sealant works well with the paint and doesn’t create any adverse effects, such as yellowing or bubbling.
- Follow the manufacturer’s instructions: Each sealant product has specific application instructions, including drying time and recommended number of coats. Read the instructions carefully and follow them precisely to achieve the best results. Some sealants may require sanding between coats, while others may not. Always allow for adequate drying time between each coat.
- Apply the sealant evenly: Use a high-quality brush or a foam applicator to apply the sealant evenly to the painted surface. Work in thin layers, following the grain of the veneer. Avoid over-brushing or applying excessive amounts of sealant, as this can lead to streaks or a cloudy finish. Keep an eye out for any drips or bubbles and smooth them out immediately.
- Sand between coats (if necessary): Depending on the sealant you choose, you may need to lightly sand the surface between coats. This helps to create a smoother finish and allows for better adhesion of subsequent coats. Use a fine-grit sandpaper and be gentle to avoid damaging the paint layers. After sanding, wipe away any dust before applying the next coat.
- Allow for sufficient drying time: Finally, be patient and allow the sealant to dry fully before using or placing objects on the furniture. Drying times can vary depending on the product and environmental conditions. Follow the manufacturer’s instructions for the recommended drying time and avoid any premature use or contact with the furniture.
Sealing the paint on your veneer furniture provides an extra layer of protection and helps to extend the life of the painted surface. It also makes the furniture easier to clean and maintain. By selecting the appropriate sealant and following the application instructions carefully, you can ensure that your painted veneer furniture remains beautiful and resilient for years to come.
Remember, proper sealing not only enhances the visual appeal of your furniture but also adds an extra layer of protection against daily wear and tear. Take the time to seal the paint, and you’ll be rewarded with a long-lasting and stunning finished piece that elevates the overall look of your space.
Conclusion
Painting veneer furniture is a fantastic way to breathe new life into old or worn-out pieces and transform them into stunning focal points in your home. By following the proper steps and techniques, you can achieve a professional-looking finish that enhances the beauty of your furniture and reflects your personal style. Here’s a summary of the key points to remember when painting veneer furniture:
- Prepare the surface: Inspect the furniture for any damage and make necessary repairs. Clean and sand the veneer to create a rougher surface for paint adhesion.
- Choose the right paint: Opt for paints specifically designed for furniture and smooth surfaces like veneer. Consider factors such as water-based vs. oil-based, finish, color, and quality to achieve the desired result.
- Apply the paint with care: Use the appropriate technique, whether it’s brush painting, spray painting, or other methods, to ensure smooth and even coverage. Work in thin coats and allow for proper drying time between coats.
- Seal the paint: Apply a sealant to protect the painted surface and increase its durability. Choose the right type of sealant for your desired level of gloss and follow the manufacturer’s instructions for application.
Throughout the entire process, remember to be patient and take your time. Proper preparation, paint selection, and application techniques are vital for achieving the best results. Keep in mind that each project is unique, so don’t be afraid to experiment and create a customized look that suits your taste and style.
Taking on the task of painting veneer furniture can be a rewarding endeavor. It allows you to unleash your creativity, revive worn-out pieces, and save money by giving new life to existing furniture. With careful attention to detail and a thoughtful approach, you can transform your veneer furniture into stunning, one-of-a-kind pieces that add charm and personality to your living space.
Remember, painting veneer furniture requires skill, patience, and attention to detail. If you’re unsure or uncomfortable with the process, it’s always a good idea to seek the assistance of a professional or experienced painter. They can provide guidance and ensure that your veneer furniture receives the care and attention it deserves.
So why wait? Get started on your veneer furniture painting project and unlock the potential of your cherished pieces. With proper preparation, the right painting techniques, and careful attention during each step, you can achieve remarkable results that will leave you proud and satisfied with your stunningly painted veneer furniture.
Now that you've mastered painting veneer furniture, why not broaden your skills with some unique styles? Dive into our guide on Painting Techniques, favored by experts, and start transforming ordinary pieces into standout items. This guide offers you an array of artistic approaches that promise to add flair to any painting project. Whether you're looking to add a sophisticated touch or a bold streak, these techniques will equip you with the creativity and know-how to make an impact. So grab your brushes, and let's get creative!
Frequently Asked Questions about How To Paint Veneer Furniture
Was this page helpful?
At Storables.com, we guarantee accurate and reliable information. Our content, validated by Expert Board Contributors, is crafted following stringent Editorial Policies. We're committed to providing you with well-researched, expert-backed insights for all your informational needs.


0 thoughts on “How To Paint Veneer Furniture”