Articles
How To Prep Furniture For Painting
Modified: September 2, 2024
Learn essential steps to properly prep your furniture for painting. Get expert tips and techniques to achieve a flawless finish. Transform your furniture with ease.
(Many of the links in this article redirect to a specific reviewed product. Your purchase of these products through affiliate links helps to generate commission for Storables.com, at no extra cost. Learn more)
How To Prep Furniture For Painting
Painting furniture can be a fantastic way to revitalize old or worn pieces, giving them a fresh and updated look. However, before diving into the painting process, it’s crucial to properly prepare the furniture to ensure a smooth and long-lasting finish. Here’s a step-by-step guide on how to prep furniture for painting:
Key Takeaways:
- Properly prepping furniture for painting involves thorough cleaning, sanding, repairing, priming, and applying paint in thin, even coats. Attention to detail and patience are essential for achieving professional-looking results.
- Adding a protective finish and reassembling the furniture, if necessary, completes the transformation process. The effort put into prepping furniture for painting pays off with stunning, durable, and personalized results.
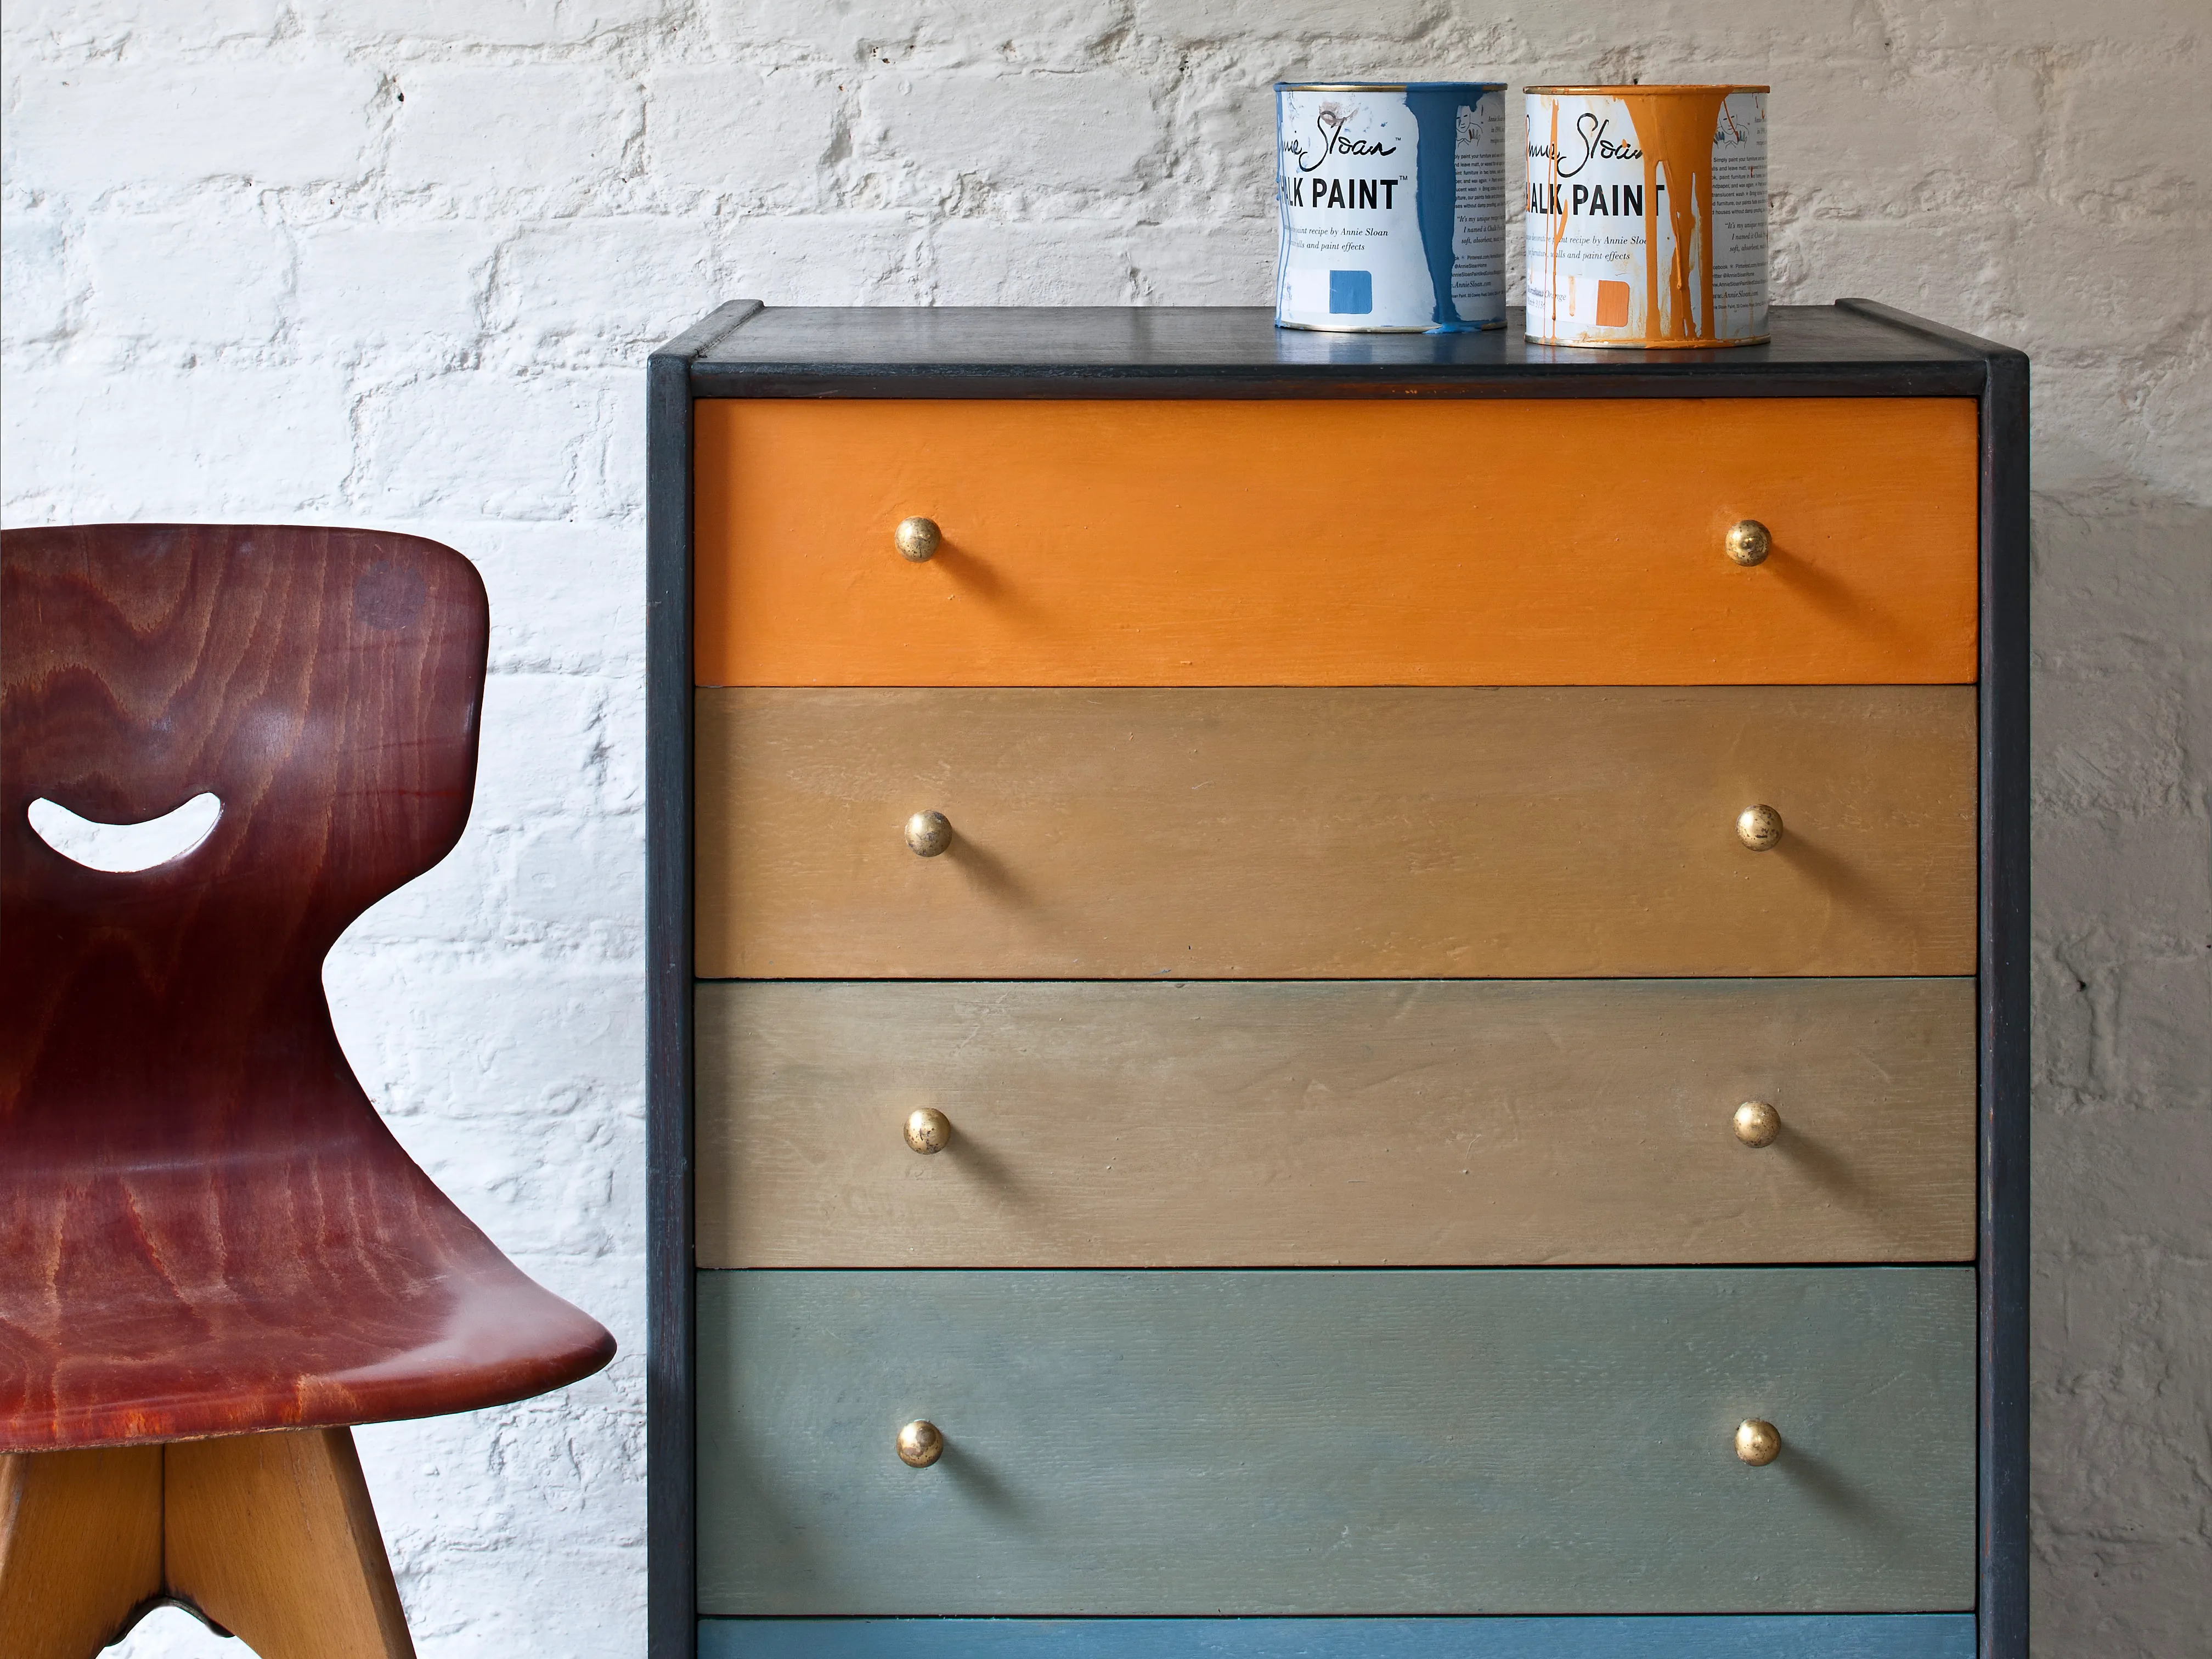
Read more: How To Paint Furniture With Chalk Paint
Step 1: Cleaning the Furniture
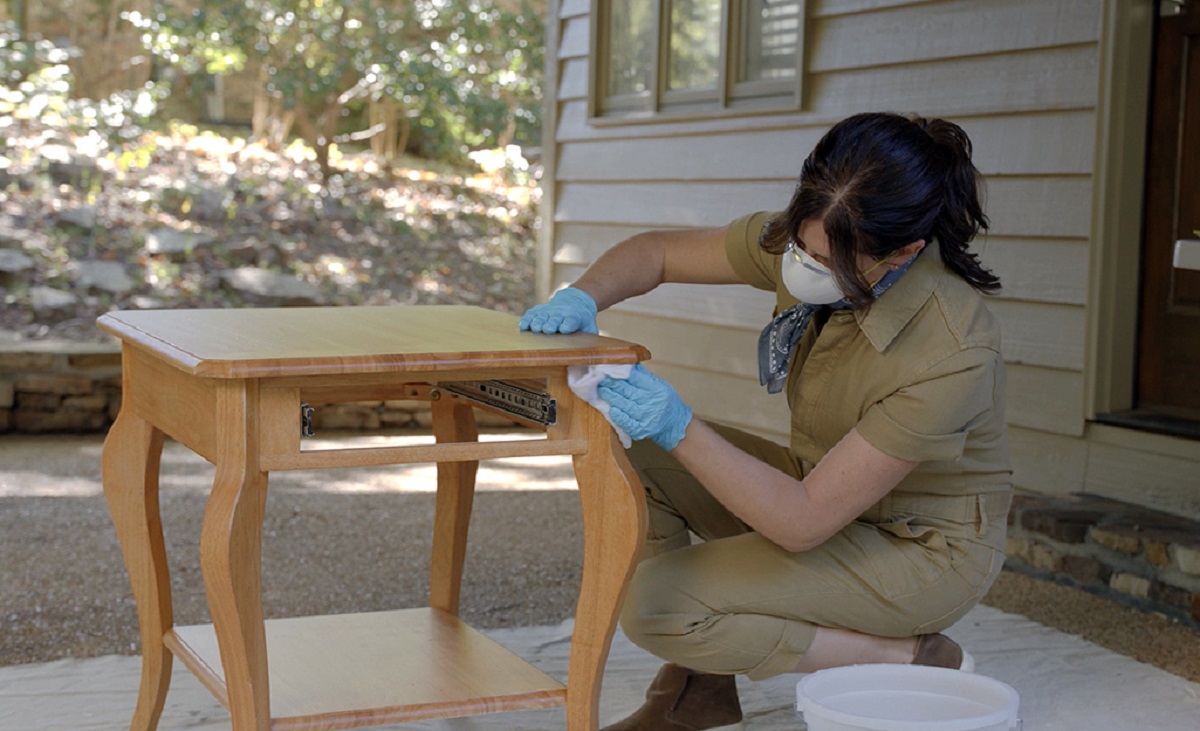
The first step in prepping furniture for painting is to thoroughly clean the surfaces. Start by removing any loose dirt and dust using a soft cloth or brush. For more extensive cleaning, you can use a mild detergent mixed with water. It’s essential to remove any grease, oil, or grime from the furniture as they can interfere with paint adhesion. Use a degreaser or a solution of equal parts water and vinegar to eliminate stubborn grease stains.
Step 2: Sanding the Furniture
Sanding the furniture is crucial for creating a smooth and even surface for the paint to adhere to. Start by choosing the right sandpaper grit. For removing old finishes or smoothing rough areas, use a coarser grit like 80 or 120. To prepare the surface for painting, use a finer grit like 220 or 320. Sand the furniture surface in the direction of the grain, applying even pressure. This will help to remove any bumps, scratches, or imperfections and promote better paint adhesion.
Step 3: Repairing Damaged Areas
Before painting, it’s essential to address any damaged areas on the furniture. Fill in cracks, holes, or dents using wood putty or a filler appropriate for the material of your furniture. Smooth out the filler with a putty knife and allow it to dry completely. For furniture with loose joints or wobbly parts, use wood glue to re-attach and reinforce them. Let the glue dry according to the manufacturer’s instructions before moving on.
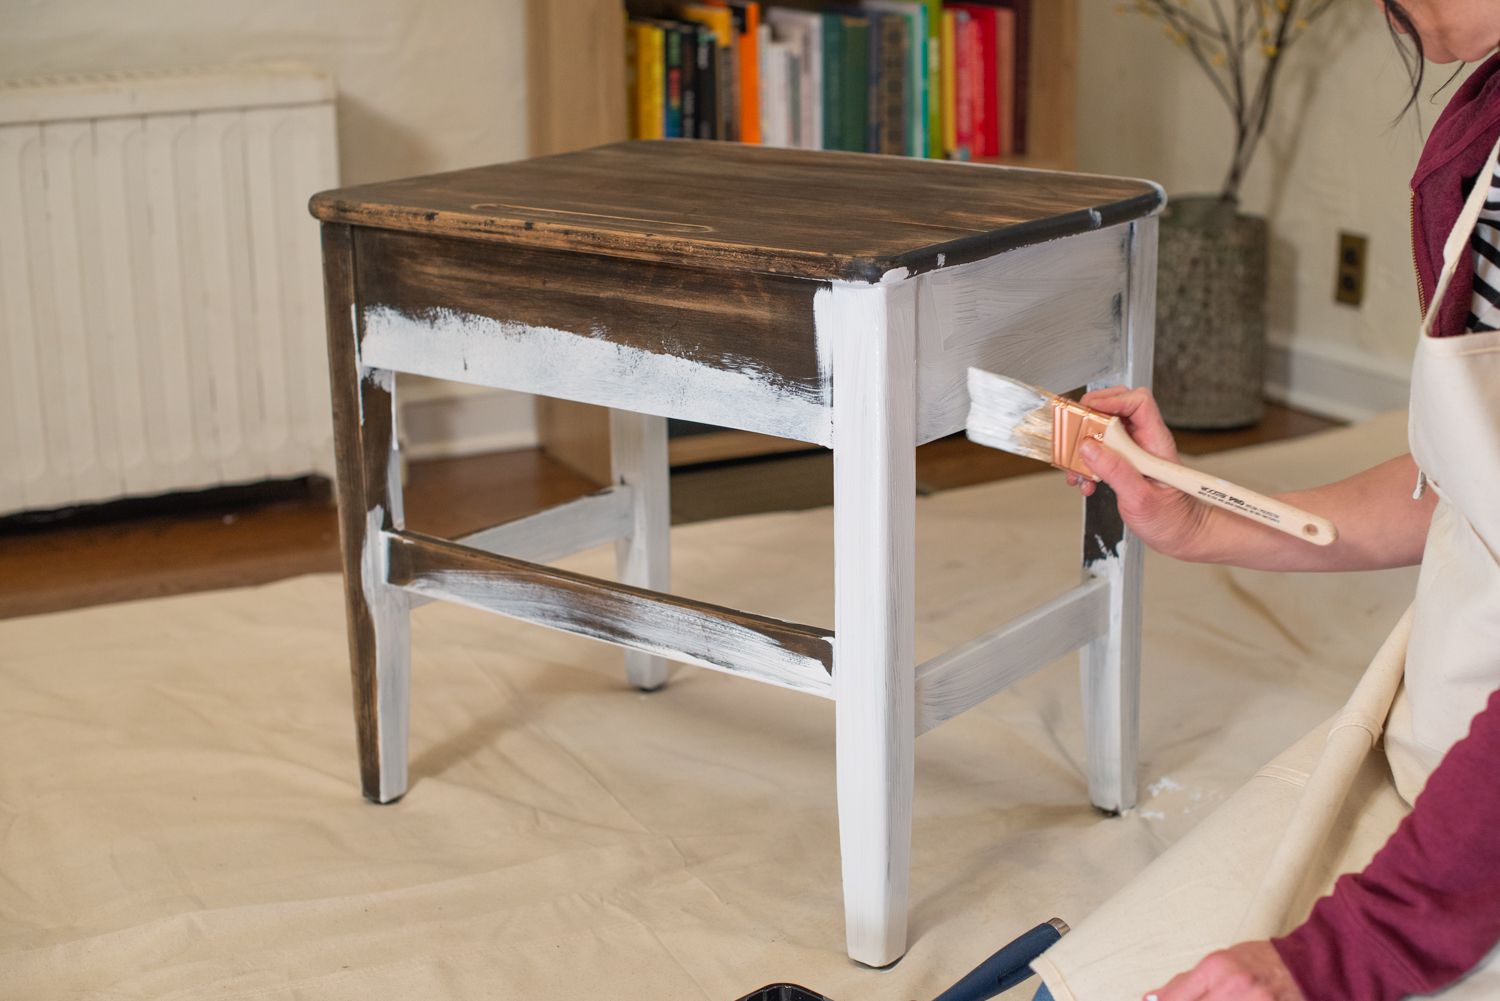
Step 4: Priming the Furniture
Priming the furniture is a crucial step to ensure proper paint adhesion and increase the durability of the final finish. Choose a primer appropriate for the type of furniture material and the paint you will be using. Apply the primer to the furniture surface using a brush or roller, ensuring even coverage. Allow the primer to dry completely before moving on to the next step.
Read more: How To Paint Fabric Furniture
Step 5: Applying Paint
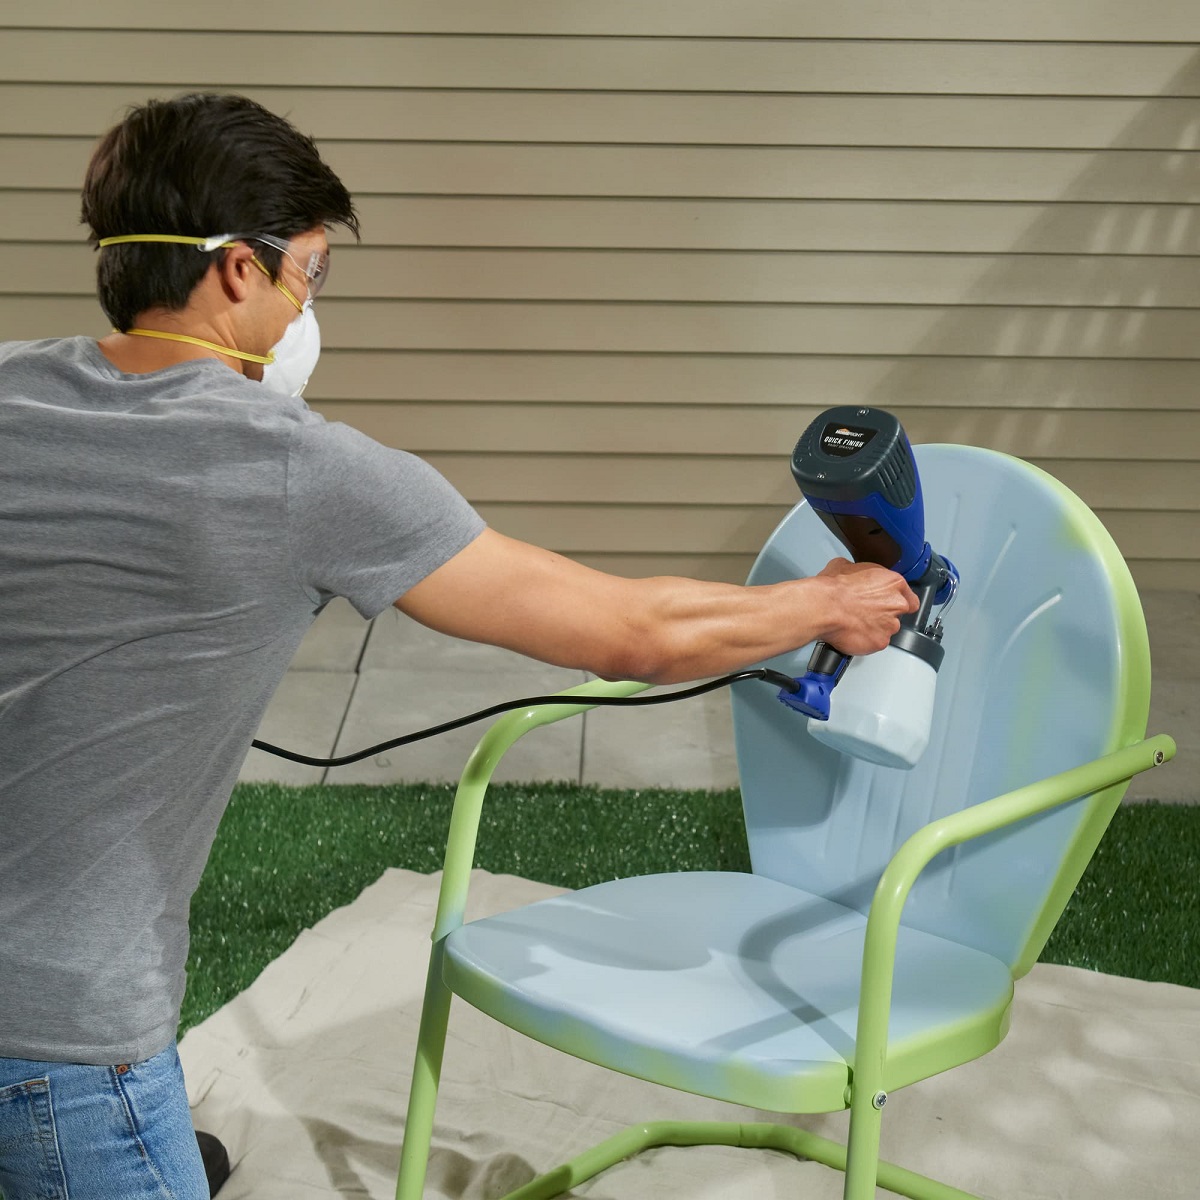
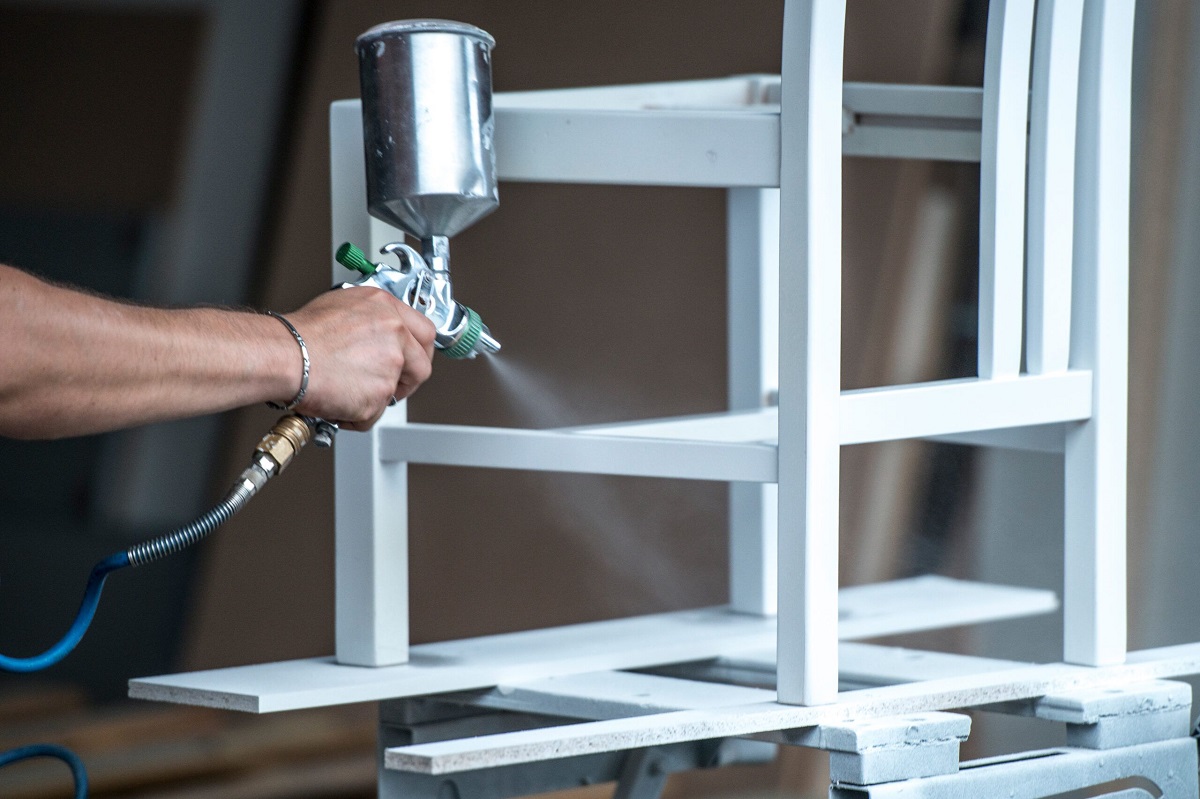
Choose a high-quality paint designed for furniture, such as latex or chalk paint. It’s best to apply multiple thin coats of paint rather than one thick coat to achieve a smooth finish. Use a brush or roller to apply the paint, following the grain of the wood. Allow each coat to dry thoroughly before applying the next one. Depending on the desired color and coverage, you may need to apply two or more coats of paint.
Step 6: Finishing Touches
After the paint has dried, you can apply a protective finish to the furniture for added durability and longevity. Choose a clear varnish, polyurethane, or wax appropriate for the type of paint you used. Apply the finish according to the manufacturer’s instructions, ensuring even coverage. This step will not only protect the paint but also provide a beautiful sheen to the furniture. If you disassembled any parts of the furniture during the prepping process, now is the time to reassemble them carefully.
Prepping your furniture properly before painting is essential for achieving professional-looking results. By following these step-by-step instructions and paying attention to detail, you can transform your furniture into stunning pieces that will stand the test of time.
Remember, take your time with each step, and don’t rush the process. The more effort you put into prepping your furniture, the better the final results will be. Happy painting!
Introduction
Painting furniture can be a creative and fulfilling way to give new life to old, worn-out pieces. Whether you’re looking to update your home decor or breathe fresh life into a thrifted find, prepping your furniture before painting is crucial for achieving professional-looking results. Proper preparation ensures that the paint adheres well, creating a durable and beautiful finish that will stand the test of time.
Prepping furniture for painting involves several essential steps, including cleaning, sanding, repairing, priming, and applying paint. Each of these steps plays a crucial role in ensuring that your furniture is ready for the painting process. By following the right techniques and using the right materials, you can transform your furniture into stunning pieces that reflect your personal style.
In this comprehensive guide, we will walk you through each step of the furniture prepping process. You’ll learn how to clean the furniture to remove dirt, grease, and grime that can interfere with paint adhesion. We’ll also teach you how to properly sand the furniture to create a smooth surface for the paint to adhere to. And if your furniture has any damaged areas, we’ll show you how to repair them to restore the structural integrity.
Furthermore, we will guide you through the priming and painting process, ensuring that you select the right products for your furniture and achieve a professional finish. Additionally, we’ll discuss the importance of applying a protective finish to increase the durability of the painted furniture and provide you with some finishing touches to complete the transformation.
Although prepping furniture for painting may seem like a time-consuming process, the results are well worth the effort. With a little patience, attention to detail, and the tips and techniques outlined in this guide, you’ll be able to transform your furniture into beautiful, custom pieces that will enhance your space and bring you joy for years to come.
So, let’s dive into the exciting world of furniture prep and painting and get ready to unleash your creativity!
Key Takeaways:
- Properly prepping furniture for painting involves thorough cleaning, sanding, repairing, priming, and applying paint in thin, even coats. Attention to detail and patience are essential for achieving professional-looking results.
- Adding a protective finish and reassembling the furniture, if necessary, completes the transformation process. The effort put into prepping furniture for painting pays off with stunning, durable, and personalized results.
Read more: How To Paint Furniture With Chalk Paint
Step 1: Cleaning the Furniture
Before you start prepping your furniture for painting, it’s essential to give it a thorough cleaning. This step ensures that the paint adheres properly and that the final finish looks smooth and professional. Cleaning the furniture involves removing dirt, dust, grease, and oil that may have accumulated over time. Here’s how you can tackle this crucial step:
Read more: How To Seal Paint On Furniture
Removing dirt and dust
Begin by using a soft cloth or brush to remove loose dirt and dust from the furniture’s surface. Gently sweep the cloth or brush over the entire piece, paying close attention to intricate details and hard-to-reach areas. If there are any crevices or grooves, you can use a small, soft-bristled brush to dislodge any stubborn dirt particles.
For a more thorough cleaning, you can mix a mild detergent with warm water. Use a sponge or soft cloth dipped in the soapy solution to wipe down the furniture. Be sure to wring out the sponge or cloth so that it’s damp but not dripping wet. As you clean, pay attention to any stains or sticky residue, working to remove them using gentle circular motions.
Once you’ve wiped down the furniture, rinse the sponge or cloth with clean water and go over the surface again to remove any soap residue. Wipe the furniture dry with a clean, dry cloth to prevent any moisture from lingering on the surface.
Removing grease and oil
Grease and oil can accumulate on furniture surfaces, particularly in kitchen or dining area pieces. To remove grease and oil stains, you can use a degreaser specifically designed for cleaning furniture. Alternatively, you can create a simple homemade solution by mixing equal parts water and vinegar.
Dip a clean cloth or sponge into the degreaser or vinegar solution and gently scrub the affected areas. Focus on any visible grease stains, taking care not to scrub too hard and damage the furniture’s finish. Depending on the severity of the grease or oil buildup, you may need to repeat this process a few times until the stains are completely removed.
After removing the grease or oil, rinse the cloth or sponge with clean water and go over the furniture again to remove any residue. Use a dry cloth to wipe the surface dry thoroughly.
By thoroughly cleaning the furniture and removing dirt, dust, grease, and oil, you create the perfect canvas for painting. This step ensures that the paint adheres evenly and prevents any debris from marring the final finish. With a clean and prepped surface, you’re ready to move on to the next step: sanding the furniture.
Step 2: Sanding the Furniture
Sanding the furniture is an essential step in prepping it for painting. Sanding creates a smooth and even surface for the paint to adhere to, resulting in a professional-looking finish. Here’s a guide on how to sand your furniture effectively:
Choosing the right sandpaper grit
The first step in sanding your furniture is selecting the appropriate sandpaper grit. The grit refers to the coarseness of the sandpaper and determines how much material it will remove from the surface. When prepping furniture for painting, you’ll typically need two different grits of sandpaper: a coarser grit for initial sanding and a finer grit for final sanding.
For initial sanding or to remove old finishes and rough areas, you’ll want to start with a coarser sandpaper, such as 80 or 120 grit. This grit will help strip away any existing paint or varnish and smooth out any imperfections. Be careful not to oversand, as it can result in uneven surfaces or damage to intricate details.
Once you’ve completed the initial sanding, switch to a finer grit sandpaper, such as 220 or 320 grit. This finer grit will smooth out any scratches left by the coarser sandpaper and prepare the surface for painting. The final sanding is crucial for achieving a polished look on your furniture.
Read more: How To Antique Paint Furniture
Sanding the surface evenly
When sanding the furniture, it’s important to maintain an even and consistent pressure as you move the sandpaper across the surface. Sand in the direction of the wood grain to prevent any damage or marks on the surface. Apply light to medium pressure, letting the sandpaper do the work. Avoid using excessive force, as it can result in uneven sanding and damage to the furniture.
Pay extra attention to the edges and corners of the furniture, as these areas are prone to have more built-up paint or varnish. Use a sanding block wrapped with sandpaper or your fingers to sand these hard-to-reach spots. This will ensure that the entire piece is evenly sanded and ready for painting.
Periodically check the sandpaper for signs of wear or clogging. If the sandpaper becomes dull or clogged with dust, replace it with fresh sandpaper. This will ensure that you have an effective sanding tool throughout the process.
After sanding, wipe away the sanding dust with a clean cloth or vacuum it using a soft brush attachment. It’s important to remove any dust particles before moving on to the next steps. This will ensure a clean surface for painting and prevent any debris from interfering with the paint adhesion.
Sanding your furniture thoroughly and evenly prepares it for the painting process. By choosing the right sandpaper grit and using proper sanding techniques, you’ll create a smooth surface that allows the paint to adhere properly. Once the sanding is complete, you’re ready to proceed to the next step: repairing any damaged areas on the furniture.
Step 3: Repairing Damaged Areas
Before moving forward with the painting process, it’s important to address any damaged areas on your furniture. Repairing these areas will ensure the structural integrity of the piece and help achieve a flawless finish. Here are the steps to repairing common issues:
Filling in cracks and holes
If your furniture has cracks or holes, it’s essential to fill them in before painting. Start by cleaning the damaged area to remove any dirt or debris. You can use a small brush or cloth to ensure the surface is clean and dry.
For small cracks or holes, you can use wood filler or putty. Choose a filler that matches the color of your furniture or opt for a natural wood tone. Using a putty knife or a spatula, apply the filler into the crack or hole, ensuring the surface is completely filled. Smooth out the filler with the putty knife, removing any excess, and create a level surface. Allow the filler to dry as per the manufacturer’s instructions.
If the damaged area is larger or more significant, you may need to use wood glue and clamps. Apply the wood glue to the edges of the crack and press the pieces together firmly. Secure the glued area with clamps and allow the glue to dry completely. Once dry, you can sand the repaired area gently to create a smooth surface.
Fixing loose joints
If your furniture has loose joints or wobbly parts, it’s crucial to fix them before painting. Loose joints can affect the stability and longevity of your furniture. To fix them, you’ll need wood glue and a clamp.
Start by cleaning the joint area to remove any dust or debris. Apply a liberal amount of wood glue to the joint, ensuring that it’s evenly distributed. Press the joint together firmly and secure it with a clamp. Make sure the clamp is tight enough to hold the pieces together but not too tight to squeeze out all the glue. Wipe off any excess glue with a damp cloth. Allow the glue to dry completely before removing the clamp.
Once the glue has dried, check the joint to ensure it’s secure. If necessary, you can reinforce the joint with screws or nails for added stability. Fill in any visible holes left by the screws with wood filler and sand the area smooth.
By repairing any cracks, holes, or loose joints, you’ll ensure that your furniture is structurally sound before applying the paint. These repairs not only improve the functionality of the piece but also contribute to a flawless and professional-looking finish. Once the repairs have been made, you’re ready to move on to the next step: priming the furniture.
Step 4: Priming the Furniture
Priming the furniture is an important step in the prepping process that prepares the surface for the paint application. Priming allows for better paint adhesion, enhances the durability of the finish, and helps achieve a smooth and professional look. Here’s what you need to know about priming your furniture:
Choosing the right primer
When selecting a primer for your furniture, it’s important to consider the type of material you’re working with and the type of paint you’ll be using. There are various types of primers available, including ones specifically designed for wood, metal, or plastic surfaces. Choose a primer that is compatible with the material of your furniture and appropriate for the paint type you plan to use.
If you’re painting over a surface that has stains or discoloration, it’s recommended to use a stain-blocking primer. This type of primer helps to prevent the stains from bleeding through the paint, ensuring a clean and even finish.
Additionally, consider using a primer with a high adhesion or bonding properties if your furniture has a slick or glossy surface. This type of primer helps the paint adhere better to smooth surfaces, providing better coverage and durability.
Applying primer to the surface
Before applying the primer, make sure the surface of the furniture is clean and dry. Remove any dust or debris using a soft cloth or brush. If needed, you can lightly sand the surface with fine-grit sandpaper to ensure better adhesion of the primer.
Next, pour the primer into a paint tray or container. Dip a high-quality brush or foam roller into the primer, making sure to coat the bristles or roller evenly. Start applying the primer to the furniture’s surface, working in smooth, even strokes in the direction of the wood grain. Pay attention to any intricate details or hard-to-reach areas, ensuring they are properly covered.
Apply the primer with a thin and even layer, avoiding excessive buildup. This will prevent drips or uneven texture in the final finish. If needed, you can apply a second coat of primer after the first coat has dried completely. Follow the manufacturer’s instructions for drying times between coats.
After applying the primer, allow it to dry thoroughly. The drying time will vary depending on the type of primer you’re using, so refer to the product’s label for guidance. Once the primer is dry, you’re ready to move on to the exciting part: applying the paint to transform and rejuvenate your furniture.
By applying a primer, you’re ensuring that the paint adheres better to the furniture’s surface, creating a long-lasting and professional finish. The primer also helps to block any stains and provides a base for the paint color to appear more vibrant. With the primer applied, you’re now ready to bring your furniture to life with a fresh coat of paint.
Read more: How To Paint Fabric Furniture
Step 5: Applying Paint
Now that you have prepped and primed your furniture, it’s time to apply the paint. Choosing the right paint and applying it properly will ensure a beautiful finish that transforms your furniture. Here’s what you need to know about applying paint to your prepped furniture:
Read more: How To Paint Furniture Black
Choosing the right paint
When it comes to selecting paint for your furniture, there are a few factors to consider. First, determine the type of paint that best suits your needs. Latex paint is popular for its easy application, quick drying time, and low odor. Chalk paint is another popular choice, as it provides a matte, vintage finish. Oil-based paints are more durable and offer a smooth finish, but they have a longer drying time and require proper ventilation when used.
Consider the color and finish you desire for your furniture. Matte or satin finishes work well for most furniture pieces, as they provide a subtle sheen and are easy to clean. Glossy or semi-gloss finishes are suitable for adding a bit more shine to certain pieces or highlighting specific features. Choose a paint color that complements your overall design and personal style.
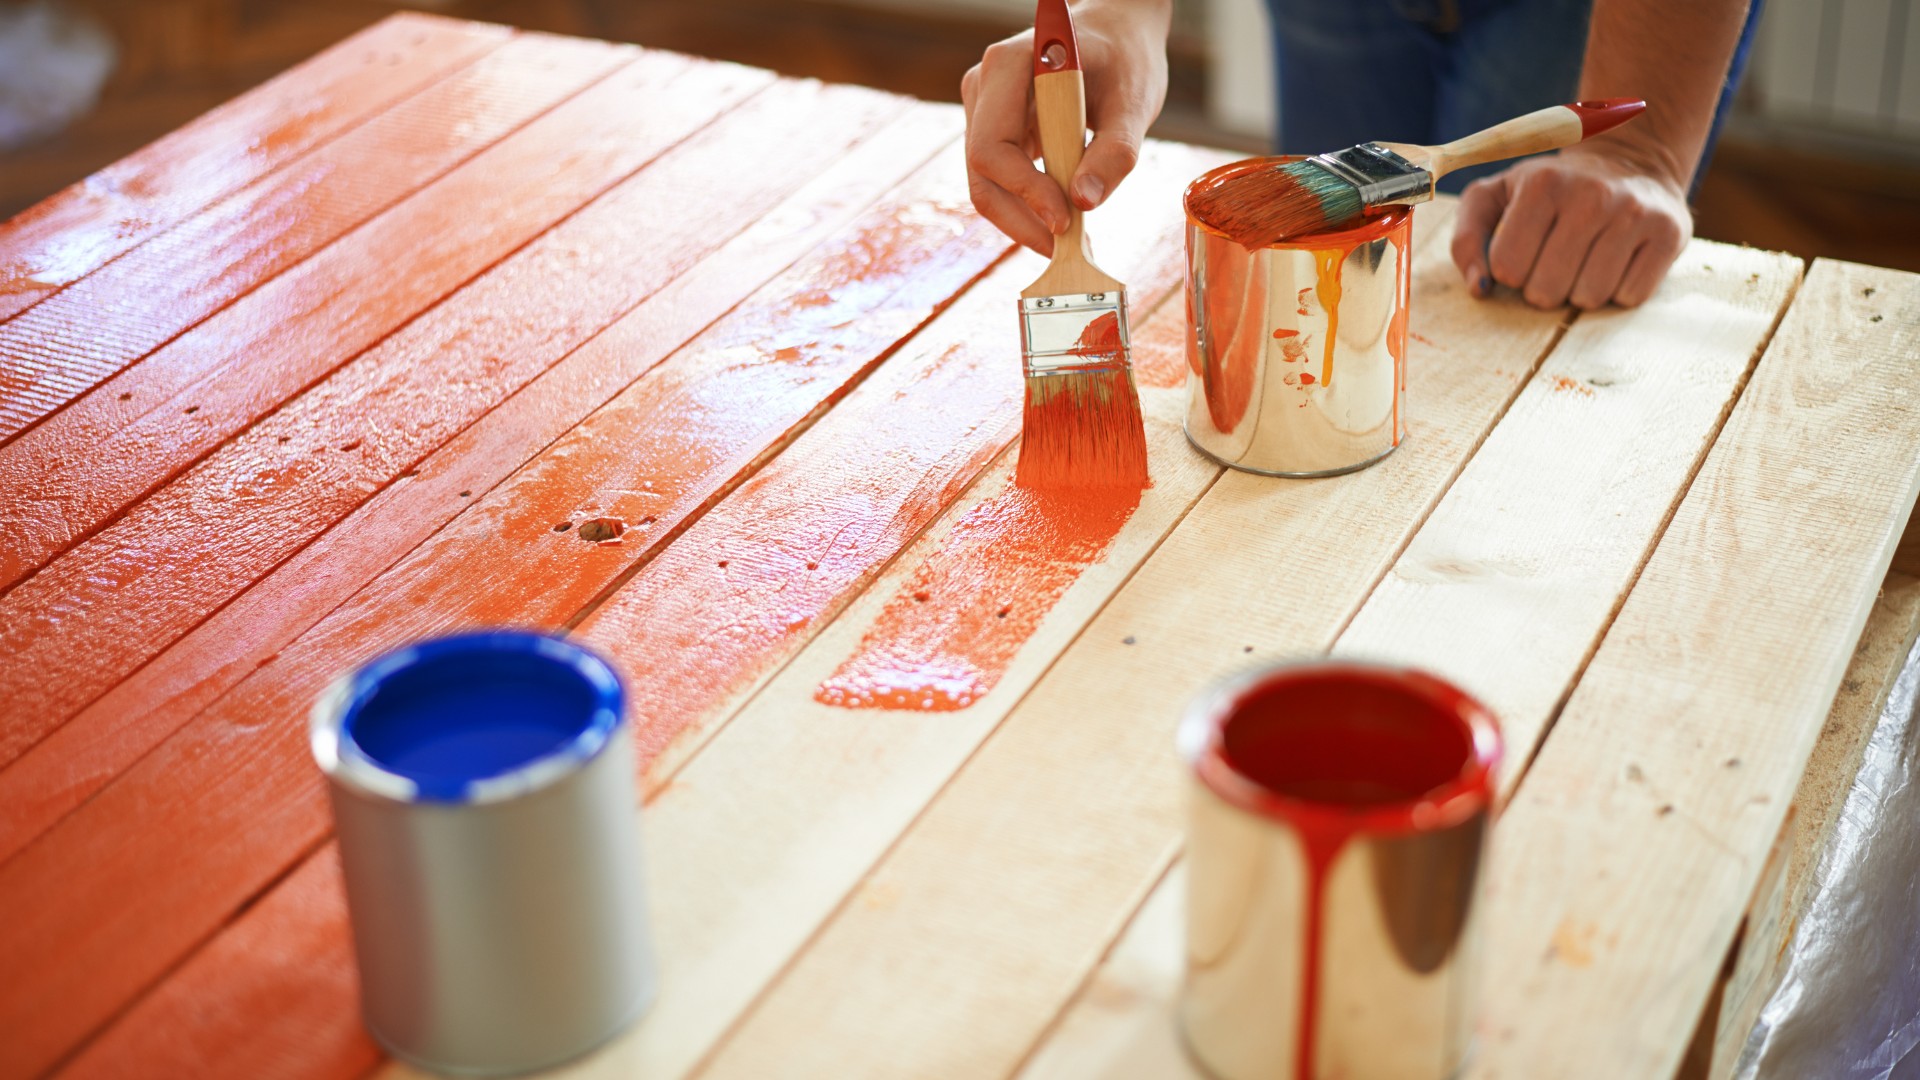
Applying paint in thin, even coats
When applying paint to your furniture, it’s important to do so in thin, even coats. This approach helps to prevent drips, uneven coverage, and a textured appearance. Here’s how to apply paint effectively:
- Stir the paint thoroughly to ensure an even consistency and distribution of color.
- Dip a paintbrush or foam roller into the paint, allowing it to absorb a moderate amount of paint. Remove any excess by gently tapping or rolling it against the edge of the paint container.
- Start applying the paint in smooth, long strokes, following the grain of the wood. Work systematically, one section at a time, to avoid overlap marks or dried edges.
- Apply the paint in thin layers, focusing on achieving even coverage. Avoid heavy application, as it can lead to dripping and longer drying times.
- If you notice any drips or uneven areas, gently brush over them with a dry brush to remove excess paint and smooth out the surface.
- Allow each coat of paint to dry completely before applying subsequent coats. Refer to the paint can label for recommended drying times.
- If necessary, apply additional coats of paint until you have achieved the desired color and coverage. Remember to allow proper drying time between each coat.
By applying paint in thin, even coats, you’ll achieve a smooth and professional-looking finish on your furniture. Take your time, be patient, and enjoy the process. The result will be a beautifully transformed piece that adds character and charm to your space.
Once the final coat of paint has dried completely, you can move on to the final step: adding finishing touches and protecting your newly painted furniture.
Step 6: Finishing Touches
As you near the completion of your furniture painting project, it’s important to add the finishing touches that will protect and enhance the final result. This final step involves applying a protective finish and, if necessary, reassembling any disassembled parts of the furniture. Let’s dive into these essential finishing touches:
Applying a protective finish
Adding a protective finish to your painted furniture is crucial for increasing its durability and longevity. The protective finish acts as a barrier, shielding the paint from daily wear and tear, moisture, and UV damage. There are several options for protective finishes, including clear varnish, polyurethane, or wax.
Before applying the protective finish, ensure that the painted surface is completely dry. Read the instructions on the protective finish product for specific drying times and application guidelines.
If you choose to use a clear varnish or polyurethane, apply it with a brush or foam roller in thin, even coats. Work in the same direction as the grain of the wood for a smooth finish. Allow each coat to dry thoroughly before applying additional coats, following the manufacturer’s instructions.
If you prefer a wax finish, apply it using a soft cloth or brush, following the manufacturer’s recommendations. Buff the wax gently to create a protective layer and a subtle sheen.
Remember, the protective finish not only adds durability but also adds a final touch of richness to the painted furniture. It brings out the color and texture, giving your piece a polished and professional appearance.
Read more: How To Paint Metal Patio Furniture
Reassembling the furniture (if necessary)
If you had to disassemble any parts of the furniture during the prepping or painting process, now is the time to reassemble them carefully. Ensure that each piece is clean and free from any residual paint, dust, or debris. Use the appropriate tools, such as a screwdriver or Allen wrench, to securely tighten any screws or fasteners.
Take your time to align the pieces properly and ensure a snug fit. Double-check that all joints and connections are sturdy and stable, as proper reassembly is essential for the furniture’s functionality and safety.
If you made any repairs to joints or added reinforcement during the prepping stage, verify that these repairs are intact and secure. This will ensure that your furniture is structurally sound and ready for use.
Once you’ve finished reassembling your furniture, step back and admire your handiwork. You have successfully prepped, painted, and finished your furniture, giving it a renewed life and a fresh look that reflects your personal style.
Now it’s time to find the perfect spot for your newly transformed piece and enjoy the fruits of your hard work. The well-prepped and beautifully painted furniture will add character, charm, and a touch of your creative spirit to any space.
Congratulations on completing all the steps with precision and care!
Before painting furniture, make sure to clean the surface thoroughly with a mild detergent and water to remove any dirt, grease, or grime. Sand the surface lightly to create a better adhesion for the paint.
Conclusion
Prepping furniture for painting is a crucial process that ensures a successful and visually appealing outcome. By following the steps outlined in this guide, you can achieve professional-looking results that will transform your furniture into stunning pieces that reflect your personal style.
Starting with thorough cleaning, removing dirt, dust, grease, and oil sets the foundation for a smooth painting surface. Sanding the furniture then creates an even surface, eliminating imperfections and promoting better paint adhesion. Repairing any damaged areas, such as filling cracks and holes or fixing loose joints, ensures structural integrity and a flawless finish.
Applying a primer prepares the furniture for the paint, enhancing adhesion and providing a base for the color. Selecting the right paint and applying it in thin, even coats results in a beautiful and durable finish. Adding a protective finish not only shields the paint but also brings out the richness of color and texture.
Finally, reassembling the furniture, if necessary, ensures its functionality and completes the transformation process.
Throughout the entire process, patience, attention to detail, and the right tools and materials are essential. Take your time and enjoy each step, knowing that the effort you put into prepping your furniture will pay off with a stunning end result.
Remember, furniture painting is not just about restoring or updating pieces; it’s also about expressing your creativity and adding a personal touch to your home. Each stroke of the brush or roller is an opportunity to create something unique and beautiful.
Now that you have completed the prepping process, step back and admire your work. Your beautifully painted furniture not only adds style and charm to your space but also breathes new life into those pieces you once thought were worn or outdated.
So go ahead, showcase your creativity, and revel in the joy of transforming furniture into cherished works of art. Enjoy the fruits of your labor and embrace the satisfaction of a job well done!
Frequently Asked Questions about How To Prep Furniture For Painting
Was this page helpful?
At Storables.com, we guarantee accurate and reliable information. Our content, validated by Expert Board Contributors, is crafted following stringent Editorial Policies. We're committed to providing you with well-researched, expert-backed insights for all your informational needs.

0 thoughts on “How To Prep Furniture For Painting”