Home>Articles>How To Install A Flagstone Patio: Our Step-by-Step Guide
Articles
How To Install A Flagstone Patio: Our Step-by-Step Guide
Modified: March 1, 2024
Learn how to install a stunning flagstone patio with our step-by-step guide. Get expert tips and insights in this comprehensive articles.
(Many of the links in this article redirect to a specific reviewed product. Your purchase of these products through affiliate links helps to generate commission for Storables.com, at no extra cost. Learn more)
Introduction
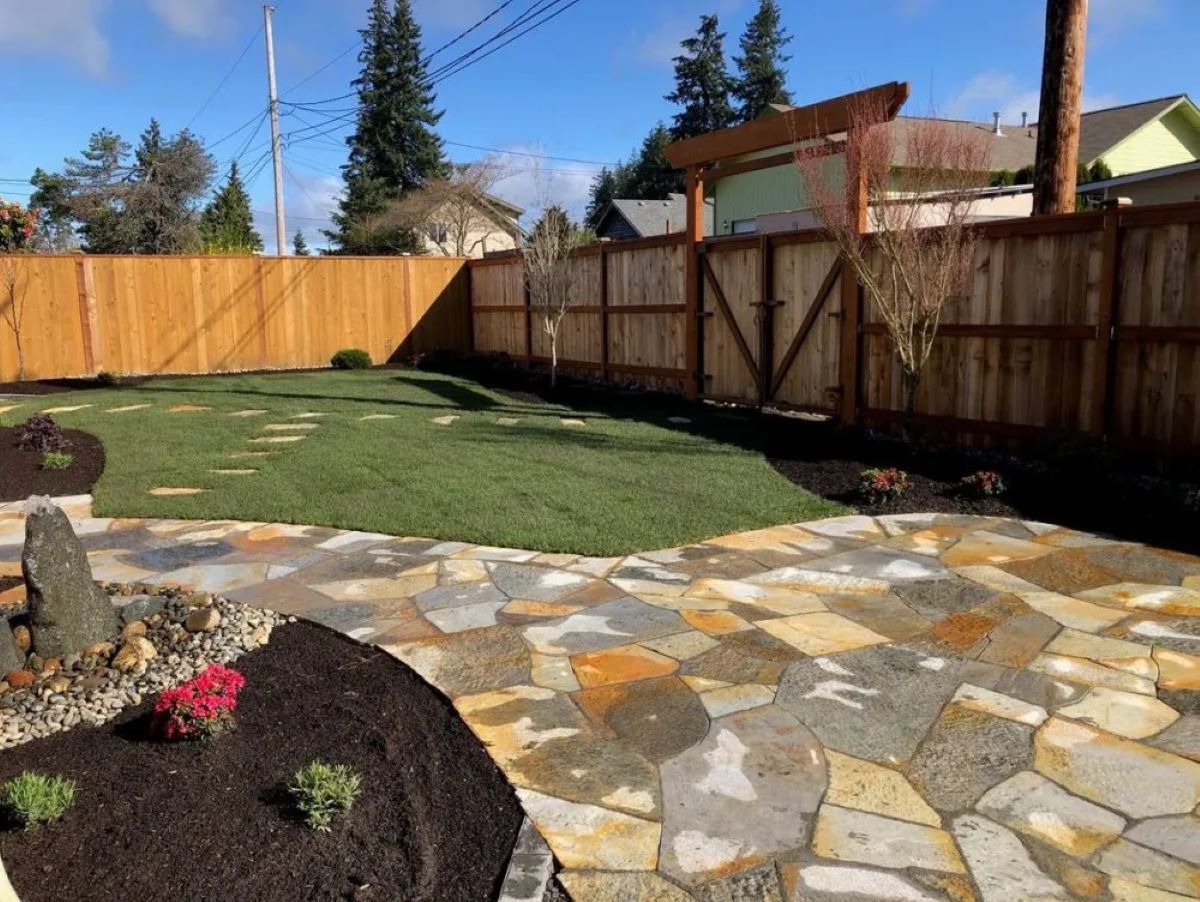
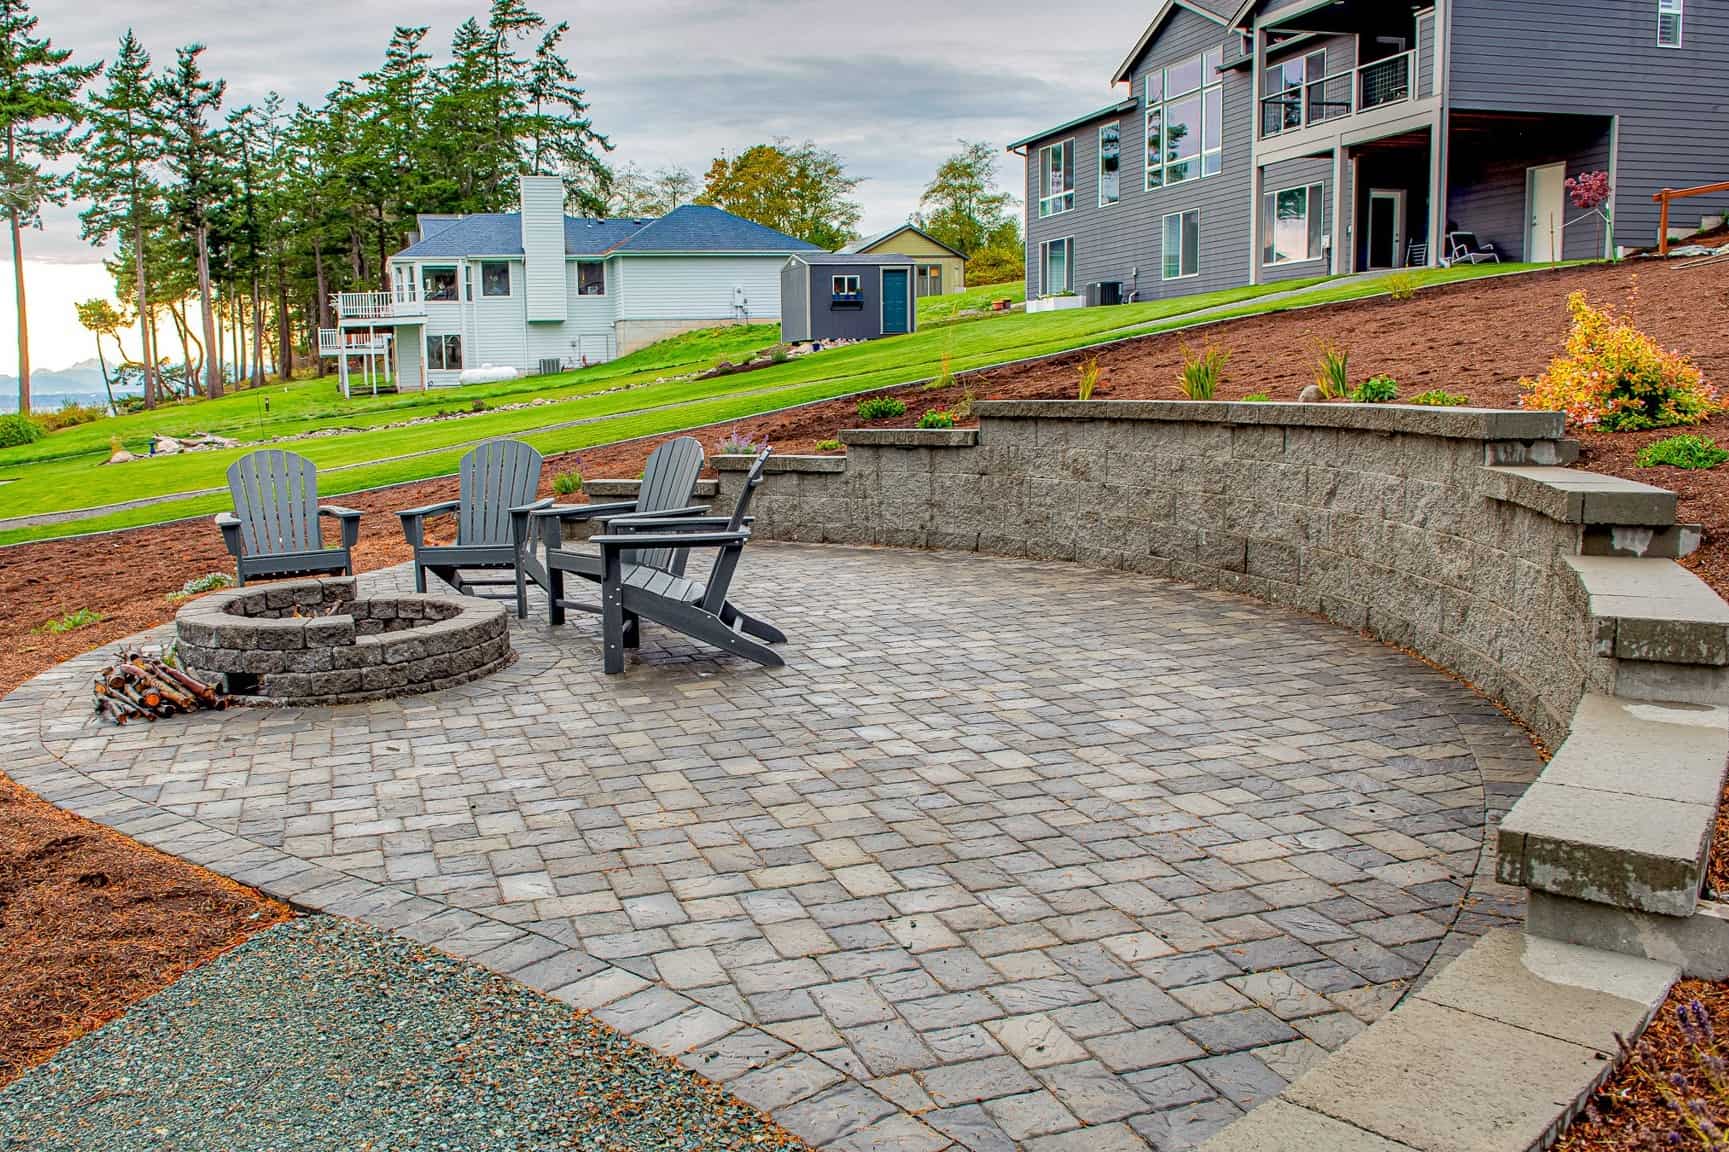
Welcome to our comprehensive guide on how to install a flagstone patio. Adding a flagstone patio to your outdoor space can greatly enhance its beauty and functionality. Whether you want a space for entertaining guests, enjoying family meals, or simply relaxing in the fresh air, a flagstone patio can provide an inviting and stylish area for outdoor living.
Flagstone is a popular choice for patios due to its natural beauty, durability, and versatility. It is a type of sedimentary rock that is split into flat, irregularly shaped pieces. These pieces are then laid on a prepared surface to create a stunning patio surface that blends seamlessly with the surrounding landscape.
While installing a flagstone patio can seem like a daunting task, with proper planning and preparation, it can be a rewarding DIY project. In this guide, we will take you through the step-by-step process of installing a flagstone patio. From assessing the space and gathering materials to setting the flagstones and finishing touches, we will cover everything you need to know to create your own beautiful and functional outdoor oasis.
Before we dive into the details of how to install a flagstone patio, it’s important to note that this guide assumes you have a basic understanding of construction and DIY projects. If you are unsure about any step or feel uncomfortable completing certain tasks, it is recommended to consult with a professional to ensure the project is done correctly and safely.
Now, let’s get started on transforming your outdoor space with a stunning flagstone patio. Follow our step-by-step guide to create a beautiful and inviting area where you can enjoy the great outdoors with family and friends.
Key Takeaways:
- Transform your outdoor space with a stunning flagstone patio by carefully planning, preparing, and executing each step. From site assessment to joint filling, this guide provides a comprehensive DIY approach to creating a beautiful and functional outdoor oasis.
- The finishing touches, including cleaning, sealing (optional), and landscaping, add the final flair to your flagstone patio. Enjoy the fruits of your labor and create lasting memories in your newly installed outdoor haven.
Step 1: Planning and Preparation
Before diving into the physical labor of installing a flagstone patio, it’s important to do some careful planning and preparation. This will ensure that you have a clear vision for your patio and have all the necessary tools and materials ready to go.
Assessing the Space
The first step in planning your flagstone patio is assessing the space where you want to install it. Take some time to measure the area and consider the shape and layout you envision for your patio. Consider factors such as the size of the space, the existing landscaping, and any obstacles that may need to be worked around.
If needed, use stakes and string to outline the dimensions of the patio area. This will give you a visual representation of the space and help you determine the amount of flagstone and other materials you will need.
Gathering Tools and Materials
Once you have assessed the space, it’s time to gather the necessary tools and materials for the project. Here is a list of some common tools you may need:
- Mason’s hammer or chisel
- Measuring tape
- Shovel
- Rake
- Wheelbarrow
- Level
- Tamping tool
- Brush
- Safety equipment (gloves, goggles, etc.)
In addition to the tools, you will also need to gather the materials for your flagstone patio. This includes:
- Flagstones
- Bedding material (such as sand or crushed rock)
- Joint filler (such as gravel or polymeric sand)
- Geotextile fabric (optional, but recommended)
- Sealer (optional)
Obtaining Permits (if necessary)
Depending on where you live and the regulations in your area, you may need to obtain permits before proceeding with your flagstone patio installation. Check with your local building department or municipality to determine if any permits are required for this type of project.
Obtaining permits, if necessary, is an important step to ensure that your patio meets all the required safety and building codes. It also helps to ensure that you won’t face any issues or fines down the line.
Take the time to familiarize yourself with any local regulations and obtain the necessary permits before proceeding with your project. This will give you peace of mind knowing that you are following all the proper procedures and guidelines.
Now that you have assessed the space, gathered the tools and materials, and obtained any necessary permits, you are ready to move on to the next step in the process: site preparation. Stay tuned for Step 2 of our guide on how to install a flagstone patio.
Read more: What Is A Flagstone Patio
Step 2: Site Preparation
Once you have completed the planning and preparation phase, it’s time to start preparing the site for your flagstone patio installation. Site preparation is a crucial step that sets the foundation for a successful and durable patio.
Clearing the Area
The first task in site preparation is clearing the area where the patio will be installed. Remove any obstructions, such as plants, rocks, or debris, from the space. It’s essential to have a clean and blank canvas to work with.
Be mindful of any existing features or structures in the area. Take into account things like utilities, drainage, and any surrounding landscape elements that you may want to preserve or work around.
Excavating the Site
After clearing the area, the next step is to excavate the site for your flagstone patio. This involves digging up the top layer of soil to create a level and stable base for your patio.
Using a shovel or a small excavator, begin digging out the area to a depth that will accommodate the thickness of your desired subbase and flagstones. Typically, a depth of around 6 to 8 inches is recommended.
As you excavate, check the depth and level of the area using a measuring tape and a level. Ensure that the entire site is excavated to a consistent depth to ensure an even and sturdy foundation for your patio.
Leveling the Ground
Once the site is excavated to the desired depth, it’s time to level the ground. This step is important to ensure that your flagstone patio sits evenly and provides a stable surface.
Use a rake and a tamping tool to level the excavated area. Rake the soil to remove any bumps or unevenness, and then use the tamping tool to compact the soil down. This will create a firm and compacted base for your patio.
Check the level of the ground using a long, straight board or a level. Make any necessary adjustments by adding or removing soil until the area is completely level.
Remember to take your time during the site preparation phase as it sets the stage for the rest of the installation process. Ensure that the area is cleared, excavated, and leveled properly to provide a solid base for your flagstone patio.
With site preparation complete, you are now ready to move on to the next step: base installation. Stay tuned for Step 3 of our guide on how to install a flagstone patio.
Step 3: Base Installation
With the site preparation complete, it’s time to move on to the base installation phase of your flagstone patio project. The base layer is vital for providing stability and preventing shifting or sinking of the flagstones over time.
Adding a Geotextile Fabric
Before laying the base material, it’s recommended to add a layer of geotextile fabric. Geotextile fabric helps to prevent weed growth and provides additional stabilization to the base layer.
Unroll the geotextile fabric over the excavated area, ensuring that it covers the entire space. Trim any excess fabric if needed. Secure the fabric in place by using landscape fabric staples or heavy rocks along the edges to prevent it from shifting during the installation process.
Installing the Subbase
After adding the geotextile fabric, it’s time to install the subbase material. The subbase acts as a solid foundation for your flagstone patio, ensuring proper drainage and stability.
The most commonly used subbase materials for a flagstone patio are crushed rock or gravel. Spread a layer of the subbase material over the fabric, making sure it is evenly distributed across the entire excavated area. Aim for a subbase thickness of about 4 to 6 inches.
Use a rake or shovel to spread and level the subbase material. Take your time to ensure that it is evenly distributed and compacted in place. Also, make sure that the subbase slopes away from your house or any structures to allow for proper drainage.
Compacting the Subbase
Once the subbase is installed and leveled, it’s important to compact it to provide a solid and stable base for the flagstone patio. Use a vibrating plate compactor to compact the subbase material.
Starting from one corner, run the compactor over the subbase in overlapping passes. Ensure that the entire subbase is compacted evenly and firmly. This will help to eliminate any voids or air pockets, minimizing the chances of settling and shifting over time.
Periodically check the level of the subbase using a long straightedge or level to ensure that it is even and slopes away from any structures for proper drainage.
Continue compacting the subbase until it is firm and solid throughout the entire patio area.
With the base installation complete, you have created a solid foundation for your flagstone patio. The next step is to set the flagstones and bring your patio to life. Stay tuned for Step 4 of our guide on how to install a flagstone patio.
Step 4: Setting the Flagstones
Now that the base layer is complete, it’s time to move on to the exciting part of setting the flagstones for your patio. This is where you can get creative with the design and layout of your outdoor space.
Layout and Design
Before you start laying the flagstones, take some time to plan the layout and design of your patio. Consider factors such as the shape and size of the flagstones, the desired pattern or arrangement, and any specific areas or features you want to highlight.
You can lay the flagstones in various patterns, such as a random mix, a uniform grid, or a mosaic-like arrangement. Experiment with different layouts to find the one that best suits your style and complements your outdoor space.
Use stakes and string to help visualize the layout and create guidelines for the placement of the flagstones. This will ensure a consistent and uniform look for your patio.
Spreading the Bedding Material
After finalizing the layout, it’s time to spread the bedding material. The bedding material provides a cushion and stabilizes the flagstones, preventing them from shifting and settling.
The most commonly used bedding material for flagstone patios is a layer of fine sand. Start by spreading a layer of sand over the compacted subbase. Aim for a thickness of about 1 inch of sand.
Use a rake or a screed board to distribute the sand evenly. Make sure to smooth out any uneven areas and remove any excess or lumps of sand.
Placing the Flagstones
With the bedding material in place, it’s time to start placing the flagstones. Carefully pick up each flagstone and place it onto the prepared bedding material. Gently press down on the flagstone to secure it in place.
When placing the flagstones, follow your predetermined layout and design. Ensure that there is equal spacing between the stones for a uniform and aesthetically pleasing look.
As you place each flagstone, use a level to check for proper alignment and ensure that it is sitting flush with the surrounding stones. Make any necessary adjustments to ensure a level and seamless surface.
Continue placing the flagstones until the entire patio area is covered. Take breaks to step back and assess the overall design and placement of the flagstones. Make adjustments as needed to achieve the desired visual appeal.
If necessary, use a mason’s hammer or chisel to trim any flagstones to fit into specific areas or along the edges of the patio. Take your time and exercise caution when making any cuts to avoid damaging the flagstones.
With the flagstones set in place, you are one step closer to completing your flagstone patio. The next step is to fill the gaps between the flagstones with joint filler to create a finished and polished look. Stay tuned for Step 5 of our guide on how to install a flagstone patio.
Read more: How To Grout Flagstone Patio
Step 5: Joint Filling
Once the flagstones are set in place, it’s time to fill the gaps between them with joint filler. Joint filling not only enhances the overall aesthetics of your flagstone patio but also helps to stabilize the stones and prevent weed growth.
Choosing the Joint Filler
There are several options available for filling the joints between flagstones. Some common joint filler materials include gravel, sand, and polymeric sand.
Gravel: Using gravel as a joint filler gives a rustic and natural look to the patio. It allows for good water drainage and can withstand heavy foot traffic. Choose gravel that is the right size for your desired joint width.
Sand: Sand is a popular choice for joint filling as it is readily available and easy to work with. It provides a clean and finished appearance to the patio. Choose fine sand that will fit into the gaps between the flagstones evenly.
Polymeric Sand: Polymeric sand is a mixture of sand and additives that forms a solid and durable bond when activated by water. It helps to stabilize the flagstones, prevent weed growth, and resist erosion. Follow the manufacturer’s instructions when using polymeric sand.
Filling the Gaps Between Flagstones
Once you have selected your joint filler material, it’s time to fill the gaps between the flagstones. Start by pouring the joint filler over the patio, ensuring that it goes deep into the gaps.
Use a broom or a brush to sweep the filler material into the gaps, ensuring they are completely filled. Push the filler material down with gentle pressure to ensure it reaches the bottom of the joints.
Continue this process until all the gaps between the flagstones are filled with the chosen joint filler material. Take your time and pay attention to detail to achieve a neat and consistent look.
Compacting the Joint Filler
After filling the joints, it’s important to compact the joint filler to ensure a solid and stable surface. This step helps to lock the flagstones in place and prevent the joint filler from shifting or washing away.
Using a vibrating plate compactor or a rubber mallet, gently compact the joint filler material. Begin at one corner of the patio and work your way across, making sure to cover the entire surface.
Repeat the process of compacting multiple times, gradually increasing the pressure to ensure the joint filler is fully compressed. This will help to eliminate any air pockets and create a firm bond between the flagstones and the filler material.
Once the joint filler is compacted, remove any excess material from the surface of the flagstones using a brush or a leaf blower. This will give your patio a clean and finished appearance.
With the joints filled and the filler material compacted, you have successfully completed the next step in installing your flagstone patio. The final step is to add the finishing touches to your patio. Stay tuned for Step 6 of our guide on how to install a flagstone patio.
Read more: How To Repair A Flagstone Patio
Step 6: Finishing Touches
Congratulations! You’re in the final step of installing your beautiful flagstone patio. Step 6 focuses on the finishing touches that will bring your patio to its full potential, ensuring its longevity and enhancing its visual appeal.
Cleaning the Patio
Before you start enjoying your new patio, it’s important to clean away any debris or dirt that may have accumulated during the installation process. Use a broom or leaf blower to sweep away loose dirt, leaves, or other debris.
If there are any stubborn stains or marks on the flagstones, you can gently scrub them using a soft-bristle brush and mild soap mixed with water. Rinse the patio thoroughly with clean water to remove any soap residue.
Sealing the Flagstones (optional)
Sealing the flagstones is an optional step but highly recommended. Sealant helps protect the flagstones from stains, weathering, and wear, prolonging their lifespan and maintaining their appearance.
Before applying a sealant, ensure that the flagstones are clean and completely dry. Follow the instructions on the sealant product for the application process. Typically, you will need to use a roller or a brush to evenly apply the sealant, allowing it to penetrate and protect the surface of the flagstones.
Allow the sealant to dry completely before using the patio. The drying time can vary depending on the product, so be sure to check the instructions provided by the manufacturer.
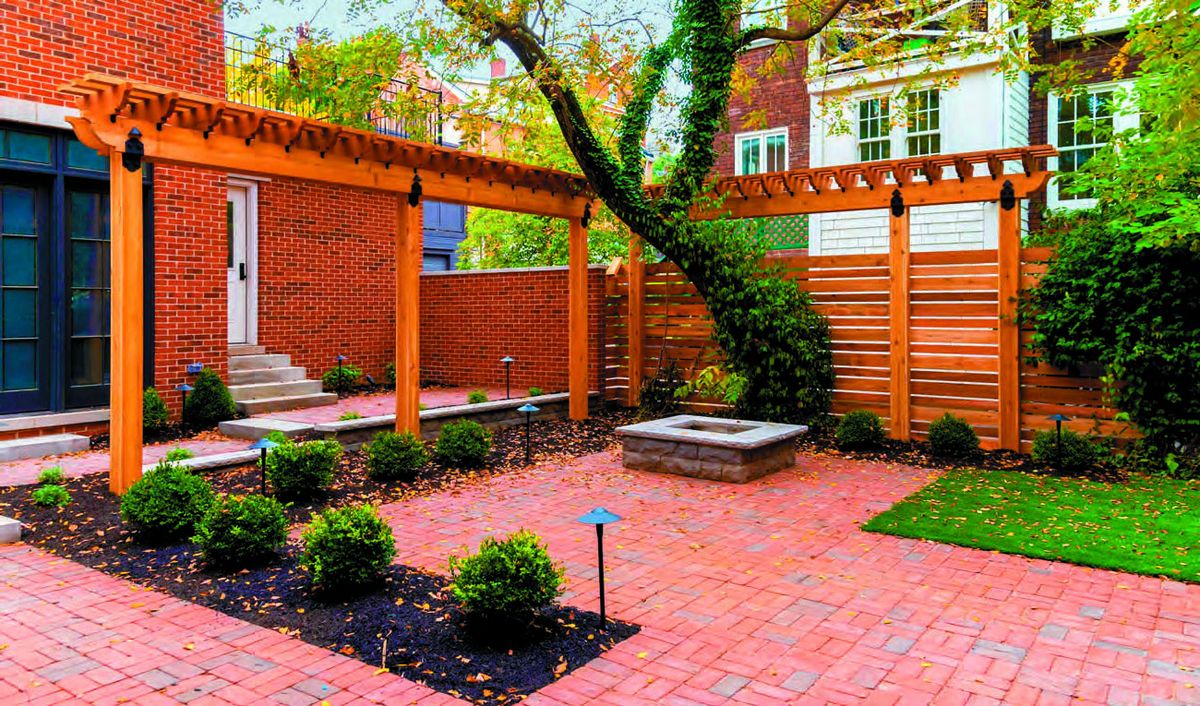
Landscaping and Adding Final Touches
Once your flagstone patio is clean and sealed (if desired), you can enhance its overall beauty by incorporating landscaping and adding final touches.
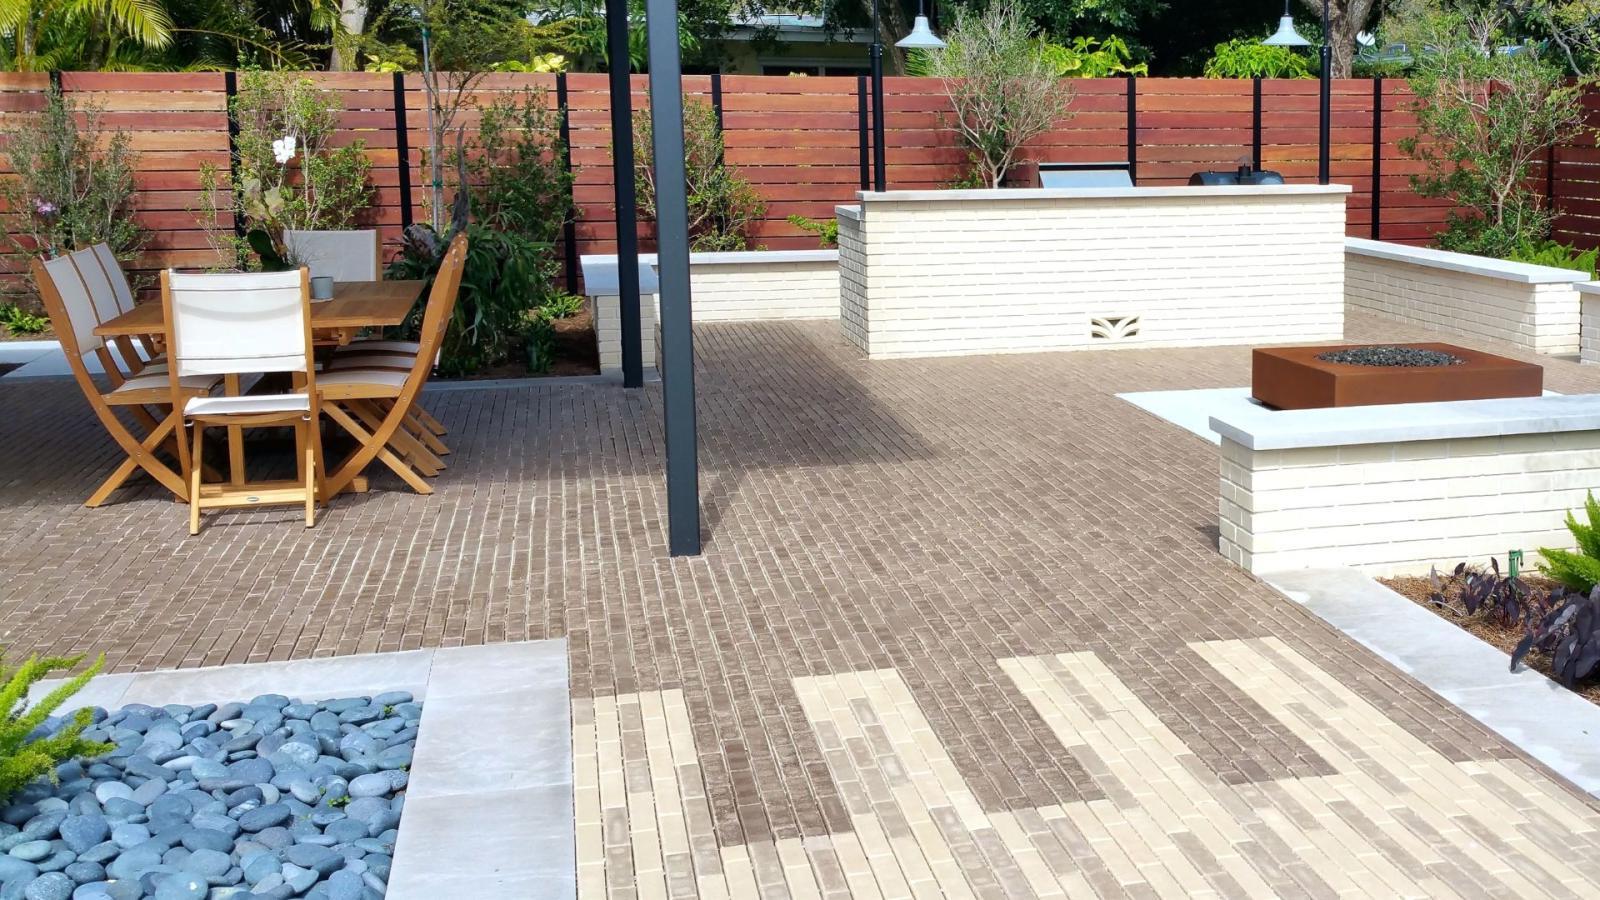
Consider adding potted plants, flower beds, or shrubs around the patio to create a cohesive and inviting outdoor space. Incorporate other elements like outdoor furniture, lighting, or a fire pit to make your patio a functional and comfortable area for relaxation and entertainment.
Take your time to assess the surrounding landscape and personalize your patio with your unique style and preferences. Consider adding pathways or water features to enhance the ambiance.
Remember to maintain your flagstone patio by regularly cleaning it and resealing it as needed. This will help preserve its beauty and protect it from the elements for years to come.
With the finishing touches complete, sit back, relax, and enjoy your newly installed flagstone patio. It’s a testament to your hard work and adds a beautiful and functional space to your outdoor living area.
Thank you for following our comprehensive guide on how to install a flagstone patio. We hope this step-by-step guide has been informative and helpful in your patio installation journey. Enjoy your new outdoor oasis!
Conclusion
Congratulations on completing the installation of your flagstone patio! You have transformed your outdoor space into a stunning and functional area where you can relax, entertain, and enjoy the beauty of nature. This comprehensive guide has taken you through the step-by-step process, from planning and preparation to the finishing touches.
By assessing the space, gathering the necessary tools and materials, and obtaining any required permits, you set a solid foundation for a successful project. The careful site preparation, including clearing the area, excavating, and leveling the ground, ensured a stable base for your patio.
With the base installation complete, you moved on to setting the flagstones. By carefully planning the layout and design, spreading the bedding material, and placing the flagstones, you created a visually appealing and cohesive patio surface.
Joint filling was the next step, which involved choosing the appropriate joint filler material, filling the gaps between the flagstones, and compacting the joint filler. This not only added the finishing touch to your patio but also stabilized the flagstones and prevented weed growth.
In the final step, you added the finishing touches to your patio. By cleaning the patio, sealing the flagstones (if desired), and incorporating landscaping and final touches, you created a space that reflects your style and enhances the overall experience.
A well-maintained flagstone patio can provide years of enjoyment and beauty. Remember to regularly clean the patio, reseal the flagstones if necessary, and keep up with any necessary maintenance to ensure its longevity.
We hope this guide has been a valuable resource for you in the installation of your flagstone patio. Remember, installing a patio is a labor-intensive task, and if at any point you feel unsure or overwhelmed, it’s always a good idea to consult with a professional to ensure the project is done correctly and safely.
Now, it’s time to sit back, relax, and enjoy your newly installed flagstone patio. Whether you’re hosting gatherings with friends and family, enjoying peaceful moments alone, or simply soaking up the natural beauty of your outdoor space, your flagstone patio will be a wonderful addition to your home.
Thank you for choosing our guide, and we wish you many memorable moments and years of enjoyment with your beautiful flagstone patio!
Frequently Asked Questions about How To Install A Flagstone Patio: Our Step-by-Step Guide
Was this page helpful?
At Storables.com, we guarantee accurate and reliable information. Our content, validated by Expert Board Contributors, is crafted following stringent Editorial Policies. We're committed to providing you with well-researched, expert-backed insights for all your informational needs.


0 thoughts on “How To Install A Flagstone Patio: Our Step-by-Step Guide”