Home>Garden Essentials>How To Make Greenery Garland Rings
Garden Essentials
How To Make Greenery Garland Rings
Modified: April 23, 2024
Discover how to create stunning garden-inspired greenery garland rings for any occasion. Learn step-by-step techniques, tips, and tricks to bring natural beauty to your events.
(Many of the links in this article redirect to a specific reviewed product. Your purchase of these products through affiliate links helps to generate commission for Storables.com, at no extra cost. Learn more)
Introduction
Welcome to the wonderful world of greenery garland rings! If you’re looking to add a touch of natural elegance to your home or event décor, creating your own greenery garland rings is a fantastic way to do it. These stunning rings can be used as decorative accents for tables, door wreaths, or even as wall hangings.
Greenery garland rings not only bring a fresh and vibrant look to any space, but they are also incredibly versatile. You can customize them to suit any season or theme by using different types of greenery and incorporating various elements like flowers, berries, or ribbons.
In this step-by-step guide, we will take you through the process of making your very own greenery garland rings. We’ll cover everything from gathering the materials to adding the finishing touches. So, grab your gardening gloves and let’s get started!
Key Takeaways:
- Create stunning greenery garland rings by gathering materials, preparing the base ring, attaching and layering greenery, securing it in place, and adding finishing touches. Let your creativity shine and bring natural elegance to any space!
- Whether using fresh or faux greenery, crafting greenery garland rings is a rewarding DIY project. Share your newfound expertise, experiment with different elements, and bring joy and beauty to your surroundings.
Read more: How To Make A Garland With Greenery
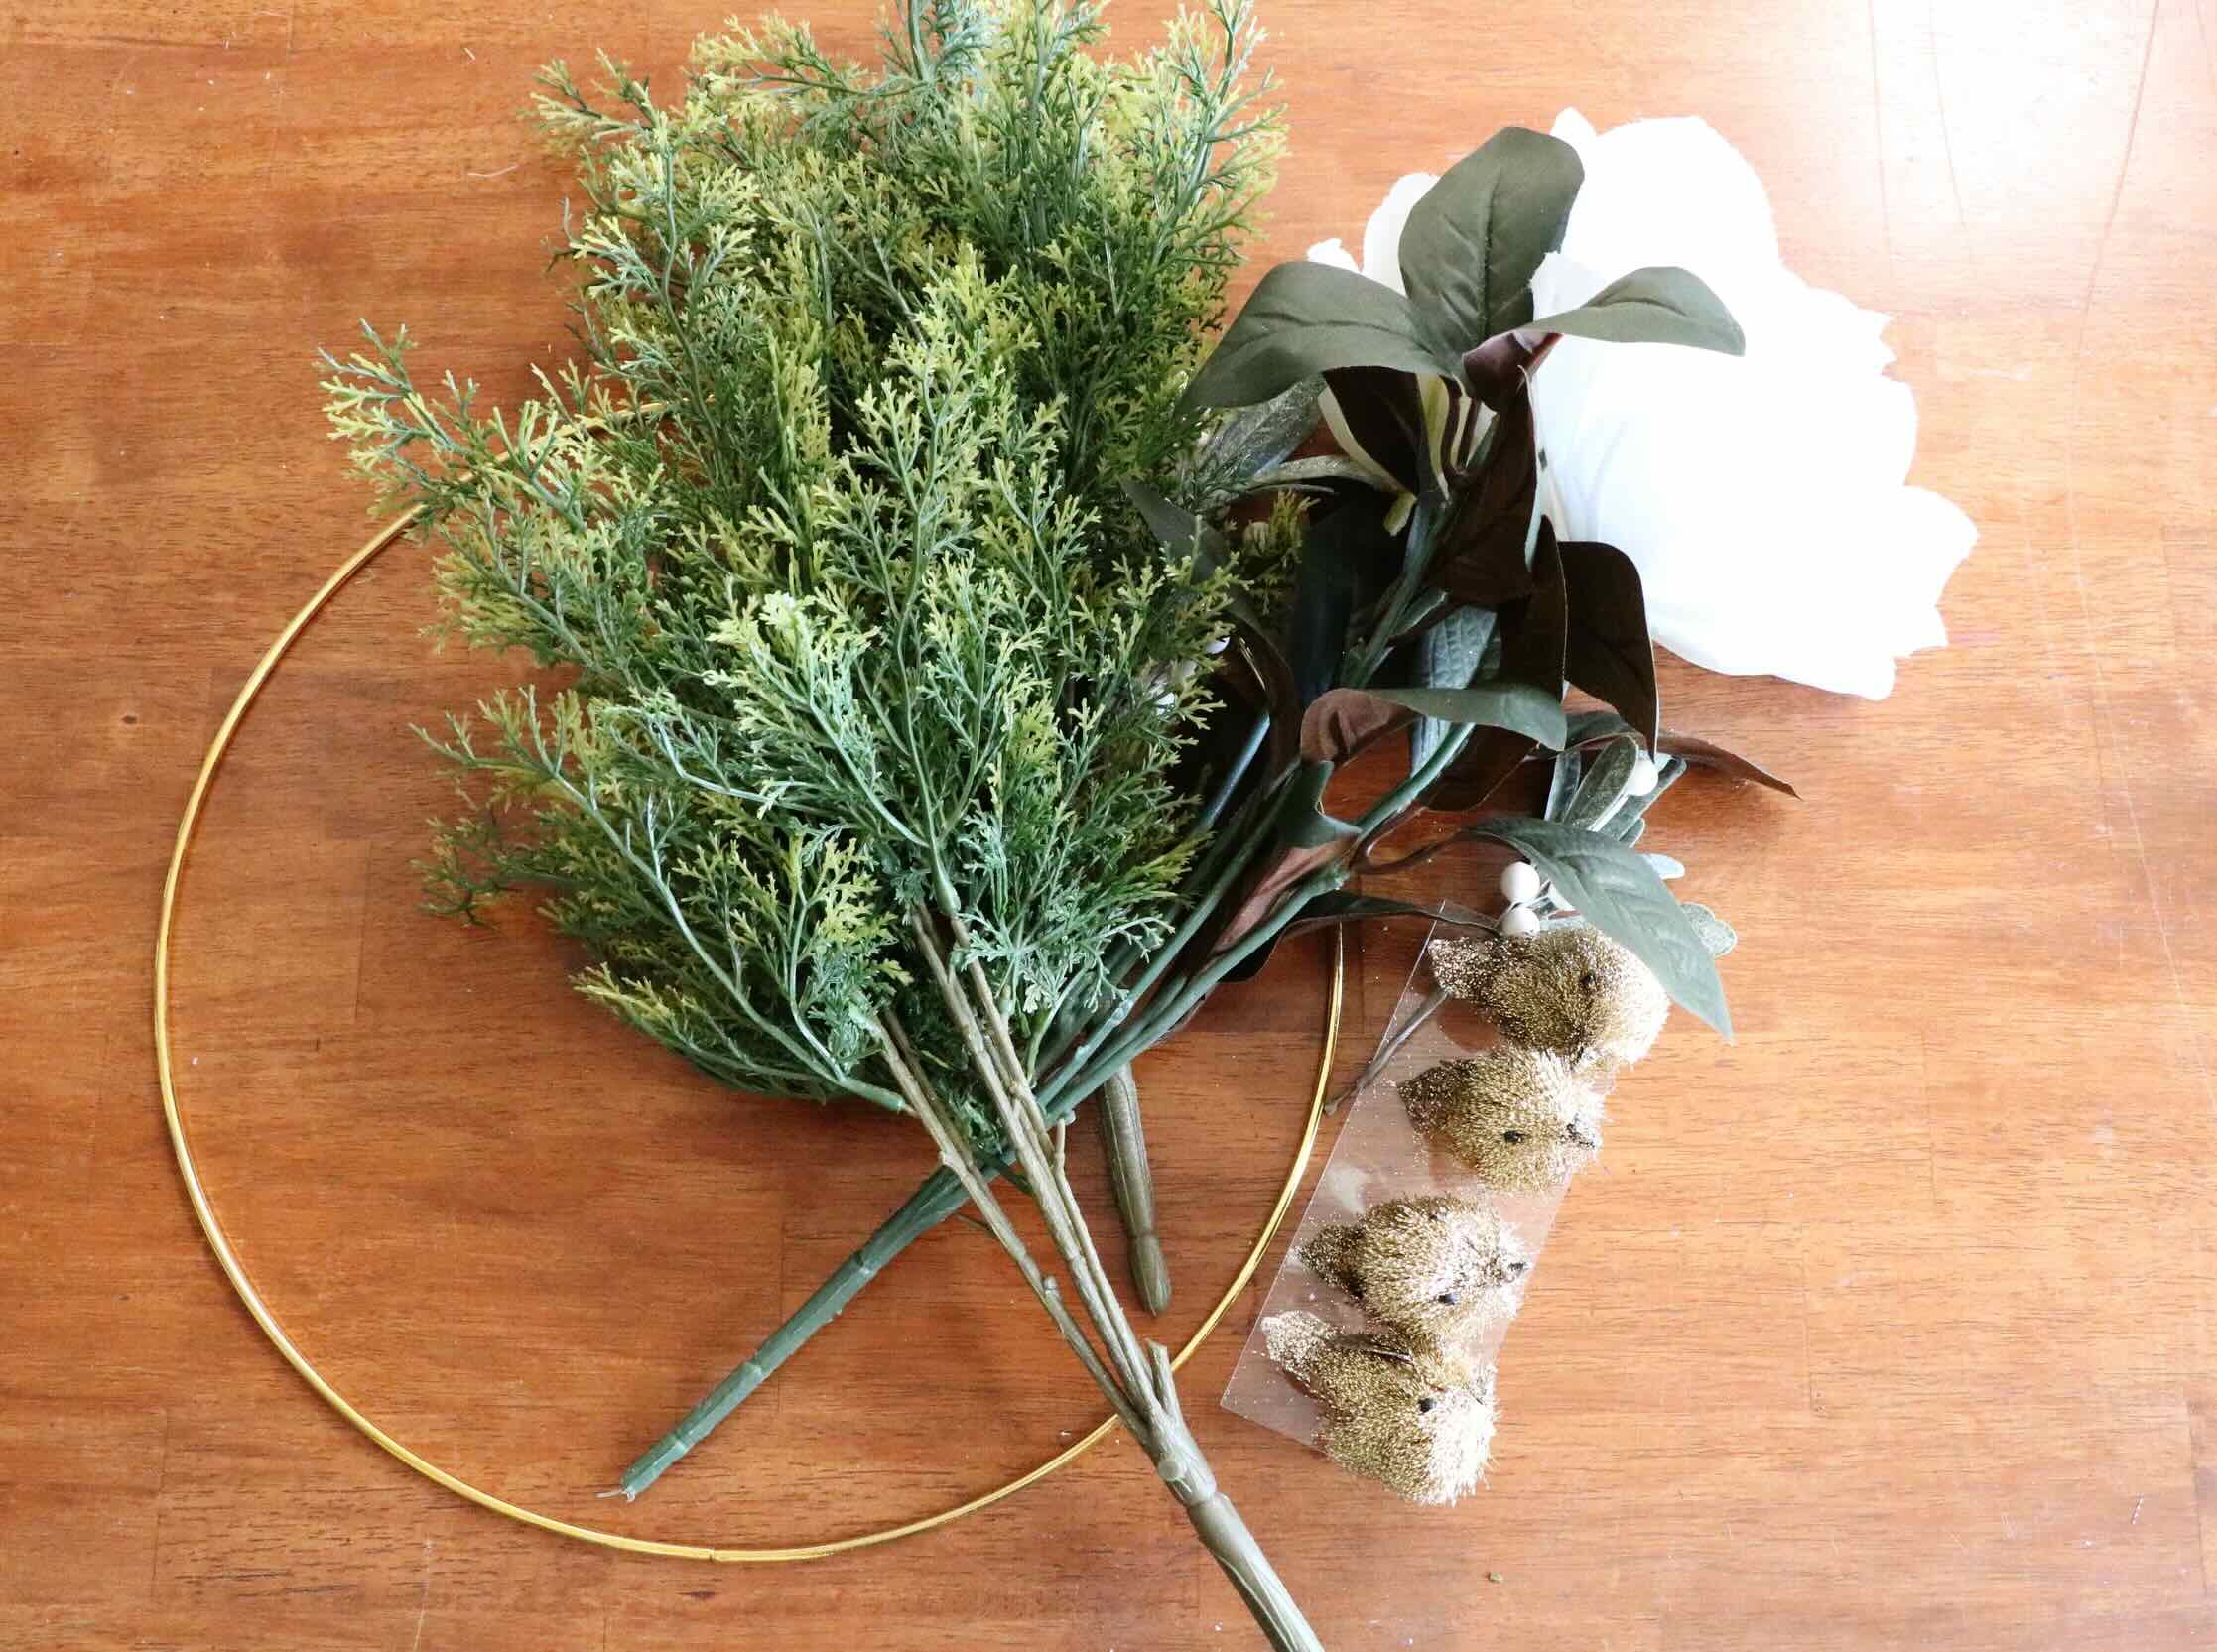
Materials Needed
Before we dive into the process of creating greenery garland rings, let’s gather all the materials you’ll need to bring your vision to life. Here is a list of the essentials:
- Garden clippers: You’ll need a good pair of garden clippers to trim and shape the greenery.
- Wire or floral tape: This will be used to secure the greenery to the base ring.
- Base ring: Select a sturdy ring as the foundation for your garland. You can use a wire wreath frame, embroidery hoop, or even a metal ring.
- Greenery: Choose an assortment of fresh or faux greenery such as eucalyptus, ferns, ivy, or any other foliage that catches your eye. Make sure you have enough to cover the entire ring.
- Add-ons: Optional items like flowers, berries, pinecones, or ribbons can be used to enhance the look of your garland.
- Scissors: A pair of scissors will come in handy for trimming any excess wire or tape.
- Optional: Floral wire: If you’re using fresh greenery, floral wire can help secure delicate stems in place.
Once you have gathered these materials, you’ll be well-equipped to create beautiful greenery garland rings. Don’t hesitate to get creative and experiment with different types of greenery and additions to make each ring unique.
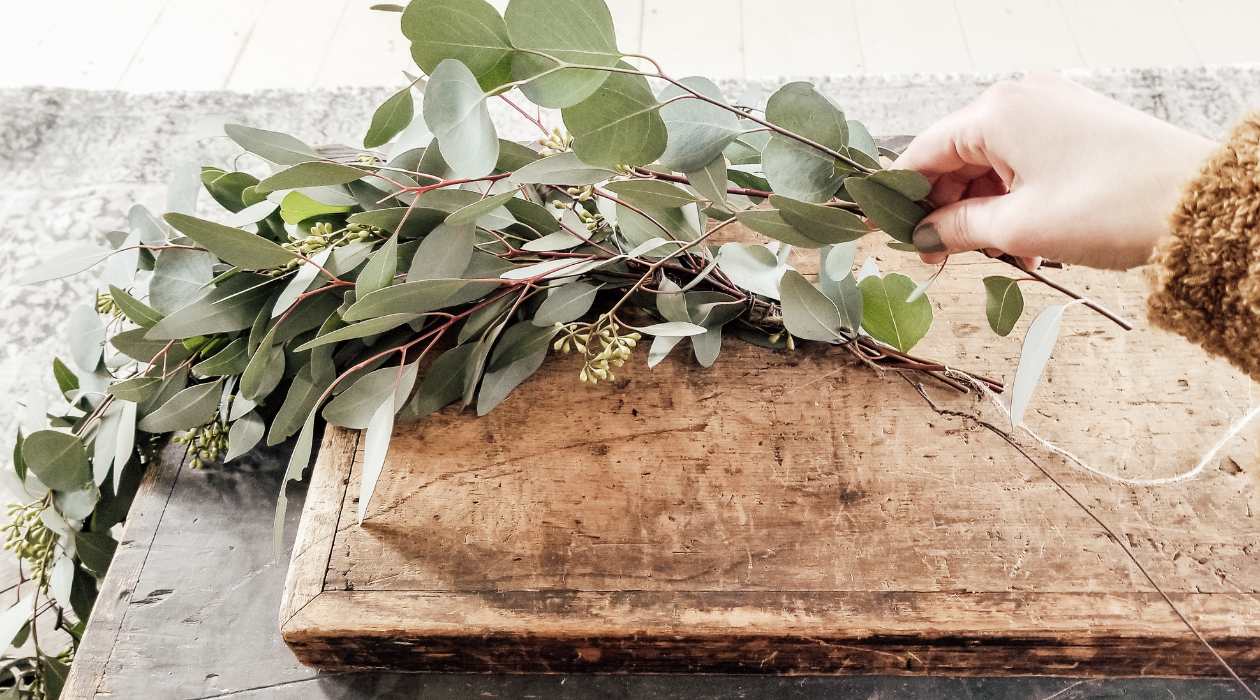
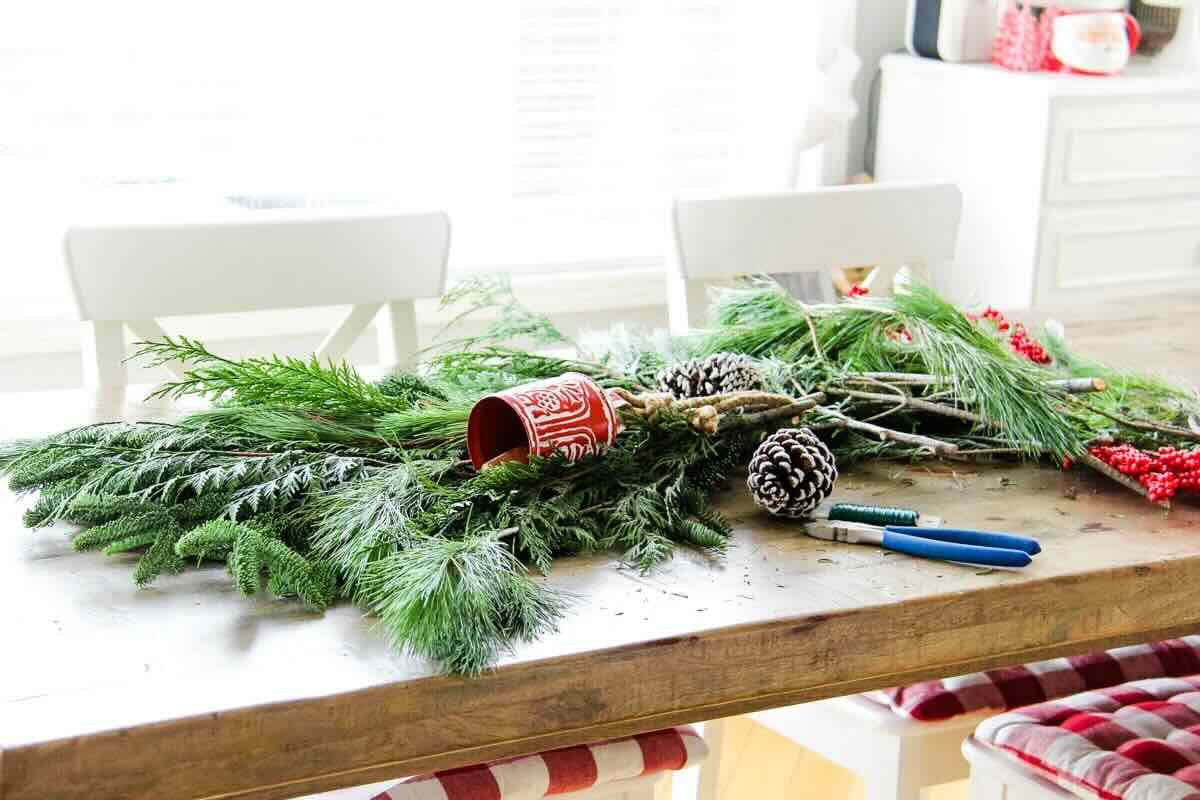
Step 1: Gather Greenery
The first step in creating your greenery garland rings is to gather the greenery you will be using. This can be fresh foliage from your garden or store-bought faux greenery. Here’s how to proceed:
- Decide on the type of greenery you want to use. Eucalyptus, ferns, ivy, and boxwood are popular choices for their lush and versatile nature.
- If you’re using fresh greenery, head to your garden or local florist, and carefully cut stems with garden clippers. Choose branches with healthy leaves and trim them to your desired length.
- If you’re using faux greenery, purchase the desired amount from a craft or home decor store. Look for realistic-looking options that closely resemble the real thing.
- Consider mixing different types of greenery to add texture and dimension to your garland. Combining foliage with varying leaf shapes and colors can result in a visually appealing arrangement.
Remember to gather more greenery than you think you’ll need, as it’s better to have some extra to work with. It’s always easier to trim down excess greenery later on than to realize you don’t have enough to cover the entire ring.
Once you have gathered all your greenery, give it a gentle shake to remove any dirt or debris. Now you’re ready to move on to the next step!
Step 2: Prepare the Base Ring
Now that you have your greenery gathered, it’s time to prepare the base ring for your garland. The base ring provides structure and support for the greenery. Here’s how to get started:
- Choose a base ring that suits your desired size and style. You can use a wire wreath frame, an embroidery hoop, or even a metal ring.
- If you’re using a wire wreath frame, position it on a flat surface. If you’re working with an embroidery hoop or a metal ring, make sure it is clean and free of any dirt or residue.
- Consider wrapping the base ring with floral tape or ribbon to provide a smooth surface for attaching the greenery. This step is optional, but it can help give your garland a more finished look.
- Secure the ends of the floral tape or ribbon with a small piece of clear tape or a dab of glue to keep everything in place.
Once the base ring is prepped and ready, you are one step closer to creating your greenery garland rings. The preparation process ensures that the base is sturdy and provides a solid foundation for attaching the greenery securely. It’s time to move on to the next step!
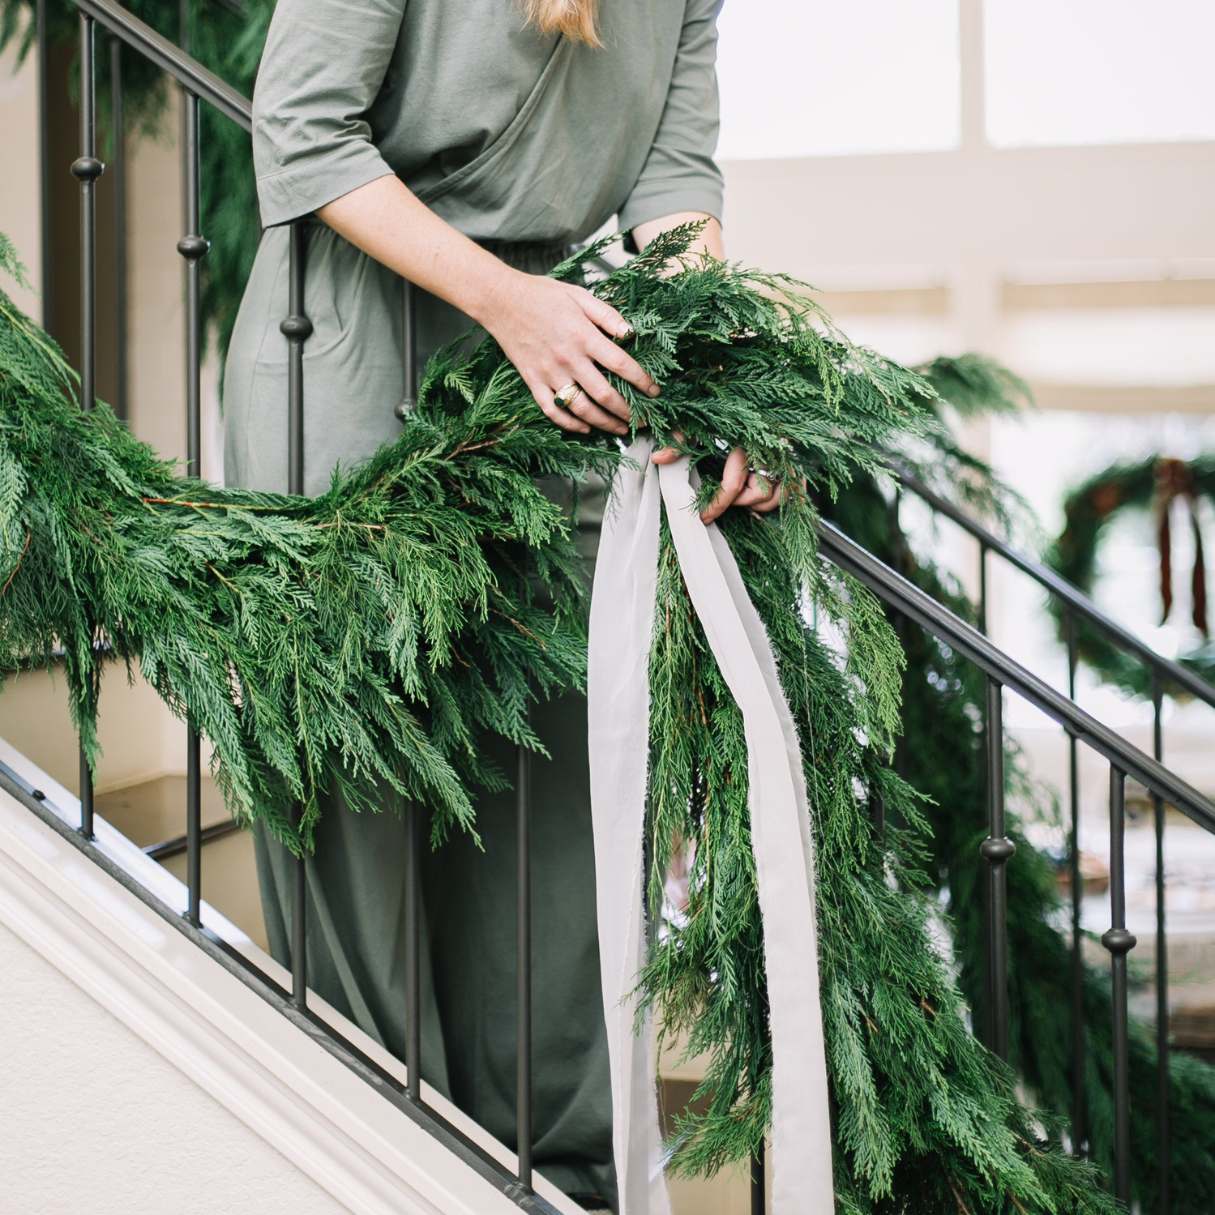
Step 3: Attach Greenery to the Ring
Now that you have your base ring prepared, it’s time to start attaching the greenery. This step will give your garland the lush and natural look you desire. Follow these steps:
- Take a piece of greenery and position it on the base ring. Arrange it so that the stems are pointing outward and the leaves are facing the front.
- Secure the greenery to the ring using wire or floral tape. Begin by wrapping the wire or tape tightly around the stem of the first piece of greenery, ensuring it is firmly attached to the ring.
- Add another piece of greenery, overlapping the stems of the previous one. Wrap the wire or tape around the new stem, as well as the base ring, securing it in place.
- Continue this process, adding pieces of greenery and securing them to the ring until you have covered the entire circumference.
- Vary the direction and angle of the greenery as you go, alternating between upward and downward-facing stems for a more natural and organic appearance.
As you attach the greenery, step back occasionally to evaluate the overall look and make adjustments if needed. Ensure that the greenery is evenly distributed and that there are no gaps or bare spots.
Remember to work with a gentle touch to prevent damaging the delicate leaves or bending the stems. Take your time and enjoy the process of creating a beautiful and personalized greenery garland ring that reflects your unique style.
When making greenery garland rings, start with a sturdy wire ring as the base. Use a variety of fresh greenery and secure it to the ring with floral wire, layering the different types of greenery for a full and lush look.
Read more: How To Make Fresh Greenery Garlands
Step 4: Continue Adding Layers
With the initial layer of greenery securely attached, it’s time to continue building up your garland by adding more layers. This step will give your garland volume and depth. Follow these steps:
- Take another piece of greenery and position it slightly overlapping the previous layer. Again, make sure the stems are pointing outward and the leaves are facing the front.
- Secure this new piece of greenery to the ring using wire or floral tape, following the same method as before.
- Continue adding more pieces of greenery, overlapping and securing each one to the ring, until you have achieved the desired fullness and thickness.
- As you add layers, try to vary the length and shape of the greenery to create a more dynamic and visually interesting garland. Mix in different textures and leaf sizes for added visual appeal.
- Step back occasionally to assess the overall look of the garland and make adjustments as necessary. Ensure that each layer is evenly distributed and there are no bare spots.
Building up the layers of your greenery garland ring is a critical step in achieving a lush and natural appearance. Don’t be afraid to experiment and get creative with the arrangement. Remember, each garland you create is a unique work of art!
Once you are satisfied with the layers you have added, you can move on to securing the greenery in place for a long-lasting garland.
Step 5: Secure the Greenery
Now that you have added all the desired layers of greenery to your garland, it’s time to secure it in place to ensure durability and longevity. Follow these steps to secure the greenery:
- Inspect the garland for any loose or protruding stems. Use garden clippers to trim any excess greenery that may be sticking out or causing imbalances in the arrangement.
- If you’re using fresh greenery, consider using floral wire to further secure any delicate stems or branches that may be prone to shifting or drooping. Simply wrap the floral wire around the stem and base ring, making sure it is hidden beneath the foliage.
- If you’re using faux greenery, gently manipulate the stems and branches to cover any visible wire or tape and create a more cohesive look.
- For added security, use additional wire or floral tape to reinforce any loose areas or gaps in the garland. This ensures that the greenery stays in place, even if the garland is moved or transported.
- Give the garland a final inspection, making sure everything is securely attached and there are no visible wires or tapes. Make any necessary adjustments to achieve the desired shape and symmetry.
By securing the greenery carefully, you can enjoy your beautiful garland for an extended period. The added stability will prevent any shifting or falling of the greenery, allowing you to display your creation with confidence.
Now that the greenery is secured, it’s time to add the finishing touches and truly make your greenery garland ring shine.
Step 6: Add Finishing Touches
Adding the finishing touches to your greenery garland ring is where you can let your creativity shine and customize the look to suit your style and occasion. Here’s how to give your garland that extra special touch:
- If desired, incorporate additional elements such as flowers, berries, pinecones, or ribbons into your garland. These can add pops of color and texture, enhancing the overall aesthetic.
- Place the additional elements strategically throughout the garland, ensuring they are evenly distributed and visually balanced. Secure them using wire or floral tape, just as you did with the greenery.
- Consider adding a decorative accent such as a bow or a hanging ornament to the top or bottom of the garland. This can act as a focal point and add a touch of elegance or playfulness, depending on your chosen style.
- Step back and assess the overall appearance of your garland. Make any final adjustments to ensure everything is visually harmonious and visually aligned with your vision.
Remember, the finishing touches are an opportunity to make the garland uniquely yours. Feel free to experiment with different elements and placement until you achieve the desired effect.
Once you are satisfied with the finished look, you can display your stunning greenery garland ring with pride. Whether it’s adorning a table centerpiece or hanging on a door or wall, it is sure to bring a touch of natural beauty and charm to any space.
Congratulations! You have successfully created your own greenery garland ring from start to finish. Be sure to take a moment to admire your handiwork and share it with others who will surely be impressed by your creativity and gardening skills.
We hope that this step-by-step guide has been helpful in your journey to create a beautiful greenery garland ring. Have fun experimenting and exploring different variations as you continue to craft stunning decorations for your home or special events.
Conclusion
Congratulations on completing your greenery garland ring! You’ve successfully transformed a simple base ring and greenery into a stunning and personalized decoration that brings the beauty of nature into your space. Creating your own garland allows you to showcase your creativity while adding a touch of natural elegance to your home or event décor.
Throughout the process, you’ve learned how to gather the right materials, prepare the base ring, attach and layer the greenery, secure it in place, and add the perfect finishing touches. Each step plays a crucial role in creating a visually stunning and durable garland that you can enjoy for a long time.
Remember, the possibilities for greenery garland rings are endless. You can experiment with different types of greenery, colors, textures, and decorative elements to craft unique pieces that suit any season or occasion. Let your imagination run wild and create garlands that reflect your personal style and taste.
Whether you’re using fresh foliage from your garden or faux greenery, the joy of creating something with your own hands and bringing a touch of nature indoors is truly rewarding. Your greenery garland ring can serve as a statement centerpiece, a welcoming door wreath, or a beautiful wall hanging.
Now that you have the knowledge and skills, feel free to share your newfound expertise with others or create additional garlands for different spaces and events. Greenery garland rings also make thoughtful and heartfelt gifts for friends and loved ones, showcasing your creativity and thoughtfulness.
We hope this step-by-step guide has inspired you to embark on more DIY projects and explore the wonderful world of gardening and decorating. Happy crafting and may your greenery garland rings bring joy and beauty to your surroundings!
Frequently Asked Questions about How To Make Greenery Garland Rings
Was this page helpful?
At Storables.com, we guarantee accurate and reliable information. Our content, validated by Expert Board Contributors, is crafted following stringent Editorial Policies. We're committed to providing you with well-researched, expert-backed insights for all your informational needs.


0 thoughts on “How To Make Greenery Garland Rings”