Home>Garden Essentials>How To Plant Cantaloupe Seeds
Garden Essentials
How To Plant Cantaloupe Seeds
Modified: May 6, 2024
Learn the step-by-step process of planting cantaloupe seeds in your garden and enjoy homegrown, juicy melons all summer long.
(Many of the links in this article redirect to a specific reviewed product. Your purchase of these products through affiliate links helps to generate commission for Storables.com, at no extra cost. Learn more)
Introduction:
Welcome to the world of gardening! If you’re looking to add a deliciously sweet and juicy fruit to your garden, cantaloupe is an excellent choice. Growing your own cantaloupe not only ensures you have access to fresh, flavorful fruits but also allows you to experience the joy of watching your plants thrive and harvest the bountiful rewards. In this article, we will guide you through the process of planting cantaloupe seeds and provide valuable tips to help your plants flourish.
Cantaloupes, scientifically known as Cucumis melo, are members of the cucurbit family, a group of vining plants that includes cucumbers, pumpkins, and squash. This warm-season crop thrives in areas with long, hot summers, making it perfect for avid gardeners looking to diversify their produce.
Growing cantaloupes from seeds is not only cost-effective but also gives you greater control over the quality and variety of your fruits. By carefully selecting the right cantaloupe seeds and following the proper planting and care techniques, you can enjoy a bountiful harvest of sweet, succulent cantaloupes.
In this guide, we will take you through the step-by-step process of planting cantaloupe seeds, from choosing the right seeds to harvesting your ripe, delicious fruits. So, grab your gardening tools and let’s get started on this exciting journey!
Key Takeaways:
- Choose the right cantaloupe seeds based on your climate, size, flavor, and disease resistance for a successful harvest. Select reputable sources for quality seeds.
- Prepare well-drained, nutrient-rich soil, and provide proper care and maintenance to grow healthy cantaloupe plants. Harvest ripe fruits using color, stem, and thump tests for sweetness.
Read more: How To Save Cantaloupe Seeds
Step 1: Choosing the Right Cantaloupe Seeds
When it comes to planting cantaloupe seeds, selecting the right variety is essential. Cantaloupes come in a wide range of sizes, flavors, and colors, so it’s crucial to choose the one that suits your preferences and growing conditions. Here are some factors to consider when selecting cantaloupe seeds:
- Climate Adaptability: Cantaloupes thrive in warm climates with temperatures ranging between 70 to 90 degrees Fahrenheit. If you live in a region with a shorter growing season, choose cantaloupe varieties that have a shorter maturation period, such as ‘Hales Best Jumbo’ or ‘Ananas’. For a longer growing season, you can opt for varieties like ‘Ambrosia’ or ‘Sugar Cube’, which tend to take a bit longer to mature.
- Size and Shape: Cantaloupes come in various shapes and sizes, from small, individual-serving types to large, oblong varieties. Consider the available space in your garden and how you plan to use the fruits when selecting the size and shape of the cantaloupe. Small-sized varieties like ‘Lilliput’ or ‘Goddess’ are perfect for containers or smaller garden spaces, while larger varieties like ‘Athena’ or ‘Charleston Gray’ are ideal for open ground planting.
- Flavor and Texture: Cantaloupes can vary in flavor from super-sweet to more subtle and can have different textures ranging from firm to melt-in-your-mouth tender. If you prefer a sweeter cantaloupe, look for varieties like ‘Savor’ or ‘Ariel’. For those who enjoy a more musky undertone, ‘Hearts of Gold’ or ‘Ha’ogen’ are excellent choices.
- Disease Resistance: Some cantaloupe varieties are bred to be resistant to common diseases, such as powdery mildew or downy mildew. If your area is prone to certain diseases, consider choosing disease-resistant varieties to ensure the health and productivity of your plants. Varieties like ‘Resist 5.0’ or ‘Honey Bun’ are known for their disease resistance.
Once you have chosen the right cantaloupe seeds, ensure they are from a reputable source to guarantee their quality. Consider purchasing seeds from reputable seed companies or nurseries to increase the likelihood of successful germination and healthy growth.
Remember, selecting the right cantaloupe seeds is the first step towards a successful harvest. By taking into account climate adaptability, size and shape, flavor and texture, and disease resistance, you can choose cantaloupe varieties that will thrive in your garden and provide you with delicious fruits to enjoy.
Step 2: Preparing the Soil
A healthy and well-prepared soil is crucial for the successful growth of cantaloupe plants. Before planting your cantaloupe seeds, it is important to ensure that the soil is rich in nutrients and has good drainage. Here’s how you can prepare the soil for optimal cantaloupe growth:
- Choose the Right Location: Cantaloupes thrive in full sun, so select a spot in your garden that receives at least 6-8 hours of direct sunlight daily. Make sure the area has well-drained soil to prevent waterlogging, as excess moisture can lead to root rot and other diseases.
- Clear the Area: Remove any weeds, rocks, or debris from the planting area. Weeds compete for nutrients and can hinder the growth of your cantaloupe plants. Clearing the area ensures that your cantaloupes have ample space and resources to grow.
- Test the Soil: Conduct a soil test to determine its pH level and nutrient content. Cantaloupes prefer slightly acidic to neutral soil, with a pH range of 6.0 to 7.0. If the soil pH is too low, you can add lime to raise it, or if it’s too high, you can add sulfur to lower it. Adjusting the pH level creates an optimal environment for your cantaloupe plants to thrive.
- Improve Soil Fertility: Enhance the soil fertility by incorporating organic matter, such as compost or well-rotted manure. This helps enrich the soil with essential nutrients and improves its texture, allowing for better water retention and root development. Spread a layer of organic matter on the planting area and mix it into the soil to a depth of about 6-8 inches.
- Loosen the Soil: Use a garden fork or tiller to loosen the soil in the planting area. This helps improve aeration and allows roots to penetrate easily. Avoid over-tilling, as it can disrupt the soil structure and negatively impact drainage.
By following these steps, you can ensure that your soil is well-prepared to provide the necessary nutrients and growing conditions for your cantaloupe plants. Remember, healthy soil is the foundation for healthy plants, so invest time and effort in preparing your soil before planting.
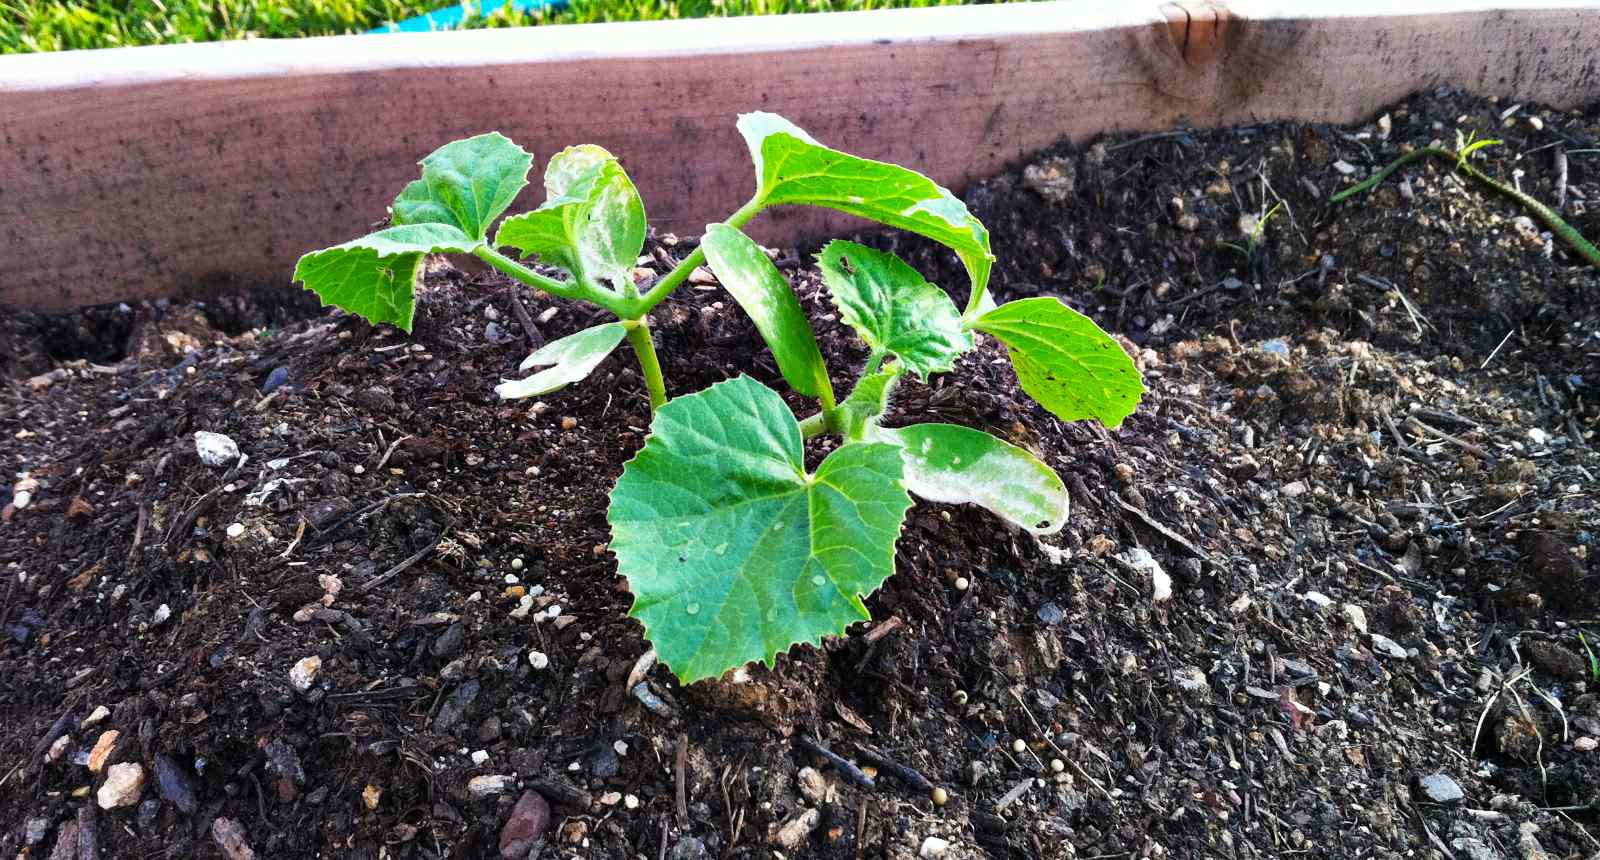
Step 3: Planting the Seeds
Now that you have chosen the right cantaloupe seeds and prepared the soil, it’s time to plant those seeds and get your cantaloupe journey underway. Follow these steps to ensure successful seed planting:
- Sow at the Right Time: Cantaloupes are warm-season crops, so it’s important to plant the seeds when the soil and air temperatures have warmed up. Wait until all danger of frost has passed and the soil temperature reaches around 60 degrees Fahrenheit (15 degrees Celsius) before sowing the seeds.
- Spacing and Depth: Create mounds or raised beds in your garden to improve drainage and prevent waterlogging. Space the mounds or rows about 3-4 feet apart to allow the vines to spread comfortably. Plant the cantaloupe seeds in groups of 2-3 seeds per mound or 6-8 inches apart in rows. Plant the seeds approximately 1 inch deep into the soil.
- Watering: After sowing the seeds, gently water the soil to ensure good seed-to-soil contact. Be careful not to wash away the seeds. Throughout the germination and seedling stage, maintain moist soil by watering regularly. However, avoid over-watering, as it can lead to fungal diseases and root rot.
- Thinning: Once the seedlings have grown a few inches tall and have developed their first true leaves, it’s time to thin them out. Remove the weaker seedlings, leaving only the strongest and healthiest ones in each mound or row. Thinning helps prevent overcrowding and allows the remaining plants to receive sufficient nutrients and space to grow.
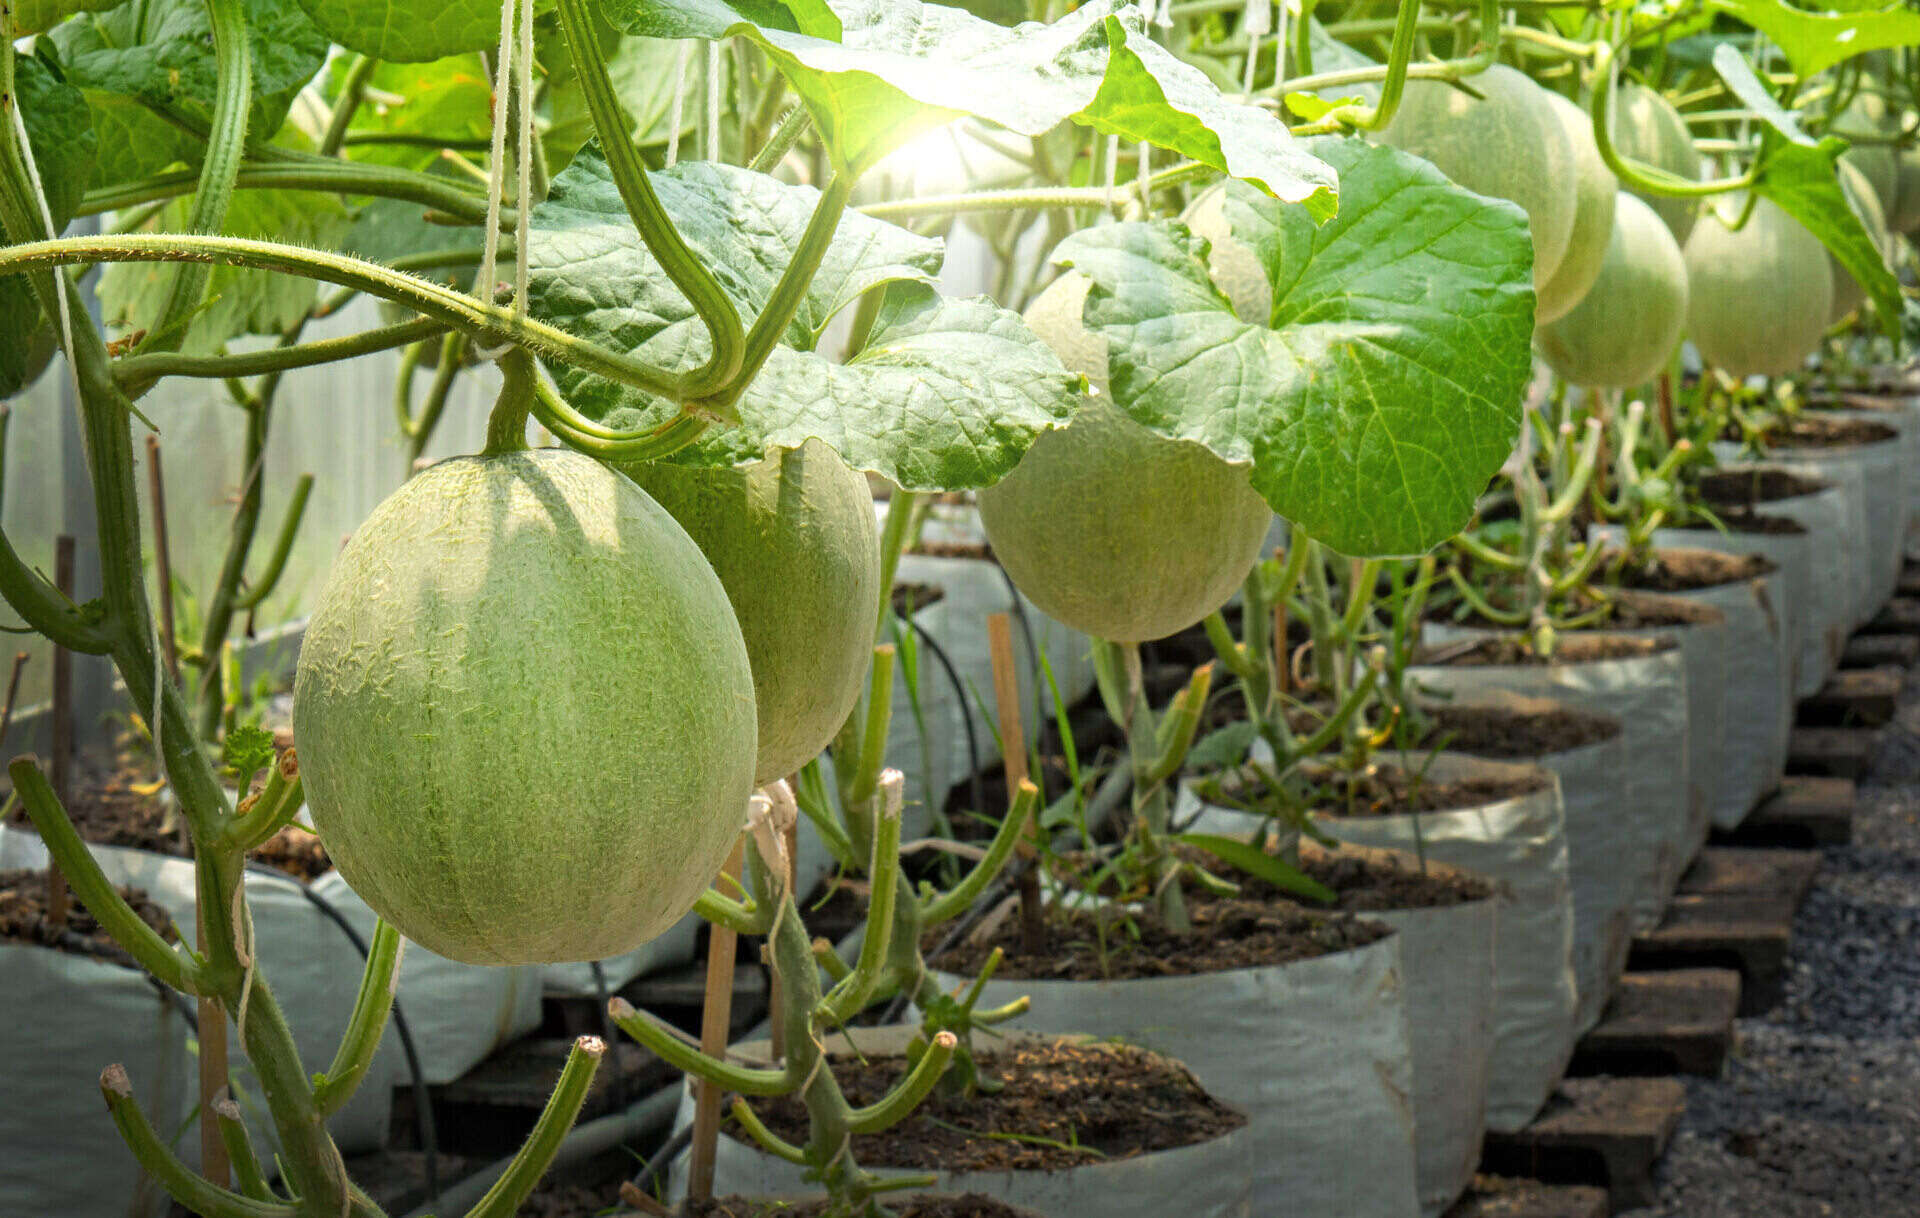
- Support Structures: Cantaloupe plants are climbers, and their vine-like growth can benefit from support structures such as trellises, cages, or stakes. As the plants grow, gently guide the vines to climb the structures to prevent the fruits from resting on the ground, which can lead to rotting and pest infestations.
Remember to label each mound or row with the variety of cantaloupe you planted. This will help you keep track of the different varieties as they grow and mature.
With proper seed spacing, adequate watering, and supportive structures, your cantaloupe seeds will sprout and grow into healthy seedlings. Patience and care in the early stages will set the foundation for a successful harvest down the line.
When planting cantaloupe seeds, make sure to choose a sunny spot with well-drained soil. Plant the seeds 1 inch deep and 18 inches apart. Keep the soil consistently moist and provide support for the vines as they grow.
Step 4: Providing Proper Care and Maintenance
Once your cantaloupe plants have sprouted and are growing, it’s crucial to provide them with the proper care and maintenance they need to thrive. Here are some essential practices to follow:
- Watering: Cantaloupes require consistent moisture, especially during hot and dry periods. Water the plants deeply, ensuring the soil is evenly moist but not waterlogged. Aim to provide around 1-2 inches of water per week, either through irrigation or rainfall. Avoid overhead watering, as it can lead to foliar diseases. Instead, water directly at the base of the plants, keeping the leaves as dry as possible.
- Fertilizing: Cantaloupes are heavy feeders and benefit from regular fertilization. Apply a balanced, organic fertilizer high in nitrogen, phosphorus, and potassium. Start fertilizing once the plants have established and continue every two to three weeks throughout the growing season. Be cautious not to over-fertilize, as excessive nitrogen can lead to excessive foliage growth at the expense of fruit development.
- Pruning and Training: To encourage better airflow and sunlight penetration, prune off any dead or yellowing leaves. Additionally, prune the lateral vines to redirect energy towards fruit production. Consider using trellises or cages to support the vines and promote upward growth. Proper training and pruning help prevent diseases and ensure more accessible harvesting and maintenance.
- Weed Control: Regularly monitor and remove weeds from the planting area. Weeds compete for nutrients, water, and sunlight, potentially inhibiting the growth of your cantaloupe plants. Mulching around the base of the plants can help suppress weed growth, retain moisture, and regulate soil temperature.
- Pest and Disease Management: Keep a lookout for common pests such as aphids, cucumber beetles, and squash bugs. Monitor the plants regularly and take immediate action if you notice any signs of pest infestation. Utilize organic pest control methods such as handpicking insects or using insecticidal soaps or neem oil. Disease prevention is crucial as well. Avoid overwatering, provide proper airflow, and consider using organic fungicides if necessary.
- Support and Fruit Protection: As the cantaloupe fruits grow, provide support by using slings or nets to prevent them from touching the ground and becoming damaged or vulnerable to rot. This also helps to maintain an even shape and promote better air circulation around the fruits.
By following these care and maintenance practices, you’ll be giving your cantaloupe plants the best chance for healthy growth and a bountiful harvest. Regular attention to watering, fertilizing, pruning, and pest and disease control ensures that your cantaloupes can thrive and produce delicious, flavorful fruits.
Read more: How To Preserve Cantaloupe Seeds
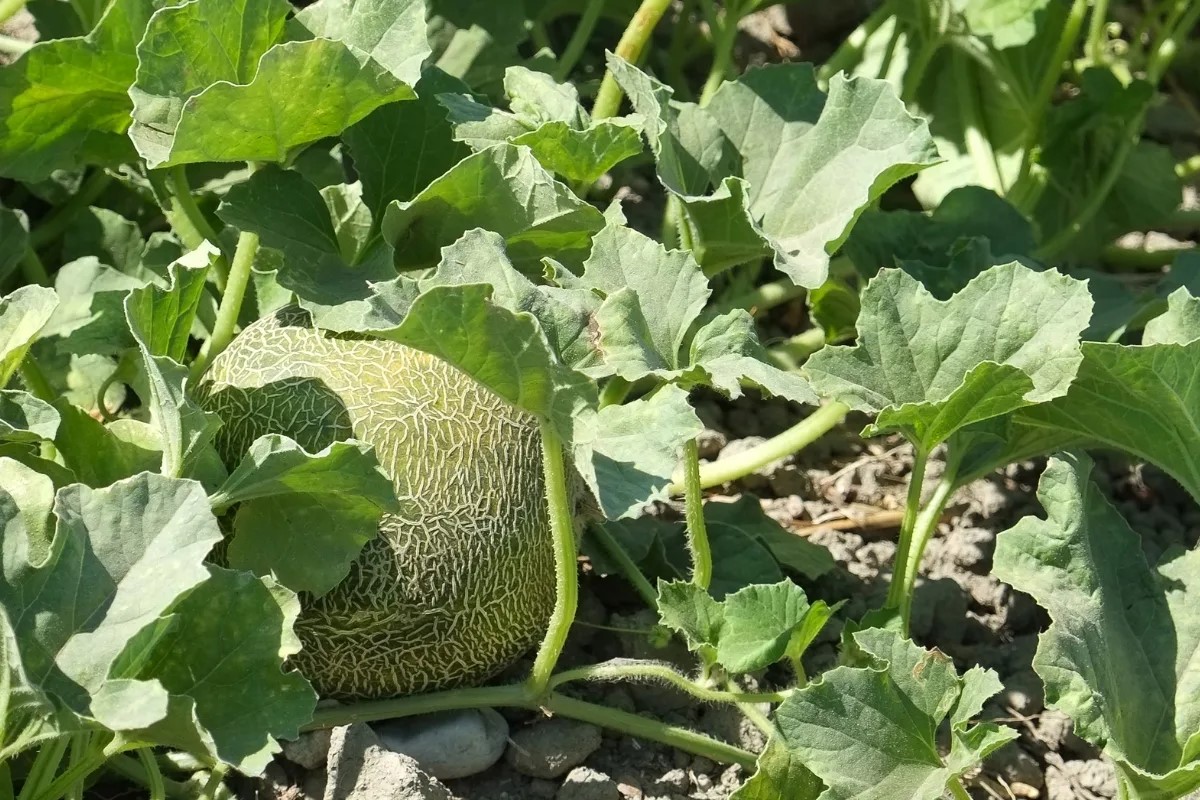
Step 5: Harvesting Ripe Cantaloupes
After all your hard work and patience, the moment has finally arrived to harvest your ripe and juicy cantaloupes. Here are some tips to help you determine when and how to harvest your cantaloupes:
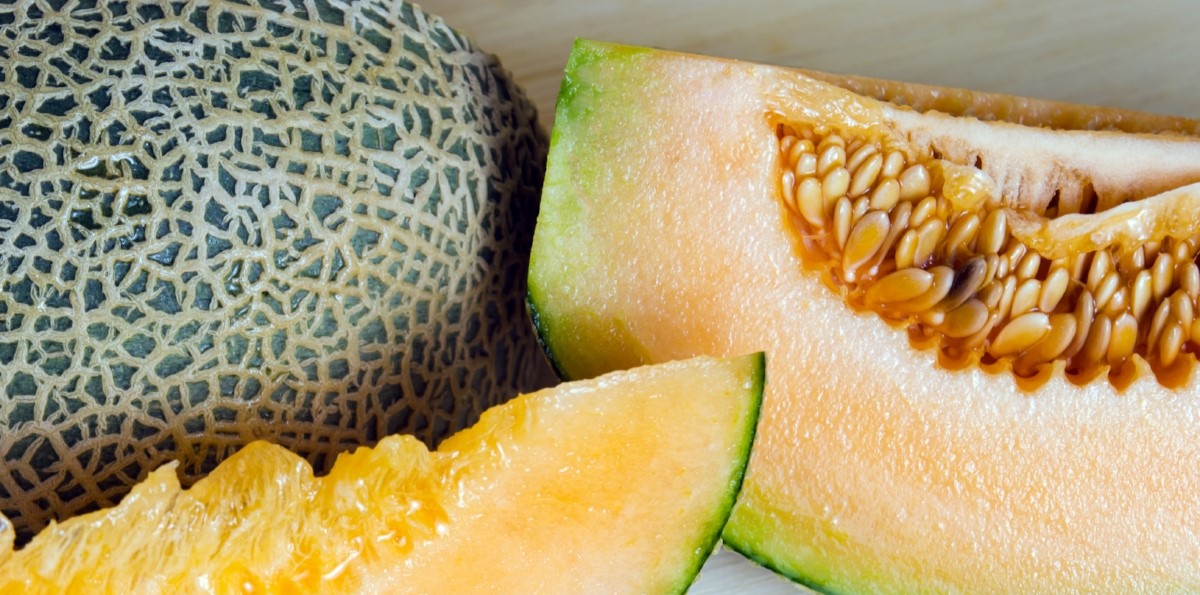
- Check for Signs of Maturity: The first step in determining if your cantaloupes are ready for harvest is to look for signs of maturity. Ripe cantaloupes often exhibit subtle changes in color, usually becoming more vibrant and golden. The skin should be firm, but not too hard, and have a slightly rough texture. Additionally, the fruit should emit a sweet aroma when you gently sniff the blossom end.
- Examine the Stem: Another reliable indicator of ripeness is the condition of the stem. Ripe cantaloupes will have a dry and easily detachable stem. If the stem is still green and firmly attached, it’s an indication that the fruit is not yet mature and needs more time to develop its flavor and sweetness.
- Use the “Thump” Test: While not foolproof, the “thump” test can be an additional method for determining ripeness. Gently tap the fruit with your knuckles and listen for a deep, hollow sound. If the sound is dull or doesn’t resonate, the cantaloupe may not be fully ripe and should be left to ripen further on the vine.
- Cut the Fruit from the Vine: Once you’ve determined that a cantaloupe is ripe and ready for harvest, carefully cut the fruit from the vine using a sharp knife or garden shears. Leave a small portion of the stem attached to the fruit to help prolong its freshness.
- Handle with Care: Cantaloupes have delicate skin that can bruise easily, so it’s important to handle them with care. Place harvested cantaloupes gently in a basket or crate to avoid any damage or bruising.
- Store and Enjoy: Cantaloupes are best enjoyed fresh, so it’s recommended to consume them shortly after harvest. If you can’t enjoy them right away, store them at room temperature for a day or two to fully ripen. Once ripe, you can refrigerate the cantaloupes to extend their shelf life and keep them fresh for up to a week.
Remember, the flavor and sweetness of cantaloupes reach their peak when harvested at the right time. Harvesting too early can result in fruit that lacks the desired sweetness, while waiting too long can cause the fruits to become overripe and mushy. Therefore, paying close attention to the signs of maturity and using these harvesting techniques will ensure that you enjoy perfectly ripe and delicious cantaloupes from your garden.
Conclusion
Congratulations on successfully growing your own cantaloupes! By following the steps outlined in this guide, you have learned how to choose the right cantaloupe seeds, prepare the soil, plant the seeds, provide proper care and maintenance, and harvest ripe and flavorful cantaloupes. Growing cantaloupes can be a rewarding and fulfilling experience, allowing you to enjoy the taste of fresh, homegrown fruits while connecting with nature.
Remember, each step in the process contributes to the overall success of your cantaloupe plants. From selecting the right variety for your climate and preferences to providing the proper care and attention they need, your effort will be rewarded with a bountiful harvest of sweet and juicy cantaloupes.
Have fun experimenting with different cantaloupe varieties to discover unique flavors, textures, and sizes. As you gain experience, you can even save seeds from your favorite fruits to grow your own varieties in the future.
Whether you enjoy your cantaloupes fresh, in salads, or as a base for refreshing summer drinks, the satisfaction of growing and harvesting your own produce cannot be matched. So, grab a slice of sweet, succulent cantaloupe and savor the fruits of your labor.
Happy gardening and happy indulging in your homegrown cantaloupes!
Now that you've mastered planting cantaloupe seeds, why not spruce up your garden's appeal? For those eager to add charm and security to their outdoor spaces, our article on garden fence ideas offers innovative and stylish solutions. From rustic to modern designs, find fences that not only protect your juicy cantaloupes but also transform your garden into a picturesque retreat. Don't miss out on these creative options to elevate your garden's aesthetics and functionality.
Frequently Asked Questions about How To Plant Cantaloupe Seeds
Was this page helpful?
At Storables.com, we guarantee accurate and reliable information. Our content, validated by Expert Board Contributors, is crafted following stringent Editorial Policies. We're committed to providing you with well-researched, expert-backed insights for all your informational needs.


0 thoughts on “How To Plant Cantaloupe Seeds”