Home>Garden Essentials>What Is Pelleted Seeds
Garden Essentials
What Is Pelleted Seeds
Modified: September 1, 2024
Discover the benefits of using pelleted seeds in your garden. Enhance your gardening experience with our comprehensive guide on what pelleted seeds are and how they can improve your planting success.
(Many of the links in this article redirect to a specific reviewed product. Your purchase of these products through affiliate links helps to generate commission for Storables.com, at no extra cost. Learn more)
Introduction
Welcome to the world of gardening, where seeds hold the promise of beautiful blooms and abundant harvests. If you are a gardening enthusiast or a professional horticulturalist, you may have come across the term “pelleted seeds.” But what exactly are pelleted seeds, and what benefits do they offer?
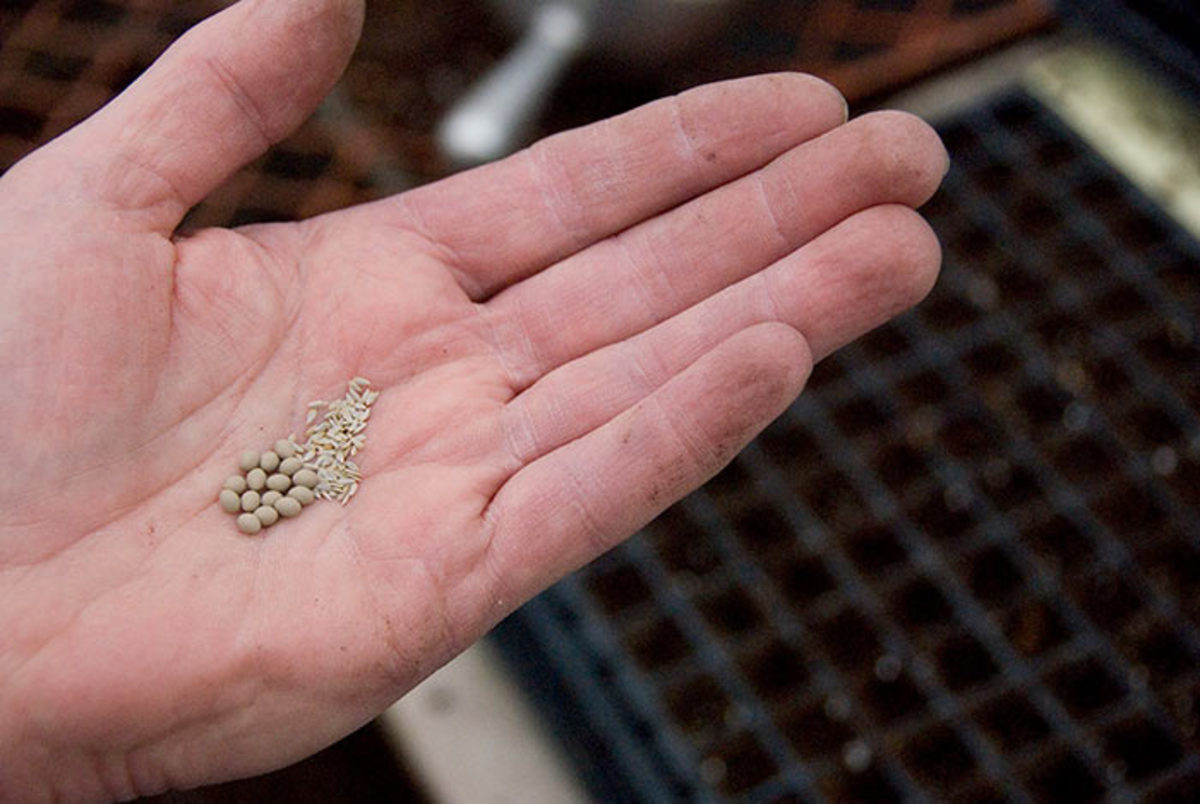
Pelleted seeds, also known as coated seeds, are a specialized form of seed that has been treated with a coating material to improve handling and germination rates. The coating is typically made of an inert material, such as clay or a mixture of clay and other natural substances. This coating encases each individual seed, forming small spheres that are uniform in size and shape. These coated seeds are easier to sow, handle, and space, making them a popular choice among gardeners.
The concept of pelleting seeds originated in the agricultural industry, where it was initially used to enhance precision sowing for large-scale farming. However, it has since gained popularity in the gardening community due to its numerous benefits. In this article, we will delve deeper into pelleted seeds, exploring their advantages, types, and tips for using them effectively.
So, if you want to simplify your seed sowing process and maximize your gardening success, read on to discover the wonders of pelleted seeds and how they can transform your gardening experience.
Key Takeaways:
- Pelleted seeds are coated with a protective layer, making them easier to handle, sow, and space. They offer improved germination and reduced waste, simplifying the gardening process for all enthusiasts.
- The pelleting process involves coating seeds with a protective layer, enhancing their handling and sowing capabilities. Pelleted seeds come in various types, including flowers, vegetables, herbs, lawns, and fruits, offering convenience and precision for gardeners.
Read more: How To Store Pellet Grill Pellets
Definition of Pelleted Seeds
Pelleted seeds, also known as coated seeds, are seeds that have been covered with a protective outer layer, creating small uniform spheres. This coating is typically made of an inert material, such as clay or a mix of clay and other natural substances. The purpose of pelleting seeds is to make them easier to handle, sow, and space.
The process of pelleting involves applying the coating material to the seeds, which is often done using specialized equipment. The coating adheres to the seed, forming a protective layer that encases it. The resulting pelleted seeds are round in shape and have a smooth, uniform surface. They can range in size, depending on the type of seed and the coating used.
Pelleted seeds offer several advantages over traditional bare seeds. The coating serves as a protective barrier, safeguarding the seed from damage, disease, and insect pests. It also improves the seed’s germination and growth by providing a consistent and controlled environment for the embryo. Additionally, the coating makes the seeds more visible, which is beneficial for accurate spacing during sowing.
While pelleted seeds are commonly used in commercial agriculture, they have gained popularity among home gardeners as well. The added convenience and ease of handling make them a preferred choice for individuals who want to simplify the seed sowing process and increase their chances of successful germination.
It is important to note that pelleted seeds are not genetically modified or altered in any way. The coating material is purely for practical purposes, and it does not affect the genetic makeup or characteristics of the seed.
Overall, pelleted seeds are a valuable innovation in the world of gardening, providing a practical solution for improved seed handling and successful seed germination. Whether you are a beginner gardener or an experienced horticulturalist, pelleted seeds can help enhance your gardening experience and increase your chances of growing healthy plants.
Benefits of Using Pelleted Seeds
Using pelleted seeds in your garden comes with numerous benefits that can streamline your gardening experience and increase the chances of successful germination and growth. Let’s explore some of the key advantages of using pelleted seeds:
- Easier handling: The coating on pelleted seeds makes them larger and easier to handle, especially for those with limited dexterity or fine motor skills. The smooth surface of the coating reduces the likelihood of seeds slipping through fingers and ensures a more controlled and precise sowing process.
- Accurate spacing: Pelleted seeds are easier to see and manipulate, allowing for more accurate spacing during sowing. This prevents overcrowding and competition among seedlings, ensuring that each plant has enough space to grow and access essential nutrients and sunlight.
- Improved germination: The coating on pelleted seeds helps regulate moisture levels and provides a protective barrier against disease and pests. These factors contribute to better germination rates, increasing the likelihood of successful seedling emergence and reducing the risk of seed failure.
- Time-saving: Since pelleted seeds are larger and easier to handle, the sowing process becomes more efficient. Gardeners can save time by sowing seeds more quickly and with greater precision, allowing for more productive and organized planting.
- Reduces waste: The size and shape consistency of pelleted seeds make it easier to sow without wasting seeds. Each seed is evenly coated, ensuring that you can sow the desired number of seeds without any excess or loss.
- Improved aesthetics: Pelleted seeds add a touch of visual appeal to the sowing process. The uniform coating gives an attractive appearance to the seeds, making gardening a more visually pleasing experience.
- Increased success rate: The combination of better handling, accurate spacing, and improved germination contributes to a higher success rate in seed establishment. This means you are more likely to see healthy seedlings emerge and flourish in your garden.
These benefits make pelleted seeds an excellent choice for both novice gardeners and experienced horticulturalists alike. Whether you are sowing seeds in open ground, containers, or starting plants indoors, pelleted seeds can simplify the process and increase the chances of a successful and bountiful garden.
The Pelleting Process
The pelleting process involves coating seeds with a protective layer, transforming them into pelleted seeds. This coating not only enhances the appearance of the seeds but also improves their handling, sowing, and germination characteristics. Let’s dive into the steps involved in the pelleting process:
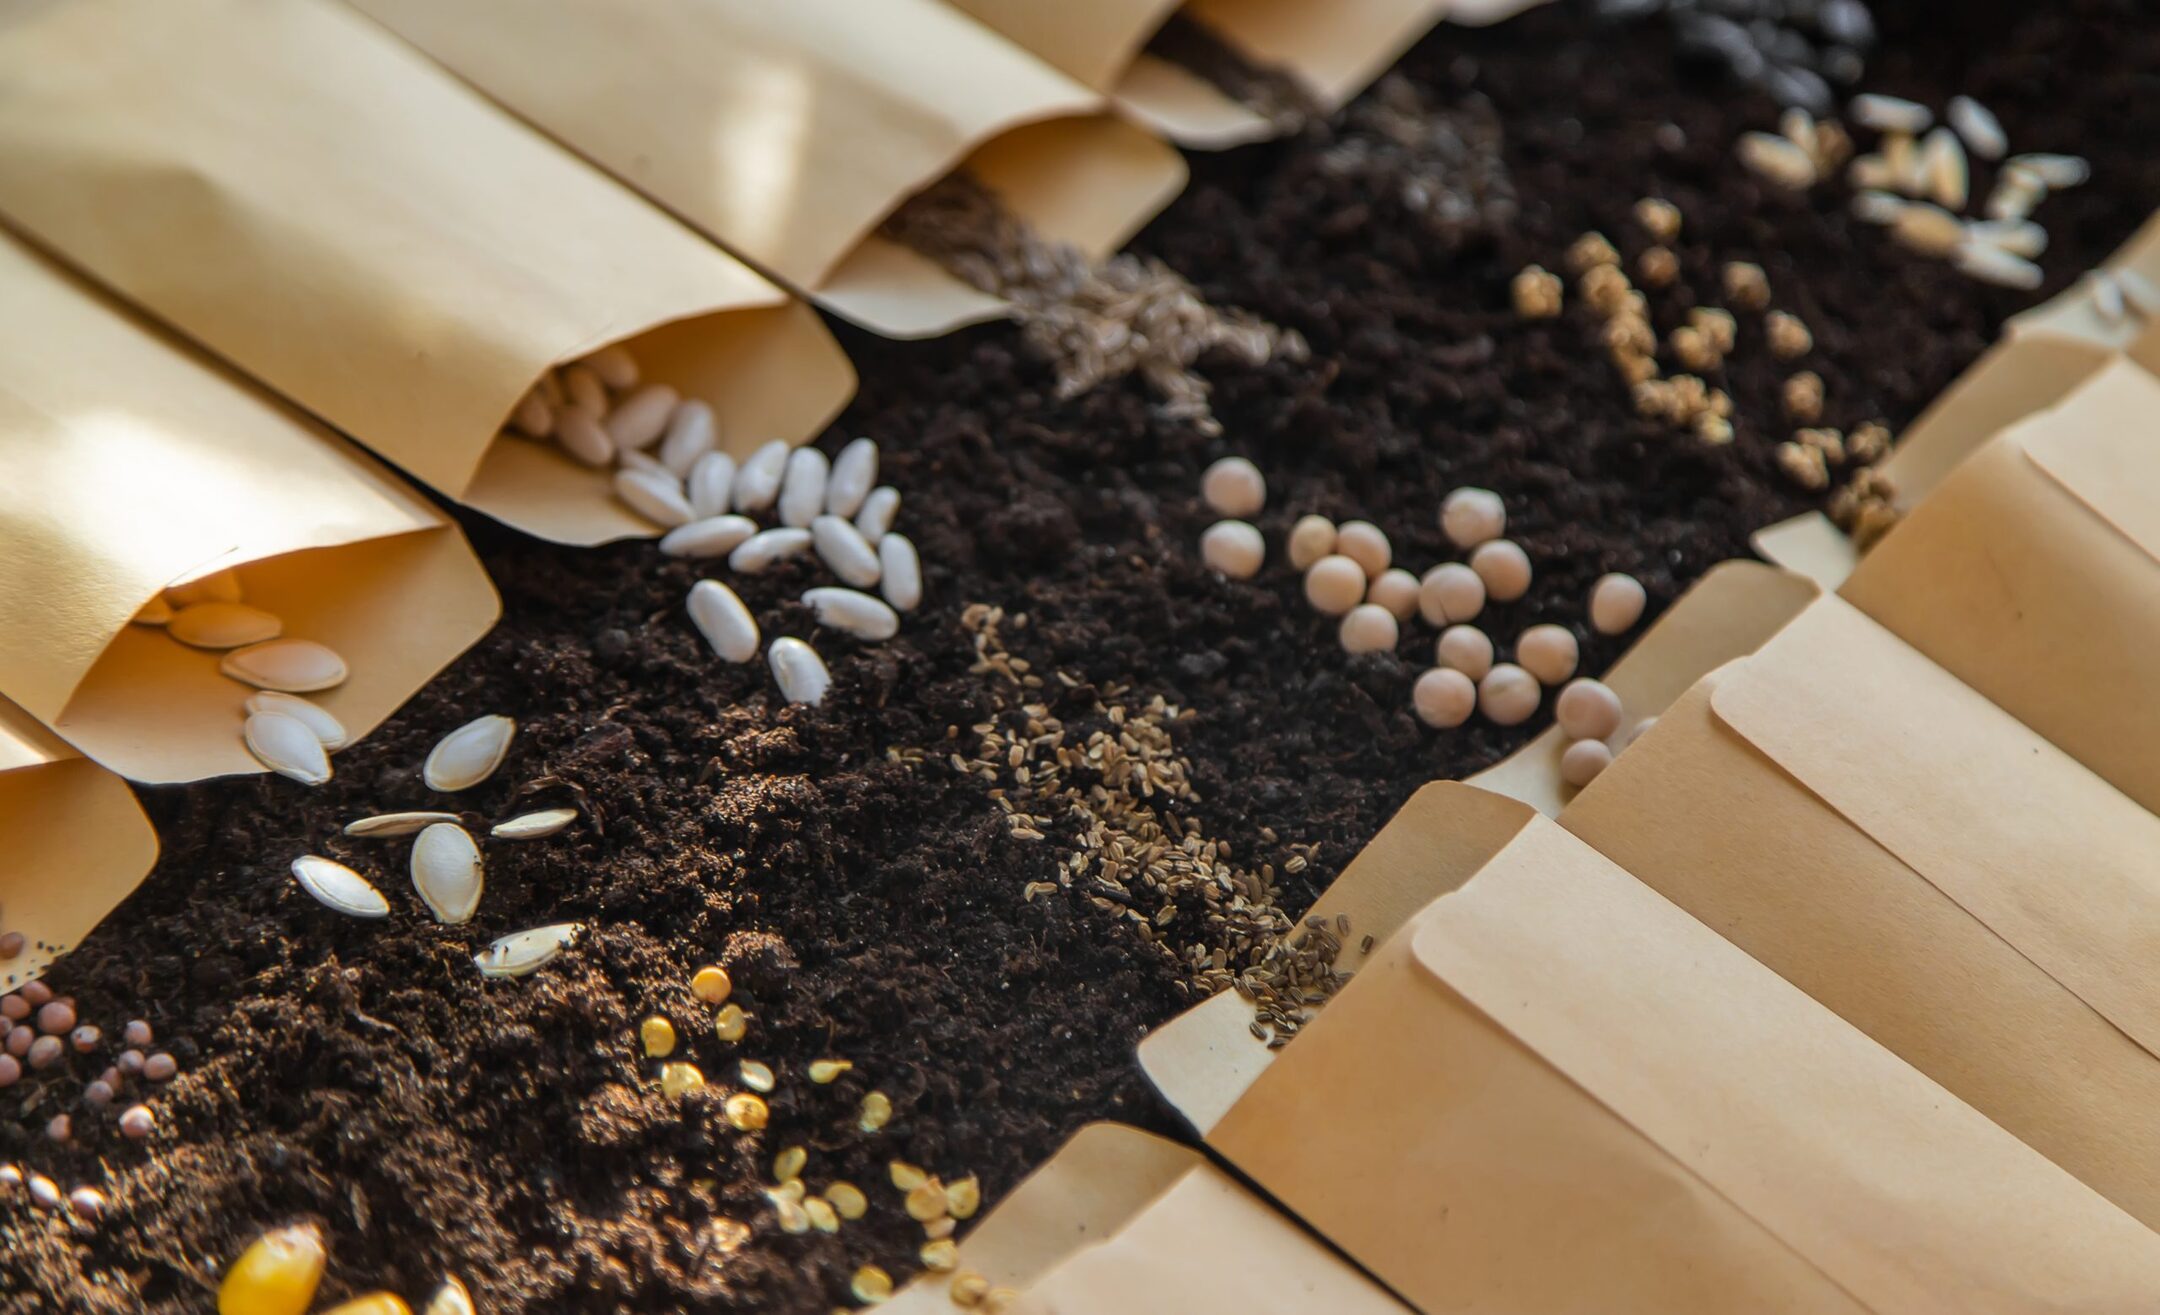
- Selection of seeds: The first step is to select the seeds for pelleting. Typically, small seeds such as lettuce, carrot, or petunia seeds are chosen due to their small size and delicate nature. These seeds can benefit greatly from the added protection and ease of handling that the pelleting process provides.
- Preparation of coating material: The coating material is prepared by mixing an inert substance like clay with other additives, such as binders, lubricants, and colorants. The clay acts as the main component, while the other additives help in the formation and adherence of the coating to the seeds.
- Coating application: The seeds are placed in a rotating drum or pan that is designed specifically for the pelleting process. The coating material, in the form of a suspension or slurry, is then applied to the seeds inside the drum. As the drum rotates, the coating material adheres to the seeds, forming a thin layer around each seed.
- Drying: After the coating has been applied, the pelleted seeds undergo a drying process. This allows the coating to harden and form a protective shell around the seeds. The drying can be done naturally by air drying or through the use of drying chambers or ovens, depending on the scale of production.
- Sizing and sorting: Once the pelleted seeds are dry, they are typically screened to remove any oversized or undersized seeds. This step ensures uniformity in seed size and shape, making them easier to handle and sow.
- Packaging: The final step in the pelleting process is packaging the pelleted seeds in suitable containers. The packaging ensures that the seeds remain protected and can be conveniently stored and transported until they are ready for use.
The pelleting process is carefully controlled to ensure that each seed receives an even and consistent coating. The thickness of the coating can vary depending on the type of seed, desired germination rates, and other factors determined by the manufacturer.
It’s important to note that the pelleting process does not alter the genetic makeup of the seeds. The coating material serves as a protective layer and does not affect the growth or development of the seed’s embryo. Once the pelleted seeds are sown, the coating dissolves in the soil, allowing the seeds to germinate and grow naturally.
By understanding the pelleting process, gardeners can appreciate the expertise and precision involved in producing pelleted seeds. These coated seeds offer several advantages that can enhance the overall success and enjoyment of gardening.
When planting pelleted seeds, make sure to follow the instructions on the seed packet for proper planting depth and spacing. The pelleted coating helps with handling and planting, but it’s important to handle them gently to avoid damaging the coating.
Types of Pelleted Seeds
Pelleted seeds are available in a wide variety of types, catering to the diverse needs and preferences of gardeners. Let’s explore some of the common types of pelleted seeds:
- Flower seeds: Pelleted flower seeds are popular among gardeners, as they offer convenience and ease of sowing when it comes to delicate or tiny flower seeds. Whether you’re looking to grow vibrant annuals or stunning perennials, there is a wide range of pelleted flower seeds available, including popular varieties like petunias, marigolds, and pansies.
- Vegetable seeds: Pelleted vegetable seeds are particularly beneficial when it comes to small seeds that require precise spacing, such as carrots, lettuce, and onions. Using pelleted vegetable seeds ensures that each seed is evenly spaced, preventing overcrowding and facilitating easier cultivation and harvesting.
- Herb seeds: For those who love to add fresh herbs to their culinary creations, pelleted herb seeds can be a game-changer. Herbs like basil, parsley, and dill can be challenging to sow precisely due to their small size. Pelleted herb seeds make the task easier, ensuring proper spacing and promoting successful germination.
- Lawn seeds: Pelleted lawn seeds are designed for efficient and even distribution when establishing a new lawn or repairing bare patches. The coating helps in proper spacing and reduces the risk of uneven growth. Common lawn grasses, including Bermuda grass, fescue, and Kentucky bluegrass, can be found in pelleted form.
- Fruit seeds: While less common, some fruit seeds are also available in pelleted form. This includes smaller seeds like strawberry seeds, which can be coated to facilitate easier handling and sowing. Pelleted fruit seeds are especially valuable for commercial growers or those looking to establish larger fruit plantations.
It’s worth noting that not all types of seeds are suitable for pelleting. Larger seeds like beans or corn, for example, are typically not pelleted due to their size and ease of handling. However, for smaller and more delicate seeds, pelleting offers significant advantages in terms of ease and accuracy of sowing.
When purchasing pelleted seeds, be sure to read the seed packet or product description to ensure that you are selecting the appropriate type for your specific gardening needs. A wide selection of pelleted seeds can be found at local garden centers, online seed catalogs, or specialty seed companies.
By choosing the right type of pelleted seed for your garden, you can enjoy the convenience and benefits they provide, making your gardening experience more enjoyable and successful.
Read more: How To Store Pellets For Pellet Stove
Advantages and Disadvantages of Pelleted Seeds
Pelleted seeds offer several advantages that can greatly benefit gardeners. However, like any gardening technique or product, they also come with a few drawbacks. Let’s take a closer look at the advantages and disadvantages of using pelleted seeds:
- Advantages:
- Ease of handling: The larger size and smooth coating of pelleted seeds make them easier to handle, particularly for individuals with limited dexterity or fine motor skills.
- Accurate spacing: Pelleted seeds allow for precise spacing during sowing, preventing overcrowding and helping to ensure that each plant has enough space to grow and thrive.
- Improved germination: The coating acts as a protective barrier, regulating moisture levels and providing a controlled environment for the seeds to germinate successfully.
- Time-saving: Pelleted seeds enable faster and more efficient sowing, saving valuable time during the planting process.
- Reduced waste: The uniform size and shape of pelleted seeds make it easier to sow without wasting seeds, as each pellet contains a single seed.
- Disadvantages:
- Cost: Pelleted seeds tend to be more expensive than conventional bare seeds because of the additional processing required to coat them.
- Selection limitations: Not all types of seeds are available in pelleted form, limiting the options for gardeners who prefer pelleted seeds.
- Loss of genetic diversity: Some critics argue that the pelleting process may contribute to the loss of genetic diversity among plant populations, as it focuses on certain commercially popular varieties.
- Dependency on commercial suppliers: Pelleted seeds are often produced and sold by commercial seed suppliers. This can limit the availability and access to pelleted seeds for home gardeners who prefer to save and exchange their own seeds.
Despite these disadvantages, many gardeners find that the benefits of using pelleted seeds outweigh the drawbacks. The ease of handling, improved germination rates, and precise spacing offered by pelleted seeds can greatly enhance the success and efficiency of gardening projects.
Ultimately, the decision to use pelleted seeds is a personal one, based on individual gardening goals, preferences, and budget. Whether you choose to incorporate pelleted seeds into your gardening routine or stick with traditional bare seeds, the most important factor is to enjoy the process and cultivate a thriving garden.
Tips for Using Pelleted Seeds
Using pelleted seeds can simplify the seed sowing process and increase the chances of successful germination. Here are some valuable tips to help you make the most of your pelleted seeds:
- Store seeds properly: Pelleted seeds should be stored in a cool, dry place to maintain their viability. Consider using airtight containers or resealable bags to protect the seeds from moisture and humidity.
- Read the seed packet: Carefully read the instructions provided on the seed packet or product label. It will provide specific information about proper sowing depth, spacing, and any other requirements specific to that particular seed variety.
- Moisten the soil: Before sowing pelleted seeds, ensure that the soil is slightly moist. This will help the seeds adhere to the soil and aid in germination.
- Pre-soak the pellets: If the pelleted seeds seem overly dry or if you are sowing in extremely dry conditions, consider pre-soaking the pellets in water for a short period before sowing. This will help the coating dissolve more quickly and enhance seed germination.
- Optimal sowing conditions: It is important to sow pelleted seeds under the right conditions. Ensure that the soil temperature and moisture levels are appropriate for the specific seed variety you are planting.
- Watch for seedling emergence: Keep a close eye on the soil after sowing the pelleted seeds. Once the seeds germinate and seedlings start to emerge, monitor them for any signs of damping-off or other fungal diseases. Prompt action can help prevent the spread of disease and keep your seedlings healthy.
- Thin seedlings, if necessary: If the pelleted seeds have been sown too densely, it may be necessary to thin the seedlings once they have emerged. This will ensure that each seedling has sufficient space to grow and access nutrients and sunlight.
- Water gently: When watering pelleted seeds, aim for a gentle and even watering technique. This will prevent the seeds from being dislodged or displaced by a heavy stream of water.
- Practice crop rotation: If you are using pelleted vegetable seeds, consider implementing a crop rotation system in your garden. This will help prevent the buildup of pests, diseases, and nutrient deficiencies in the soil.
- Save excess pelleted seeds: If you have more pelleted seeds than you need for your current planting, consider saving the excess in a cool, dry place for future use. Properly stored pelleted seeds can remain viable for several years.
By following these tips, you can ensure that you get the most out of your pelleted seeds and increase your chances of a successful and flourishing garden. Remember to always adjust your approach based on the specific requirements of the seed variety you are planting.
Enjoy the convenience and benefits that pelleted seeds offer, and watch as your garden thrives with healthy and vibrant plants.
Conclusion
Pelleted seeds have revolutionized the way gardeners sow and grow their plants. With their distinct advantages and unique characteristics, pelleted seeds offer convenience, ease of handling, and improved germination rates.
Throughout this article, we have explored the definition of pelleted seeds and the benefits they provide. We learned about the pelleting process, which involves coating seeds with a protective layer to enhance their handling and sowing capabilities. We discovered the different types of pelleted seeds available, including flowers, vegetables, herbs, lawns, and even fruits.
While pelleted seeds offer numerous advantages, such as accurate spacing, improved germination, and reduced waste, it’s important to consider the potential disadvantages. Factors like cost, limited seed selection, and the potential loss of genetic diversity are worth noting. However, for most gardeners, the benefits outweigh the drawbacks.
To make the most of pelleted seeds, we provided valuable tips to guide you in their usage, including proper storage, pre-soaking, optimal sowing conditions, and careful watering. These tips will help ensure successful germination and healthy plant growth.
In conclusion, pelleted seeds have revolutionized the gardening world by simplifying the seed sowing process. They offer convenience, precision, and improved germination rates. Whether you are a beginner gardener looking for an easier way to handle small seeds or an experienced horticulturalist seeking enhanced efficiency, pelleted seeds can be a valuable addition to your gardening toolkit.
So, embrace the world of pelleted seeds and witness the transformation they can bring to your gardening experience. Enjoy the ease, precision, and success that pelleted seeds offer as you cultivate a garden full of beauty, abundance, and joy.
Frequently Asked Questions about What Is Pelleted Seeds
Was this page helpful?
At Storables.com, we guarantee accurate and reliable information. Our content, validated by Expert Board Contributors, is crafted following stringent Editorial Policies. We're committed to providing you with well-researched, expert-backed insights for all your informational needs.


0 thoughts on “What Is Pelleted Seeds”