Home>Furniture>Outdoor Furniture>How To Build A Patio Cover With A Corrugated Metal Roof
Outdoor Furniture
How To Build A Patio Cover With A Corrugated Metal Roof
Modified: August 27, 2024
Learn how to build a stunning patio cover with a durable and stylish corrugated metal roof. Create the perfect outdoor furniture space for relaxation and entertainment.
(Many of the links in this article redirect to a specific reviewed product. Your purchase of these products through affiliate links helps to generate commission for Storables.com, at no extra cost. Learn more)
Introduction
Creating a comfortable and inviting outdoor space is a desirable addition to any home. One way to enhance the functionality and aesthetics of your outdoor area is by building a patio cover with a corrugated metal roof. Not only does this type of roof provide excellent protection from the elements, but it also adds a modern and stylish touch to your outdoor furniture setup.
In this article, we will guide you through the step-by-step process of building a patio cover with a corrugated metal roof. We will discuss the materials and tools needed, provide detailed instructions for each stage of the construction, and offer valuable tips along the way. Whether you are a seasoned DIY enthusiast or a beginner with a passion for outdoor projects, this guide will help you create a durable and attractive patio cover that will withstand the test of time.
Before we delve into the construction process, it’s important to mention that obtaining the necessary permits, if required in your area, is crucial. Checking with your local building department will ensure that you comply with any regulations and avoid any unnecessary setbacks or fines.
Now, let’s gather our materials and tools and get started on building your dream patio cover!
Key Takeaways:
- Building a patio cover with a corrugated metal roof adds protection and modern style to your outdoor space. Remember to plan, measure, obtain permits, and secure the roof panels for a successful project.
- Completing a patio cover project involves careful preparation, sturdy installation, and finishing touches. Regular maintenance and personalization with furniture and decor create a welcoming outdoor oasis.
Read more: How To Build A Corrugated Metal Fence
Materials and Tools Needed
Before embarking on your patio cover project, it’s essential to gather all the necessary materials and tools. Here is a comprehensive list:
Materials:
- Pressure-treated lumber for support beams and posts
- Corrugated metal roofing panels
- Galvanized metal screws
- Metal roofing closure strips
- Roofing underlayment
- Flashing material
- Concrete mix
- Gravel or crushed stone
- Wood sealer or stain
- Patio furniture and accessories
Tools:
- Tape measure
- Level
- Hammer
- Drill
- Saw
- Plumb bob or string and weight
- Shovel or post hole digger
- Wheelbarrow or mixing container
- Masonry trowel
Having all the necessary materials and tools at hand will save you time and ensure a smooth construction process. It’s also important to invest in high-quality materials to create a sturdy and long-lasting patio cover.
Now that we have everything ready, let’s move on to the first step: planning and measuring the patio area.
Step 1: Planning and Measuring
Before you start any construction work, it’s crucial to carefully plan and measure the patio area where you’ll be installing the cover. This step is essential to ensure that your patio cover fits properly and meets your specific needs.
Read more: How To Build A Tin Roof Patio Cover
1. Determine the Size
Decide on the size of your patio cover based on the available space and your desired coverage. Consider the furniture and activities you plan to have under the cover to determine the ideal dimensions.
2. Mark the Area
Use stakes or spray paint to mark the perimeter of the patio cover on the ground. This will give you a visual reference when measuring and help you visualize the final structure.
3. Measure for Support Beams
Measure and mark the locations for the support beams. The number of beams required will depend on the size of the cover and the anticipated load it will bear. Typically, placing beams 6 to 8 feet apart is recommended.
4. Determine Beam Height
Decide on the desired height of your patio cover. Keep in mind the clearance required above your patio furniture and any other elements you plan to have under the cover.
5. Check for Obstructions
Identify and clear any obstructions in the patio area, such as tree branches or utility lines. It’s important to have a clear and safe workspace before proceeding.
Once you have completed the planning and measuring stage, you are ready to move on to the next step: obtaining any necessary permits (if applicable).
Step 2: Obtaining Permits (If Applicable)
Depending on your location and local building codes, you may need to obtain permits before proceeding with the construction of your patio cover. Permits are typically required for structural modifications or additions to your property.
1. Research Local Regulations
Begin by researching the specific regulations and permit requirements in your area. Contact your local building department or visit their website to gather information on the necessary permits, fees, and any other documentation you may need.
2. Submit Permit Application
Once you have gathered all the required information, complete the permit application and submit it to the appropriate department. Provide accurate and detailed information about your planned patio cover, including the dimensions, materials, and any other relevant details.
Read more: How To Build A Patio Roof
3. Pay Permit Fees
Be prepared to pay the applicable permit fees, which will vary depending on your location and the scope of your project. Make sure to budget for these fees in your overall project cost.
4. Wait for Approval
After submitting your permit application and paying the fees, the building department will review your plans and inspect your property if necessary. The approval process can take some time, so be patient and follow up if needed.
5. Obtain the Permit
Once your permit is approved, you will receive the necessary documentation. This permit should be displayed at the construction site throughout the project. Make sure to comply with any conditions or requirements outlined in the permit.
It’s essential to obtain the necessary permits to ensure that your patio cover meets safety standards and local regulations. Failure to obtain permits can result in fines, penalties, or even having to dismantle the structure. Once you have obtained the required permits, you can proceed with the next steps of building your patio cover.
Step 3: Preparing the Patio Area
Before you can begin installing the support beams and roof panels, you need to prepare the patio area. This step involves clearing the space, ensuring proper drainage, and creating a stable foundation. Here’s what you need to do:
1. Clear the Area
Remove any furniture, plants, or obstacles from the patio area. Clearing the space will provide a clean and safe working environment for the construction process. You may also need to trim any overhanging branches or vegetation that could potentially interfere with the patio cover.
2. Assess the Soil and Drainage
Check the soil composition and drainage in the area. Ensure that the ground is compact and stable enough to support the weight of the patio cover. If you notice any areas with poor drainage, consider adding gravel or crushed stone to improve water flow away from the structure.
3. Level the Ground
Use a level to ensure that the patio area is level and even. If necessary, you may need to make adjustments by adding or removing soil. A level surface will help ensure a stable foundation for the support beams and overall structure.
4. Secure the Footings
Measure and mark the locations for the support beam footings. Dig holes for the footings using a post hole digger or shovel. The size and depth of the footings will depend on your local building codes and the size of your patio cover. Consult the building department or a structural engineer for specific recommendations.
Read more: How To Build A Covered Patio
5. Pour Concrete Footings
Mix concrete according to the manufacturer’s instructions and pour it into the footings. Use a masonry trowel to smooth the surface and ensure that the footings are level. Allow the concrete to cure and set according to the recommended timeframe.
With the patio area properly prepared, you are ready to move on to the next step: installing the support beams.
Step 4: Installing Support Beams
The support beams are the backbone of your patio cover structure, providing stability and strength. In this step, you will install the support beams onto the footings and secure them in place. Follow these steps to ensure a sturdy installation:
1. Cut the Support Beams
Measure and cut the pressure-treated lumber into the appropriate lengths for the support beams. Use a saw to make clean and accurate cuts. Make sure the beams are cut to the desired height, allowing for the necessary clearance above your patio furniture and other elements.
2. Attach the Beams to the Footings
Position the support beams onto the footings, ensuring they are aligned with your marked locations. Use a level to make sure the beams are perfectly horizontal and plumb. Secure the beams to the footings using galvanized brackets and screws or anchor bolts.
Read more: How Much To Build A Patio Roof
3. Connect Multiple Beams
If your patio cover requires more than one support beam, connect them using galvanized metal connectors or joining plates. Secure the connections tightly to ensure stability.
4. Check for Level and Stability
Verify that the support beams are level and stable. Use a level to check both the beams’ horizontal and vertical alignment. Make any necessary adjustments by adding shims or adjusting the footings as needed.
5. Treat and Seal the Beams
Apply a wood sealer or stain to the support beams to protect them from weathering and extend their lifespan. Follow the manufacturer’s instructions for application and drying times.
With the support beams securely installed, your patio cover is starting to take shape. The next step will focus on attaching the corrugated metal roof panels.
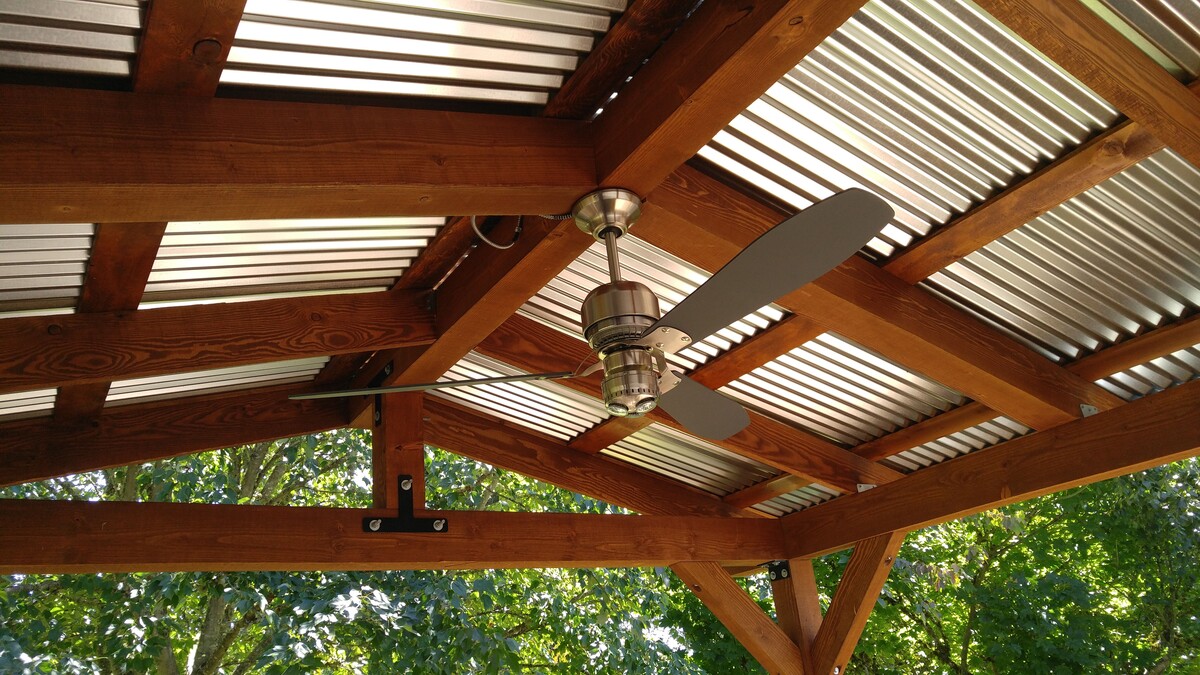
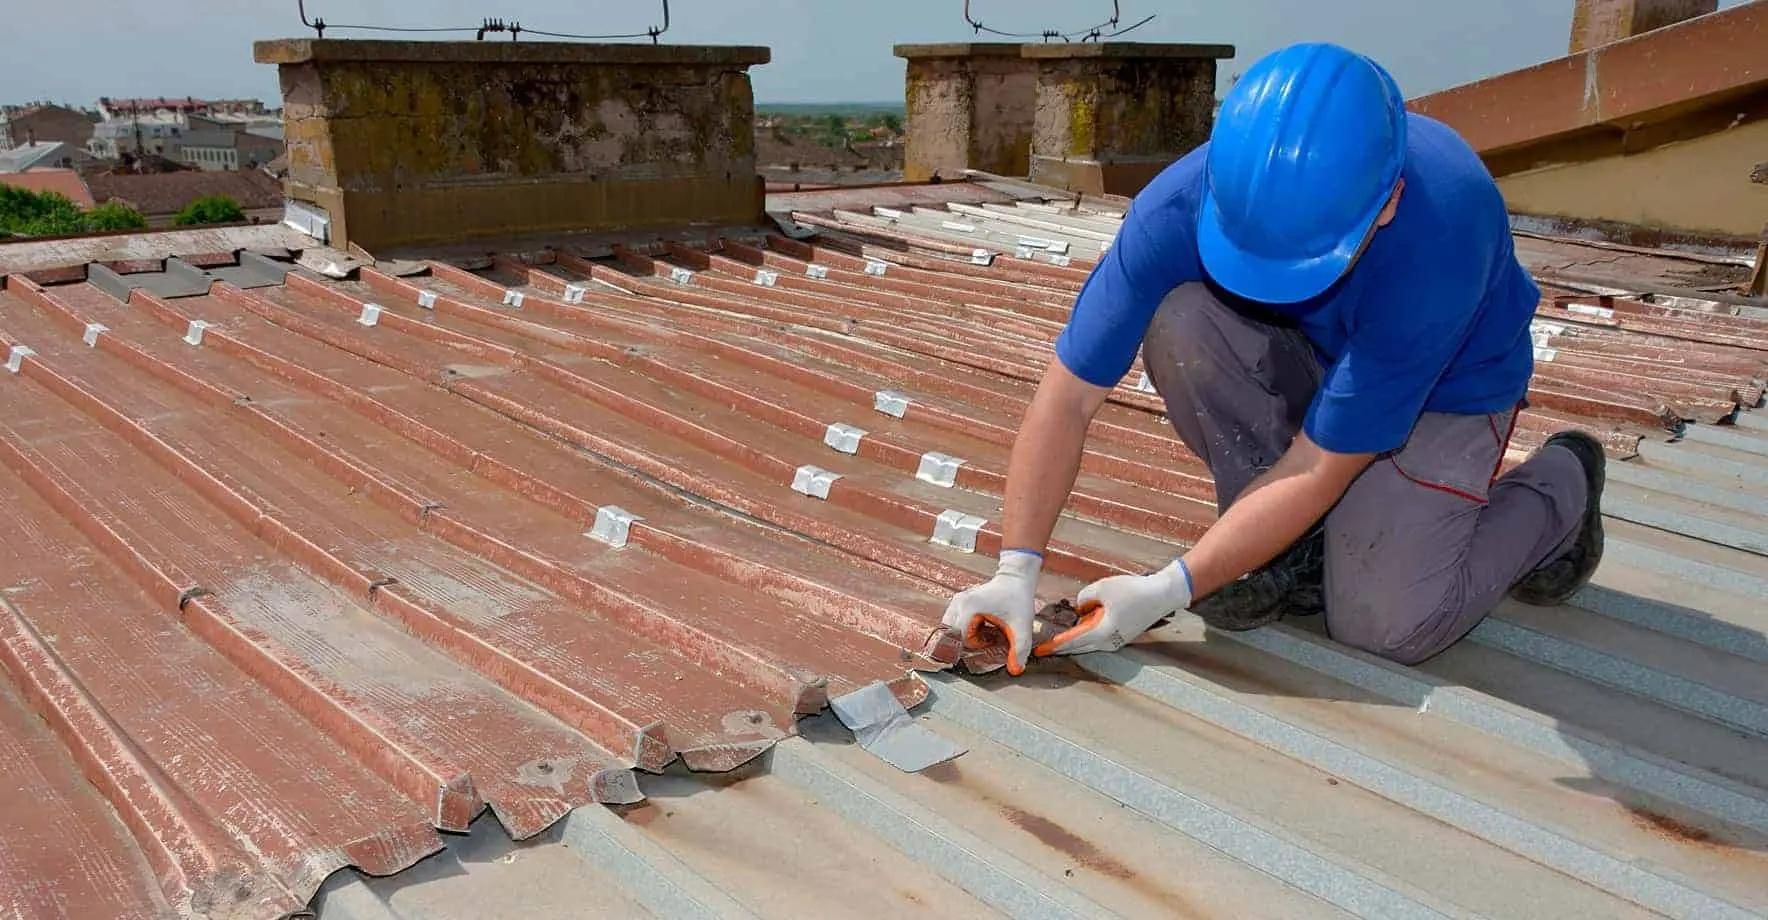
Step 5: Attaching the Corrugated Metal Roof Panels
Now that you have the support beams in place, it’s time to attach the corrugated metal roof panels to create a weatherproof and durable cover for your patio. Follow these steps to ensure proper installation:
Read more: How To Build A Freestanding Patio Cover
1. Measure and Cut the Roof Panels
Measure the width and length of each section of the patio cover. Transfer these measurements onto the corrugated metal roof panels, allowing for overhang on the edges. Use a saw or metal cutting shears to cut the panels to the appropriate size.
2. Install Roofing Underlayment
Before attaching the metal panels, it’s advisable to install roofing underlayment to provide an additional layer of protection against moisture. Roll out the underlayment on top of the support beams, ensuring that it covers the entire roof area. Secure it in place with roofing nails or staples.
3. Align and Place the First Panel
Start with one corner of the patio cover and align the first metal roof panel with the support beams. Make sure it is centered and level. Use metal roofing closure strips to create a watertight seal between the panel and the support beams.
4. Secure the Panels
Using galvanized metal screws, attach the metal roof panel to the support beams. Place screws through the ridges of the corrugations, ensuring a secure and tight fit. Space the screws apart according to the manufacturer’s recommendations, typically around 12 inches apart along the panel edges and 24 inches apart in the field.
Read more: How To Build A Wood Patio Cover
5. Overlap and Repeat
Overlap the next metal roof panel with the first, ensuring a proper alignment and tight fit. Secure it in place with screws, following the same spacing pattern. Continue overlapping and attaching the remaining panels until the entire patio cover is covered.
By properly attaching the corrugated metal roof panels, you are creating a durable and visually appealing cover for your patio. The next step will focus on securing the roof panels in place, ensuring their stability and resistance to wind and other elements.
Step 6: Securing the Roof Panels in Place
Securing the roof panels is an important step in ensuring the stability and longevity of your patio cover. By following proper installation techniques, you can prevent the panels from shifting or loosening over time. Here’s how to secure the roof panels effectively:
1. Add Additional Closure Strips
To enhance the stability of the roof panels, insert additional metal roofing closure strips between each panel. These strips fit into the ridges of the corrugations and create a secure connection. Make sure the closure strips are properly aligned and centered before attaching the next panel.
2. Use Galvanized Screws
When securing the roof panels, use galvanized metal screws that are specifically designed for corrugated metal. These screws are resistant to rust and corrosion, ensuring a secure and long-lasting connection. Place the screws through the ridges of the corrugations, maintaining the recommended spacing for proper support.
Read more: How Much To Build A Covered Patio
3. Apply Proper Screw Placement
Avoid over-tightening the screws, as it may distort the metal panels. Instead, tighten them enough to create a snug fit without causing damage. Place the screws near the edges of the panels, ensuring they are securely fastened to the support beams.
4. Consider Wind Bracing
If you live in an area prone to high winds, consider adding wind bracing to reinforce the stability of the roof panels. Wind bracing systems typically consist of additional support beams or diagonal bracing that connects the roof panels to the underlying structure. Consult a professional or structural engineer for guidance on the appropriate wind bracing techniques for your specific location.
5. Inspect and Tighten Regularly
Regularly inspect your patio cover and check for any loose or damaged screws. Tighten them if necessary to ensure the roof panels remain securely in place. Performing routine maintenance and inspections will help identify any issues early on and prevent further damage.
By properly securing the roof panels, you can have peace of mind knowing your patio cover will withstand various weather conditions and provide years of protection and enjoyment. The next step focuses on adding flashing to the edges for optimal waterproofing and aesthetics.
Step 7: Adding Flashing to the Edges
Adding flashing to the edges of your patio cover is crucial for proper waterproofing and protection against potential leaks. Flashing is a thin, weather-resistant metal strip that is installed along the roof’s edges to deflect water away from vulnerable areas. Follow these steps to add flashing to the edges of your patio cover:
Read more: How To Build An Aluminum Patio Cover
1. Measure and Cut the Flashing
Measure the length of each edge where you plan to install the flashing. Using tin snips or metal shears, cut the flashing to the appropriate length. Make sure to leave a small overhang at the ends for optimal water diversion.
2. Install the Bottom Edge Flashing
Start by installing the bottom edge flashing. Place the flashing along the bottom edge of the roof panels, ensuring it is properly aligned and centered. Attach the flashing by securing it to the support beams with galvanized screws. Space the screws evenly along the flashing for a secure and tight fit.
3. Install the Side Edge Flashing
Next, install the side edge flashing. Place the flashing vertically along the side edges of the roof panels, overlapping the bottom edge flashing to create a watertight seal. Secure the side edge flashing to the support beams using galvanized screws, similarly to the bottom edge flashing.
4. Install the Top Edge Flashing
Finally, install the top edge flashing. Place the flashing along the top edge of the roof panels, overlapping the side edge flashing. Secure it to the support beams with galvanized screws, ensuring a secure and tight fit. The top edge flashing will provide extra protection against water infiltration.
Read more: How To Build A Solar Panel Patio Cover
5. Seal the Flashing Joints
To further waterproof the flashing and prevent any potential leaks, apply a waterproof sealant to the joints where the flashing overlaps. This will provide an additional layer of protection against moisture intrusion.
By adding flashing to the edges of your patio cover, you create a barrier against water penetration and potential roof leaks. The final step will focus on completing the patio cover to ensure its functionality and aesthetic appeal.
Step 8: Completing the Patio Cover
With the roof panels and flashing in place, you’re nearing the completion of your patio cover project. In this final step, you’ll focus on finishing touches to enhance the functionality and aesthetic appeal of your new outdoor space. Follow these steps to complete your patio cover:
1. Trim Excess Flashing
Using tin snips or metal shears, trim any excess flashing along the edges to create clean and neat lines. Be cautious and take your time to ensure accurate cuts.
2. Seal Screw Holes
Inspect the screw holes on the roof panels and flashing, and seal them with a waterproof sealant to prevent any potential water penetration. This extra step will provide added protection against leaks and further ensure the durability of your patio cover.
3. Add Gutters and Downspouts (Optional)
If you wish to divert rainwater away from the patio area, consider installing gutters and downspouts. Gutters will collect the water that runs off the roof, and downspouts will direct it into a drainage system or a designated area away from the patio. This optional addition can help protect your furniture and keep the patio area dry.
4. Paint or Stain the Wood (Optional)
If you prefer a different appearance for the support beams or any other wooden components of your patio cover, consider painting or staining them. Choose a weather-resistant paint or stain that complements your outdoor decor and suits your personal style. Make sure to follow the manufacturer’s instructions for application and drying times.
5. Arrange Patio Furniture and Accessories
Now that your patio cover is complete, it’s time to bring life to the space by arranging your patio furniture and accessories. Consider how you plan to use the area and arrange your furniture accordingly. Add comfortable seating, outdoor rugs, potted plants, and other accessories to create a welcoming and enjoyable outdoor oasis.
With the final touches complete, you can now step back and admire your finished patio cover. Enjoy the shade and protection it provides, and make lasting memories in your newly transformed outdoor living space.
Conclusion
Congratulations on successfully completing your patio cover project! By following the step-by-step guide outlined in this article, you have created a functional and stylish addition to your outdoor space. Your new patio cover with a corrugated metal roof not only adds protection from the elements but also enhances the aesthetic appeal of your patio area.
Throughout the construction process, you learned how to plan and measure the patio area, obtain permits if necessary, prepare the patio area, install support beams, attach corrugated metal roof panels, secure the roof panels in place, add flashing to the edges, and complete the patio cover. Each step was carefully explained to ensure a smooth and successful project.
Remember to regularly inspect and maintain your patio cover to prolong its lifespan. Check for any loose screws or damaged areas and make repairs as needed. By staying proactive in your maintenance routines, you can ensure that your patio cover remains in excellent condition for years to come.
Now that your patio cover is complete, it’s time to enjoy the benefits it brings. Create a welcoming outdoor space by adding comfortable patio furniture, lighting, and decorative elements that reflect your personal style. Whether you’re enjoying a cozy evening with friends or finding solace in a quiet moment alone, your patio cover will provide the perfect haven.
Thank you for choosing this guide to assist you in building your patio cover. We hope it has been helpful and insightful. Now, go out and embrace the beauty of your new outdoor retreat!
Now that you've mastered building a patio cover with a corrugated metal roof, why not turn your attention to sprucing up the deck area? Our next guide offers creative ideas on using colorful decor and simple enhancements to elevate your outdoor space. Perfect for those who love spending time outside, this article will show you how to transform your deck into a haven for relaxation and social gatherings. Don't miss out on these practical tips to enhance your outdoor living experience!
Frequently Asked Questions about How To Build A Patio Cover With A Corrugated Metal Roof
Was this page helpful?
At Storables.com, we guarantee accurate and reliable information. Our content, validated by Expert Board Contributors, is crafted following stringent Editorial Policies. We're committed to providing you with well-researched, expert-backed insights for all your informational needs.


0 thoughts on “How To Build A Patio Cover With A Corrugated Metal Roof”