Home>Gardening & Outdoor>Outdoor Structures>How To Make A Floor For A Metal Shed
Outdoor Structures
How To Make A Floor For A Metal Shed
Modified: August 27, 2024
Learn how to build a sturdy and durable floor for your metal shed with our step-by-step guide. Create a solid foundation for your outdoor structure. Expert tips for outdoor structures.
(Many of the links in this article redirect to a specific reviewed product. Your purchase of these products through affiliate links helps to generate commission for Storables.com, at no extra cost. Learn more)
Introduction
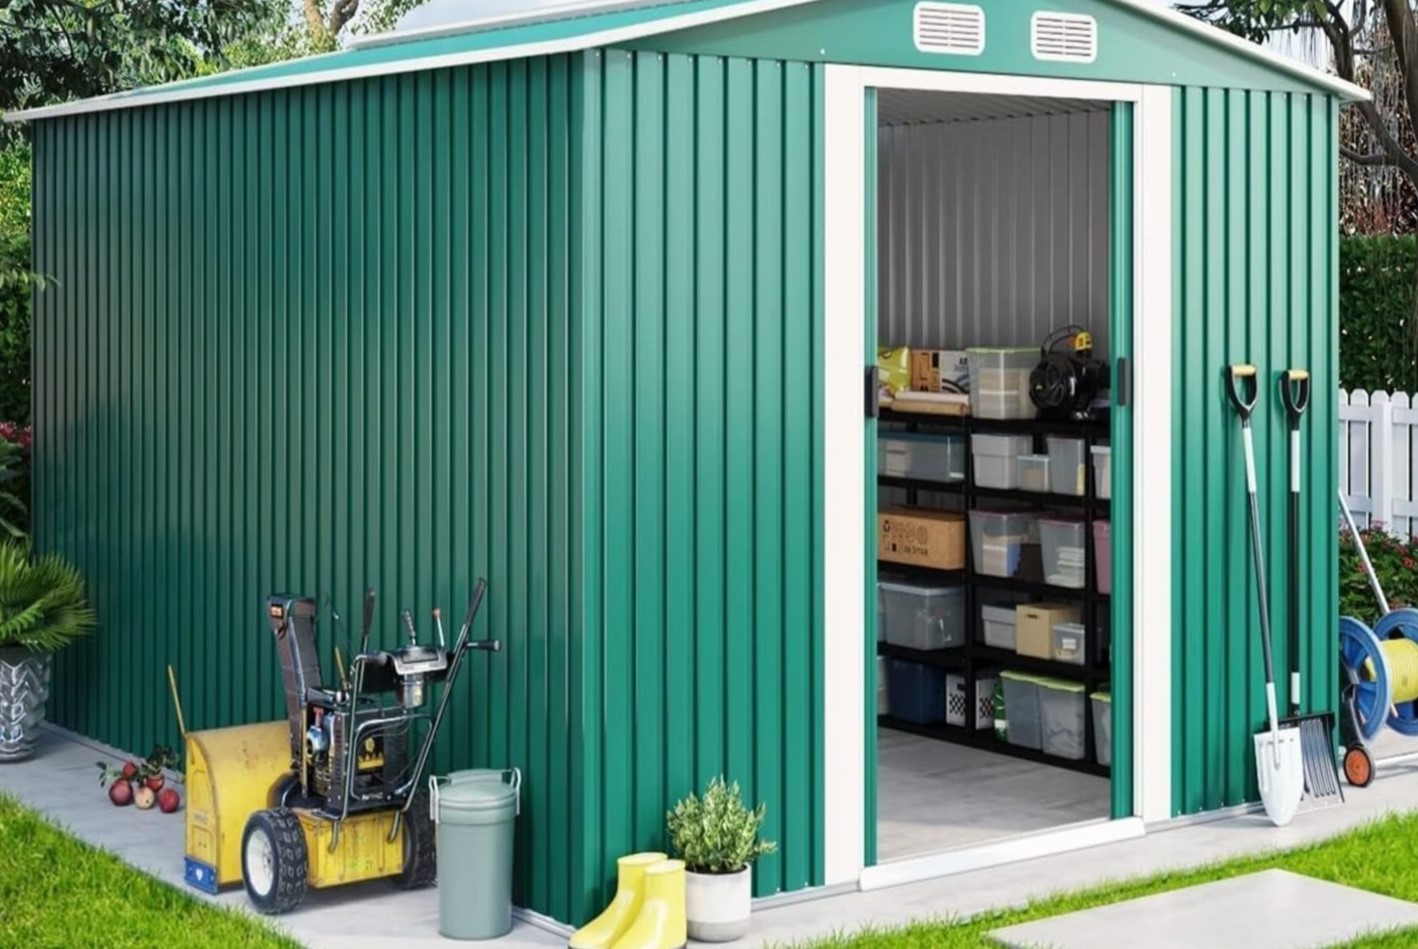
When it comes to setting up a metal shed, creating a sturdy and level floor is crucial for ensuring the structure's stability and longevity. A well-constructed floor not only provides a solid base for the shed but also protects the contents from moisture and pests. Whether you plan to use your metal shed for storage, as a workshop, or for other purposes, a properly built floor will contribute to its overall functionality and durability.
In this comprehensive guide, we will walk you through the step-by-step process of constructing a floor for a metal shed. From gathering the necessary materials and tools to laying the final flooring, we will cover each stage in detail, providing valuable insights and practical tips along the way. By following these instructions, you can create a reliable and robust foundation for your metal shed, ensuring that it stands the test of time.
So, roll up your sleeves and get ready to embark on this rewarding DIY project. With the right guidance and a can-do attitude, you'll soon be well on your way to enjoying a solid, well-built floor for your metal shed. Let's dive in and explore the first crucial step: gathering the materials and tools you'll need for the job.
Key Takeaways:
- Building a sturdy floor for a metal shed requires gathering materials, preparing the ground, constructing a strong foundation, installing floor joists, and laying the flooring material with precision and attention to detail.
- Attention to finishing touches, such as addressing edges, sealing gaps, and customizing the interior, ensures the completed floor is not only functional but also well-protected and ready to support various activities within the metal shed.
Read more: How To Paint A Metal Shed
Step 1: Gather Materials and Tools
Before you begin constructing the floor for your metal shed, it’s essential to assemble all the necessary materials and tools. This preparation phase sets the stage for a smooth and efficient building process, allowing you to tackle each step with confidence and precision.
Here’s a comprehensive list of materials and tools you’ll need:
- Pressure-Treated Lumber: This will serve as the primary material for constructing the floor frame and joists. Opt for pressure-treated lumber to ensure durability and resistance to decay.
- Concrete Blocks or Gravel: These will be used to create a stable foundation for the floor, ensuring proper support and elevation.
- Galvanized Nails or Deck Screws: These fasteners are essential for securing the lumber components together, providing structural stability.
- Plywood or Oriented Strand Board (OSB): These materials will form the actual flooring surface, offering a solid and smooth base for the shed’s interior.
- Measuring Tape, Level, and Square: Accurate measurements and precise angles are crucial for a well-built floor, making these tools indispensable.
- Saw: Whether it’s a circular saw, miter saw, or hand saw, you’ll need a reliable cutting tool to trim the lumber to the required dimensions.
- Hammer or Drill: Depending on your preference, choose a hammer for nailing or a drill for screwing the components together.
- Personal Protective Equipment (PPE): Safety should always be a priority, so ensure you have safety glasses, work gloves, and hearing protection.
By gathering these materials and tools beforehand, you can streamline the construction process and minimize interruptions. With everything at your fingertips, you’ll be well-equipped to move on to the next crucial step: preparing the ground for the shed’s floor.
Step 2: Prepare the Ground
Before laying the foundation for your metal shed’s floor, it’s essential to prepare the ground to ensure a stable and long-lasting base. Proper ground preparation not only contributes to the structural integrity of the floor but also helps prevent issues such as moisture buildup and uneven settling over time.
Here’s a detailed guide on how to prepare the ground for your shed’s floor:
- Clear the Area: Start by clearing the designated area of any debris, vegetation, or obstacles. Use a rake or shovel to remove rocks, roots, and other impediments that could affect the floor’s stability.
- Level the Ground: Use a long, straight board or a leveling tool to assess the evenness of the ground. If there are any noticeable bumps or depressions, consider using a shovel to level the surface, ensuring uniform support for the floor.
- Install Concrete Blocks or Add Gravel: Depending on your preference and the specific ground conditions, you can choose to lay concrete blocks as support piers or spread a layer of gravel to create a stable base. Ensure that the blocks or gravel are positioned evenly to provide consistent support across the entire floor area.
- Verify Levelness: Once the support elements are in place, recheck the levelness of the ground to confirm that the foundation will be uniform and stable. Adjust the positioning of the blocks or gravel as needed to achieve a balanced and level surface.
- Consider Drainage: If your shed will be located in an area prone to water accumulation, such as a low-lying spot in your yard, it’s crucial to address drainage. You may need to incorporate measures such as sloping the ground away from the shed or adding drainage channels to prevent water from pooling beneath the floor.
By meticulously preparing the ground according to these steps, you’ll establish a solid and dependable foundation for your metal shed’s floor. With the ground ready, you can confidently move on to the next phase: building the foundation that will support the floor structure.
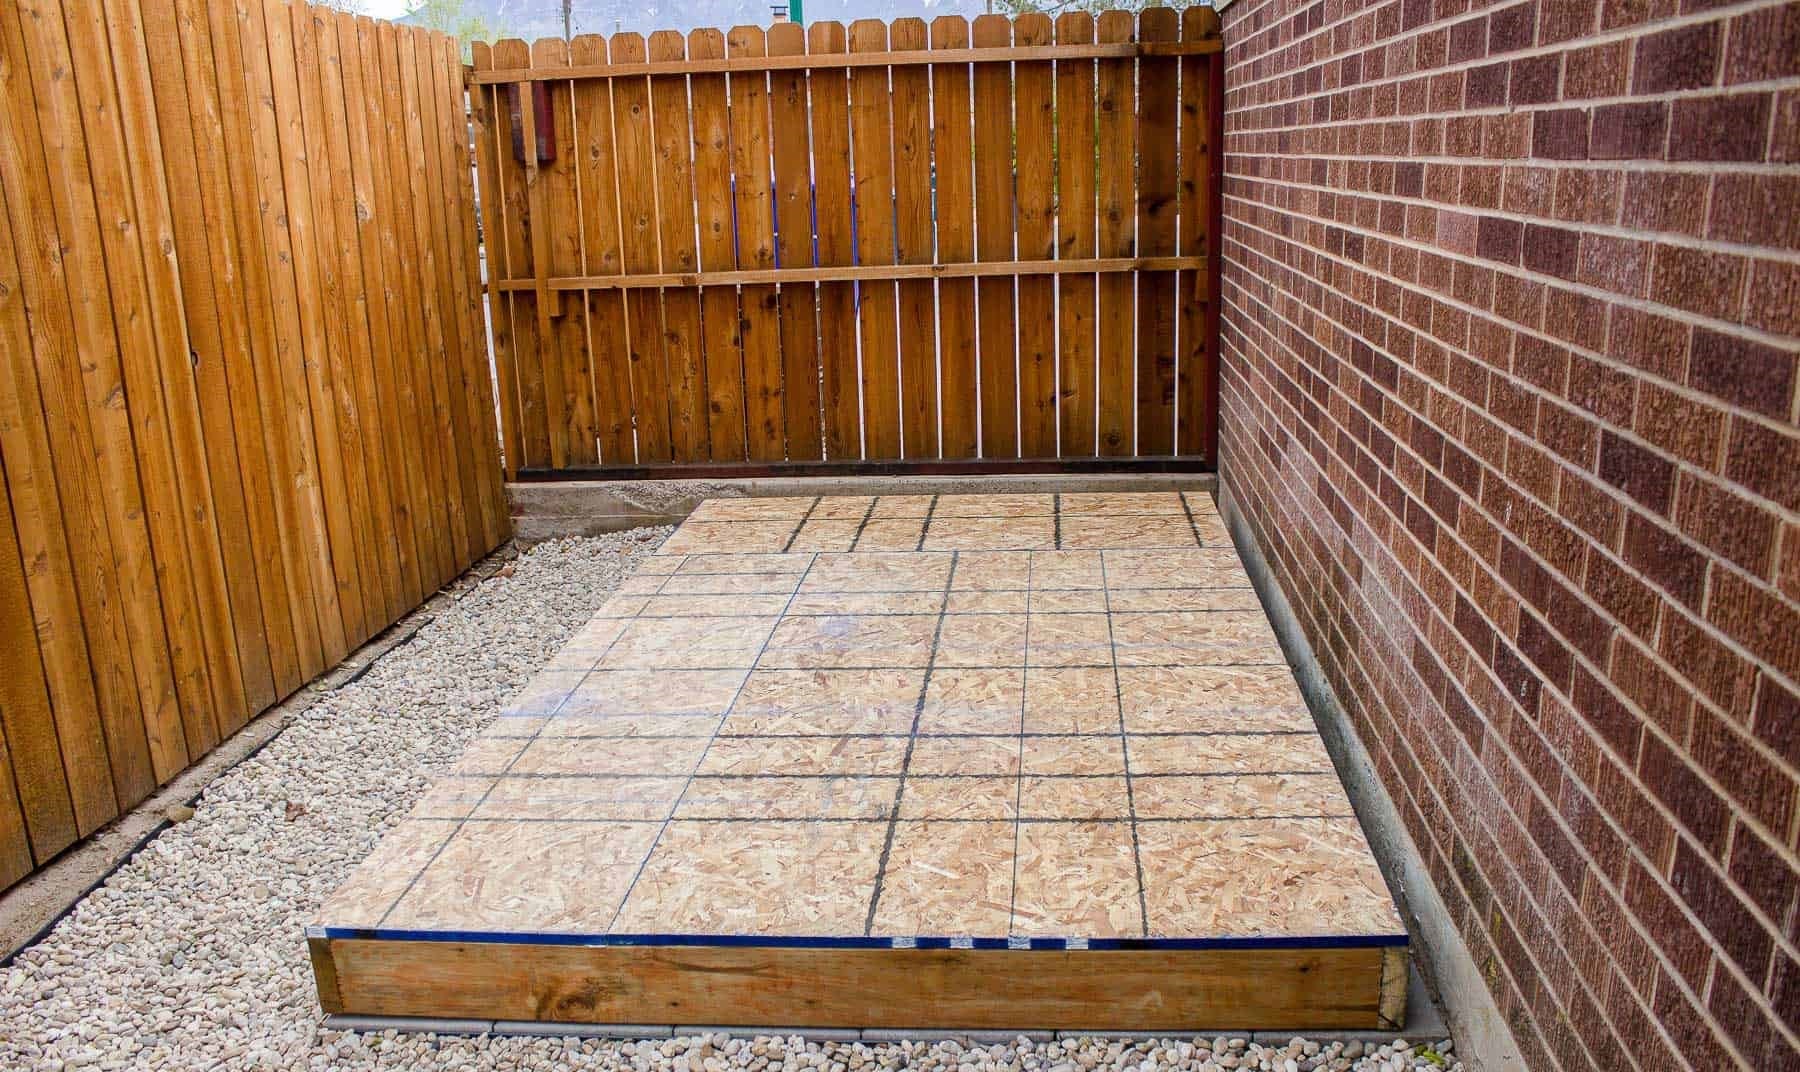
Step 3: Build the Foundation
With the ground prepared, it’s time to construct the foundation that will provide essential support for your metal shed’s floor. The foundation serves as the base on which the floor frame and joists will rest, ensuring stability and structural integrity for the entire structure.
Here’s a detailed overview of the process for building the foundation:
- Position the Support Beams: Place pressure-treated lumber beams or skids on the prepared ground, ensuring they are parallel and appropriately spaced to accommodate the shed’s dimensions. These beams will serve as the primary support for the floor frame.
- Secure the Beams: Use galvanized nails or deck screws to secure the beams in place, ensuring they are firmly anchored and level. This step is crucial for establishing a sturdy and reliable foundation for the shed’s floor.
- Add Cross Bracing (Optional): Depending on the size of your shed and local building codes, you may need to incorporate cross bracing between the support beams to enhance stability and prevent shifting over time. Consult relevant guidelines to determine if this step is necessary for your project.
- Verify Alignment and Levelness: Use a level to confirm that the support beams are perfectly aligned and level. Adjust their positioning as needed to achieve uniformity and ensure a solid base for the floor construction.
- Consider Anchoring (Optional): Depending on your location and the shed’s size, anchoring the support beams to the ground may be recommended for added stability, especially in areas prone to high winds or seismic activity. Evaluate the need for anchoring based on local regulations and environmental factors.
By following these steps, you’ll establish a robust and well-anchored foundation for your metal shed’s floor, laying the groundwork for the next phase of the construction process. With the foundation in place, you’re ready to proceed to the critical step of installing the floor joists that will form the framework for the shed’s flooring.
Consider using pressure-treated lumber for the floor frame to prevent rot and decay. Make sure the frame is level and use galvanized screws to secure the metal shed floor to the frame for stability.
Step 4: Install the Floor Joists
As you progress in building the floor for your metal shed, the installation of floor joists plays a pivotal role in providing structural support and ensuring the overall stability of the flooring system. These horizontal framing members will form the framework on which the shed’s flooring material will be laid, contributing to a solid and durable foundation.
Here’s a detailed guide on how to install the floor joists for your shed:
- Measure and Cut the Joists: Using pressure-treated lumber, measure and cut the floor joists to the appropriate length, ensuring they align with the shed’s dimensions and spacing requirements. Precision in these measurements is crucial for a well-fitted and stable floor structure.
- Position the Joists: Place the cut floor joists perpendicular to the support beams, ensuring they are evenly spaced according to the shed’s design specifications. This step forms the framework that will support the shed’s flooring material and distribute the load evenly across the foundation.
- Secure the Joists: Use galvanized nails or deck screws to firmly attach the floor joists to the support beams, ensuring a secure and stable connection. Proper fastening is essential for maintaining the structural integrity of the floor framework.
- Consider Blocking (Optional): Depending on the shed’s size and local building codes, you may need to incorporate blocking between the floor joists to enhance stability and prevent excessive movement. Consult relevant guidelines to determine if this step is necessary for your project.
- Verify Alignment and Levelness: Use a level to confirm that the floor joists are perfectly aligned and level. Adjust their positioning as needed to achieve uniformity and ensure a solid framework for the shed’s flooring.
By following these steps, you’ll establish a sturdy and well-structured framework for the shed’s floor, setting the stage for the next phase: laying the actual flooring material. With the floor joists securely in place, you’re ready to move forward in creating a reliable and functional floor for your metal shed.
Read more: How To Install A Metal Shed
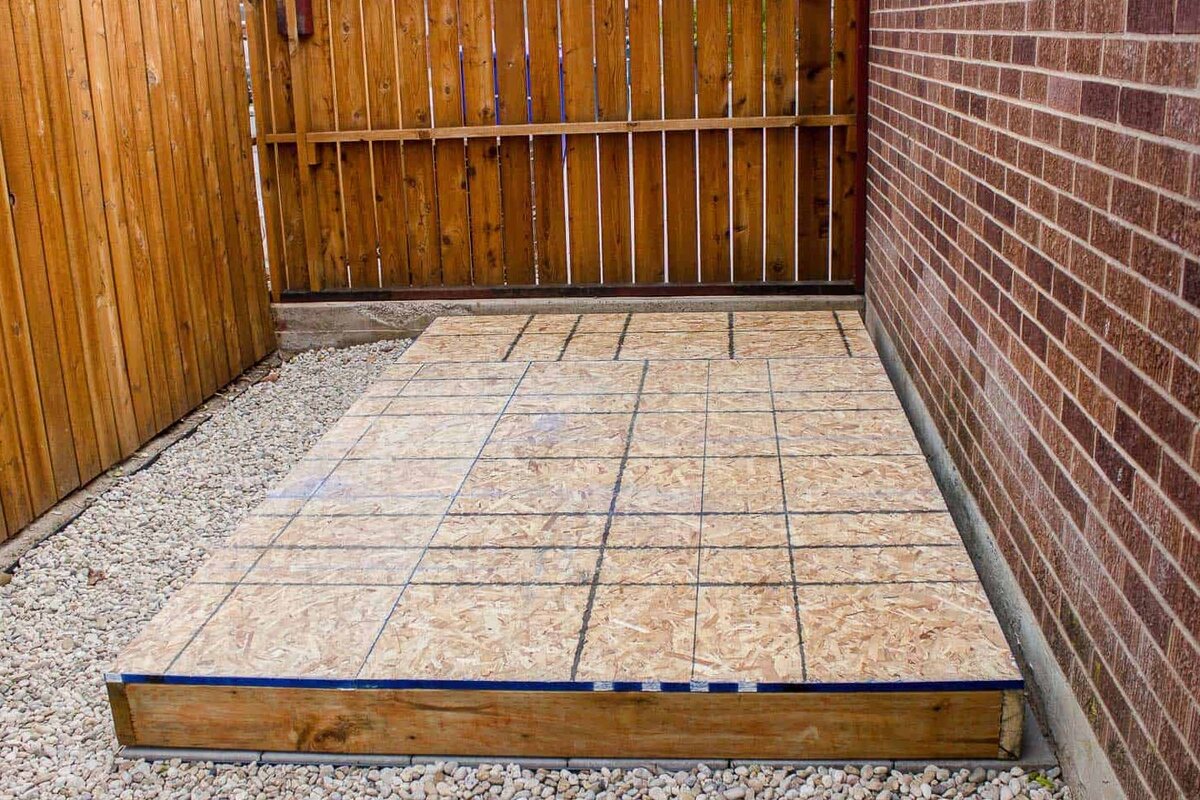
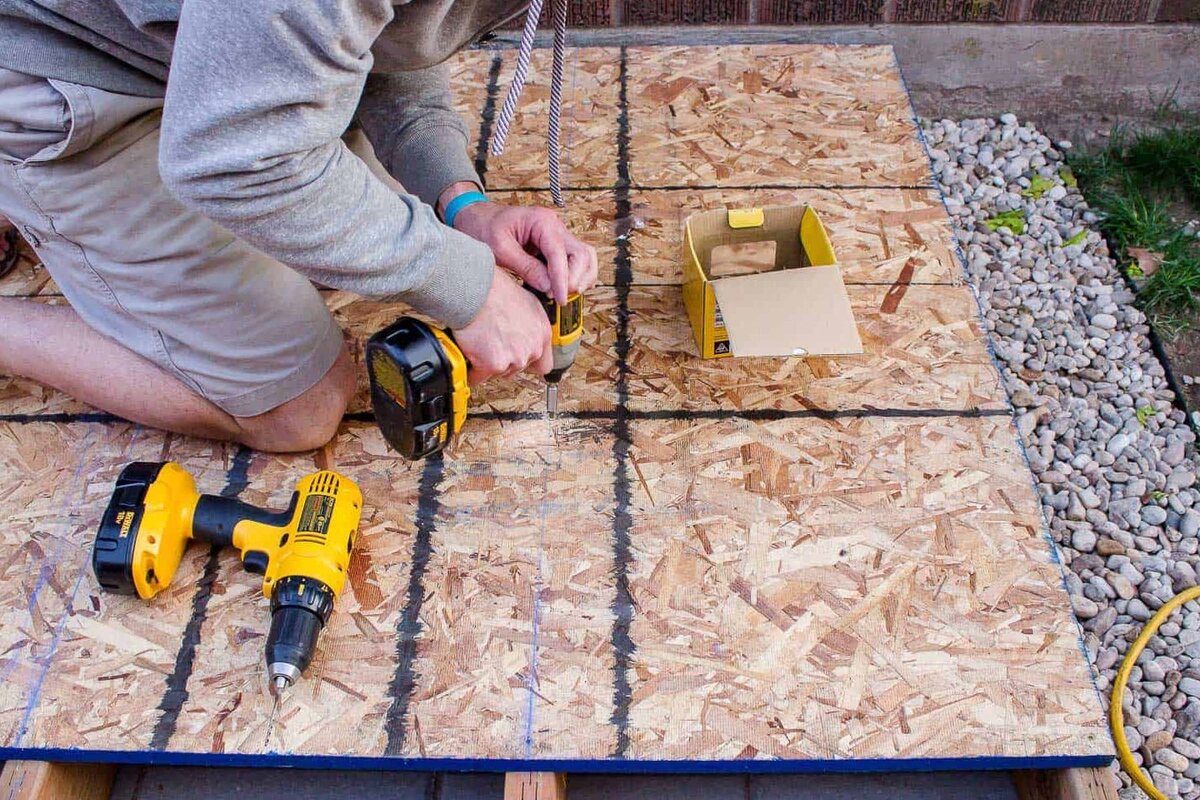
Step 5: Lay the Flooring
As you approach the final stages of constructing the floor for your metal shed, the process of laying the flooring material is a critical step that directly contributes to the shed’s functionality and overall durability. The choice of flooring material and the precision of its installation are key factors in creating a solid and reliable surface for the shed’s interior.
Here’s a comprehensive guide on how to lay the flooring for your metal shed:
- Select the Flooring Material: Choose a suitable material for the shed’s flooring, such as plywood or oriented strand board (OSB), based on your specific needs and preferences. Opt for a material that offers durability, moisture resistance, and a smooth surface for the shed’s interior.
- Measure and Cut the Flooring Panels: Using precise measurements, cut the flooring panels to fit the dimensions of the shed’s interior, ensuring a snug and accurate fit. This step is crucial for achieving a seamless and professional-looking floor surface.
- Position the Flooring Panels: Place the cut flooring panels onto the installed floor joists, ensuring they are aligned and evenly positioned across the entire floor area. This process forms the solid and functional surface on which the contents of the shed will be placed.
- Secure the Flooring Panels: Use appropriate fasteners, such as galvanized nails or deck screws, to securely attach the flooring panels to the floor joists, ensuring a tight and stable connection. Proper fastening is essential for maintaining the integrity of the shed’s floor.
- Consider Sealing and Finishing (Optional): Depending on your preferences and the intended use of the shed, you may choose to seal or finish the flooring material to enhance its durability and resistance to moisture. This step can prolong the lifespan of the floor and contribute to its overall quality.
By following these steps, you’ll complete the construction of a reliable and functional floor for your metal shed, providing a solid and secure base for various activities and storage needs. With the flooring material expertly installed, you’re now ready to add the finishing touches and bring your metal shed project to completion.
Step 6: Finishing Touches
As you near the completion of constructing the floor for your metal shed, attending to the finishing touches not only adds aesthetic appeal but also enhances the functionality and longevity of the structure. These final details contribute to a polished and well-protected floor, ensuring that your shed is ready to serve its intended purpose effectively.
Here’s a comprehensive guide on the finishing touches for your metal shed’s floor:
- Addressing Edges and Corners: Use trim or molding to cover exposed edges and corners of the flooring material, providing a clean and professional finish while protecting the edges from potential damage.
- Sealing Gaps (Optional): If necessary, apply sealant or caulk to fill any gaps or seams in the flooring material, especially in areas where moisture or pests could potentially infiltrate. This step helps maintain the integrity of the floor and enhances its resistance to external elements.
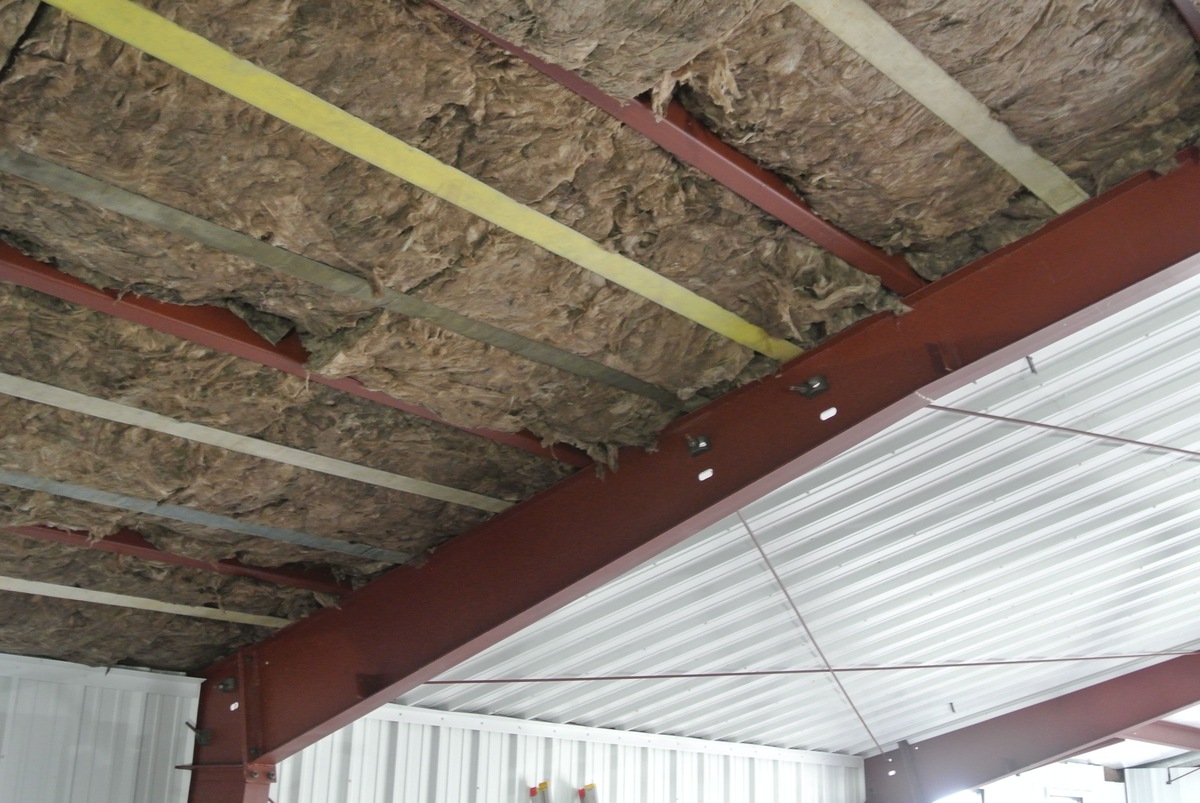
- Consider Insulation (Optional): Depending on your climate and intended use of the shed, you may choose to add insulation beneath the floor to regulate temperature and enhance comfort, especially if the shed will be used as a workshop or a space for extended periods.
- Apply a Protective Finish (Optional): If the shed’s floor will be subjected to heavy use or exposure to the elements, consider applying a protective finish, such as a sealant or floor paint, to safeguard the flooring material and prolong its lifespan.
- Organize and Customize: Take this opportunity to organize the interior of the shed and customize the floor layout to suit your specific needs, whether it involves installing storage solutions, workbenches, or other functional elements.
By attending to these finishing touches, you’ll elevate the overall quality and functionality of the floor for your metal shed, ensuring that it is well-prepared to accommodate your storage, workspace, or recreational requirements. With the finishing touches complete, your metal shed’s floor is now ready to support your endeavors and provide a reliable space for various activities.
Conclusion
Congratulations on successfully completing the construction of a sturdy and functional floor for your metal shed. By following the step-by-step guide outlined in this comprehensive resource, you’ve laid the groundwork for a reliable and durable foundation that will serve your storage, workshop, or recreational needs for years to come.
From gathering the essential materials and tools to meticulously preparing the ground and meticulously installing the floor joists and flooring material, you’ve demonstrated a commitment to quality craftsmanship and attention to detail. The finishing touches added the final layer of protection and customization, ensuring that your metal shed’s floor is well-equipped to meet your specific requirements.
As you stand back and admire the completed floor, envision the countless possibilities that await within your metal shed. Whether it becomes a sanctuary for your hobbies, a secure storage space for your belongings, or a productive workshop for DIY projects, the solid foundation you’ve built will provide the support and reliability you need.
Remember, the key to a successful construction project lies not only in the end result but also in the knowledge and experience gained along the way. As you embark on future endeavors, may the skills and insights acquired from this project continue to guide you toward successful and fulfilling DIY pursuits.
With a well-constructed floor beneath your feet, your metal shed is now ready to become a functional and inviting space that reflects your creativity and resourcefulness. Embrace the opportunities that lie ahead and enjoy the satisfaction of a job well done!
Frequently Asked Questions about How To Make A Floor For A Metal Shed
Was this page helpful?
At Storables.com, we guarantee accurate and reliable information. Our content, validated by Expert Board Contributors, is crafted following stringent Editorial Policies. We're committed to providing you with well-researched, expert-backed insights for all your informational needs.


0 thoughts on “How To Make A Floor For A Metal Shed”