Home>Home Appliances>Laundry Appliances>How To Test A Washing Machine Motor
Laundry Appliances
How To Test A Washing Machine Motor
Modified: October 18, 2024
Learn how to test a washing machine motor to troubleshoot laundry appliances. Follow our step-by-step guide for effective troubleshooting.
(Many of the links in this article redirect to a specific reviewed product. Your purchase of these products through affiliate links helps to generate commission for Storables.com, at no extra cost. Learn more)
Introduction
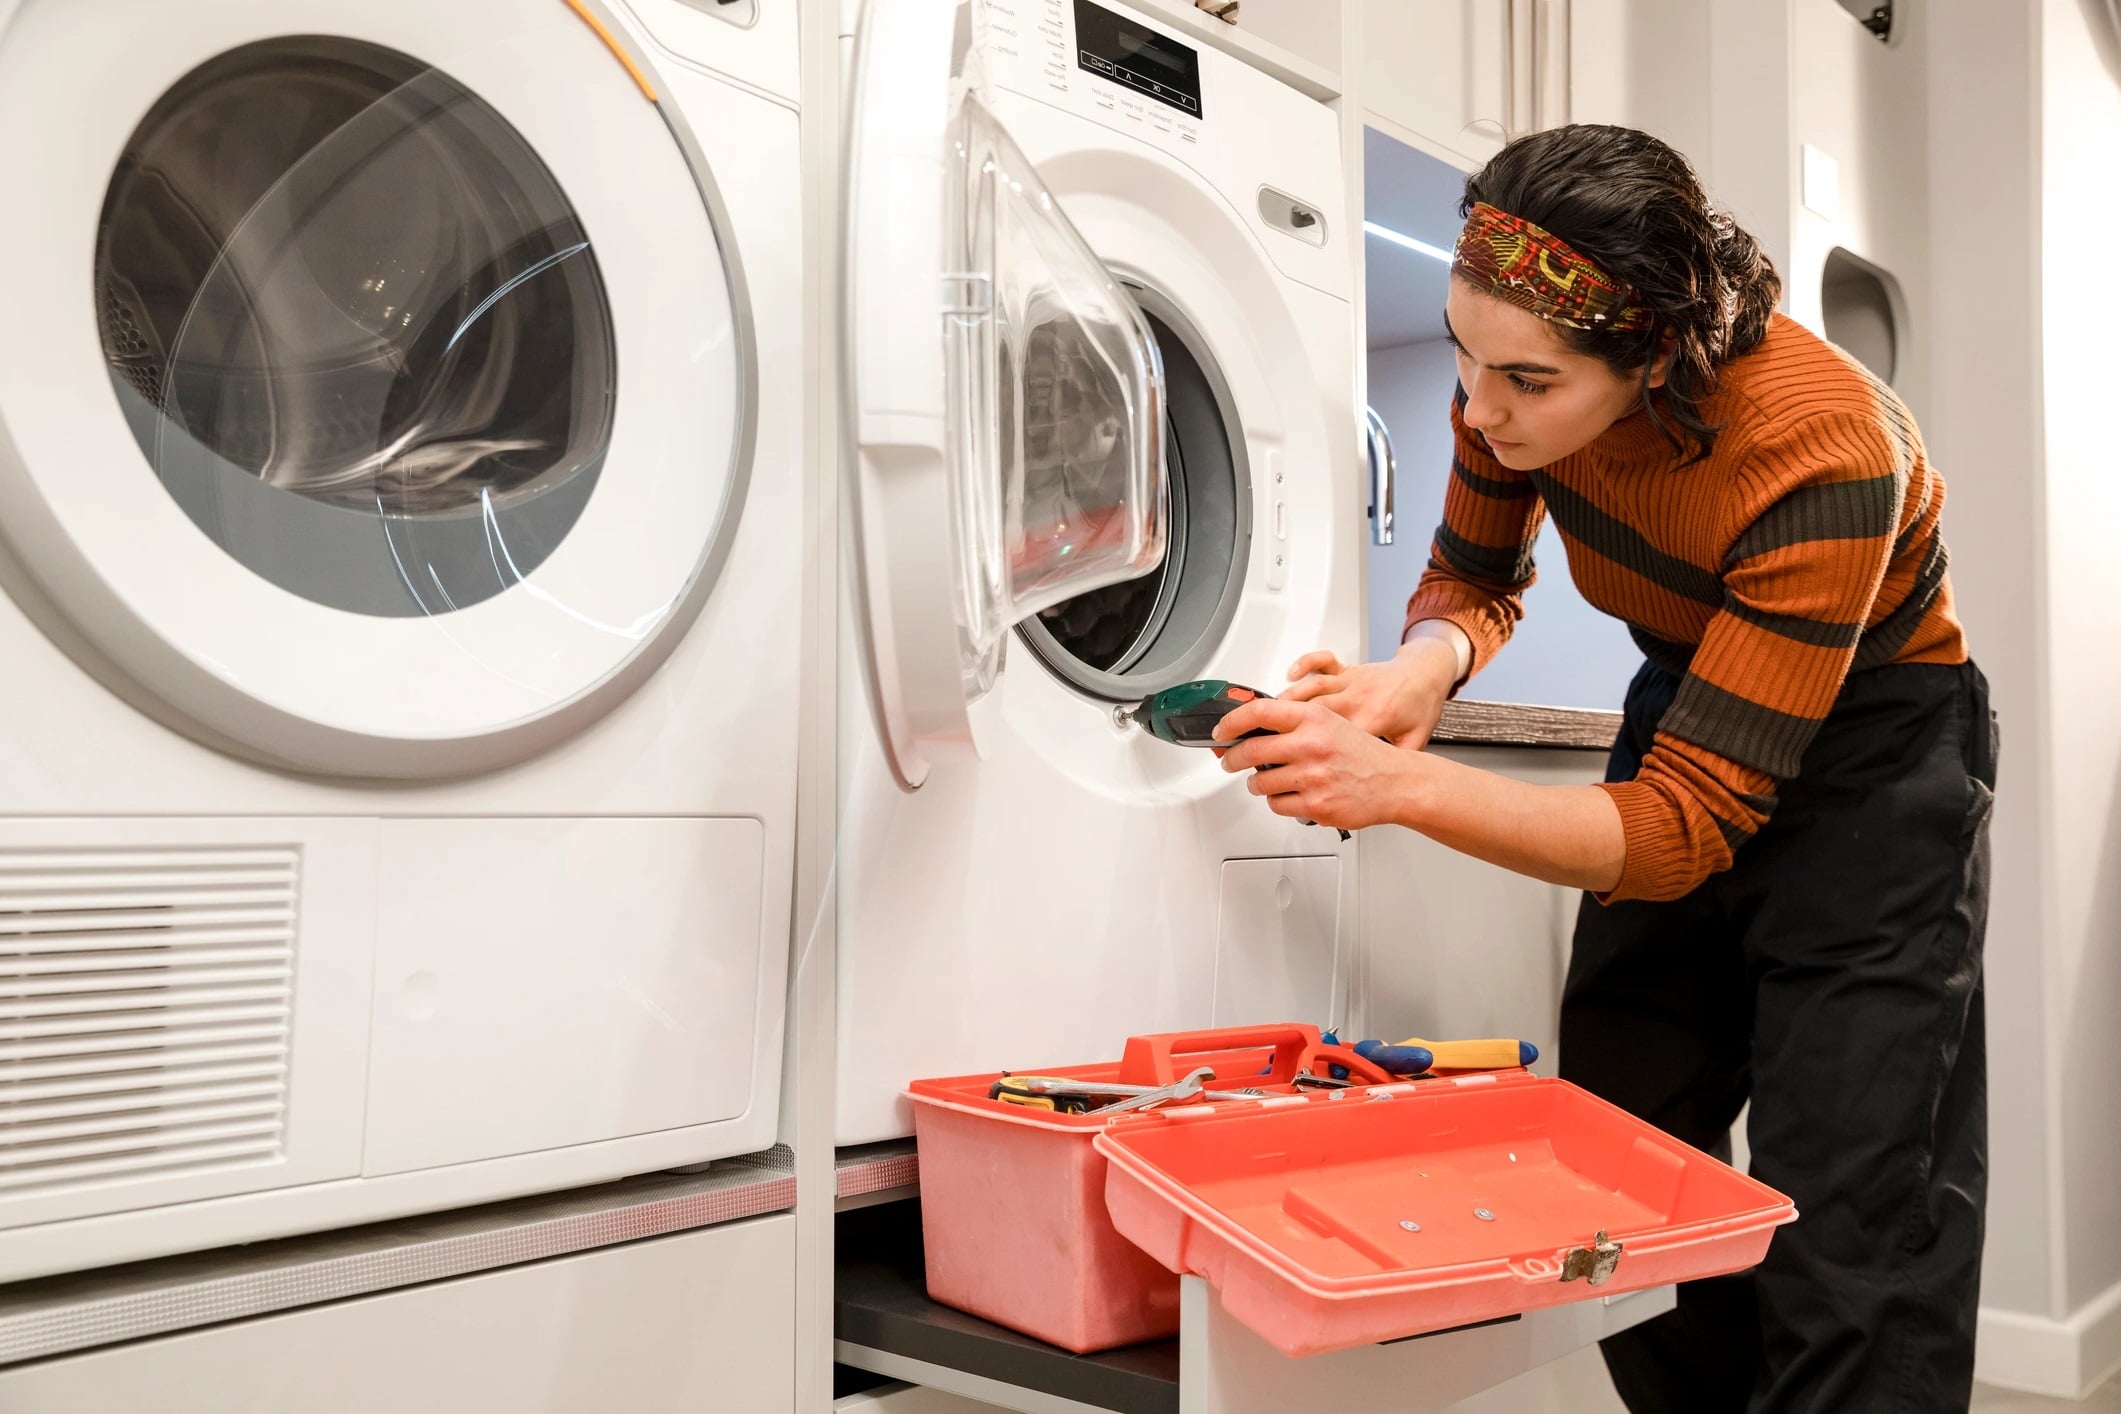
A washing machine is a vital appliance in any household, simplifying the daunting task of laundry. At the heart of this indispensable appliance lies the washing machine motor, a complex and crucial component responsible for powering the various functions that enable the machine to clean clothes effectively. Over time, the motor may experience wear and tear, leading to malfunctions that can disrupt the smooth operation of the washing machine. To troubleshoot and diagnose potential issues with the washing machine motor, it is essential to conduct thorough testing to pinpoint the root cause of any problems.
In this comprehensive guide, we will delve into the intricacies of testing a washing machine motor. By understanding the testing process and the necessary precautions to take, you can effectively assess the motor's condition and identify any faults that may be impeding its performance. Whether you are a seasoned technician or a determined DIY enthusiast, mastering the art of testing a washing machine motor is a valuable skill that can save time and money, ensuring that your laundry appliance continues to function optimally.
Throughout this guide, we will explore the step-by-step process of testing the motor windings, checking for continuity, evaluating the motor capacitor, and examining the motor start switch. By following these testing procedures, you can gain valuable insights into the health of the washing machine motor and make informed decisions regarding any necessary repairs or replacements. Let's embark on this enlightening journey to unravel the mysteries of the washing machine motor and equip ourselves with the knowledge and skills to keep our laundry appliances running smoothly.
Key Takeaways:
- Mastering the art of testing a washing machine motor ensures a hassle-free laundry experience. By following safety precautions and using the right tools, you can diagnose and address potential motor issues, prolonging the appliance’s lifespan.
- Testing the motor windings, continuity, capacitor, and start switch provides valuable insights into the motor’s health. This empowers you to make informed decisions about repairs or replacements, ensuring the washing machine runs efficiently.
Read more: How To Test Windshield Washer Pump
Safety Precautions
When dealing with electrical components such as a washing machine motor, it is paramount to prioritize safety to prevent accidents and injuries. Before initiating any testing procedures, it is crucial to adhere to the following safety precautions:
-
Power Disconnection: Always disconnect the washing machine from the power supply before attempting to test the motor. This can be achieved by unplugging the machine from the electrical outlet or switching off the circuit breaker that supplies power to the appliance. Verifying that the power is completely disconnected is essential to avoid the risk of electric shock.
-
Personal Protective Equipment (PPE): Prior to commencing any testing, ensure that you are equipped with the necessary personal protective equipment. This includes wearing insulated gloves and safety goggles to protect yourself from potential electrical hazards.
-
Knowledge and Understanding: Familiarize yourself with the specific model of the washing machine and its motor. Refer to the manufacturer's manual or technical documentation to gain a comprehensive understanding of the motor's components and the recommended testing procedures.
-
Work Area Preparation: Create a well-lit and organized work area to facilitate the testing process. Ensure that the surrounding environment is dry to minimize the risk of electrical mishaps.
-
Avoiding Contact with Moving Parts: Exercise caution to prevent contact with moving parts of the washing machine during the testing process. Ensure that the machine is not in operation and that any spinning or rotating components are stationary before initiating the tests.
-
Expert Consultation: If you are uncertain about any aspect of the testing process or encounter unfamiliar issues, seek guidance from a qualified technician or professional with expertise in washing machine repairs.
By diligently adhering to these safety precautions, you can mitigate potential risks and create a secure testing environment when evaluating the washing machine motor. Prioritizing safety not only safeguards your well-being but also ensures a systematic and effective testing process, enabling you to accurately diagnose any motor-related issues.
Tools and Materials Needed
Before embarking on the testing process for a washing machine motor, it is essential to gather the requisite tools and materials to facilitate a thorough and accurate assessment. Equipping yourself with the following items will ensure that you are well-prepared to conduct the necessary tests and effectively evaluate the motor's performance.
Tools:
-
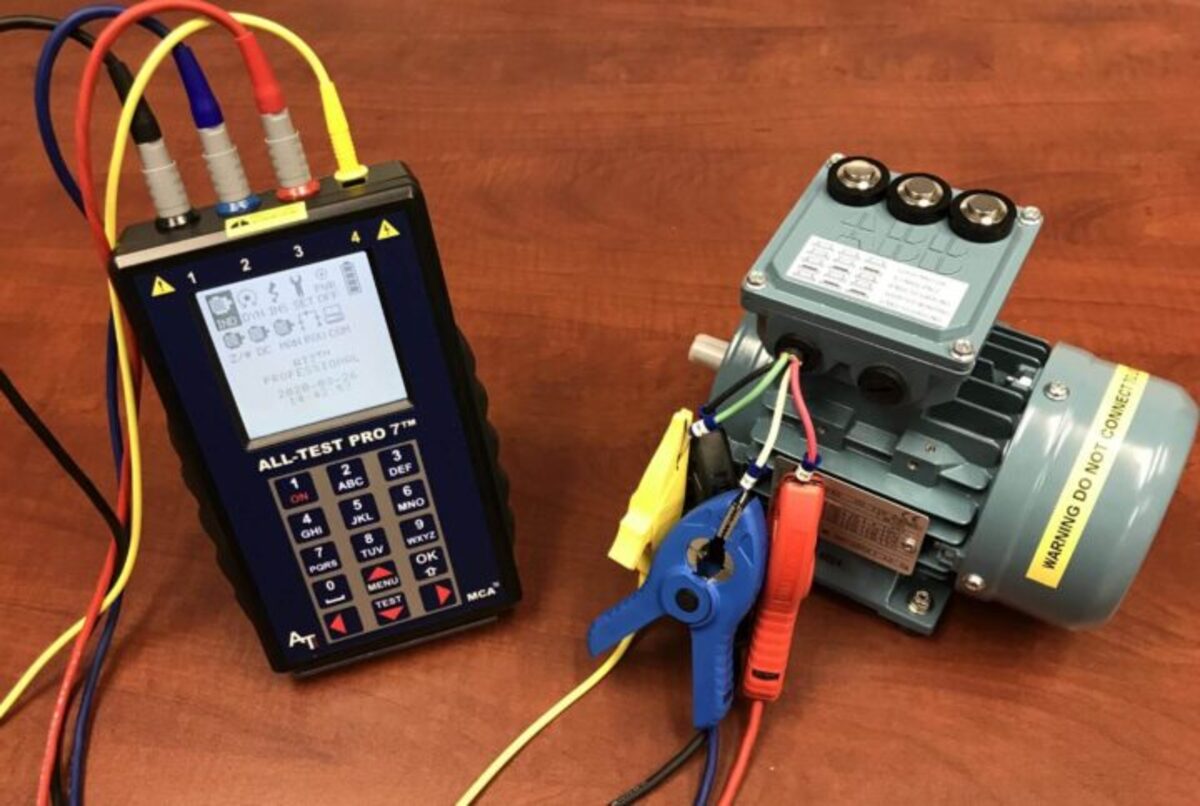
Multimeter: This versatile electronic measuring instrument is indispensable for testing various electrical parameters, including voltage, current, and resistance. A digital multimeter enables precise measurements and is essential for assessing the motor windings, continuity, and electrical components.
-
Insulated Screwdriver Set: A set of insulated screwdrivers is crucial for safely handling electrical components during the testing process. The insulation provides protection against electrical shocks and ensures secure manipulation of screws and terminals.
-
Needle-Nose Pliers: These specialized pliers with long, narrow jaws are invaluable for gripping and manipulating small wires and terminals within the washing machine motor. They facilitate precise handling and manipulation of electrical connections during testing.
-
Wire Strippers: To access and test the motor's wiring, wire strippers are essential for cleanly and safely removing insulation from the wires. This enables accurate testing and analysis of the electrical connections.
-
Flashlight: A reliable flashlight is indispensable for illuminating the interior of the washing machine, especially when conducting tests in dimly lit areas. It aids in identifying and accessing the motor and its associated components.
-
Safety Gloves and Goggles: Insulated gloves and safety goggles provide essential personal protection against electrical hazards during the testing process. Prioritizing safety equipment is crucial to minimize the risk of injuries or accidents.
Materials:
-
Replacement Capacitor (if necessary): In the event of a faulty motor capacitor, having a replacement capacitor on hand can expedite the repair process. Ensure that the replacement capacitor is compatible with the specific washing machine model.
-
Pen and Paper: Maintaining a record of test results, observations, and measurements is vital for documenting the testing process and analyzing the motor's performance. A pen and paper facilitate organized record-keeping during the evaluation.
-
Manufacturer's Manual or Technical Documentation: Referencing the washing machine's manual or technical documentation provides valuable insights into the motor's specifications, wiring diagrams, and recommended testing procedures. It serves as a crucial reference guide during the testing process.
By assembling these essential tools and materials, you can approach the testing of the washing machine motor with confidence and preparedness. These resources enable a systematic and thorough evaluation, empowering you to identify and address any potential issues affecting the motor's functionality.
Read more: How To Test A Washing Machine Control Board
Testing the Motor Windings
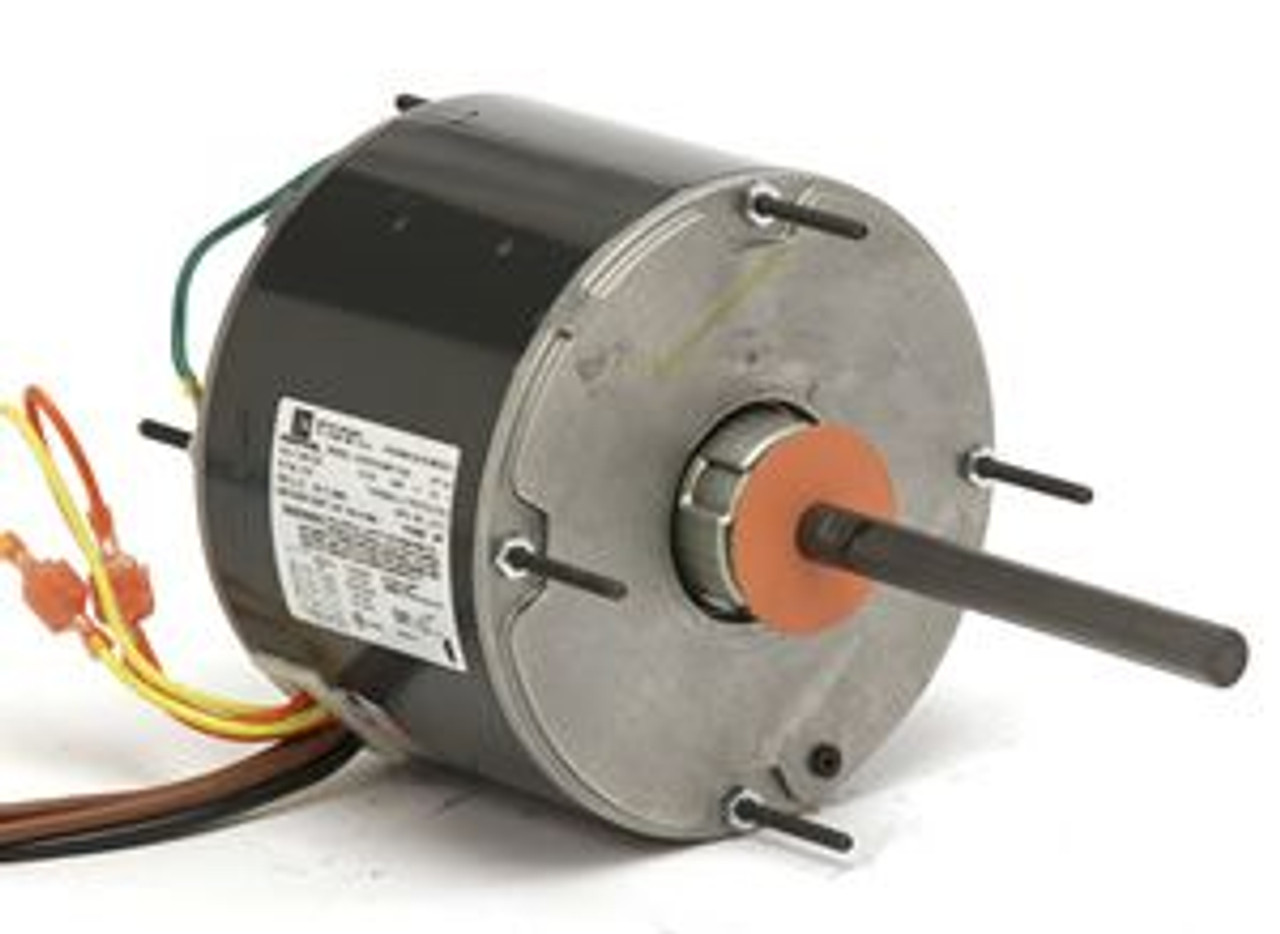
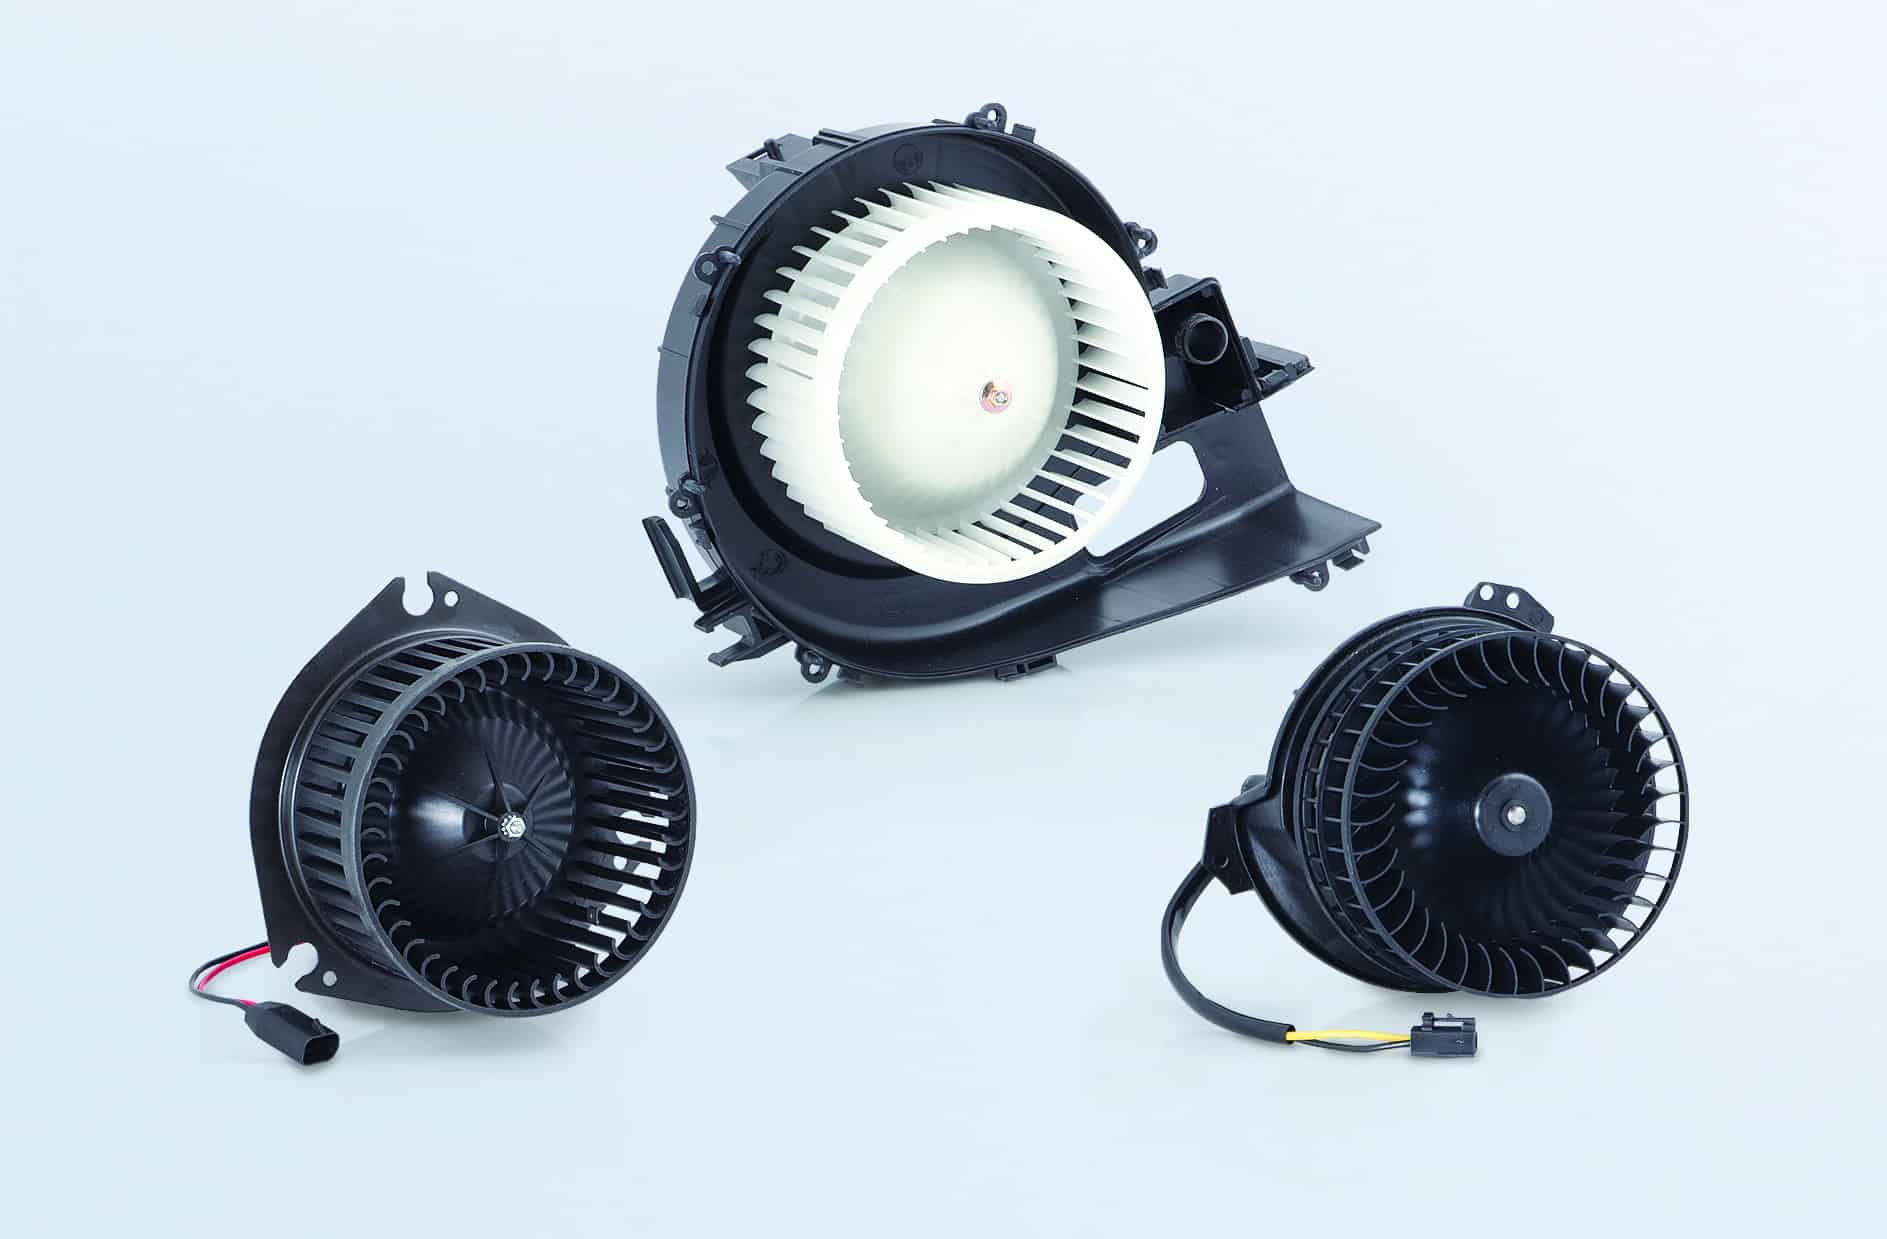
Testing the motor windings is a fundamental step in evaluating the health and functionality of a washing machine motor. The motor windings, comprising the stator and rotor windings, are essential components that generate the electromagnetic forces necessary for motor operation. By conducting a comprehensive assessment of the motor windings, you can identify potential faults such as short circuits, open circuits, or insulation breakdown, which may impede the motor's performance.
To initiate the testing process, begin by disconnecting the washing machine from the power supply and gaining access to the motor. Refer to the manufacturer's manual or technical documentation to locate the motor windings and understand the specific testing procedures recommended for the particular motor model.
Using a digital multimeter set to the resistance or ohms function, proceed to test the stator windings. Identify the terminals associated with the stator windings and carefully connect the multimeter probes to these terminals. The multimeter should display a resistance reading within the specified range indicated in the manufacturer's documentation. Deviations from the expected resistance values may indicate potential issues such as short or open circuits within the stator windings.
Next, proceed to test the rotor windings using the same multimeter and resistance measurement settings. Connect the multimeter probes to the designated rotor winding terminals and observe the resistance reading. Similar to the stator windings, the measured resistance should align with the manufacturer's specified values. Significant deviations from the expected resistance range may signify underlying faults within the rotor windings, warranting further investigation.
During the testing process, it is essential to record the resistance measurements for both the stator and rotor windings, noting any discrepancies or irregularities. Documenting these measurements facilitates a systematic analysis and comparison with the manufacturer's specified values, aiding in the identification of potential winding issues.
In addition to resistance measurements, it is advisable to inspect the motor windings for signs of physical damage, such as burnt insulation or visible wear. Visual examination complements the electrical testing and provides insights into the overall condition of the motor windings.
By meticulously testing the motor windings and analyzing the obtained measurements, you can gain valuable insights into the integrity and functionality of the washing machine motor. This thorough evaluation forms the foundation for diagnosing potential winding-related issues and devising appropriate remedial actions to restore the motor to optimal performance.
Testing the Motor Continuity
Testing the continuity of a washing machine motor is a critical step in assessing its overall functionality and identifying potential electrical faults. Continuity testing involves verifying the integrity of the electrical pathways within the motor, ensuring that current can flow unimpeded through the various components. By conducting thorough continuity tests, you can pinpoint any breaks or interruptions in the electrical circuits, which may hinder the motor's operation.
To initiate the continuity testing process, begin by disconnecting the washing machine from the power supply and gaining access to the motor. Utilize a digital multimeter set to the continuity or resistance mode to perform the tests. The continuity mode emits an audible beep or visual indicator when a complete circuit is detected, facilitating the identification of uninterrupted electrical pathways.
Identify the motor's electrical terminals and components, including the motor windings, start switch, and other relevant connections. Carefully place the multimeter probes on the terminals associated with the motor windings, ensuring secure contact for accurate measurements. The multimeter should indicate continuity, signifying that the electrical pathways within the windings are intact and capable of conducting current.
Next, proceed to test the continuity of the motor start switch, which plays a pivotal role in initiating the motor's operation. By placing the multimeter probes on the start switch terminals, you can verify the presence of continuity when the switch is engaged. A lack of continuity in the start switch may indicate a malfunction, necessitating further inspection or potential replacement.
In addition to testing the motor windings and start switch, it is essential to assess the continuity of other relevant electrical connections and components within the motor assembly. This includes inspecting the wiring harness, terminal blocks, and any interconnecting cables for consistent continuity. Any disruptions in continuity observed during these tests may indicate wiring faults or loose connections that require attention.
Throughout the continuity testing process, meticulous documentation of the measurements and observations is crucial for comprehensive analysis. Record the continuity status of each tested component, noting any instances of interrupted pathways or irregularities. This documentation serves as a valuable reference for diagnosing potential electrical issues and formulating targeted solutions.
By diligently testing the motor continuity and scrutinizing the obtained measurements, you can gain valuable insights into the electrical integrity of the washing machine motor. This meticulous evaluation forms the basis for identifying and addressing potential continuity-related issues, ensuring the motor's reliable performance and operational efficiency.
When testing a washing machine motor, use a multimeter to check for continuity in the motor windings. If there is no continuity, the motor may be faulty and in need of replacement.
Testing the Motor Capacitor
Testing the motor capacitor is a crucial aspect of evaluating the overall health and functionality of a washing machine motor. The capacitor serves as a vital component that facilitates the motor's starting and running operations by providing the necessary phase shift and torque. A faulty or deteriorating capacitor can significantly impact the motor's performance, leading to issues such as failure to start, erratic operation, or motor overheating. Therefore, conducting thorough testing of the motor capacitor is essential to identify potential capacitor-related issues and ensure the motor's optimal functionality.
To commence the testing process, it is imperative to prioritize safety by disconnecting the washing machine from the power supply and taking necessary precautions to prevent electrical hazards. Once the safety measures are in place, locate the motor capacitor within the washing machine assembly. The capacitor is typically situated near the motor and is identifiable by its cylindrical or rectangular shape, often featuring terminals for electrical connections.
Utilize a digital multimeter with capacitance measurement capabilities to assess the motor capacitor. Set the multimeter to the capacitance mode and discharge the capacitor to eliminate any residual charge. This can be achieved by using an insulated screwdriver to bridge the capacitor terminals, ensuring safe discharge before proceeding with the testing.
Carefully connect the multimeter probes to the capacitor terminals, observing the polarity to ensure accurate measurements. The multimeter should display the capacitance value, which can be compared to the manufacturer's specified capacitance rating for the particular motor model. Significant deviations from the expected capacitance value may indicate a defective or deteriorating capacitor, warranting further attention.
In addition to capacitance measurement, it is advisable to assess the capacitor's ability to hold and discharge charge effectively. This can be accomplished by utilizing the multimeter's resistance mode to verify the capacitor's charging and discharging capabilities. Anomalies in the charging or discharging process may signify capacitor issues that could impact the motor's performance.
Throughout the testing process, meticulous documentation of the capacitance measurements and observations is essential for comprehensive analysis. Record the capacitance values and any irregularities observed during the testing, providing valuable insights into the capacitor's condition.
By diligently testing the motor capacitor and scrutinizing the obtained measurements, you can gain valuable insights into the capacitor's integrity and functionality. This meticulous evaluation forms the basis for identifying potential capacitor-related issues and devising targeted solutions to ensure the motor's reliable performance and operational efficiency.
Testing the Motor Start Switch
The motor start switch is a critical component of a washing machine motor, playing a pivotal role in initiating the motor's operation. Testing the motor start switch is essential to ensure that it functions seamlessly, enabling the motor to start and run efficiently. By conducting thorough testing of the start switch, potential issues affecting the motor's starting process can be identified and addressed, contributing to the overall reliability and performance of the washing machine.
To commence the testing process, it is imperative to prioritize safety by disconnecting the washing machine from the power supply and taking necessary precautions to prevent electrical hazards. Once the safety measures are in place, locate the motor start switch within the washing machine assembly. The start switch is typically positioned in close proximity to the motor and is identifiable by its terminals and associated wiring.
Utilize a digital multimeter set to the continuity or resistance mode to assess the motor start switch. The continuity mode emits an audible beep or visual indicator when a complete circuit is detected, facilitating the identification of uninterrupted electrical pathways. Carefully place the multimeter probes on the start switch terminals, ensuring secure contact for accurate measurements. The multimeter should indicate continuity when the switch is engaged, signifying that the electrical pathways within the switch are intact and capable of conducting current.
In addition to continuity testing, it is essential to evaluate the switch's ability to initiate the motor's operation effectively. This can be achieved by engaging the start switch and observing the multimeter's readings to verify the presence of continuity during the switch activation. Any inconsistencies or interruptions in the continuity readings may indicate potential issues with the start switch, necessitating further inspection or potential replacement.
Throughout the testing process, meticulous documentation of the continuity measurements and observations is crucial for comprehensive analysis. Record the continuity status of the start switch, noting any instances of interrupted pathways or irregularities. This documentation serves as a valuable reference for diagnosing potential switch-related issues and formulating targeted solutions.
By diligently testing the motor start switch and scrutinizing the obtained measurements, valuable insights into the switch's integrity and functionality can be gained. This meticulous evaluation forms the basis for identifying potential start switch-related issues and devising targeted solutions to ensure the motor's reliable performance and operational efficiency.
Read more: How To Test A Small Electric Motor
Conclusion
In conclusion, mastering the art of testing a washing machine motor is a valuable skill that empowers individuals to diagnose and address potential issues affecting the motor's performance. By adhering to safety precautions, gathering the necessary tools and materials, and meticulously conducting tests on the motor windings, continuity, capacitor, and start switch, one can gain valuable insights into the motor's health and functionality.
The thorough evaluation of the motor windings provides crucial information about potential short circuits, open circuits, or insulation breakdown, enabling the identification of underlying issues that may impede the motor's operation. Additionally, testing the motor's continuity ensures the integrity of electrical pathways, safeguarding against interruptions that could disrupt the motor's functionality.
The assessment of the motor capacitor is essential in identifying potential faults that may impact the motor's starting and running operations. By scrutinizing the capacitance values and the capacitor's charging and discharging capabilities, individuals can pinpoint any deteriorating or defective components that require attention.
Furthermore, testing the motor start switch is pivotal in ensuring the seamless initiation of the motor's operation. By verifying the switch's continuity and its ability to activate the motor effectively, potential issues affecting the starting process can be identified and addressed, contributing to the overall reliability and performance of the washing machine motor.
The culmination of these testing procedures equips individuals with a comprehensive understanding of the washing machine motor's condition, enabling informed decisions regarding any necessary repairs or replacements. The insights gained from the testing process serve as a foundation for maintaining the motor's optimal performance and prolonging its operational lifespan.
In essence, the ability to test a washing machine motor empowers individuals to proactively address potential issues, ensuring the continued efficiency and functionality of this indispensable household appliance. Whether undertaking DIY maintenance or seeking professional assistance, the knowledge and skills acquired from testing the washing machine motor are invaluable in preserving the seamless operation of the appliance and facilitating a hassle-free laundry experience.
Frequently Asked Questions about How To Test A Washing Machine Motor
Was this page helpful?
At Storables.com, we guarantee accurate and reliable information. Our content, validated by Expert Board Contributors, is crafted following stringent Editorial Policies. We're committed to providing you with well-researched, expert-backed insights for all your informational needs.


0 thoughts on “How To Test A Washing Machine Motor”