Home>Articles>How To Test A Electric Motor With A Multimeter
Articles
How To Test A Electric Motor With A Multimeter
Modified: October 20, 2024
Learn how to test an electric motor using a multimeter - step-by-step guide with helpful tips and tricks. Find helpful articles on motor testing methods.
(Many of the links in this article redirect to a specific reviewed product. Your purchase of these products through affiliate links helps to generate commission for Storables.com, at no extra cost. Learn more)
Introduction
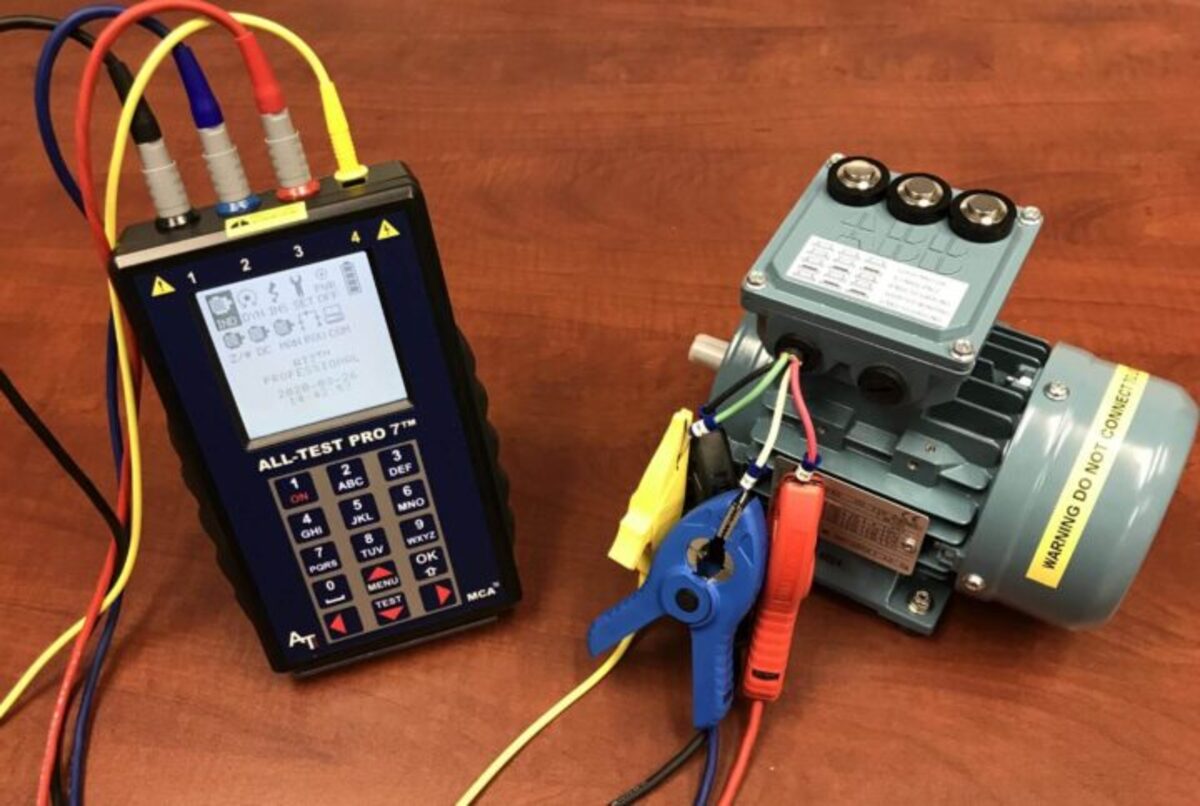
Welcome to this guide on how to test an electric motor with a multimeter. Electric motors are widely used in various applications, from household appliances to industrial machinery. Over time, these motors may experience issues or fail to function properly, requiring troubleshooting and testing.
A multimeter is a valuable tool that can help you diagnose and determine the health of an electric motor. It allows you to measure different electrical parameters such as voltage, current, and resistance. By performing a series of tests, you can identify potential problems and take appropriate actions to rectify them.
In this article, we will walk you through the step-by-step process of testing an electric motor using a multimeter. We will cover the necessary safety precautions and provide detailed instructions on how to set up your multimeter for accurate measurements. Additionally, we will guide you through testing the power supply, checking the motor’s continuity, measuring resistance, and assessing the motor’s insulation, voltage, run capacitor, and startup capacitor.
Whether you are a DIY enthusiast or a professional technician, understanding how to test an electric motor can save you time, money, and frustration. By following these steps, you can quickly identify and resolve issues without the need for expensive repairs or replacements.
Before we dive into the testing process, it’s important to remember that working with electrical equipment can be dangerous. Always prioritize your safety and take necessary precautions. If you are unsure or uncomfortable with any step, it is recommended to seek assistance from a qualified electrician or technician.
Now, let’s get started with the first step: Safety Precautions.
Key Takeaways:
- Prioritize safety and follow the step-by-step process to accurately test an electric motor with a multimeter. By understanding the testing procedures, you can identify and resolve motor issues effectively.
- Regular maintenance and proper troubleshooting empower you to diagnose motor problems and make informed decisions. By following safety precautions and utilizing the multimeter, you can ensure the efficient operation of electric motors.
Read more: How To Test A Small Electric Motor
Step 1: Safety Precautions
Before testing an electric motor with a multimeter, it is crucial to prioritize your safety. Working with electricity can be hazardous, so it’s important to take the necessary precautions. Here are some safety measures to keep in mind:
1. Disconnect the Power: Before handling any electrical components, make sure the power supply to the motor is disconnected. This can be done by unplugging the motor or turning off the circuit breaker that supplies power to it. This step ensures your safety and prevents accidental electrical shocks.
2. Wear Personal Protective Equipment (PPE): When working with electrical equipment, it is advisable to wear appropriate personal protective equipment. This may include safety goggles, insulated gloves, and non-conductive footwear. These items help protect you from potential hazards such as electrical shocks or burns.
3. Allow the Motor to Cool: Electric motors can become hot during operation. Before attempting any testing or maintenance, allow the motor to cool down to avoid burning yourself. This is particularly important if the motor has been running for an extended period.
4. Work in a Well-Ventilated Area: When testing an electric motor, ensure that you are working in a well-ventilated area. This will help dissipate any fumes or odors that may be emitted during testing. If you detect any unusual smells or smoke, immediately stop the testing and investigate further.
5. Follow Manufacturer’s Guidelines: Always refer to the manufacturer’s guidelines and instructions specific to your electric motor. Different motors may have unique requirements or safety considerations, so it’s essential to follow their recommendations for safe testing procedures.
6. Use Insulated Tools: When working with electrical components, use insulated tools to minimize the risk of electrical shock. Insulated tools have handles made from non-conductive materials, preventing the flow of electricity from reaching your body.
7. Double-Check Connections: Before taking any measurements or performing tests, ensure that all connections are secure. Loose or faulty connections can result in inaccurate readings or potential hazards during testing. Take a moment to visually inspect and verify that all connections are properly made.
8. Be Mindful of Moving Parts: Electric motors may have rotating parts or moving components. Exercise caution and be mindful of these parts during the testing process. Keep your fingers and clothing away from the motor’s moving parts to prevent injuries.
By adhering to these safety precautions, you can minimize the risks associated with testing an electric motor. Take your time, be cautious, and prioritize your well-being throughout the entire testing process.
With safety covered, let’s move on to Step 2: Setting Up Your Multimeter.
Step 2: Setting Up Your Multimeter
Now that you’ve taken the necessary safety precautions, it’s time to set up your multimeter for testing the electric motor. Here’s how:
1. Select the Correct Function: Most multimeters have various functions, such as measuring voltage, current, resistance, and continuity. To test an electric motor, you will primarily be using the voltage, resistance, and continuity functions. Set your multimeter to the appropriate function based on the test you will be performing.
2. Adjust Range and Units: Depending on the multimeter model, you may need to manually adjust the measurement range and units. For example, if you’re measuring voltage, select the appropriate voltage range based on the expected voltage of the motor. Similarly, for resistance, adjust the range to ensure accurate readings.
3. Set the Multimeter to AC or DC: Determine whether your electric motor operates on AC (Alternating Current) or DC (Direct Current). This information can usually be found on the motor’s nameplate or in its documentation. Adjust the multimeter to the corresponding AC or DC setting to match the motor’s power source.
4. Connect the Test Leads: Multimeters come with test leads – one red and one black. Connect the red lead to the positive or voltage terminal on the multimeter, and the black lead to the common or negative terminal. Make sure the leads are securely plugged into the designated ports.
5. Verify Proper Grounding: Ensure your multimeter is properly grounded by connecting the metal probe of the black lead to a known ground point. This helps maintain accuracy in your readings and prevents potential electrical damage to the multimeter.
6. Calibrate the Multimeter: Some multimeters require periodic calibration to maintain accuracy. Check the user manual or manufacturer’s instructions to determine if calibration is necessary and follow the recommended procedure if needed.
7. Familiarize Yourself with the Functions and Controls: Take a moment to familiarize yourself with the various functions and controls on your multimeter. This includes understanding how to select the desired function, switch between ranges, and adjust settings. Knowing your multimeter’s capabilities ensures you can use it effectively during the testing process.
Once your multimeter is set up and ready to go, you can move on to Step 3: Testing the Power Supply of the Electric Motor.
Step 3: Testing Power Supply
After setting up your multimeter, the next step is to test the power supply of the electric motor. This will help determine if the motor is receiving the correct voltage and if there are any issues with the power source. Follow these steps to perform the power supply test:
1. Ensure Power is Disconnected: Before testing the power supply, make sure the motor is disconnected from any power source. This includes disconnecting the power cord or turning off the circuit breaker.
2. Set Multimeter to Voltage Function: Switch your multimeter to the voltage function and select the appropriate AC or DC setting based on the motor’s power source.
3. Connect the Test Leads: Connect the red test lead of your multimeter to the positive terminal of the motor’s power supply source. Connect the black test lead to the negative terminal or ground point.
4. Power On the Motor: Restore power to the motor by plugging in the power cord or turning on the circuit breaker.
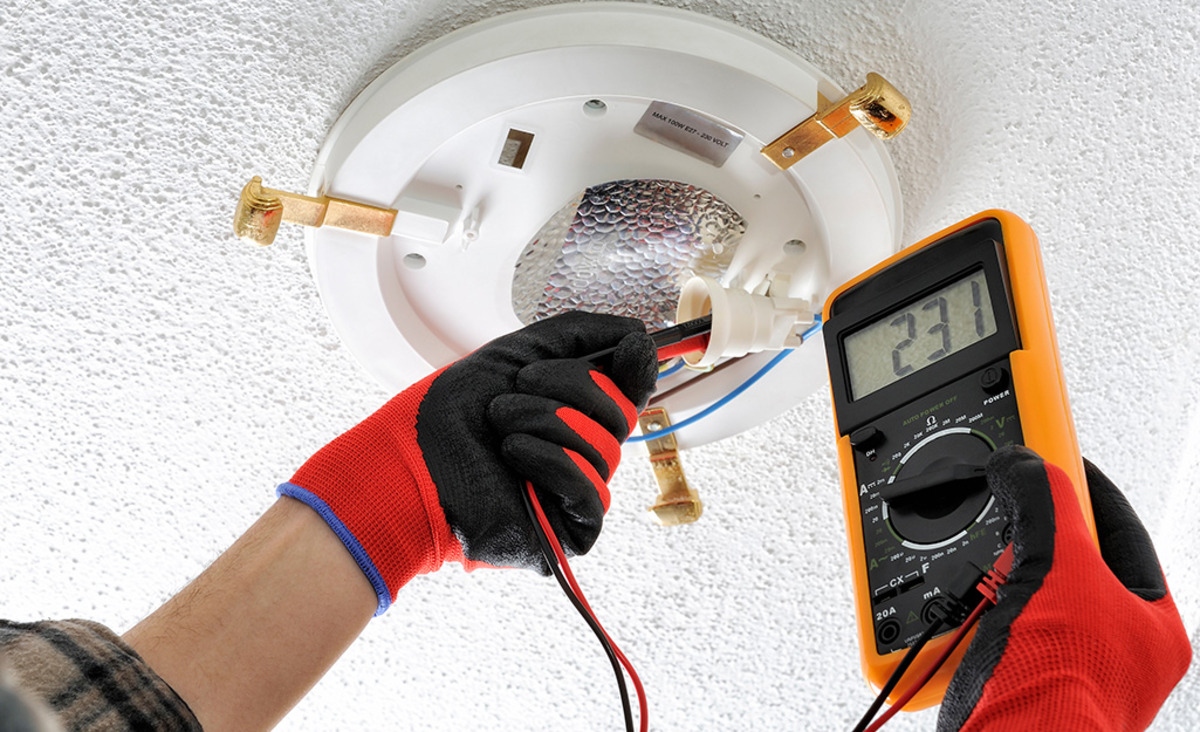
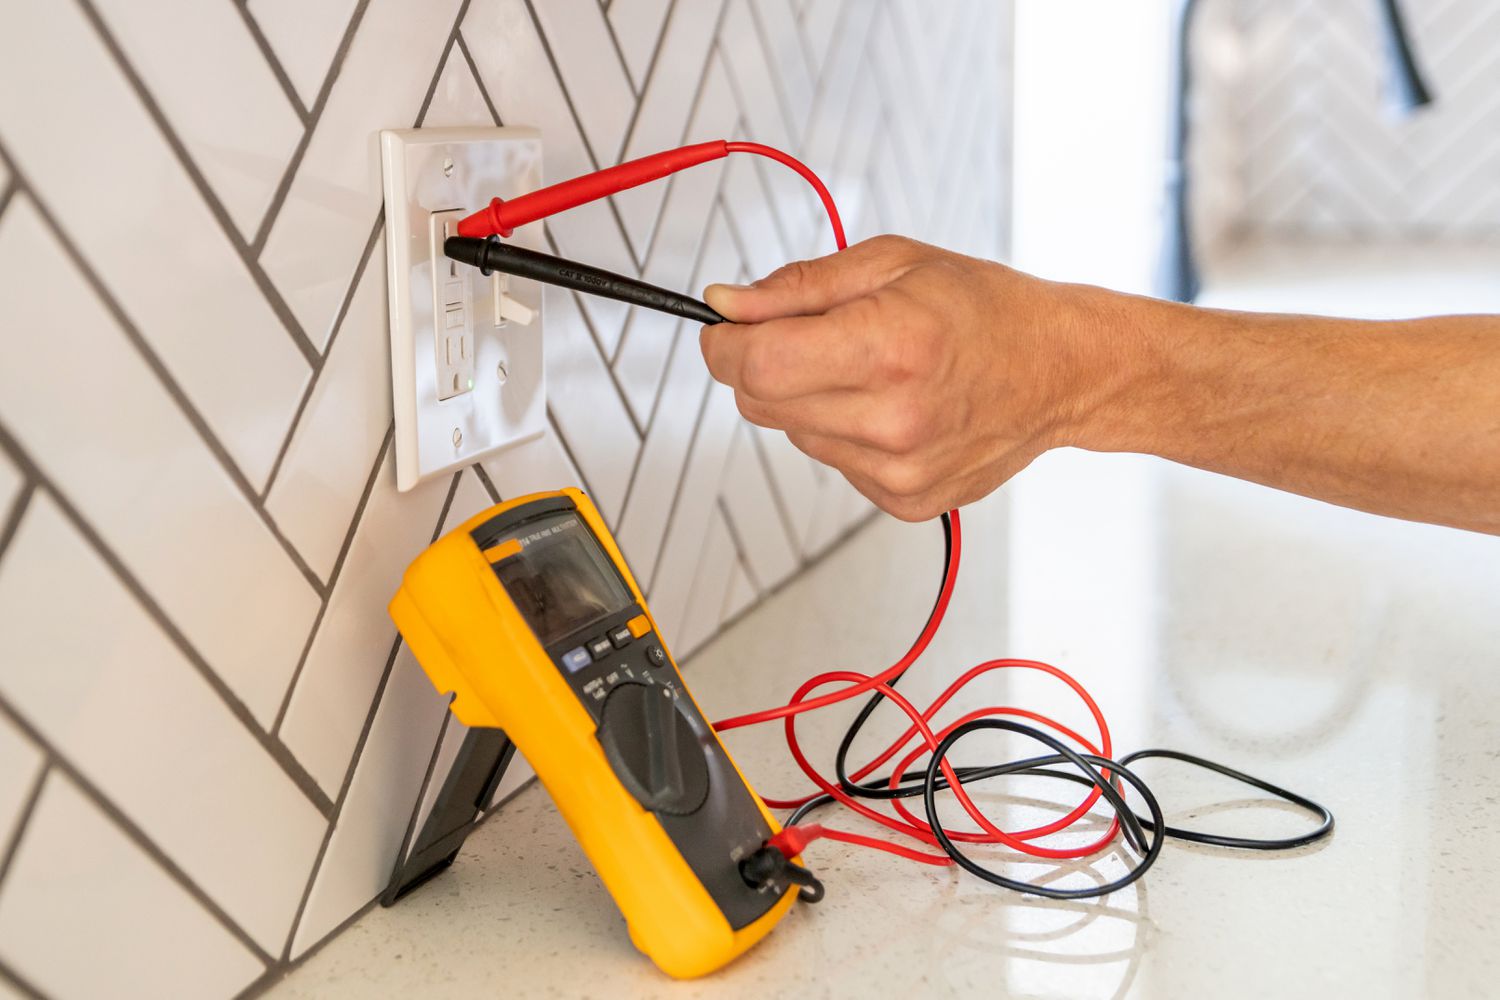
5. Measure Voltage: Place the multimeter probes on the corresponding terminals of the motor’s power supply source. Ensure a good connection between the probes and the terminals. The multimeter will display the voltage reading.
6. Verify Voltage Rating: Compare the voltage reading on your multimeter with the motor’s voltage rating. If the measured voltage is within the acceptable range of the motor’s rating, the power supply is functioning correctly.
7. Look for Voltage Fluctuations: While measuring the voltage, observe if there are any significant fluctuations or variations in the reading. Drastic changes or unstable voltage levels could indicate a potential problem with the power supply or electrical wiring.
8. Check for Any Voltage Drop: A significant voltage drop from the power supply to the motor may indicate wiring issues or a faulty connection. If you notice a significant drop in voltage, it’s advisable to consult a professional electrician to investigate and rectify the problem.
By performing the power supply test, you can ensure that your electric motor is receiving the appropriate voltage and that the power source is reliable. If the power supply test is successful, you can proceed to Step 4: Testing the Motor’s Continuity.
Step 4: Testing Motor’s Continuity
Continuity testing is essential to check if there are any breaks in the circuitry of the electric motor. This test helps identify any open circuits or faulty connections within the motor. Here’s how you can perform continuity testing on the motor:
1. Disconnect Power: Before conducting the continuity test, ensure that the power supply to the motor is disconnected. This is important to prevent any electrical accidents during the testing process.
2. Set Multimeter to Continuity Mode: Switch your multimeter to the continuity mode. This mode usually has a symbol that looks like a sound wave or a diode. Refer to your multimeter’s user manual if you are unsure about the specific setting.
3. Connect Test Leads: Connect the red test lead to one end of the motor’s circuit or component that you want to test for continuity. Connect the black test lead to the other end. It is essential to ensure a good connection between the test leads and the motor.
4. Listen for the Signal: Once the test leads are connected, the multimeter will emit a sound or display a value if there is continuity in the circuit. This indicates that there is no break or interruption in the flow of electrical current in that particular component or circuit of the motor.
5. Check for Open Circuits: If you do not hear any sound or see a value on the multimeter, it indicates an open circuit or a break in the circuitry. This means that there is a faulty connection, a broken wire, or a damaged component that needs further investigation and repair.
6. Analyze Multiple Components: Repeat the continuity test for various components and circuits within the motor, such as windings, switches, and terminals. This will help identify the specific area where the continuity is interrupted and require repair or replacement.
7. Document and Troubleshoot: Keep track of your testing results and note any components that show no continuity. This documentation will help in troubleshooting and determining the appropriate repair or replacement solutions for the faulty components.
By conducting the continuity test, you can identify any breaks or interruptions in the motor’s circuitry. This allows you to pinpoint the specific areas that require further attention and repair. Once the continuity testing is complete, you can move on to Step 5: Measuring Resistance of the Motor.
Read more: How To Test An LED Bulb With A Multimeter
Step 5: Measuring Resistance
Measuring the resistance of an electric motor helps determine the condition of its windings and coils. Resistance testing can identify issues such as short circuits, open circuits, or damaged windings. Follow these steps to measure the resistance of the motor:
1. Ensure Power is Disconnected: Before measuring the resistance, make sure the motor is disconnected from any power source. This is crucial for your safety and to avoid any interference with the readings.
2. Set Multimeter to Resistance Mode: Set your multimeter to the resistance or ohms mode. This mode is commonly represented by the symbol Ω. If your multimeter has multiple resistance ranges, choose an appropriate range that will accommodate the expected resistance of the motor.
3. Test the Test Leads: With the multimeter still in resistance mode, touch the test leads together. This will help you identify any resistance in the test leads themselves. The multimeter should display a reading close to zero ohms. If not, make sure the test leads are properly connected or replace them if necessary.
4. Disconnect Motor Wires: If possible, disconnect the motor wires to isolate the specific component or winding you want to measure. This allows for more accurate resistance readings without interference from other parts of the motor’s circuitry.
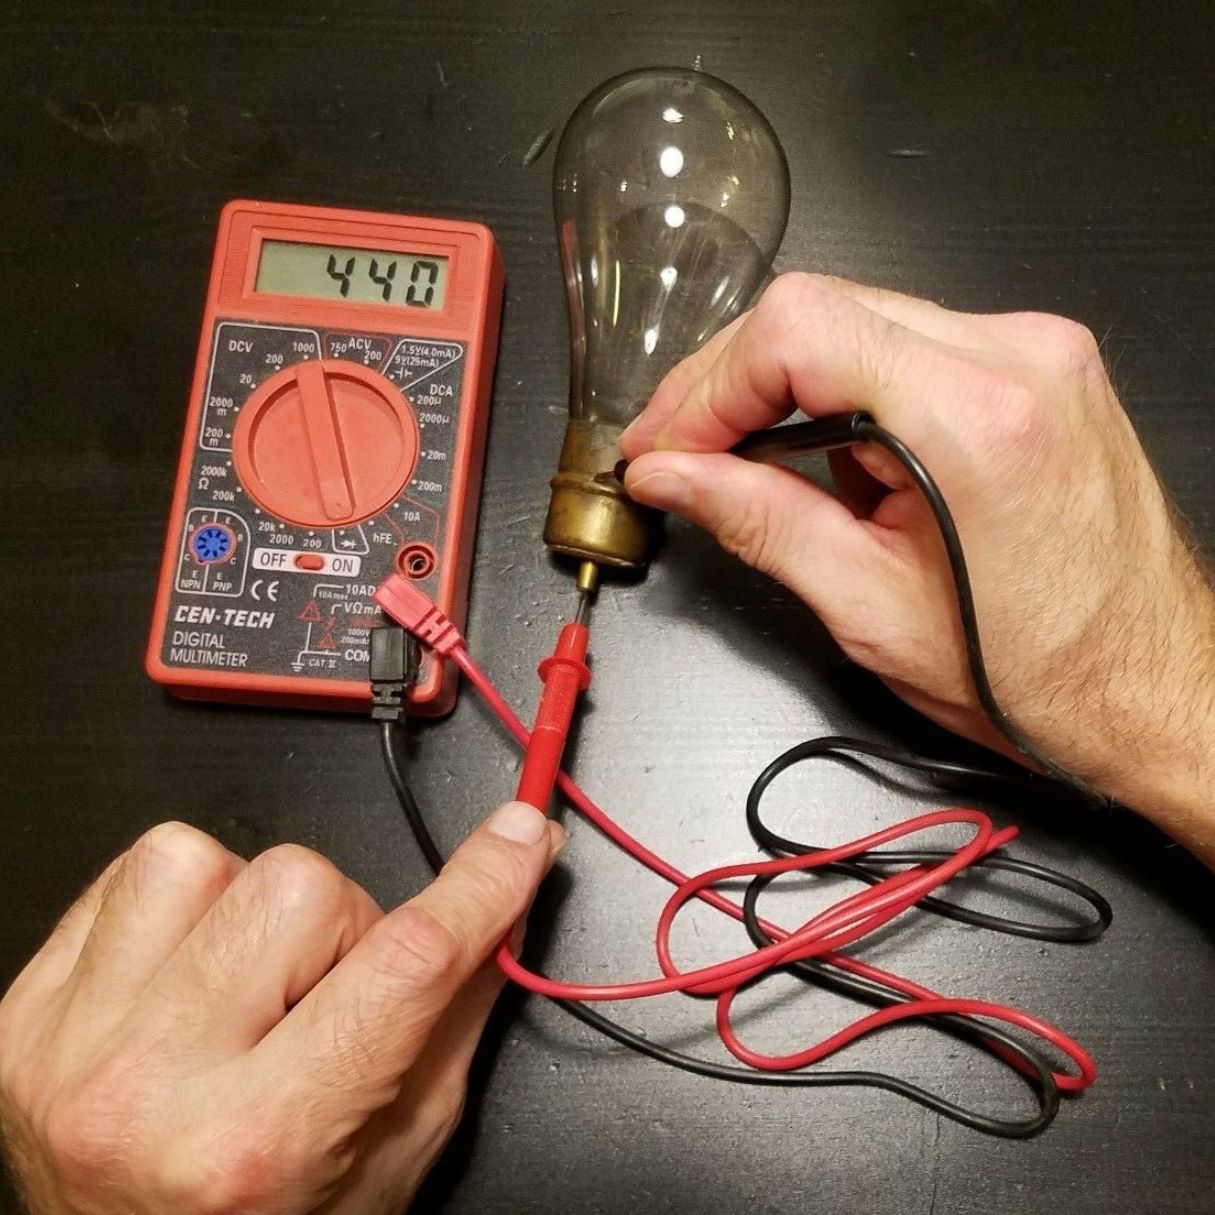
5. Connect Test Leads: Connect the test leads of the multimeter to the two ends of the component or winding you wish to measure. Ensure a secure and stable connection between the test leads and the motor.
6. Read the Resistance: Once the test leads are connected to the motor, the multimeter will display the resistance reading. Take note of the value shown on the multimeter, which represents the resistance of the component or winding being tested.
7. Compare with Specifications: Consult the motor’s specifications or documentation to determine the acceptable range of resistance for the component or winding being tested. Compare the measured resistance with the specified range to assess the condition of the motor. If the measured resistance falls outside the expected range, further investigation or repair may be necessary.
8. Test Other Components: Repeat the resistance measurement for other components or windings within the motor that require evaluation. This will help identify any abnormalities or deviations from the expected resistance values.
Measuring the resistance of an electric motor provides valuable insight into the health of its internal components. It allows you to identify any potential issues with the windings, coils, or connections. Once the resistance measurements are complete, you can move on to Step 6: Checking the Motor’s Insulation.
When testing an electric motor with a multimeter, set the multimeter to the resistance or continuity setting. Then, place the multimeter probes on the motor’s terminals. If the reading is within the motor’s specified range, the motor is functioning properly.
Step 6: Checking Motor’s Insulation
Checking the insulation of an electric motor is crucial to ensure its safe and efficient operation. Insulation breakdown can lead to short circuits, electrical faults, or even motor failure. Follow these steps to check the insulation of the motor:
1. Ensure Power is Disconnected: Before checking the insulation, make sure the motor is completely disconnected from any power source. This is vital for your safety and to prevent any interference during the testing process.
2. Insulation Resistance Test: Set your multimeter to the insulation resistance or megohm (MΩ) mode. This mode is specifically designed to measure high resistance values, which are typical for insulation testing.
3. Connect Test Leads: Connect the test leads to the motor as follows: the red lead to the terminal of the motor winding under test and the black lead to the motor’s frame or grounding point.
4. Measure Insulation Resistance: Once the test leads are properly connected, initiate the insulation resistance test on your multimeter. The multimeter will apply a test voltage and measure the insulation resistance in megaohms (MΩ).
5. Evaluate the Reading: The measured insulation resistance should ideally be significantly higher than the manufacturer’s specified minimum resistance value. Higher resistance indicates better insulation condition. If the measured resistance is significantly lower than expected, it could indicate insulation deterioration or a potential fault.
6. Compare with Standards: Consult applicable industry standards or the manufacturer’s guidelines to determine the acceptable insulation resistance range for the specific motor. Compare the measured insulation resistance with the recommended range to assess its condition.
7. Perform Polarization Index (PI) Test: In addition to measuring insulation resistance, you can perform a polarization index test (PI) to assess the insulation quality further. This test involves taking multiple measurements at regular time intervals and calculating the ratio of insulation resistance values. A higher PI value indicates better insulation condition.
8. Document the Results: Record the insulation resistance measurement and any additional test results. This documentation will be useful for future reference and comparison during subsequent inspections.
Regularly checking the insulation of your electric motor helps ensure its reliability and longevity. Identifying insulation issues early on allows you to address them promptly and prevent potential motor failures. Once you have checked the motor’s insulation, you can proceed to Step 7: Determining the Motor’s Voltage.
Step 7: Determining Motor’s Voltage
Determining the voltage of an electric motor is an important step in understanding its power requirements and compatibility with the electrical supply. It helps ensure that the motor is operating within its voltage rating for optimal performance and safety. Follow these steps to determine the motor’s voltage:
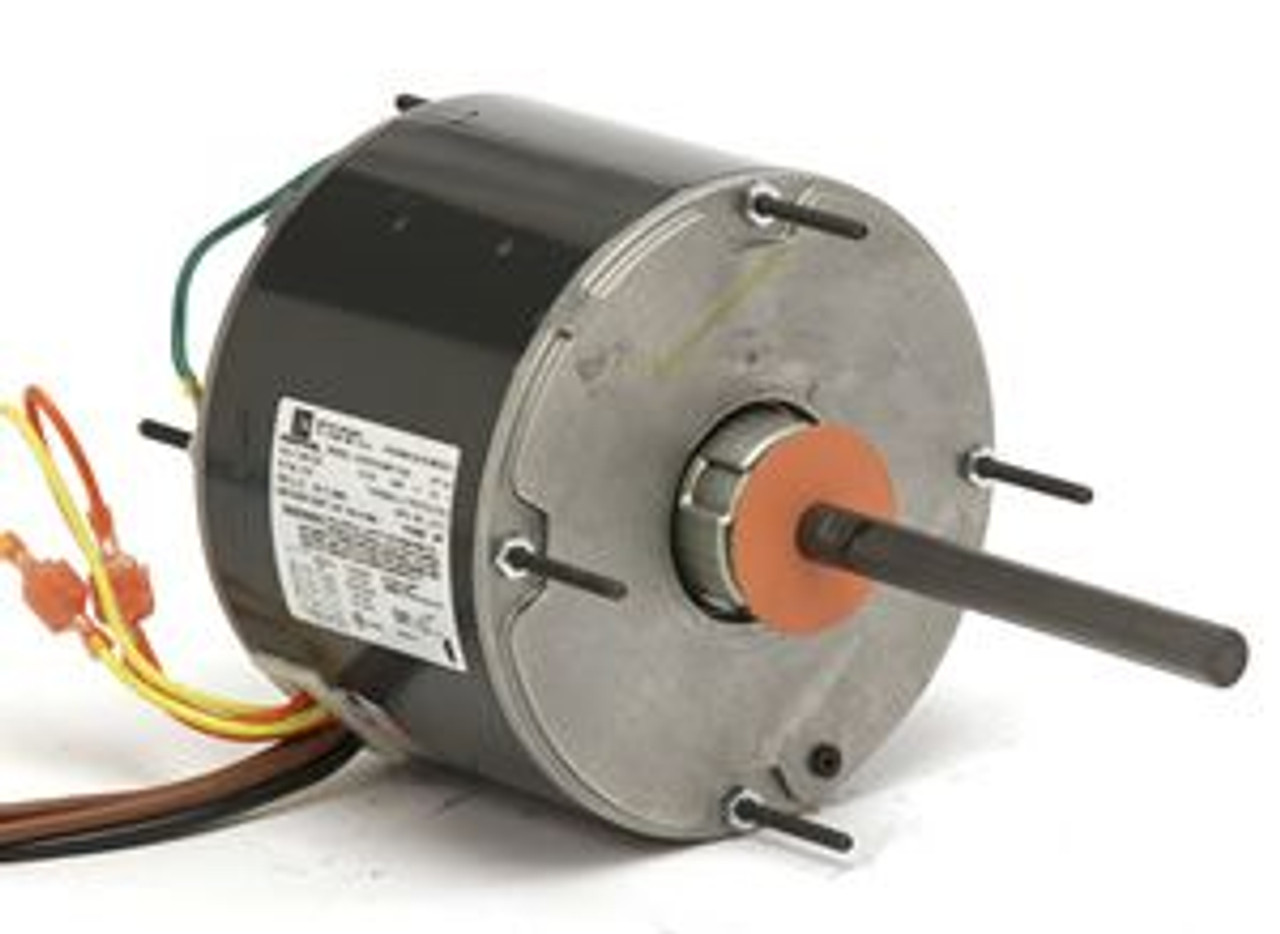
1. Review Nameplate Information: Locate the motor’s nameplate, which is typically affixed to the motor housing. The nameplate provides essential information, including the voltage rating. Take note of the rated voltage indicated on the nameplate.
2. Verify Power Supply: Verify the voltage of the electrical power supply that is feeding the motor. This can be done by checking the circuit breaker, power outlet, or electrical panel. Ensure that the power supply voltage matches or is within the acceptable range of the motor’s rated voltage.
3. Set Multimeter to Voltage Function: Set your multimeter to the appropriate voltage function based on the motor’s power supply type (AC or DC). Choose a voltage range on the multimeter that can accommodate the expected voltage of the motor.
4. Connect Test Leads: Connect the test leads of the multimeter to the corresponding terminals of the motor. The red test lead should be connected to the positive terminal, and the black test lead should be connected to the negative or ground terminal.
5. Read the Voltage: With the test leads connected, switch on the motor or restore power to it. The multimeter will display the voltage reading. Take note of the voltage measurement on the multimeter.
6. Compare with Nameplate Information: Compare the measured voltage with the motor’s rated voltage on the nameplate. Ideally, the measured voltage should be close to the rated voltage. A significant deviation from the rated voltage could indicate a wiring issue, power supply problem, or motor malfunction that needs further investigation.
7. Monitor Voltage Fluctuations: While monitoring the voltage, observe for any significant fluctuations or variations in the reading. Unstable or fluctuating voltage can affect the motor’s performance and longevity. If you notice abnormal voltage fluctuations, it may be necessary to consult an electrician or technician to address the issue.
8. Consider Load Conditions: Keep in mind that the motor’s voltage may vary depending on the load conditions and specific application requirements. In some cases, motors may operate at a slightly higher or lower voltage than their rated voltage to optimize performance in certain applications. Refer to the manufacturer’s guidelines or consult with an expert if you have any doubts.
Accurately determining the voltage of your electric motor ensures its proper operation within specified limits. This step also helps in troubleshooting potential issues related to voltage compatibility. Once you have determined the motor’s voltage, you can move on to Step 8: Testing the Motor’s Run Capacitor.
Step 8: Testing Motor’s Run Capacitor
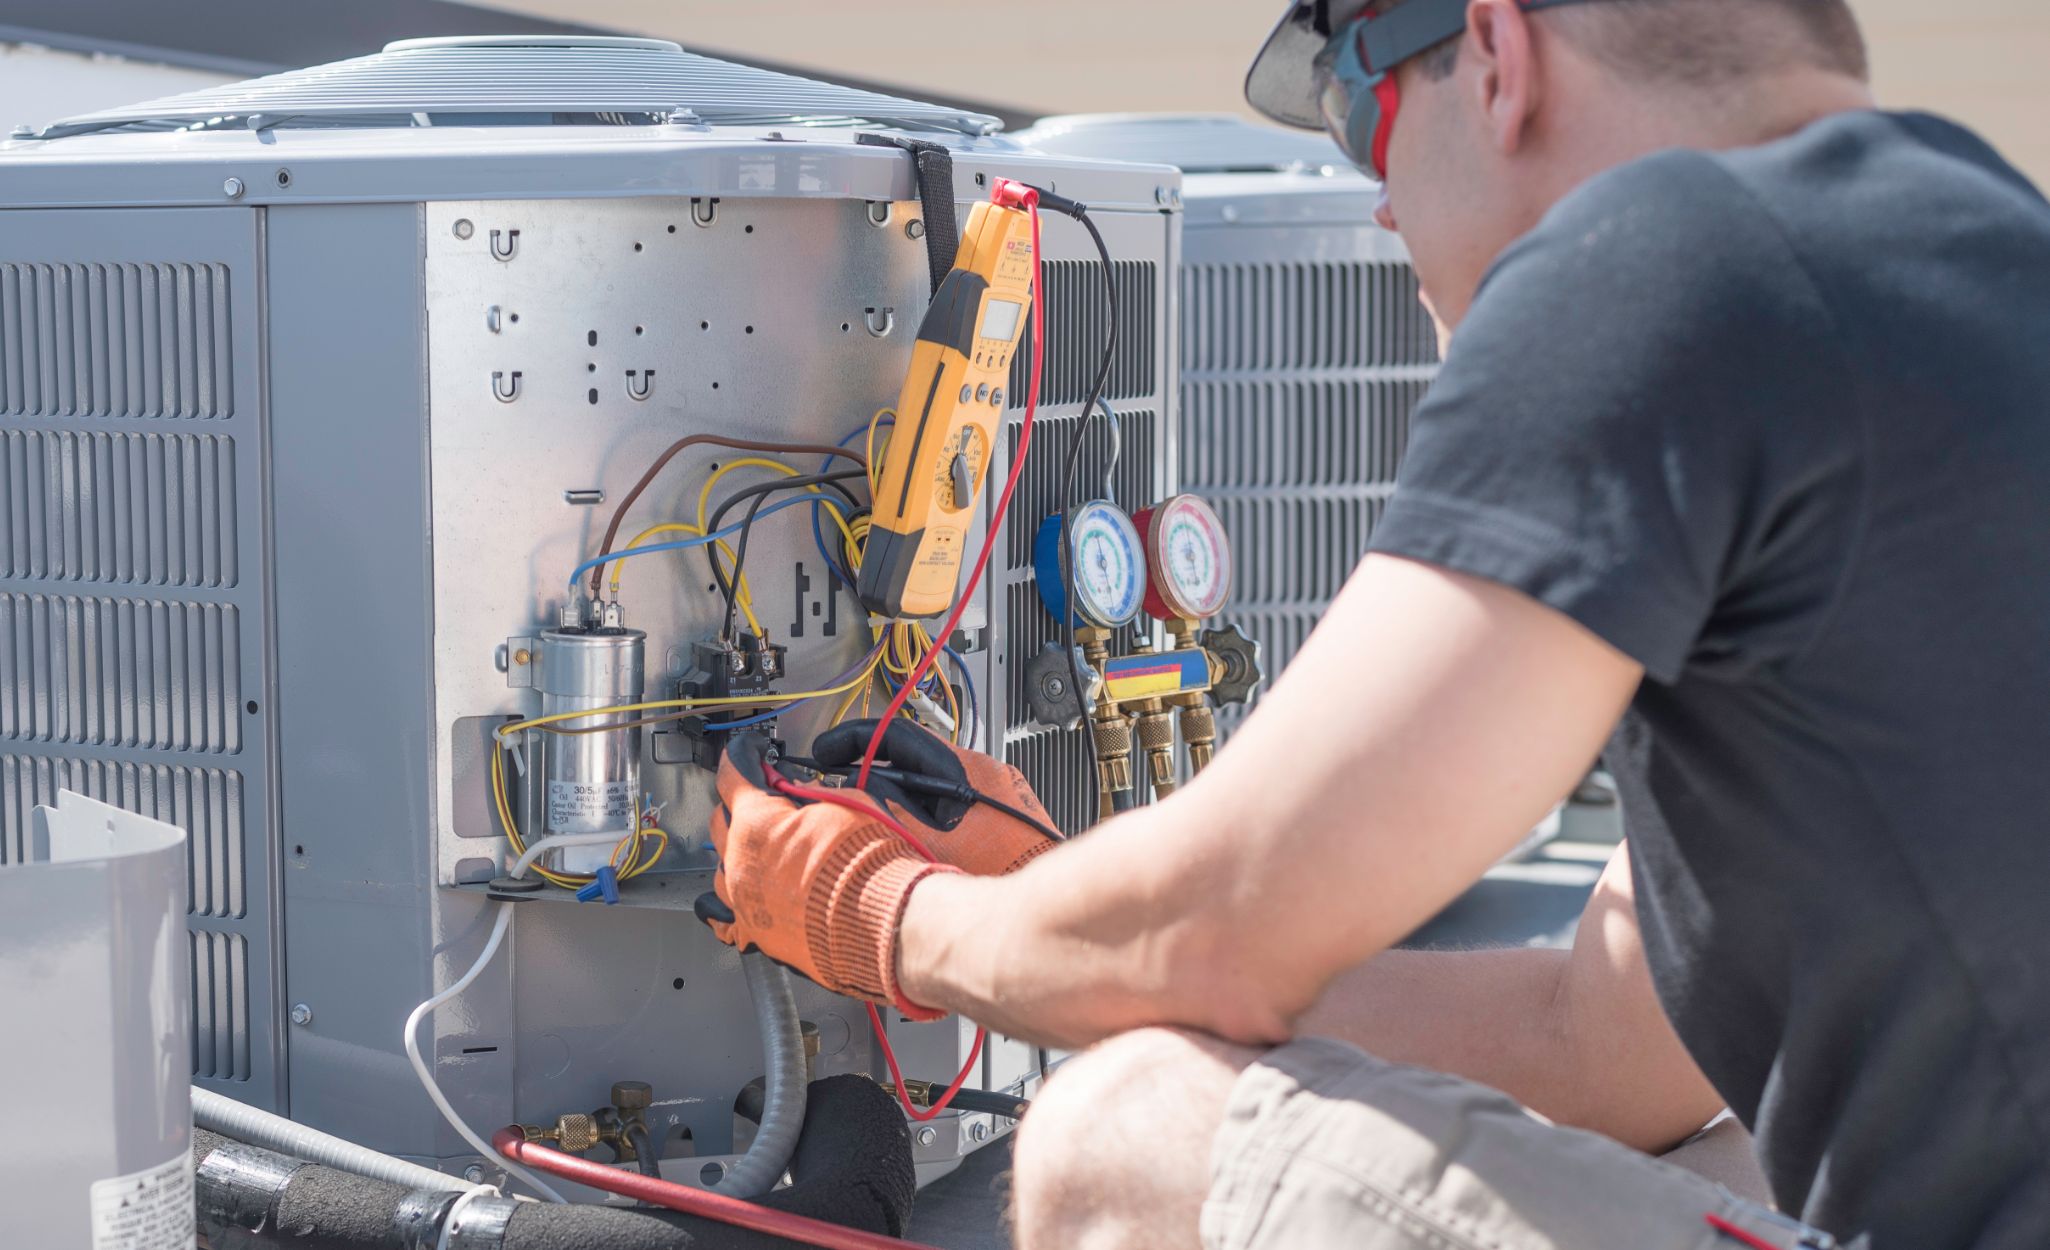
The run capacitor plays a crucial role in the operation of an electric motor, providing an extra boost of power for efficient performance. Testing the run capacitor helps verify its functionality and identify any potential issues. Follow these steps to test the motor’s run capacitor:
1. Ensure Power is Disconnected: Before testing the run capacitor, make sure the power supply to the motor is completely disconnected. This prevents any electrical accidents or interference during the testing process.
2. Locate the Run Capacitor: Identify the location of the run capacitor in the motor. In most cases, it is a cylindrical or oval-shaped component connected to the motor’s wiring or terminal board.
3. Discharge the Capacitor: Capacitors store electrical energy even after power is disconnected. To ensure safety, discharge the run capacitor before proceeding with the testing. You can do this by using an insulated screwdriver or a discharge tool to short the capacitor’s terminals together. Take caution as the capacitor may still hold a charge and can cause a shock if mishandled.
4. Set Multimeter to Capacitance Mode: Switch your multimeter to the capacitance mode (usually indicated by the symbol “F” for farads). Make sure the range on the multimeter is suitable for measuring the capacitance value of the run capacitor.
5. Connect Test Leads: Connect the test leads of the multimeter to the corresponding terminals of the run capacitor. The polarity does not matter for capacitance testing, so you can connect the red and black leads to either terminal.
6. Read the Capacitance: Once the test leads are securely connected, the multimeter will display the capacitance value of the run capacitor. Take note of the reading on the multimeter.
7. Compare with Specifications: Refer to the motor’s documentation or manufacturer’s guidelines to determine the acceptable range of capacitance for the run capacitor. Compare the measured capacitance value with the specified range to assess if it falls within the acceptable limits.
8. Check for Possible Issues: If the measured capacitance deviates significantly from the specified range, it could indicate a problem with the run capacitor. A lower capacitance reading may indicate a faulty or weakened capacitor, while a higher reading could suggest a shorted or deteriorated capacitor. In such cases, it is advisable to replace the faulty capacitor with a new one.
Testing the run capacitor helps ensure its proper functioning and can prevent motor performance issues. If the run capacitor test is successful, you can proceed to Step 9: Assessing the Motor’s Startup Capacitor.
Read more: How To Test An Ac Adapter With A Multimeter
Step 9: Assessing Motor’s Startup Capacitor
The startup capacitor in an electric motor provides the necessary boost to initiate its rotation. Testing the startup capacitor is crucial to ensure it is functioning properly and aiding in the motor’s startup sequence. Follow these steps to assess the motor’s startup capacitor:
1. Ensure Power is Disconnected: Before testing the startup capacitor, make sure the power supply to the motor is completely disconnected. This is essential for your safety and to prevent any interference during the testing process.
2. Locate the Startup Capacitor: Identify the location of the startup capacitor in the motor. It is typically a smaller cylindrical or oval-shaped component connected to the motor’s wiring or terminal board.
3. Discharge the Capacitor: Similar to the run capacitor, capacitors store electrical energy even after power is disconnected. To discharge the startup capacitor safely, use an insulated screwdriver or a discharge tool to short the terminals together. Take care as the capacitor may still hold a charge and can cause a shock if mishandled.
4. Set Multimeter to Capacitance Mode: Switch your multimeter to the capacitance mode (usually indicated by the symbol “F” for farads). Ensure that the range on the multimeter is suitable for measuring the capacitance value of the startup capacitor.
5. Connect Test Leads: Connect the test leads of the multimeter to the corresponding terminals of the startup capacitor. Polarity does not matter for capacitance testing, so you can connect the red and black leads to either terminal.
6. Read the Capacitance: Once the test leads are securely connected, the multimeter will display the capacitance value of the startup capacitor. Take note of the reading on the multimeter.
7. Compare with Specifications: Refer to the motor’s documentation or manufacturer’s guidelines to determine the acceptable range of capacitance for the startup capacitor. Compare the measured capacitance value with the specified range to assess if it falls within the acceptable limits.
8. Check for Possible Issues: If the measured capacitance deviates significantly from the specified range, it could indicate a problem with the startup capacitor. A lower capacitance reading may suggest a faulty or weakened capacitor, while a higher reading could imply a shorted or deteriorated capacitor. In such cases, it is advisable to replace the faulty capacitor with a new one.
Assessing the startup capacitor ensures that it is in good working condition, helping the electric motor initiate its rotation effectively. If the startup capacitor assessment is successful, you can proceed to Step 10: Troubleshooting Motor Issues.
Step 10: Troubleshooting Motor Issues
After completing the previous steps to test various aspects of the electric motor, it’s time to troubleshoot any issues that may have been identified. Troubleshooting helps pinpoint the root cause of motor problems and determines the appropriate solutions. Here’s how to troubleshoot motor issues:
1. Identify Symptoms: Begin by identifying the specific symptoms or issues with the motor. This can include unusual noises, vibrations, failure to start, inconsistent speed, overheating, or any other abnormal behavior. Gathering detailed information about the problem will guide your troubleshooting process.
2. Refer to Troubleshooting Manuals or Guides: Consult the motor’s troubleshooting manuals or guides provided by the manufacturer. These resources often contain valuable information on common motor issues and their recommended solutions. Follow the troubleshooting steps outlined in the documentation to narrow down the problem.
3. Inspect Wiring and Connections: Thoroughly inspect the motor’s wiring and connections, looking for loose or damaged wires, faulty connectors, or improper connections. Poor electrical connections or wiring issues can cause motor problems, so ensure all connections are secure, properly insulated, and in good condition.
4. Check for Mechanical Issues: Examine the motor’s mechanical components, including bearings, shafts, and couplings, for any signs of wear, damage, or misalignment. Excessive friction, misaligned parts, or worn-out components can affect the motor’s performance. Lubricate or replace any damaged or worn parts as necessary.
5. Monitor Operating Conditions: Look into the motor’s operating conditions, such as ambient temperature, ventilation, and load conditions. Operating the motor beyond its specified limits, either in terms of temperature or load, can lead to performance issues. Ensure the motor is operating within its recommended parameters.
6. Test Additional Components: If the issue persists, perform additional tests on motor components such as switches, relays, or sensors to identify any faults or malfunctions. Follow the manufacturer’s guidelines or consult with an expert if necessary to properly diagnose and repair these components.
7. Consult Professional Help: If you’re unable to identify or resolve the motor issues, it may be necessary to seek assistance from a professional technician or electrician. They have the expertise and specialized equipment to diagnose and address complex motor problems.
8. Perform Proper Maintenance: Regular maintenance plays a vital role in prolonging the lifespan and optimizing the performance of the electric motor. Follow the recommended maintenance schedule and perform tasks such as cleaning, lubrication, and inspections to prevent future issues.
Through troubleshooting, you can identify the underlying issues affecting the motor’s performance and take appropriate actions to resolve them. Remember to prioritize safety and seek professional assistance when needed. With proper troubleshooting and maintenance, you can ensure the motor operates efficiently and reliably.
Congratulations! You have completed the steps to test and troubleshoot an electric motor. By following these guidelines, you can effectively diagnose potential issues and take the necessary measures to rectify them. Remember that working with electrical equipment can be hazardous, so prioritize safety and consult professionals when in doubt.
Should you have any further questions or encounter specific motor-related issues, don’t hesitate to reach out for assistance. Happy troubleshooting!
Conclusion
Testing an electric motor with a multimeter is a valuable skill that can save you time, money, and frustration. By following the step-by-step process outlined in this guide, you can effectively diagnose motor issues, identify faulty components, and take appropriate actions to resolve them.
Throughout the testing process, it is crucial to prioritize safety. Always disconnect the power supply before starting any tests and use personal protective equipment when necessary. If you are uncomfortable or unsure about any step, seek assistance from a qualified professional.
By setting up your multimeter correctly, you can accurately measure the power supply, continuity, resistance, and insulation of the motor. Testing the run capacitor and startup capacitor helps ensure their proper functionality. Assessing the motor’s voltage and troubleshooting any identified issues allows you to address potential problems and restore the motor’s performance.
Remember that regular maintenance and proper care are essential to keep the motor in optimal condition. Following the manufacturer’s guidelines and performing routine inspections can prevent future issues and extend the motor’s lifespan.
By understanding how to test and troubleshoot an electric motor, you empower yourself to diagnose motor problems and make informed decisions regarding repairs or replacements. Whether you are a DIY enthusiast or a professional technician, this guide provides a comprehensive framework to effectively test and troubleshoot electric motors.
Always consult the motor’s documentation, manufacturer’s guidelines, and industry standards for specific instructions and recommended practices. When in doubt, don’t hesitate to consult with experts or professionals in the field.
With the knowledge gained from this guide, may you be successful in testing and troubleshooting electric motors. Wishing you smooth and efficient motor testing experiences!
Now that you've mastered testing electric motors with a multimeter, why not level up your DIY skills even further? Dive into our next feature, where we unravel secrets of efficient motor repair. You'll discover practical advice and innovative techniques that could save you time and money in 2024. Don't miss out on this chance to enhance your motor maintenance expertise!
Frequently Asked Questions about How To Test A Electric Motor With A Multimeter
Was this page helpful?
At Storables.com, we guarantee accurate and reliable information. Our content, validated by Expert Board Contributors, is crafted following stringent Editorial Policies. We're committed to providing you with well-researched, expert-backed insights for all your informational needs.


0 thoughts on “How To Test A Electric Motor With A Multimeter”