Articles
How To Test A Ceiling Fan Capacitor
Modified: May 6, 2024
Learn how to test a ceiling fan capacitor with this informative article. Discover simple steps and troubleshooting techniques.
(Many of the links in this article redirect to a specific reviewed product. Your purchase of these products through affiliate links helps to generate commission for Storables.com, at no extra cost. Learn more)
Introduction
A ceiling fan capacitor plays a crucial role in the functioning of a ceiling fan. It is responsible for storing and providing the electrical energy needed to start and run the motor of the fan. Over time, capacitors can become faulty or worn out, leading to issues such as the fan not starting, running at a slower speed, or making strange noises.
If you’re experiencing any of these problems with your ceiling fan, it might be time to test the capacitor. By testing the capacitor, you can determine whether it is the cause of the issues and decide if a replacement is necessary. Testing a ceiling fan capacitor is a relatively simple process that can be done with basic tools and a multimeter.
In this article, we will guide you through the steps to test a ceiling fan capacitor. We will also explain the common signs of a faulty capacitor and the safety precautions to take before starting the testing process. So, let’s dive in and learn how you can diagnose and potentially fix the capacitor issues in your ceiling fan.
Key Takeaways:
- Testing a ceiling fan capacitor is crucial for diagnosing common issues such as slow speed, strange noises, or the fan not starting. By following safety precautions and using a multimeter, you can determine if the capacitor needs replacement.
- Replacing a faulty capacitor in a ceiling fan can restore its optimal functionality. By carefully selecting a replacement capacitor and following the step-by-step process, you can ensure safe and efficient operation of the fan.
Read more: How To Test A Fan Capacitor
Understanding Ceiling Fan Capacitors
Before we jump into testing the capacitor, it’s important to have a basic understanding of what a ceiling fan capacitor is and how it functions. A capacitor is an electrical component that stores electrical energy in the form of an electric field. In the case of a ceiling fan capacitor, it is used to provide the initial energy boost that helps the motor start and run smoothly.
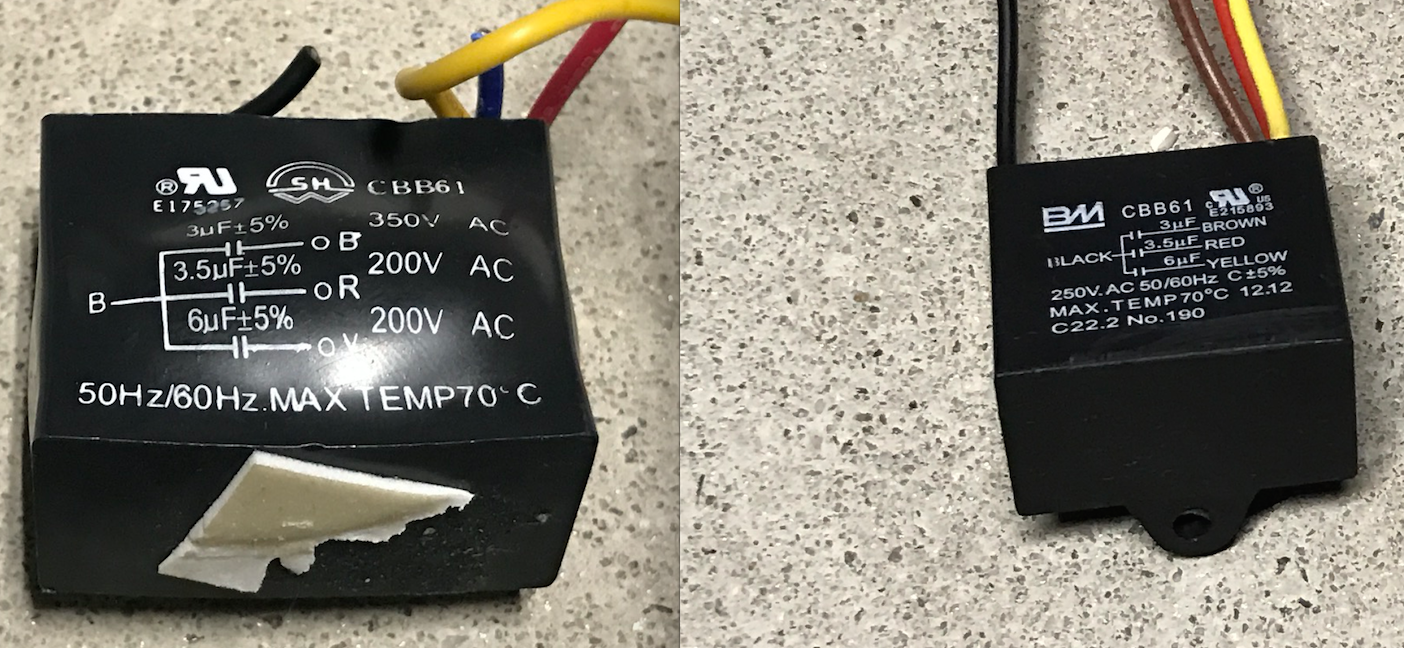
Ceiling fan capacitors are typically small cylindrical devices that are connected to the fan’s motor. They come in various capacitance ratings, which determine the amount of electrical energy they can store and supply to the motor. The capacitance rating is measured in microfarads (μF), and you can usually find this information labeled on the capacitor itself.
There are two common types of capacitors used in ceiling fans: start capacitors and run capacitors. Start capacitors provide the necessary energy to start the fan’s motor and are only active during the initial startup phase. Run capacitors, on the other hand, continue to provide energy to keep the motor running smoothly.
Capacitors can become faulty over time due to factors such as aging, heat exposure, and electrical surges. When a capacitor starts to fail, it may exhibit certain symptoms that indicate a potential issue. By understanding these symptoms, you can determine whether the capacitor is likely to be the cause of the ceiling fan problems you’re experiencing.
Common Signs of a Faulty Capacitor
When a ceiling fan capacitor starts to malfunction, it can manifest in various ways. Here are some common signs to look out for that may indicate a faulty capacitor:
- Fan not starting: One of the most obvious signs of a faulty capacitor is when the fan does not start at all. If you notice that your ceiling fan is unresponsive when you turn it on, the capacitor could be the culprit.
- Slow speed: Another indicator of a faulty capacitor is when the fan runs at a much slower speed than usual. If you find that your fan is spinning sluggishly or not producing enough airflow, it may be due to a weak capacitor that is not supplying enough electrical energy to the motor.
- Strange noises: A failing capacitor can also cause the fan to make strange noises. You might hear buzzing, humming, or clicking sounds coming from the fan while it is operating. These sounds can indicate an issue with the capacitor’s ability to properly regulate the electrical energy.
- Intermittent operation: Capacitor problems can sometimes result in the fan operating intermittently. It may start and stop randomly or work only for a short period before shutting off. This erratic behavior is a clear indication that the capacitor is not functioning correctly.
- Excessive heat: If you notice that the capacitor feels excessively hot to the touch, it could be a sign of a problem. Overheating can occur when a capacitor is operating beyond its normal limits or when there is internal damage to its components.
It’s important to note that while these signs are often associated with a faulty capacitor, other factors could be causing the issues in your ceiling fan. If you’re unsure, it’s best to test the capacitor to confirm whether it’s the cause of the problem.
Tools and Materials Needed
To test a ceiling fan capacitor, you’ll need a few basic tools and materials. Here’s a list of what you’ll need:
- Safety goggles: Protect your eyes by wearing safety goggles throughout the testing process.
- Multimeter: A multimeter is a versatile tool used for measuring voltage, current, and resistance. It will be used to test the capacitance of the ceiling fan capacitor.
- Screwdriver: Depending on the type of fan you have, you may need a screwdriver to remove the fan’s housing or access the capacitor.
- Non-contact voltage tester: This tool can be used to ensure the power to the fan is turned off before starting the testing process.
- Replacement capacitor (optional): If the capacitor is found to be faulty, you may want to have a replacement capacitor on hand for immediate installation.
It’s important to note that the specific tools and materials needed may vary depending on the design of your ceiling fan and the type of capacitor it uses. Before starting the testing process, ensure you have all the necessary tools and equipment ready.
Additionally, make sure to follow safety guidelines when working with electrical components. If you’re not comfortable or experienced with electrical work, it’s best to seek assistance from a professional electrician.
Step 1: Safety Precautions
Before you begin testing a ceiling fan capacitor, it’s essential to prioritize safety. Working with electrical components can be hazardous, so take the following precautions to ensure your safety:
- Turn off the power: Start by turning off the power supply to the ceiling fan at the circuit breaker. This will help prevent any accidental electrical shocks while you’re handling the capacitor.
- Use safety goggles: Protect your eyes from any debris or small particles that may be dislodged while working on the fan.
- Ensure appropriate clothing: Wear clothing that is comfortable and doesn’t have any loose ends that could get caught in the fan.
- Avoid wet areas: Ensure the area where you’re working is dry to minimize the risk of electrical accidents.
- Keep children and pets away: Make sure children and pets are kept away from the work area to avoid any potential accidents.
- Don’t touch bare wires: Never touch any bare wires or conductive parts while the power supply is turned on. Always assume that wires are live until proven otherwise.
- Verify power supply is off: Use a non-contact voltage tester to verify that there is no power running through the fan before starting the testing process.
By following these safety precautions, you can minimize the risk of accidents and ensure a safe working environment. Remember, if you’re unsure or uncomfortable with any aspect of the testing process, it’s best to consult a professional electrician for assistance.
Read more: How To Replace A Ceiling Fan Capacitor
Step 2: Turn Off the Power
Before you can begin testing the ceiling fan capacitor, you need to ensure that the power supply to the fan is completely turned off. This step is crucial to prevent any electrical accidents and ensure your safety throughout the testing process. Here’s how you can turn off the power:
- Locate the circuit breaker: Identify the circuit breaker in your home that controls the power supply to the ceiling fan. In most cases, the circuit breaker panel is located in the basement, utility room, or garage.
- Switch off the circuit breaker: Once you have located the circuit breaker for the fan, switch it off by flipping the corresponding switch to the off position. This will cut off the power supply to the fan and ensure no electricity is flowing through its components.
- Verify the power is off: To be absolutely certain that the power is turned off, use a non-contact voltage tester. Hold the tester near the fan’s wiring or any exposed wires to check for the presence of voltage. If the tester does not detect any current, it means the power is successfully turned off.
- Label the circuit breaker: It’s a good practice to label the circuit breaker that controls the ceiling fan for future reference. This will make it easier to identify and isolate the power supply to the fan if needed.
By ensuring the power supply is turned off, you eliminate the risk of electrical shocks and can safely proceed with the testing process. Remember, safety should always be your top priority when working with electrical components.
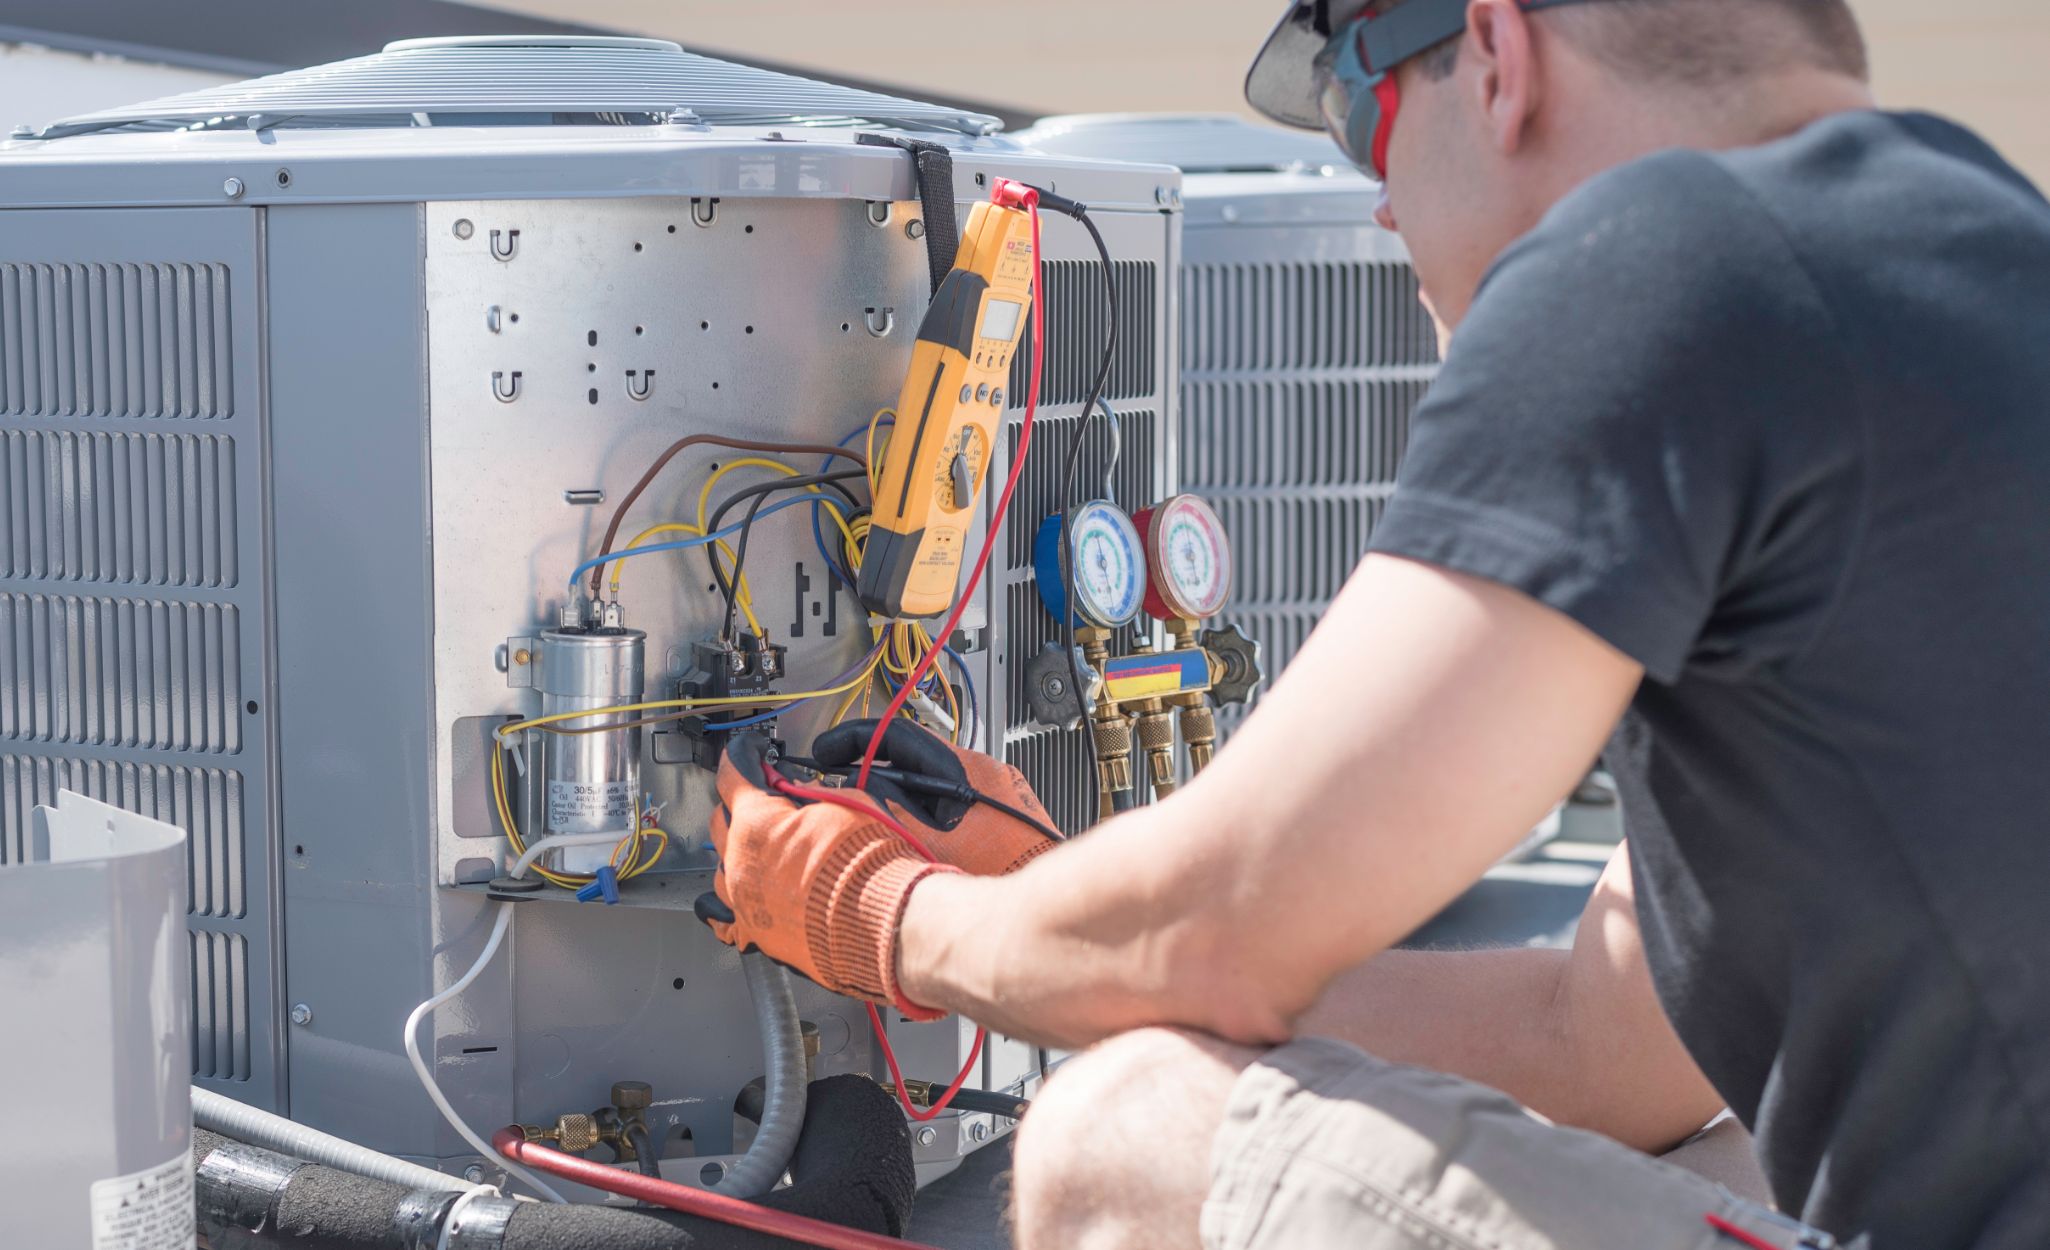
Step 3: Access the Capacitor
After turning off the power supply to the ceiling fan, the next step is to access the capacitor. Depending on the design of your fan, you may need to remove the fan’s housing or grille to gain access to the capacitor. Here’s how you can access the capacitor:
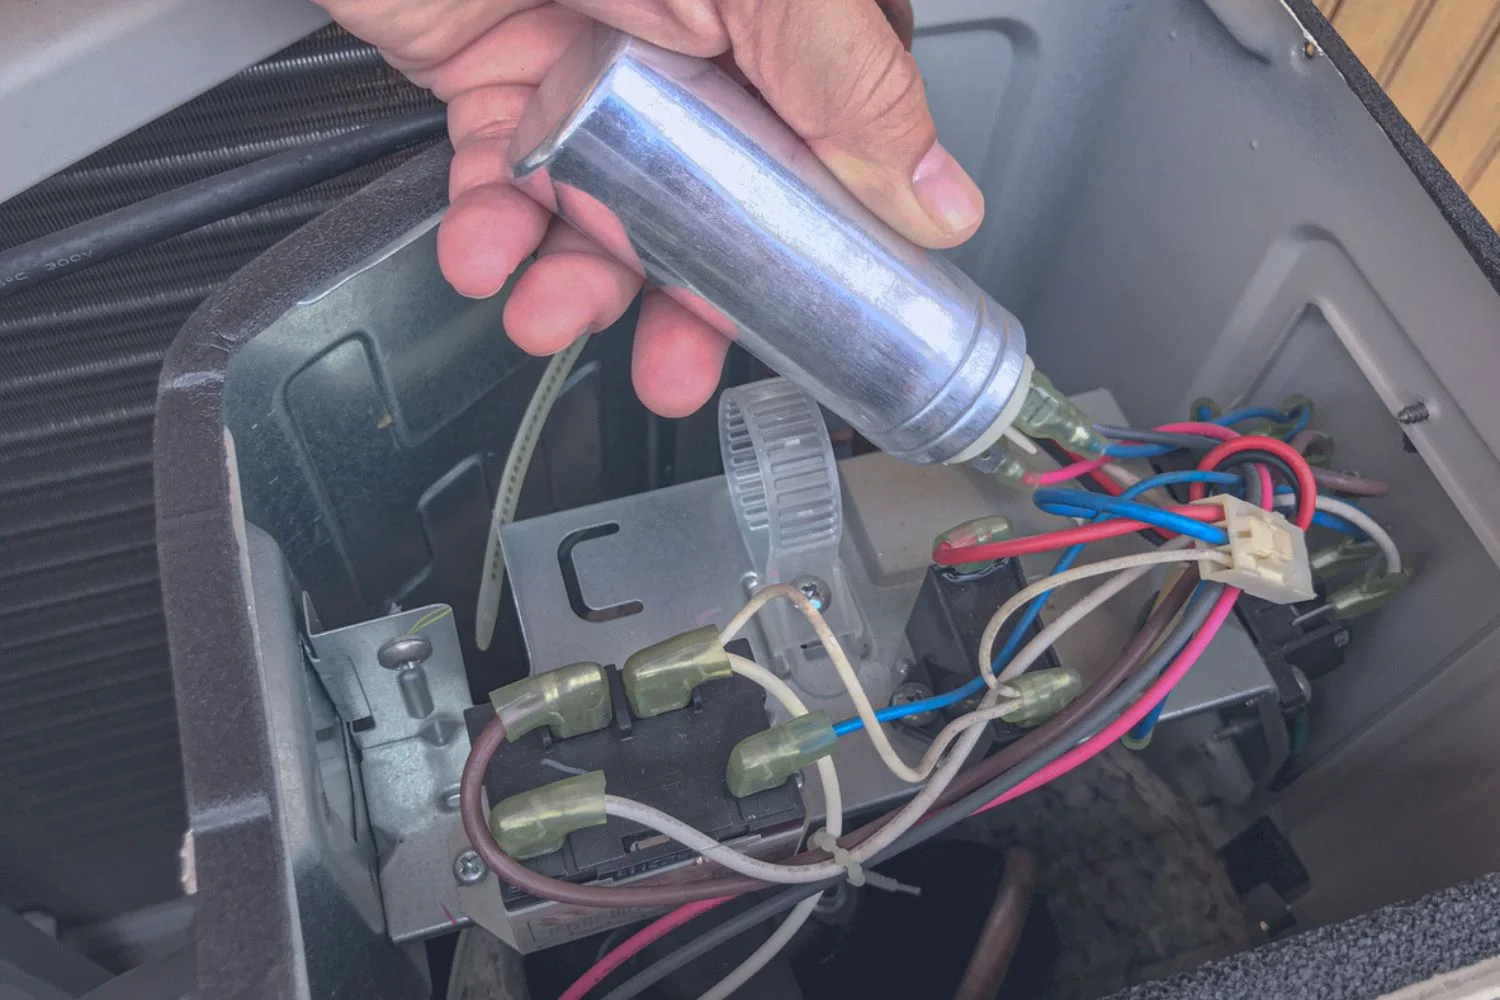
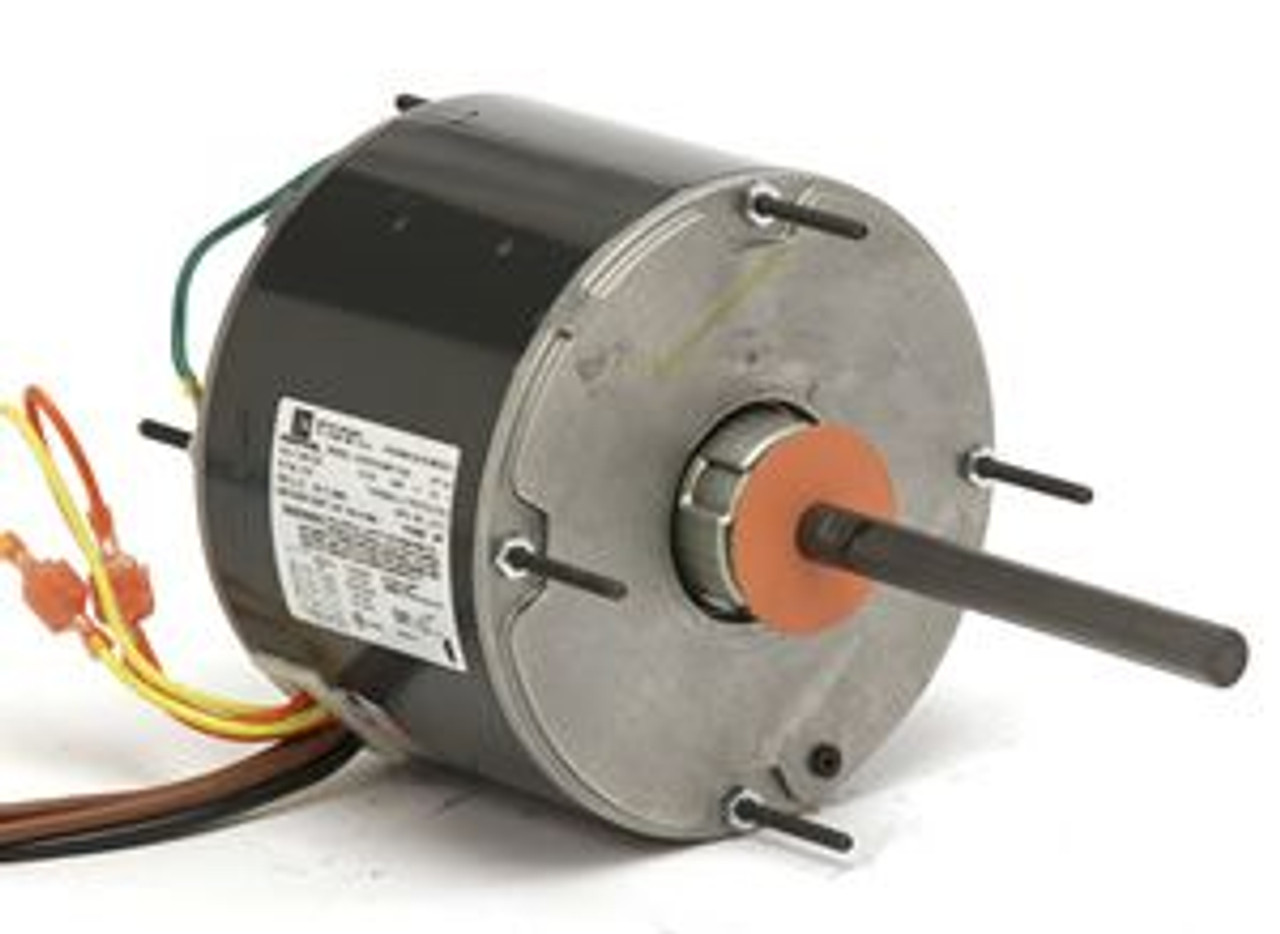
- Locate the capacitor: The capacitor is typically located near the fan motor and is connected to the motor with wires. Look for the cylindrical or oval-shaped component that is connected to the motor.
- Remove the fan housing or grille: Use a screwdriver to remove the screws or fasteners that secure the fan’s housing or grille in place. Carefully lift off the housing or grille to expose the inner components of the fan.
- Take note of the wiring: Before disconnecting the wires from the capacitor, make sure to take note of their positions or take a picture for reference. This will help ensure that you reconnect the wires correctly when it’s time to replace the capacitor.
- Disconnect the wires from the capacitor: Using a pair of pliers or a screwdriver, carefully disconnect the wires that are connected to the capacitor. Take caution not to damage the wires or the capacitor in the process.
- If needed, remove the capacitor: In some cases, the capacitor may be held in place with a bracket or mounting mechanism. If that’s the case, carefully remove the capacitor from its mounting position.
By following these steps, you should be able to access the capacitor of your ceiling fan. Remember to handle the components with care and avoid applying excessive force to prevent any damage. Once you have gained access to the capacitor, you can proceed to the next step of testing it.
When testing a ceiling fan capacitor, use a multimeter to check for continuity. Disconnect the capacitor and set the multimeter to the ohms setting. Place the probes on the capacitor terminals and check for a reading. If there is no reading, the capacitor is faulty and needs to be replaced.
Step 4: Test the Capacitor
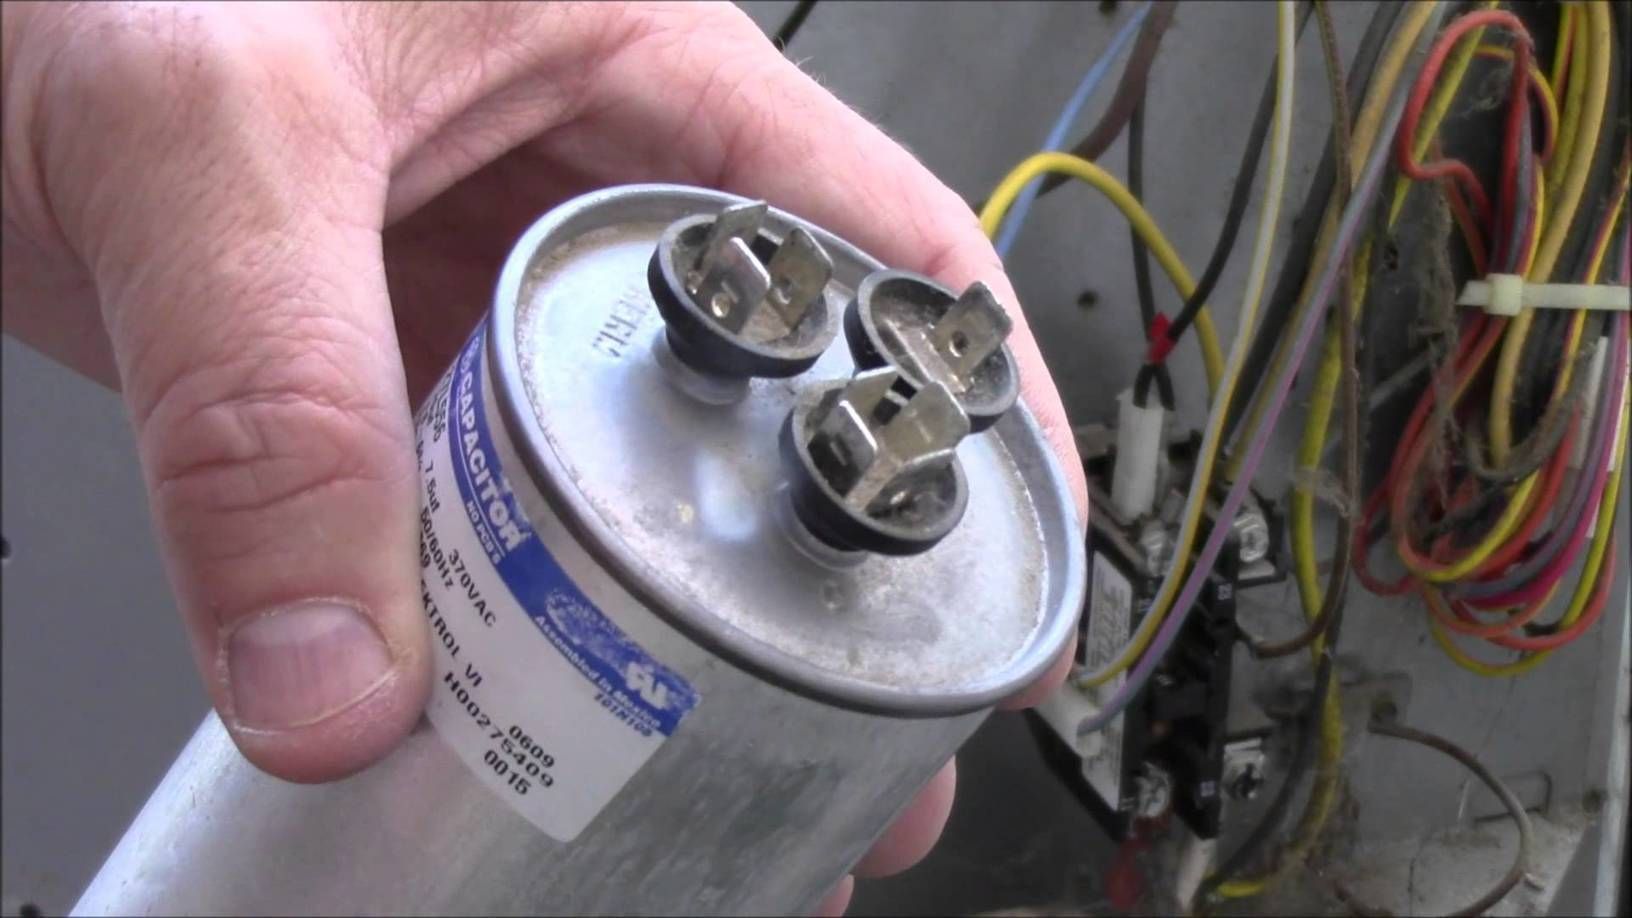
With the capacitor exposed and disconnected from the fan, it’s time to test its functionality. To test the capacitor, you’ll need a multimeter, which is a versatile tool used for measuring voltage, current, and resistance. Here’s how to test the ceiling fan capacitor:
- Select the capacitance measurement setting: Set your multimeter to the capacitance measurement setting. This setting is usually denoted by the symbol for capacitance (usually “F” or “μF”) on the multimeter dial.
- Set the range: Some multimeters have a range selection option for capacitance measurement. If your multimeter has this feature, set the appropriate range based on the capacitance rating of your fan’s capacitor. If you’re unsure, start with the highest range and adjust accordingly if needed.
- Touch the leads: With the multimeter set to the capacitance measurement mode, touch the multimeter leads (red to positive, black to negative) to the corresponding capacitor terminals. Make sure there is good contact between the leads and the terminals.
- Observe the reading: The multimeter will display the measured capacitance value. Compare this to the capacitance rating stated on the capacitor. If the measured value is significantly different from the rated capacitance, it indicates a faulty capacitor.
- Repeat the test: It’s a good practice to repeat the test a couple of times to ensure accurate results. If the readings consistently differ from the rated capacitance, it’s a clear indication that the capacitor is faulty.
Testing the capacitor with a multimeter will give you an indication of its functionality. However, keep in mind that capacitors can sometimes have internal problems that may not be detectable through this test. If you suspect a fault with the capacitor based on other symptoms, it may still be necessary to replace it, even if the multimeter reading appears to be within the normal range.
In the next step, we’ll go over how to interpret the results of the capacitor test using a multimeter.
Step 5: Using a Multimeter
Using a multimeter is an effective way to test the capacitor of your ceiling fan and determine its functionality. Here’s how you can use a multimeter to test the capacitor:
- Select the capacitance measurement mode: Set your multimeter to the capacitance measurement mode. This mode is usually represented by the symbol for capacitance (F or μF) on the dial or display of the multimeter.
- Set the range: If your multimeter has a range selection feature for capacitance measurement, set it according to the capacitance range of your fan’s capacitor. If you’re unsure of the range, start with the highest range and adjust as needed.
- Touch the leads to the capacitor terminals: Take the multimeter leads, ensuring that the red lead is connected to the positive terminal and the black lead is connected to the negative terminal of the capacitor. Make firm contact between the leads and the terminals.
- Read the multimeter display: Once the leads are connected, the multimeter will display the capacitance value. This value should be within the acceptable range specified on the capacitor or in the fan’s manual. If the multimeter displays a value significantly different from the rated capacitance, it indicates a faulty capacitor.
- Repeating the test: To ensure accurate results, it’s best to repeat the test a few times. If the readings consistently diverge from the rated capacitance, it provides a clear indication that the capacitor is faulty and needs replacement.
By using a multimeter in capacitance measurement mode, you can determine the capacitance value of the fan’s capacitor. Comparing this value to the expected range will help you establish if the capacitor is functioning properly or if it requires replacement.
In the following step, we’ll discuss how to interpret the results of the capacitor test and determine whether a replacement is necessary.
Read more: How To Test HVAC Capacitor
Step 6: Interpreting the Results
Interpreting the results of the capacitor test is crucial to determine whether the capacitor is functioning properly or if it needs to be replaced. Here’s how you can interpret the results:
- Within the expected range: If the capacitance value measured by the multimeter falls within the expected range specified on the capacitor or in the fan’s manual, it indicates that the capacitor is functioning properly. In this case, the capacitor is not likely the cause of the issues you’re experiencing with the ceiling fan.
- Significantly lower reading: If the multimeter displays a capacitance value that is significantly lower than the expected range, it indicates a weak or faulty capacitor. A lower reading suggests that the capacitor is not storing and delivering the required electrical energy effectively, leading to the fan’s performance issues.
- Significantly higher reading: On the other hand, if the multimeter displays a capacitance value that is significantly higher than the expected range, it might imply that the capacitor has developed a high internal resistance. This high resistance can result in the capacitor not being able to perform its intended function, causing irregular fan operation.
It’s important to note that testing the capacitor with a multimeter provides a good indication of its functionality. However, it may not detect all possible issues with the capacitor. If you’re experiencing persistent problems with the fan, even if the multimeter reading falls within the expected range, it may still be necessary to consider replacing the capacitor.
In the next step, we’ll cover how to replace the capacitor if it is found to be faulty.
Step 7: Replacing the Capacitor (if necessary)
If the capacitor is found to be faulty after testing, it is important to replace it to ensure the proper functioning of your ceiling fan. Here’s how you can replace the capacitor:
- Obtain a replacement capacitor: Determine the correct capacitance rating and voltage specifications for your ceiling fan’s capacitor. You can find this information labeled on the faulty capacitor itself or in the fan’s manual. Purchase a replacement capacitor that matches these specifications.
- Prepare for replacement: Ensure the power supply to the fan is still turned off. Remove the faulty capacitor by disconnecting the wires attached to it. Take note of the positions of the wires or take a picture for future reference.
- Install the new capacitor: Connect the wires of the new capacitor to the fan, following the same positions as the old capacitor. Make sure the connections are secure and tight. If necessary, use electrical tape or wire connectors to ensure proper insulation.
- Mount the capacitor: If the new capacitor needs to be mounted, secure it in its designated position using any brackets or mounting mechanisms provided. Ensure it is firmly attached and won’t interfere with the movement of the fan blades.
- Reassemble the fan: Put the fan’s housing or grille back in place and secure it with the screws or fasteners. Make sure everything is properly aligned and tightened.
- Restore power: Finally, go back to the circuit breaker panel and turn on the power supply to the ceiling fan by flipping the corresponding switch to the on position.
By following these steps, you can successfully replace the faulty capacitor in your ceiling fan. The new capacitor should restore the proper functioning of the fan and resolve any issues you were experiencing.
It’s worth mentioning that if you are not comfortable working with electrical components or if you are unsure about any aspect of the replacement process, it’s best to seek assistance from a professional electrician.
Step 8: Powering On the Ceiling Fan
After replacing the faulty capacitor in your ceiling fan, it’s time to power it back on and ensure that the fan is functioning as expected. Here’s how you can safely power on the ceiling fan:
- Double-check the connections: Before turning on the power, make sure all the wires are securely connected to the new capacitor. Verify that there are no loose or exposed wires.
- Inspect the fan: Take a quick visual inspection of the fan to ensure that everything is properly reassembled and there are no loose parts or potential hazards.
- Turn on the power supply: Return to the circuit breaker panel and switch on the power supply to the ceiling fan by flipping the corresponding switch to the on position.
- Test the fan: Once the power is restored, operate the fan using the appropriate controls (wall switch, pull chain, or remote control). Observe the fan’s speed and listen for any unusual noises. The fan should operate smoothly without any issues.
- Monitor the fan: Keep an eye on the fan for a while to make sure it remains operational without any problems. If you notice any unusual behavior or if the previous issues persist, further troubleshooting may be required.
If the fan operates as expected and the previous issues are resolved, congratulations! You have successfully replaced the capacitor and restored the functionality of your ceiling fan.
However, if you encounter any issues or the fan is still exhibiting problems even with the new capacitor, it may be necessary to consult a professional electrician for further inspection and repairs.
By following these steps, you can safely power on your ceiling fan and enjoy its optimal performance.
Conclusion
Testing and replacing a faulty capacitor in a ceiling fan can restore the fan’s functionality and resolve common issues such as the fan not starting, running at a slower speed, or making strange noises. By following the step-by-step process outlined in this guide, you can diagnose and address capacitor-related problems with your ceiling fan.
Remember, safety should always be a top priority when working with electrical components. Be sure to follow the necessary safety precautions, such as turning off the power supply and wearing safety goggles, before attempting any testing or replacement procedures.
Understanding the signs of a faulty capacitor, such as the fan not starting, running slowly, or making unusual noises, can help pinpoint the problem. By using a multimeter to test the capacitance of the fan’s capacitor, you can determine if it is within the expected range. If the capacitor is found to be faulty, replacing it with a new capacitor that matches the required specifications can restore the proper functioning of the ceiling fan.
However, if you’re uncomfortable with electrical work or unsure about any aspect of the testing or replacement process, it’s always recommended to seek assistance from a professional electrician. They have the expertise and experience to safely and effectively handle electrical repairs.
By successfully testing and replacing a faulty capacitor, you can extend the lifespan of your ceiling fan and enjoy its efficient and reliable operation for years to come.
Now that you've mastered testing a ceiling fan capacitor, why not tackle more ceiling fan fixes? Our detailed guide on how to repair ceiling fans covers everything you'll need to know to keep your cooling devices in top shape. From noisy motors to wobbly blades, learn how to address common issues with ease and confidence.
Frequently Asked Questions about How To Test A Ceiling Fan Capacitor
Was this page helpful?
At Storables.com, we guarantee accurate and reliable information. Our content, validated by Expert Board Contributors, is crafted following stringent Editorial Policies. We're committed to providing you with well-researched, expert-backed insights for all your informational needs.


0 thoughts on “How To Test A Ceiling Fan Capacitor”