Home>Home Security and Surveillance>How To Install Foscam 720P HD Plug & Play Wireless Security Camera
Home Security and Surveillance
How To Install Foscam 720P HD Plug & Play Wireless Security Camera
Modified: August 28, 2024
Learn how to easily install the Foscam 720P HD Plug & Play Wireless Security Camera for your home security and surveillance needs.
(Many of the links in this article redirect to a specific reviewed product. Your purchase of these products through affiliate links helps to generate commission for Storables.com, at no extra cost. Learn more)
Introduction
Welcome to our comprehensive guide on how to install the Foscam 720P HD Plug & Play Wireless Security Camera. With this easy-to-follow tutorial, you’ll be able to set up your home surveillance system quickly and efficiently.
Home security is a top priority for many homeowners, and with advances in technology, installing a wireless security camera has never been easier. The Foscam 720P HD Plug & Play Wireless Security Camera offers high-quality video and audio monitoring, remote access capabilities, and simple installation.
Before we dive into the step-by-step process, let’s take a look at what you’ll need to get started.
Key Takeaways:
- Easy Installation
Setting up the Foscam 720P HD Plug & Play Wireless Security Camera is a breeze with simple steps like unboxing, connecting to power and Wi-Fi, and configuring settings. You can have your home surveillance system up and running in no time! - Remote Access and Peace of Mind
Once installed, the Foscam camera offers remote access, motion detection, and night vision, providing peace of mind and real-time monitoring. You can control and monitor your home security from anywhere, anytime.
Read more: How To Reset Funlux 720P Outdoor Camera
System Requirements
Before you begin the installation process, make sure you have the following:
- A Foscam 720P HD Plug & Play Wireless Security Camera (model number XYZ)
- A power outlet near the desired camera location
- A Wi-Fi network with internet access
- A smartphone or tablet with the Foscam app installed
With these essential components in place, you’re ready to start setting up your Foscam wireless security camera. Let’s get started.
Key Takeaways:
- Easy Installation
Setting up the Foscam 720P HD Plug & Play Wireless Security Camera is a breeze with simple steps like unboxing, connecting to power and Wi-Fi, and configuring settings. You can have your home surveillance system up and running in no time! - Remote Access and Peace of Mind
Once installed, the Foscam camera offers remote access, motion detection, and night vision, providing peace of mind and real-time monitoring. You can control and monitor your home security from anywhere, anytime.
Read more: How To Reset Funlux 720P Outdoor Camera
System Requirements
Before you begin the installation process, it’s essential to ensure that you have all the necessary components and meet the system requirements for the Foscam 720P HD Plug & Play Wireless Security Camera. Here’s what you need:
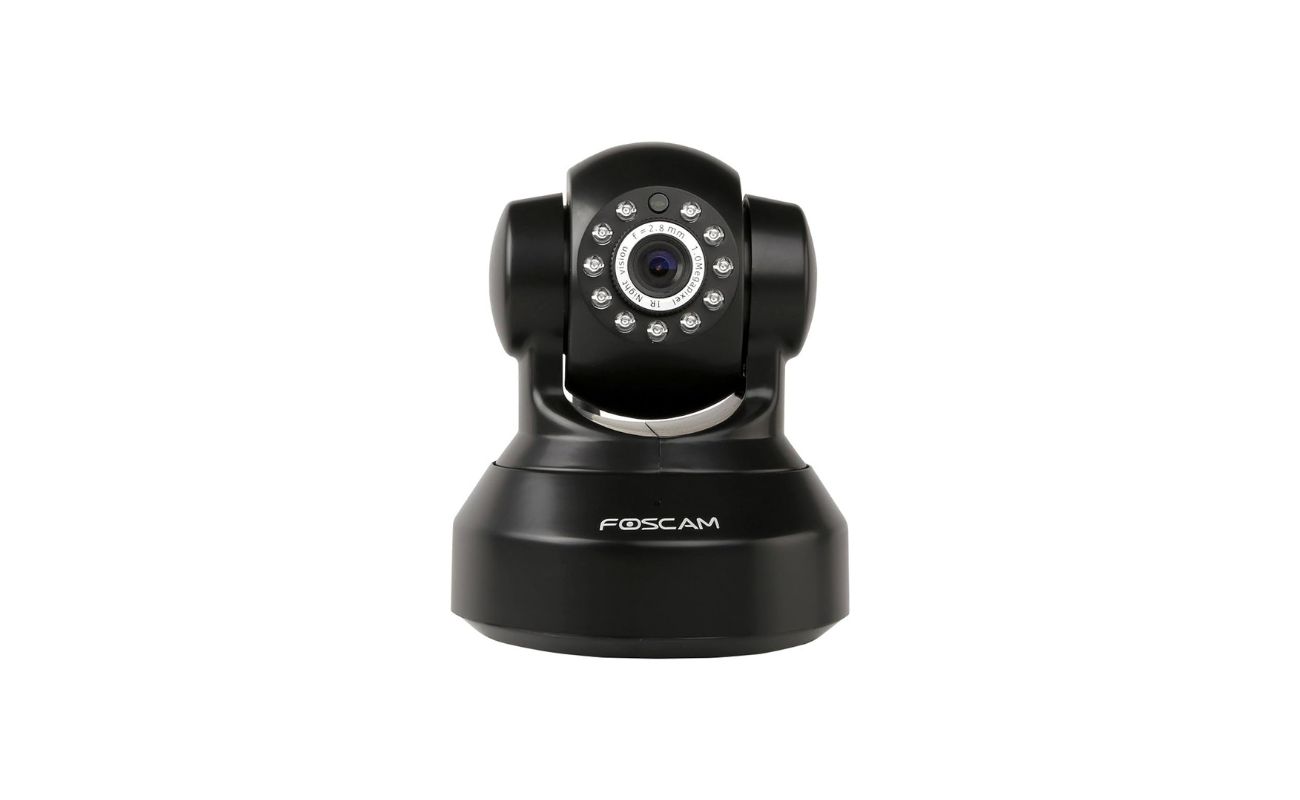
Foscam 720P HD Plug & Play Wireless Security Camera
You’ll need the Foscam 720P HD Plug & Play Wireless Security Camera itself. This camera model offers high-definition video recording, night vision capabilities, and a wide viewing angle. Make sure you have the camera with all its accessories, such as the power adapter and mounting hardware.
Power Outlet
Ensure that there is a power outlet near the desired location for the camera. The camera requires a power source to function properly. It’s crucial to select a location where the power outlet is easily accessible and not obstructed by furniture or other objects.
Read more: How To Install Q-See 8-Channel 6 HD 720P Night Vision Cameras With 1TB HDD DVR Security System
Wi-Fi Network
The Foscam 720P HD Plug & Play Wireless Security Camera connects to your home’s Wi-Fi network for remote access and real-time monitoring. Make sure you have a reliable Wi-Fi network with internet access available in the area where you plan to install the camera.
Smartphone or Tablet
You’ll need a smartphone or tablet with the Foscam app installed to control and monitor the camera remotely. The Foscam app is compatible with both iOS and Android devices, so ensure that your device meets the minimum requirements for running the app.
By ensuring that you have all these system requirements met, you can proceed with confidence to the installation process. Now that you’re ready, let’s move on to the next step.
Step 1: Unboxing the Foscam 720P HD Plug & Play Wireless Security Camera
Before you can start the installation process, you’ll need to unbox the Foscam 720P HD Plug & Play Wireless Security Camera and familiarize yourself with its components. Follow these steps:
- Find a clean, well-lit workspace where you can unbox the camera comfortably. Make sure to keep any small parts or accessories in a secure place to prevent loss or damage.
- Gently unpack the camera from its box, ensuring that you remove all the protective packaging materials. Take care not to use any sharp objects that could scratch or damage the camera.
- Inspect the camera and its components. You should find the camera unit itself, a power adapter, an Ethernet cable, a Wi-Fi antenna, and any necessary mounting hardware.
- Check for any visible damage or defects on the camera. If you notice any issues, contact the manufacturer or seller promptly for assistance.
Once you have unboxed the camera and verified its contents, you’re ready to move on to the next step of the installation process. In the following steps, we will guide you through connecting the camera to power and your Wi-Fi network, configuring the camera settings, and installing the Foscam app on your smartphone or tablet.
Ensure that you take your time during the unboxing process and carefully handle the camera and its accessories. This will help prevent any unnecessary damage or difficulties as you continue with the installation. Now that you’ve successfully unboxed the camera, let’s proceed to the next step.
Step 2: Connecting the Camera to Power
Now that you have unboxed the Foscam 720P HD Plug & Play Wireless Security Camera, the next step is to connect it to a power source. Follow these steps carefully:
- Find a suitable location for your camera where you have easy access to a power outlet.
- Take the power adapter that came with the camera and plug it into the designated DC input port on the camera.
- Once the power adapter is securely connected to the camera, plug the other end into a nearby power outlet.
- Ensure that the camera’s power indicator LED lights up, indicating that it is receiving power.
It is important to note that the camera should be installed indoors and protected from extreme weather conditions. If you plan to install the camera outdoors, make sure to use a weatherproof casing or choose a camera specifically designed for outdoor use.
By connecting the camera to a power source, you have successfully completed this step. In the next step, we will guide you through connecting the camera to your Wi-Fi network.
Remember, safety should always be a priority when working with electrical components. Make sure to follow the manufacturer’s instructions and take the necessary precautions to avoid any potential hazards. Now that you have connected the camera to power, let’s move on to the next step.
Step 3: Connecting the Camera to Your Router
With the Foscam 720P HD Plug & Play Wireless Security Camera powered on, the next step is to connect it to your Wi-Fi network. Follow these steps to establish a connection:
- Locate the Ethernet cable that came with the camera. Connect one end of the cable to the Ethernet port on the camera and the other end to an available LAN port on your router.
- Wait for a few moments as the camera establishes a connection with your router. The camera’s indicator lights will indicate that it is successfully connected to the network.
- Once the camera is connected to your router, you can proceed to configure its settings and access it remotely.
It is worth mentioning that connecting the camera directly to your router via an Ethernet cable is the initial setup process. After the initial setup, you can disconnect the Ethernet cable and rely on the camera’s wireless capabilities to connect to your Wi-Fi network.
By connecting the camera to your router, you have now established a connection between the camera and your home network. In the next step, we will guide you through configuring the camera settings.
Remember to refer to the camera’s user manual for any specific instructions or troubleshooting steps related to connecting the camera to your router. Now that you have successfully connected the camera to your router, let’s move on to the next step.
Step 4: Configuring the Camera Settings
After connecting the Foscam 720P HD Plug & Play Wireless Security Camera to your router, the next step is to configure its settings. Follow these steps to set up your camera:
- Open a web browser on your computer and enter the IP address of the camera. This information can be found in the camera’s user manual or on the manufacturer’s website.
- You will be prompted to enter a username and password. By default, the username is usually “admin,” and the password is left blank. However, it is recommended to change the default login credentials for security reasons.
- Once you have logged in, you will have access to the camera’s settings interface. Here, you can configure various options such as video quality, motion detection, audio settings, and more.
- Customize the camera settings according to your preferences. You may want to ensure that the camera is set to the correct date and time, adjust the video resolution, enable or disable audio recording, and configure any other desired settings.
- Make sure to save your changes before exiting the settings interface.
Configuring the camera settings allows you to tailor the camera’s functionality to meet your specific needs. It enables you to optimize video quality, fine-tune motion detection settings, set up email alerts, and more.
Take your time to explore the different settings available and make any necessary adjustments. Refer to the camera’s user manual or online resources for more detailed instructions on specific settings and their functionalities.
By configuring the camera settings, you have now personalized your camera to your preferences. In the next step, we will guide you through installing the Foscam app on your smartphone or tablet.
Remember to keep your login credentials secure and avoid using common usernames and passwords to ensure the privacy and security of your camera and network. Now that you have successfully configured the camera settings, let’s move on to the next step.
Step 5: Installing the Foscam App
With the Foscam 720P HD Plug & Play Wireless Security Camera configured, the next step is to install the Foscam app on your smartphone or tablet. The Foscam app allows you to access and control your camera remotely. Follow these steps to install the app:
- Open the app store on your smartphone or tablet. The Foscam app is available for both iOS and Android devices.
- Search for “Foscam” in the app store’s search bar.
- Locate the official Foscam app and tap on it to access the app’s download page.
- Tap on the “Install” button to begin the installation process. The app will now download and install on your device.
- After the installation is complete, locate the Foscam app icon on your device’s home screen or in the app drawer.
Once you have installed the Foscam app, you are one step closer to accessing your camera’s live feed and controlling its settings remotely.
It is worth noting that the Foscam app may require certain permissions, such as access to your device’s camera and microphone, to function properly. Make sure to grant the necessary permissions when prompted to ensure the app works as intended.
By installing the Foscam app on your smartphone or tablet, you have equipped yourself with a powerful tool to monitor and manage your Foscam camera from anywhere, anytime. In the next step, we will guide you through pairing the camera with the Foscam app.
Remember to download the official Foscam app from a trusted source to ensure its authenticity and reliability. Now that you have successfully installed the app, let’s move on to the next step.
When installing the Foscam 720P HD Plug & Play Wireless Security Camera, make sure to carefully follow the manufacturer’s instructions for mounting and connecting the camera. It’s important to position the camera in a location that provides a clear view of the area you want to monitor, and to ensure a stable Wi-Fi connection for optimal performance.
Step 6: Pairing the Camera with the Foscam App
Now that you have the Foscam app installed on your smartphone or tablet, the next step is to pair the camera with the app. Follow these steps to successfully pair your camera:
- Launch the Foscam app on your device.
- Tap on the “Add Camera” or “+” button to initiate the pairing process.
- Scan the QR code located on the camera’s packaging or the camera itself. The app will use the QR code to identify and connect to your specific camera.
- Alternatively, you can manually enter the camera’s serial number or IP address if a QR code is not available.
- Follow the on-screen instructions to complete the pairing process. This may involve entering the camera’s login credentials, such as the username and password set during the initial configuration.
- Once the camera is successfully paired with the app, you will be able to access its live feed and control its settings directly from your smartphone or tablet.
Pairing your camera with the Foscam app allows you to monitor and manage your camera remotely, providing you with peace of mind even when you’re away from home. You can view the camera’s live feed, receive motion detection alerts, adjust settings, and more, all from the convenience of your mobile device.
Make sure to follow the instructions on the app screen carefully and double-check that you enter the correct credentials or scan the correct QR code for your camera. Additionally, ensure that your smartphone or tablet has a stable internet connection for seamless communication with the camera.
By successfully pairing your camera with the Foscam app, you have unlocked the full potential of your Foscam 720P HD Plug & Play Wireless Security Camera. In the final step, we will guide you through testing the camera to ensure everything is working as expected.
Remember to keep your camera and app updated with the latest firmware and software versions to benefit from any security enhancements or new features. Now that you have paired your camera with the Foscam app, let’s proceed to the last step.
Read more: How To Install Foscam Outdoor Camera
Step 7: Testing the Camera
After successfully pairing your Foscam 720P HD Plug & Play Wireless Security Camera with the Foscam app, it’s time to test the camera and ensure everything is working as expected. Follow these steps to perform a thorough camera test:
- Launch the Foscam app on your smartphone or tablet.
- Select the paired camera from the list of available cameras in the app.
- Wait for the live feed to load on your device’s screen. You should be able to see the view from the camera in real-time.
- Test the various features and functionalities of the camera, such as panning and tilting (if applicable), zooming, and adjusting the viewing angle.
- Activate the camera’s motion detection feature to ensure it detects movement and triggers notifications properly.
- Confirm that you can access the camera’s settings through the app and make any necessary adjustments if needed.
- Test the app’s remote access capabilities by connecting to the camera from a different network or using cellular data.
- Check the camera’s night vision functionality to ensure clear images in low light or dark conditions.
During the testing process, pay attention to any issues or abnormalities that you may come across. If you encounter any difficulties or notice any unexpected behavior, consult the camera’s user manual or the manufacturer’s support resources to troubleshoot and resolve the problem.
By thoroughly testing the camera, you can ensure that it is functioning correctly and meeting your expectations. This step is crucial in ensuring that you have a reliable and effective home security system in place.
Congratulations! You have completed all the necessary steps to install and set up the Foscam 720P HD Plug & Play Wireless Security Camera. You can now enjoy the benefits of real-time monitoring, remote access, and peace of mind knowing that your home is securely protected.
Remember to regularly maintain and update your camera’s firmware and the Foscam app to access the latest features and security enhancements. Now that you have successfully tested the camera, you are ready to enjoy the full capabilities of your Foscam security system.
Conclusion
Installing a home security system is a crucial step in safeguarding your property and loved ones. With the Foscam 720P HD Plug & Play Wireless Security Camera, you can take control of your home security with ease. Throughout this comprehensive guide, we have walked you through the step-by-step process of unboxing the camera, connecting it to power and your Wi-Fi network, configuring the settings, and pairing it with the Foscam app. Finally, we tested the camera to ensure everything is functioning correctly.
The Foscam 720P HD Plug & Play Wireless Security Camera offers peace of mind through its high-definition video and audio capabilities, remote access functionality, and easy installation process. By following the steps outlined in this guide, you have successfully set up your home surveillance system and can now monitor your property from anywhere, anytime.
It is essential to remember that security is an ongoing commitment. Make sure to regularly update your camera’s firmware and the Foscam app to benefit from the latest features and security enhancements. Additionally, keep an eye on the camera’s performance and address any issues promptly to maintain optimal functionality.
With the Foscam 720P HD Plug & Play Wireless Security Camera, you can have peace of mind knowing that you have taken proactive steps to protect your home and loved ones. Enjoy the convenience and reliability of real-time monitoring and remote access, and rest assured that your home is under constant surveillance.
Thank you for following this guide. We hope it has been informative and helpful in setting up your Foscam 720P HD Plug & Play Wireless Security Camera. Stay safe and secure!
Now that you're set with your Foscam security camera installation, why stop there? Enhancing your home's safety doesn't have to be complex or tedious. Consider reading our next piece on why you need home security, which offers valuable insights into the benefits of a robust security system. This guide will not only outline the essentials but also give you peace of mind, knowing your haven is well-protected. Don't miss out on making your space secure and stress-free!
Frequently Asked Questions about How To Install Foscam 720P HD Plug & Play Wireless Security Camera
Was this page helpful?
At Storables.com, we guarantee accurate and reliable information. Our content, validated by Expert Board Contributors, is crafted following stringent Editorial Policies. We're committed to providing you with well-researched, expert-backed insights for all your informational needs.