Home>Home Security and Surveillance>How To Wire A Motion Detector Light
Home Security and Surveillance
How To Wire A Motion Detector Light
Modified: March 21, 2024
Looking to enhance your home security and surveillance? Learn how to wire a motion detector light for added protection and peace of mind.
(Many of the links in this article redirect to a specific reviewed product. Your purchase of these products through affiliate links helps to generate commission for Storables.com, at no extra cost. Learn more)
Introduction
Installing a motion detector light can significantly enhance the security and convenience of your home. This technology allows your outdoor lights to automatically turn on when motion is detected, making it an effective deterrent against potential intruders and providing you with peace of mind. Whether you’re looking to improve the security of your property or simply want to illuminate your pathway at night, wiring a motion detector light is a relatively simple and rewarding DIY project.
In this step-by-step guide, we will walk you through the process of wiring a motion detector light for your home. We will cover everything from gathering the necessary materials to testing the final installation. By following these instructions and adhering to proper safety measures, you’ll be able to complete this project successfully.
Before we begin, it’s essential to ensure that you have a basic understanding of electrical wiring and safety precautions. If you have any doubts or concerns, it’s always best to consult a licensed electrician.
Now, let’s gather our materials and get started with the installation process.
Key Takeaways:
- Installing a motion detector light enhances home security and convenience by automatically illuminating outdoor spaces when motion is detected, deterring potential intruders, and saving energy by operating only when needed.
- Prioritize safety when wiring a motion detector light, gather all necessary materials, turn off the power, carefully mount the fixture, connect the wiring, test the light, and secure the wiring for a successful installation.
Step 1: Gather the necessary materials
Before you begin the installation process, it’s crucial to gather all the materials and tools you’ll need. Here’s a list of the items you’ll typically require:
1. Motion detector light kit: Purchase a motion detector light kit that suits your needs. These kits usually include a motion sensor, light fixture, mounting hardware, and wiring instructions.
2. Screwdriver: You’ll need a screwdriver to mount the motion detector light and make any necessary adjustments during the installation.
3. Wire strippers: Wire strippers are essential for removing the insulation from the electrical wires, allowing proper connections.
4. Wire connectors: These small plastic caps are used to connect the electrical wires securely.
5. Electrical tape: Electrical tape helps to insulate and protect the connections from moisture and potential damage.
6. Voltage tester: A voltage tester is a handy tool that allows you to check whether the power is turned off before starting the installation.
7. Ladder or step stool: Depending on the height of the installation location, a ladder or step stool will provide safe access to the area.
8. Optional materials: Depending on your specific installation requirements, you may need additional materials such as a junction box, conduit, or outdoor-rated extension cord.
Before you proceed to the next step, double-check that you have all the necessary materials and tools on hand. This will ensure a smooth and uninterrupted installation process. Take a moment to review the instructions provided with your motion detector light kit to familiarize yourself with any additional requirements or specific recommendations.
Once you have gathered all the required materials, you’re ready to move on to the next step – turning off the power. Ensuring your safety is essential during any electrical installation or repair work.
Step 2: Turn off the power
Before you start working with any electrical components, it is crucial to turn off the power to the area where you will be installing the motion detector light. This step is essential for your safety, as working with live electrical wires can be extremely dangerous.
Follow these steps to properly turn off the power:
1. Locate the main circuit breaker panel: The circuit breaker panel is usually located in the garage, basement, or utility room. It contains a series of switches or circuit breakers that control the power supply to different areas of your home.
2. Identify the circuit breaker for the area where the motion detector light will be installed: Look for a labeled switch or breaker that corresponds to the outdoor lights or the specific area where you are working. If there is no labeling, you may need to trial-and-error by turning off individual breakers until the power is cut to the right area.
3. Turn off the circuit breaker: Flip the switch or push the lever to the “off” position. This will cut off the power supply to the area where you will be working. Double-check that the power is indeed turned off by testing a nearby light switch or outlet.
4. Use a voltage tester to verify that there is no electrical current: Even after turning off the circuit breaker, it is essential to use a voltage tester to ensure that no residual electrical current is present. Follow the manufacturer’s instructions to use the voltage tester properly. If the voltage tester indicates any live current, double-check your circuit breaker or seek professional assistance.
5. Consider using a lockout/tagout device: If you want to take an extra safety precaution, you can use a lockout/tagout device to physically lock and tag the circuit breaker. This prevents anyone from inadvertently turning the power back on while you are working.
By following these steps and ensuring that the power is turned off, you can work on the wiring without the risk of electric shock. Remember, safety should always be your top priority when working with electrical components. Once you have confirmed that the power is off, you can proceed to the next step, which involves determining the location for the motion detector light.
Step 3: Determine the location for the motion detector light
Choosing the right location for your motion detector light is crucial to ensure its effectiveness and functionality. Here are a few factors to consider when determining the location:
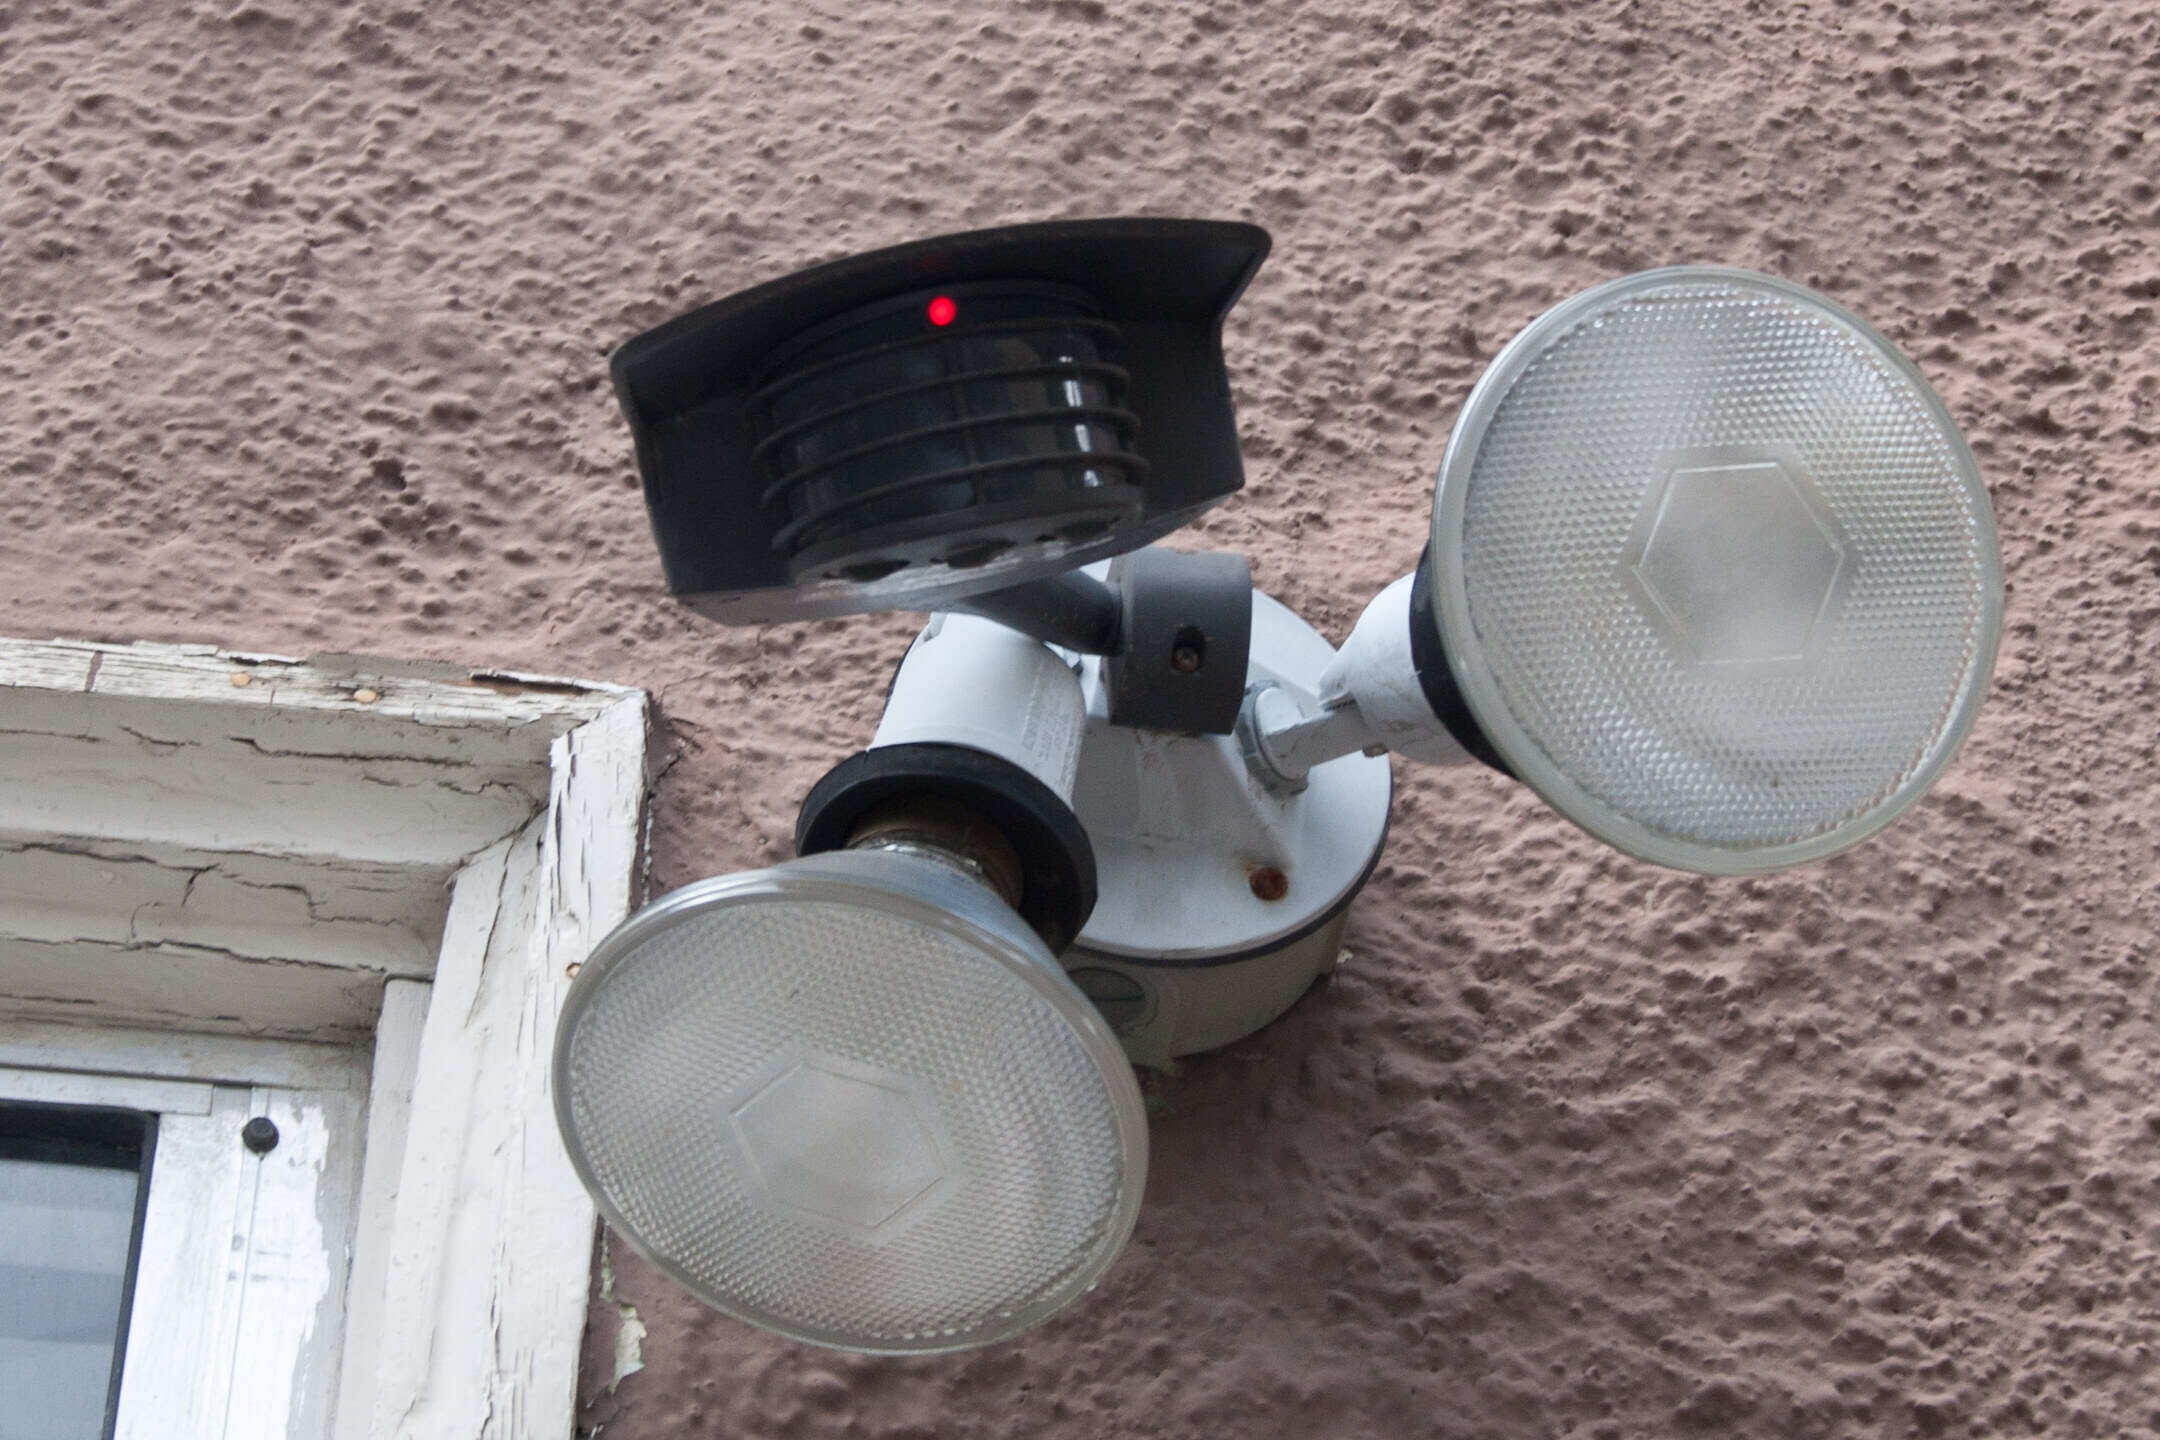
1. Coverage area: Consider the desired coverage area for the motion detector light. The range of the motion sensor may vary depending on the model, so refer to the manufacturer’s instructions for specific details. Keep in mind that the sensor should have a clear line of sight to detect motion effectively.
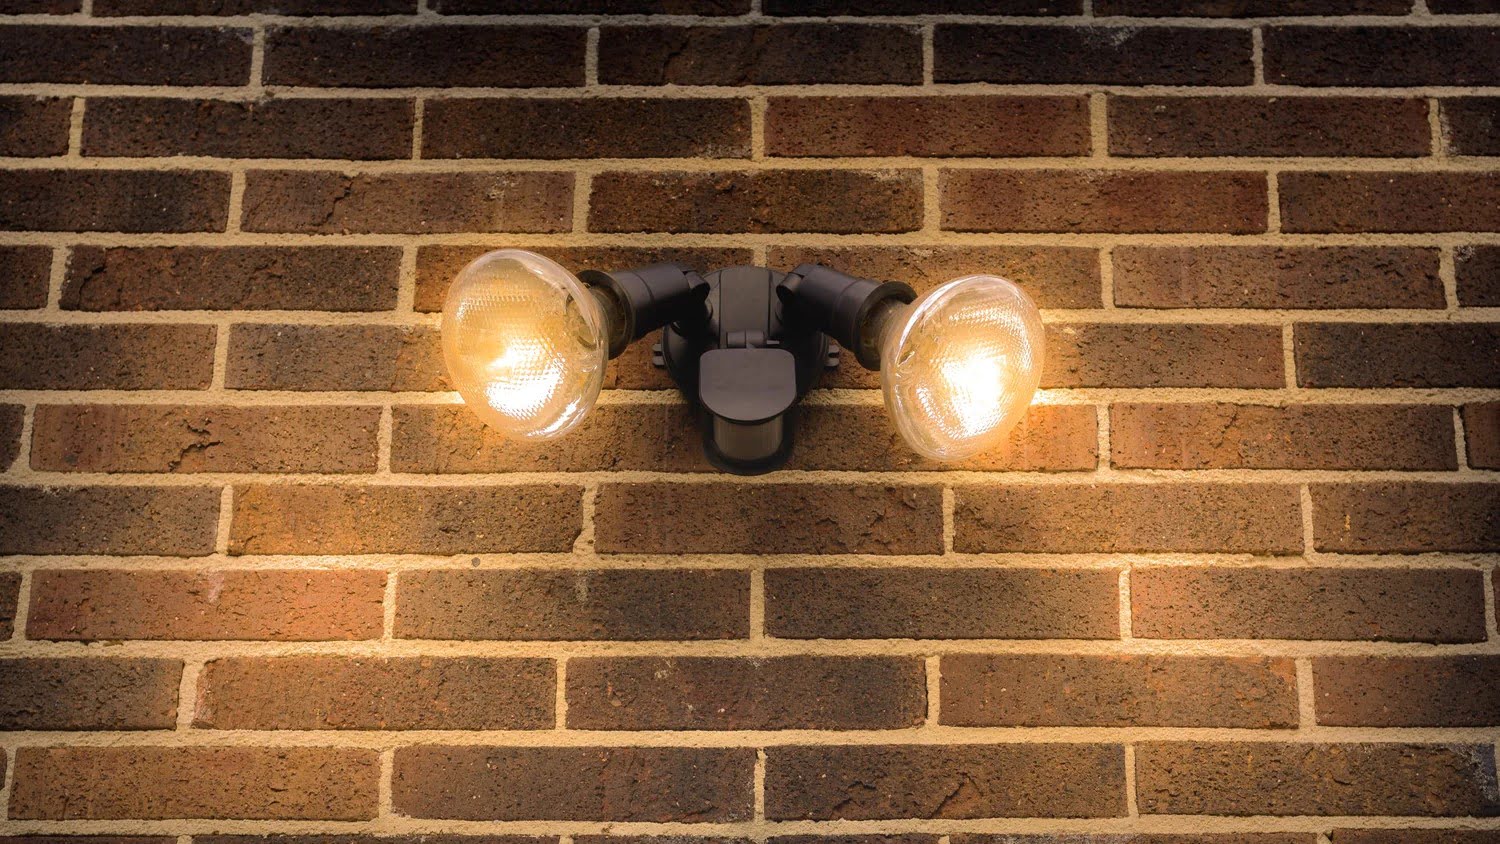
2. Height and angle: The height and angle at which you install the motion detector light can impact its performance. Generally, it is recommended to mount the light at a height between 6-10 feet above the ground. This height ensures optimal coverage and minimizes the risk of tampering or accidental damage.
3. Installation surface: Choose a sturdy surface to mount the motion detector light. It should be capable of supporting the weight of the light fixture and withstand outdoor elements like rain, wind, and extreme temperatures. If necessary, reinforce the mounting surface with screws or anchors for added stability.
4. Accessibility: Consider the accessibility of the motion detector light for maintenance and adjustments. Ensure that the location allows easy access to the light fixture, especially when it comes to replacing bulbs or making adjustments to the motion sensor settings.
5. Lighting conditions: Take note of the existing lighting conditions in the area. Avoid installing the motion detector light in areas that receive constant bright light, as this can interfere with the motion sensor’s functionality. Additionally, ensure that the light is not obstructed by trees, shrubs, or other objects that could trigger false alarms.
Carefully assess your property and consider these factors to determine the most suitable location for your motion detector light. Once you have selected a location, mark it and proceed to the next step – mounting the motion detector light.
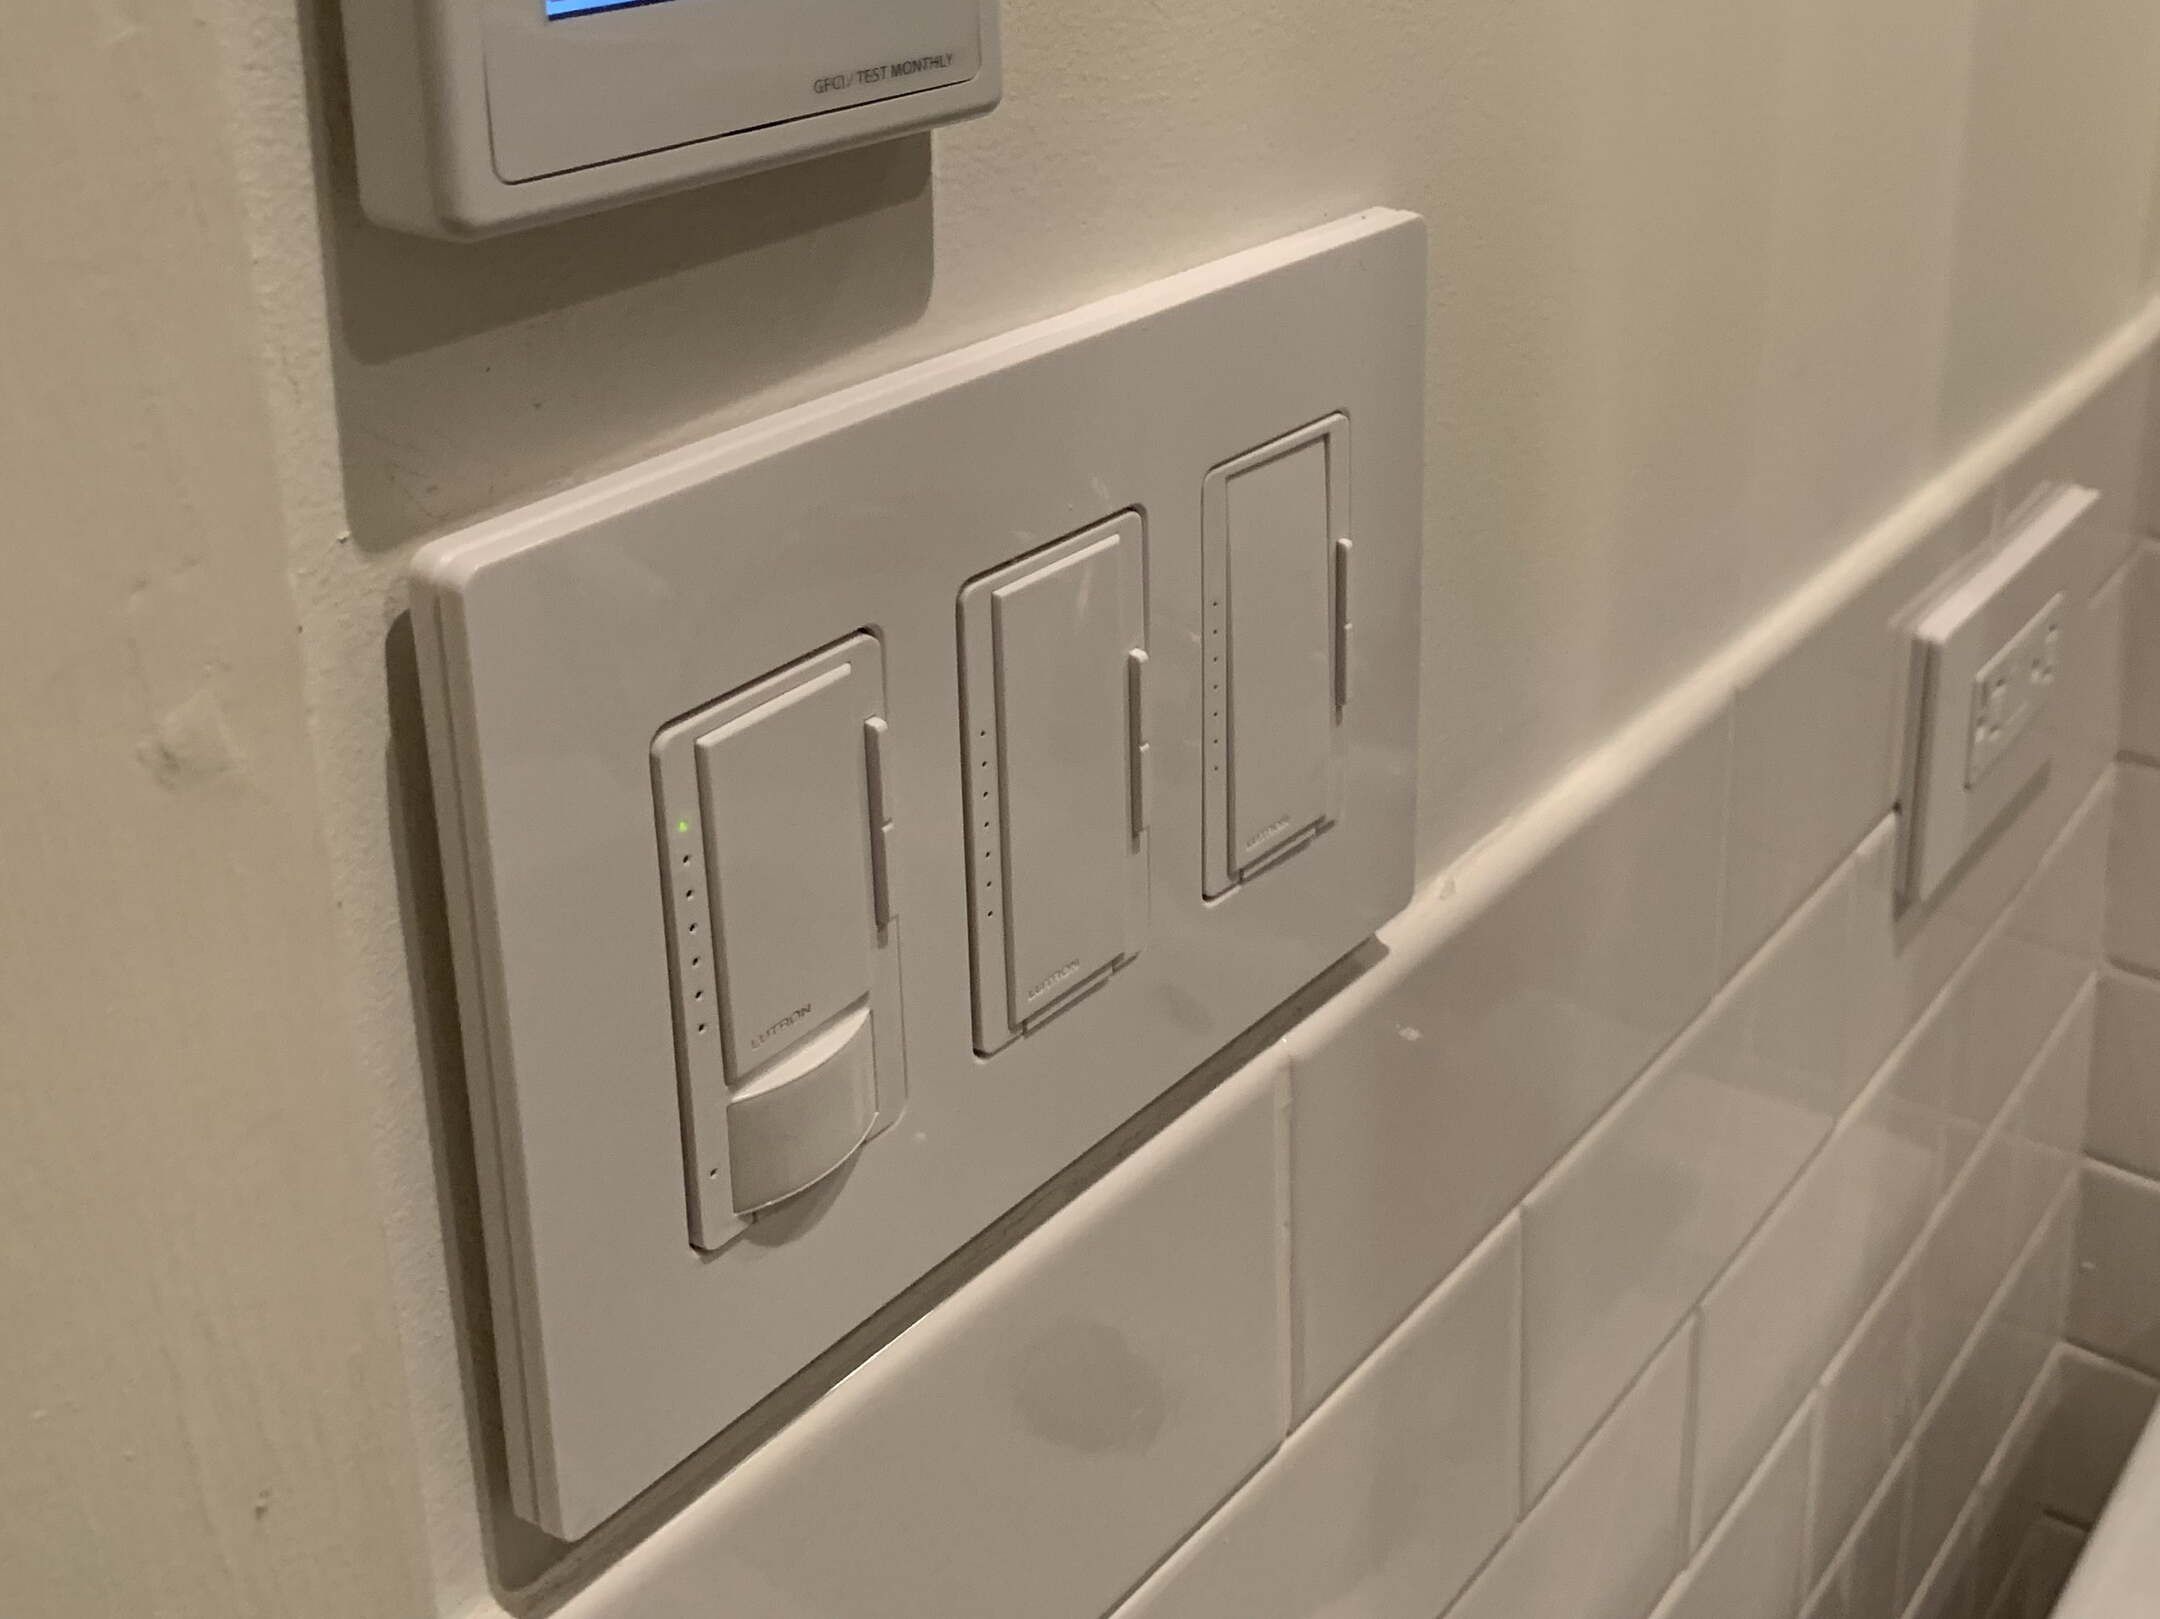
Step 4: Mount the motion detector light
Now that you have determined the location for your motion detector light, it’s time to mount the fixture securely. Follow these steps to ensure a proper installation:
1. Position the mounting bracket: Attach the mounting bracket included with the motion detector light kit to the desired location. Hold the bracket against the installation surface and mark the screw holes with a pencil or marker. Use a screwdriver or drill, depending on the type of screws provided, to secure the mounting bracket in place.
2. Attach the light fixture to the mounting bracket: Carefully align the holes on the back of the motion detector light fixture with the corresponding holes on the mounting bracket. Insert the screws or bolts provided with the kit and tighten them to secure the light fixture to the bracket. Be mindful not to overtighten and damage the fixture.
3. Adjust the angle of the light fixture: Most motion detector lights have an adjustable head that allows you to change the angle of the light. Use this feature to position the light fixture in the desired direction, ensuring optimal coverage of the area. You can typically adjust the angle by loosening the screws on the sides of the fixture and maneuvering it into the desired position.
4. Check stability: Once the light fixture is mounted, give it a gentle shake to ensure it is stable and securely in place. Any excessive movement or looseness should be addressed before proceeding to the wiring step.
It’s important to note that the specific mounting instructions may vary depending on the brand and model of your motion detector light. Always refer to the manufacturer’s instructions for any specific guidelines or recommendations provided with your kit.
With the motion detector light securely mounted, you are ready to move on to the next step – connecting the wiring. Proper wiring is crucial for the successful functioning of your motion detector light, so let’s proceed to the next step with caution.
When wiring a motion detector light, make sure to turn off the power at the circuit breaker before starting. Always follow the manufacturer’s instructions for proper installation.
Read more: How To Wire A Motion Detector
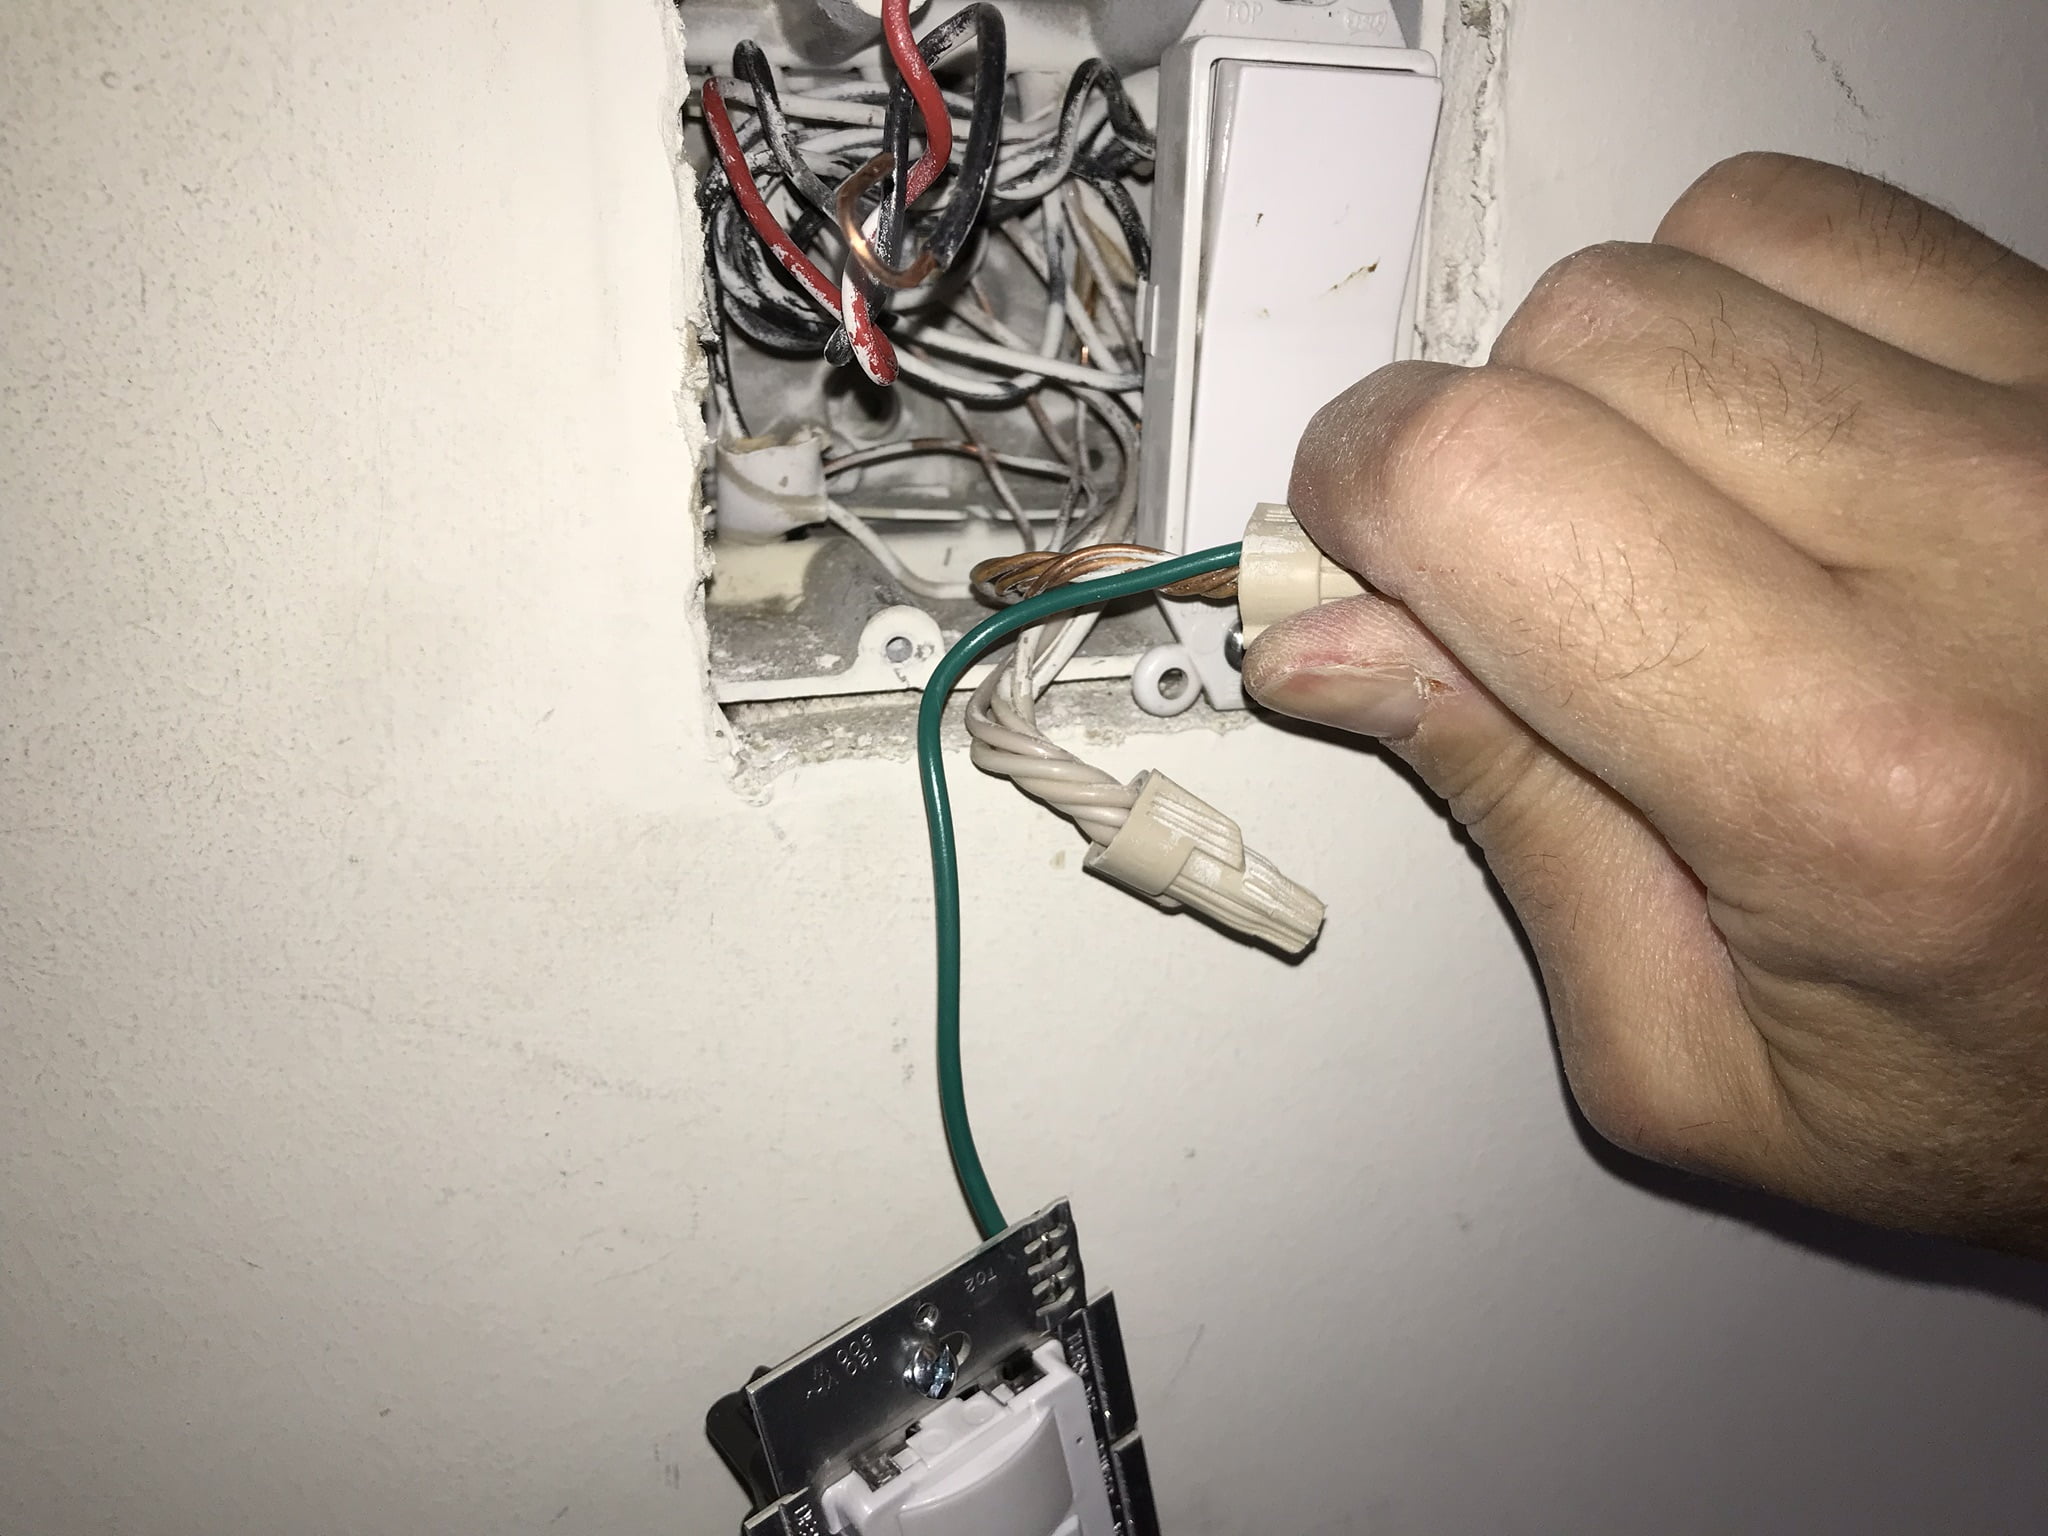
Step 5: Connect the wiring
Before proceeding with the wiring process, it’s important to double-check that the power to the area is still turned off. Confirm this by using a voltage tester to ensure there is no electrical current flowing through the wires.
Follow these steps to connect the wiring for your motion detector light:
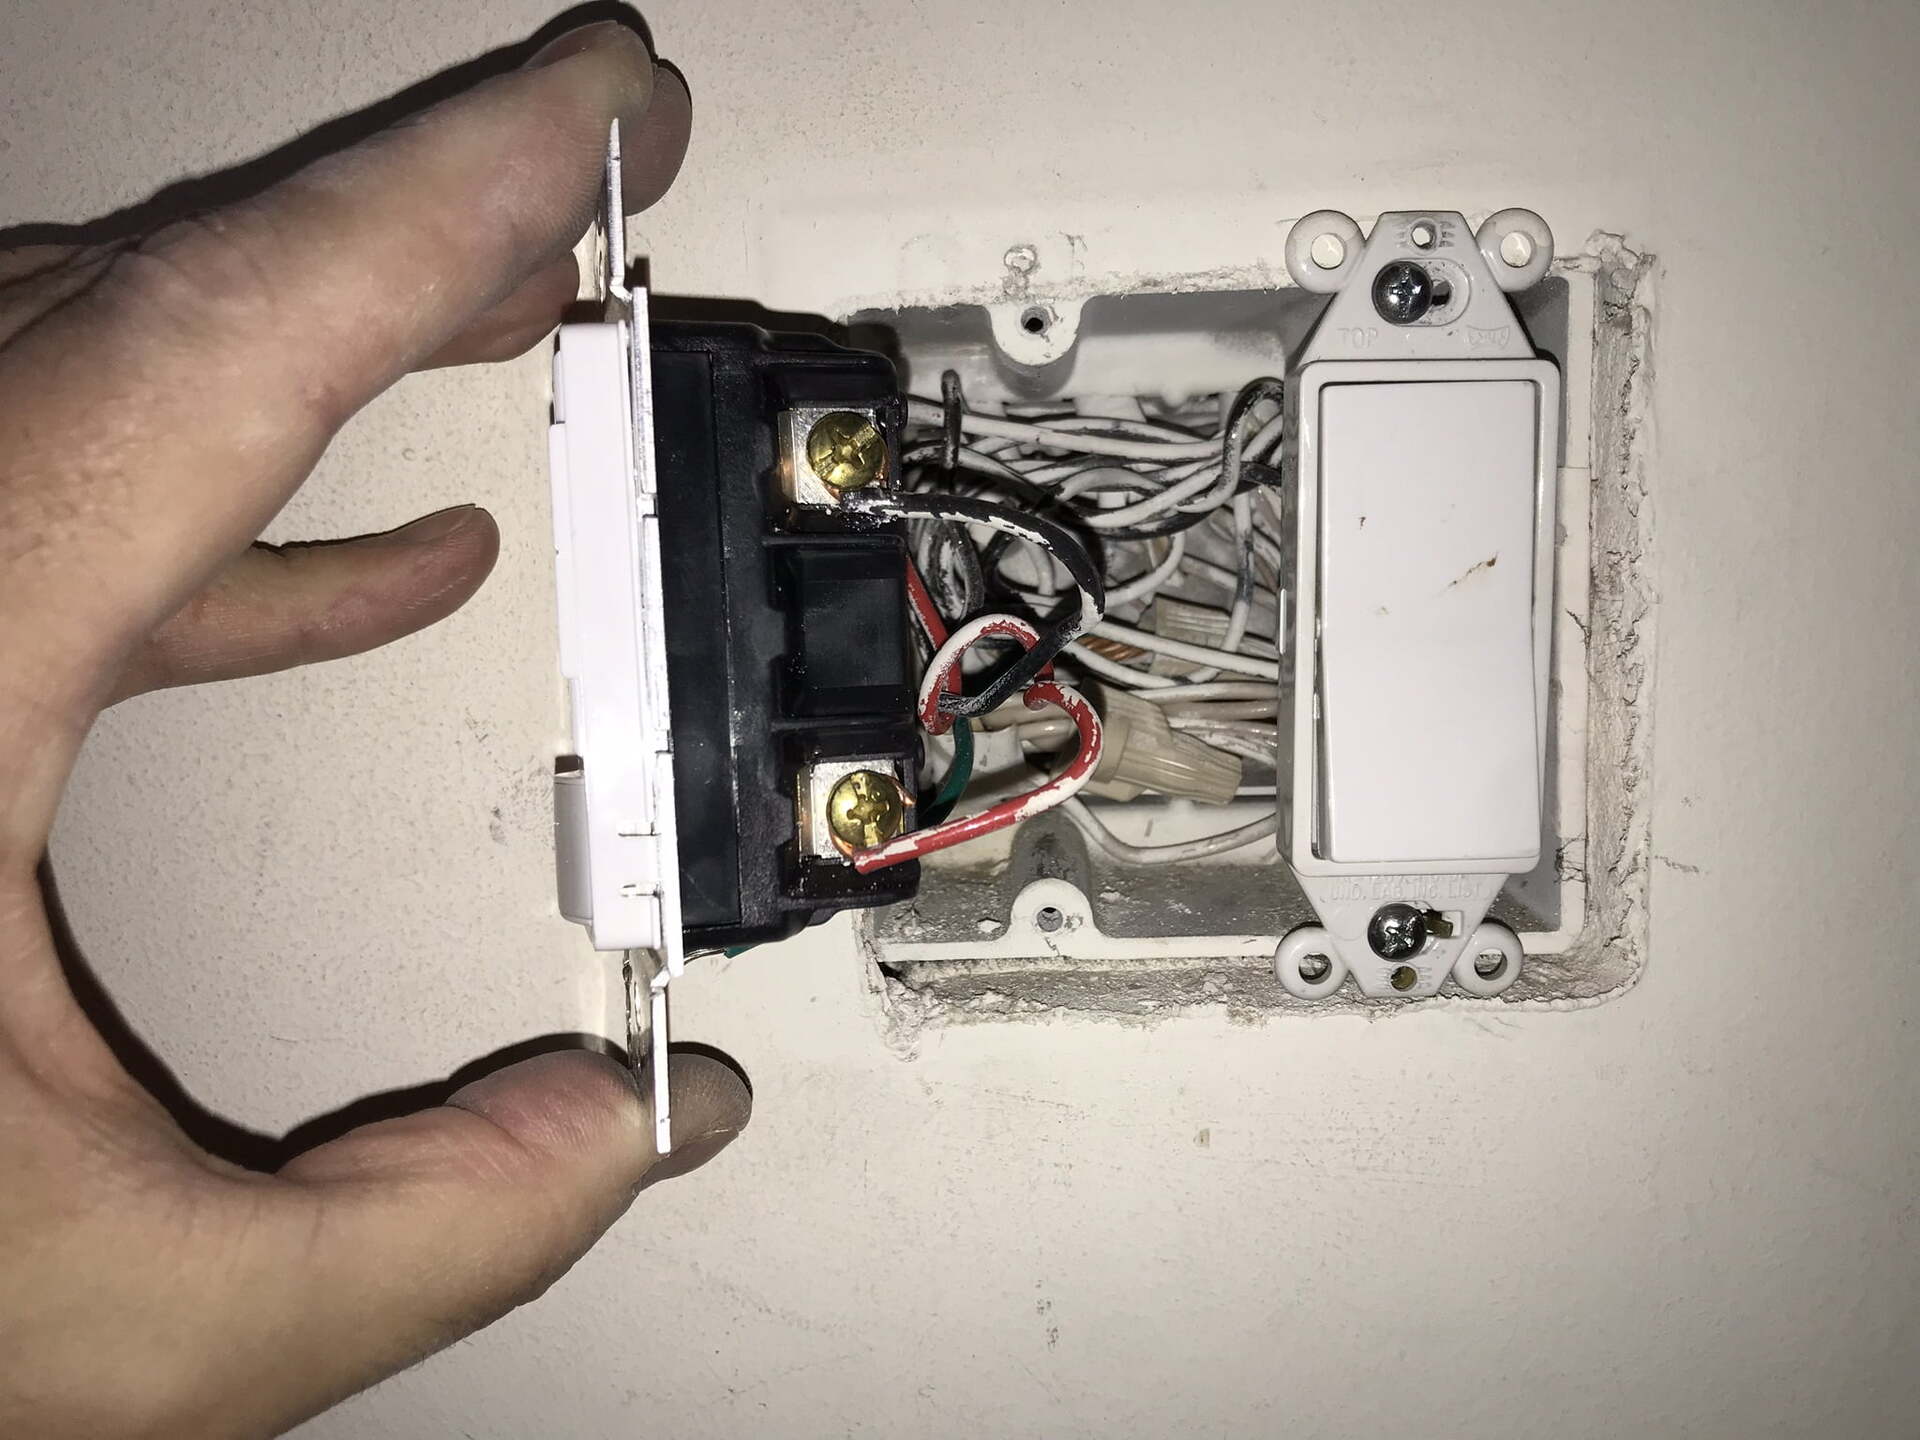
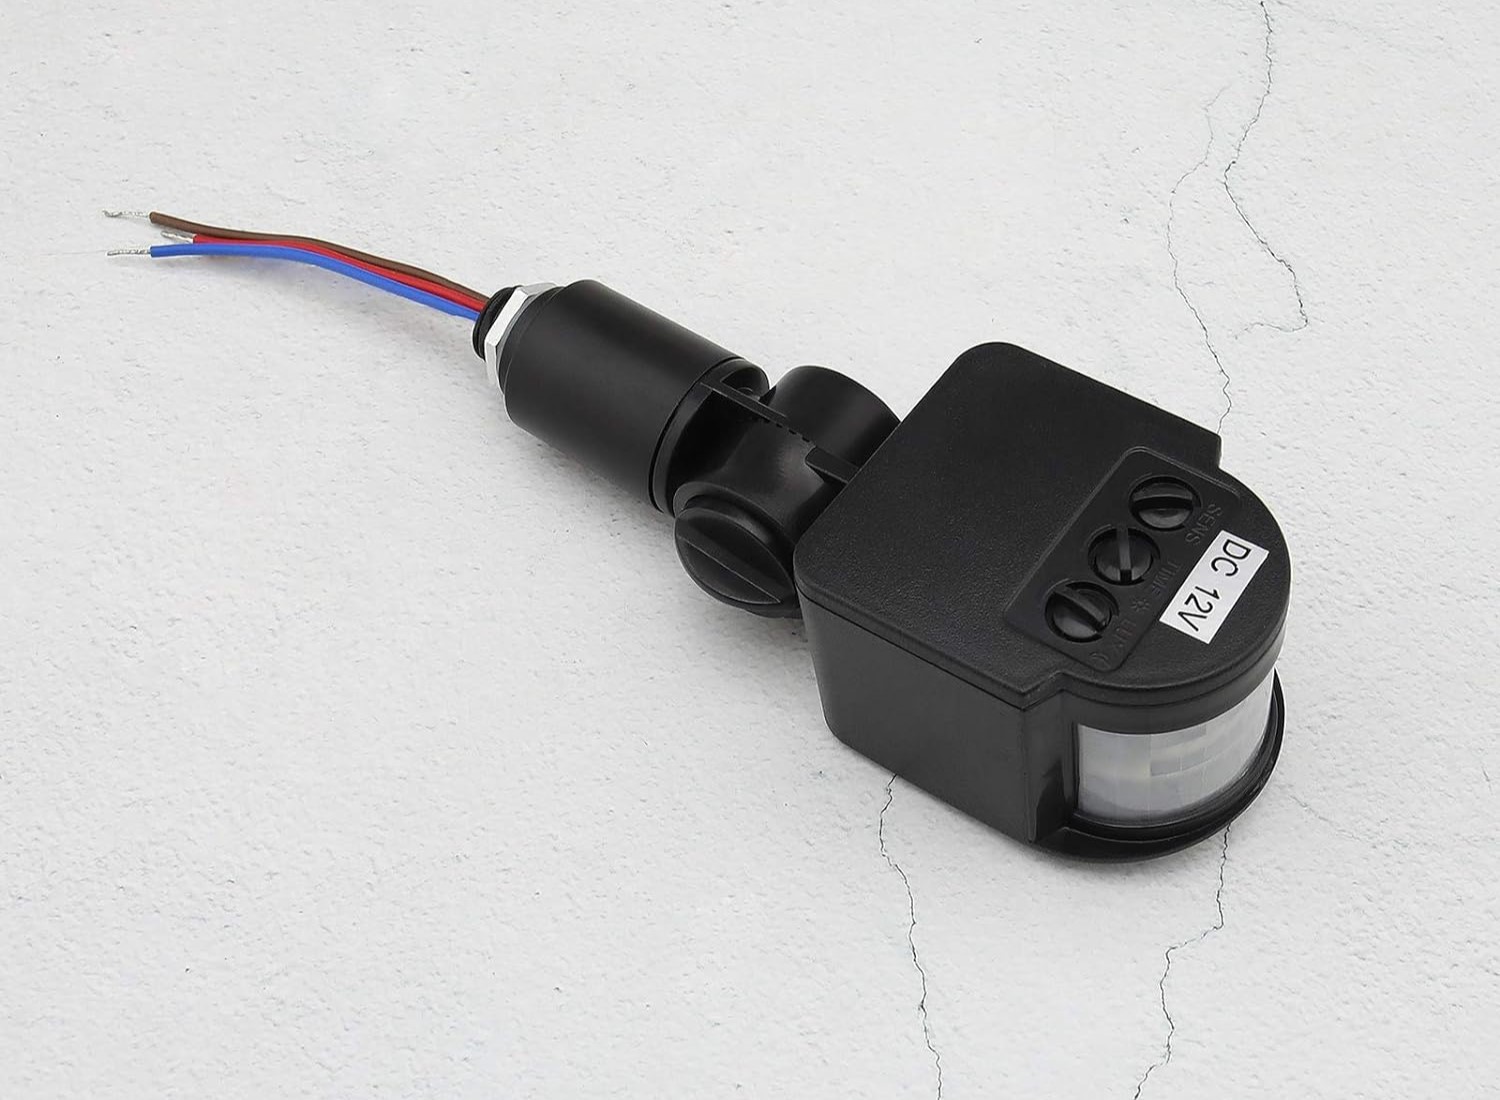
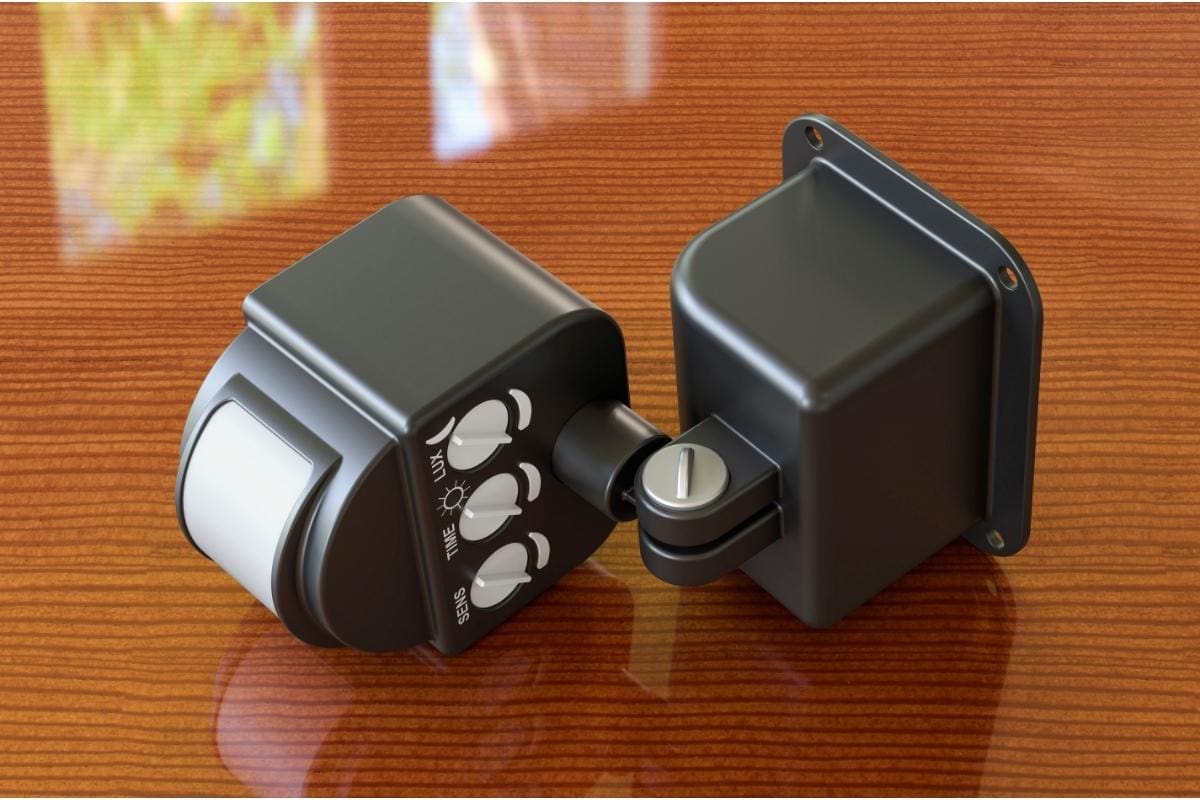
1. Identify the existing electrical wires: Locate the electrical box or junction box where the motion detector light will be connected. Identify the incoming wires, usually a black (hot) wire, a white (neutral) wire, and a green or bare copper (ground) wire. These wires supply power to the light.
2. Connect the wires: Begin by stripping the insulation from the ends of the motion detector light wires, following the manufacturer’s instructions for the appropriate length. Connect the black wire from the motion detector light to the black (hot) wire in the electrical box using a wire connector. Next, connect the white wire from the motion detector light to the white (neutral) wire in the box using another wire connector. Finally, connect the green or bare copper wire from the motion detector light to the green or bare copper (ground) wire in the box using a wire connector.
3. Insulate and secure the connections: Once the wires are securely connected, wrap each wire connector with electrical tape to provide additional insulation and protection. This helps to prevent moisture and potential electrical hazards. Carefully tuck the connected wires back into the electrical box, ensuring they are not pinched or damaged.
4. Follow manufacturer’s instructions: Some motion detector lights may have additional wiring requirements or specific instructions for connecting the wires. Be sure to refer to the manufacturer’s instructions provided with your kit and follow any additional steps or recommendations as necessary.
Remember, if you are unsure about any step or encountering difficulties, it’s always best to consult a licensed electrician for assistance. Safety should always be a priority when working with electrical components.
Once you have successfully connected the wiring, you are ready to test your motion detector light. Proceed to the next step to ensure it is functioning correctly.
Step 6: Test the motion detector light
Now that the wiring is complete, it’s time to test your motion detector light to ensure it is functioning properly. Follow these steps to conduct a thorough test:
1. Turn on the power: Double-check that the power to the area has been turned back on at the circuit breaker panel.
2. Check the settings: Refer to the manufacturer’s instructions to understand the specific settings and adjustments for your motion detector light. Some lights may have adjustable sensitivity, range, or duration settings. Set these parameters according to your preferences.
3. Walk or wave in front of the motion sensor: Move within the designated range of the motion sensor to trigger its activation. This may involve walking back and forth or waving your hand near the sensor. Observe the light to ensure it turns on promptly and remains illuminated as long as there is motion detected.
4. Adjustments: If necessary, make any adjustments to the position, angle, or sensitivity of the motion sensor to optimize its performance. Take note of any blind spots or overly sensitive areas to fine-tune the settings for ideal coverage.
5. Test during different lighting conditions: Test the motion detector light during different times of the day and in varying lighting conditions. Ensure that the light functions as intended, distinguishing between natural movement and actual motion that requires illumination.
6. Test from different angles: Walk or move in front of the motion sensor from different angles to verify that it detects motion from all directions within the specified range. This helps ensure that there are no gaps in coverage and that the sensor is working accurately.
7. Test at different distances: Test the motion detector light at various distances within its range to ensure consistent and reliable detection. Walk closer and farther away from the sensor to verify its effectiveness at different distances.
By conducting a thorough testing process, you can detect and address any issues or limitations with your motion detector light. Adjusting the settings and positioning as necessary will help maximize its performance and provide the desired level of security and convenience.
If any issues arise or if the motion detector light does not function as expected, refer to the troubleshooting section of the manufacturer’s instructions or seek professional assistance. Once you are satisfied with the testing results, you can proceed to the final step of securing the wiring and closing up the wall.
Step 7: Secure the wiring and close up the wall
After successfully testing your motion detector light, it’s time to secure the wiring and close up the wall to ensure a clean and safe installation. Follow these steps for the final stage of the process:
1. Secure the wiring: Use zip ties or cable clips to secure the wiring along the mounting bracket or any other convenient surfaces. This helps keep the wiring organized and prevents it from dangling or getting in the way. Avoid placing the wiring near any sharp edges or areas prone to excessive heat.
2. Insulate the wiring connections: Double-check that the wire connectors are firmly secured and wrapped with electrical tape. This provides an extra layer of protection and helps prevent water intrusion or accidental contact with the live wires.
3. Place the light fixture cover or hood: Depending on the design of your motion detector light, install the appropriate cover or hood to protect the light bulb and internal components from weather elements. Ensure that it is securely fastened according to the manufacturer’s instructions.
4. Close up the wall: If you have made any openings in the wall during the installation process, such as drilling holes for the mounting bracket or wiring, it’s time to close them up. Use weatherproof caulking or sealant to seal any gaps or penetrations, ensuring proper insulation and protection against elements.
5. Test the motion detector light one final time: Before completing the installation, conduct a final test to ensure that the light turns on and off as expected. Walk in front of the motion sensor to trigger its activation and verify that it responds correctly.
6. Clean up the area: Once you are confident that the motion detector light is installed securely and functioning properly, clean up the installation area. Remove any debris, tools, or equipment and tidy up the surroundings to leave a clean and organized finish.
7. Keep documentation: Make sure to keep a record of the installation, including any product manuals, warranty information, or details of the wiring connections. This documentation will come in handy for future reference or if any maintenance or troubleshooting is required.
With the wiring secured and the wall closed up, your motion detector light installation is complete. Enjoy the enhanced security and convenience that it brings to your home. Remember to periodically check and maintain the light to ensure its continued optimal performance.
Congratulations on successfully wiring and installing your motion detector light!
Conclusion
Installing a motion detector light can significantly improve the security and convenience of your home. By following the step-by-step instructions outlined in this guide, you have learned how to wire and install a motion detector light successfully. From gathering the necessary materials to testing and securing the wiring, each step contributes to a safe and efficient installation.
A motion detector light provides an added layer of security by automatically illuminating your outdoor space when motion is detected. This acts as a deterrent to potential intruders, making your home less vulnerable to break-ins. Additionally, motion detector lights offer convenience and energy efficiency by ensuring that lights only operate when needed, saving you money on electricity bills.
Remember, safety should always be your top priority when working with electrical components. If you have any doubts or concerns about the wiring process, consult a licensed electrician for assistance. It’s better to seek professional help than to risk compromising your safety or the functionality of the motion detector light.
Regularly test and maintain your motion detector light to ensure its proper functioning. Keep an eye on the sensitivity settings, range coverage, and the positioning of the light fixture to optimize its performance. This will ensure that your motion detector light continues to provide reliable security and convenience over time.
By taking the time to wire and install a motion detector light, you are taking a proactive step towards safeguarding your home and loved ones. Enjoy the peace of mind that comes with improved security and the added convenience of automated lighting. With proper installation, maintenance, and periodic testing, your motion detector light will serve you well for years to come.
Frequently Asked Questions about How To Wire A Motion Detector Light
Was this page helpful?
At Storables.com, we guarantee accurate and reliable information. Our content, validated by Expert Board Contributors, is crafted following stringent Editorial Policies. We're committed to providing you with well-researched, expert-backed insights for all your informational needs.