Home>Home Security and Surveillance>How To Wire The Non-Sensor Switch In A Three-Way Switch Setup With A Motion Detector
Home Security and Surveillance
How To Wire The Non-Sensor Switch In A Three-Way Switch Setup With A Motion Detector
Modified: March 6, 2024
Learn how to wire a non-sensor switch in a three-way switch setup with a motion detector for enhanced home security and surveillance.
(Many of the links in this article redirect to a specific reviewed product. Your purchase of these products through affiliate links helps to generate commission for Storables.com, at no extra cost. Learn more)
Introduction
Welcome to our comprehensive guide on how to wire the non-sensor switch in a three-way switch setup with a motion detector. Home security and surveillance systems have become increasingly popular as homeowners strive to protect their property and loved ones. These systems often include motion detectors that can be integrated with existing lighting setups. By installing a motion detector in conjunction with a three-way switch setup, you can achieve both convenience and enhanced security.
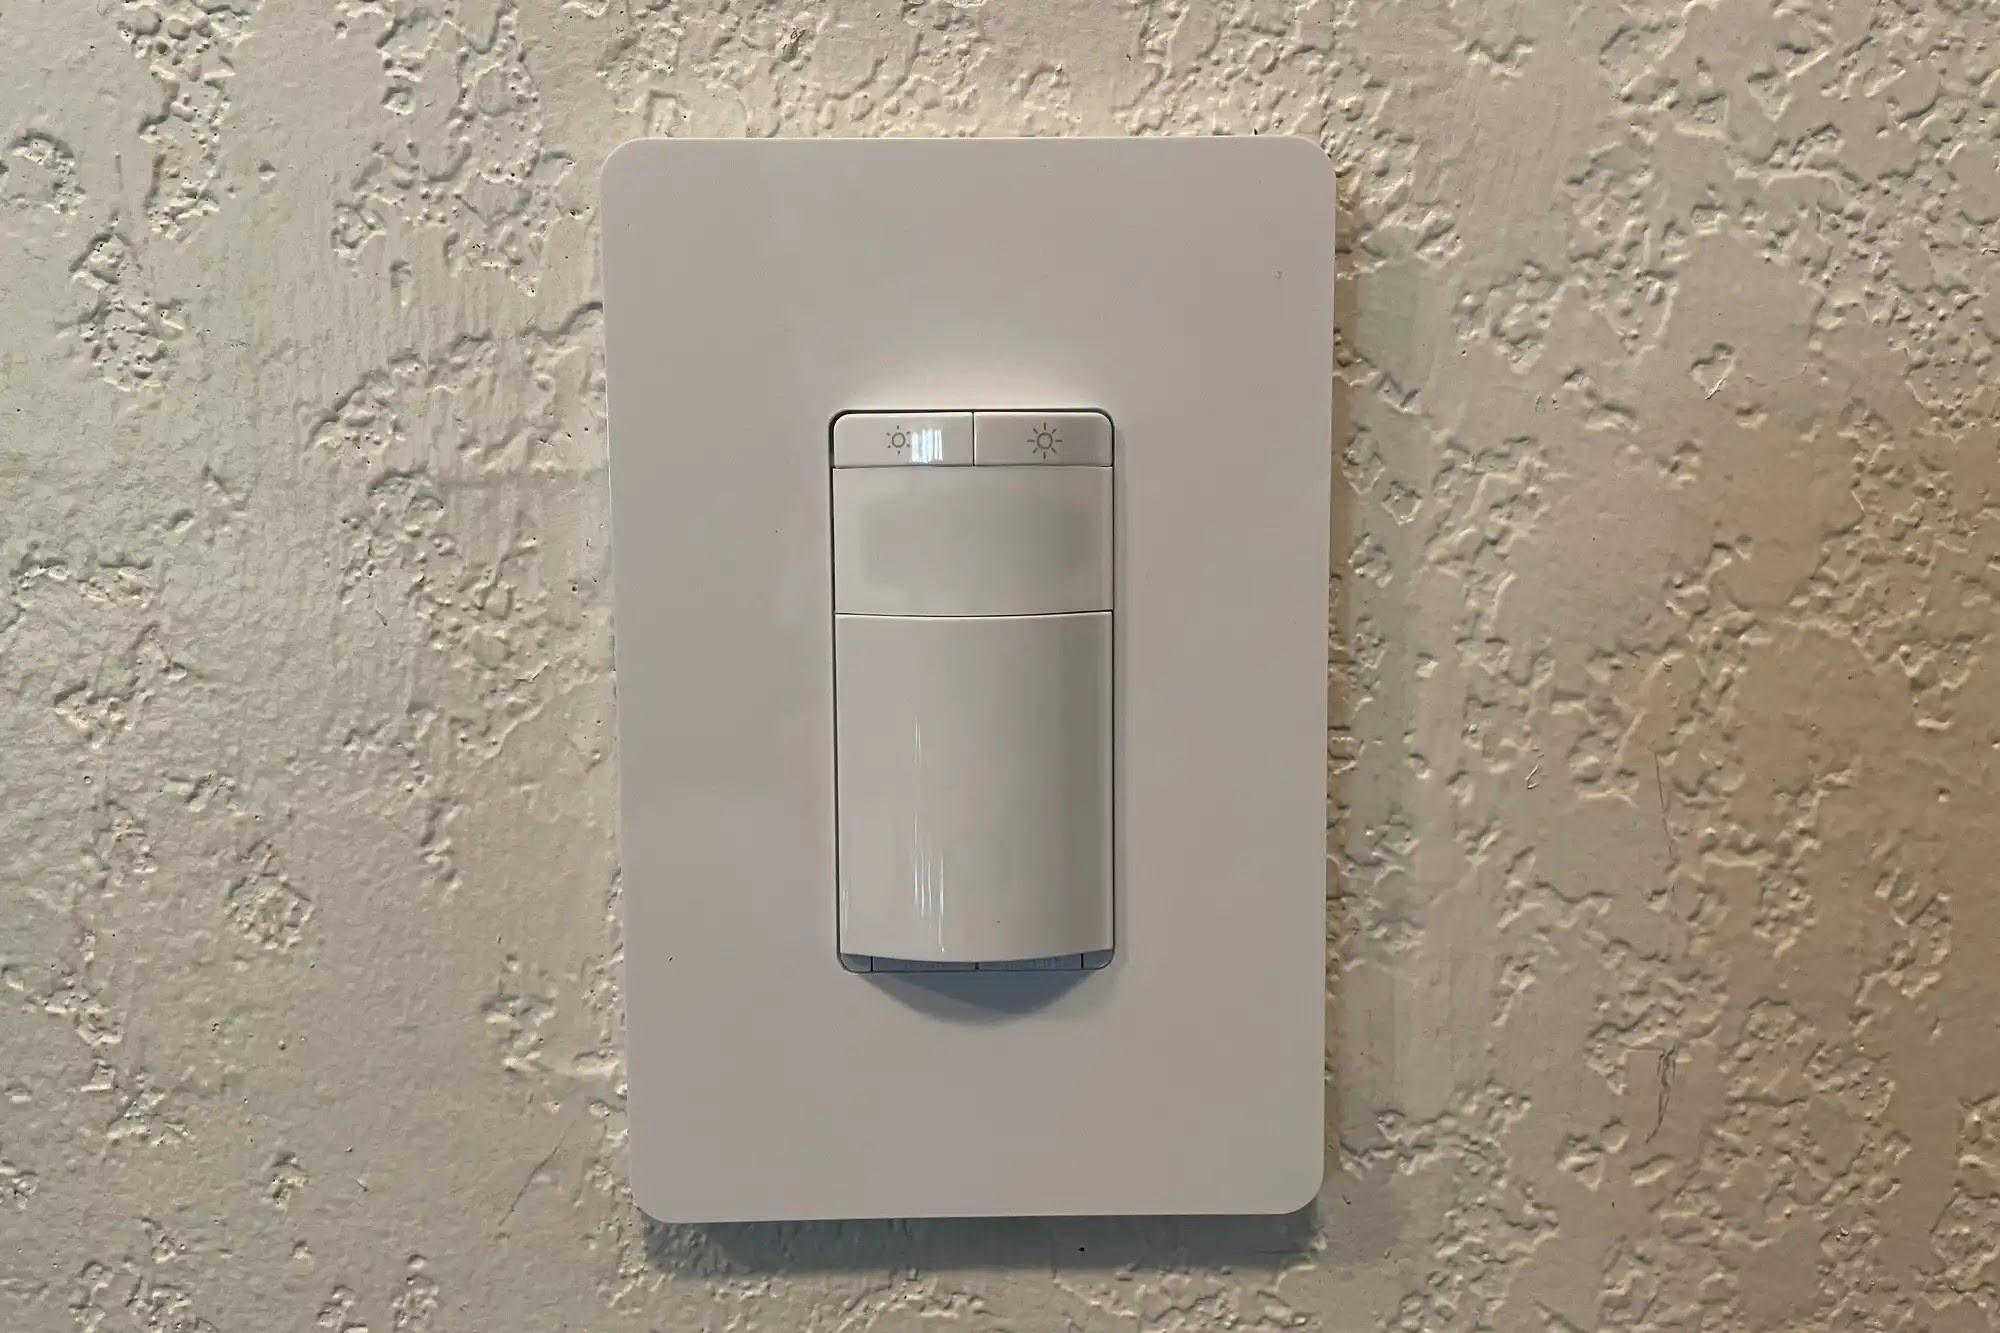
In a traditional three-way switch setup, two switches control the same light fixture from different locations. Typically, one switch is located at the top or bottom of a staircase, while the other switch is placed at the opposite end. The non-sensor switch in this setup does not have a motion detection feature and is responsible for turning the light on or off manually.
To improve security, efficiency, and convenience, adding a motion detector to this setup allows the light to automatically turn on when motion is detected and turn off when no motion is detected within a specified timeframe. However, it is essential to correctly wire the non-sensor switch in this setup to maintain control over the light manually, even with the motion detector in place.
In this guide, we will take you through the step-by-step process of wiring the non-sensor switch in a three-way switch setup with a motion detector. We will explain the necessary tools and materials, as well as provide detailed instructions to ensure a successful installation.
Note that while this guide focuses on wiring the non-sensor switch, it is essential to consult the manufacturer’s instructions for the specific motion detector you are using. Different models may have slight variations in wiring requirements. Now, let’s dive into the process and get started on securing your property.
Key Takeaways:
- Enhance home security and convenience by wiring a non-sensor switch with a motion detector in a three-way switch setup. Enjoy automatic lighting with the ability to control it manually for added peace of mind.
- Prioritize safety and follow step-by-step instructions to successfully wire the non-sensor switch. Enjoy the benefits of motion detection while maintaining control over your lighting system.
Understanding the Non-Sensor Switch in a Three-Way Switch Setup
Before we begin wiring the non-sensor switch with a motion detector in a three-way switch setup, let’s first understand the role of the non-sensor switch and its connection with the other components.
In a typical three-way switch setup, there are three essential components: the power source, the traveler wires, and the light fixture. The power source supplies electricity to the system, while the traveler wires carry the current between the switches. The light fixture, as the name suggests, is the actual light that is controlled by the switches.
In this setup, one of the switches is designated as the non-sensor switch. This switch does not have a motion detection feature and operates manually. Its primary function is to turn the light on or off based on the user’s input. The non-sensor switch can be located at the top or bottom of a staircase, for example, where users can easily access it.
When the non-sensor switch is in the “on” position, it completes the circuit and allows electricity to flow to the light fixture, turning it on. Conversely, when the switch is in the “off” position, the circuit is broken, and the light fixture remains off. This simple mechanism allows users to control the light manually without relying on motion detection.
When we introduce a motion detector to the three-way switch setup, we want to maintain the ability to control the light manually, even when the motion detector is activated. This ensures that users have full control over the light and can override the motion detection feature if necessary. By properly wiring the non-sensor switch, we can achieve this desired functionality.
In the next section, we will discuss the tools and materials you will need to complete the wiring process successfully. Gathering these items before you begin will help ensure a smooth installation process.
Gathering the Required Tools and Materials
Before you start wiring the non-sensor switch in a three-way switch setup with a motion detector, it’s important to gather all the necessary tools and materials. Having everything on hand will help make the installation process more efficient and ensure that you have everything you need to complete the project successfully. Here are the tools and materials you will need:
1. Wire cutters and strippers: These tools will be essential for cutting and stripping the electrical wires to the correct length and size.
2. Screwdrivers: You will need both a flat-head and a Phillips-head screwdriver to remove and install switches and other components throughout the process.
3. Voltage tester: A voltage tester will allow you to ensure that the power to the circuit is turned off before you start working. This tool is crucial for safety purposes.
4. Electrical tape: Electrical tape will be used to insulate and secure any exposed wires, preventing any potential electrical hazards.
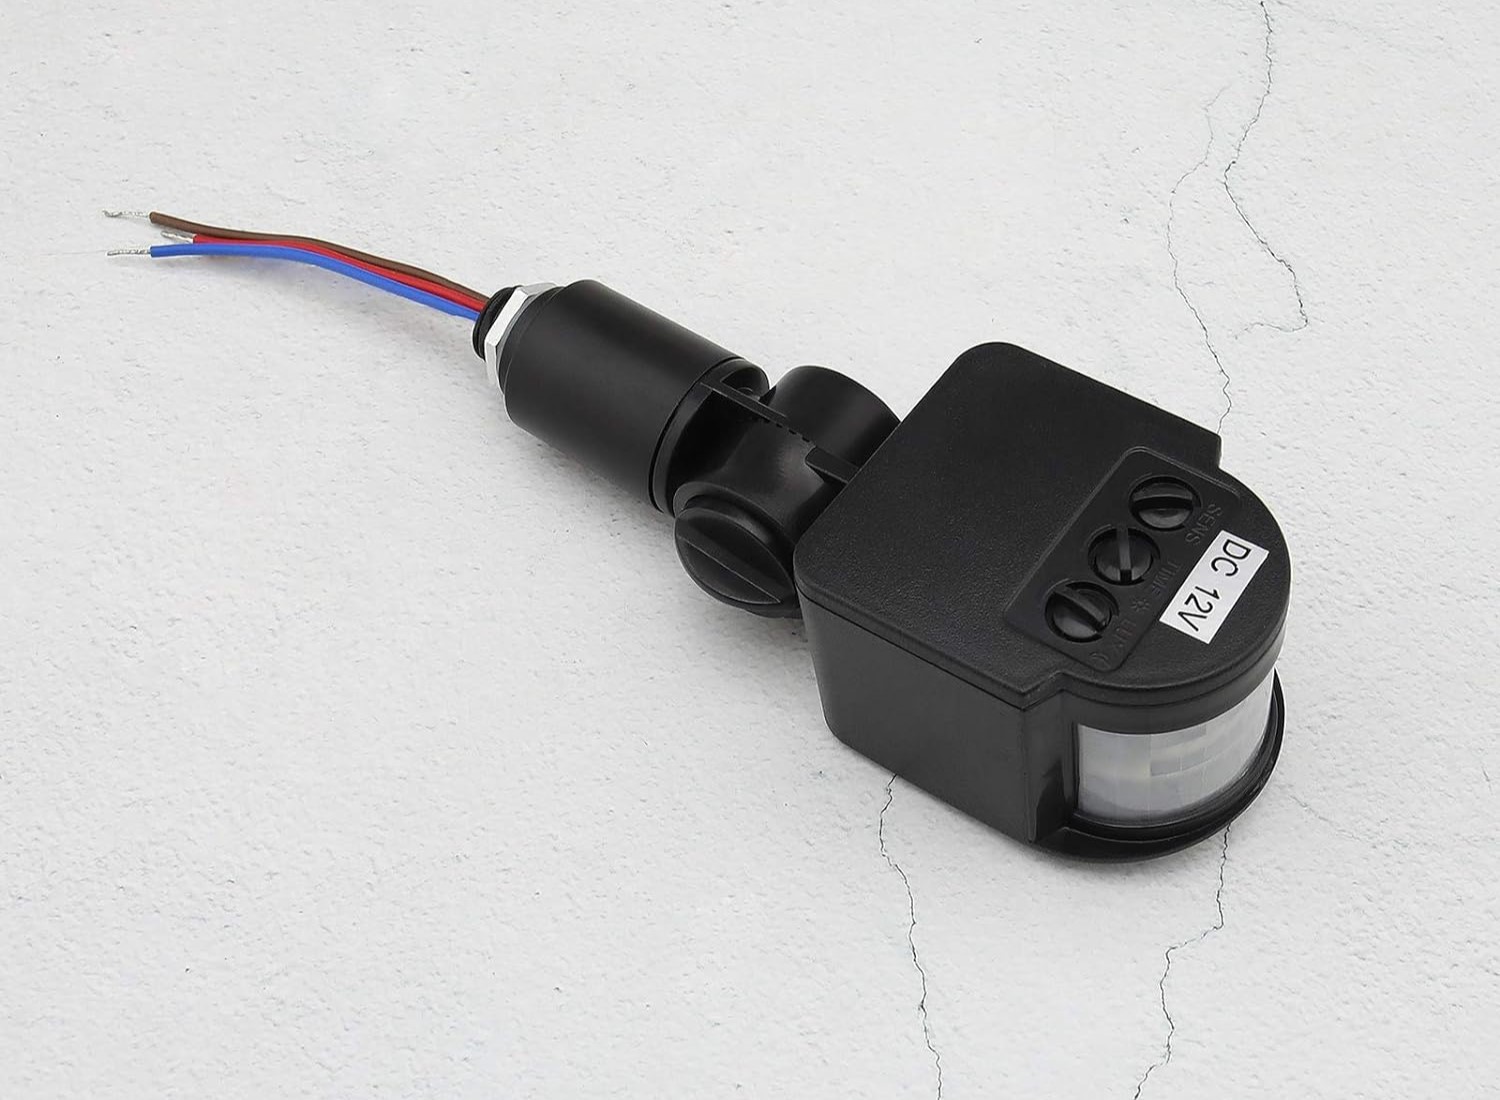
5. Motion detector: Choose a motion detector that is compatible with your existing lighting setup and meets your specific needs in terms of detection range, sensitivity, and features.
6. Three-way switches: Make sure you have the appropriate three-way switches for your setup. These switches have three terminals and are specifically designed for three-way wiring configurations.
7. Electrical wires: Depending on the configuration of your existing wiring, you may need additional electrical wires to connect the motion detector and switches.
8. Wire connectors: Wire connectors, such as wire nuts, will be necessary to securely connect the electrical wires together.
9. Mounting hardware: If your motion detector requires mounting, gather the necessary hardware, such as screws or brackets, to securely attach it to the desired location.
10. Safety goggles and gloves: Safety should always be a priority when working with electricity. Wear safety goggles and gloves to protect yourself from any potential hazards.
Once you have gathered all the tools and materials mentioned above, you’ll be well-prepared to proceed with the wiring process. In the next section, we will walk you through the step-by-step instructions on how to wire the non-sensor switch in a three-way switch setup with a motion detector.
Step 1: Disconnect Power to the Circuit
Safety should always be the first priority when working with electrical circuits. Before starting any wiring work, it is crucial to disconnect the power to the circuit to ensure your safety and prevent the risk of electrical shock. Follow these steps to disconnect the power:
- Locate the electrical panel or circuit breaker box in your home. This is usually found in the basement, utility room, or garage.
- Open the electrical panel door by removing any screws or latches that secure it.
- Inside the panel, you will see rows of circuit breakers or fuses. Identify the circuit breaker that controls the power to the area where you’ll be working. It should be labeled accordingly.
- Flip the circuit breaker switch to the “off” position for the designated circuit. This will disconnect the power supply to that specific circuit. Double-check that the power is indeed off by testing a nearby light switch or outlet with a voltage tester.
- If the circuit breaker is not labeled, you can use a non-contact voltage tester to identify the circuit that supplies power to the area. Hold the voltage tester near each breaker and look for a visual or audible indication of live electrical current.
- Once you have confirmed that the power is off, you can proceed with the wiring work safely.
It is important to note that if you are unsure or uncomfortable working with electrical circuits, it is best to consult a licensed electrician for assistance. Your safety should always be the top priority.
Now that you have disconnected the power to the circuit, you can continue with the next step in wiring the non-sensor switch in a three-way switch setup with a motion detector. In the following section, we will guide you through the process of removing the existing non-sensor switch.
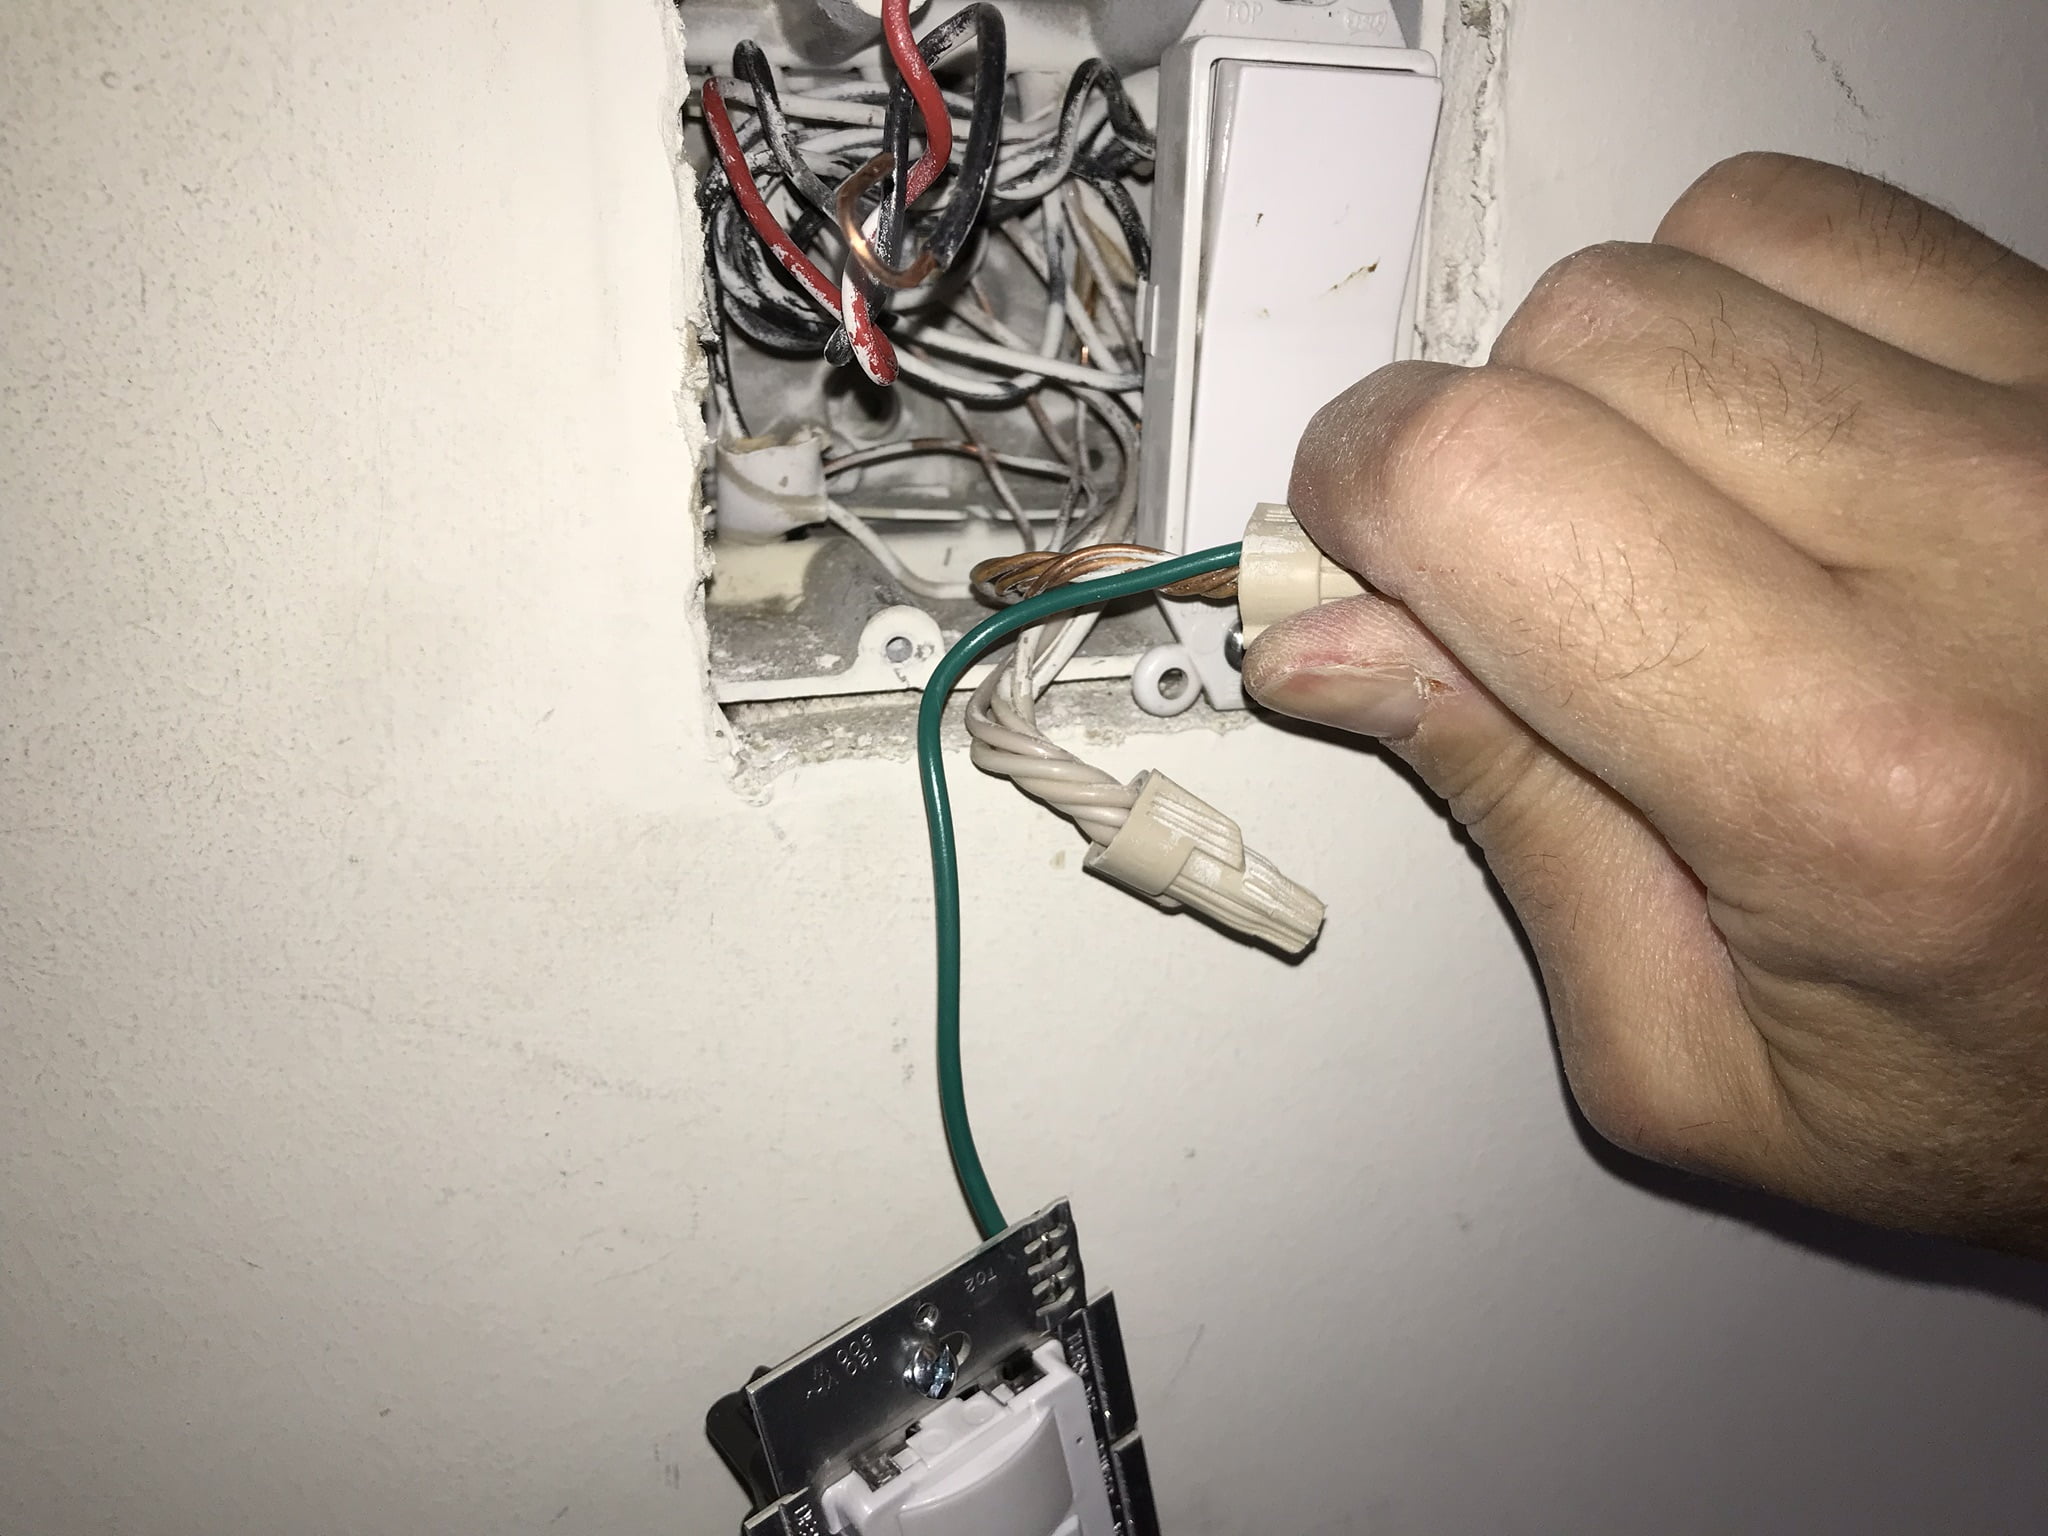
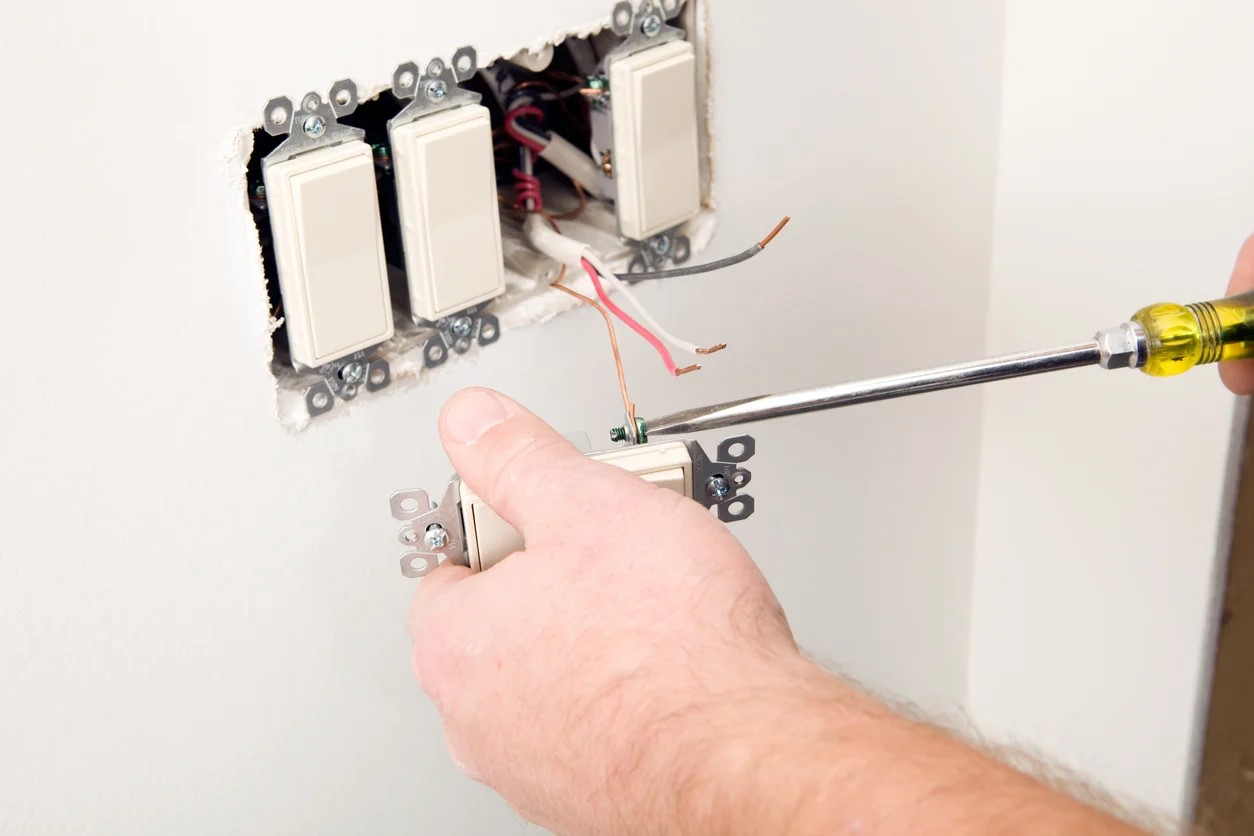
Step 2: Remove the Existing Non-Sensor Switch
Now that the power to the circuit is turned off, it’s time to remove the existing non-sensor switch. Follow these steps to safely remove the switch:
- Locate the non-sensor switch that you want to replace. This switch is typically found at the top or bottom of a staircase, but it could be in other locations as well.
- Use a flat-head or Phillips-head screwdriver, depending on the type of screws used, to remove the screws that secure the switch cover plate to the wall.
- Gently pull the cover plate away from the wall to expose the switch. Take care not to damage the surrounding wall or any electrical wires.
- Next, remove the screws that secure the switch to the electrical box. Depending on the switch, there may be one or two screws holding it in place.
- Gently pull the switch away from the box, exposing the electrical wires connected to it. Take note of how the wires are connected to the switch terminals, as this information will be useful when connecting the new switch later.
- Using a voltage tester, double-check that there is no electrical current present in the wires connected to the switch. Touch the probes of the voltage tester to the exposed wires to verify that there is no voltage.
- If there is no voltage, carefully disconnect the wires from the switch terminals. Depending on the type of switch, you may need to unscrew the terminal screws or release them using a small screwdriver.
- Once the wires are disconnected, you can remove the existing non-sensor switch from the electrical box and set it aside.
With the non-sensor switch removed, you’re now ready to move on to the next step of identifying the common terminal. This step is crucial for correctly wiring the new switch in a three-way switch setup with a motion detector.
Remember, if you are uncertain about any part of the process, it is always best to consult a licensed electrician for assistance. Safety should be your top priority when working with electrical circuits.
In the next section, we will guide you through the process of identifying the common terminal on the existing wiring and new switch.
When wiring a non-sensor switch in a three-way setup with a motion detector, make sure to connect the common wire from the motion detector to the common terminal of the non-sensor switch. This will allow the non-sensor switch to control the light along with the motion detector.
Read more: How Much Is A Motion Detector Sensor
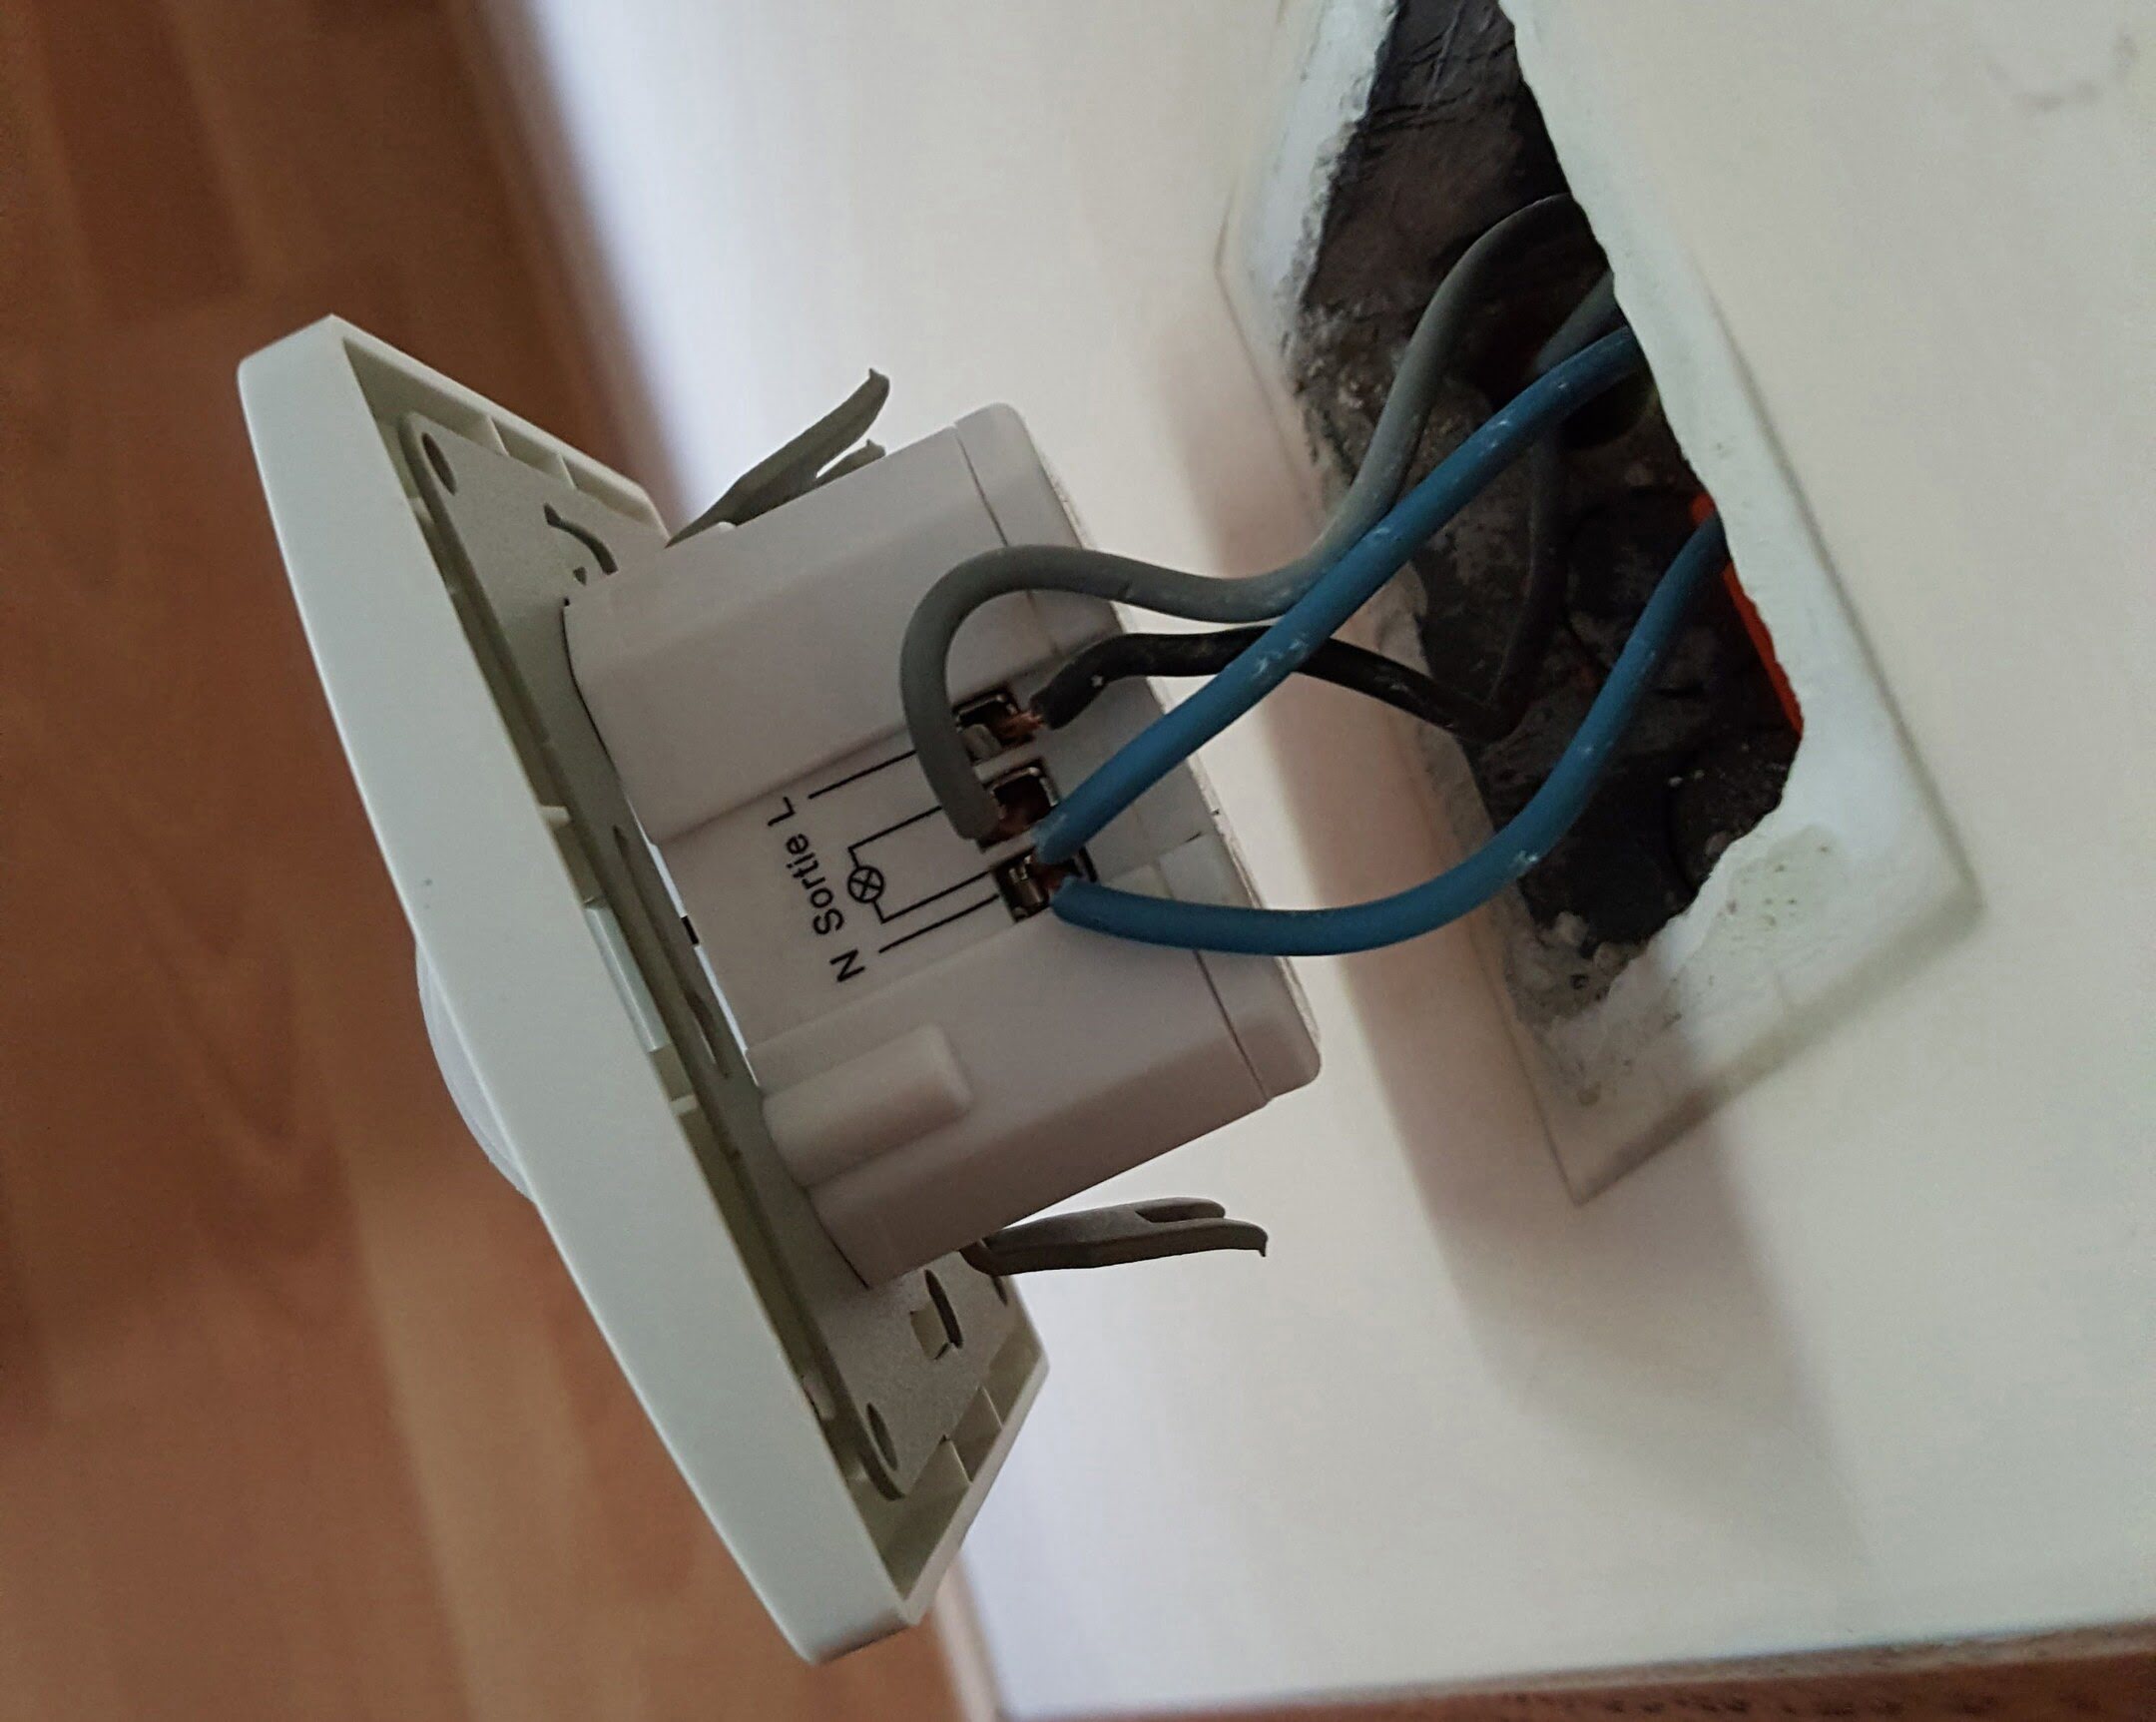
Step 3: Identify the Common Terminal
Identifying the common terminal is a crucial step in wiring the non-sensor switch in a three-way switch setup with a motion detector. The common terminal is responsible for carrying the incoming and outgoing electrical power in the circuit. Follow these steps to identify the common terminal:
- Take a close look at the existing wiring connected to the non-sensor switch. You will notice three wires attached to the switch’s terminals.
- The wire that is connected to the terminal in a different color or labeled differently compared to the other two wires is the common wire. It is often black, but it may also be red or a different color depending on the wiring setup.
- Mark the common wire with a small piece of electrical tape or a label sticker. This will help you recognize it during the wiring process.
- If the wires are not color-coded and there are no noticeable differences, you can use a voltage tester to identify the common wire. With the power still off, touch one probe of the voltage tester to a wire and the other probe to the metal box or ground wire. The wire that shows voltage is the common wire.
- Now, it’s time to identify the common terminal on your new switch. Consult the manufacturer’s instructions for your specific switch model to determine which terminal is designated as the common terminal.
- Typically, the common terminal is labeled “COM” or “C” and may be a different color or positioned differently compared to the other terminals.
- Once you have identified the common terminal, you’re ready to move on to the next step of identifying and connecting the remaining terminals.
Properly identifying the common terminal is crucial for correctly wiring the new switch with the motion detector. It ensures that the circuit functions as intended and allows for manual control of the light fixture alongside the motion detection feature.
In the next section, we will guide you through identifying and connecting the remaining terminals in the three-way switch setup.
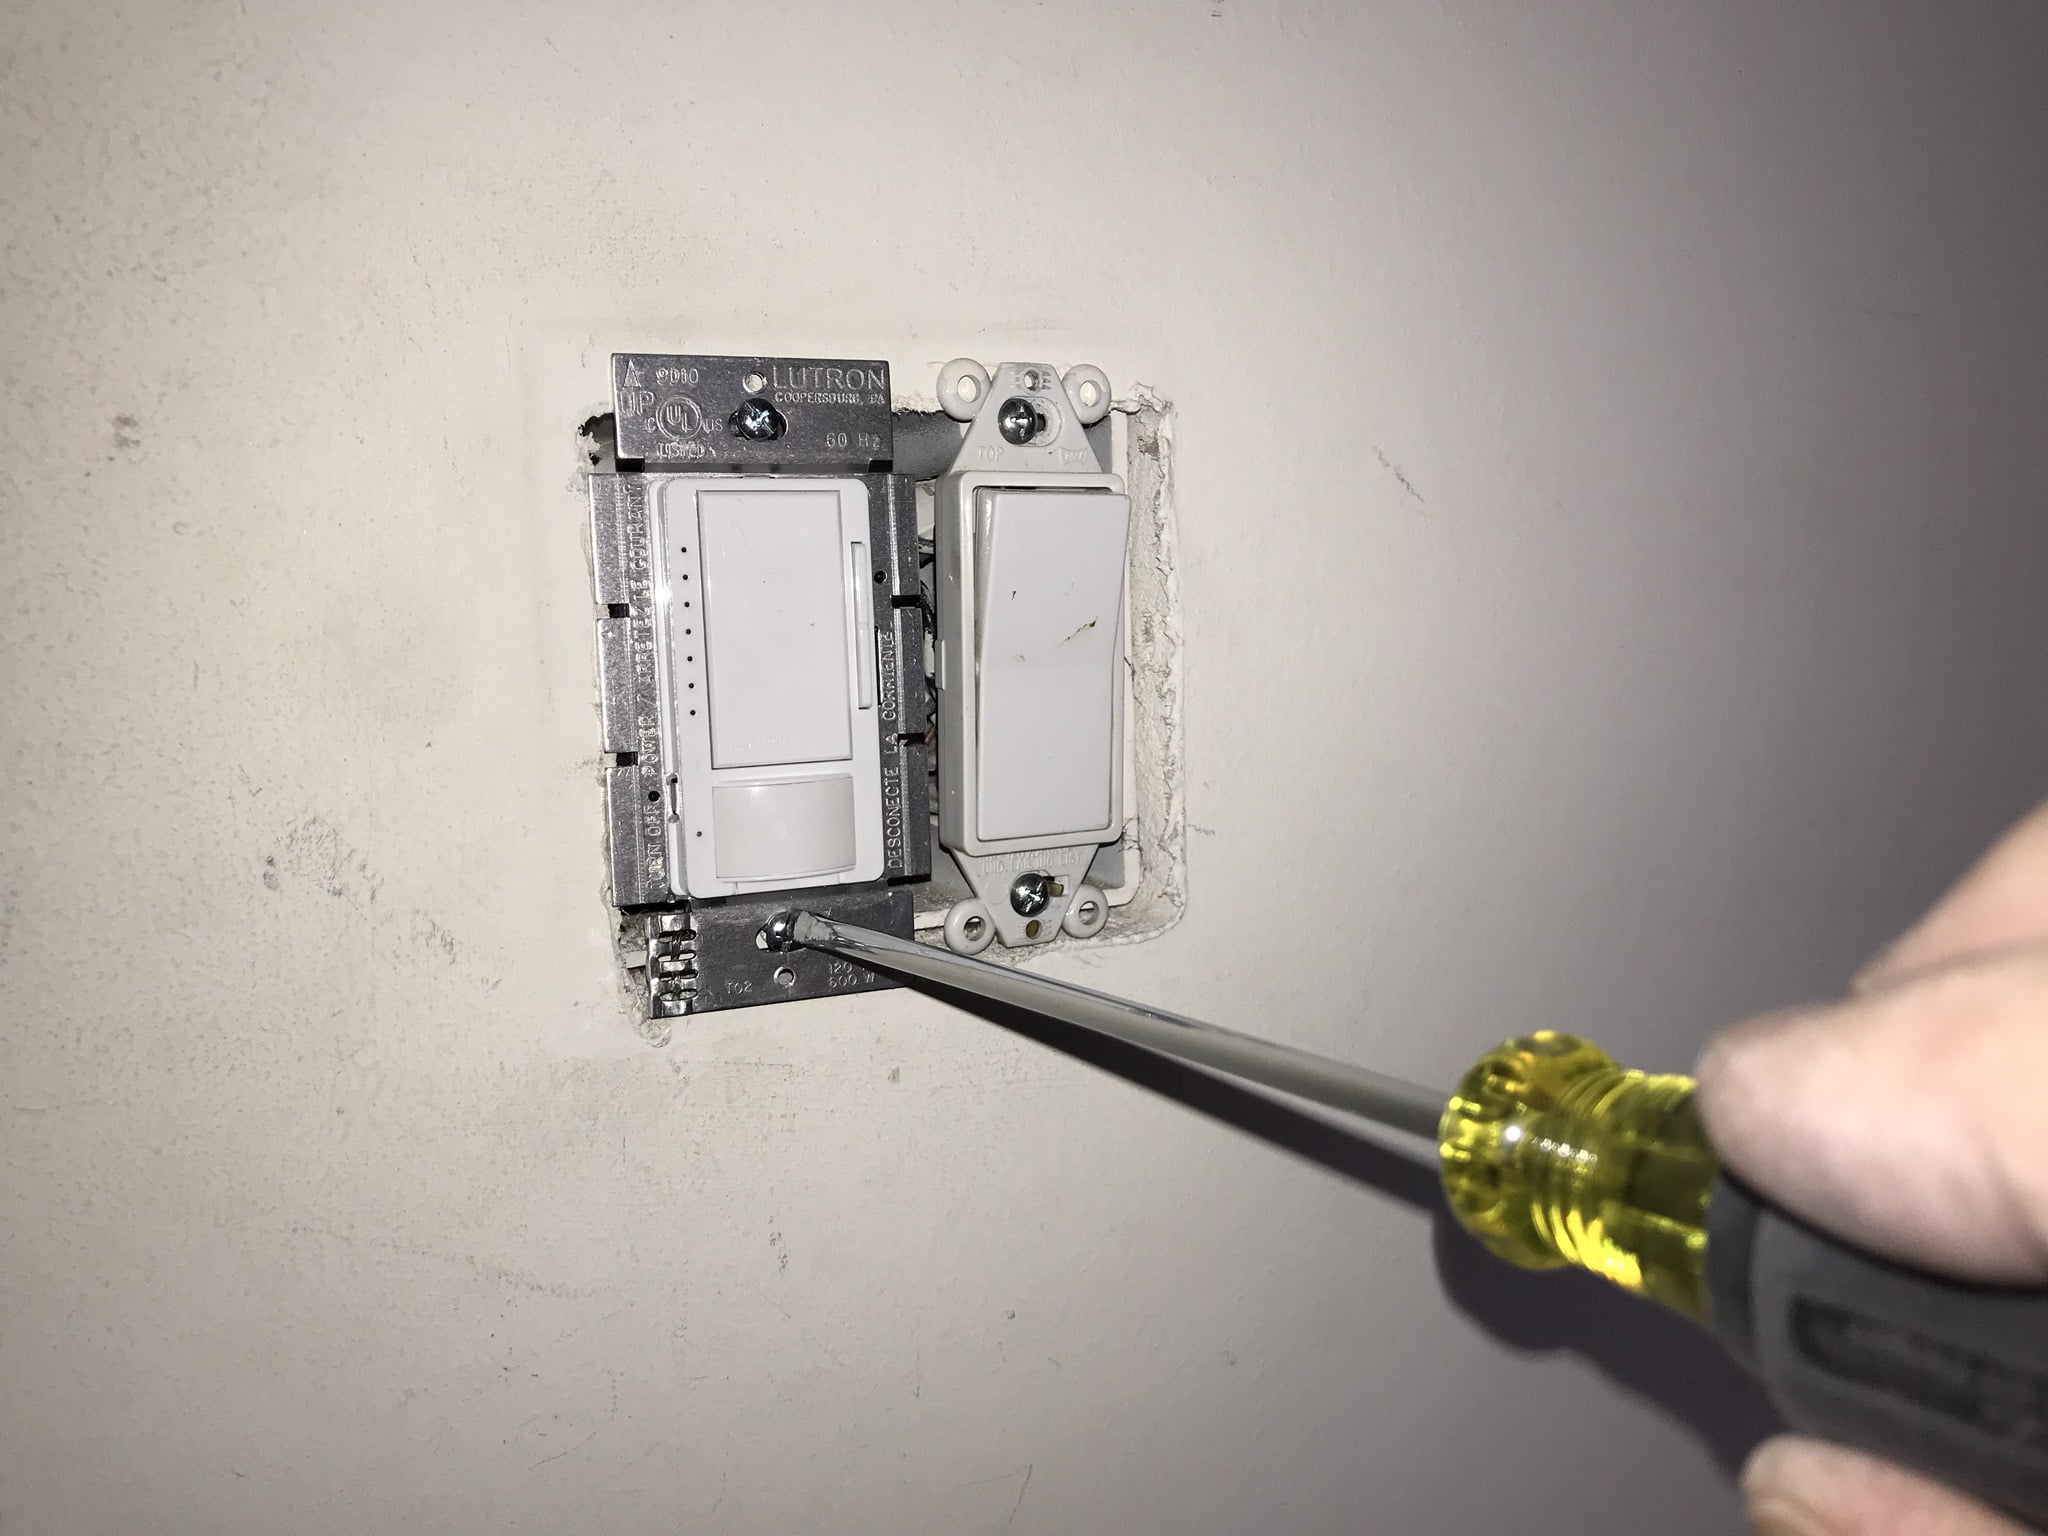
Step 4: Identify and Connect the Remaining Terminals
Now that you have identified the common terminal, it’s time to identify and connect the remaining terminals in the three-way switch setup. The remaining terminals are responsible for controlling the flow of electricity between the switches. Follow these steps to identify and connect the remaining terminals:
- Look at the remaining two wires connected to the non-sensor switch. These wires are usually the same color and are referred to as the “traveler wires.”
- Take note of which traveler wire is connected to which terminal on the existing non-sensor switch. This information is important for connecting the wires to the correct terminals on the new switch.
- Identify the traveler wire that is connected to the terminal opposite the common terminal. For example, if the common terminal is on the left side, the traveler wire on the right side is connected to the opposite terminal.
- Disconnect the traveler wires from the existing switch’s terminals. Remember to label them or take note of their positions to ensure the correct wiring later.
- Consult the manufacturer’s instructions for your new switch to determine which terminals are designated as the traveler terminals.
- Typically, the traveler terminals are labeled “T1” and “T2,” or they may have different colored screws or positions than the common terminal.
- Connect the traveler wire from the common terminal to the appropriate traveler terminal on the new switch. Repeat the process for the other traveler wire.
- Ensure that the connections are secure by tightening the terminal screws firmly.
By identifying and connecting the remaining terminals correctly, you are ensuring that the flow of electricity between the switches is appropriately controlled. This step is crucial for the proper functioning of the three-way switch setup with a motion detector.
In the next step, we will guide you through the process of mounting and connecting the motion detector to complete the setup.
Step 5: Mount and Connect the Motion Detector
Now that you have correctly identified and connected the terminals in the three-way switch setup, it’s time to mount and connect the motion detector. Follow these steps to mount and connect the motion detector:
- Select a suitable location for the motion detector. This is typically a strategic spot where it can effectively detect motion within the desired range.
- If necessary, use mounting hardware such as screws or brackets to securely attach the motion detector to the desired location. Ensure that the mounting is stable and will not be easily moved or tampered with.
- Next, identify the wiring connections on the motion detector. These typically include the power supply wires, the load wires (connected to the light fixture), and sometimes an additional wire for optional features or settings.
- Connect the power supply wire from the common terminal of the non-sensor switch to the designated power input terminal on the motion detector. Use a wire connector, such as a wire nut, to secure the connection.
- If there is a separate terminal for the load wire (connected to the light fixture), connect it to the appropriate terminal on the motion detector.
- If there are any additional wires for specific features or settings on the motion detector, consult the manufacturer’s instructions for proper connection.
- Ensure that all wire connections are secure and properly insulated using electrical tape to prevent any exposed wires.
It’s essential to refer to the manufacturer’s instructions for your specific motion detector to ensure the correct wiring configuration. Different models may have slightly different wiring requirements.
Once you have mounted and connected the motion detector as per the instructions, you’re ready to move on to the final step of restoring power and testing the setup.
In the next section, we will guide you through restoring power and testing the functionality of the three-way switch setup with the motion detector.
Step 6: Restore Power and Test the Setup
After completing the wiring and connection processes, it’s time to restore power to the circuit and test the functionality of the three-way switch setup with the motion detector. Follow these steps to restore power and test the setup:
- Go back to the electrical panel or circuit breaker box in your home.
- Locate the circuit breaker that supplies power to the area where you’ve been working.
- Flip the circuit breaker switch back to the “on” position, restoring power to the circuit.
- Double-check that the power is indeed restored by testing a nearby light switch or outlet with a voltage tester.
- Once you’ve confirmed that the power is back on, head back to the location of the three-way switch setup with the newly installed motion detector.
- Test the setup by manually operating the non-sensor switch. Flip it to the “on” and “off” positions, and observe if the light turns on and off accordingly.
- Now, activate the motion detector by walking within its detection range. The light should automatically turn on when motion is detected and turn off after a specified period of no motion.
- Adjust any sensitivity or timer settings on the motion detector as per the manufacturer’s instructions if necessary.
Testing the setup ensures that the wiring and connections have been done correctly and that both the manual and motion detection functionalities are functioning as intended.
If you encounter any issues during testing or if the setup does not work as expected, double-check the wiring, connections, and settings on the motion detector. Make sure everything is properly installed and consult the manufacturer’s instructions for troubleshooting steps.
Congratulations! You have successfully completed the process of wiring the non-sensor switch in a three-way switch setup with a motion detector. You now have a convenient and secure lighting system that combines manual control with motion detection functionality.
Remember, if you are unsure or uncomfortable working with electrical circuits, it is always best to consult a licensed electrician for assistance. Your safety should be the top priority.
We hope this guide has been helpful in achieving your home security and surveillance goals. Enjoy the enhanced convenience and peace of mind that your new setup provides!
Conclusion
In conclusion, wiring the non-sensor switch in a three-way switch setup with a motion detector is a great way to enhance both the convenience and security of your home. By combining manual control with motion detection capabilities, you can ensure that your lights turn on automatically when motion is detected and still have the ability to control them manually.
Throughout this comprehensive guide, we’ve covered the step-by-step process of wiring the non-sensor switch, from disconnecting power to the circuit to testing the setup. We’ve explained the importance of understanding the non-sensor switch’s role in the three-way switch setup and provided guidance on how to gather the necessary tools and materials for a successful installation.
By following each step carefully and referring to the manufacturer’s instructions, you can confidently wire the non-sensor switch, identify the common and traveler terminals, and connect the motion detector. Once the setup is complete, restoring power and testing the functionality will ensure that everything is working as intended.
However, it’s essential to prioritize safety throughout the entire process. Always disconnect the power to the circuit before working on any electrical components, and if you have any doubts or concerns, it’s best to consult a licensed electrician for assistance.
With your newly installed three-way switch setup with a motion detector, you can enjoy the convenience of automatic lighting and the added security of motion detection. Whether you’re navigating a dark staircase, entering a room, or enhancing your home’s security, this setup will provide peace of mind and improved functionality.
Thank you for taking the time to follow this guide. We hope it has been informative and helpful in achieving your home security and surveillance goals. Enjoy the enhanced convenience and security that your new setup provides!
Frequently Asked Questions about How To Wire The Non-Sensor Switch In A Three-Way Switch Setup With A Motion Detector
Was this page helpful?
At Storables.com, we guarantee accurate and reliable information. Our content, validated by Expert Board Contributors, is crafted following stringent Editorial Policies. We're committed to providing you with well-researched, expert-backed insights for all your informational needs.