Home>Renovation & DIY>Home Renovation Guides>How To Replace A Kitchen Backsplash
Home Renovation Guides
How To Replace A Kitchen Backsplash
Modified: August 17, 2024
Learn how to replace a kitchen backsplash with our comprehensive home renovation guide. Get expert tips and step-by-step instructions for a successful DIY project.
(Many of the links in this article redirect to a specific reviewed product. Your purchase of these products through affiliate links helps to generate commission for Storables.com, at no extra cost. Learn more)
Introduction
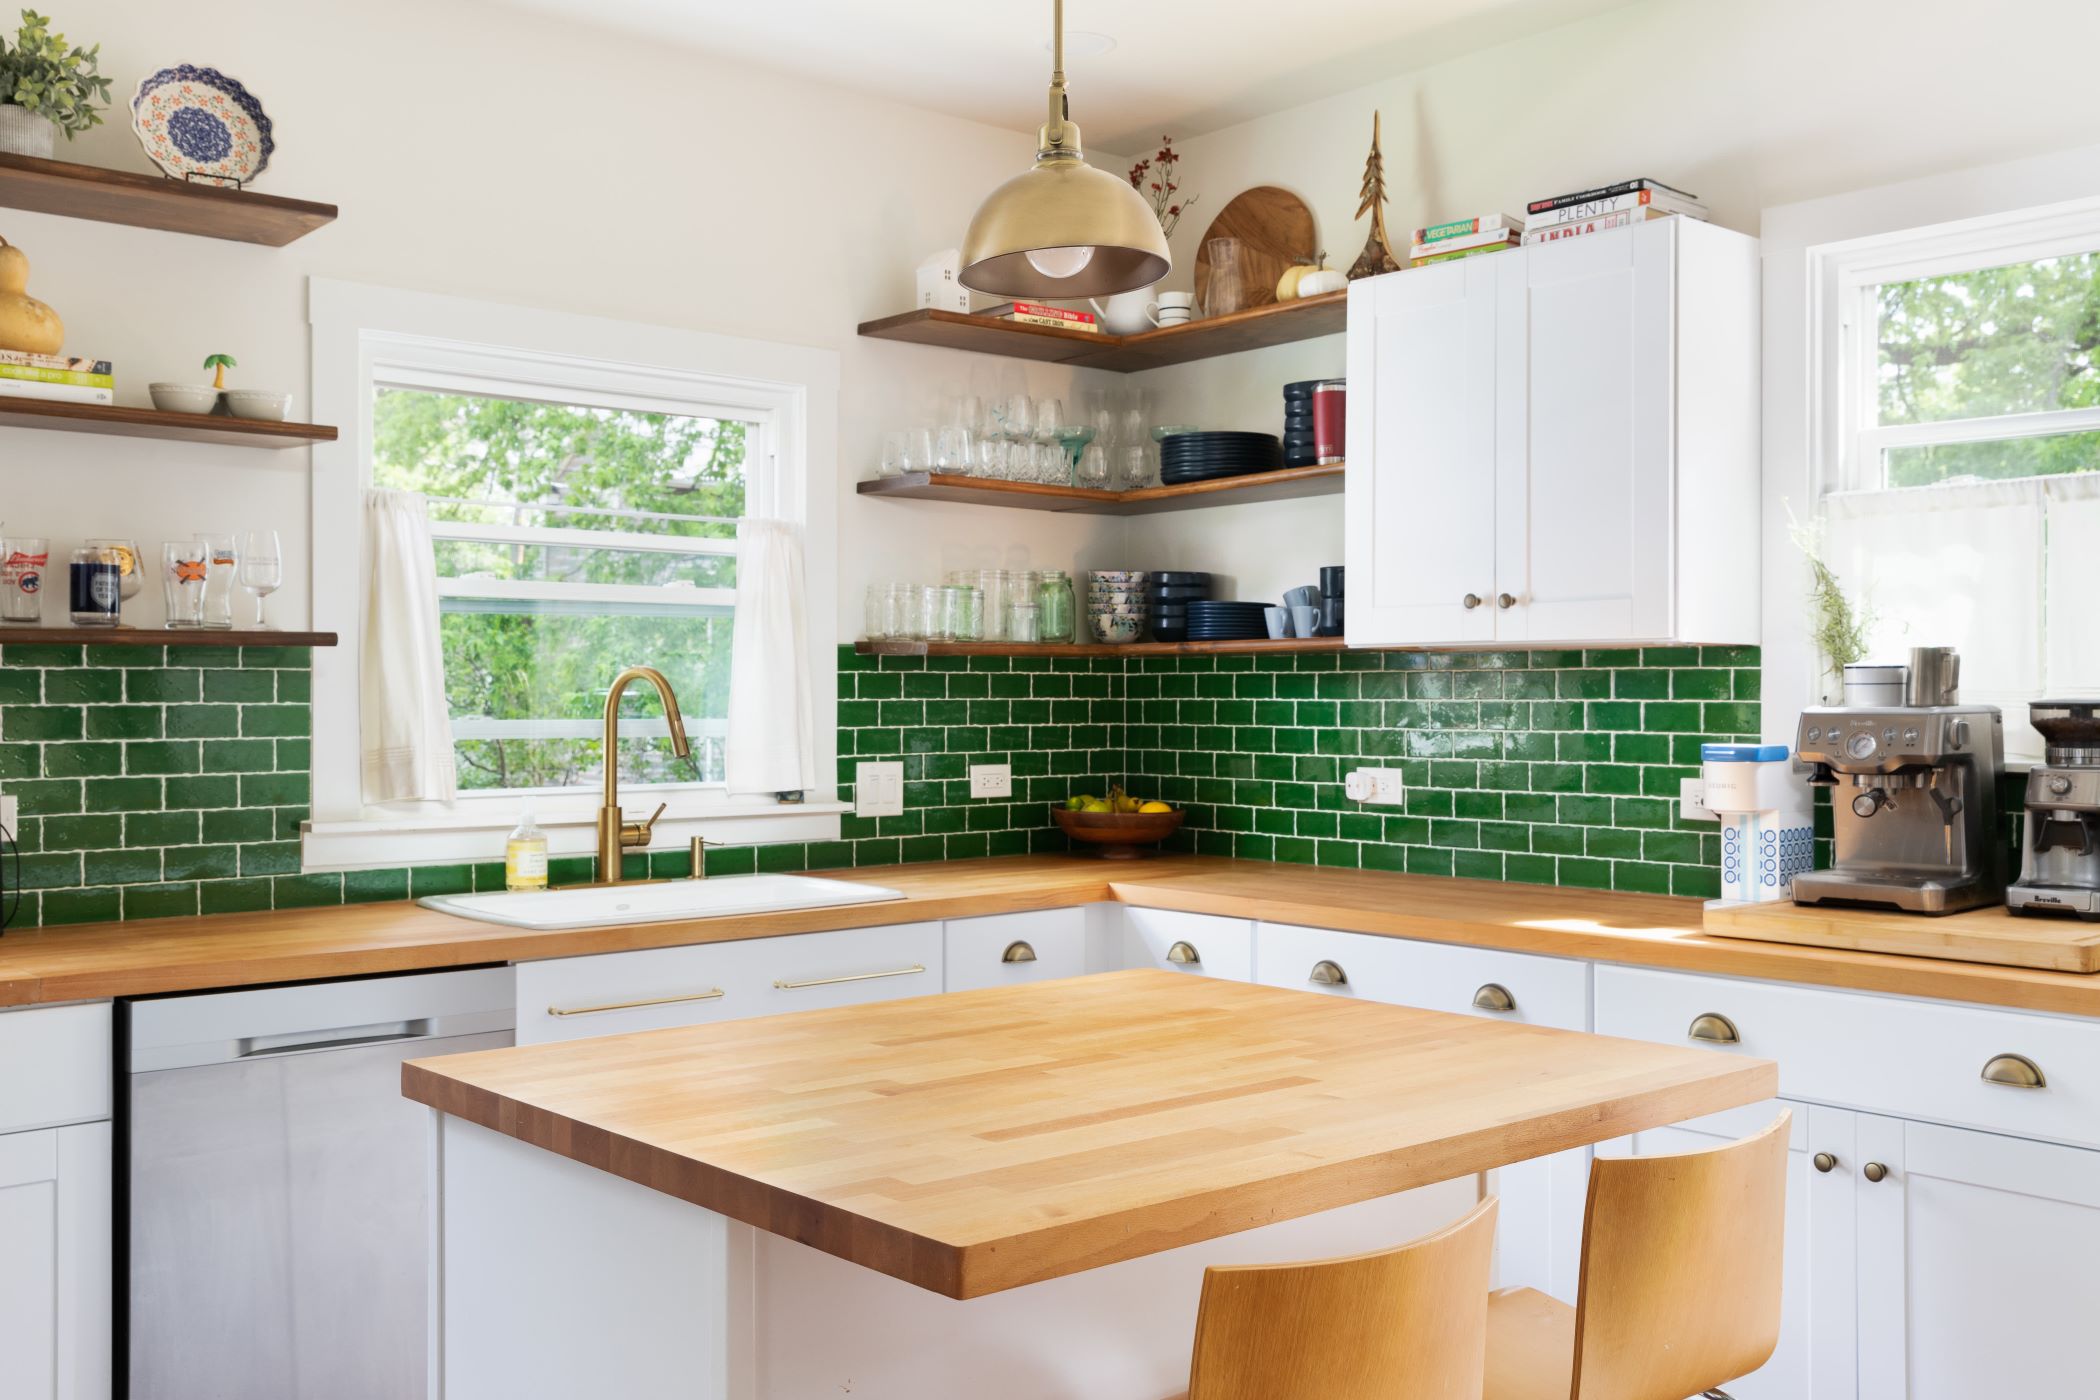
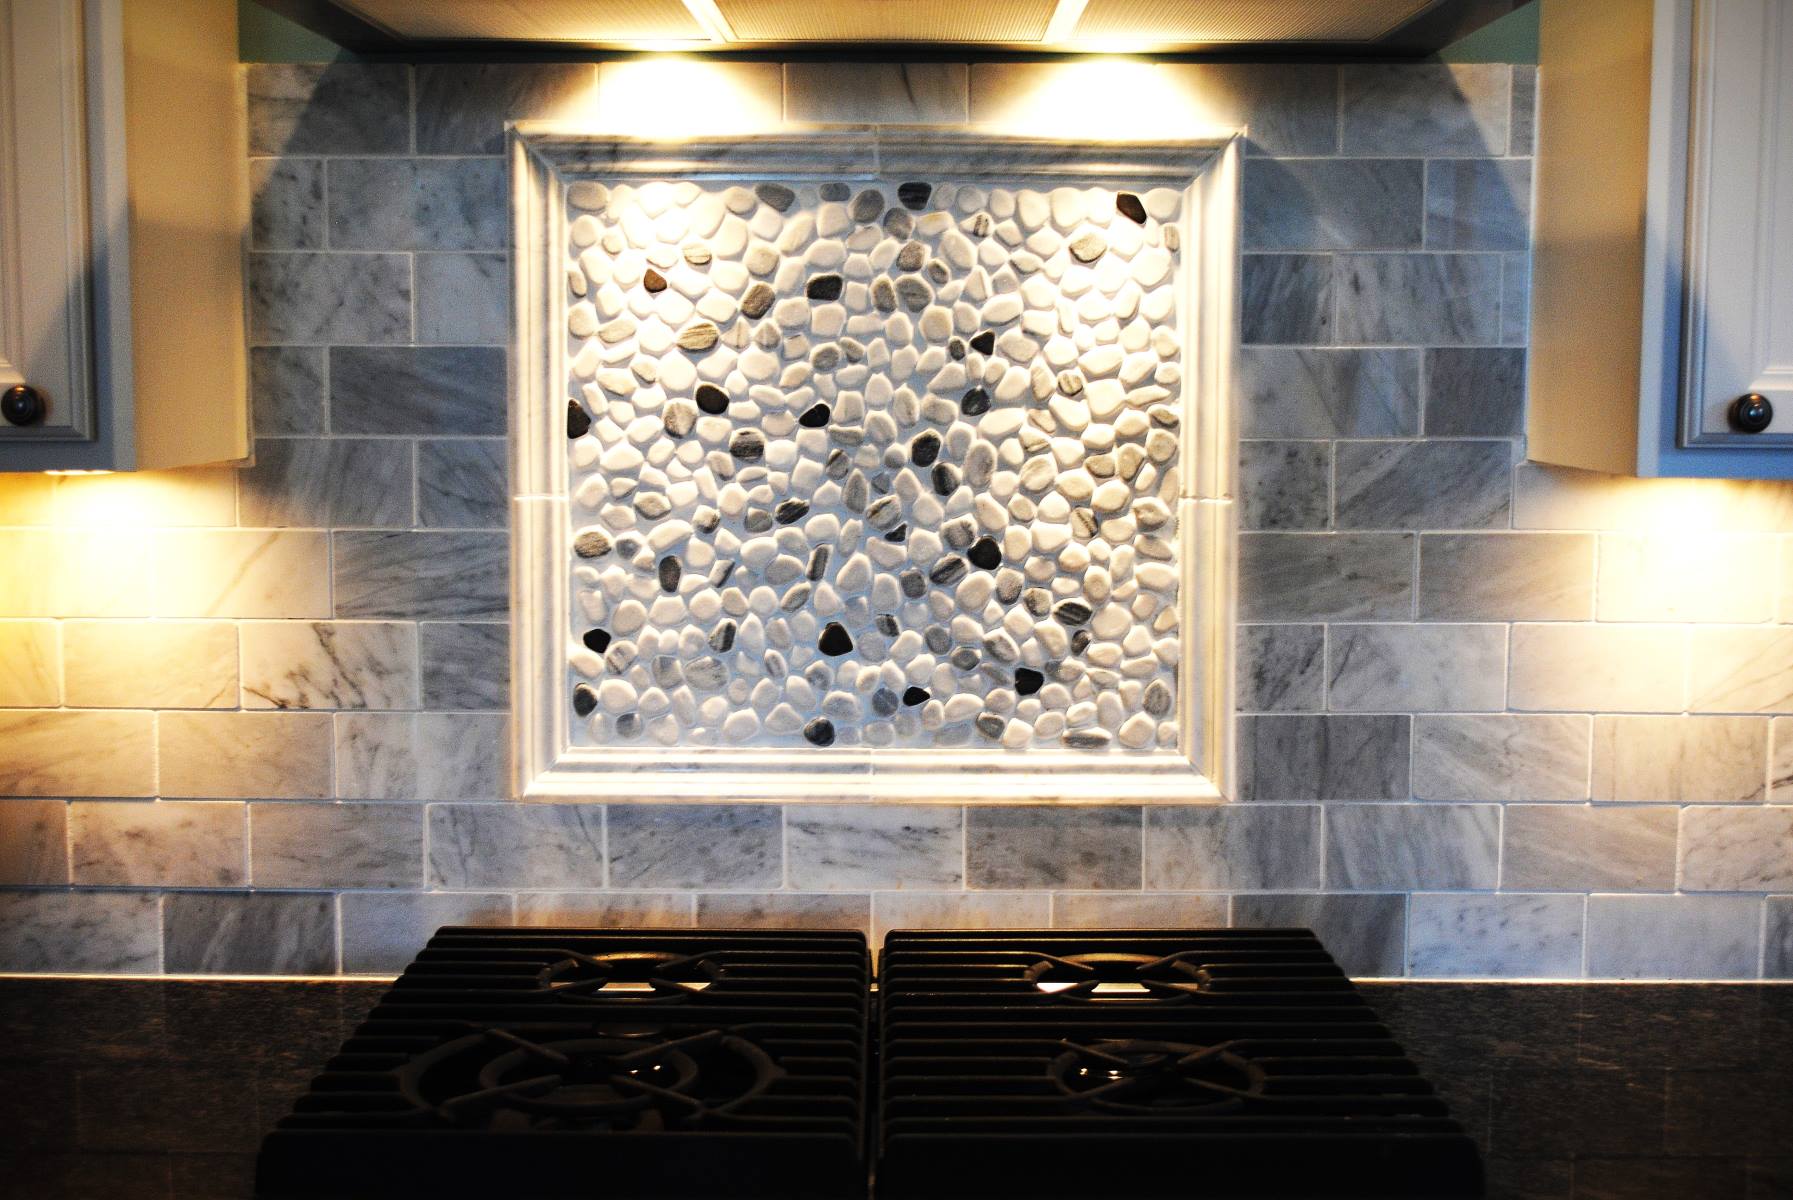
Replacing a kitchen backsplash is a fantastic way to breathe new life into your kitchen space. Whether you're looking to update the style, enhance the functionality, or simply add a fresh touch to your kitchen, a new backsplash can make a significant impact. From classic subway tiles to intricate mosaic designs, the options are endless, allowing you to unleash your creativity and personalize your kitchen to reflect your unique style.
In this comprehensive guide, we will walk you through the step-by-step process of replacing your kitchen backsplash. You'll learn how to gather the necessary materials and tools, remove the old backsplash, prepare the wall surface, install the new backsplash, and finish off the project with grouting and sealing. By following these steps, you can transform your kitchen and create a stunning focal point that ties the entire space together.
Whether you're a seasoned DIY enthusiast or a first-time renovator, this guide is designed to equip you with the knowledge and confidence to tackle this project with ease. With a bit of patience, attention to detail, and the right guidance, you'll be amazed at the difference a new backsplash can make in your kitchen. So, roll up your sleeves, gather your tools, and let's embark on this exciting journey to revitalize your kitchen with a brand-new backsplash!
Key Takeaways:
- Revitalize your kitchen by replacing the backsplash with new tiles. Follow the step-by-step guide to gather materials, remove the old backsplash, prepare the wall, install the new tiles, and finish with grouting and sealing.
- Transform your kitchen with a stunning new backsplash. Gather materials and tools, remove the old backsplash, prepare the wall, install the new tiles, and finish with grouting and sealing for a complete renovation.
Step 1: Gather Materials and Tools
Before diving into the process of replacing your kitchen backsplash, it's essential to gather all the necessary materials and tools. Having everything on hand will streamline the project and ensure a smooth workflow. Here's a comprehensive list of items you'll need:
Materials:
- Backsplash Tiles: Select the type of tiles that best complement your kitchen's style and color scheme. Whether you opt for ceramic, glass, porcelain, or natural stone tiles, ensure that you have enough to cover the entire backsplash area, accounting for any cuts or wastage.
- Grout: Choose a high-quality grout in a color that enhances the overall look of your backsplash. Consider both sanded and unsanded grout options based on the tile material and spacing.
- Adhesive: Invest in a reliable tile adhesive or thin-set mortar to securely affix the tiles to the wall surface.
- Primer: If your wall surface requires priming, ensure you have the appropriate primer to promote strong adhesion.
- Sealer: Depending on the type of tiles you've chosen, you may need a sealant to protect the tiles and grout from moisture and stains.
- Backer Board: If your existing wall surface is not suitable for tiling, consider using a backer board to create a stable and even base for the new backsplash.
Tools:
- Tile Cutter or Wet Saw: To achieve precise cuts on the tiles, a tile cutter or wet saw is indispensable.
- Notched Trowel: This tool is essential for spreading the adhesive evenly on the wall before placing the tiles.
- Grout Float: Use a grout float to apply and pack the grout into the spaces between the tiles, ensuring a uniform and professional finish.
- Level: Maintaining a level surface is crucial during the installation process. A reliable level will help you align the tiles accurately.
- Sponge and Bucket: Keep a sponge and bucket of water nearby to clean off excess grout and adhesive as you work.
- Tile Spacers: These small, cross-shaped plastic pieces are used to maintain consistent spacing between the tiles, ensuring a neat and uniform appearance.
- Safety Gear: Don't forget to prioritize safety by wearing goggles, gloves, and a dust mask, especially when cutting tiles or mixing grout and adhesive.
By gathering these materials and tools, you'll set the stage for a successful backsplash replacement project. With everything at your fingertips, you'll be ready to move on to the next step of removing the old backsplash and preparing the wall surface for the new tiles.
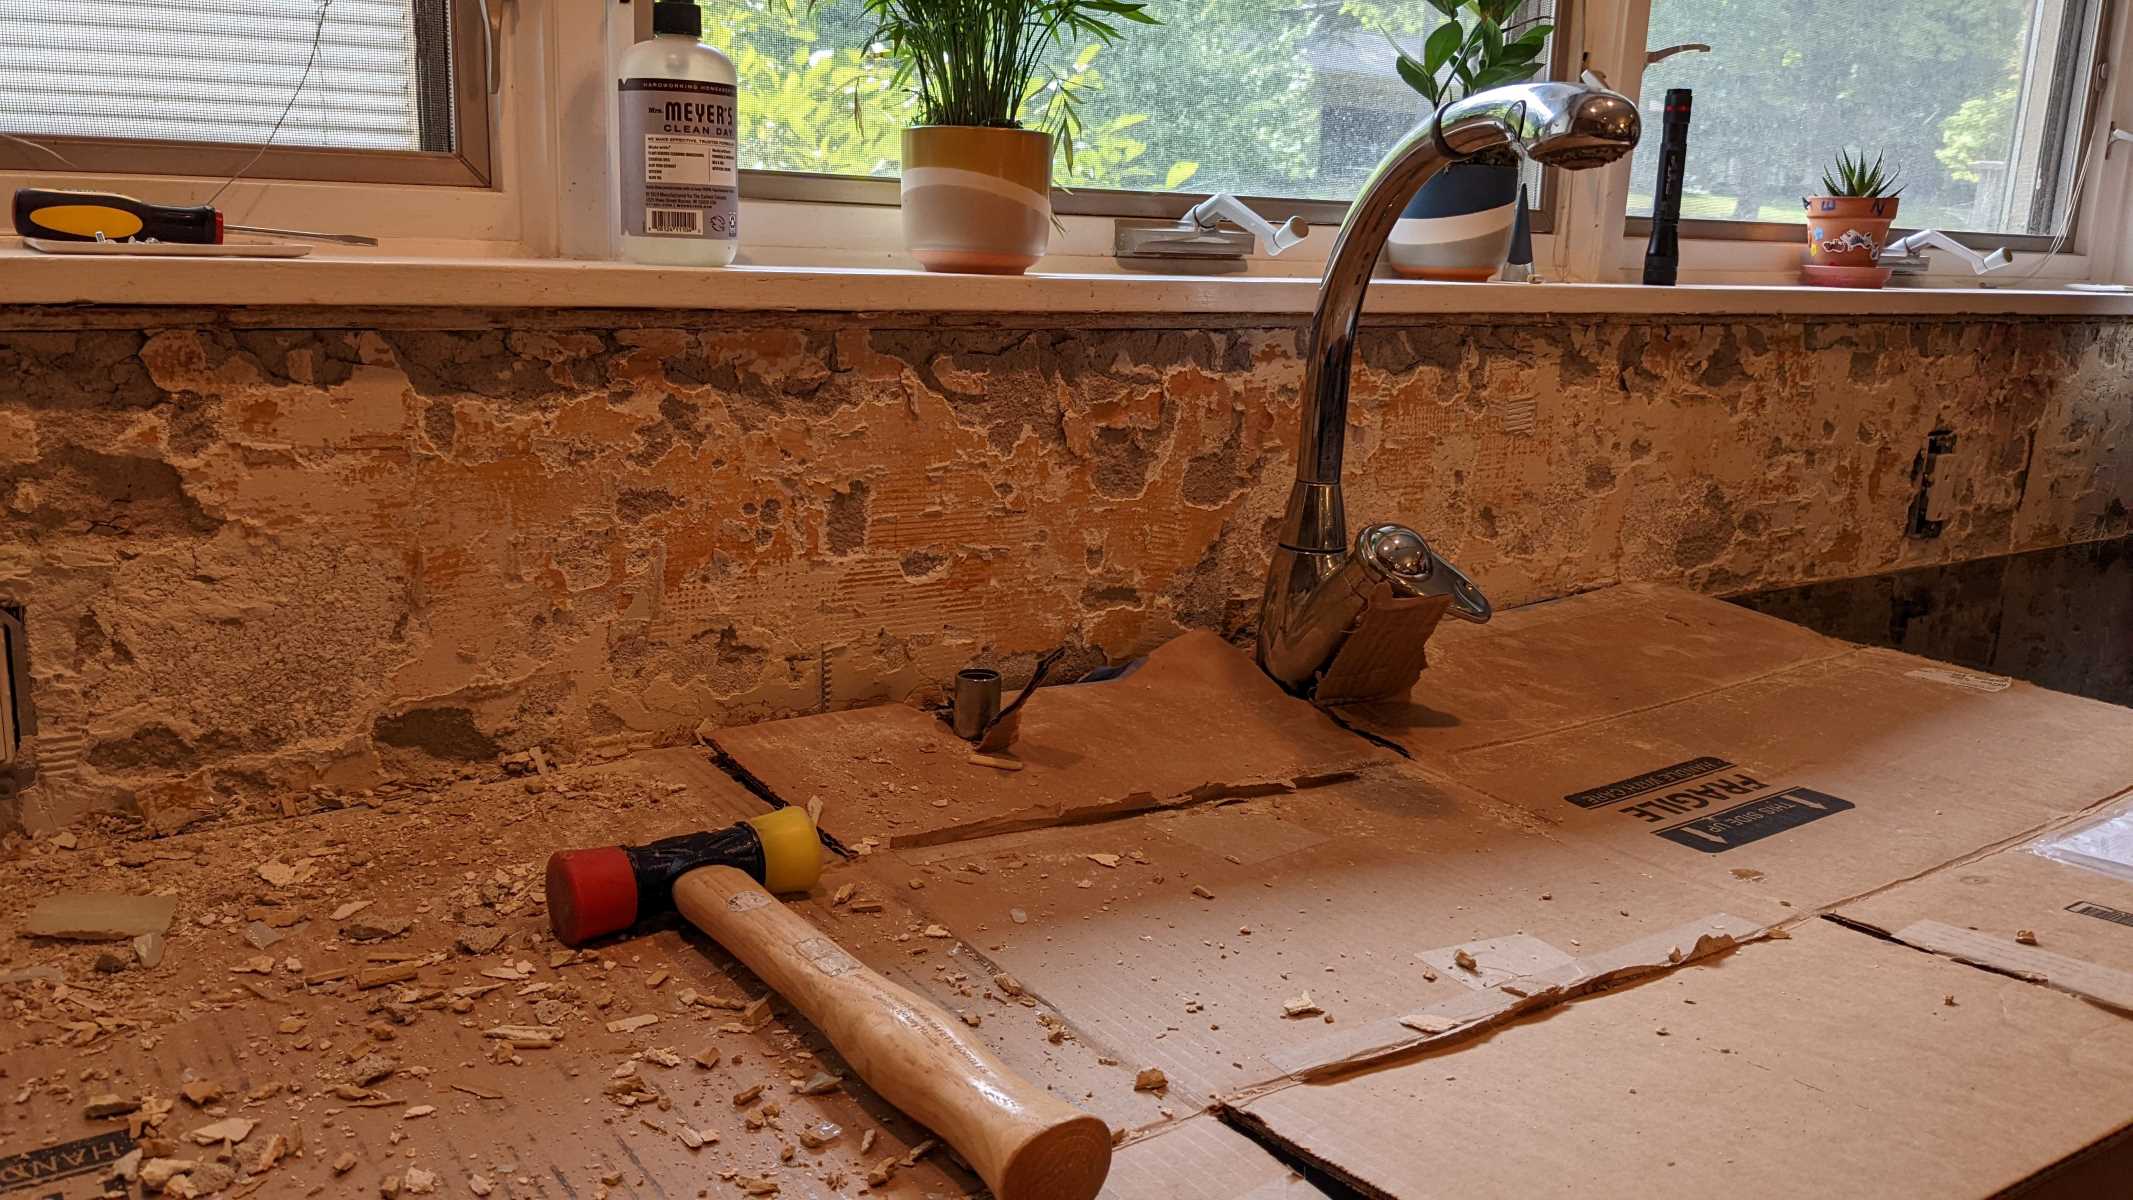
Step 2: Remove the Old Backsplash
Removing the old backsplash is a crucial step in the process of replacing it with a fresh, new design. Whether your existing backsplash is made of ceramic tiles, glass tiles, or any other material, the removal process requires careful attention to avoid damaging the surrounding walls and cabinets. Here's a detailed guide on how to effectively remove the old backsplash:
1. Prepare the Workspace
Before starting the removal process, it's essential to prepare the workspace. Clear the area around the backsplash, removing any small appliances, utensils, or decorative items that could obstruct your work. Protect the countertops and cabinets by covering them with a durable drop cloth or plastic sheeting to prevent any debris or tools from causing damage.
2. Inspect and Test
Carefully inspect the existing backsplash to assess how it was installed. Depending on the method used, the tiles may be adhered with mortar, mastic, or other types of adhesive. Additionally, check for any grout lines that may have weakened over time. It's also a good idea to test a small area by gently tapping the tiles to determine their adhesion and identify any loose or cracked tiles.
3. Remove the Tiles
Using a putty knife or a similar flat tool, carefully pry the tiles away from the wall. Start at a corner or an edge and work methodically to avoid causing unnecessary damage. If the tiles are particularly stubborn, a heat gun or a hairdryer can be used to soften the adhesive, making it easier to remove the tiles without causing excessive force.
4. Address the Adhesive
Once the tiles are removed, you may find residual adhesive or mortar on the wall. Use a putty knife or a scraper to gently remove the remaining adhesive, taking care not to gouge or damage the wall surface. If the adhesive is particularly stubborn, a commercial adhesive remover can be used following the manufacturer's instructions.
5. Clean and Inspect
After removing the tiles and adhesive, thoroughly clean the wall surface to ensure it is free from any debris, adhesive, or dust. Inspect the wall for any signs of damage or uneven areas that may need to be addressed before installing the new backsplash.
By following these steps, you can effectively remove the old backsplash, preparing the wall surface for the installation of the new tiles. Taking the time to complete this process carefully will set the stage for a successful and visually appealing new backsplash in your kitchen.
Step 3: Prepare the Wall Surface
With the old backsplash successfully removed, the next critical step is to prepare the wall surface for the installation of the new backsplash. This preparation process is essential to ensure that the new tiles adhere securely and create a flawless, long-lasting finish. Here's a detailed guide on how to effectively prepare the wall surface:
1. Clean and Repair
Begin by thoroughly cleaning the wall surface to remove any remaining debris, dust, or adhesive residue from the previous backsplash. Use a mild detergent or a specialized wall cleaner to ensure that the surface is free from any contaminants that could hinder the adhesion of the new tiles. Once the wall is clean and dry, inspect it for any signs of damage, such as cracks, dents, or uneven areas. Address any imperfections by filling in cracks with spackling compound and sanding down rough spots to create a smooth and even surface.
2. Apply Primer
If the wall surface is porous or uneven, applying a primer is crucial to promote strong adhesion and prevent the tiles from absorbing moisture from the adhesive. Choose a high-quality primer suitable for the specific wall material, whether it's drywall, plaster, or another type of surface. Using a paint roller or brush, apply a thin, even coat of primer to the entire backsplash area and allow it to dry completely as per the manufacturer's instructions.
3. Measure and Plan
Before applying the adhesive and installing the new tiles, take precise measurements of the backsplash area to determine the layout and ensure a symmetrical and visually appealing result. Use a level and a straight edge to mark guidelines for the tile placement, taking into account any design considerations such as borders, patterns, or focal points. Planning the layout in advance will help you avoid potential issues and ensure a professional-looking finish.
4. Protect Surrounding Areas
To prevent any accidental damage or mess during the installation process, protect the surrounding areas by covering countertops, cabinets, and appliances with a durable drop cloth or plastic sheeting. This precaution will safeguard your kitchen from adhesive spills, grout splatter, and any other potential mishaps, allowing you to focus on the task at hand without worrying about unintended consequences.
By meticulously preparing the wall surface, you'll create an ideal foundation for the new backsplash, setting the stage for a seamless and visually stunning installation. Taking the time to complete this step with precision and attention to detail will ensure that your new backsplash not only enhances the aesthetic appeal of your kitchen but also stands the test of time with durability and resilience.
Step 4: Install the New Backsplash
With the wall surface meticulously prepared, it's time to embark on the exciting phase of installing the new backsplash. This step involves carefully affixing the tiles to the wall, ensuring precise placement and a secure bond that will result in a visually captivating and long-lasting finish. Here's a detailed guide on how to effectively install the new backsplash:
1. Apply the Adhesive
Using a notched trowel, spread a thin, even layer of tile adhesive or thin-set mortar onto the prepared wall surface. Work in small sections to prevent the adhesive from drying out before the tiles are placed. The notches on the trowel will create ridges in the adhesive, promoting strong adhesion and ensuring that the tiles are securely bonded to the wall.
2. Place the Tiles
Carefully press the tiles into the adhesive, following the layout plan you established during the preparation phase. Use tile spacers to maintain consistent spacing between the tiles, ensuring a uniform and professional-looking result. As you progress, periodically use a level to confirm that the tiles are aligned correctly and adjust them as needed to maintain a straight and even surface.
3. Cut and Trim
For areas that require smaller or irregularly shaped tiles, use a tile cutter or wet saw to achieve precise cuts. Measure and mark the tiles accurately before cutting to ensure a seamless fit. Pay close attention to corners, edges, and any obstacles such as electrical outlets or switches, taking the necessary precautions to create a polished and tailored appearance.
4. Allow for Setting
Once all the tiles are in place, allow the adhesive to set and cure according to the manufacturer's instructions. This crucial waiting period ensures that the tiles adhere firmly to the wall, creating a stable and durable backsplash that will withstand daily use and cleaning.
5. Remove Spacers and Clean
After the adhesive has set, carefully remove the tile spacers, leaving behind clean and uniform grout lines. Use a damp sponge to wipe away any excess adhesive or debris from the tile surfaces, ensuring that the tiles are free from any blemishes or residue.
By following these steps with precision and attention to detail, you'll successfully install the new backsplash, transforming your kitchen with a stunning focal point that reflects your unique style and enhances the overall aesthetic of the space. With the tiles securely in place, the next step involves grouting and sealing the backsplash to complete the project with finesse and durability.
Step 5: Grout and Seal the Backsplash
With the new tiles securely in place, the final steps of grouting and sealing the backsplash are essential to complete the installation process and ensure a polished, durable finish. Grout not only fills the gaps between the tiles but also enhances the overall appearance of the backsplash, while sealing protects the grout and tiles from moisture and stains. Here's a detailed guide on how to effectively grout and seal the backsplash:
1. Choose the Right Grout
Select a high-quality grout that complements the color and style of your tiles. Consider factors such as sanded or unsanded grout, depending on the width of the grout lines and the type of tiles used. Ensure that the grout color enhances the overall aesthetic of the backsplash, whether you prefer a seamless blend or a contrasting effect.
2. Apply the Grout
Using a rubber grout float, apply the grout diagonally across the tiles, ensuring that the grout lines are completely filled. Work in small sections, holding the float at a 45-degree angle to the tiles to pack the grout firmly into the spaces. Avoid leaving any gaps or air pockets within the grout lines, as thorough and even application is crucial for a professional-looking result.
3. Clean Excess Grout
After applying the grout, use a damp sponge to gently wipe away the excess grout from the tile surfaces. Rinse the sponge frequently and continue to clean the tiles, ensuring that the grout lines are neatly defined and free from any residue. Take care not to remove grout from the spaces between the tiles, focusing on achieving a clean and uniform appearance.
4. Allow the Grout to Cure
Allow the grout to cure for the recommended time specified by the manufacturer. This curing period is essential for the grout to set and achieve its full strength. Avoid exposing the grout to moisture or heavy use during this time to ensure a durable and long-lasting finish.
5. Seal the Grout and Tiles
Once the grout has fully cured, apply a high-quality grout sealer to protect the grout from moisture, stains, and discoloration. Additionally, if your tiles require sealing, choose a suitable sealant based on the tile material to safeguard them from potential damage. Follow the manufacturer's instructions for both the grout sealer and tile sealant to ensure thorough and effective protection.
By meticulously grouting and sealing the backsplash, you'll not only enhance its visual appeal but also ensure its resilience and longevity. With the grout lines neatly defined and the tiles protected, your new backsplash will stand as a stunning and functional centerpiece in your kitchen, reflecting your unique style and attention to detail.
Conclusion
Congratulations on successfully completing the installation of your new kitchen backsplash! By following the step-by-step process outlined in this guide, you've not only transformed the aesthetic appeal of your kitchen but also demonstrated your ability to tackle a rewarding home renovation project with confidence and precision.
As you stand back and admire the stunning new focal point in your kitchen, it's important to reflect on the journey you've undertaken. From carefully selecting the perfect tiles and gathering the necessary materials and tools to meticulously removing the old backsplash, preparing the wall surface, and skillfully installing and grouting the new tiles, each step has contributed to the creation of a space that reflects your unique style and attention to detail.
The new backsplash serves as more than just a decorative element; it's a testament to your dedication to enhancing your living environment. Its functionality goes hand in hand with its visual appeal, providing a protective barrier against moisture and stains while serving as a captivating backdrop that ties the entire kitchen together.
As you revel in the satisfaction of a job well done, take a moment to appreciate the newfound vibrancy and personality that the new backsplash has brought to your kitchen. Whether you opted for classic subway tiles, intricate mosaic designs, or bold, modern patterns, the backsplash stands as a reflection of your taste and creativity, adding depth and character to the heart of your home.
Furthermore, the skills and knowledge you've gained throughout this process are invaluable. You've honed your ability to plan, execute, and complete a significant home improvement project, setting a precedent for future endeavors and instilling a sense of accomplishment that resonates every time you step into your revitalized kitchen.
As you move forward, remember that the journey doesn't end with the completion of this project. Your newly acquired expertise and confidence can be applied to future renovations, empowering you to continue enhancing your living space with creativity and flair.
So, take a moment to bask in the satisfaction of a job well done, knowing that your efforts have not only revitalized your kitchen but also enriched your own skills and capabilities as a homeowner and DIY enthusiast. Your new backsplash stands as a testament to your dedication, creativity, and the transformative power of a well-executed home renovation project.
Frequently Asked Questions about How To Replace A Kitchen Backsplash
Was this page helpful?
At Storables.com, we guarantee accurate and reliable information. Our content, validated by Expert Board Contributors, is crafted following stringent Editorial Policies. We're committed to providing you with well-researched, expert-backed insights for all your informational needs.


0 thoughts on “How To Replace A Kitchen Backsplash”