Home>Technology>Smart Home Devices>Canon Ivy Printer: How To Use
Smart Home Devices
Canon Ivy Printer: How To Use
Modified: February 18, 2024
Learn how to use the Canon Ivy Printer with your smart home devices. Discover tips and tricks for seamless integration and effortless printing. Unlock the full potential of your smart home setup today!
(Many of the links in this article redirect to a specific reviewed product. Your purchase of these products through affiliate links helps to generate commission for Storables.com, at no extra cost. Learn more)
Introduction
Welcome to the world of portable printing with the Canon Ivy Printer! This innovative device allows you to effortlessly print your favorite photos anytime, anywhere. Whether you're capturing precious moments with friends and family or creating tangible memories from your travels, the Canon Ivy Printer is a compact and convenient solution for bringing your digital snapshots to life.
In this comprehensive guide, we'll explore the various aspects of using the Canon Ivy Printer, from unboxing and charging the device to connecting it to your smartphone and printing your cherished photographs. Additionally, we'll delve into troubleshooting common issues to ensure that your printing experience is smooth and seamless.
The Canon Ivy Printer is designed to cater to the needs of modern-day photography enthusiasts who value portability, ease of use, and the ability to transform digital images into physical keepsakes. With its sleek and compact design, this pocket-sized printer is a perfect companion for on-the-go printing, allowing you to share memories with friends or decorate your space with personalized photo prints.
Whether you're a seasoned photographer or someone who simply appreciates the art of preserving memories, the Canon Ivy Printer offers a user-friendly and enjoyable printing experience. By following the steps outlined in this guide, you'll be well-equipped to make the most of this cutting-edge printing device and infuse your world with the joy of instant, tangible photography.
Now, let's embark on this exciting journey of discovery and learn how to unleash the full potential of the Canon Ivy Printer. From unboxing to troubleshooting, we've got you covered every step of the way. Get ready to unlock the power of portable printing and elevate your photography experience with the Canon Ivy Printer!
Key Takeaways:
- Unbox, charge, connect, and print! The Canon Ivy Printer brings digital memories to life with vibrant, high-quality prints. Its compact design and user-friendly app make on-the-go printing a breeze.
- Troubleshoot with ease! Resolve common issues like connectivity, print quality, power, and paper handling to ensure seamless and delightful printing experiences. The Canon Ivy Printer is your gateway to instant, personalized photography.
Read more: How To Turn On A Canon Printer
Unboxing the Canon Ivy Printer
Unveiling the Canon Ivy Printer is an exciting moment that marks the beginning of your journey into portable printing. The compact and elegantly designed packaging of the printer reflects the innovation and sophistication that await you within. Let’s dive into the unboxing process and discover what’s included in the Canon Ivy Printer package.
What’s in the Box
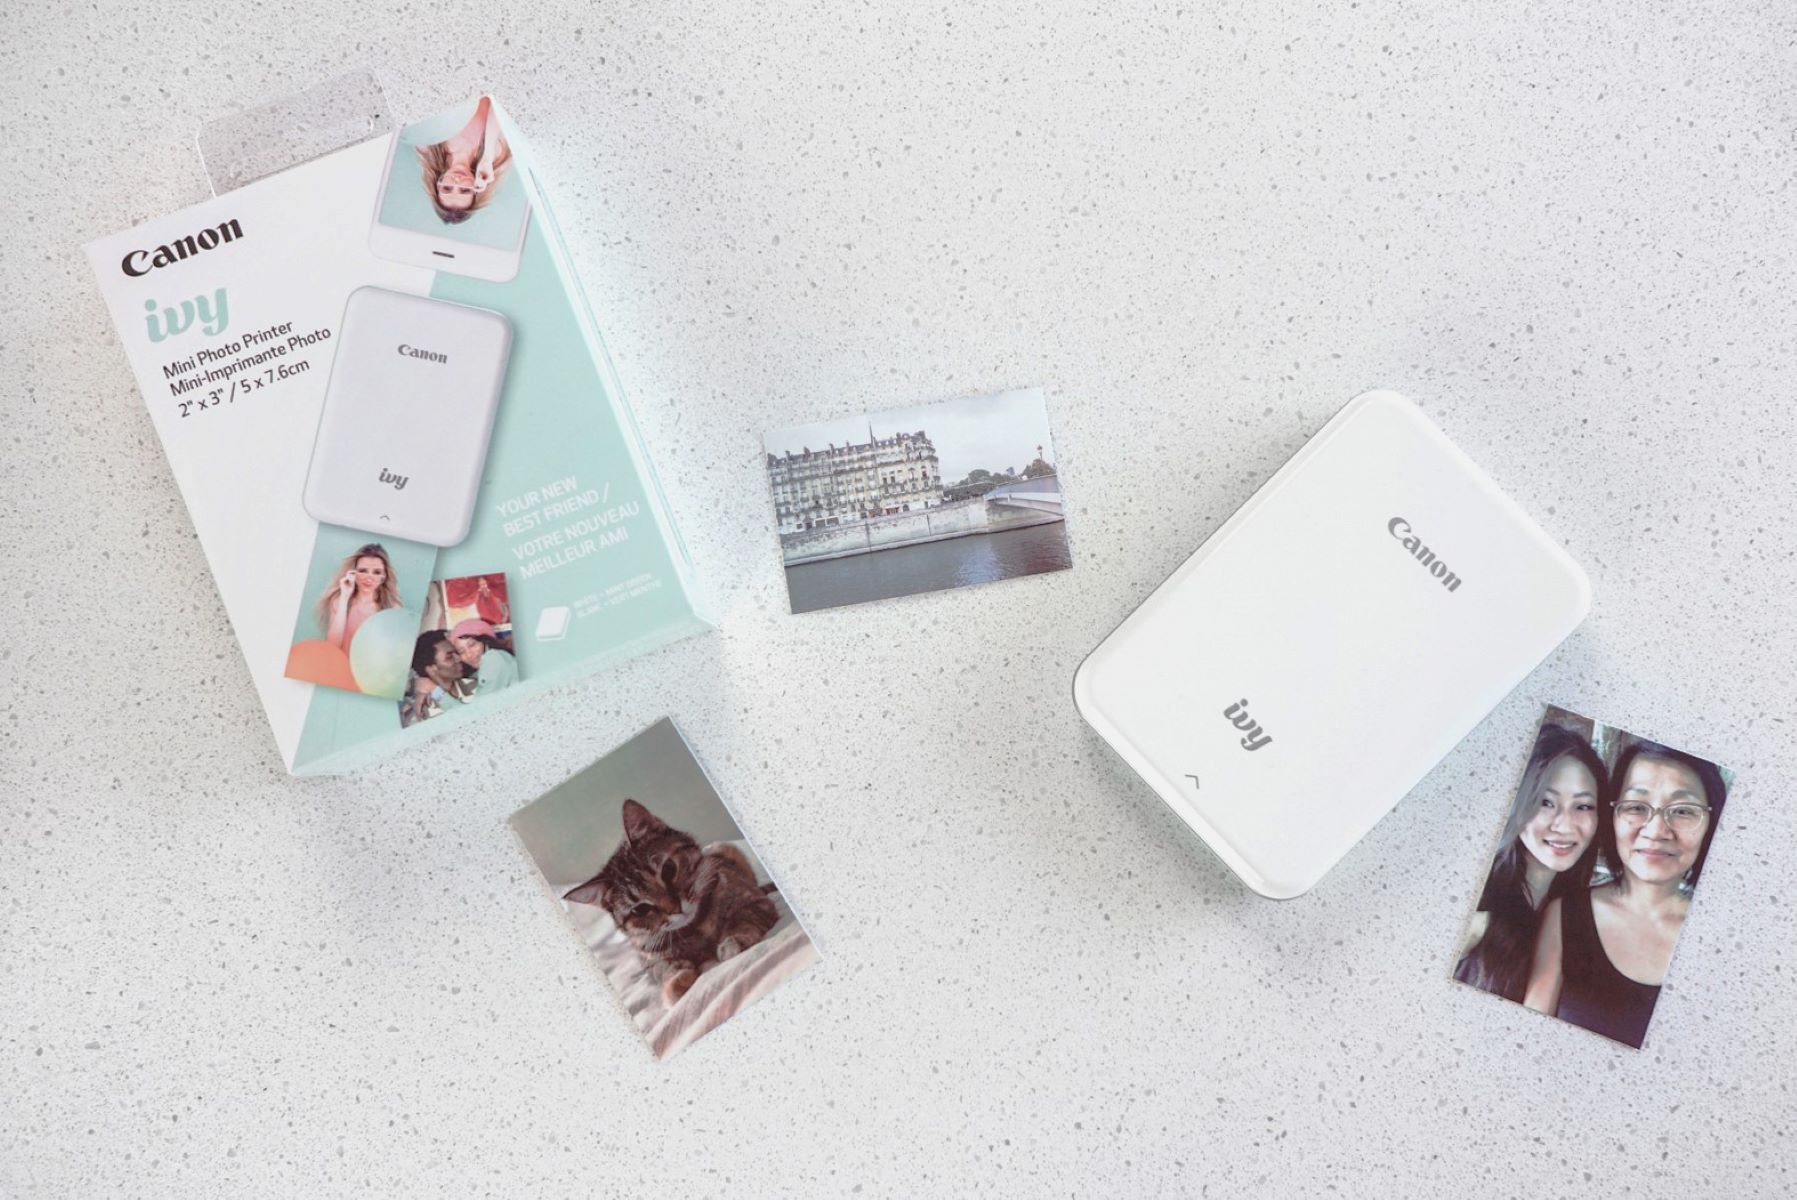
Upon opening the Canon Ivy Printer package, you’ll be greeted by a carefully curated selection of items that are essential for getting started with your portable printing adventure. The contents typically include:
- The Canon Ivy Printer: This sleek and compact printer is the heart of the package, boasting a stylish design that embodies modern printing technology.
- A Starter Pack of ZINK Photo Paper: The package usually includes a starter pack of ZINK photo paper, which is specially designed for use with the Canon Ivy Printer. This high-quality paper ensures that your printed photos are vibrant, smudge-proof, and long-lasting.
- A Micro USB Cable: To power up your Canon Ivy Printer and keep it charged, a micro USB cable is provided for convenient connectivity.
- A Quick Start Guide: The package contains a quick start guide that offers clear and concise instructions for setting up and using the Canon Ivy Printer. This guide is your go-to resource for getting started with your new device.
- Warranty Information: In addition to the above items, the package may include warranty information and important documentation to ensure that you have access to support and assistance if needed.
The Unboxing Experience
As you carefully unpack each item from the Canon Ivy Printer package, you’ll appreciate the attention to detail and thoughtful design that Canon has put into the presentation. The compact size of the printer and its accompanying accessories reflects the device’s portability and user-friendly nature.
Once you’ve unboxed the Canon Ivy Printer and familiarized yourself with its contents, you’re ready to embark on the next steps of setting up and using this remarkable portable printing device. With the essentials in hand, you’re well-equipped to delve into the world of instant, on-the-go photo printing.
Now that you’ve unboxed the Canon Ivy Printer and have a clear understanding of what’s included, it’s time to move on to the next phase: charging the printer and preparing it for seamless connectivity with your smartphone or tablet. Get ready to power up your Canon Ivy Printer and unlock its full potential!
Charging the Canon Ivy Printer
Before you can begin printing your favorite photos with the Canon Ivy Printer, it’s essential to ensure that the device is adequately charged. The process of charging the printer is straightforward and sets the stage for seamless printing experiences on the go. Let’s explore the steps involved in charging your Canon Ivy Printer and preparing it for photo printing adventures.
Read more: How To Fax On A Canon Printer
Charging Essentials
When it comes to charging the Canon Ivy Printer, you’ll need to have the following items readily available:
- Canon Ivy Printer: The compact and portable printer itself is the centerpiece of the charging process.
- Micro USB Cable: The included micro USB cable serves as the means of connecting the printer to a power source for charging.
- Power Source: You’ll need access to a power source, such as a USB port on a computer, a USB wall adapter, or a portable power bank, to facilitate the charging process.
The Charging Process
To charge the Canon Ivy Printer, follow these simple steps:
- Locate the Micro USB Port: On the Canon Ivy Printer, locate the micro USB port, which is typically situated on the side or rear of the device. This is where you’ll connect the micro USB cable for charging.
- Connect the Micro USB Cable: Take the micro USB cable and connect one end to the micro USB port on the Canon Ivy Printer. Ensure that the connection is secure to facilitate uninterrupted charging.
- Connect to Power Source: With the micro USB cable attached to the printer, connect the other end of the cable to a power source. This can be a USB port on a computer, a USB wall adapter, or a portable power bank. Once connected, the charging process will commence.
- Monitor the Charging Status: While the Canon Ivy Printer is charging, you can monitor the status of the process through the printer’s indicator lights or the accompanying mobile app, if applicable. The indicator lights may illuminate or flash to indicate the charging status.
- Complete the Charging Process: Allow the Canon Ivy Printer to charge until it reaches full capacity. The time required for a full charge may vary, but once the charging process is complete, you’ll be ready to disconnect the printer from the power source and begin using it for photo printing.
By following these steps, you can ensure that your Canon Ivy Printer is powered up and ready to bring your digital memories to life through vibrant and high-quality photo prints. With the printer fully charged, you’re now prepared to explore the next phase of the printing process: connecting the Canon Ivy Printer to your smartphone or tablet for seamless photo printing experiences.
With the Canon Ivy Printer charged and ready for action, you’re one step closer to immersing yourself in the joy of on-the-go photo printing. Get ready to unleash your creativity and transform your digital snapshots into tangible keepsakes with the power of the Canon Ivy Printer!
Connecting the Canon Ivy Printer to Your Device
Seamless connectivity is at the heart of the Canon Ivy Printer experience, allowing you to effortlessly print your cherished photos directly from your smartphone or tablet. By establishing a connection between the printer and your device, you can unleash the power of portable printing and bring your digital memories to life in the form of vibrant, high-quality photo prints. Let’s explore the process of connecting the Canon Ivy Printer to your device and setting the stage for on-the-go photo printing adventures.
Prerequisites for Connectivity
Before initiating the connection process, ensure that you have the following essentials at your disposal:
- Canon Ivy Printer: The compact and portable printer is the centerpiece of the connectivity process.
- Smartphone or Tablet: Ensure that your smartphone or tablet is powered on and within close proximity to the Canon Ivy Printer. The printer is compatible with both iOS and Android devices, making it versatile and accessible for a wide range of users.
- Canon Mini Print App: Download and install the Canon Mini Print app on your smartphone or tablet from the App Store (for iOS devices) or Google Play Store (for Android devices). This app serves as the bridge between your device and the Canon Ivy Printer, enabling seamless photo printing experiences.
- Bluetooth Connectivity: The Canon Ivy Printer utilizes Bluetooth technology to establish a wireless connection with your smartphone or tablet. Ensure that Bluetooth is enabled on your device to facilitate the pairing process.
Read more: How To Calibrate Canon Printer
Establishing the Connection
To connect the Canon Ivy Printer to your device, follow these simple steps:
- Power On the Canon Ivy Printer: Ensure that the Canon Ivy Printer is powered on and in a ready state for connectivity. The printer’s indicator lights may provide visual cues to indicate its readiness for pairing.
- Launch the Canon Mini Print App: Open the Canon Mini Print app on your smartphone or tablet. Upon launching the app, it will prompt you to begin the pairing process with the Canon Ivy Printer.
- Enable Bluetooth on Your Device: If Bluetooth is not already enabled on your device, activate it through the settings menu. This will allow the Canon Mini Print app to detect and connect to the Canon Ivy Printer.
- Select the Canon Ivy Printer: Within the Canon Mini Print app, select the option to add or connect a printer. The app will scan for available printers, and the Canon Ivy Printer should appear in the list of detected devices.
- Pair the Devices: Once the Canon Ivy Printer is detected, initiate the pairing process within the Canon Mini Print app. Follow the on-screen prompts to establish a secure and seamless Bluetooth connection between the printer and your device.
- Confirmation and Ready to Print: Upon successful pairing, the Canon Mini Print app will display a confirmation message, indicating that the Canon Ivy Printer is now connected to your device. You’re now ready to start printing your favorite photos using the Canon Ivy Printer.
With the Canon Ivy Printer successfully connected to your device, you’ve unlocked the potential for instant and on-the-go photo printing. The seamless connectivity between the printer and your smartphone or tablet empowers you to bring your digital memories to life in the form of vibrant and tangible photo prints. Now that your Canon Ivy Printer is paired with your device, it’s time to explore the next phase of the printing process: using the Canon Mini Print app to transform your digital snapshots into personalized photo prints.
By following the steps outlined above, you can ensure that the Canon Ivy Printer is seamlessly connected to your device, ready to embark on a journey of creative and memorable photo printing experiences. Get ready to infuse your world with the joy of instant photography and personalized photo prints, courtesy of the Canon Ivy Printer!
Using the Canon Mini Print App
The Canon Mini Print app serves as the gateway to a world of creative possibilities, allowing you to transform your digital snapshots into personalized photo prints with ease and convenience. By leveraging the features and functionalities of this intuitive app, you can unleash your creativity and bring your favorite memories to life in the form of vibrant and high-quality prints. Let’s delve into the process of using the Canon Mini Print app to enhance and personalize your photo printing experiences with the Canon Ivy Printer.
Exploring the Features
Upon launching the Canon Mini Print app on your smartphone or tablet, you’ll discover a range of features designed to elevate your printing endeavors:
- Photo Selection: The app allows you to choose photos from your device’s gallery or social media accounts, giving you the flexibility to select and print your favorite snapshots.
- Photo Customization: With the Canon Mini Print app, you can personalize your photos by adding filters, frames, text, stickers, and creative effects. This feature enables you to infuse your prints with a touch of individuality and creativity.
- Collage Creation: Create captivating photo collages by combining multiple images into a single print. The app offers intuitive tools for arranging and customizing collage layouts, allowing you to craft visually stunning compositions.
- Printing Control: Through the Canon Mini Print app, you have precise control over the printing process. You can adjust settings such as paper type, print quality, and the number of copies, ensuring that each print meets your exact specifications.
- AR Live Filters: The app features augmented reality (AR) live filters that add an interactive and dynamic element to your photo printing experiences. Explore a variety of AR filters to enhance your photos with captivating visual effects.
Printing Process
Once you’ve selected and customized your desired photos within the Canon Mini Print app, the printing process is straightforward and seamless:
- Select Photos for Printing: Choose the photos you wish to print from your device’s gallery or social media accounts within the Canon Mini Print app. Apply customizations and enhancements to personalize your prints according to your preferences.
- Adjust Printing Settings: Fine-tune the printing settings to ensure that the output meets your exact specifications. This includes selecting the paper type, print quality, and the number of copies to be printed.
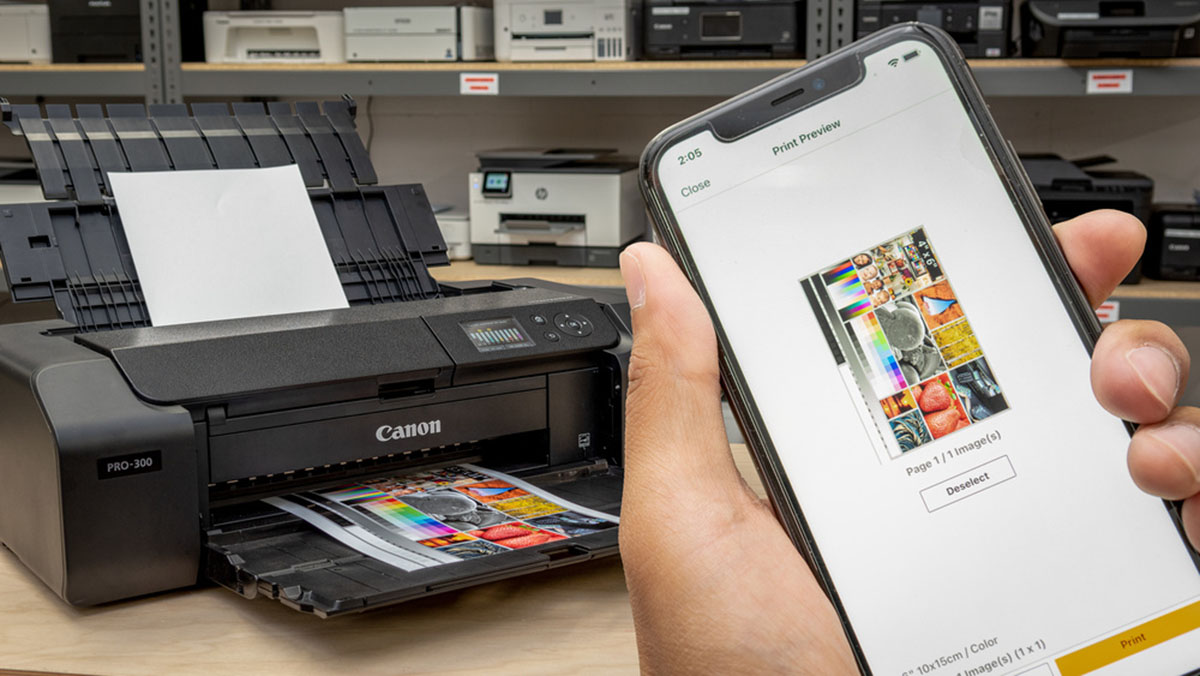
- Preview and Confirm: Review a preview of your customized prints within the app to ensure that everything looks perfect. Once you’re satisfied with the preview, confirm the printing settings and proceed to initiate the printing process.
- Print Wirelessly to the Canon Ivy Printer: With the printing settings confirmed, initiate the wireless printing process from the Canon Mini Print app. The app will communicate with the paired Canon Ivy Printer, sending the print job wirelessly for seamless and efficient printing.
- Enjoy Your Personalized Prints: Once the printing process is complete, collect your vibrant and personalized photo prints from the Canon Ivy Printer. Your digital memories have now been transformed into tangible keepsakes, ready to be shared and cherished.
By leveraging the intuitive features and functionalities of the Canon Mini Print app, you can elevate your photo printing experiences and infuse your prints with a touch of creativity and personalization. Whether you’re creating vibrant single prints or captivating photo collages, the app empowers you to unleash your creativity and bring your digital memories to life in a tangible and meaningful way.
With the Canon Mini Print app as your creative companion, you’re equipped to embark on a journey of personalized photo printing experiences, transforming your digital snapshots into cherished keepsakes with the power of the Canon Ivy Printer. Get ready to explore the endless possibilities of on-the-go photo printing and infuse your world with the joy of instant, personalized photography!
Read more: How To Fix A Canon Printer
Printing Photos with the Canon Ivy Printer
Printing your cherished photos with the Canon Ivy Printer is a seamless and enjoyable process that allows you to transform your digital memories into vibrant and tangible prints. Whether you’re capturing candid moments with friends, documenting scenic landscapes, or preserving special occasions, the Canon Ivy Printer empowers you to bring your favorite snapshots to life with ease. Let’s explore the steps involved in printing photos with the Canon Ivy Printer and witness the magic of instant, on-the-go photo printing.
Preparing for Printing
Prior to initiating the printing process, ensure that you have the following essentials in place:
- Charged Canon Ivy Printer: Ensure that the printer is adequately charged and in a ready state for printing. A fully charged printer enables uninterrupted printing experiences, allowing you to bring your digital memories to life without delay.
- Connected Device: Your smartphone or tablet should be securely connected to the Canon Ivy Printer through the Canon Mini Print app. This ensures seamless communication between your device and the printer, facilitating the wireless printing process.
- Selected Photos: Within the Canon Mini Print app, choose the photos you wish to print and apply any desired customizations, such as filters, frames, text, or stickers, to infuse your prints with personal touches.
- ZINK Photo Paper: Load the Canon Ivy Printer with ZINK photo paper, ensuring that the paper tray is stocked with the necessary supplies for producing vibrant and smudge-proof prints.
Initiating the Printing Process
Once you’re prepared to print your selected photos, follow these simple steps to initiate the printing process:
- Confirm Printing Settings: Within the Canon Mini Print app, review the printing settings to ensure that they align with your preferences. This includes selecting the print quality, paper type, and the number of copies to be printed.
- Initiate Wireless Printing: With the printing settings confirmed, initiate the wireless printing process from the Canon Mini Print app. The app will communicate with the paired Canon Ivy Printer, sending the print job wirelessly for seamless and efficient printing.
- Monitor the Printing Progress: As the Canon Ivy Printer processes the print job, you can monitor the printing progress through the app or by observing the indicator lights on the printer. This allows you to stay informed about the status of the printing process.
- Retrieve Your Prints: Once the printing process is complete, collect your vibrant and personalized photo prints from the Canon Ivy Printer. Each print reflects the beauty and essence of your digital memories, now transformed into tangible keepsakes.
By following these steps, you can seamlessly print your cherished photos with the Canon Ivy Printer, infusing your world with the joy of instant and personalized photography. Whether you’re creating individual prints or captivating photo collages, the printer empowers you to bring your digital memories to life in a tangible and meaningful way.
The Canon Ivy Printer’s ability to deliver vibrant and smudge-proof prints ensures that your digital snapshots are preserved in high-quality physical form, ready to be shared, displayed, or cherished as mementos of cherished moments. With the power of the Canon Ivy Printer at your fingertips, you’re equipped to embark on a journey of creative and memorable photo printing experiences, bringing your digital memories to life with the touch of a button.
Now that you’ve successfully printed your cherished photos with the Canon Ivy Printer, you’re ready to share and celebrate your personalized prints, each one a testament to the beauty and significance of your digital memories. Get ready to immerse yourself in the joy of instant photography and the art of transforming digital snapshots into tangible keepsakes!
Troubleshooting Common Issues
While using the Canon Ivy Printer, you may encounter occasional challenges or issues that can affect the printing experience. Addressing these common issues through troubleshooting measures can help ensure that your printing endeavors remain smooth and seamless. Let’s explore some common issues that users may encounter with the Canon Ivy Printer and the corresponding troubleshooting steps to resolve them effectively.
Read more: How To Reset A Canon Printer
Issue 1: Connectivity Problems
Symptoms: Difficulty in establishing a wireless connection between the Canon Ivy Printer and your smartphone or tablet, leading to print jobs not being processed.
Troubleshooting Steps:
- Ensure Bluetooth Connectivity: Verify that Bluetooth is enabled on both the Canon Ivy Printer and your smartphone or tablet. If Bluetooth is disabled, enable it through the device settings to facilitate the pairing process.
- Restart Devices: Power off both the Canon Ivy Printer and your connected device, then power them back on to reset the wireless connection. This can help resolve temporary connectivity issues.
- Re-Pair the Devices: Within the Canon Mini Print app, attempt to re-establish the wireless connection between the printer and your device. Follow the on-screen prompts to initiate the pairing process and ensure a secure connection.
Issue 2: Print Quality Concerns
Symptoms: Prints from the Canon Ivy Printer exhibit issues such as faded colors, streaks, or uneven printing, impacting the overall print quality.
Troubleshooting Steps:
- Check Paper Quality: Ensure that the ZINK photo paper used with the Canon Ivy Printer is of high quality and free from damage. Low-quality or damaged paper can affect print output.
- Calibrate Printer: Use the calibration function within the Canon Mini Print app to optimize the printer’s performance. This can help address issues related to print quality and ensure consistent output.
- Clean Print Head: If the print quality issues persist, refer to the printer’s user manual for instructions on cleaning the print head. A clean print head can contribute to improved print quality.
Issue 3: Power and Battery Concerns
Symptoms: The Canon Ivy Printer experiences power-related issues, such as difficulty in powering on, rapid battery drainage, or failure to hold a charge.
Troubleshooting Steps:
- Charge and Reset: Connect the Canon Ivy Printer to a power source using the provided micro USB cable and allow it to charge fully. After charging, power off the printer and then power it back on to reset its functionality.
- Check Battery Health: If the printer’s battery seems to drain rapidly, consider assessing its overall health. Refer to the user manual for guidance on evaluating and maintaining the battery’s performance.
- Update Firmware: Check for firmware updates for the Canon Ivy Printer, as manufacturers often release updates to address performance and power management issues. Updating the firmware can help resolve power-related concerns.
Issue 4: Paper Jams or Misfeeds
Symptoms: The Canon Ivy Printer experiences issues with paper jams, misfeeds, or difficulty in feeding ZINK photo paper during the printing process.
Troubleshooting Steps:
- Clear Paper Path: Power off the Canon Ivy Printer and carefully clear any obstructions or jammed paper from the paper path. Ensure that the paper tray and feed mechanisms are free from debris or damage.
- Use Genuine Paper: Ensure that you’re using genuine ZINK photo paper designed for use with the Canon Ivy Printer. Substituting with incompatible paper types can lead to feeding issues.
- Adjust Paper Alignment: Check the paper alignment within the printer’s paper tray and adjust it as needed to ensure smooth and consistent paper feeding during the printing process.
By employing these troubleshooting measures, you can effectively address common issues that may arise during the use of the Canon Ivy Printer, ensuring that your printing experiences remain seamless and enjoyable. Additionally, referring to the printer’s user manual for specific guidance on troubleshooting and maintenance can provide valuable insights into resolving potential challenges.
With the ability to troubleshoot common issues, you’re well-equipped to maintain the optimal performance of your Canon Ivy Printer and continue enjoying the convenience and creativity of on-the-go photo printing. By addressing challenges as they arise, you can ensure that your printing experiences with the Canon Ivy Printer remain consistently delightful and rewarding, allowing you to bring your digital memories to life with ease and confidence.
Read more: How To Print On Cardstock On A Canon Printer
Conclusion
Congratulations on embarking on a journey of creativity and personalization with the Canon Ivy Printer! Throughout this comprehensive guide, we’ve explored the various facets of using this innovative portable printer, from unboxing and charging to connecting it to your device and printing your cherished photos. By delving into the troubleshooting measures for common issues, we’ve equipped you with the knowledge and confidence to ensure seamless and enjoyable printing experiences.
The Canon Ivy Printer represents a gateway to the world of instant, on-the-go photo printing, empowering you to transform your digital memories into vibrant and tangible prints with ease. Its sleek and compact design, coupled with the seamless connectivity facilitated by the Canon Mini Print app, makes it a versatile companion for capturing and sharing moments in real time.
As you’ve learned, the process of unboxing the Canon Ivy Printer unveils a carefully curated selection of essentials, setting the stage for an exciting journey into portable printing. Charging the printer ensures that it’s ready to bring your digital snapshots to life, while connecting it to your device through the Canon Mini Print app opens the door to a world of creative possibilities.
Using the Canon Mini Print app, you’ve discovered the power of personalization, allowing you to infuse your prints with filters, frames, text, stickers, and captivating AR live filters. The printing process itself is seamless and efficient, culminating in the transformation of your digital memories into vibrant and high-quality photo prints, ready to be shared, displayed, or cherished as mementos of special moments.
By addressing common issues through troubleshooting measures, you’ve gained the ability to ensure that your printing experiences with the Canon Ivy Printer remain smooth and rewarding. Whether it’s resolving connectivity challenges, optimizing print quality, addressing power-related concerns, or troubleshooting paper handling issues, you’re well-prepared to maintain the optimal performance of your printer.
As you continue your journey with the Canon Ivy Printer, remember that each print is a testament to the beauty and significance of your digital memories. Whether you’re creating individual prints, captivating collages, or personalized keepsakes, the Canon Ivy Printer empowers you to infuse your world with the joy of instant photography and the art of transforming digital snapshots into tangible treasures.
With the knowledge and insights gained from this guide, you’re equipped to embark on a journey of creativity, personalization, and joyous printing experiences with the Canon Ivy Printer. As you immerse yourself in the art of instant photography, may each print serve as a celebration of life’s moments, a testament to your creativity, and a cherished memento of the beauty that surrounds you.
Now, armed with the power of the Canon Ivy Printer, go forth and continue creating, preserving, and sharing your digital memories in the form of vibrant and tangible prints. The world of portable printing awaits, ready to capture and celebrate the beauty of your unique perspective and the moments that define your story.
Frequently Asked Questions about Canon Ivy Printer: How To Use
Was this page helpful?
At Storables.com, we guarantee accurate and reliable information. Our content, validated by Expert Board Contributors, is crafted following stringent Editorial Policies. We're committed to providing you with well-researched, expert-backed insights for all your informational needs.

0 thoughts on “Canon Ivy Printer: How To Use”