
Articles
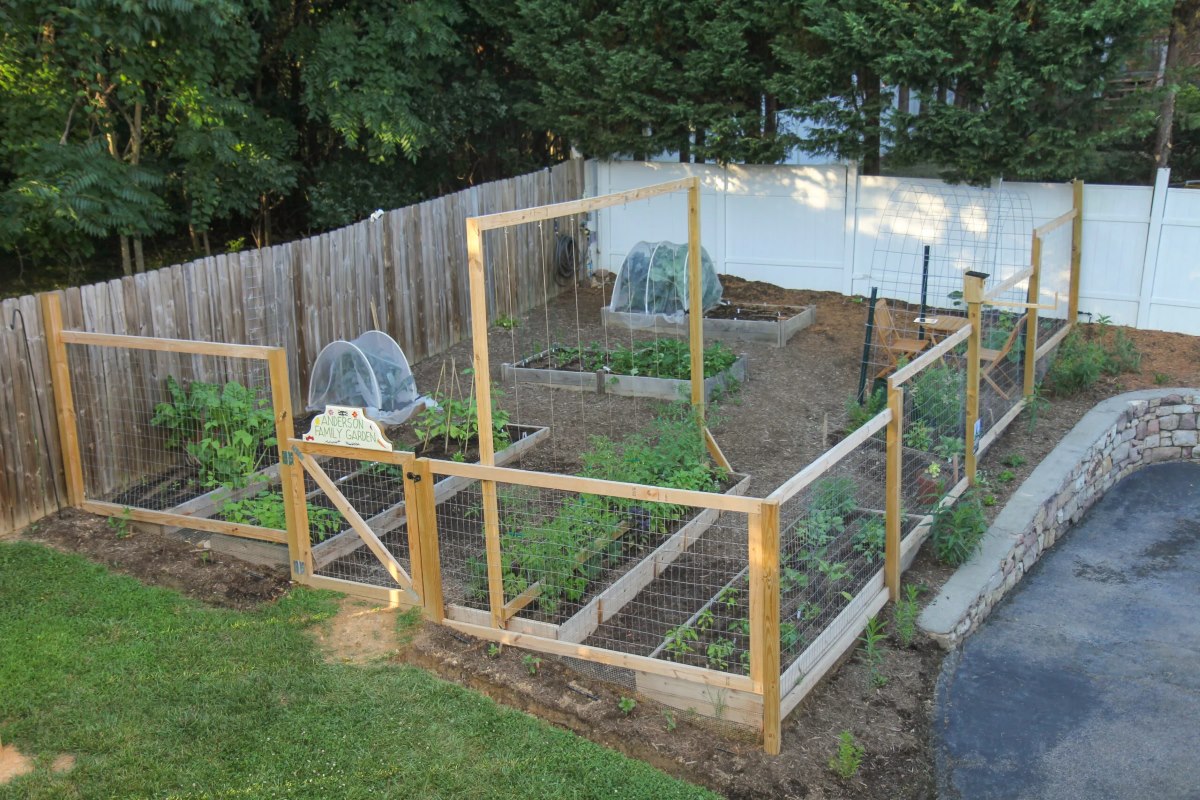
How To Build A Fence For A Garden
Modified: September 2, 2024
Learn how to build a sturdy and beautiful garden fence with our step-by-step gardening guide. Enhance your gardening skills and create a secure and stylish space for your plants.
(Many of the links in this article redirect to a specific reviewed product. Your purchase of these products through affiliate links helps to generate commission for Storables.com, at no extra cost. Learn more)
Introduction
Building a fence for your garden is a great way to add both functionality and aesthetic appeal to your outdoor space. Whether you want to protect your plants from curious critters or create a private and tranquil oasis, a carefully designed and well-constructed garden fence can help you achieve your goals.
In this article, we will guide you through the step-by-step process of building a fence for your garden. From planning and designing to installing and maintaining, we will cover everything you need to know to create a beautiful and functional barrier around your beloved plants.
Before we dive into the details, it’s important to note that building a fence requires some basic skills and knowledge of tools. If you’re not comfortable with carpentry work, it may be helpful to enlist the assistance of a professional or someone with experience in fence installation.
Now, let’s get started on this exciting journey of building your garden fence!
Key Takeaways:
- Plan, design, and gather materials thoughtfully to build a garden fence that complements your outdoor space while meeting your specific needs and local regulations.
- Regular maintenance, including inspections, repairs, and protective treatments, is essential to ensure the longevity and visual appeal of your garden fence for years to come.
Step 1: Planning and Designing Your Garden Fence
Before you begin building your garden fence, it’s crucial to spend some time planning and designing the layout. This step will ensure that you create a fence that not only meets your needs but also complements the overall aesthetic of your garden.
Start by determining the purpose of your fence. Are you building it primarily for privacy, to keep out animals, or to add a decorative element to your garden? Understanding the main goal will help you make informed decisions throughout the planning and design process.
Next, measure the area where you want to install the fence. Take note of any existing structures, trees, or other obstacles that may affect the placement. Consider the height and width of your fence, keeping in mind any local regulations or neighborhood covenants that may restrict your options.
Once you have a clear understanding of your goals and have taken necessary measurements, it’s time to choose a design for your garden fence. Browse through magazines, online resources, or visit local garden centers to gather inspiration. Consider factors such as the style, material, and color that will best complement your garden’s overall theme.
When selecting the material for your fence, you have various options such as wood, vinyl, metal, or composite materials. Each material has its own advantages and considerations, so take the time to research and choose one that suits your needs and budget.
It’s also important to consider the maintenance requirements of different materials. For example, wood fences may require regular staining or painting, while vinyl fences are relatively low maintenance.
Additionally, think about the layout and functionality of your fence. Will it encompass your entire garden or just a specific area? Will there be any gates or access points? Make sure to include these elements in your design to ensure practicality and ease of use.
Lastly, always check with your local authorities or homeowners’ association to understand any regulations or permits required for installing a fence. Some neighborhoods have restrictions on fence heights, materials, or design, so it’s crucial to be aware of these beforehand.
By dedicating time to planning and designing your garden fence, you can create a beautiful and functional barrier that enhances the overall look of your garden while serving its intended purpose.
Step 2: Gathering Materials and Tools
Once you have your garden fence design finalized, it’s time to gather the necessary materials and tools before you can begin the installation process. Having everything on hand will ensure a smooth and efficient construction process.
Here are the materials and tools you will typically need for building a garden fence:
Materials:
- Fence posts
- Fence rails
- Fence panels or pickets
- Gates (if desired)
- Fence post cement or concrete mix
- Fence hardware (such as hinges, latches, and screws)
- Garden soil (for backfilling around posts)
Tools:
- Tape measure
- Level
- Post hole digger or auger
- Shovel
- Hammer
- Screwdriver
- Saw (if cutting fence panels)
- Drill
- Work gloves
- Safety glasses
When purchasing materials, make sure to account for the length and height of your fence, as well as any gates or additional features you plan to include. It’s recommended to buy a little extra to account for any mistakes or unforeseen circumstances.
As for the tools, check that you have all the necessary equipment before you begin. It’s helpful to have them organized and easily accessible, so you don’t waste time searching for the right tool during the construction process.
Additionally, consider investing in safety equipment such as work gloves and safety glasses to protect yourself during the construction process. Safety should always be a top priority.
If you’re uncertain about the exact materials and tools you’ll need, consult with a professional at your local hardware store or seek advice from experienced DIYers. They can guide you in selecting the appropriate materials and tools based on your specific project requirements.
By gathering all the essential materials and tools ahead of time, you’ll be well-prepared to start building your garden fence. This will help ensure a smoother and more efficient installation process, bringing you one step closer to creating the garden oasis you envision.
Step 3: Marking the Perimeter of Your Garden
Now that you have your materials and tools ready, it’s time to mark the perimeter of your garden to establish the exact location where the fence will be installed. This step is crucial as it will ensure accurate placement and alignment of the fence posts.
Here’s how to mark the perimeter of your garden:
- Start by locating the corners of your desired fence area. Use a tape measure to measure the distance from each corner, ensuring they are properly aligned.
- Using stakes or small flags, mark the corners with a visible marker. This will serve as your reference point for the rest of the perimeter.
- Stretch a string or twine tightly between each corner stake, following the desired fence line. This will help maintain a straight and even perimeter as you mark the remaining points.
- At regular intervals, place additional stakes or flags along the string, indicating the positions for the fence posts. The spacing between posts will depend on the size of your fence panels or pickets, as well as the structural requirements of your chosen material.
- Continue this process along the entire perimeter until you have marked the location for each fence post.
- Double-check all measurements and alignments to ensure accuracy. Adjust the stakes or flags as necessary.
Remember that accurate marking is crucial for a level and well-aligned fence. Investing time and effort in this step will save you from potential problems during the installation.
It’s also worth noting that if your garden has uneven terrain or slopes, you may need to adjust the height of the fence posts or make accommodations to maintain a consistent fence line. Consider consulting with a professional or experienced DIYers for guidance on how to handle such situations.
Once you have completely marked the perimeter of your garden, you’re ready to move on to the next step: installing the fence posts. With the precise marking in place, you’ll have a solid foundation for building a sturdy and well-positioned garden fence.
Step 4: Installing Fence Posts
With the perimeter of your garden marked, it’s time to start installing the fence posts. The posts serve as the foundation and support for your fence, so it’s crucial to ensure they are securely placed and aligned.
Here’s a step-by-step guide on installing fence posts:
- Start by digging the post holes. Use a post hole digger or auger to create holes deep enough to provide stability and support for your chosen fence height. The depth will depend on various factors, including the type of soil and the height of your fence. As a general rule, aim for at least one-third of the post’s length below ground level.
- Space the holes according to the measurements from your perimeter marking. Make sure they align with the position of the stakes or flags you previously placed.
- Remove any excess dirt or debris from the holes, ensuring they are clean and ready for the next step.
- If desired and recommended for your chosen fence material, pour a small amount of gravel or cement into the bottom of each hole. This will help improve stability and prevent posts from shifting over time.
- Place a fence post in each hole, ensuring they are straight and level. Use a level tool to check both vertically and horizontally. Adjust the post as necessary to achieve proper alignment.
- Fill the hole with soil, firmly packing it around the post to provide support and stability. Tamp down the soil to eliminate air pockets and create a solid base.
- Repeat this process for all the remaining fence posts, working your way around the perimeter of your garden.
Note that certain types of fence posts, such as metal or vinyl, may require different installation methods. Always refer to the manufacturer’s instructions for specific guidelines and recommendations.
It’s essential to take your time during this step to ensure that the fence posts are accurately positioned and level. Properly installed posts will provide a solid foundation for your fence, ensuring its stability and longevity.
Once all the fence posts are securely in place, you’re ready to move on to the next step of attaching the rails. This will bring you closer to completing your garden fence and enjoying the benefits of a beautifully defined and protected outdoor space.
When building a fence for a garden, make sure to use pressure-treated wood to prevent rot and decay. Additionally, set your fence posts at least 2 feet deep to ensure stability.
Read more: How To Build A Wattle Fence
Step 5: Attaching the Rails
After successfully installing the fence posts, the next step in building your garden fence is attaching the rails. The rails serve as horizontal supports for the fence panels or pickets, providing stability and structure to your fence.
Follow these steps to attach the rails to the fence posts:
- Start by measuring and marking the desired height for your fence rails on the fence posts. Use a level to ensure that the markings are consistent and level across all the posts.
- Measure and cut the lengths of the rails to fit between the fence posts. Depending on your design, you may need to miter the ends of the rails to achieve a clean and seamless connection at the corners.
- Hold the first rail against the marked height on the fence posts. Use screws or nails to attach the rail securely to each post. Make sure it is level and aligned properly with the horizontal line.
- Repeat this process for each rail, ensuring that they are evenly spaced and parallel to one another. Use a level to check the alignment as you go.
- For added strength and stability, consider adding a middle rail between the top and bottom rails. This can provide extra support for the fence panels or pickets.
- Double-check all the rails to ensure they are securely attached and level. Make any necessary adjustments before proceeding.
It’s important to note that the method of attaching the rails may vary depending on the type of fence material you are using. For example, wooden fences may require screws or nails, while vinyl or metal fences may use specialized brackets or connectors. Follow the manufacturer’s instructions for the specific guidelines related to your chosen fence material.
By securely attaching the rails to the fence posts, you are one step closer to completing your garden fence. The rails provide the necessary foundation for the fence panels or pickets, bringing your vision to life and creating a defined boundary for your garden.
In the next step, we will guide you through the process of installing the fence panels or pickets, which will add the finishing touch to your garden fence project.
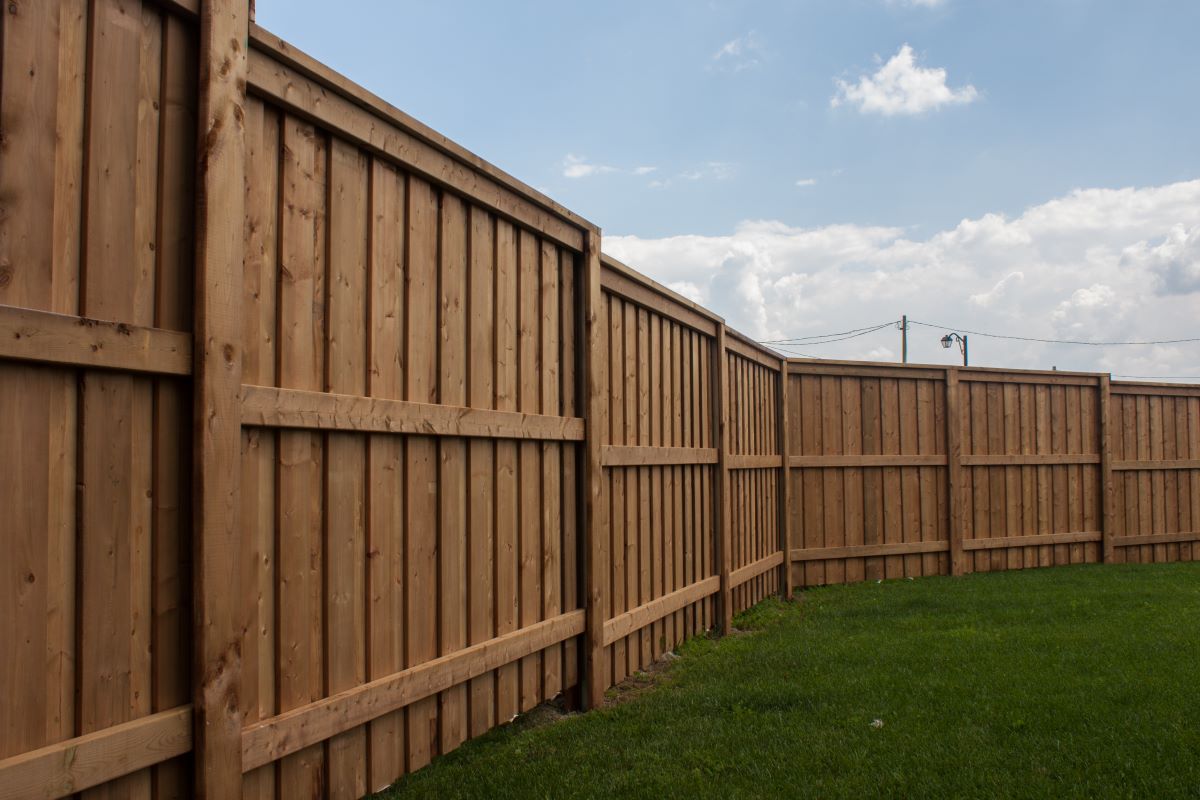
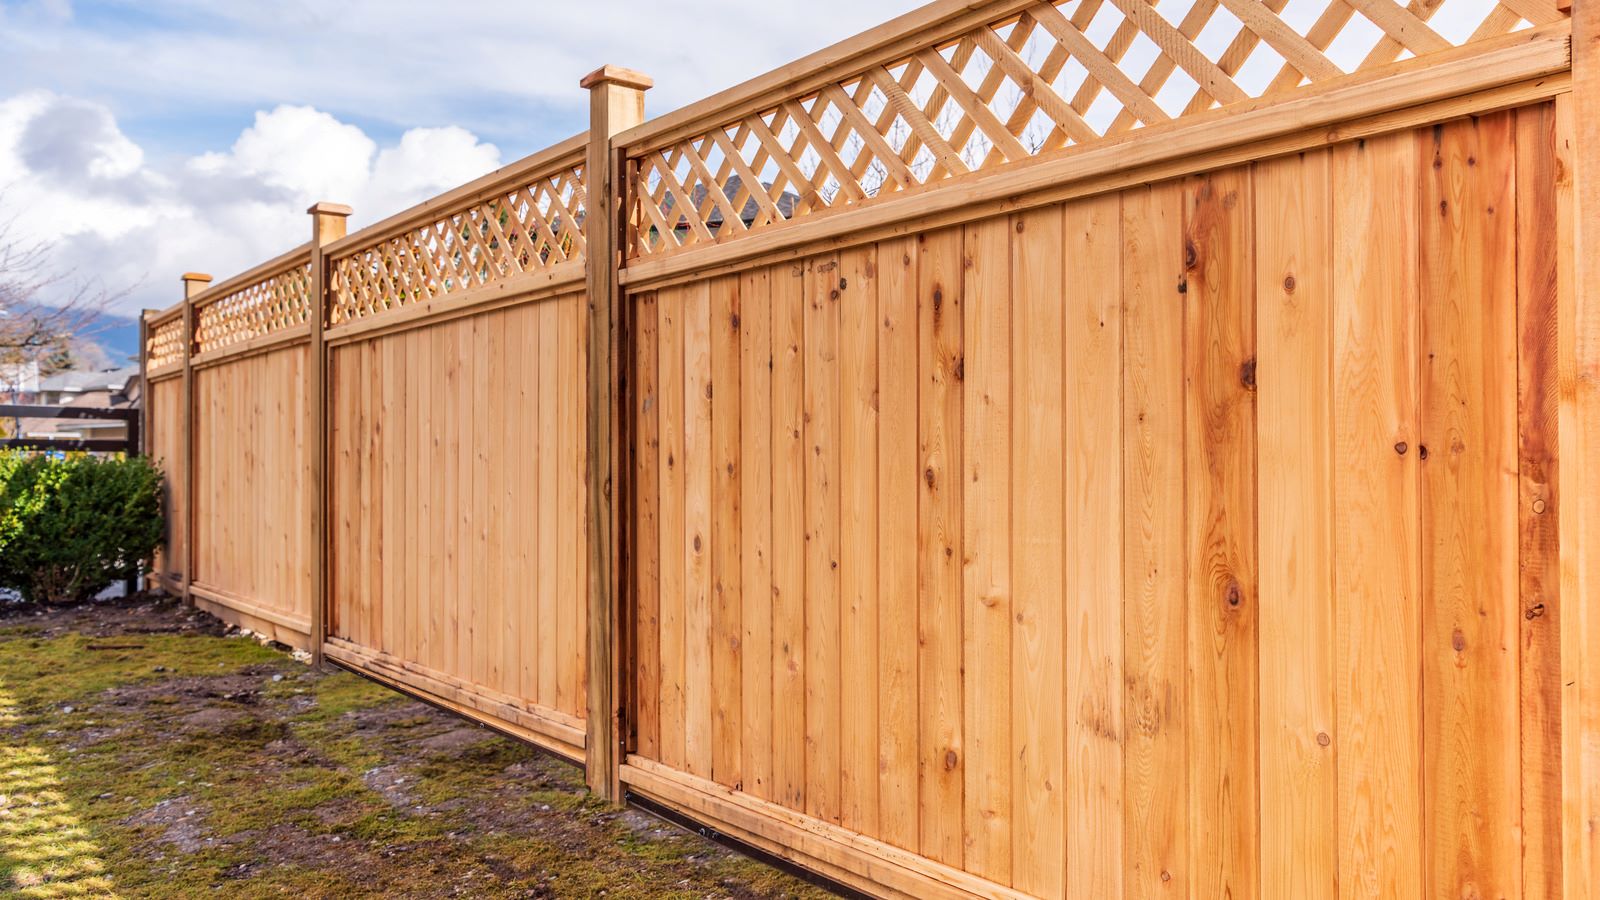
Step 6: Installing Fence Panels
Installing the fence panels is the next critical step in building your garden fence. The panels not only add privacy and security but also contribute to the overall visual appeal of your outdoor space. Here’s a step-by-step guide to help you install the fence panels:
- Start by placing the first fence panel against the first two fence posts. Ensure that the panel is level and aligned with the top and bottom rails.
- Secure the panel to the posts using screws or nails, following the manufacturer’s instructions and recommendations for your chosen fence material. This is typically done through pre-drilled holes or brackets provided with the panels.
- Proceed to the next panel, ensuring there is a small gap between it and the previous panel. This gap allows for natural expansion and contraction of the material due to weather conditions. Again, ensure the panel is level and aligned before securing it in place.
- Continue attaching the panels one by one until you have installed all of them along the fence line.
- If you encounter any uneven terrain or slopes, adjust the placement of the fence panels accordingly. This may involve cutting or trimming the panels to match the contour of the ground.
- Double-check the alignment and stability of each panel, making any necessary adjustments before proceeding.
- For added strength and durability, consider reinforcing the panels by attaching additional screws or nails at appropriate intervals.
It’s important to follow the manufacturer’s instructions and utilize the recommended hardware when installing the fence panels. This ensures proper installation and avoids potential damage or instability in the future.
Take your time during this step to ensure that each panel is securely attached and aligned with the surrounding panels and fence structure. This attention to detail will contribute to a clean and professional-looking finished fence.
Once all the fence panels are installed, you’re almost done! In the next step, we will guide you through adding a gate, which will provide access to your garden and complete the functionality of your fence.
Step 7: Adding a Gate
Adding a gate to your garden fence serves as a functional entry point while providing convenience and accessibility to your outdoor space. Follow these steps to successfully install a gate:
- Start by determining the location and size of your gate. Measure the distance between the two adjacent fence panels or posts to ensure that your gate will fit properly.
- If necessary, cut the fence panels or pickets to create an opening for the gate. Ensure that the edges are clean and aligned with the rest of the fence.
- Install the gate hinges on one side of the gate opening. Use screws or nails to attach them securely to the fence post or panel.
- Attach the gate latch on the opposite side of the gate opening. Make sure it aligns with the latch mechanism on the gate and allows for easy opening and closing.
- Hold the gate in place, ensuring that it fits properly within the gate opening. Adjust the hinges or latch as needed to achieve a level and aligned gate.
- Secure the gate in place by attaching the hinges firmly to the fence post or panel. Ensure that the gate swings freely and smoothly.
- Test the gate latch to ensure it securely closes and locks. Make any necessary adjustments to achieve proper alignment.
- Consider adding additional gate hardware such as decorative elements, handles, or locks to enhance both the functionality and aesthetics of your gate.
When choosing gate hardware, select materials and designs that complement your fence and overall garden style. This will create a cohesive and visually appealing look.
It’s important to ensure that your gate is properly installed and functions smoothly. Double-check the alignment, stability, and security of the gate to avoid any issues in the future.
Once your gate is installed, your garden fence is complete! However, there are a few finishing touches and maintenance steps to consider, which we will cover in the next step.
Step 8: Finishing Touches and Maintenance
With your garden fence and gate installed, it’s time to add the finishing touches and establish a proper maintenance routine to ensure the longevity and beauty of your fence. Here are some important steps to consider:
- Inspect the entire fence to make sure all components are securely attached and in good condition. Check for loose screws or nails, damaged panels, or any signs of wear and tear.
- If you notice any issues, make necessary repairs or replacements promptly to maintain the integrity and stability of your fence.
- Consider applying a protective sealant or weatherproofing treatment to your fence. This will help protect the material from the elements, such as rain, sunlight, and temperature changes, improving its longevity and appearance.
- Regularly clean your fence to remove dirt, debris, and any organic matter that may accumulate over time. This can be done with a gentle detergent and a soft brush or sponge. Rinse thoroughly with water to avoid residue and potential damage to the material.
- For wooden fences, consider applying a fresh coat of paint or stain periodically to maintain its color and protect it from rot and decay. Follow the manufacturer’s instructions for the appropriate timing and products to use.
- Trim any plants or vegetation that may grow around or against the fence. This will prevent them from damaging the structure or compromising its stability. Additionally, consider installing a barrier or edging around the base of the fence to prevent weed growth and maintain a clean and tidy appearance.
- Regularly inspect and lubricate the gate hinges and latch to ensure smooth operation. This will prevent rust and corrosion and keep the gate functioning properly.
- Keep an eye out for any signs of pest infestation, such as termites or wood-boring insects. If detected, take appropriate measures to eliminate the infestation and protect your fence from further damage.
By implementing these maintenance practices, you can prolong the life of your garden fence and keep it looking beautiful for years to come. Regular inspections and timely repairs will ensure its functionality and preserve its aesthetic appeal.
Remember to consult the manufacturer’s recommendations for specific maintenance guidelines based on the material of your fence. Different materials may require different care and treatment methods.
Congratulations on completing your garden fence! With proper care and maintenance, it will serve as a durable and attractive addition to your outdoor space, providing privacy, security, and a beautiful backdrop for your garden.
Read more: How To Build A Brick Fence
Conclusion
Building a fence for your garden is a rewarding project that adds both practicality and beauty to your outdoor space. By following the step-by-step guide outlined in this article, you have now learned how to plan, design, gather materials, install, and maintain your garden fence with confidence.
Throughout the process, you have discovered the importance of careful planning and design, ensuring accurate measurements and choosing the right materials for your specific needs. From marking the perimeter to installing fence posts, attaching rails, installing fence panels, adding a gate, and completing finishing touches, each step plays a crucial role in the successful completion of your garden fence.
Remember that safety is paramount, so always exercise caution and wear appropriate protective gear when working with tools and materials. If you are uncertain about any aspect of the project, consider seeking guidance from professionals or experienced DIYers.
Once your garden fence is complete, take pride in the accomplishment and enjoy the benefits it brings. It provides a defined and protected space for your garden, enhancing privacy, security, and the overall ambiance of your outdoor area.
Finally, do not forget to establish a regular maintenance routine to keep your fence in optimal condition. Performing maintenance tasks such as cleaning, inspections, repairs, and applying protective treatments will ensure the longevity and visual appeal of your garden fence for years to come.
Now that you have the knowledge and skills to build and maintain a garden fence, it’s time to put them into practice. Get started on your project and create a beautiful and functional fencing solution that enhances your garden and outdoor living space.
Frequently Asked Questions about How To Build A Fence For A Garden
Was this page helpful?
At Storables.com, we guarantee accurate and reliable information. Our content, validated by Expert Board Contributors, is crafted following stringent Editorial Policies. We're committed to providing you with well-researched, expert-backed insights for all your informational needs.


0 thoughts on “How To Build A Fence For A Garden”