Home>Articles>How Do You Clean A Primo Water Dispenser Drip Tray
Articles
How Do You Clean A Primo Water Dispenser Drip Tray
Modified: May 6, 2024
Looking for articles on how to clean a Primo water dispenser drip tray? Find all the information you need to keep your dispenser clean and functioning efficiently.
(Many of the links in this article redirect to a specific reviewed product. Your purchase of these products through affiliate links helps to generate commission for Storables.com, at no extra cost. Learn more)
Introduction
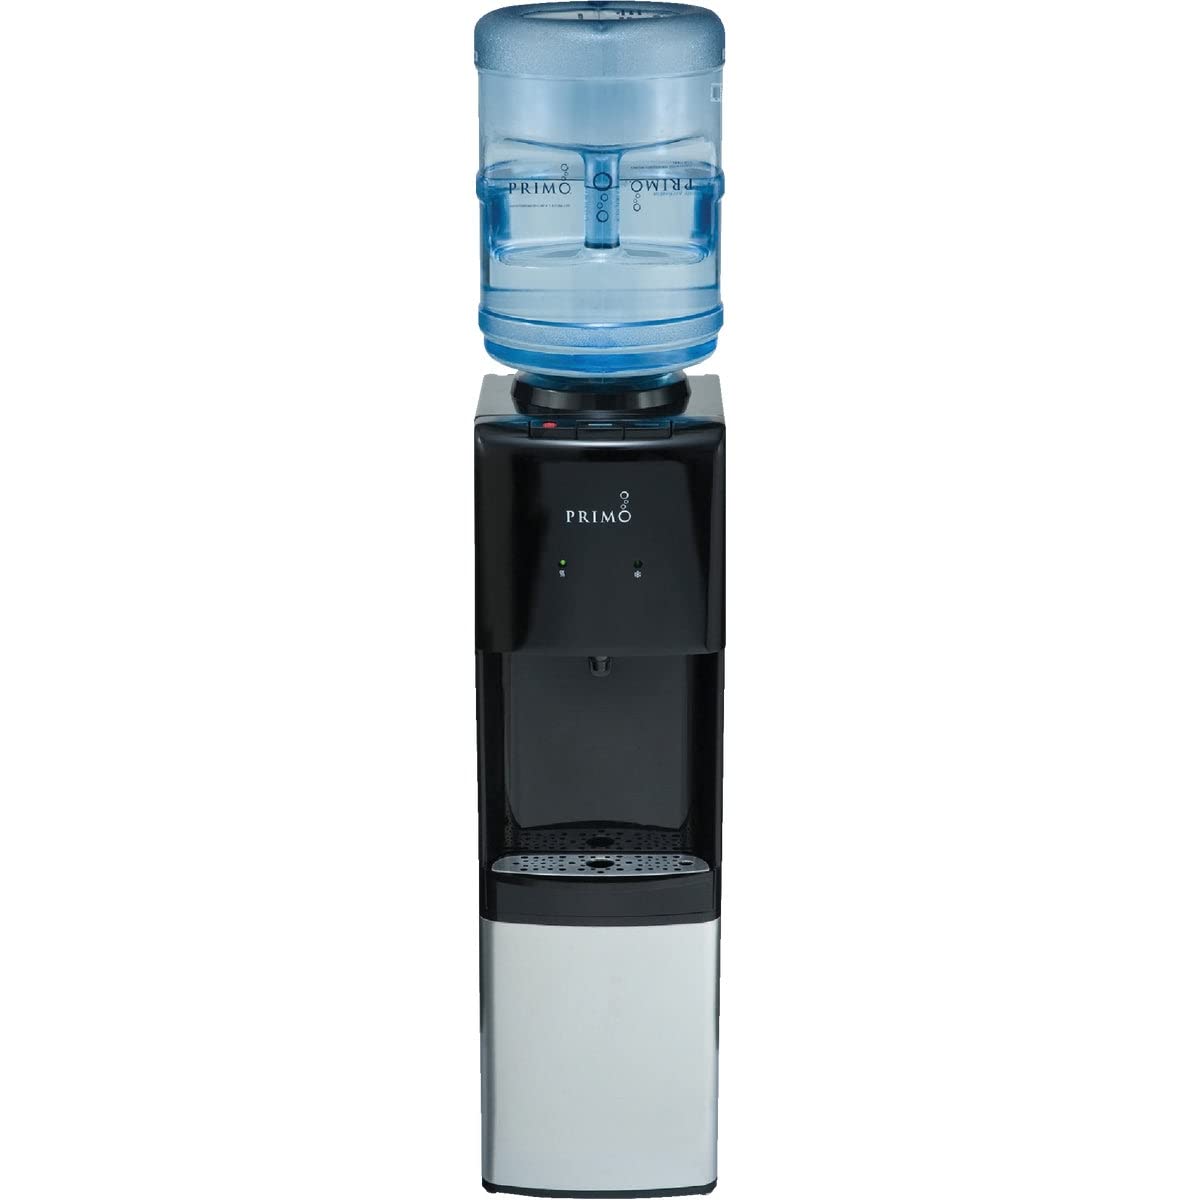
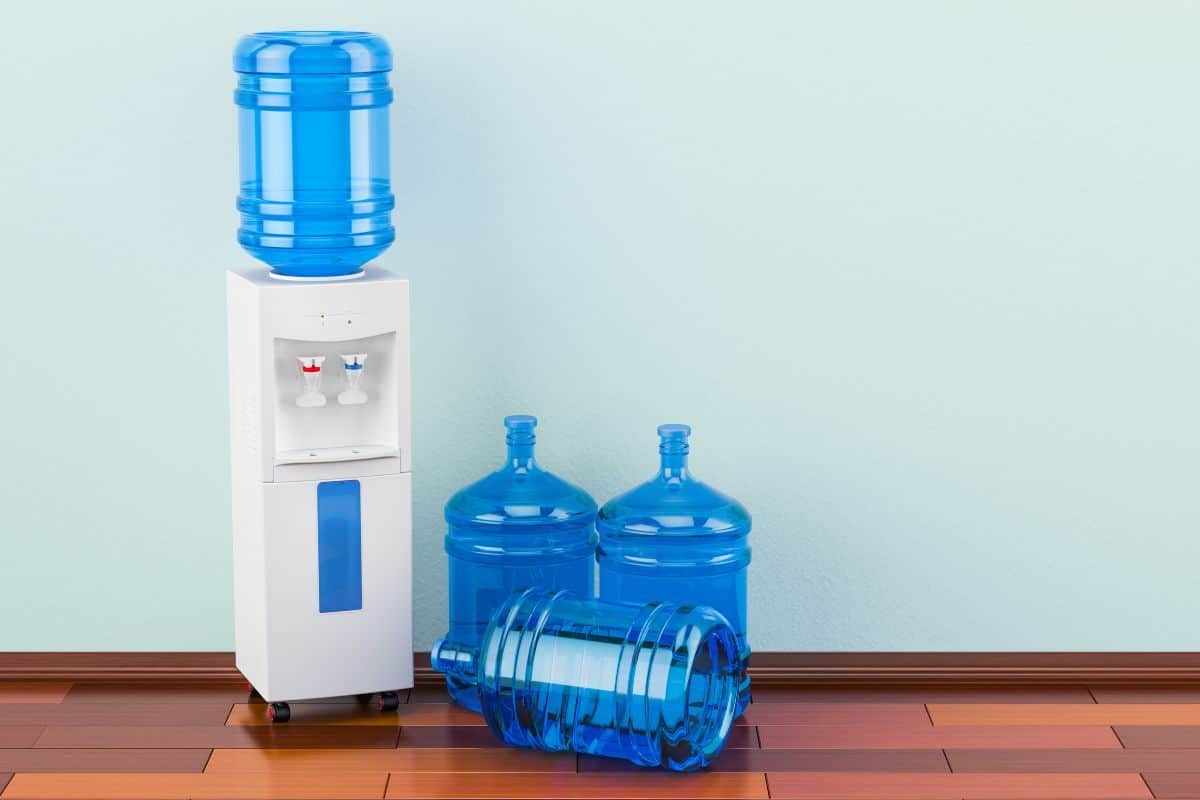
Welcome to this guide on how to clean a Primo Water Dispenser drip tray. If you own a Primo Water Dispenser, you know how convenient it is to have clean, fresh water available at your fingertips. However, over time, the drip tray can accumulate dirt, debris, and water stains, resulting in an unsightly and potentially unhygienic situation. Regularly cleaning the drip tray is essential to maintain the cleanliness and functionality of your water dispenser.
In this article, we will provide you with step-by-step instructions on how to properly clean a Primo Water Dispenser drip tray. By following these easy steps, you can ensure that your water dispenser remains in optimal condition, providing you with pure and refreshing water.
Before we begin, make sure you have the following materials ready:
Key Takeaways:
- Keep your Primo Water Dispenser clean and hygienic by following these 7 simple steps to clean the drip tray and exterior. Enjoy pure and refreshing water with regular maintenance.
- Gather warm water, mild dish soap, and vinegar for an effective cleaning solution. Follow the step-by-step guide to ensure your Primo Water Dispenser remains in optimal condition.
Read more: How To Clean Out A Primo Water Dispenser
Materials Needed
- Warm water
- Mild dish soap
- Soft cloth or sponge
- Vinegar (optional)
Now that you have gathered all the necessary materials, let’s proceed with the cleaning process.
Key Takeaways:
- Keep your Primo Water Dispenser clean and hygienic by following these 7 simple steps to clean the drip tray and exterior. Enjoy pure and refreshing water with regular maintenance.
- Gather warm water, mild dish soap, and vinegar for an effective cleaning solution. Follow the step-by-step guide to ensure your Primo Water Dispenser remains in optimal condition.
Read more: How To Clean Out A Primo Water Dispenser
Materials Needed
Before we start cleaning the Primo Water Dispenser drip tray, it’s important to gather all the necessary materials. Having these items ready will ensure a smooth and efficient cleaning process. Here’s what you’ll need:
- Warm water: Having warm water on hand will make it easier to dissolve any dirt or grime on the drip tray.
- Mild dish soap: A gentle dish soap is ideal for removing sticky residue and stains from the drip tray.
- Soft cloth or sponge: Using a soft cloth or sponge will prevent scratching or damaging the surface of the drip tray. Avoid using abrasive materials that could cause harm.
- Vinegar (optional): If you prefer a natural cleaning solution, vinegar can be used as an alternative to dish soap. It can effectively break down mineral deposits and sanitize the drip tray.
These materials are readily available in most households, making it convenient to clean your Primo Water Dispenser drip tray without any additional hassle. With these items at your disposal, let’s move on to the step-by-step cleaning process.
Step 1: Turn off the Water Dispenser
The first step to cleaning the Primo Water Dispenser drip tray is to turn off the water dispenser and unplug it from the power source. This ensures your safety and prevents any accidents while cleaning. You don’t want water accidentally spilling or the dispenser turning on during the cleaning process.
Locate the power switch or button on the water dispenser and switch it off. If your dispenser is connected to an electrical outlet, unplug it to ensure it is completely disconnected from the power source.
By turning off the water dispenser and disconnecting it from the power supply, you are creating a safe environment for cleaning the drip tray without any risks. Once you have taken this precautionary step, you can move on to the next step of the cleaning process.
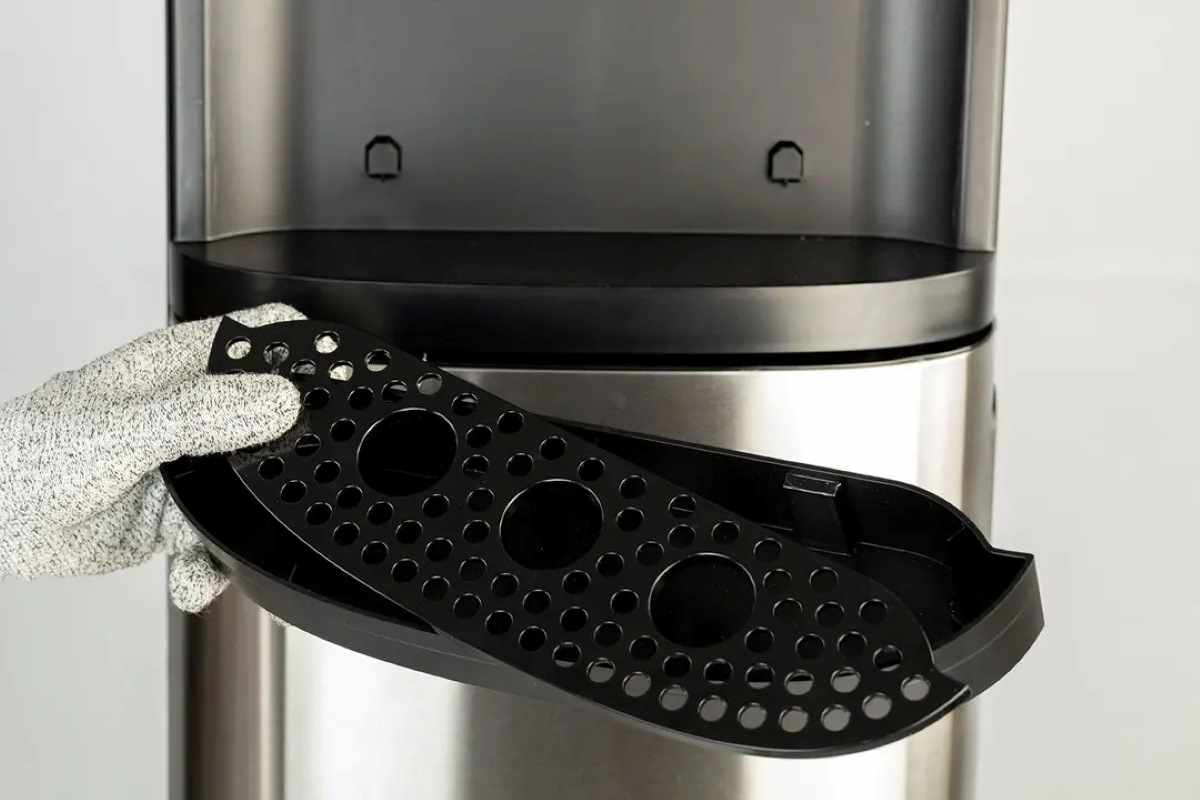
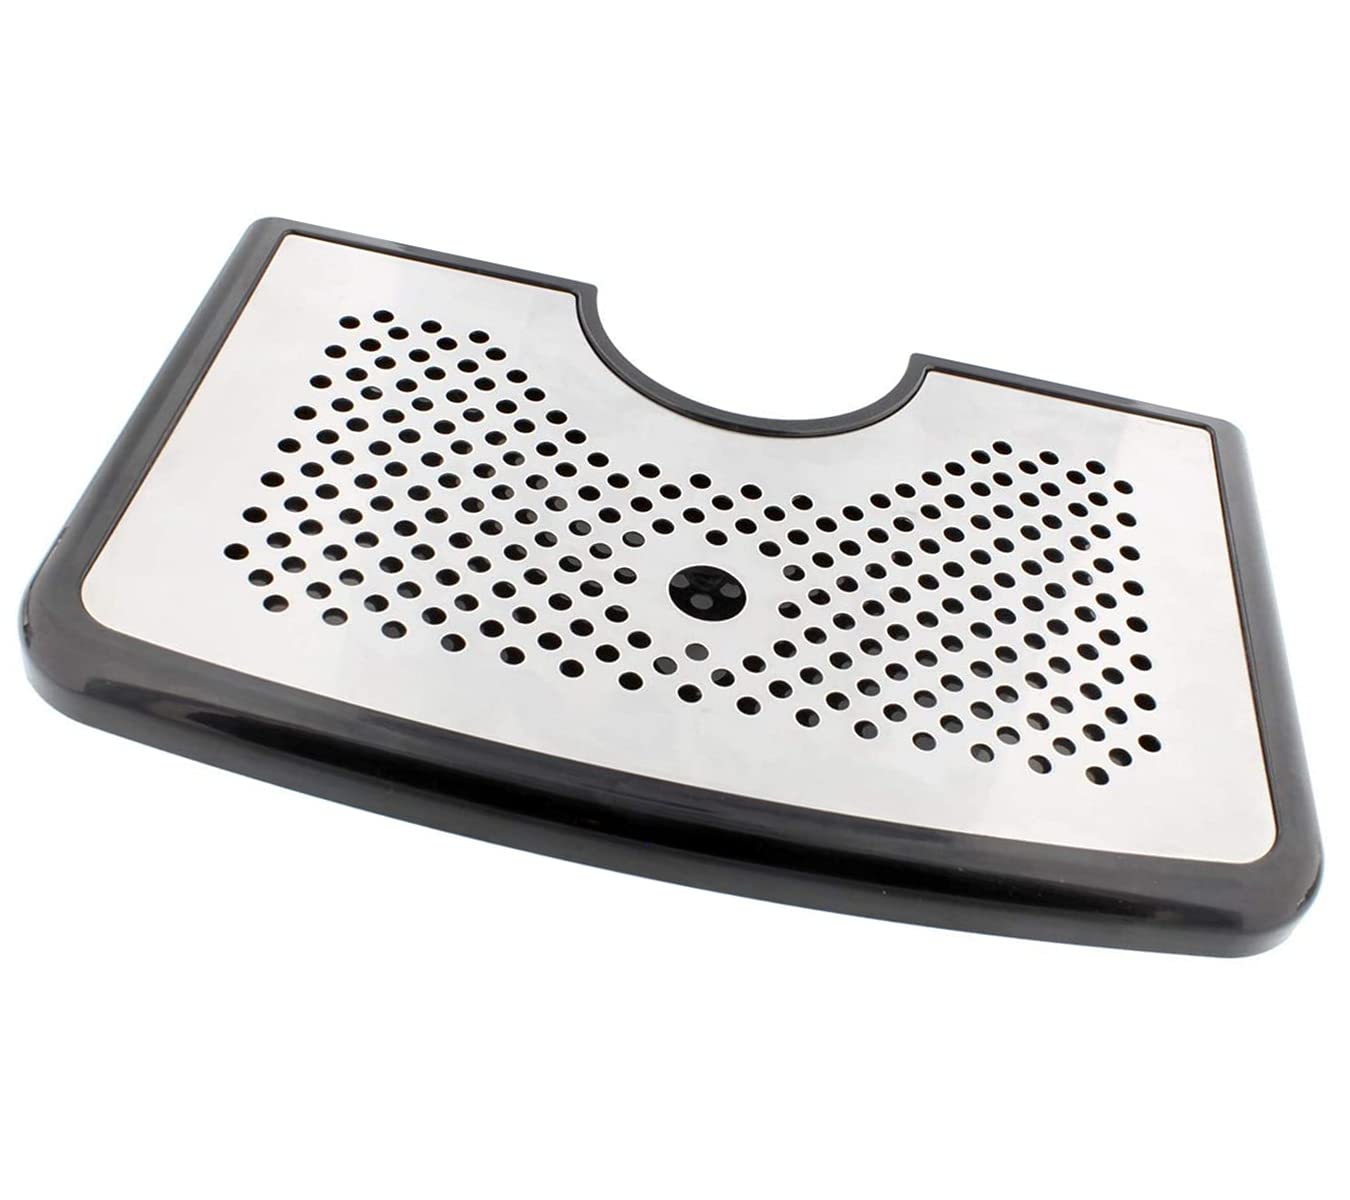
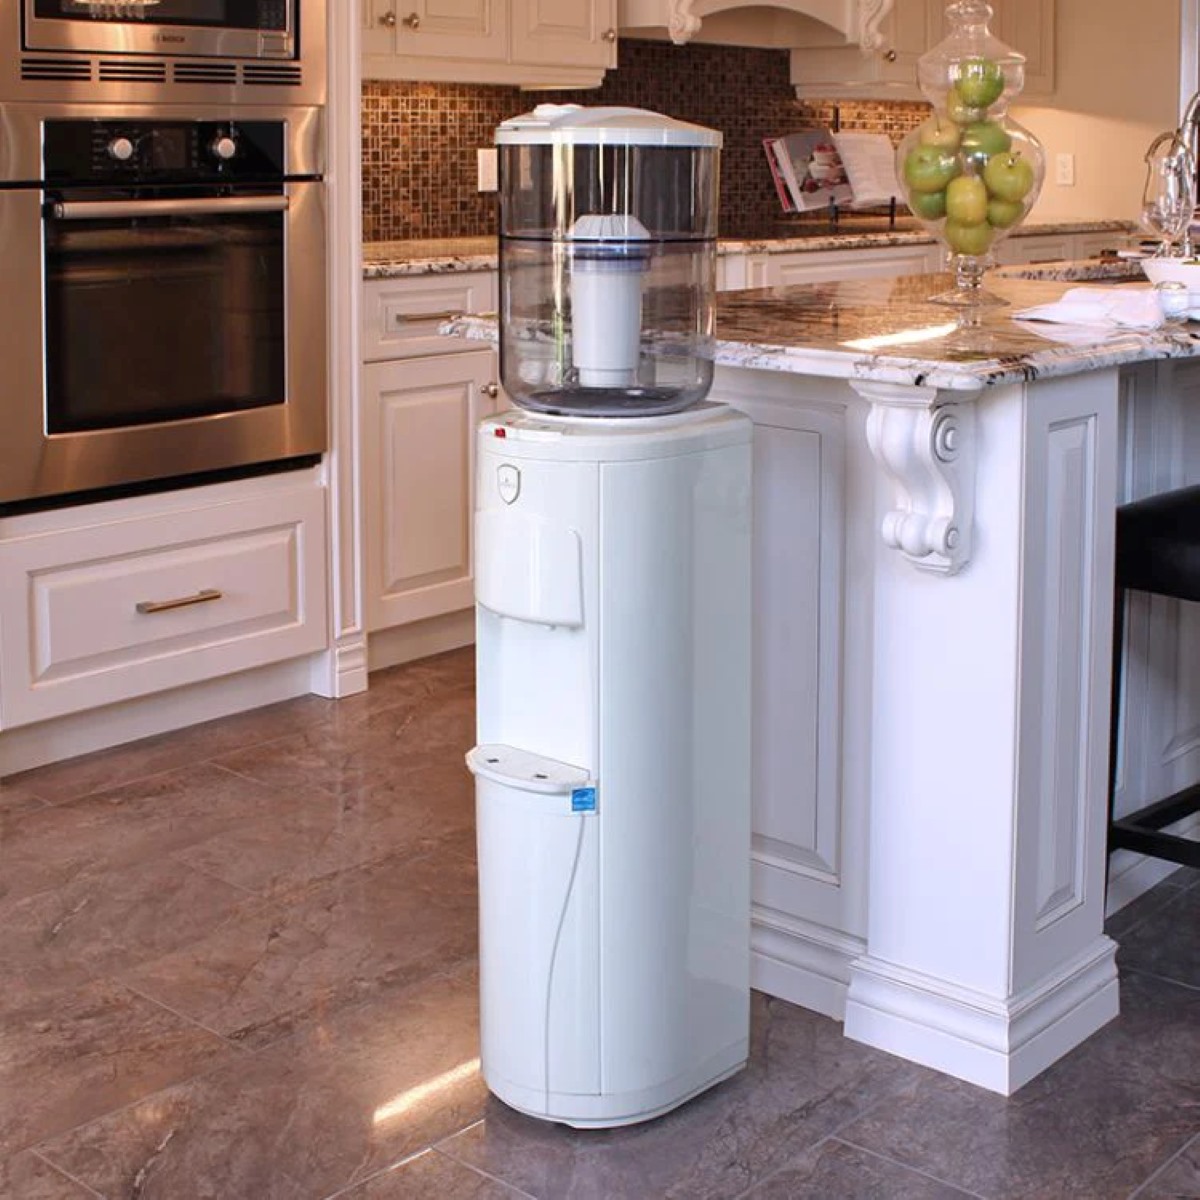
Step 2: Remove the Drip Tray
After you have turned off the Primo Water Dispenser and ensured its safety, it’s time to remove the drip tray. The drip tray is usually located at the bottom of the dispenser, underneath the water spout.
Start by carefully sliding the drip tray forward. Depending on the model of your Primo Water Dispenser, there may be a latch or release button that you need to press to detach the drip tray from the machine. Check the user manual or refer to the manufacturer’s instructions if you are unsure of how to remove the drip tray.
Once the drip tray is detached, gently lift it out of the water dispenser. Be cautious as the tray may contain water or spills that have accumulated over time. Hold the tray with both hands to ensure a steady grip and to avoid any accidental spillage.
Inspect the drip tray for any signs of dirt, debris, or residues. It’s common for the drip tray to collect water stains, mineral deposits, or sticky substances. Now that you have successfully removed the drip tray, it’s time to move on to the next step: emptying the drip tray.
Read more: How To Clean Primo Water Dispenser Top Load
Step 3: Empty the Drip Tray
Now that you have removed the drip tray from your Primo Water Dispenser, it’s important to empty out any water, dirt, or debris that may have accumulated. Emptying the drip tray is a crucial step in cleaning it thoroughly and preventing any potential contamination.
Find a suitable sink or drain where you can safely empty the contents of the drip tray. Hold the tray securely and carefully tilt it to pour out the water and other substances it contains. Ensure that you have a firm grip on the tray to avoid any accidental spills or splatters.
Depending on the amount of liquid or residue in the drip tray, you may need to pour it out gradually or in stages. It’s important to empty the tray completely to provide a clean surface for the next steps in the cleaning process.
While emptying the drip tray, take a moment to inspect its interior for any solid particles or debris that may have collected. If you notice any such particles, use a soft cloth or sponge to wipe them away and ensure the tray is free from any obstructions.
Once the drip tray is emptied, you can move on to the next step: cleaning the drip tray to remove any stains or build-up.
To clean a Primo water dispenser drip tray, remove it from the unit and wash it with warm soapy water. Use a soft cloth or sponge to scrub off any residue, then rinse and dry thoroughly before placing it back in the dispenser.
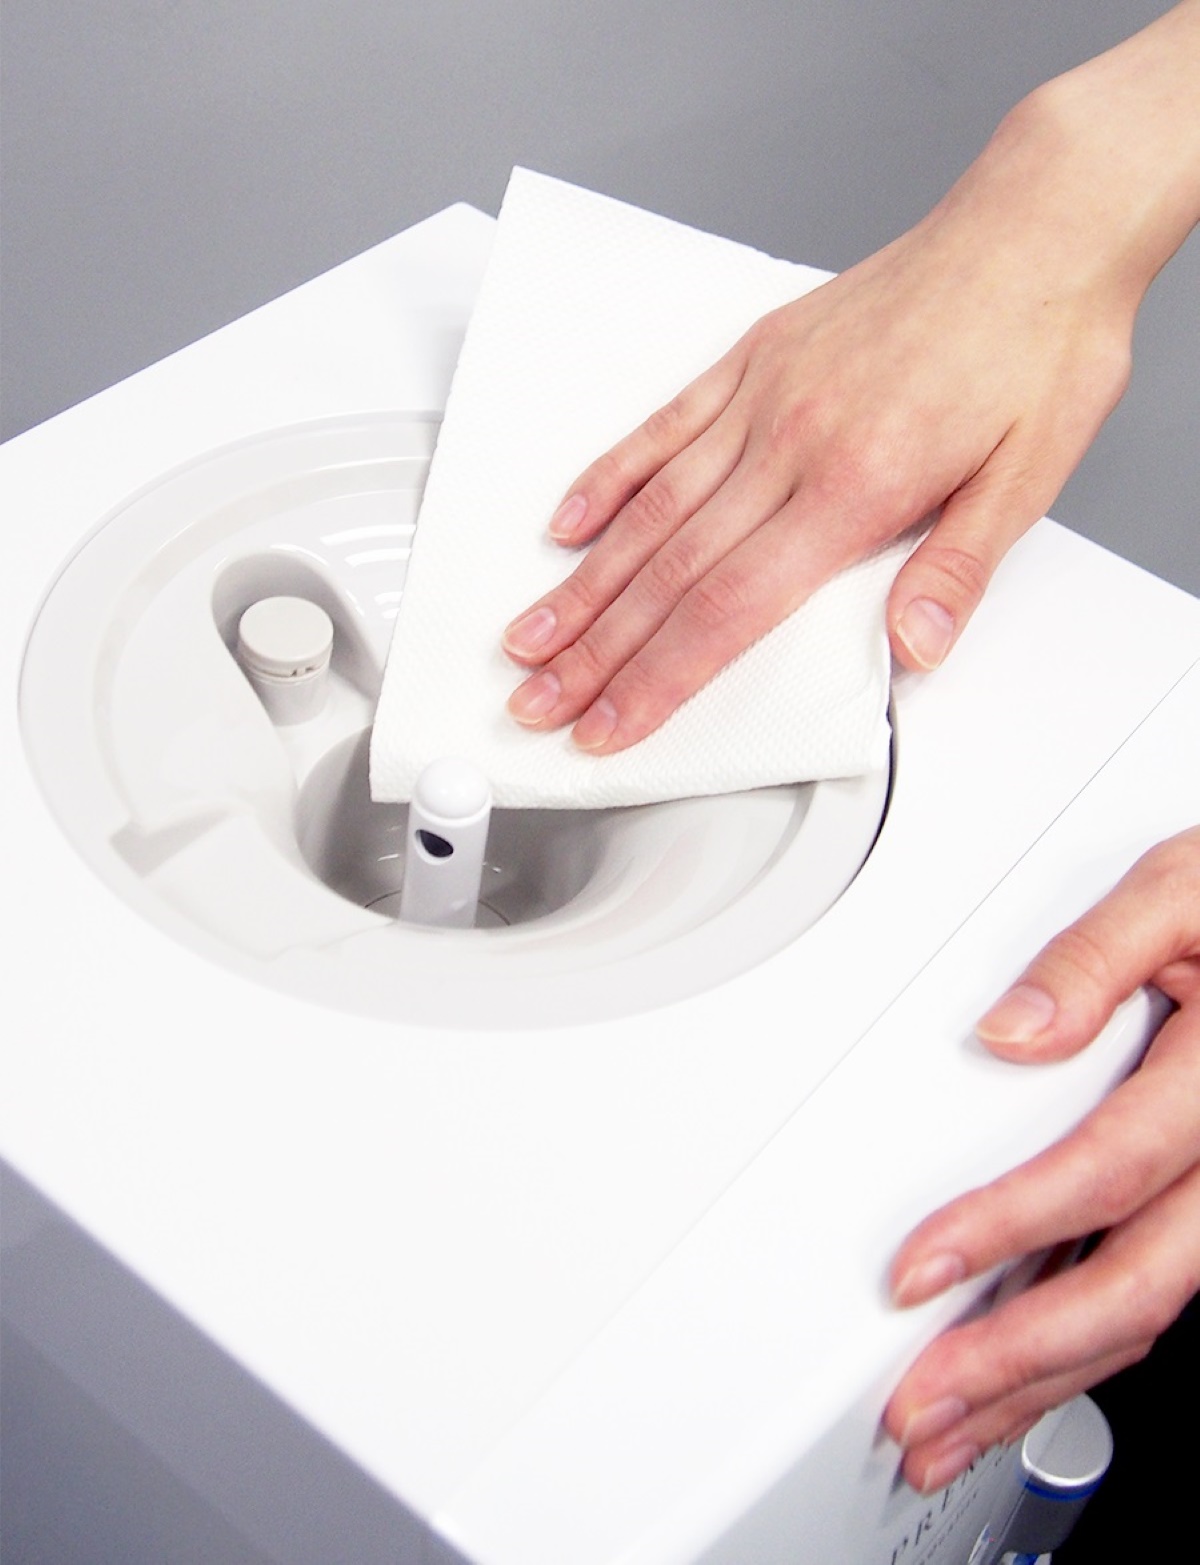
Step 4: Clean the Drip Tray
Now that the drip tray is empty, it’s time to give it a thorough cleaning to remove any stains, dirt, or residue that may have accumulated over time. Cleaning the drip tray is essential for maintaining a clean and hygienic Primo Water Dispenser.
Start by preparing a cleaning solution. You can either use warm water and mild dish soap or vinegar diluted with water. Both options are effective in removing stains and sanitizing the drip tray.
If using dish soap, mix a small amount of it with warm water in a sink or a bowl. Dip a soft cloth or sponge into the cleaning solution and gently scrub the interior and exterior of the drip tray. Pay attention to any stubborn stains or residue, giving them some extra care and effort to remove.
If you prefer to use vinegar, mix equal parts of vinegar and water in a container. Vinegar’s acidic properties help break down mineral deposits and sanitize the drip tray. Dip the cloth or sponge into the vinegar solution and clean the drip tray, making sure to cover all areas thoroughly.
For stubborn stains or build-up, you can let the cloth or sponge soaked in the cleaning solution sit on the affected areas for a few minutes. This allows the cleaning solution to penetrate the stains and make them easier to remove.
Make sure to clean all the corners and crevices of the drip tray to ensure a thorough cleaning. Pay attention to the spout area, as residue may accumulate there as well.
Once you are satisfied with the cleaning, rinse the drip tray thoroughly with clean water to remove any soap or vinegar residue. This step is important to prevent any unwanted tastes or odors from lingering in the drip tray.
With the drip tray now clean and free from stains or debris, we can move on to the next step: rinsing and drying the drip tray.
Step 5: Rinse and Dry the Drip Tray
After giving the drip tray a thorough cleaning, it’s important to rinse it off to remove any remaining soap or cleaning solution. Rinsing the drip tray ensures that it is free from any residue and ready to be reassembled into your Primo Water Dispenser.
Start by holding the drip tray under running water, making sure to rinse it from all angles. Use your hands to rub the surface and ensure all traces of soap or cleaning solution are washed away.
If you notice any stubborn residue that doesn’t come off with just water, you can gently scrub it with a soft brush or sponge. However, be cautious not to scrub too hard, as this can scratch or damage the surface of the drip tray.
Once you have thoroughly rinsed the drip tray, it’s time to dry it off. Use a clean, soft cloth or towel to remove any excess water from the drip tray. Make sure to dry both the interior and exterior of the tray to prevent any moisture from remaining.
If you want to speed up the drying process, you can also leave the drip tray to air dry for a short period. Placing it on a clean, dry surface with good airflow will help it dry faster.
Remember, it’s essential to ensure that the drip tray is completely dry before reassembling it back into the Primo Water Dispenser. This prevents any moisture from causing mold or mildew growth and helps maintain the cleanliness of your water dispenser.
With the drip tray rinsed and dried, it’s time to move on to the next step: reassembling the drip tray back into the water dispenser.
Step 6: Reassemble the Drip Tray
Now that the drip tray is clean and dry, it’s time to reassemble it back into your Primo Water Dispenser. Properly reassembling the drip tray ensures that it fits securely and functions correctly, providing you with a seamless water dispensing experience.
Carefully align the drip tray with its designated position on the bottom of the water dispenser. Depending on your specific model, there may be notches or slots that help guide the drip tray into place. Make sure the drip tray is positioned correctly and fits snugly into the designated area.
Once the drip tray is in position, gently push it back towards the rear of the water dispenser. This ensures that it is securely attached and won’t move or detach during normal use.
Double-check to ensure that the drip tray is aligned correctly, sitting flush with the surface of the water dispenser. It should be level and stable, ready to catch any drips or spills that may occur during water dispensing.
Take a moment to ensure that the drip tray is securely in place and won’t accidentally come loose. Give it a slight tug or shake to make sure it is attached correctly. If it feels loose or unstable, repeat the reassembly process to ensure proper attachment.
With the drip tray successfully reassembled, you have completed the major steps in cleaning your Primo Water Dispenser drip tray. However, to thoroughly maintain the cleanliness of your water dispenser, there is one final step to follow: cleaning the exterior.
Read more: How To Use Primo Water Dispenser
Step 7: Clean the Exterior of the Water Dispenser
While cleaning the drip tray is essential, it’s also important to clean the exterior of your Primo Water Dispenser to maintain its overall cleanliness and appearance. Over time, dust, dirt, and fingerprints can accumulate on the surface of the dispenser, making it look dull or unattractive. Taking the time to clean the exterior will not only enhance its visual appeal but also ensure a more hygienic water dispensing experience.
To clean the exterior of the water dispenser, start by preparing a mild cleaning solution. Dilute a small amount of dish soap in warm water, creating a solution that is gentle yet effective at removing dirt and grime.
Dampen a soft cloth or sponge in the cleaning solution and gently wipe down the exterior of the water dispenser. Pay attention to any areas that may be particularly dirty, such as the control panel or buttons. Be cautious when cleaning near electrical components, making sure to avoid any excessive moisture that could damage the dispenser.
If you prefer a natural cleaning solution, you can use a mixture of equal parts water and white vinegar. Vinegar is a natural disinfectant and can help remove any stubborn stains or odors from the surface of the water dispenser.
After wiping down the exterior, use a clean, damp cloth to remove any soapy residue. This step is important to prevent any slippery surfaces or residue that may come into contact with the water or affect the taste and quality of the dispensed water.
Once the exterior has been thoroughly cleaned and wiped down, use a dry cloth to remove any excess moisture and give the water dispenser a final shine. Make sure to dry any control panels or buttons to prevent any damage or malfunction.
If your Primo Water Dispenser has a stainless steel exterior, you can use a specialized stainless steel cleaner to maintain its shine and prevent any fingerprints or smudges. Follow the manufacturer’s instructions on the cleaner for the best results.
Cleaning the exterior of your water dispenser not only improves its appearance but also contributes to a more sanitary water dispensing experience. With the exterior now clean and shiny, your Primo Water Dispenser is ready to provide you with clean, refreshing water.
Now that you have followed the seven steps to clean your Primo Water Dispenser drip tray and its exterior, you can enjoy the benefits of a hygienic and well-maintained water dispenser. Regularly cleaning the drip tray and exterior will help prolong the lifespan of your water dispenser and ensure that every glass of water is pure and refreshing.
Remember to consult the manufacturer’s instructions or user manual specific to your Primo Water Dispenser for any additional guidelines or recommendations regarding cleaning and maintenance.
Enjoy the convenience and cleanliness of your Primo Water Dispenser!
Conclusion
Cleaning the drip tray of your Primo Water Dispenser is a crucial step in maintaining its cleanliness and functionality. By following the seven steps outlined in this guide, you can keep your water dispenser in optimal condition and ensure that every glass of water is clean, fresh, and free from impurities.
We started by gathering the necessary materials such as warm water, mild dish soap, a soft cloth or sponge, and optionally, vinegar. Then, we proceeded to turn off the water dispenser and remove the drip tray. After emptying the contents of the tray, we thoroughly cleaned it using a cleaning solution or vinegar mixture.
We then rinsed and dried the drip tray to remove any residue and moisture. Once dry, we reassembled the drip tray back into the water dispenser, making sure it was securely attached. Finally, we cleaned the exterior of the water dispenser, ensuring its overall cleanliness and visual appeal.
Regularly cleaning the drip tray and the exterior of your Primo Water Dispenser not only enhances its lifespan but also ensures a sanitary and enjoyable water dispensing experience. It helps prevent the formation of mold, mildew, or unpleasant odors, giving you peace of mind knowing that your water is pure and refreshing.
Remember, always consult the manufacturer’s instructions or user manual specific to your Primo Water Dispenser for any additional guidelines or recommendations regarding cleaning and maintenance.
Now that you have the knowledge and steps to clean your Primo Water Dispenser drip tray, take the time to incorporate this cleaning routine into your regular maintenance schedule. By doing so, you can enjoy clean, fresh water whenever you need it, making your Primo Water Dispenser a reliable source of hydration for you and your family.
Cheers to a clean and healthy water dispensing experience!
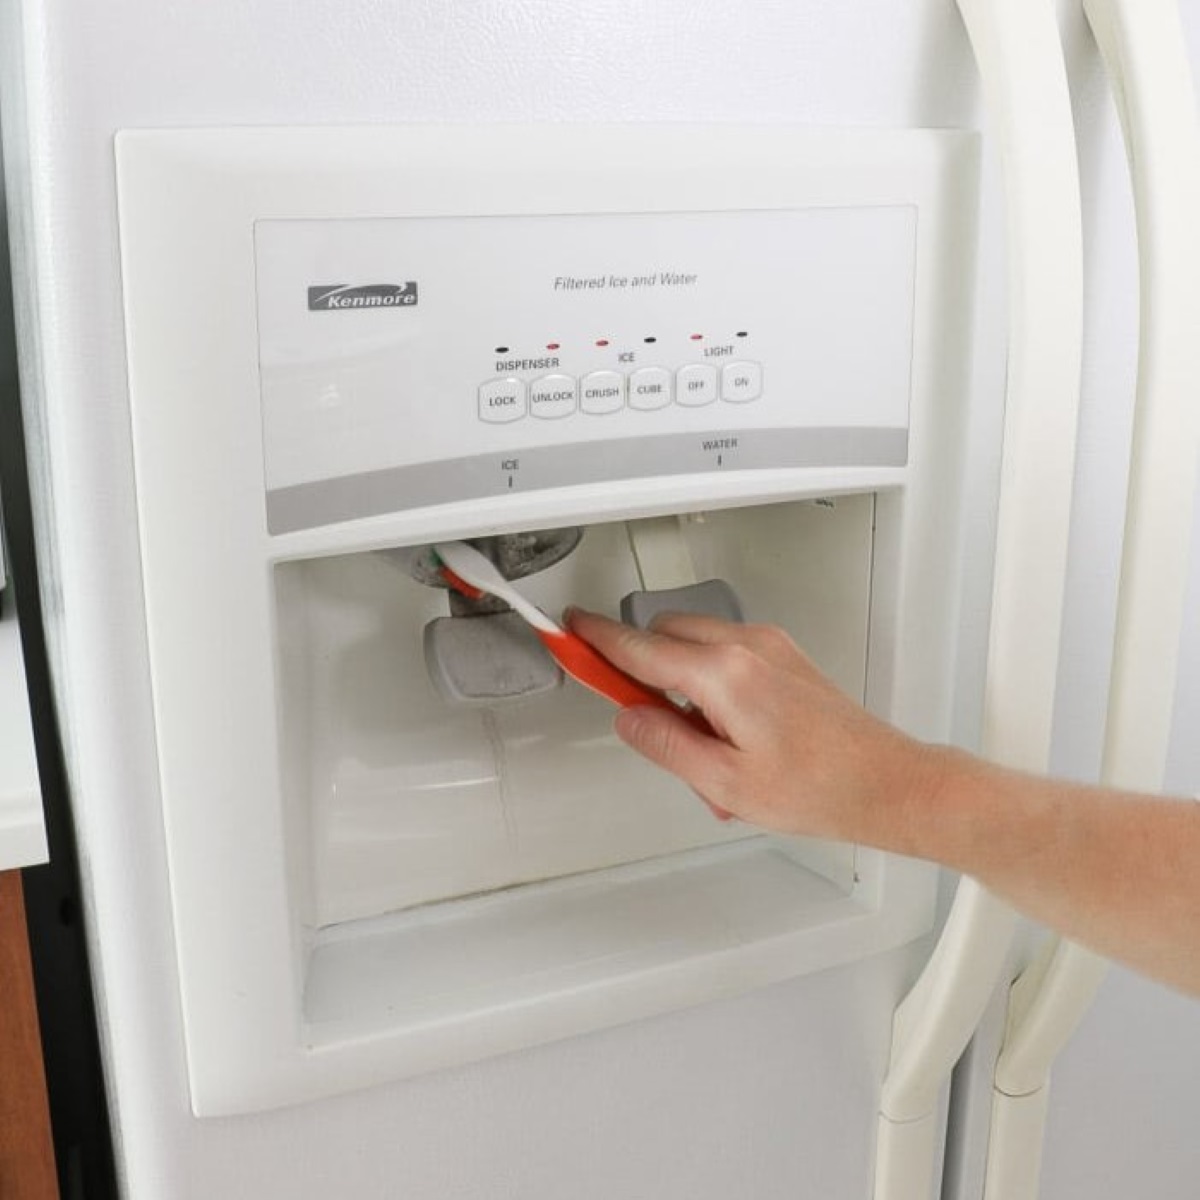
Now that you've mastered cleaning your Primo water dispenser drip tray, why not extend that fresh sparkle to other appliances? Dive into our easy-to-follow guide on keeping your fridge spotless with our Cleaning Tips. From scrubbing hidden grime to polishing surfaces, you'll find practical advice to help your refrigerator look and perform its best. Don't miss out on these essential tips for a cleaner, fresher kitchen!
Frequently Asked Questions about How Do You Clean A Primo Water Dispenser Drip Tray
Was this page helpful?
At Storables.com, we guarantee accurate and reliable information. Our content, validated by Expert Board Contributors, is crafted following stringent Editorial Policies. We're committed to providing you with well-researched, expert-backed insights for all your informational needs.

0 thoughts on “How Do You Clean A Primo Water Dispenser Drip Tray”