Articles
How To Build An Attic Storage
Modified: January 19, 2024
Learn how to build attic storage with our informative articles. Maximize your space and add functionality to your home with these step-by-step guides.
(Many of the links in this article redirect to a specific reviewed product. Your purchase of these products through affiliate links helps to generate commission for Storables.com, at no extra cost. Learn more)
Introduction
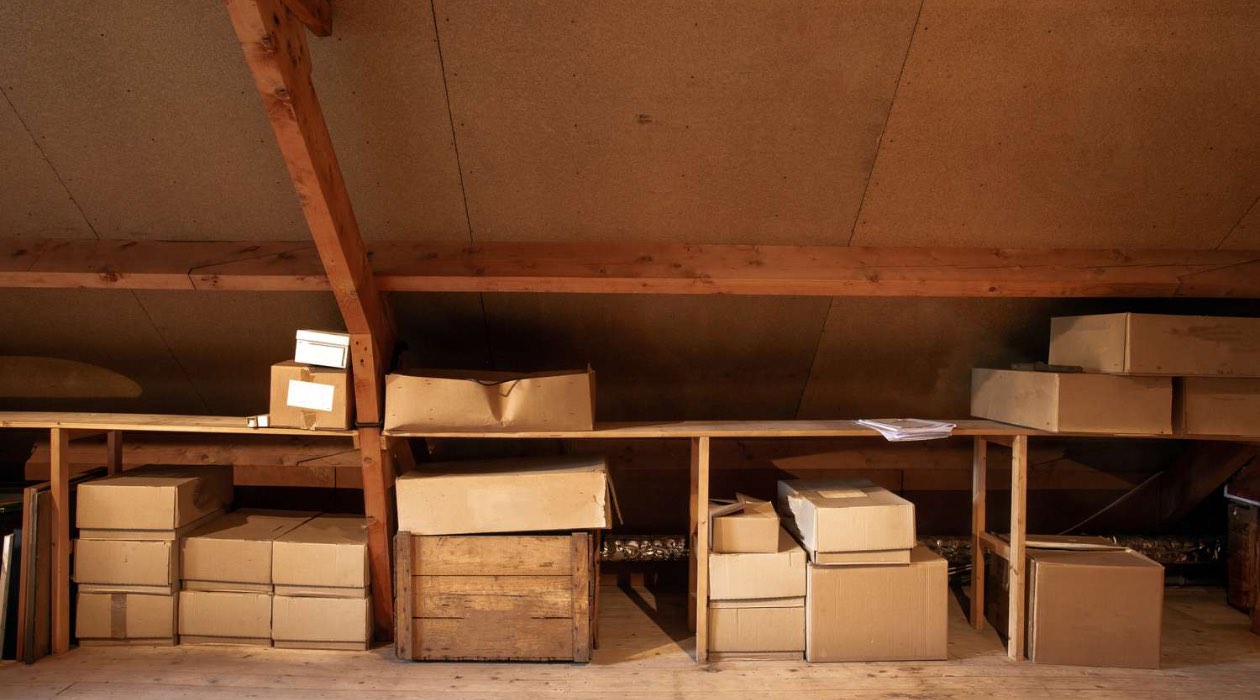
Having an attic in your home can be a blessing in disguise. It provides you with extra space that you can utilize for storage, keeping your living areas clutter-free. However, without proper organization and planning, the attic can quickly become a chaotic mess. That’s why it’s important to take the time to build an attic storage system that is not only efficient but also maximizes the available space.
In this article, we will guide you through the process of building an attic storage system step by step. From assessing the attic space to securing the storage area, we will cover all the essential aspects to ensure that your attic storage is durable, functional, and well-organized.
Before diving into the steps, it’s important to note that each attic is unique, and the specific requirements may vary depending on the size and structure of your attic. It’s always a good idea to consult with a professional or construction expert if you have any doubts or concerns.
With that said, let’s get started on building your attic storage!
Key Takeaways:
- Transform your attic into a functional storage space by assessing, clearing out clutter, insulating, installing flooring, building shelving units, organizing, and securing the area. Maximize space and enjoy a clutter-free living environment.
- Prioritize safety and regular maintenance to ensure the longevity of your attic storage system. Create a well-organized and efficient storage area while consulting professionals for guidance on adapting the steps to your unique attic space.
Read more: How To Build An Attic
Step 1: Assessing your attic
Before you begin building your attic storage, it’s crucial to assess the space and determine its suitability for storage purposes. Here are some factors to consider:
- Structural integrity: Ensure that the attic floor can support the weight of storage items. Check for any signs of sagging or structural damage. If you’re unsure, consult a professional to assess the load-bearing capacity.
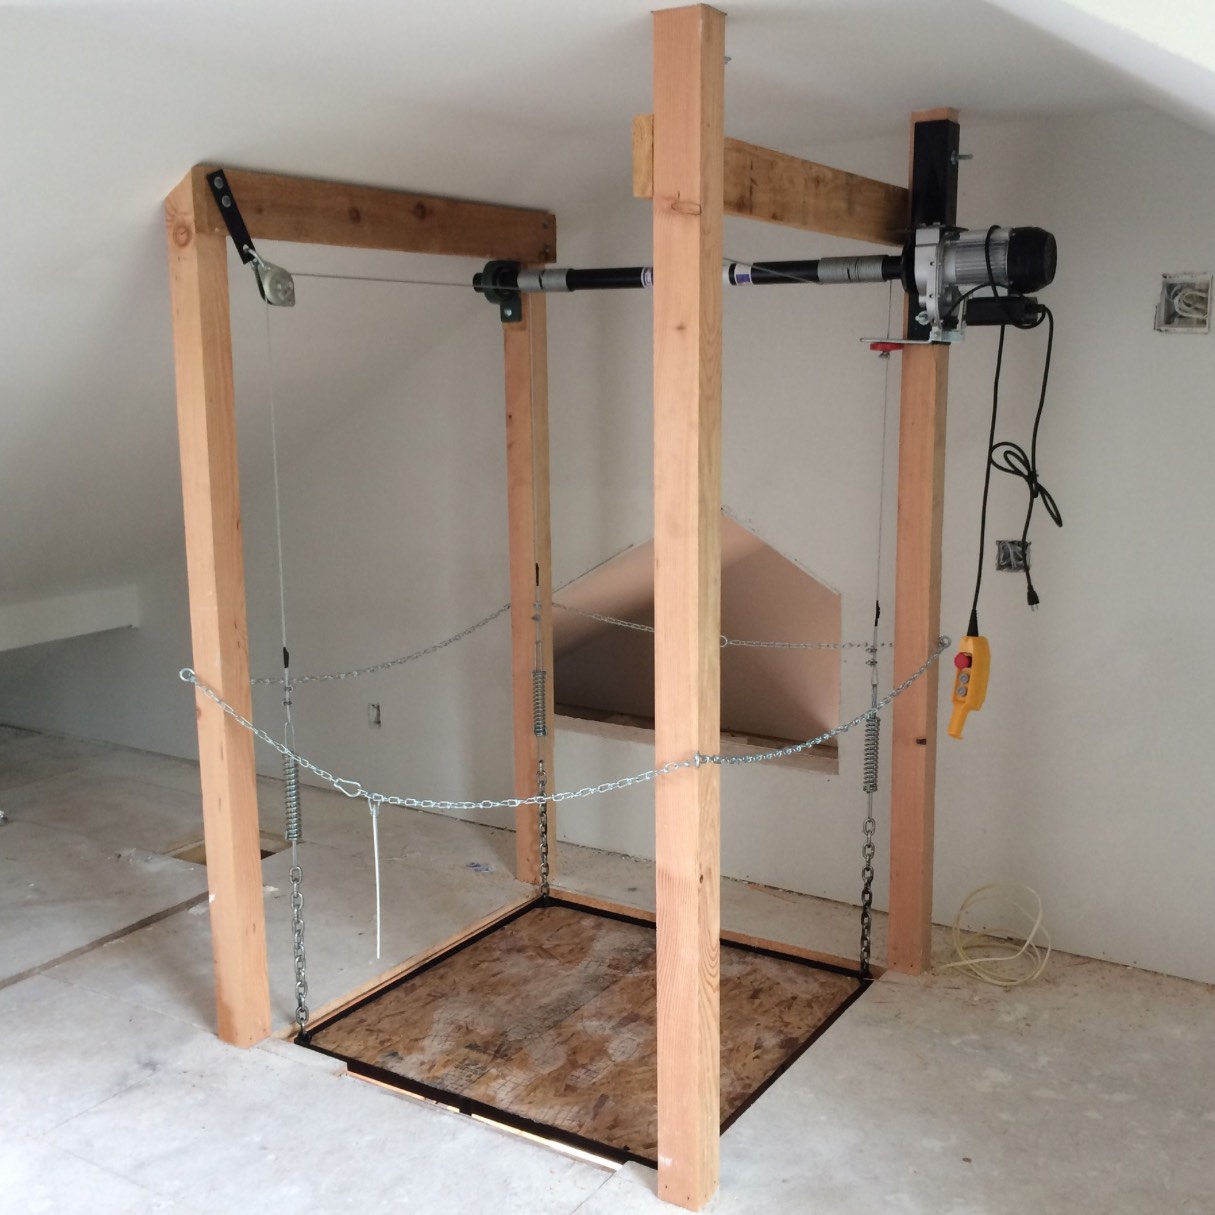
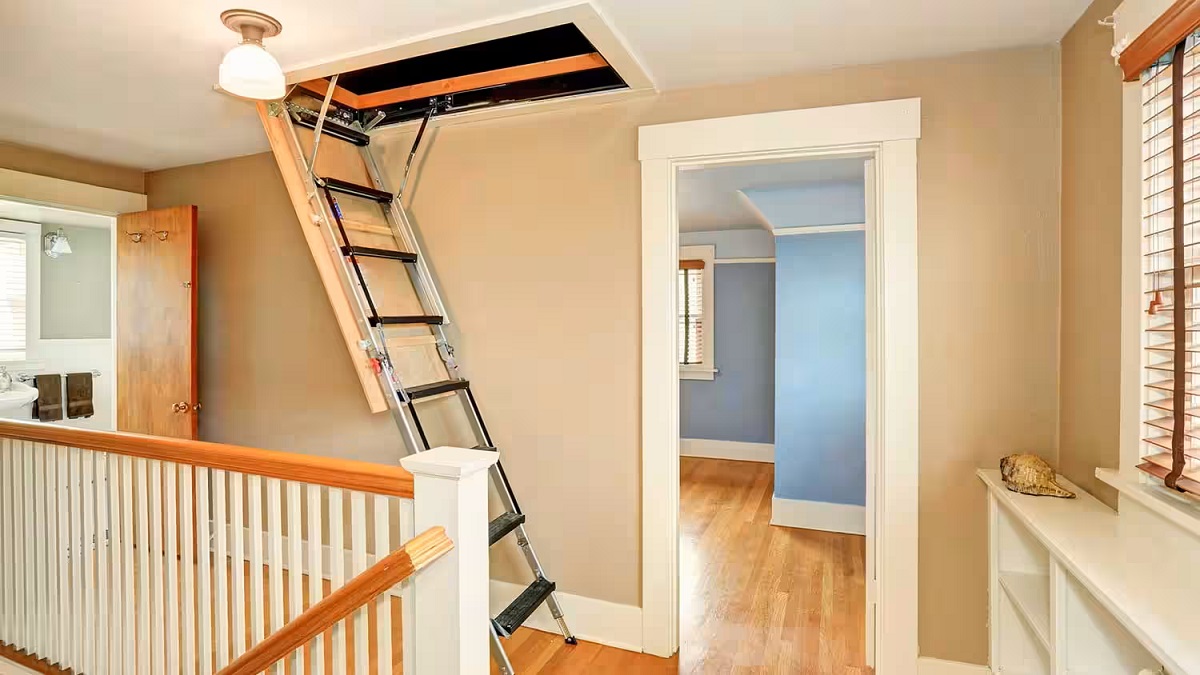
- Access: Evaluate the accessibility of your attic. Is there a staircase or ladder for easy entry? Consider the ease of carrying items in and out of the attic.
- Headroom: Measure the height of the attic to ensure that it provides enough headroom for you to move around comfortably. You don’t want to bump your head on low ceilings or exposed beams.
- Lighting and ventilation: Adequate lighting and ventilation are essential for a functional attic storage area. If necessary, install additional windows or skylights to bring in natural light, and consider adding vents or an attic fan to improve airflow.
- Insulation: Check the insulation in your attic. Proper insulation is crucial to regulate temperature and prevent extreme heat or cold. If necessary, consider adding or upgrading insulation to ensure a comfortable and climate-controlled storage space.
Take measurements of the available space in your attic and create a sketch or floor plan. This will help you envision the layout and design of your storage system. Consider any obstacles like pipes, ductwork, or awkward angles that may affect placement and accessibility.
By thoroughly assessing your attic, you can identify any potential challenges or limitations that may require adjustments in your storage plan. It’s better to address these issues beforehand rather than encountering problems during the construction process.
Once you have a clear understanding of the attic space, you’re ready to move on to the next step: clearing out the attic.
Step 2: Clearing out the attic
Before you can begin building your attic storage, it’s essential to clear out the existing clutter in your attic. This step may seem daunting, especially if your attic has become a dumping ground for unused items over the years. However, by decluttering and organizing your attic, you can create a clean and blank canvas for your storage project.
Here’s how to efficiently clear out your attic:
- Sort and categorize: Start by sorting through the items in your attic and categorizing them into different groups. Create separate piles for items to keep, donate, sell, or throw away. Be honest with yourself and let go of things that you no longer need or use.
- Use storage containers: Invest in sturdy storage containers or plastic bins to store your belongings. Clear, plastic containers are ideal as they allow you to see the contents without opening each box. Label the containers for easy identification in the future.
- Utilize vertical space: Make the most of your attic’s height by utilizing vertical storage solutions. Install wall-mounted shelving units, hooks, or racks to hang items such as tools, sports equipment, or seasonal clothing. This will maximize the use of space and keep things organized.
- Consider off-site storage: If you are limited on space or have items that you don’t need immediate access to, consider renting a storage unit. This is a great solution for items like holiday decorations or sentimental items that you want to keep but don’t necessarily need in your daily life.
- Dispose of unwanted items: Properly dispose of items that are damaged, broken, or beyond repair. Check your local recycling centers, donate usable items to charities, and safely dispose of hazardous materials in accordance with local regulations.
By clearing out the clutter and organizing your attic, you’ll create a more functional and spacious storage space.
Once you have successfully cleared out your attic, it’s time to move on to the next step: insulating the attic.
Step 3: Insulating the attic
Insulating your attic is a crucial step in creating a comfortable and energy-efficient storage area. Proper insulation helps regulate temperatures, prevent heat loss or gain, and protect your stored items from extreme conditions. Here’s how you can insulate your attic:
- Determine insulation type: Research different types of insulation materials, such as fiberglass batts, blown-in cellulose, or spray foam insulation. Consider factors like R-value (thermal resistance) and moisture resistance to choose the most suitable insulation for your attic.
- Prepare the attic: Clear out the attic space, removing any debris or old insulation materials. Ensure that the attic is clean, dry, and free from any obstructions that could affect the insulation process.
- Seal air leaks: Before installing insulation, identify and seal any air leaks in the attic. Common areas to check for leaks include gaps around windows, vents, electrical outlets, and HVAC ducts. Use caulking, weatherstripping, or foam sealant to close these gaps and prevent unwanted airflow.
- Install insulation: Follow the manufacturer’s instructions to install the insulation material of your choice. Whether you’re using fiberglass batts, blown-in insulation, or spray foam, make sure to cover the attic floor and walls evenly. Pay close attention to areas with pipes, electrical wires, or other obstructions, ensuring that they are properly insulated.
- Consider ventilation: Adequate attic ventilation is essential to prevent moisture buildup and promote air circulation. Install vents or a ridge vent system to ensure proper airflow. This will help maintain the longevity of your insulation and prevent issues like mold or mildew.
Proper insulation can significantly improve the energy efficiency of your home and keep your attic storage area well-protected. It will also create a comfortable environment for you to access your stored items without worrying about extreme temperatures or humidity.
Now that you have insulated your attic, it’s time to move on to the next step: installing flooring in the attic.
Step 4: Installing flooring in the attic
Installing flooring in your attic will provide a stable and secure surface for your storage area. It will not only protect your items from coming into direct contact with the attic floor but also allow you to move around more easily. Here’s how you can install flooring in your attic:
- Choose the flooring material: Select a suitable flooring material that meets your needs and budget. Common options for attic flooring include plywood, OSB (oriented strand board), or attic flooring panels specifically designed for this purpose. Consider the thickness of the material to ensure durability and sufficient weight-bearing capacity.
- Prepare the attic floor: Clean the attic floor thoroughly, removing any dirt, debris, or nails. Ensure that the floor is level and free from any unevenness that could affect the installation process.
- Measure and cut the flooring materials: Measure the dimensions of the attic space and cut the flooring material accordingly. Take into account any obstacles such as pipes or electrical outlets and make necessary adjustments to ensure a precise fit.
- Install the flooring: Begin by laying the first row of flooring material along one wall of the attic. Use screws or nails to secure it to the floor joists. Repeat the process, interlocking the panels or boards as you move along, until the entire attic floor is covered.
- Leave expansion gaps: Be sure to leave small gaps between the flooring panels or boards to allow for natural expansion and contraction due to temperature and humidity changes.
- Optional: Apply a finish: If desired, you can apply a finish or sealant to the attic floor to protect it from moisture and wear. This step is particularly important if you plan to use the attic storage area frequently or for heavy items.
By installing flooring in your attic, you create a stable base for your storage area, making it easier to access and organize your belongings. It also adds an aesthetic touch, turning your attic into a functional space that’s both practical and visually appealing.
Now that your attic has a solid and secure floor, it’s time to move on to the next step: building shelving units.
Consider using sturdy and lightweight materials such as plywood or plastic bins for attic storage to maximize space and ensure items are easily accessible.
Read more: How To Build Stairs To Attic
Step 5: Building shelving units
Building shelving units in your attic will provide you with a systematic and efficient way to organize your belongings. By utilizing vertical space, you can maximize your storage capacity and keep items easily accessible. Here’s how you can build shelving units in your attic:
- Measure and plan: Measure the dimensions of your attic and determine the available wall space for installing the shelving units. Consider the height, width, and depth of the shelves, taking into account the size of the items you plan to store.
- Select materials: Choose the appropriate materials for your shelves based on your preferences and budget. Common options include plywood, MDF (medium-density fiberboard), or metal shelving brackets. Ensure the materials are sturdy and can support the weight of your stored items.
- Prepare the materials: Cut the plywood or MDF boards into the desired sizes for the shelves. Sand the edges and surfaces to create smooth and even surfaces.
- Install the brackets: Attach the metal shelving brackets securely to the walls of your attic using screws and a level to ensure they are straight. Space them evenly and make sure they are properly aligned for a stable and balanced shelving unit.
- Attach the shelves: Place the cut boards onto the brackets and secure them in place with screws or nails. Make sure they are level and have sufficient support from the brackets. Consider adding additional support brackets for longer shelves to prevent sagging.
- Adjust and customize: Once the basic shelving units are installed, you can customize them further to suit your specific storage needs. Add dividers, hooks, or baskets to organize smaller items. Incorporate adjustable shelves or modular systems to accommodate changing storage requirements.
Building shelving units in your attic allows you to create a structured and organized storage area. It not only maximizes the space available but also makes it easier to locate and access your stored items.
With the shelving units in place, it’s time to move on to the next step: organizing and maximizing storage space in your attic.
Step 6: Organizing and maximizing storage space
Now that you have built shelving units in your attic, it’s time to focus on organizing and maximizing the storage space available. Proper organization will not only make it easier to find and access your belongings but also ensure that the attic storage area remains tidy and functional. Here are some tips to help you with this step:
- Categorize your belongings: Sort your items into categories such as seasonal decorations, sports equipment, or camping gear. This will make it easier to locate specific items when you need them.
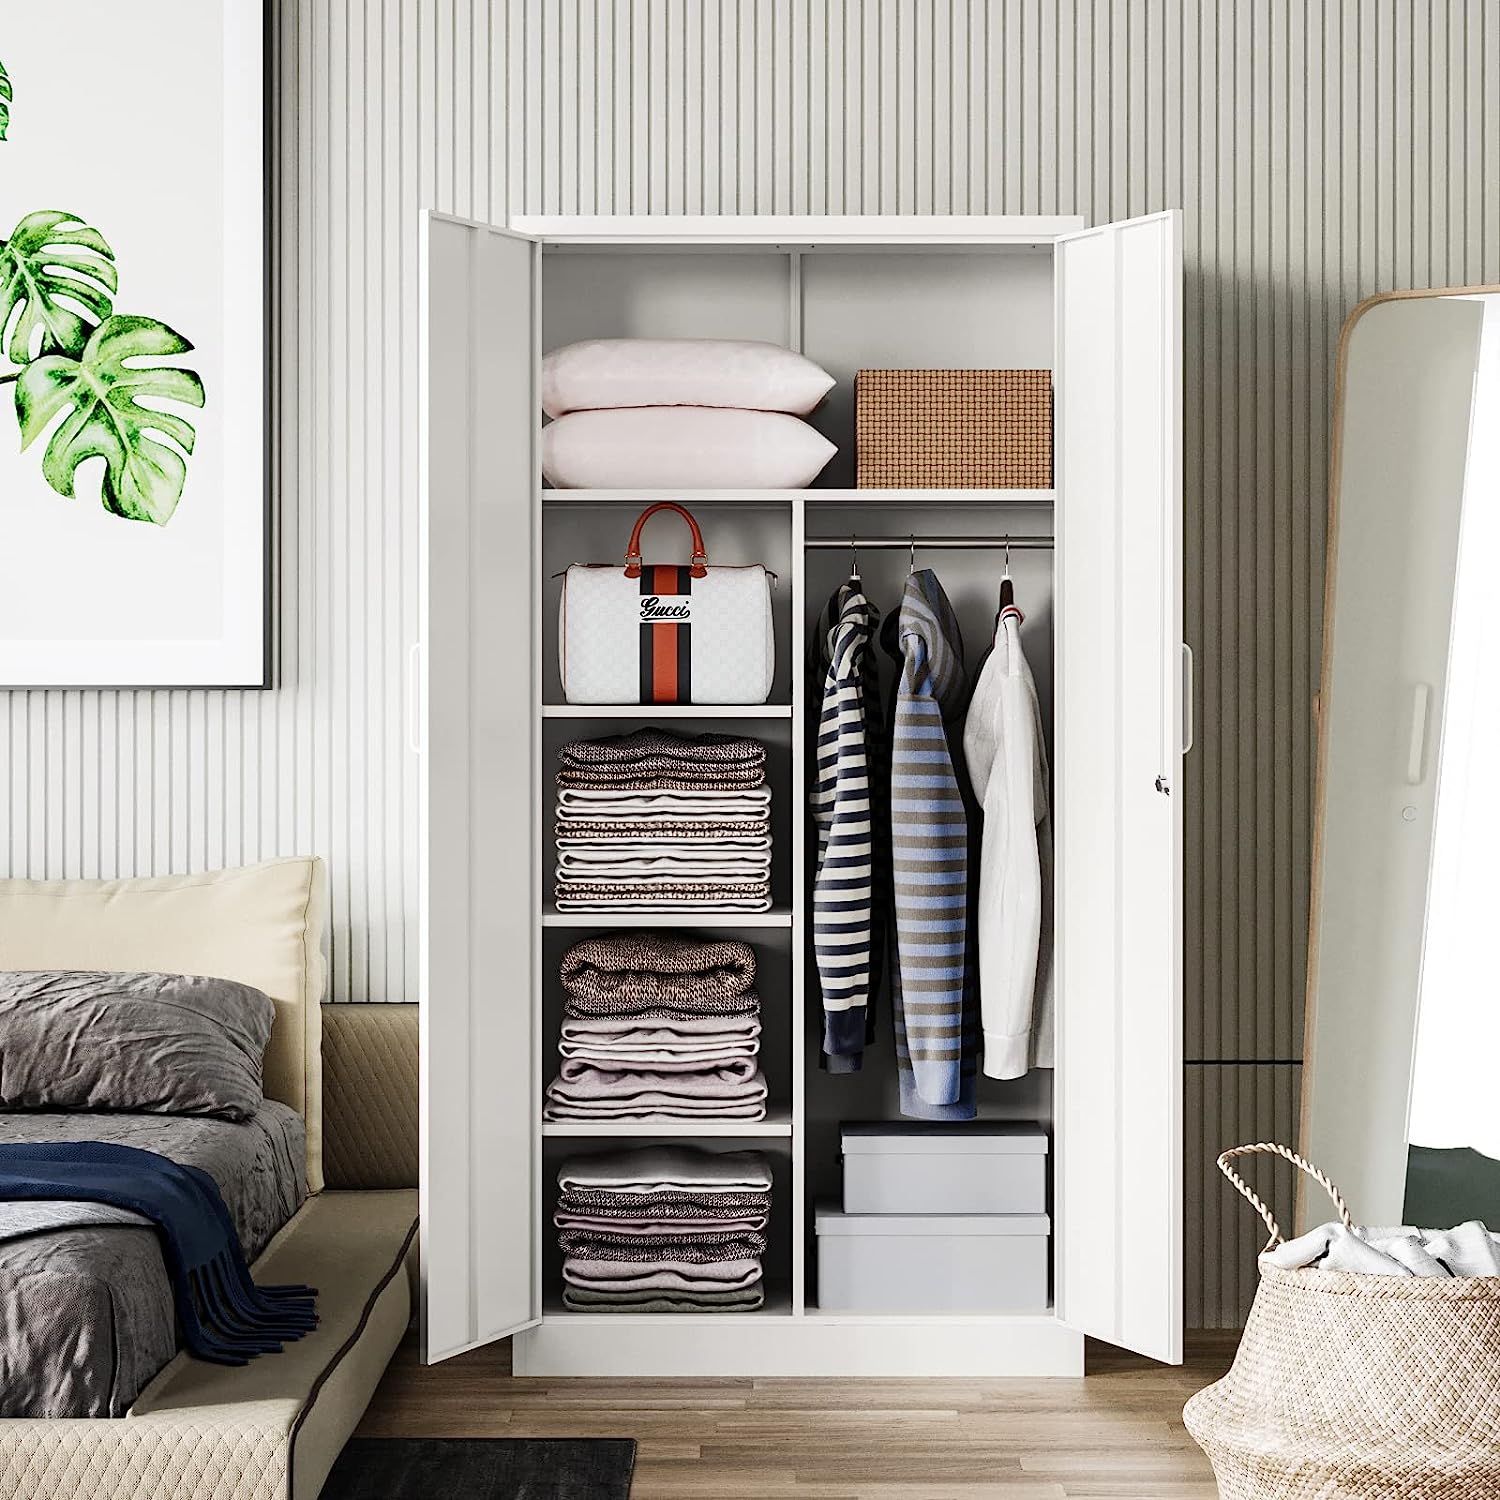
- Utilize storage containers: Place your items in sturdy, labeled storage containers to keep them protected and organized. Clear containers are ideal as they allow you to see the contents at a glance. Stack smaller containers on shelves or utilize larger bins for bulkier items.
- Maximize vertical space: Take advantage of the height of your attic by using stackable storage solutions. Utilize the vertical space between shelves by installing hooks, hanging racks, or utilizing wall-mounted storage systems.
- Label everything: Label each container or shelf to easily identify the contents. This will save you time and effort when searching for specific items. Consider using color-coded labels or numbering systems for even more efficient organization.
- Create zones: Divide your attic storage area into different zones based on the categories of items. This will help you allocate specific spots for different types of belongings and maintain a sense of order.
- Arrange items strategically: Place frequently used items within easy reach and reserve the higher or harder-to-reach shelves for items that are less frequently accessed. Keep heavy items on lower shelves to prevent strain or accidents.
- Leave walkways: Ensure that there are clear pathways between shelves, allowing you to move around comfortably and safely. This will make it easier to retrieve items and prevent any tripping hazards.
By organizing your attic storage space effectively, you can maximize every inch of available space and create a well-structured and efficient storage area. Take the time to regularly assess and reorganize your belongings to optimize the storage space based on your changing needs.
With your attic storage area well-organized, it’s time to focus on the final step: securing the attic storage area.
Step 7: Securing the attic storage area
Securing your attic storage area is an important step to ensure the safety of your belongings and prevent any accidents or damage. By taking the necessary precautions, you can create a secure and well-protected storage space. Here are some measures you can take to secure your attic storage area:
- Install attic access door or hatch: If your attic doesn’t already have a door or hatch, consider installing one to restrict access and prevent unauthorized entry. Ensure that the door or hatch is sturdy and lockable for added security.
- Consider installing a handrail: If your attic has a staircase or ladder for access, installing a handrail can provide additional safety and stability when climbing up and down.
- Secure shelving units: Ensure that the shelves are securely anchored to the wall or floor to prevent them from tipping over. Use brackets or straps to secure them in place.
- Use safety straps for heavy items: If you have bulky or heavy items stored on higher shelves, use safety straps or bungee cords to prevent them from falling off and causing injury or damage.
- Install smoke detectors and fire extinguishers: As with any area of your home, it’s important to have smoke detectors installed in the attic. Place a fire extinguisher nearby to be prepared in case of emergencies.
- Keep the attic well-ventilated: Ensure proper airflow and ventilation in your attic to prevent humidity buildup and reduce the risk of mold or mildew. Keep vents clear and consider installing an attic fan to improve air circulation.
- Regular inspection and maintenance: Periodically check the attic storage area for any signs of damage, wear, or pest infestation. Take the necessary steps to address any issues promptly to maintain a safe and secure environment.
By implementing these security measures, you can have peace of mind knowing that your attic storage area is well-protected and secure. It’s important to prioritize safety and regularly maintain the storage space to ensure its longevity.
With the completion of Step 7, you have successfully built and secured your attic storage area. Enjoy your organized and functional space!
Conclusion
Building an attic storage system can significantly enhance the functionality and organization of your home. By following the steps outlined in this article, you can transform your attic space into a well-structured and efficient storage area. From assessing the attic and clearing out clutter to insulating the space, installing flooring, building shelving units, organizing your belongings, and securing the area, each step is essential to creating a successful attic storage system.
Remember, every attic is unique, and it’s important to adapt the steps based on your specific attic space and storage needs. Consulting with professionals or construction experts can provide valuable guidance and ensure that your attic storage system is built safely and efficiently.
With an organized and functional attic storage system, you can enjoy a clutter-free living space while having easy access to your stored items. Not only does this optimize your available space, but it also enhances the overall aesthetic of your home.
Maintain regular upkeep of your attic storage area, periodically reassessing and reorganizing your belongings to maximize space and efficiency. By doing so, you can ensure the long-term effectiveness and durability of your attic storage system.
Now that you have the knowledge and guidance to build your attic storage system, it’s time to tackle this rewarding project. Get started today and unlock the full potential of your attic space!
Frequently Asked Questions about How To Build An Attic Storage
Was this page helpful?
At Storables.com, we guarantee accurate and reliable information. Our content, validated by Expert Board Contributors, is crafted following stringent Editorial Policies. We're committed to providing you with well-researched, expert-backed insights for all your informational needs.


0 thoughts on “How To Build An Attic Storage”