Articles
How To Build Wall Cabinets For Living Room
Modified: October 20, 2024
Learn how to build beautiful and functional wall cabinets for your living room with our expert articles. Transform your space with these DIY projects.
(Many of the links in this article redirect to a specific reviewed product. Your purchase of these products through affiliate links helps to generate commission for Storables.com, at no extra cost. Learn more)
Introduction
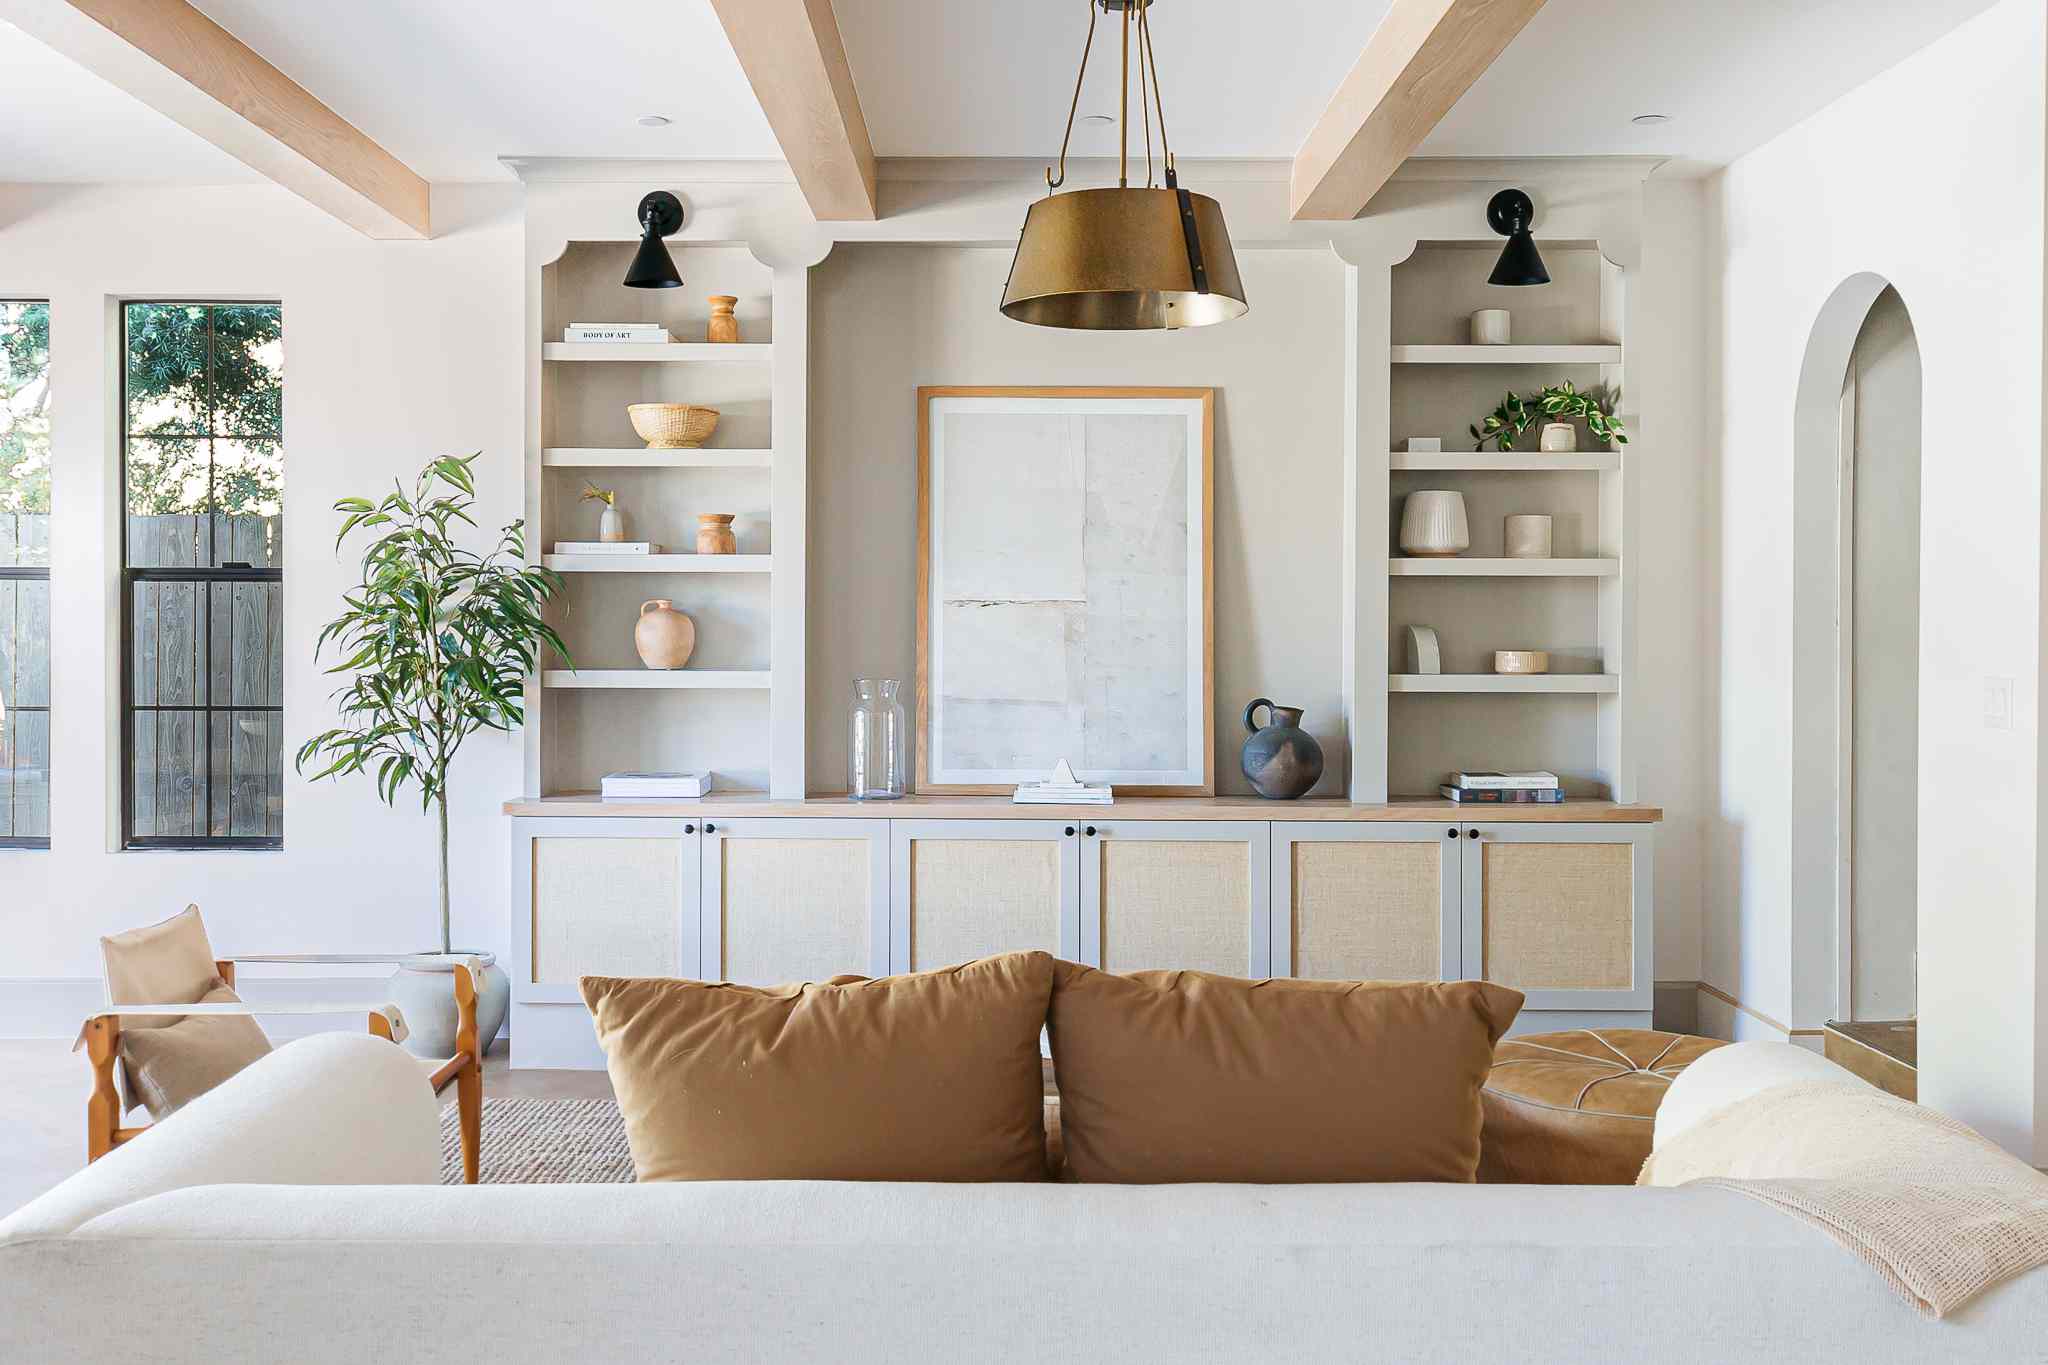
Welcome to our comprehensive guide on how to build wall cabinets for your living room. Wall cabinets are not only a functional storage solution, but they also add a touch of elegance and sophistication to your living space. Whether you need extra storage for books, decor items, or personal belongings, building your own wall cabinets allows you to customize the design and size to perfectly fit your needs.
In this article, we will walk you through the step-by-step process of building wall cabinets for your living room. We will cover everything from materials needed and planning to measuring, cutting, assembling, and installing the cabinets. By the end of this guide, you will have the knowledge and confidence to create beautiful and functional wall cabinets that will enhance the overall look and organization of your living room.
Please keep in mind that building wall cabinets requires a basic understanding of woodworking and the use of power tools. If you are new to woodworking, it is recommended to seek assistance from a professional or take a beginner’s woodworking class to familiarize yourself with the tools and techniques involved.
Now that we have set the expectations, let’s gather the necessary materials and dive into the exciting process of building your very own wall cabinets!
Key Takeaways:
- Building wall cabinets for your living room requires careful planning, precise measurements, and attention to detail. From cutting wood panels to attaching cabinet doors, each step contributes to creating functional and elegant storage solutions.
- The process of building wall cabinets is a rewarding journey that allows you to customize your living space while honing your woodworking skills. With the right materials, tools, and techniques, you can create beautiful cabinets that enhance the organization and aesthetics of your home.
Read more: How To Build Living Room Curtains
Materials Needed
Before you start building your wall cabinets, it’s important to gather all the necessary materials to ensure a smooth and efficient construction process. Here is a list of the basic materials you will need:
- Wood panels: Choose a high-quality wood, such as plywood or MDF, that is suitable for cabinetry.
- Screws: Use screws that are appropriate for the thickness of the wood panels you are using.
- Wood glue: This will help strengthen the joints and ensure the durability of your cabinets.
- Cabinet hinges: Select hinges that are suitable for the size and weight of your cabinet doors.
- Cabinet knobs or handles: These will add functionality and style to your cabinet doors.
- Shelves and dividers: Depending on your design and storage needs, you may need additional shelves and dividers.
- Back panels: Use thin plywood or MDF panels to cover the back of the cabinets.
- Bottom panel: A solid piece of plywood or MDF will serve as the base for your cabinets.
- Mounting brackets: These will be used to secure the cabinets to the wall.
- Sandpaper: Select different grits to ensure a smooth and polished finish.
- Paint or stain: Choose a suitable finish to match your living room decor.
- Paintbrushes and rollers: These will be used to apply the finish to the cabinets.
- Measuring tape, pencil, and level: Essential tools for precise measurements and accurate installation.
- Power tools: Depending on your preference and availability, you may need a circular saw, drill, and sander.
While this list covers the basic materials needed, keep in mind that additional supplies may be required depending on the design and specific requirements of your wall cabinets. It’s always a good idea to consult your chosen woodworking plans or seek advice from a professional to ensure you have all the necessary materials on hand.
Now that you have gathered your materials, it’s time to move on to the planning and measuring stage of your wall cabinet project.
Planning and Measuring
Proper planning and accurate measurements are crucial when building wall cabinets. Taking the time to plan and measure will ensure that your cabinets fit perfectly in the designated space and meet your storage needs. Here are the key steps to follow during the planning and measuring stage:
1. Assess your living room: Take a good look at your living room and determine the available space for the wall cabinets. Consider factors such as the height, width, and depth of the cabinets, as well as any obstacles or architectural features that may impact the placement.
2. Determine the cabinet size: Based on the available space, decide on the dimensions of your wall cabinets. Consider how much storage space you need and how the cabinets will fit into the overall aesthetic of your living room.
3. Sketch your design: Create a rough sketch of your wall cabinets, indicating the dimensions, layout, and any additional features such as shelves or dividers. This will serve as a visual guide throughout the construction process.
4. Take accurate measurements: Measure the height, width, and depth of the space where the cabinets will be installed. Measure multiple times to ensure accuracy and make note of any irregularities or variations in the wall or floor level.
5. Consider electrical outlets and switches: Take note of the location of electrical outlets and switches on the wall. Plan your cabinet design accordingly, making sure to leave enough space around these fixtures for accessibility.
6. Mark the wall: Use a pencil or masking tape to mark the exact placement of the cabinets on the wall. This will help you visualize the final result and allow you to make any necessary adjustments before installation.
7. Double-check your measurements: Before proceeding to the cutting and assembly phase, double-check all your measurements to ensure accuracy. It’s better to catch any errors or discrepancies now than to face issues later on.
By following these steps, you will have a solid plan and accurate measurements to guide you throughout the construction process. Now, it’s time to move on to the next step: cutting the wood panels for your wall cabinets.
Cutting the Wood Panels
Once you have completed the planning and measuring stage, it’s time to cut the wood panels for your wall cabinets. This step requires precision and attention to detail to ensure that your panels fit together seamlessly. Follow these steps to cut the wood panels:
1. Prepare your workspace: Set up a clean and well-lit area in your workshop or garage where you can safely cut the wood panels. Ensure you have enough space to maneuver the panels and use clamps or sawhorses to secure them in place.
2. Mark your measurements: Transfer the measurements from your design sketch to the wood panels using a pencil or marking tool. Double-check your measurements to avoid any mistakes.
3. Use the appropriate saw: Depending on the thickness of the wood panels and your comfort level with power tools, you can use a circular saw or a table saw to make the cuts. Make sure the saw blade is suitable for cutting plywood or MDF.
4. Wear safety gear: Safety should always be a priority when working with power tools. Wear protective goggles, gloves, and a dust mask to keep yourself safe from any potential hazards.
5. Cut the panels: Align the blade with the marked cutting line and slowly guide the saw along the line to make the cuts. Take your time and maintain a steady hand to achieve clean and precise cuts.
6. Repeat the process: Repeat the cutting process for each panel needed for your wall cabinets. Label the panels accordingly to keep track of which piece belongs to which part of the cabinet.
7. Sand the edges: Use sandpaper or a sanding block to smooth out any rough edges or splinters on the cut panels. This will ensure a clean and professional finish.
8. Double-check your cuts: Once you have cut all the panels, double-check their measurements and fit. Make any necessary adjustments before moving on to the next step.
Remember, cutting the wood panels is a critical step in the construction process. Take your time, measure accurately, and exercise caution when using power tools. With the panels cut to the correct size, you are now ready to assemble the cabinet frame.
Assembling the Cabinet Frame
Now that you have cut the wood panels for your wall cabinets, it’s time to assemble the cabinet frame. The frame serves as the structural backbone of the cabinets and provides support for the shelves, dividers, and doors. Follow these steps to effectively assemble the cabinet frame:
1. Lay out the panels: Lay out the panels on a flat surface according to your design sketch. Make sure all the panels are facing the correct direction and align them properly.
2. Apply wood glue: Apply a small bead of wood glue on the edges of the panels that will be joined together. Spread the glue evenly using a brush or your finger.
3. Secure with screws: Use screws to secure the panels together. Pre-drill holes to prevent the wood from splitting and then drive the screws into place. Make sure the screws are countersunk, meaning they are slightly below the surface of the wood.
4. Check for squareness: Use a carpenter’s square to check if the cabinet frame is square. Ensure that all corners form right angles by measuring the diagonals of the frame. Adjust as necessary before the glue dries.
5. Reinforce with corner braces: To provide additional stability and strength, you can reinforce the corners of the cabinet frame with metal corner braces. Use screws to attach the braces to the inside of the corners.
6. Repeat for additional cabinets: If you are building multiple wall cabinets, repeat the above steps to assemble the frames for each cabinet.
7. Allow the glue to dry: Give the wood glue sufficient time to dry before moving on to the next step. This typically takes a few hours, but follow the instructions provided by the glue manufacturer for the best results.
Assembling the cabinet frame is an essential step in the construction process. Take your time, ensure the panels are aligned correctly, and use proper techniques to join them securely. With the cabinet frame successfully assembled, you are ready to move on to the next step: installing shelves and dividers.
Installing Shelves and Dividers
With the cabinet frame assembled, it’s time to install the shelves and dividers that will maximize the storage functionality of your wall cabinets. Follow these steps to effectively install the shelves and dividers:
1. Measure and mark: Measure the desired height for each shelf and use a pencil to mark the position on the inside walls of the cabinet frame. Do the same for any dividers you want to install.
2. Cut the shelves and dividers: Using the measurements from the previous step, cut the wood panels for the shelves and dividers. Make sure to cut them to the appropriate size and sand the edges for a smooth finish.
3. Insert the shelves: Place the pre-cut shelves inside the cabinet frame at their designated positions. Ensure that they fit snugly and are level. Use a level tool to check for a straight and even alignment.
4. Secure the shelves: Use screws or shelf brackets to secure the shelves to the cabinet frame. Place the screws or brackets on the sides of the cabinet, ensuring a sturdy connection between the shelves and the frame.
5. Install the dividers: If you want to include dividers in your wall cabinets, slide them into place between the shelves. Make sure they fit securely and provide the desired compartments for storage.
6. Double-check the alignment: Take a step back and review the placement of the shelves and dividers. Ensure that they are level, evenly spaced, and aligned with your design intentions. Make any necessary adjustments before proceeding.
7. Sand and finish: Lastly, sand the edges of the shelves and dividers to ensure they are smooth and free from splinters. Apply a finish of your choice, such as paint or stain, to protect and enhance the appearance of the wood.
Installing shelves and dividers is a key part of creating functional and organized wall cabinets. By following these steps and taking the time to measure accurately, you can customize your cabinets to suit your storage needs. With the shelves and dividers in place, you are ready to move on to the next step: adding the back and bottom panels.
When building wall cabinets for a living room, make sure to measure the space accurately and consider the weight of the items to be stored. Use sturdy materials and proper mounting hardware for secure installation.
Adding Back and Bottom Panels
With the shelves and dividers installed, it’s time to add the back and bottom panels to your wall cabinets. These panels provide stability, a finished look, and protection for the contents of the cabinet. Follow these steps to effectively add the back and bottom panels:
1. Measure and cut the panels: Measure the dimensions of the cabinet frame to determine the size needed for the back and bottom panels. Transfer these measurements to the appropriate wood panels and cut them accordingly.
2. Test the fit: Before attaching the panels, test their fit to ensure they align properly with the cabinet frame. Make any necessary adjustments or trims to achieve a precise fit.
3. Apply wood glue: Apply a thin layer of wood glue to the back edges of the cabinet frame where the back panel will be placed. This will help create a secure bond between the panel and the frame.
4. Attach the back panel: Position the back panel onto the glued area of the cabinet frame. Use clamps or brad nails to hold it in place while the glue sets. Ensure the panel is flush with the edges of the cabinet frame.
5. Secure with screws or nails: Once the glue has dried, reinforce the back panel by using screws or finishing nails. Space them evenly along the edges of the panel, making sure to countersink them to achieve a smooth finish.
6. Repeat the process for the bottom panel: Apply wood glue to the bottom of the cabinet frame and place the pre-cut bottom panel onto it. Use clamps or brad nails to secure it temporarily. Then, attach the panel permanently using screws or nails.
7. Allow the glue to dry: Give the wood glue sufficient time to dry according to the manufacturer’s instructions before moving on to the next step. This will provide a strong and durable bond.
8. Sand and finish the panels: Once the glue has completely dried, use sandpaper or a sander to smooth out any rough edges or imperfections on the back and bottom panels. Finish the panels with paint, stain, or varnish for a polished look.
By adding the back and bottom panels, you are reinforcing the structure of your wall cabinets and completing their overall appearance. With these panels securely in place, you are ready to move on to the next step: attaching cabinet doors.
Attaching Cabinet Doors
Attaching cabinet doors is the final step in constructing your wall cabinets. Proper installation of the doors is essential for both functionality and aesthetics. Follow these steps to effectively attach the cabinet doors:
1. Measure and mark: Measure and mark the placement of the cabinet doors on the cabinet frame. Ensure that the doors are centered and evenly spaced, leaving enough room for the doors to open and close smoothly.
2. Install door hinges: Use a pencil to mark the position of the hinges on the cabinet frame. Attach the hinges to the frame using screws, following the manufacturer’s instructions for proper installation. Make sure the hinges are aligned and securely fastened.
3. Attach hinges to the doors: Measure and mark the position of the hinges on the back of the cabinet doors. Use a chisel or router to create shallow recesses or mortises for the hinges to sit in. Attach the hinges to the doors using screws.
4. Hang the doors: Carefully align the hinges on the doors with the hinges on the cabinet frame. Ensure that the doors are level and centered within the opening. Slowly close the doors to test their fit and adjust as necessary.
5. Check for smooth movement: Open and close the cabinet doors multiple times to check for any obstructions or misalignment. Make any necessary adjustments to the hinges or door position to ensure smooth and even movement.
6. Secure the doors: Once the doors are properly aligned, use a drill or screwdriver to secure the hinges tightly to the cabinet frame.
7. Install cabinet knobs or handles: Determine the desired position for the cabinet knobs or handles. Mark the location, and then attach them to the doors using screws or bolts.
8. Double-check the alignment: Step back and review the overall appearance of the cabinet doors. Ensure that they are level, aligned, and operate smoothly. Make any final adjustments before moving on to the next step.
Attaching cabinet doors is a crucial step that brings your wall cabinets to completion. Take your time, ensure proper alignment, and make any necessary adjustments to achieve a professional and polished result.
With the cabinet doors attached, you are now ready to move on to the next step: mounting the cabinets on the wall.
Mounting the Cabinets on the Wall
Mounting your wall cabinets securely is essential to ensure their stability and safety. Follow these steps to effectively mount the cabinets on the wall:
1. Locate the wall studs: Use a stud finder to locate the wall studs where you plan to mount the cabinets. Mark the positions of the studs with a pencil.
2. Position the cabinets: With the help of a friend or a cabinet lift, position the cabinets against the wall at the desired height. Use a level to ensure they are straight and aligned.
3. Mark the mounting points: With the cabinets in place, use a pencil to mark the mounting points on the back of the cabinets. These marks should align with the wall studs.
4. Pre-drill the holes: Using a drill, pre-drill pilot holes at the marked mounting points on the back of the cabinets. This will make it easier to secure the cabinets to the wall.
5. Secure the cabinets: Have a friend hold the cabinet in place while you drive screws through the pre-drilled holes and into the wall studs. Use long enough screws to securely anchor each cabinet to the wall.
6. Double-check the alignment: After securing each cabinet, check their alignment and make any necessary adjustments to ensure they are level and evenly spaced.
7. Install additional support: For larger or heavier cabinets, consider reinforcing the installation by attaching additional support brackets to both the cabinets and the wall. This will provide extra stability.
8. Test the stability: Gently push and shake the cabinets to ensure their stability. If there is any wobbling or movement, reinforce the mounting or seek professional assistance to ensure a secure installation.
9. Repeat for additional cabinets: If you have multiple cabinets, repeat the above steps for each cabinet, ensuring proper alignment and securing them to the wall.
Mounting your cabinets on the wall requires careful attention to detail and proper anchoring to ensure their safety and longevity. By following these steps, you can confidently hang your cabinets and enjoy their functional and aesthetic benefits.
With your cabinets securely mounted on the wall, you are now ready for the final step: adding the finishing touches to complete your project.
Finishing Touches
Adding the finishing touches to your wall cabinets is where you bring your project to completion and enhance the overall appearance. Follow these steps to give your cabinets a polished and professional look:
1. Sand any rough surfaces: Use sandpaper or a sander to smooth out any rough edges or imperfections on the cabinets. Pay special attention to the corners and edges.
2. Fill any visible holes or gaps: Use wood filler or putty to fill any visible screw holes or gaps in the wood. Smooth out the filler and allow it to dry before sanding it flush with the surface.
3. Apply a finish: Choose a finish that complements your living room decor, such as paint, stain, or varnish. Apply the finish using a brush or roller, following the manufacturer’s instructions. Allow the finish to dry completely before proceeding.
4. Install decorative molding (optional): If desired, you can install decorative molding to enhance the appearance of your cabinets. Measure and cut the molding to fit along the edges of the cabinets, then attach it using adhesive or small finishing nails.
5. Install lighting (optional): To showcase your wall cabinets and enhance the ambiance of your living room, you can install LED strip lights or puck lights inside the cabinets. Follow the manufacturer’s instructions for proper installation.
6. Clean and organize the interior: Before placing items inside the cabinets, give the interior a thorough cleaning to remove any dust or debris. Organize your items in a functional and visually appealing manner.
7. Add decorative elements: Consider adding decorative elements such as plants, artwork, or decorative items to the top of your cabinets to further enhance their visual appeal.
8. Step back and admire your work: Take a moment to step back and admire your newly finished wall cabinets. Appreciate the time and effort you put into building them and the impact they have on your living room.
By paying attention to these finishing touches, your wall cabinets will not only be functional but also aesthetically pleasing. The attention to detail in the final steps will elevate the overall look and feel of your living space.
Congratulations! You have successfully built and completed your wall cabinets for the living room. Enjoy the storage space and the added elegance they bring to your home.
Please note that the specific finishing touches may vary depending on your personal preferences and the design of your wall cabinets.
Conclusion
Congratulations on completing your journey to build wall cabinets for your living room! By following the step-by-step process outlined in this guide, you have now created functional storage solutions that enhance the organization and aesthetics of your living space.
Throughout the process, you learned how to plan and measure, cut wood panels, assemble the cabinet frame, install shelves and dividers, add back and bottom panels, attach cabinet doors, mount the cabinets on the wall, and add the finishing touches. Each step required careful attention to detail and craftsmanship, but the end result is well worth the effort.
Remember, building wall cabinets requires a basic understanding of woodworking techniques and the use of power tools. If it was your first woodworking project, congratulations on taking this bold step. If you had prior experience, this guide served as a helpful refresher to guide you through the process.
Now that your wall cabinets are in place, take a moment to appreciate the transformation they bring to your living room. The customized cabinets provide ample storage space for your belongings, while adding elegance and sophistication to your décor.
Feel free to customize your wall cabinets further by adding lighting, decorative molding, or other personal touches that reflect your style and taste. Make them a focal point of your living room, showcasing your craftsmanship and attention to detail.
Remember to continue caring for your wall cabinets by regularly cleaning them and maintaining their finish. This will ensure their longevity and continued beauty over time.
We hope this comprehensive guide has empowered you to build wall cabinets for your living room. Enjoy the benefits of a well-organized space and the sense of accomplishment that comes with completing a woodworking project. Happy organizing and decorating!
Now that you've mastered building wall cabinets, why not tackle more creative woodworking projects? Our curated list of the best woodworking projects for the upcoming year offers a variety of designs that will enhance any room in your home. From simple crafts to more intricate constructions, these projects will keep your tools buzzing and creativity flowing. So, roll up those sleeves and prepare for your next DIY adventure!
Frequently Asked Questions about How To Build Wall Cabinets For Living Room
Was this page helpful?
At Storables.com, we guarantee accurate and reliable information. Our content, validated by Expert Board Contributors, is crafted following stringent Editorial Policies. We're committed to providing you with well-researched, expert-backed insights for all your informational needs.
0 thoughts on “How To Build Wall Cabinets For Living Room”