Articles
How To Build An Outdoor Tv Cabinet
Modified: October 19, 2024
Looking for a solution to keep your outdoor storage organized? Learn how to build a durable and weather-resistant outdoor TV cabinet for easy storage of your electronics and other essentials.
(Many of the links in this article redirect to a specific reviewed product. Your purchase of these products through affiliate links helps to generate commission for Storables.com, at no extra cost. Learn more)
Introduction
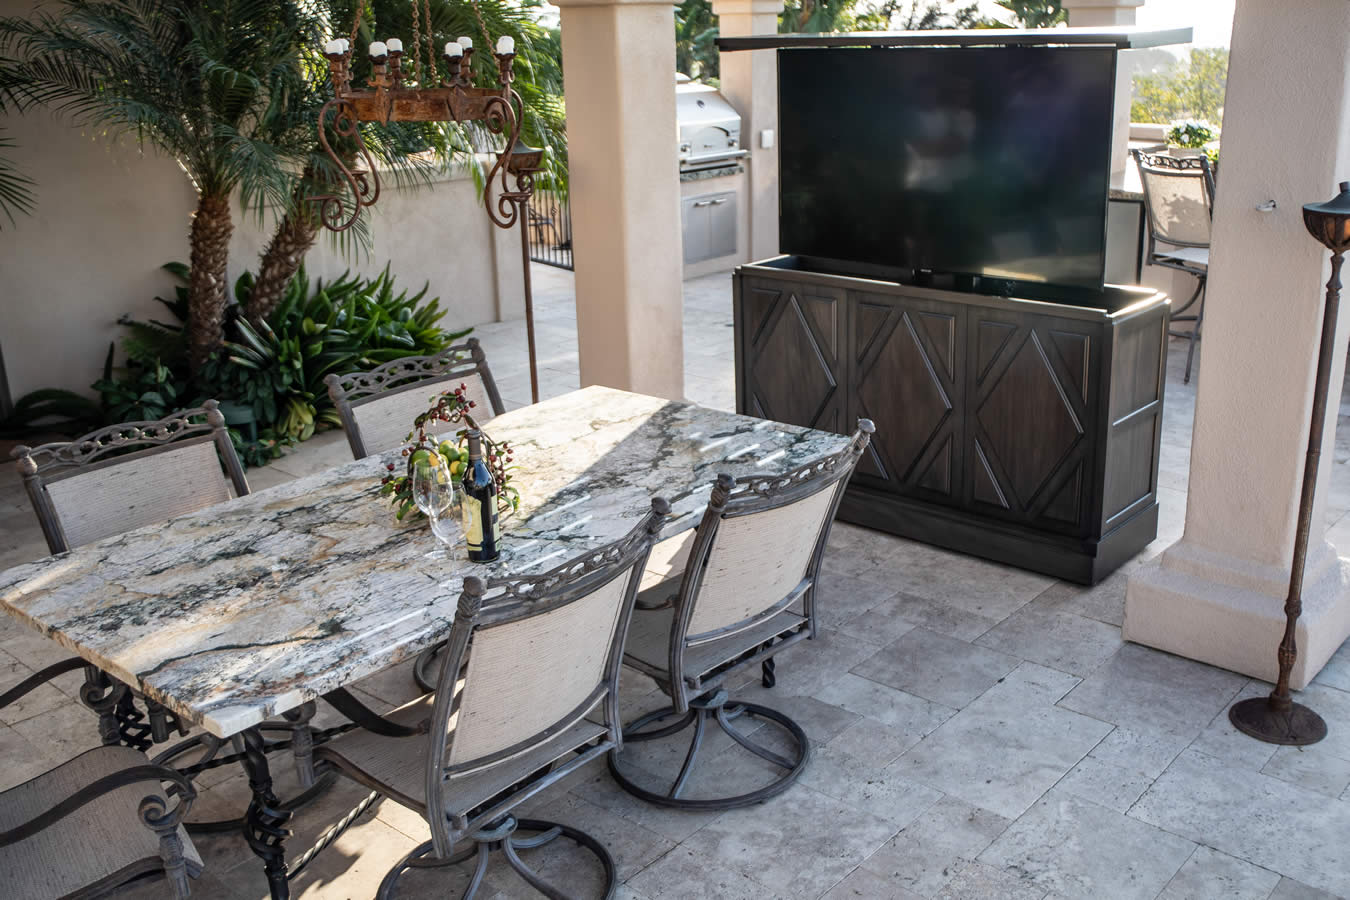
Creating an outdoor TV cabinet is a fantastic way to enjoy your favorite shows and movies while enjoying the great outdoors. Whether you’re hosting a backyard gathering or simply want to relax under the sun, having an outdoor TV can enhance the overall entertainment experience. However, it’s important to protect your TV from the elements, such as rain, dust, and extreme temperatures.
Building an outdoor TV cabinet allows you to keep your TV safe and secure while still enjoying the benefits of outdoor viewing. In this guide, we will take you through a step-by-step process of how to build an outdoor TV cabinet. From choosing the right location to mounting the TV and adding necessary ventilation, we’ll cover all the essential details to ensure you have a functional and durable TV cabinet.
Before we get started, it’s important to note that building an outdoor TV cabinet requires some basic woodworking skills and tools. It’s always a good idea to consult with a professional or experienced individual if you’re unsure about any aspect of the construction. Additionally, be sure to check local building codes and regulations before starting this project.
Now, let’s dive into the exciting world of creating your own outdoor TV cabinet and enjoy your favorite entertainment in the serenity of your outdoor space.
Key Takeaways:
- Building an outdoor TV cabinet requires careful consideration of location, materials, and design to ensure both functionality and aesthetic appeal. Proper maintenance and protection from the elements are essential for long-term enjoyment.
- Attention to detail in ventilation, cable management, and seasonal maintenance is crucial for preserving the quality and performance of the outdoor TV cabinet. Embracing the DIY process leads to a rewarding entertainment space in the great outdoors.
Read more: How To Build Outdoor Cabinets
Step 1: Determine the Location
The first step in building an outdoor TV cabinet is to determine the best location for it. Consider factors such as visibility, sunlight exposure, and available space. Here are some key considerations to keep in mind:
- Visibility: Choose a location where the TV can be easily viewed from different seating areas in your outdoor space. Take into account the angle and distance from which the TV will be seen for optimal viewing experience.
- Sunlight Exposure: Avoid placing the TV cabinet in direct sunlight as it can cause glare and potentially damage the screen. Look for a spot that provides shade or consider adding an awning or canopy to protect the TV from direct sunlight.
- Weather Protection: Ensure that the chosen location provides sufficient protection from rain, wind, and other extreme weather conditions. Consider positioning the cabinet under a roof, pergola, or any other protective structure.
- Accessibility: Make sure the chosen location allows for easy access to the cabinet’s doors, controls, and cables. You don’t want to struggle with reaching the TV or adjusting the settings when needed.
Once you have considered these factors, take measurements of the designated area to determine the dimensions for your TV cabinet. This will help you plan the size and design of the cabinet accordingly.
Remember to also think about the overall aesthetics of your outdoor space. The TV cabinet should blend seamlessly with the existing decor and complement the overall ambiance. If you have a particular theme or style in mind, incorporate it into your design choices for the cabinet.
By carefully selecting the location of your outdoor TV cabinet, you can ensure that it enhances your entertainment experience while providing adequate protection for your TV. Take your time with this step to ensure you create a functional and visually appealing setup that meets your needs and preferences.
Step 2: Choose the Materials
Once you have determined the location for your outdoor TV cabinet, it’s time to choose the right materials for its construction. Selecting the appropriate materials is crucial to ensure durability, weather resistance, and overall longevity of the cabinet. Here are some key considerations when choosing materials:
- Weather-resistant Wood: Opt for wood that is specifically treated for outdoor use, such as cedar, teak, or pressure-treated lumber. These types of wood are known for their resistance to rot, decay, and insect damage. Avoid using regular plywood or untreated lumber as they are not suitable for outdoor conditions.
- Waterproofing: Consider using waterproofing sealants or paints to further protect the wood from moisture. This will help prevent warping, cracking, and swelling of the cabinet due to exposure to rain or humidity.
- Hardware: Choose high-quality outdoor-rated hardware, such as screws, hinges, and handles, that are resistant to rust and corrosion. Stainless steel or brass hardware is ideal for outdoor use as they can withstand exposure to the elements without deteriorating.
- Glass or Acrylic: Depending on your design preference, you may want to include a window or door with a protective screen for your TV. Using tempered glass or acrylic will provide both visibility and protection against the weather. Ensure that the chosen material is UV-resistant to prevent discoloration or damage to the screen.
- Fasteners and Adhesives: Select weather-resistant fasteners and adhesives that are designed for outdoor use. These will ensure that all the components of the cabinet are securely connected and durable over time.
In addition to these materials, consider incorporating other elements into your design, such as outdoor-rated paint, stain, or varnish to enhance the appearance and protection of the cabinet. You may also want to add decorative elements or architectural features to personalize the cabinet and make it blend seamlessly with your outdoor space.
Keep in mind that the choice of materials will depend on your budget, climate, and personal preferences. It’s important to prioritize quality and longevity when selecting materials, as you want your outdoor TV cabinet to withstand the elements and provide many years of enjoyment.
Once you have gathered all the necessary materials, you’re ready to move on to the next step: measuring and planning the cabinet design.
Step 3: Measure and Plan the Cabinet Design
Now that you have chosen the materials for your outdoor TV cabinet, it’s time to carefully measure and plan the design. This step is crucial to ensure that the cabinet fits the designated space and meets your specific requirements. Here are the key steps to follow:
- Measurements: Use a measuring tape to gather accurate dimensions of the space where the cabinet will be placed. Consider both the width and height constraints to ensure the cabinet fits perfectly in the allocated area.
- TV Size: Determine the size of your TV and allow for enough space within the cabinet to accommodate it comfortably. Consider leaving a few inches of clearance around the edges for ventilation and cable management.
- Design/Layout: Decide on the overall design and layout of the cabinet. Will it have a single door or multiple doors? Do you want shelves for additional storage? Sketch out the basic design and think about how the TV and other electronics will be positioned within the cabinet.
- Ventilation: Ensure proper ventilation by incorporating vents or louvers into the design. This will help prevent overheating of the TV and other electronic components. Plan the placement and size of the vents to allow for adequate airflow.
- Cable Management: Plan for cable management within the cabinet to keep the cords organized and hidden. Incorporate cable holes or channels for easy routing of cables from the TV to the back of the cabinet.
- Assembly Method: Determine how the cabinet will be assembled. Will it be built using screws, nails, or other fasteners? Consider the structural integrity and stability of the cabinet and choose the appropriate assembly method.
During the planning stage, it’s also a good idea to consult any available pre-made plans or templates that align with your desired design. These resources can provide valuable insight into the construction process and help streamline your efforts.
Once you have measured and planned the cabinet design, you are ready to move on to the next step: cutting the boards and assembling the frame. This is where the actual construction of the cabinet begins, so be prepared with the necessary tools and equipment.
Step 4: Cut the Boards and Assemble the Frame
With the measurements and design plan in hand, it’s time to start building the frame of your outdoor TV cabinet. This step involves cutting the boards to the required sizes and assembling them to create the basic structure. Follow these steps to ensure a sturdy and well-built frame:
- Cutting the Boards: Using a circular saw or a miter saw, carefully cut the boards according to the dimensions specified in your design plan. Take precise measurements and make clean, straight cuts to ensure that all pieces fit together accurately.
- Assembling the Frame: Begin by assembling the four sides of the cabinet. Attach the horizontal boards to the vertical boards using screws or nails, ensuring a secure connection at each joint. Use a level to ensure that the frame is straight and square.
- Adding Support Braces: To increase the stability and strength of the frame, add support braces at strategic points, such as the corners and the middle of longer sides. These braces can be cut from additional boards and attached perpendicular to the frame using screws or nails.
- Reinforcing the Corners: Reinforce the corners of the frame by adding corner brackets or metal braces. These will provide added support and increase the durability of the cabinet.
Once the frame is assembled, double-check all the connections and make any necessary adjustments to ensure a secure and solid structure. Take the time to sand any rough edges or splinters on the exposed surfaces of the frame, preparing it for the next step in the construction process.
Remember, it’s important to wear safety goggles and follow proper safety precautions while operating power tools and handling materials. If you’re new to woodworking or feel unsure about any step, don’t hesitate to seek guidance from a professional or experienced individual.
With the frame complete, you’re ready to move on to the next step: adding the back panel and shelves. This will further strengthen the cabinet structure and provide additional storage options for your electronic devices and accessories.
Read more: How To Make An Outdoor TV Cabinet
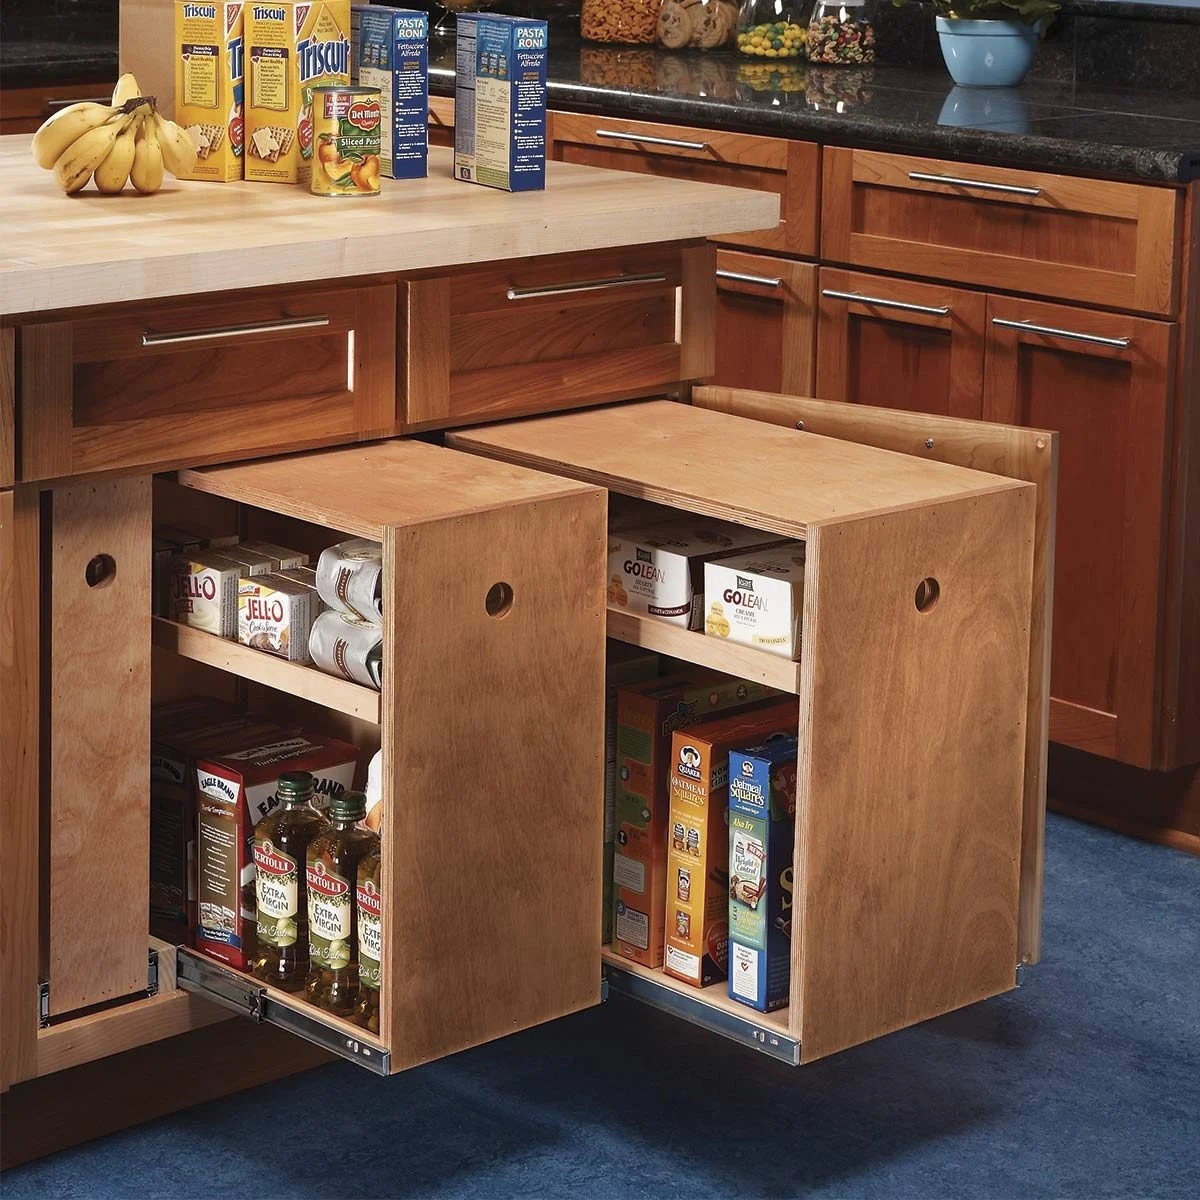
Step 5: Add the Back Panel and Shelves
In this step, we will focus on adding the back panel and shelves to your outdoor TV cabinet. These elements not only enhance the cabinet’s structural integrity but also provide necessary storage space for your electronic devices and other accessories. Follow these steps to complete this stage of the construction process:
- Back Panel: Measure and cut a piece of weather-resistant plywood or composite material to fit the dimensions of the back of your cabinet frame. Attach it securely using screws, ensuring that it aligns perfectly with the edges of the frame. The back panel will help reinforce the cabinet structure and protect the TV from the elements.
- Shelves: Determine the desired placement and number of shelves within your cabinet. Measure and cut pieces of plywood or composite material to the appropriate sizes, ensuring they fit securely within the cabinet frame. Attach each shelf using shelf brackets or by screwing them directly into the frame.
- Spacing and Adjustments: Consider the size of your electronic devices and any additional accessories you plan to store on the shelves. Adjust the height and spacing of the shelves accordingly to accommodate everything comfortably.
- Additional Support: If necessary, add additional support brackets or braces underneath the shelves to ensure they can safely bear the weight of your devices. This will prevent sagging or bowing over time.
As you add the back panel and shelves, double-check all the connections and make any necessary adjustments to ensure a snug and stable fit. Sand any rough edges or surfaces to create a smooth finish and eliminate any potential hazards.
At this stage, the cabinet is starting to take shape. It’s important to visualize how the TV and electronic devices will be positioned within the cabinet to ensure there is enough space for proper functionality and ventilation. Planning ahead will help you avoid any potential issues during the mounting and installation process.
With the back panel and shelves securely in place, we can now move on to the exciting step of installing the doors and hardware. This will give your outdoor TV cabinet a refined and finished look while allowing easy access to your electronic equipment.
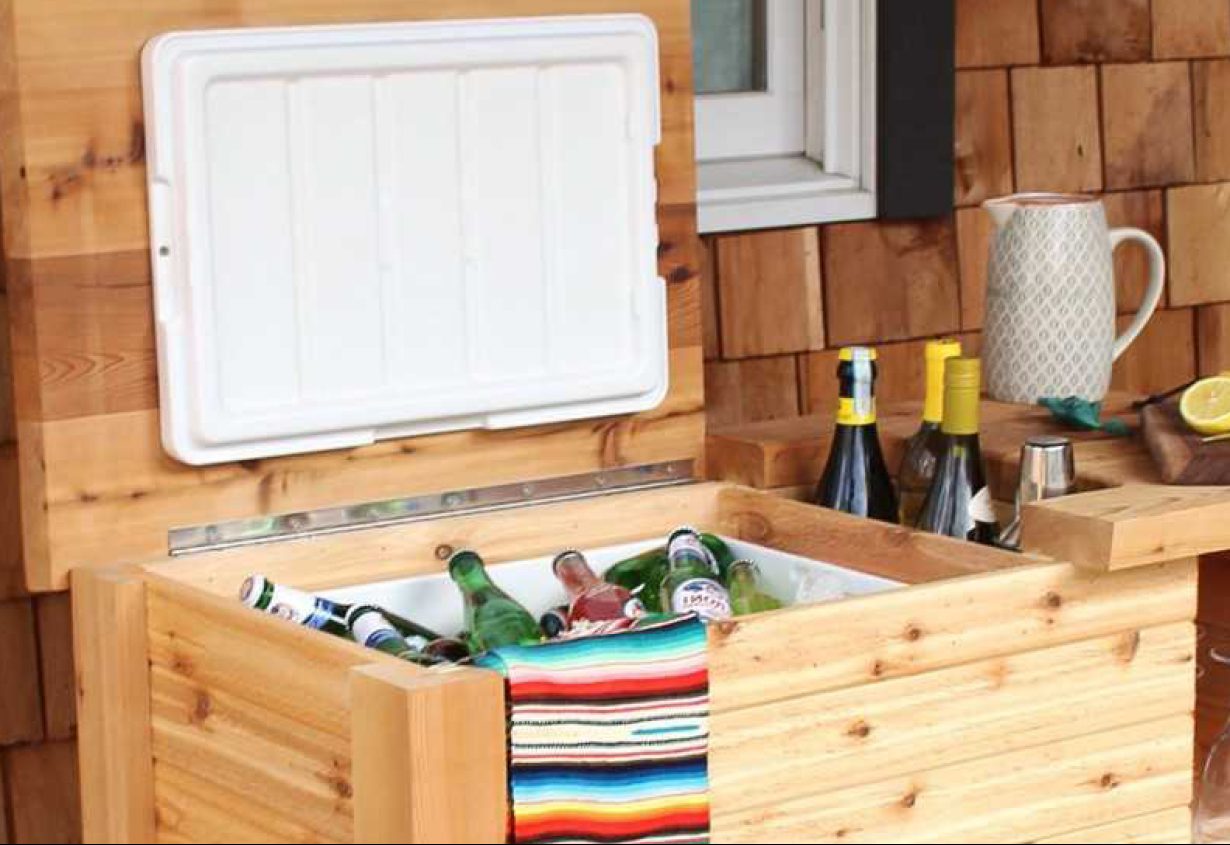
When building an outdoor TV cabinet, make sure to use weather-resistant materials such as cedar or marine-grade plywood to protect the TV from the elements. Additionally, consider adding ventilation to prevent overheating.
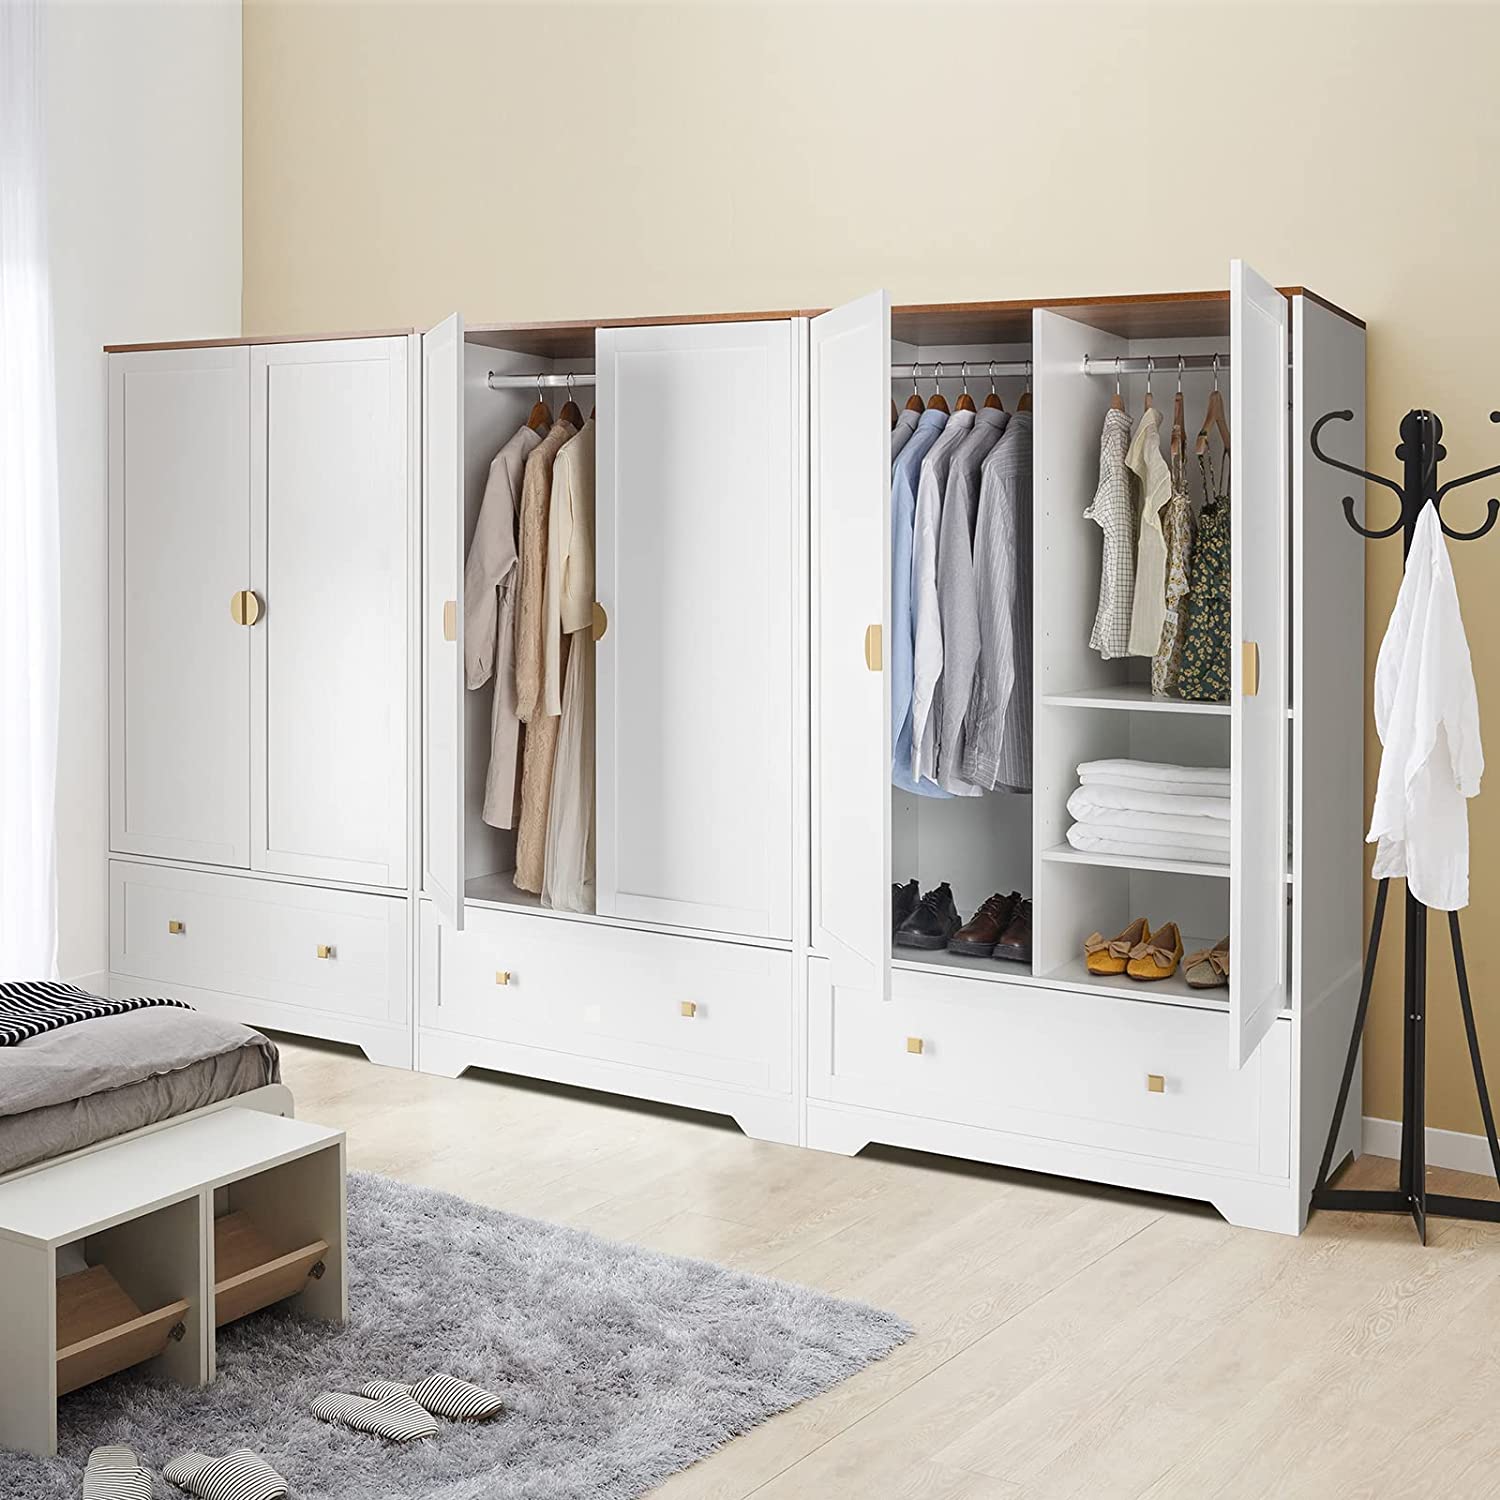
Step 6: Install the Doors and Hardware
In this step, we will focus on installing the doors and hardware for your outdoor TV cabinet. The doors not only provide protection for your electronics but also add an attractive aesthetic to the overall design. Follow these steps to complete this stage of the construction process:
- Door Design: Decide on the style and design of your cabinet doors. You can choose to have a single large door that covers the entire front of the cabinet or opt for multiple smaller doors. This will depend on your preference and the dimensions of your cabinet.
- Measurements and Cutting: Measure the dimensions for each door and cut the plywood or composite material to the appropriate size. Ensure that the doors fit snugly within the cabinet frame.
- Hinges: Attach hinges to the doors using screws. Position them in a way that allows the doors to swing open and close smoothly. Make sure the hinges are aligned properly and that the doors are level with the frame.
- Door Handles or Knobs: Install door handles or knobs to facilitate easy opening and closing of the doors. Choose hardware that is weather-resistant and matches the style of your outdoor space. Secure them firmly to the doors using screws.
- Latch or Lock: If desired, install a latch or lock mechanism on the doors for added security. This will prevent unauthorized access to your electronics when not in use.
During the installation process, double-check the alignment, functionality, and security of the doors. Make any necessary adjustments to ensure proper operation.
Once the doors and hardware are installed, take a step back and admire the progress. The cabinet is now taking shape and is ready for the next stage of sanding and finishing.
Step 7: Sand and Finish the Cabinet
After the doors and hardware are installed, it’s time to sand and finish the cabinet to enhance its appearance and protect it from the elements. Sanding and finishing will ensure a smooth and polished surface while providing extra durability. Follow these steps to complete this stage of the construction process:
- Sanding: Start by using medium-grit sandpaper to smooth out any rough surfaces, splinters, or imperfections on the cabinet. Focus on the entire exterior, including the frame, doors, and shelves. Gradually work your way up to finer-grit sandpaper to achieve a smooth finish.
- Cleaning: Once sanding is complete, remove any dust or debris from the cabinet using a clean cloth or vacuum. This will ensure a clean surface for the finishing process.
- Finishing Options: Choose a suitable finish for your outdoor TV cabinet. Options include paint, stain, or clear sealant. Each option has its own aesthetic appeal and level of protection. Consider using an exterior-grade finish that is weather-resistant and UV-resistant to prolong the life of the cabinet.
- Application: Follow the instructions provided with the chosen finishing product and apply it evenly to the cabinet surface. Use a brush, roller, or sprayer depending on the type of finish you select. Apply multiple coats if desired, allowing each coat to dry completely before applying the next one.
- Protective Coating: Consider adding an additional layer of clear sealant specifically designed for outdoor use. This will provide added protection against moisture, UV rays, and other environmental factors.
Allow the finish to dry thoroughly according to the manufacturer’s instructions. This may take several hours or even days, depending on the type of finish used and the climate in your area.
Once the cabinet is fully dried, inspect it for any touch-ups or areas that may need additional sanding or finishing. Make any necessary adjustments to ensure a flawless final product.
Sanding and finishing the cabinet not only improve its visual appeal but also help protect it from the outdoor elements. Enjoy the satisfaction of seeing your cabinet transform into a beautiful and functional piece of outdoor furniture.
Next, we will move on to Step 8: mounting the TV and electronics. This is where the practicality of your outdoor TV cabinet comes to life, allowing you to enjoy your favorite shows and movies in the great outdoors.
Step 8: Mount the TV and Electronics
Now that your outdoor TV cabinet is sanded and finished, it’s time to mount the TV and organize the electronics inside the cabinet. Mounting the TV securely and arranging the electronics properly will ensure a seamless viewing experience. Follow these steps to complete this stage of the construction process:
- TV Mounting: Determine the best method to mount your TV inside the cabinet. You may choose to use a TV wall mount to secure it to the back panel or utilize a TV mount stand designed for outdoor use. Carefully follow the manufacturer’s instructions for proper installation.
- Organize Cables: Arrange the cables from your TV and other electronic devices in a neat and organized manner. Use cable ties or adhesive cable clips to secure the cables and prevent them from tangling or getting in the way. Consider using a cable management system, such as cable channels or grommet holes, to hide and route the cables effectively.
- Electronic Placement: Place your electronic devices, such as cable/satellite boxes, game consoles, or streaming devices, on the shelves or designated areas within the cabinet. Ensure that there is enough space for ventilation and that the devices are easily accessible for maintenance or adjustments.
- Power Supply: Make sure there is an accessible power source near the cabinet. You may need to install weatherproof outlets or utilize outdoor extension cords specifically designed for outdoor use.
- Remote Control Access: If your TV and devices require remote control access, consider using a wireless remote control extender or installing a glass or acrylic window in the cabinet to allow the infrared signal to pass through.
Take your time to carefully mount the TV, organize the cables, and place the electronics inside the cabinet. This will help create a clean and functional setup that enhances your outdoor viewing experience.
Once everything is set up, test the TV and electronics to ensure that they are working properly. Adjust the viewing angle and make any necessary adjustments to improve the visibility of the TV from different seating areas in your outdoor space.
Congratulations! You have successfully mounted the TV and electronics inside your outdoor TV cabinet. Now, let’s move on to Step 9: adding ventilation and cable management to ensure the functionality and longevity of your equipment.
Read more: How To Build An Outdoor Tv Enclosure
Step 9: Add Ventilation and Cable Management
Proper ventilation and cable management are crucial to ensure the longevity and functionality of your outdoor TV cabinet. In this step, we will focus on creating a well-ventilated environment for your electronic devices and organizing the cables for a clean and clutter-free setup. Follow these steps to complete this stage of the construction process:
- Ventilation: Cut ventilation holes or install ventilation fans in strategic locations on the cabinet to allow for adequate airflow. This will help dissipate any heat generated by the TV and electronics, preventing overheating and damage. Be sure to position the ventilation openings away from direct exposure to rain and other elements.
- Cable Routing: Use cable channels, grommet holes, or adhesive clips to route and secure the cables neatly inside the cabinet. This will prevent tangling, tripping hazards, and accidental disconnections. Consider labeling the cables to make future maintenance or troubleshooting easier.
- Cable Length Management: Organize the excess length of cables by coiling them neatly and securing them with cable ties or Velcro straps. Avoid tight bends or kinks in the cables, as this can cause signal interference or damage to the wires.
- Weatherproof Cable Connections: Use weatherproof cable connectors or enclosures to protect the cable connections from rain, dust, and other outdoor elements. This will ensure that the connections remain secure and free from corrosion.
- Wireless Solutions: Where possible, consider utilizing wireless solutions to eliminate the need for physical cables. For example, you can utilize wireless HDMI or audio transmitters to transmit the signals from your sources to the TV without the need for long cables.
By implementing proper ventilation and cable management techniques, you are reducing the risk of equipment damage and promoting a clean and organized outdoor TV cabinet setup.
Before finalizing this step, double-check all the cable connections, ensure proper airflow through the ventilation openings, and tidy up any loose cables. This will help create a visually appealing and functional setup for your outdoor entertainment needs.
Now that you have established ventilation and cable management, it’s time to move on to Step 10: adding the final touches and obtaining helpful maintenance tips to keep your outdoor TV cabinet in excellent condition.
Step 10: Final Touches and Maintenance Tips
In the final step of building your outdoor TV cabinet, we will focus on adding the finishing touches and providing maintenance tips to ensure the longevity and optimal performance of your cabinet. Follow these steps to complete this stage of the construction process:
- Final Touches: Take a step back and assess the overall appearance of your outdoor TV cabinet. Make any necessary touch-ups to the finish, tighten any loose screws or hardware, and ensure that all components are securely in place. Consider adding additional decorative elements, such as trim or molding, to enhance the aesthetic appeal of the cabinet.
- Weather Protection: To further protect your outdoor TV cabinet from the elements, consider adding a weatherproof cover during periods of inclement weather or when the TV is not in use for an extended period. This will help keep dust, rain, and other debris from accumulating on the cabinet and the TV.
- Cleaning: Regularly clean the cabinet and the TV screen with a soft, non-abrasive cloth to remove any dirt or fingerprints. Avoid using harsh chemicals or abrasive cleaners that can damage the finish or the screen. Consult the manufacturer’s guidelines for specific cleaning recommendations.
- Seasonal Maintenance: Inspect the cabinet periodically, especially during seasonal changes, for any signs of wear or damage. Check for any loose or deteriorated components and make the necessary repairs or replacements. Ensure that the cabinet is secure and stable in its location.
- Protecting against Pests: Take precautions to prevent pests, such as insects or small animals, from nesting or causing damage to the cabinet. Consider using natural repellents or DIY deterrents, such as peppermint oil or mothballs, to deter unwanted visitors.
- Regular Inspections: Perform regular inspections of the TV and electronics inside the cabinet to ensure they are functioning properly. Check for any signs of overheating, loose connections, or other issues that may affect the performance of your equipment. Consult the user manuals for specific maintenance guidelines for your devices.
By implementing these final touches and following regular maintenance practices, you can ensure that your outdoor TV cabinet remains in excellent condition for years to come. Sit back, relax, and enjoy your favorite shows and movies in the comfort of your outdoor space.
Congratulations! You have successfully completed the construction of your outdoor TV cabinet. Take pride in your accomplishment, and make the most of your newly created entertainment space.
We hope this step-by-step guide has been helpful in guiding you through the process. If you have any further questions or need assistance, feel free to consult with a professional or seek advice from experienced individuals in the field.
Conclusion
Congratulations on completing the construction of your outdoor TV cabinet! By following the steps in this guide, you have created a functional and stylish addition to your outdoor space. Now, you can enjoy your favorite TV shows, movies, and sports events while embracing the beauty of the great outdoors. Remember to take pride in your accomplishment and make the most of your newly created entertainment space.
Building an outdoor TV cabinet requires careful planning, attention to detail, and the right materials. Throughout the process, you considered the location, chose suitable materials, measured and planned the cabinet design, cut the boards and assembled the frame, added the back panel and shelves, installed the doors and hardware, sanded and finished the cabinet, mounted the TV and electronics, added ventilation and cable management, and added the final touches.
To ensure the longevity and optimal performance of your outdoor TV cabinet, it is important to follow the provided maintenance guidelines. Regular cleaning, seasonal inspections, and protection from the elements will help preserve the quality of your cabinet for years to come. Additionally, staying vigilant about cable management, ventilation, and protecting against pests will further contribute to the functionality of your setup.
Remember to check local building codes and regulations before embarking on this project. If you ever feel unsure about any aspect of the construction or need assistance, consulting with a professional or experienced individual is always a good idea.
We hope this guide has been helpful in guiding you through the process of building your outdoor TV cabinet. Now it’s time to sit back, relax, and enjoy countless hours of entertainment in the great outdoors. Cheers to your DIY success!
After mastering the craft of building an outdoor TV cabinet, why stop there? Expand your skills with our guide on the most engaging and innovative woodworking projects set to trend in 2024. Whether you're looking to challenge yourself further or just want to create something unique for your home, these projects offer both functional and creative opportunities. Get your tools ready and let your creativity flow!
Frequently Asked Questions about How To Build An Outdoor Tv Cabinet
Was this page helpful?
At Storables.com, we guarantee accurate and reliable information. Our content, validated by Expert Board Contributors, is crafted following stringent Editorial Policies. We're committed to providing you with well-researched, expert-backed insights for all your informational needs.

0 thoughts on “How To Build An Outdoor Tv Cabinet”