Articles
How To Clean Calcium Buildup On Faucet
Modified: October 21, 2024
Learn effective techniques and tips for removing stubborn calcium buildup on your faucet with our informative articles. Say goodbye to unsightly deposits and restore your faucet's shine!
(Many of the links in this article redirect to a specific reviewed product. Your purchase of these products through affiliate links helps to generate commission for Storables.com, at no extra cost. Learn more)
Introduction
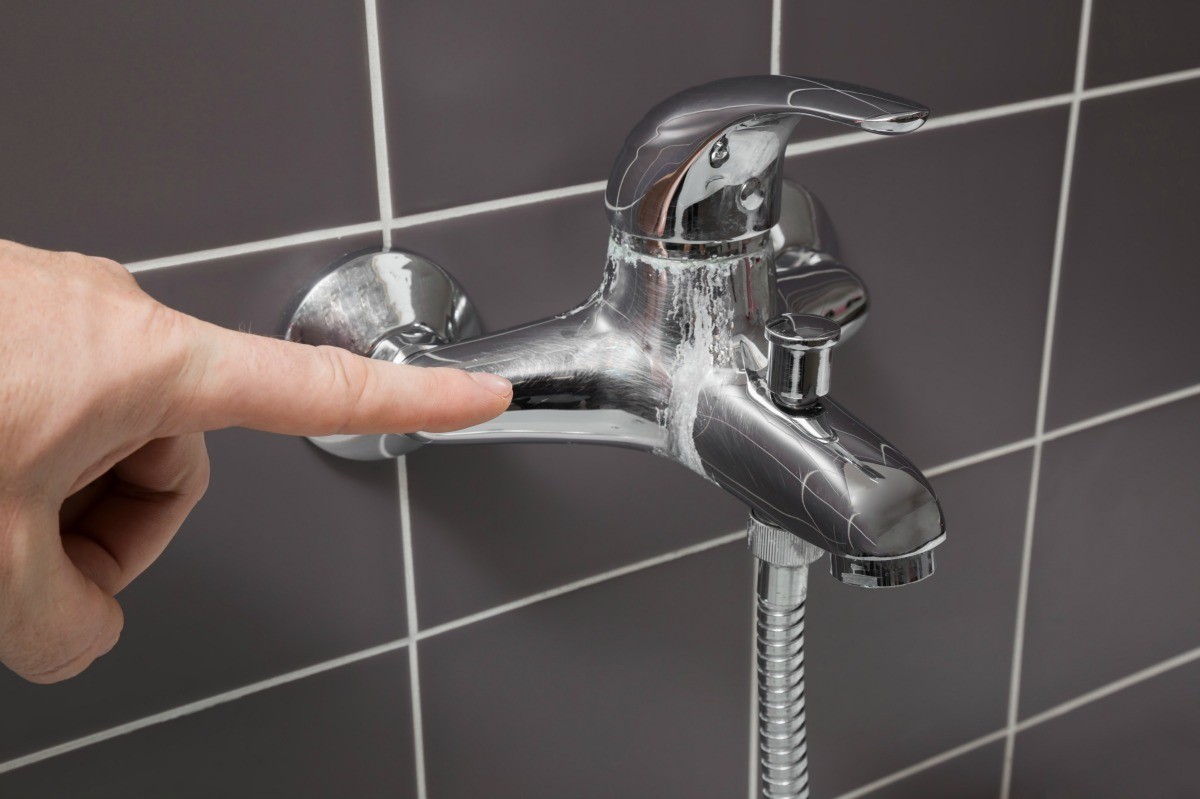
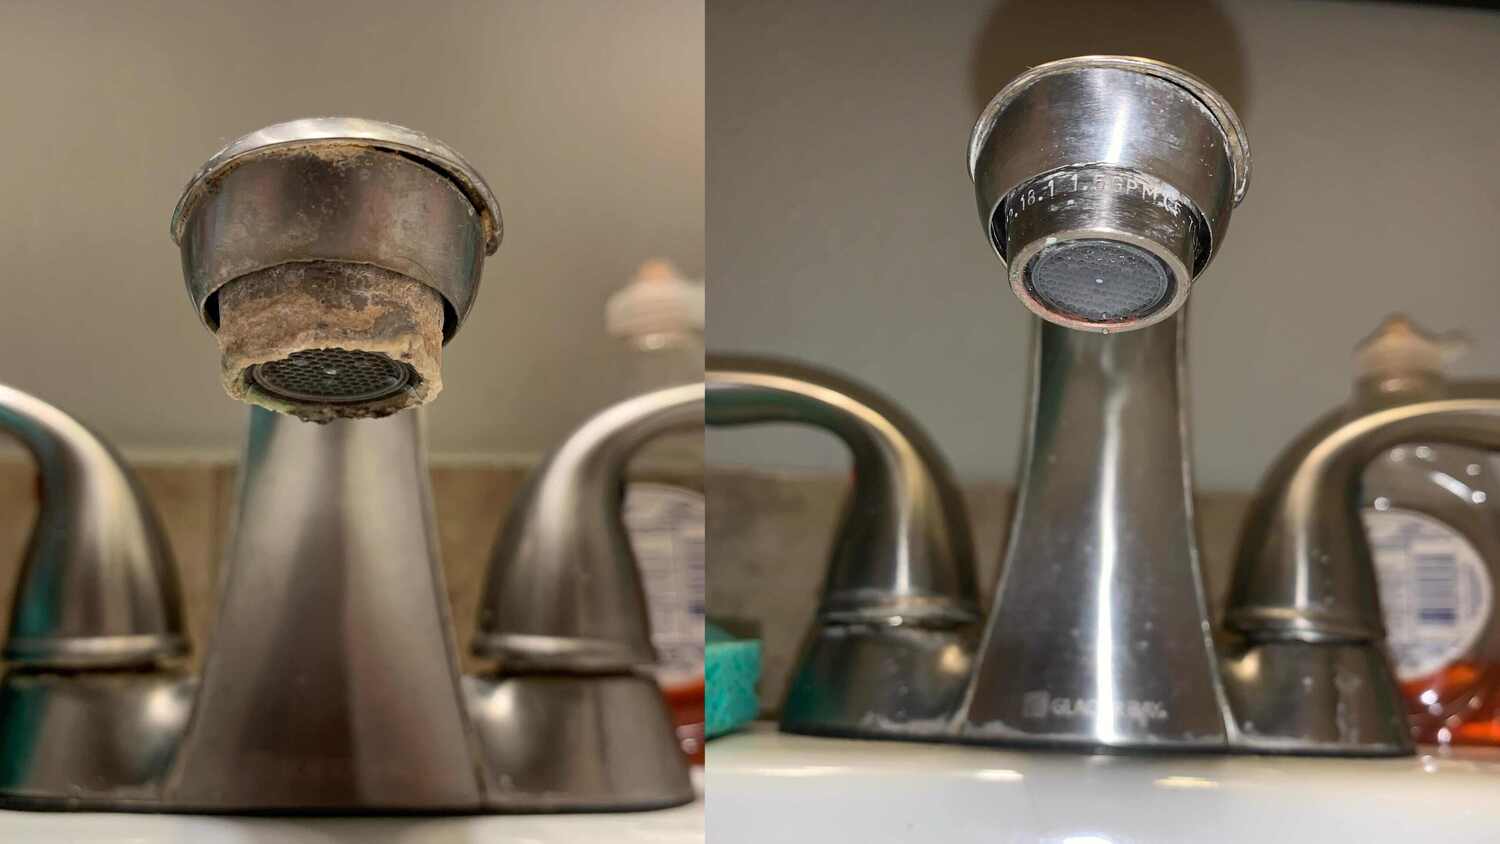
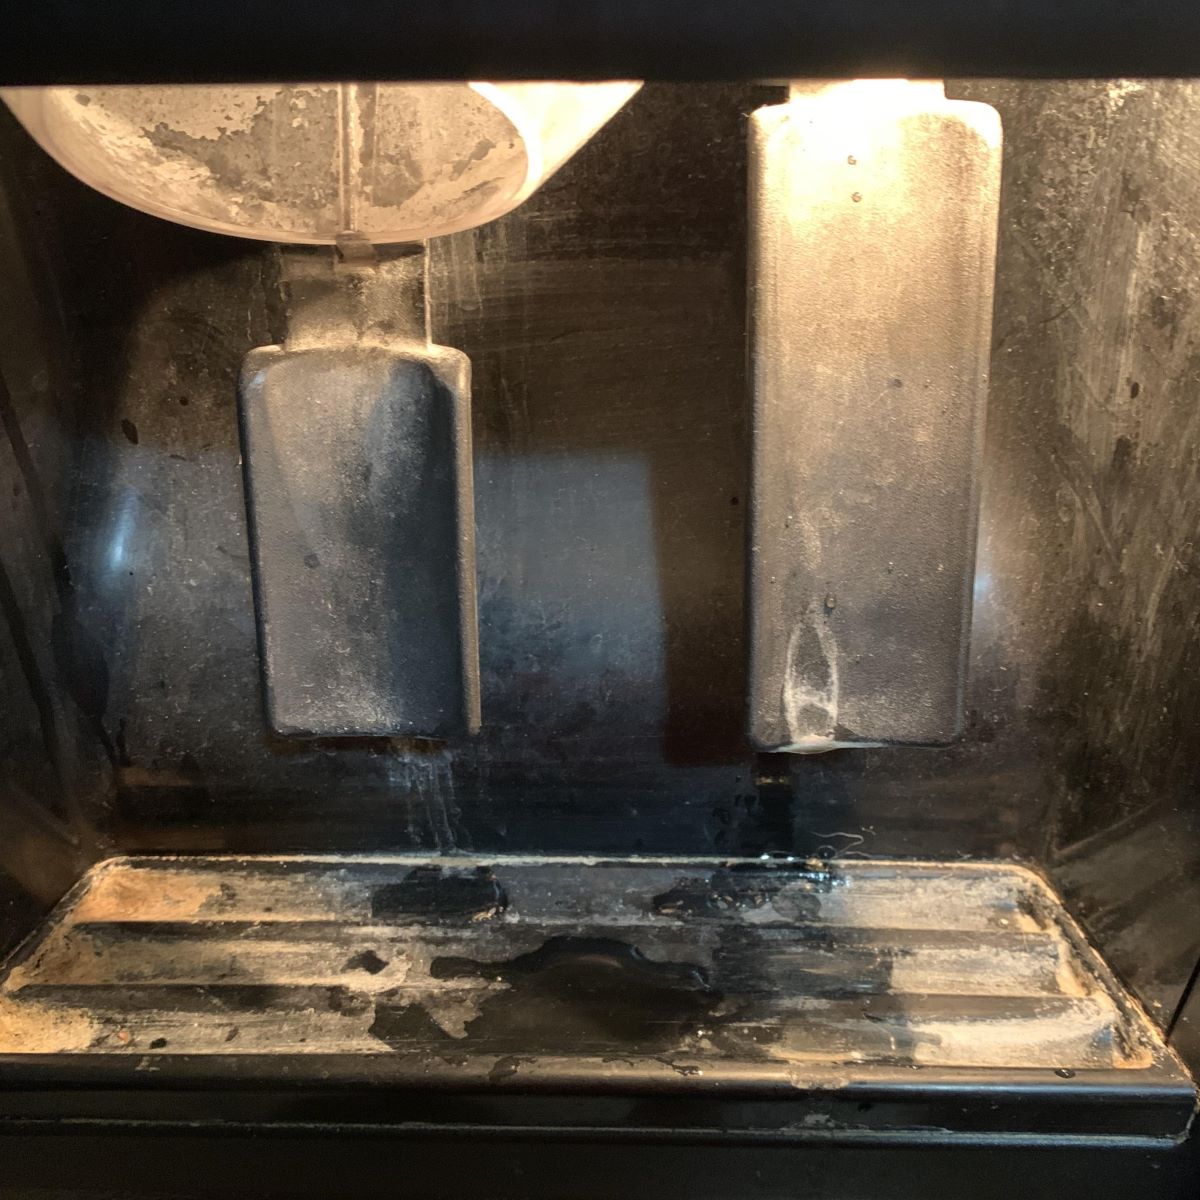
Have you noticed a chalky white residue building up on your faucets? If so, you are likely dealing with calcium buildup, also known as limescale. Calcium buildup occurs when hard water flows through your plumbing system, leaving behind mineral deposits. Over time, this can not only affect the appearance of your faucets but also impact their functionality.
Fortunately, cleaning calcium buildup on your faucets is a straightforward process that can be done at home with some basic tools and materials. In this article, we will guide you through the steps to effectively remove calcium buildup and restore the shine to your faucets.
Before we dive into the cleaning process, let’s take a closer look at what causes calcium buildup on faucets.
Key Takeaways:
- Say goodbye to calcium buildup on your faucets by using simple household items like white vinegar and warm water. Regular maintenance will keep your fixtures sparkling and functional.
- Understanding the causes of calcium buildup and following a step-by-step cleaning process will help you restore the shine and functionality of your faucets. Regular maintenance is key to preventing mineral deposits.
Read more: How To Clean Calcium Buildup In Sink
Understanding Calcium Buildup on Faucets
In order to effectively clean calcium buildup on faucets, it’s important to understand what causes it in the first place. Calcium buildup occurs when hard water, which is water that is rich in minerals such as calcium and magnesium, flows through the plumbing system and comes into contact with surfaces such as faucets. When the water evaporates, it leaves behind mineral deposits, resulting in the formation of a chalky white residue.
Hard water is a common issue in many areas, and it can have several negative effects on faucets. Not only does calcium buildup make your faucets look dull and unsightly, but it can also cause them to function improperly. Over time, the mineral deposits can clog the aerator, reducing water flow and pressure. It can also lead to leaks or corrosion if not addressed promptly.
Calcium buildup is particularly common on metallic surfaces such as chrome or stainless steel faucets. The minerals in the hard water react with the metal, resulting in the formation of a thin layer of scale. If left unattended, this can become quite stubborn and hard to remove.
Now that we understand the problem, it’s time to gather the necessary tools and materials to tackle the task of cleaning calcium buildup on faucets.
Tools and Materials Needed
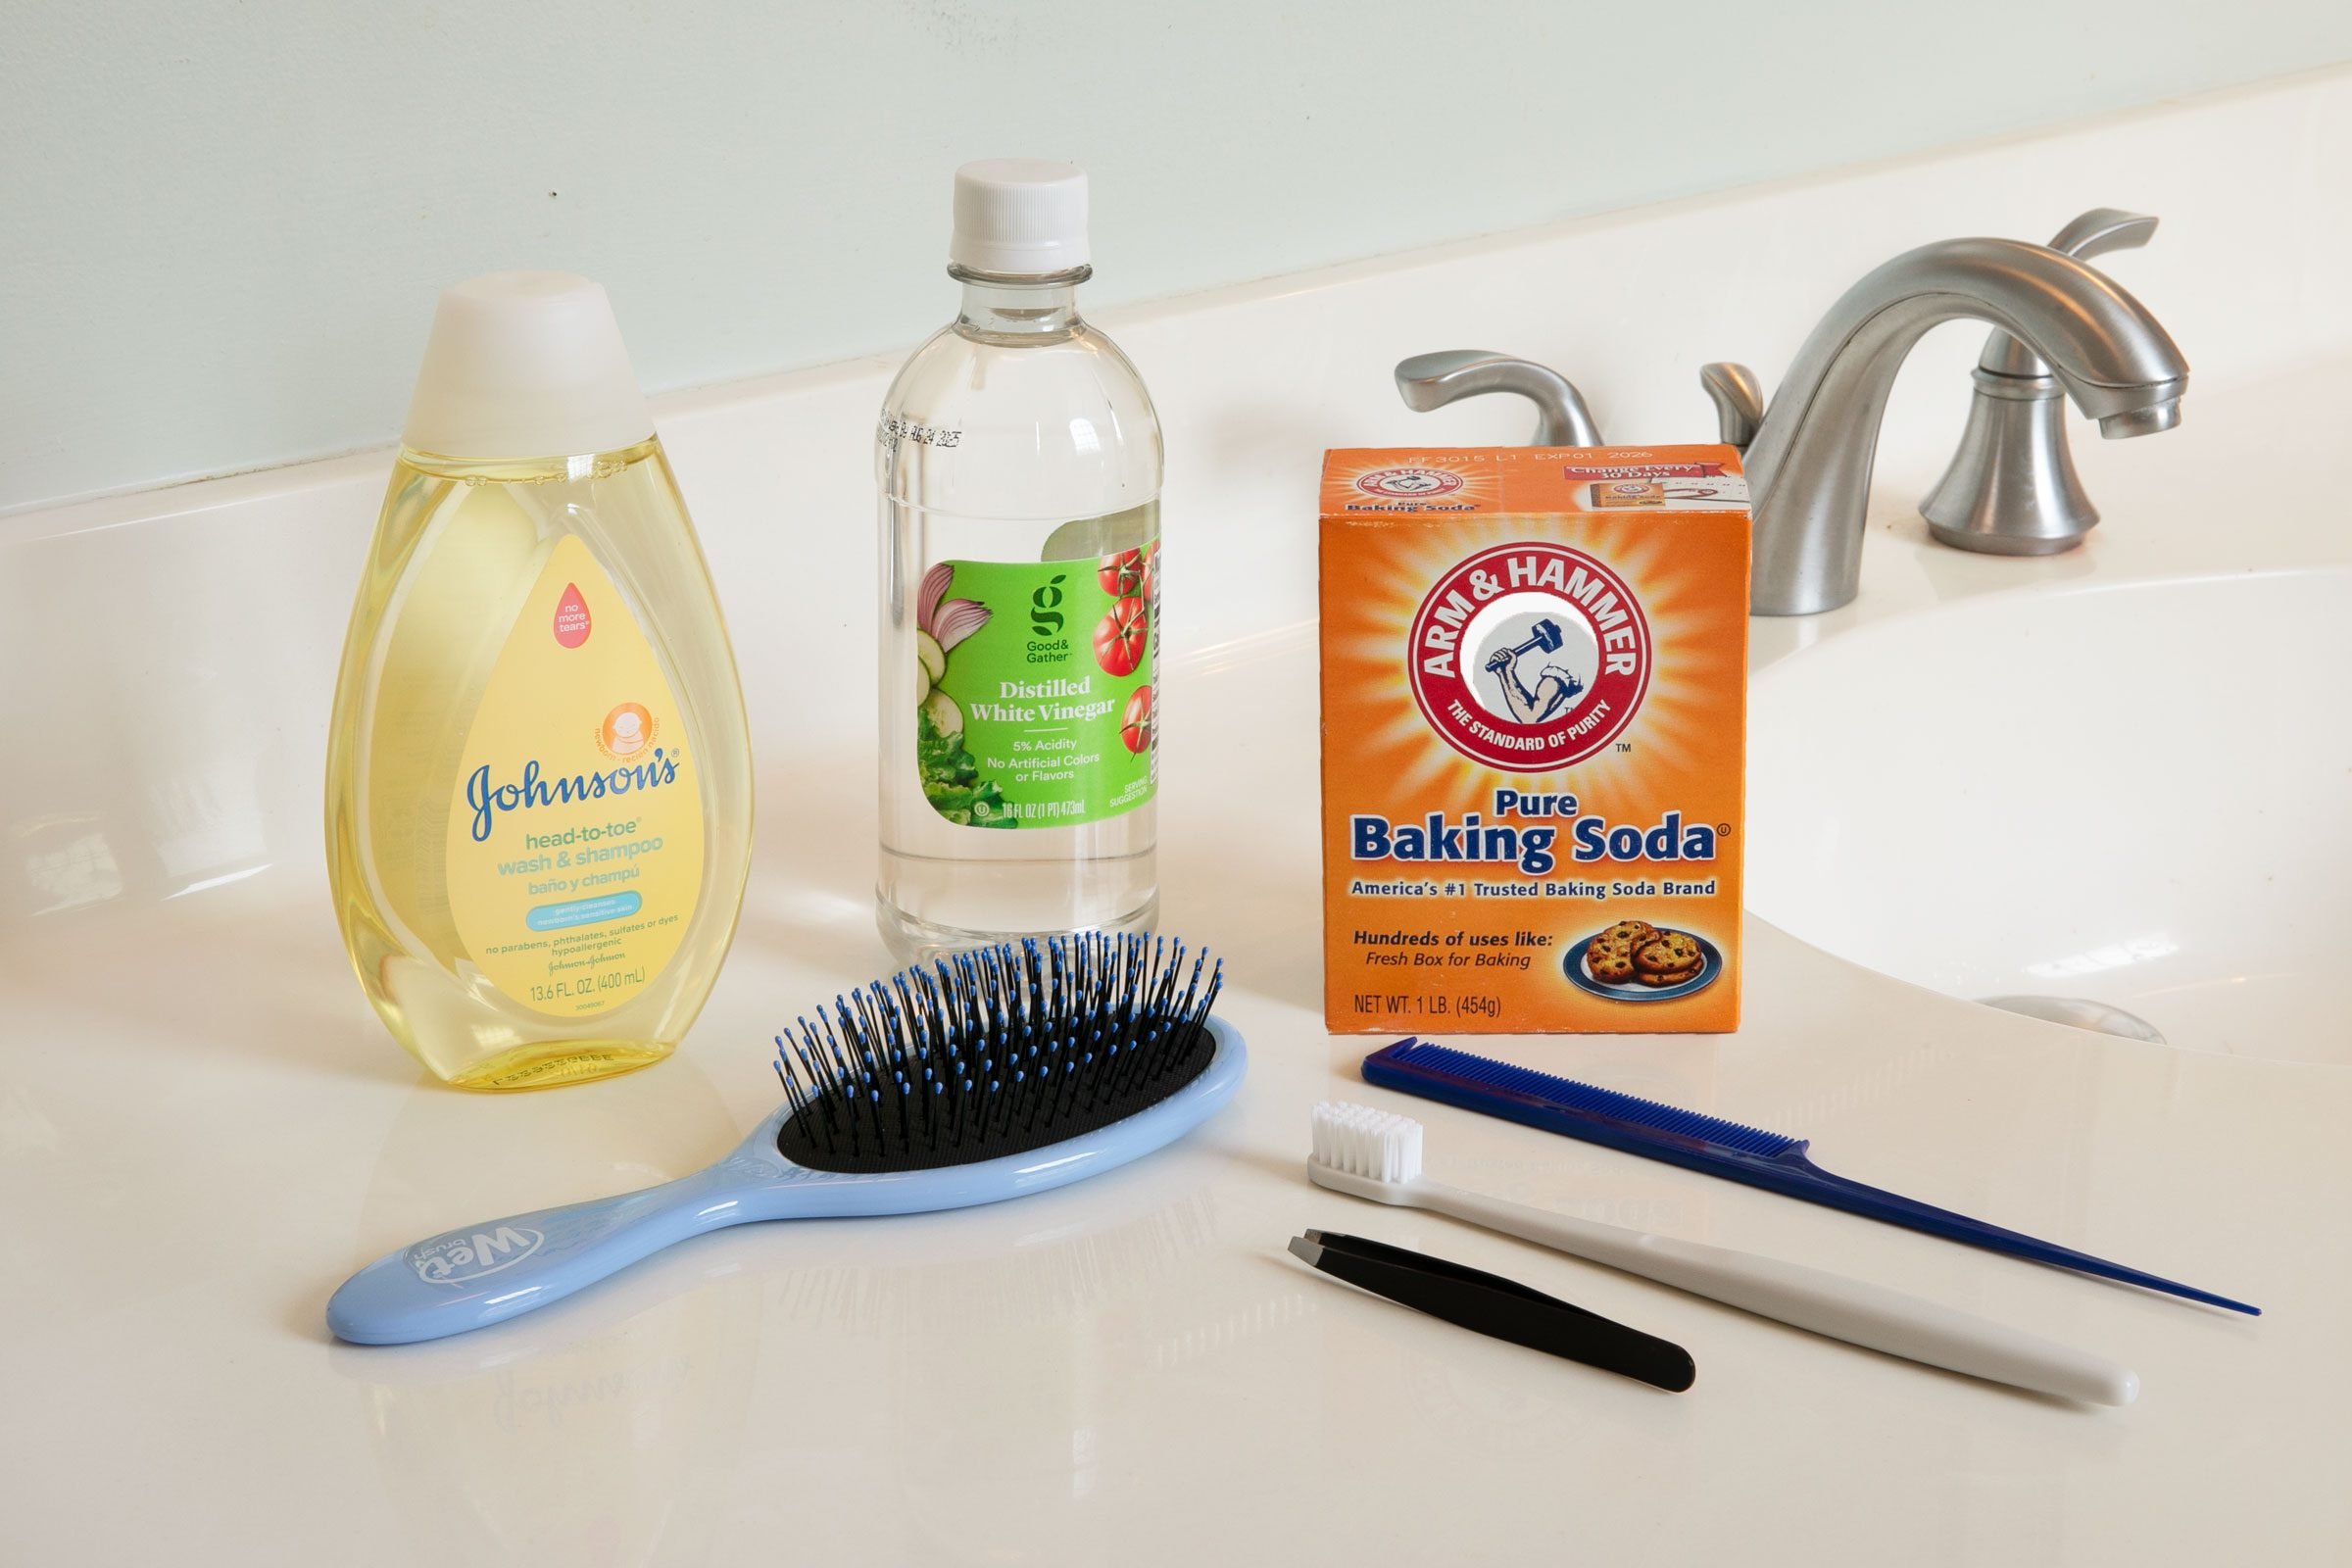
To successfully clean calcium buildup on your faucets, it’s important to gather the following tools and materials:
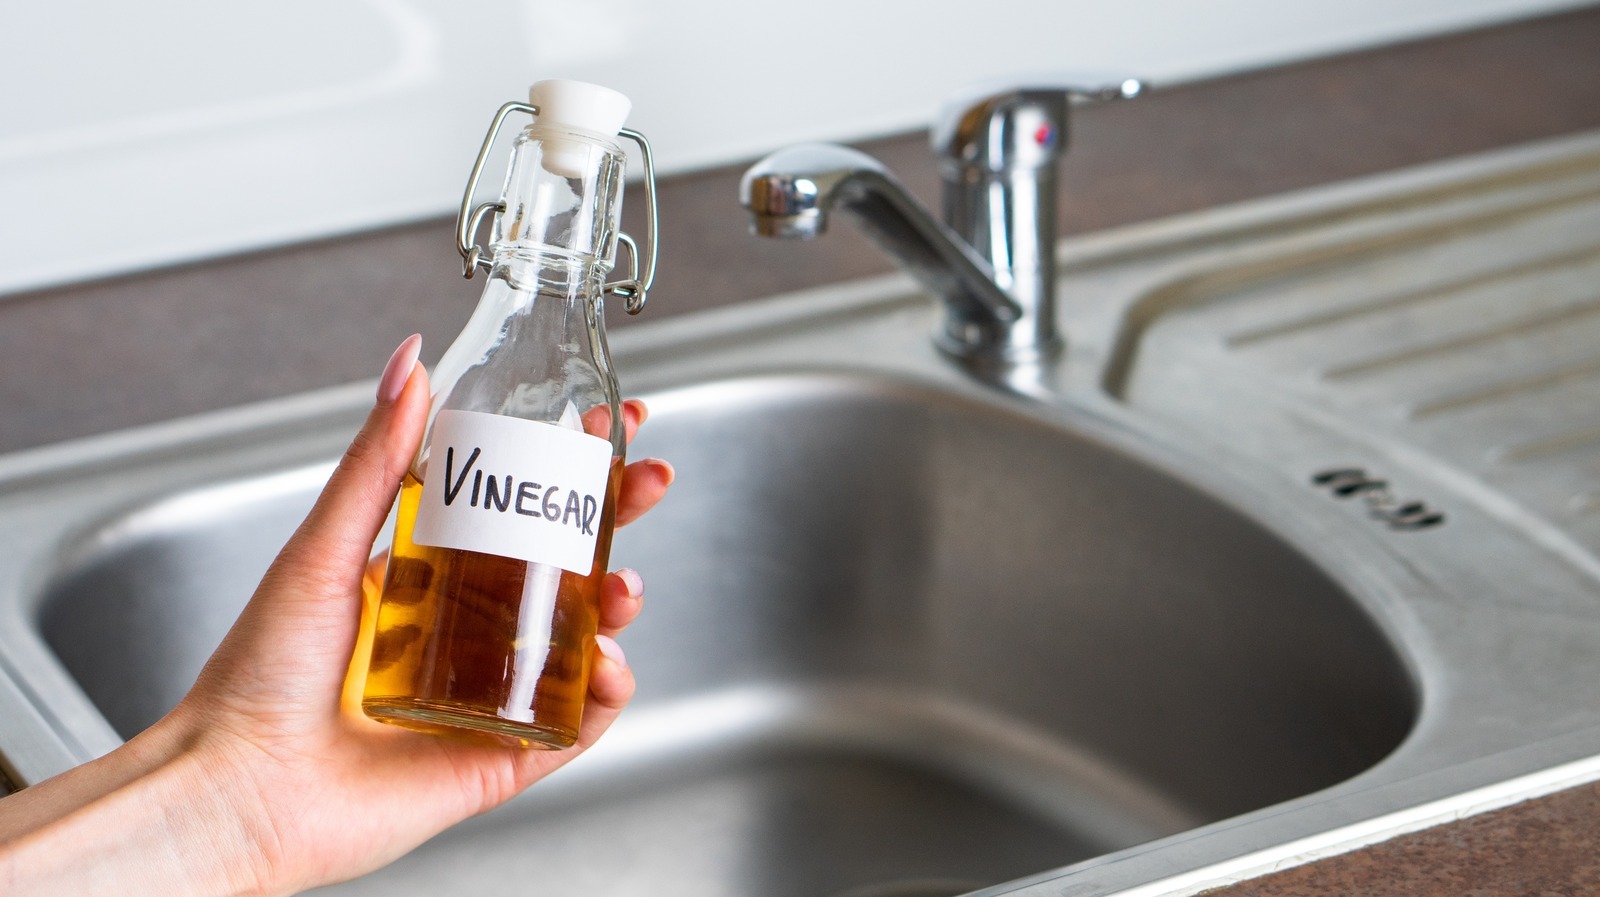
- White vinegar
- Warm water
- Clean cloth or sponge
- Old toothbrush or small brush
- Plastic bag or container
- Adjustable wrench or pliers (if necessary)
The star of the show when it comes to removing calcium buildup is white vinegar. White vinegar is an acidic solution that helps dissolve the mineral deposits and makes them easier to remove. You can find white vinegar at any grocery store, and it is an affordable and eco-friendly option for cleaning.
You will also need warm water to dilute the vinegar and facilitate the cleaning process. A clean cloth or sponge will be useful for wiping and scrubbing the surfaces of the faucet, while an old toothbrush or small brush can help reach into crevices and remove stubborn buildup.
To soak the faucet aerator, you will need a plastic bag or container. This will allow you to immerse the aerator in the vinegar solution and let it sit for a period of time, ensuring that the mineral deposits are thoroughly loosened and dissolved.
Lastly, depending on your faucet design, you may also need an adjustable wrench or pliers to remove the faucet aerator. Not all faucets have removable aerators, so check your faucet model before proceeding.
Now that we have everything we need, let’s move on to the step-by-step process of cleaning calcium buildup on faucets.
Step 1: Preparation
Before you begin the process of cleaning calcium buildup on your faucets, it’s important to take some preparatory steps to ensure a smooth and efficient cleaning process.
1. Turn off the water supply: Start by turning off the water supply to the faucet you will be cleaning. Look for the shutoff valves located under the sink and turn them clockwise to shut off the water flow. This will prevent any water from spurting out while you are cleaning.
2. Protect the surrounding area: Place a towel or a cloth over the sink to protect it from any accidental spills or drips during the cleaning process. This will help keep your countertops and surrounding areas clean and dry.
3. Prepare the vinegar solution: In a bowl or container, mix equal parts of white vinegar and warm water. The vinegar’s acidity will help dissolve the calcium deposits, while the warm water will aid in the cleaning process.
4. Remove any loose debris: Use a clean cloth or sponge to wipe away any loose debris or dirt from the surface of the faucet. This will make it easier to target the calcium buildup and ensure a more thorough cleaning.
Once you have completed these preparation steps, you are now ready to move on to the next step, which involves removing the faucet aerator.
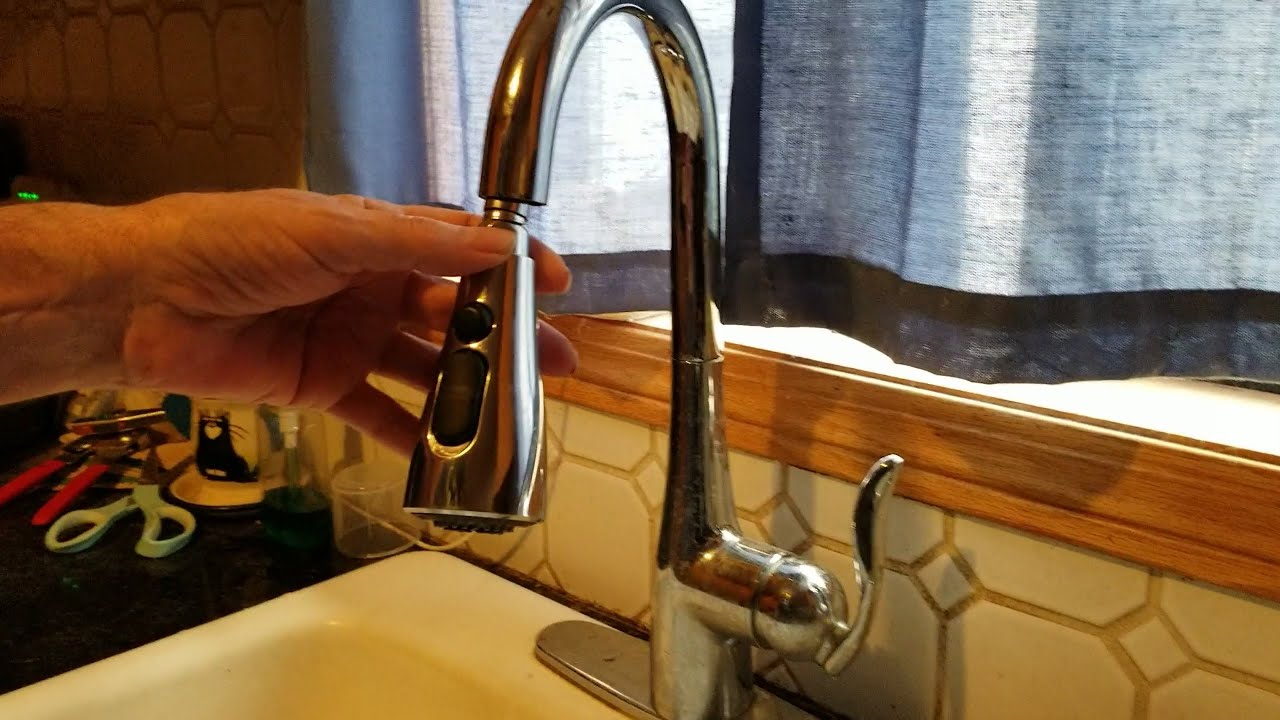
Step 2: Removing the Faucet Aerator
The faucet aerator is a small device located at the end of the faucet spout. It helps regulate the water flow and can often accumulate a substantial amount of calcium buildup. Removing the aerator is an important step in effectively cleaning the faucet and ensuring that all mineral deposits are thoroughly addressed.
Follow these steps to remove the faucet aerator:
- Locate the aerator: The aerator is typically located at the tip of the faucet spout. It may be a separate piece that can be unscrewed or integrated into the spout itself. Take a close look at your faucet to identify the aerator.
- Use an adjustable wrench or pliers (if necessary): Depending on the design of your faucet, you may need to use an adjustable wrench or pliers to unscrew the aerator. Place the wrench or pliers around the aerator and turn counterclockwise to loosen it. Be careful not to apply excessive force to avoid damaging the faucet.
- Gently twist and remove the aerator: Once the aerator is loose, twist it gently with your hand to remove it from the faucet spout. If it seems stuck, use a cloth to grip and twist it. Take care not to scratch or damage the faucet surface while doing so.
By removing the aerator, you will have better access to the interior components of the faucet, making it easier to clean and remove any mineral deposits that may have accumulated inside.
With the aerator removed, you can now proceed to the next step, which involves soaking the aerator in a vinegar solution to dissolve the calcium buildup.
Read more: How To Clean Calcium Buildup In Toilet Bowl
Step 3: Soaking the Aerator in Vinegar Solution
Soaking the faucet aerator in a vinegar solution is an effective way to dissolve the calcium buildup and restore its functionality. This step is crucial for removing any stubborn mineral deposits that may have accumulated inside the aerator.
- Prepare the aerator for soaking: Take the removed aerator and inspect it for any visible calcium buildup. If you notice any debris or large deposits, gently scrub them off using an old toothbrush or a small brush.
- Fill a plastic bag or container with vinegar solution: Take a plastic bag or container and fill it with the vinegar solution you prepared in advance. Ensure that there is enough solution to fully submerge the aerator.
- Place the aerator in the vinegar solution: Immerse the aerator fully into the vinegar solution, making sure that it is completely covered. Allow it to soak for at least 30 minutes to an hour. This soak will loosen and dissolve the calcium deposits.
- Agitate the aerator (optional): For heavily clogged aerators, you can gently agitate the solution by swirling it around or lightly tapping the bag or container. This can help dislodge any stubborn calcium deposits.
- Rinse the aerator: After the designated soaking time, remove the aerator from the vinegar solution and rinse it thoroughly under running water. Use your fingers or a brush to remove any remaining loosened deposits.
- Inspect and reassemble the aerator: Once the aerator is clean, inspect it for any remaining calcium buildup. If necessary, repeat the soaking and rinsing process until all deposits are removed. Finally, reassemble the aerator back onto the faucet spout.
Soaking the aerator in vinegar solution is an effective method for tackling stubborn calcium buildup. By allowing the vinegar to dissolve the deposits, you can restore the functionality and water flow of the aerator.
Next, we’ll move on to cleaning the rest of the faucet, including the base and handles, to ensure a thorough and complete cleaning process.
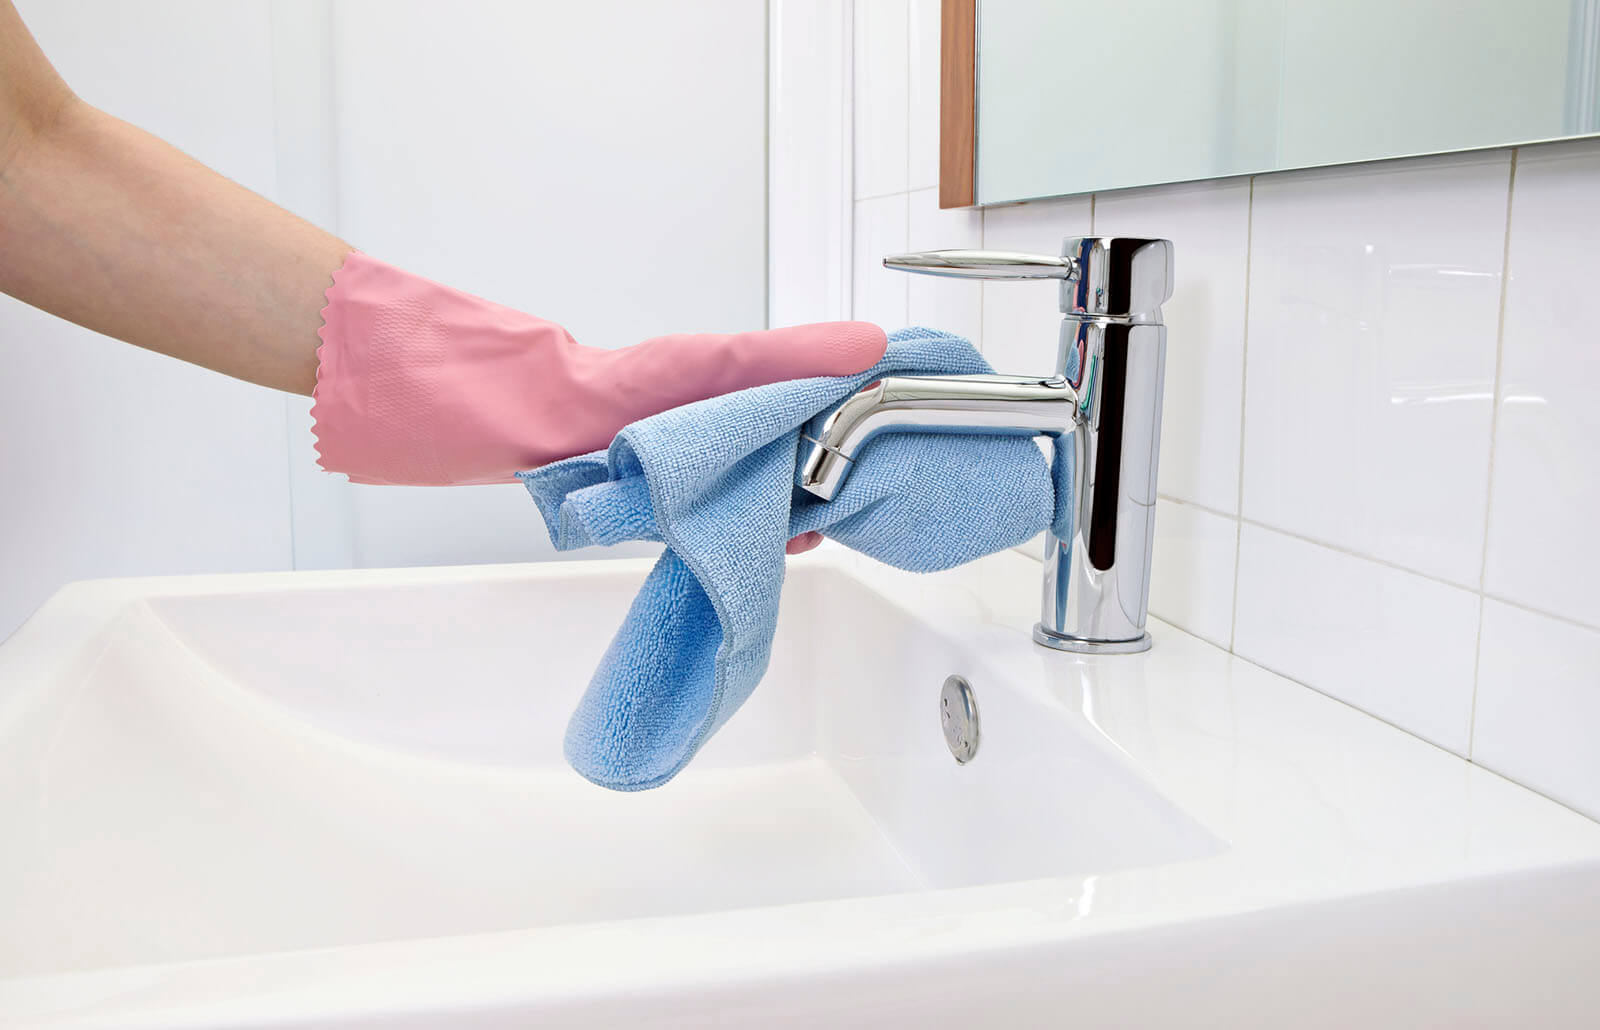
Use a mixture of equal parts water and white vinegar to soak a cloth and wrap it around the faucet. Let it sit for an hour, then scrub with a toothbrush and rinse with water. Repeat if necessary.
Step 4: Cleaning the Faucet Base
While the faucet aerator plays a significant role in accumulating calcium buildup, it is equally important to clean the base of the faucet. The base, also known as the faucet body, can gather mineral deposits over time, affecting its appearance and overall performance. Follow these steps to effectively clean the faucet base:
- Moisten a cloth or sponge: Start by moistening a clean cloth or sponge with the vinegar solution you prepared earlier. Make sure the cloth or sponge is damp but not dripping.
- Gently scrub the base: Use the damp cloth or sponge to gently scrub the surface of the faucet base. Pay attention to areas where calcium buildup is visible, such as the edges and crevices. Apply gentle pressure to remove the deposits without scratching the surface. For stubborn buildup, you can use an old toothbrush or small brush to scrub the area more effectively.
- Rinse with warm water: Once the base is thoroughly cleaned, rinse it with warm water to remove any vinegar residue and loosened deposits. Wipe the base dry with a clean, dry cloth.
Cleaning the faucet base helps restore its appearance and prevent further buildup of mineral deposits. By regularly maintaining the cleanliness of the base, you can ensure that your faucet remains in optimal condition.
Now that we’ve cleaned the faucet base, let’s move on to the next step, which involves cleaning the faucet handles.
Step 5: Cleaning the Faucet Handles
The faucet handles are another area where calcium buildup can accumulate over time. As these are the parts of the faucet that are frequently touched and operated, it’s important to clean them regularly to maintain their appearance and functionality. Follow these steps to effectively clean the faucet handles:
- Dampen a cloth or sponge: Start by dampening a clean cloth or sponge with the vinegar solution. Make sure the cloth or sponge is not dripping wet.
- Gently wipe down the handles: Use the damp cloth or sponge to gently wipe down the surfaces of the faucet handles. Pay attention to any visible calcium buildup or dirt. Apply gentle pressure to remove the deposits without damaging the handles.
- Reach into crevices and edges: Use an old toothbrush or small brush to clean hard-to-reach areas, such as the crevices between the handles and the base. Carefully scrub these areas to remove any buildup that may be hiding there.
- Rinse with warm water: Once the handles are clean, rinse them with warm water to remove any vinegar residue or loosened deposits. Make sure to dry the handles thoroughly with a clean, dry cloth.
By regularly cleaning the faucet handles, you not only maintain their appearance but also ensure smooth operation and prevent any potential blockages caused by mineral deposits. Keeping the handles clean contributes to the overall maintenance of your faucet.
Now that we have cleaned the faucet handles, let’s move on to the next step, which involves reassembling the faucet aerator.
Step 6: Reassembling the Faucet Aerator
After cleaning the faucet aerator and allowing it to dry, it’s time to reassemble it and restore it back to its original position on the faucet spout. Follow these steps to successfully reassemble the faucet aerator:
- Inspect the aerator: Before reassembling, inspect the cleaned aerator to ensure that all the calcium buildup has been removed. Use a brush or your fingers to remove any remaining debris or deposits.
- Align the aerator: To reassemble the aerator, align it with the end of the faucet spout. Ensure that the threads on the aerator and the spout are properly aligned for a secure fit.
- Twist the aerator clockwise: Once aligned, twist the aerator clockwise to tighten it onto the faucet spout. Use your hand to tighten it firmly, but be careful not to over-tighten, as it may damage the aerator or the faucet.
- Check for leaks: After reassembling the aerator, turn on the water supply and check for any leaks around the aerator. If you notice any leaks, gently tighten the aerator a bit more until the leaks stop.
Reassembling the faucet aerator is the final step in the cleaning process. By properly aligning and tightening the aerator, you can ensure that the water flow and pressure are restored, and any potential leaks are prevented.
Now that we have reassembled the aerator, let’s move on to the final step, which involves cleaning any exposed surfaces of the faucet.
Read more: How To Remove Calcium Buildup In Toilet Bowl
Step 7: Cleaning Exposed Surfaces
In the final step of cleaning calcium buildup on faucets, we will focus on cleaning any exposed surfaces of the faucet that may have accumulated mineral deposits. Follow these steps to effectively clean the exposed surfaces:
- Dampen a cloth or sponge: Start by dampening a clean cloth or sponge with the vinegar solution prepared earlier. Ensure that the cloth or sponge is not dripping wet.
- Wipe down the surfaces: Use the damp cloth or sponge to wipe down all exposed surfaces of the faucet, including the spout, handles, and any other visible parts. Pay attention to areas with visible calcium buildup and apply gentle pressure to remove the deposits.
- Rinse with warm water: Once you have cleaned the surfaces, rinse them thoroughly with warm water to remove any vinegar residue or loosened deposits. Use a clean, dry cloth to wipe down the surfaces and dry them completely.
By cleaning the exposed surfaces, you not only remove any remaining calcium buildup but also restore the shine and luster of your faucet. This step completes the cleaning process and ensures that your faucet looks clean, polished, and free from mineral deposits.
With the cleaning process now complete, your faucets should be sparkling clean and free from calcium buildup. Remember to regularly maintain and clean your faucets to prevent the accumulation of mineral deposits in the future. Keeping your faucets clean not only enhances their appearance but also prolongs their lifespan and maintains their functionality.
Thank you for following this step-by-step guide on how to clean calcium buildup on faucets. Enjoy your clean and shiny faucets!
Conclusion
Cleaning calcium buildup on faucets is an essential maintenance task that helps restore the appearance and functionality of your fixtures. By following the step-by-step process outlined in this guide, you can easily remove mineral deposits and enjoy clean, shiny faucets once again.
Understanding the causes of calcium buildup, such as hard water, is crucial in tackling the problem effectively. Equipped with the right tools and materials, such as white vinegar and warm water, you can dissolve and remove stubborn mineral deposits.
Throughout the cleaning process, it is important to be mindful of the different parts of the faucet that can accumulate calcium buildup, including the aerator, base, and handles. By thoroughly cleaning each component, you ensure that your faucet functions optimally and remains visually appealing.
Regular maintenance is key to preventing the buildup of calcium and other mineral deposits on your faucets. Consider implementing a routine cleaning schedule to keep your fixtures in pristine condition.
Remember, as you clean your faucets, it’s essential to be cautious and gentle to avoid damaging the faucet’s surfaces. Use appropriate tools, such as brushes or sponges, to scrub away deposits without scratching or causing harm.
By following these guidelines and investing a little time and effort into cleaning calcium buildup on your faucets, you can extend the lifespan of your fixtures, prevent leaks or corrosion, and maintain the overall aesthetic appeal of your kitchen or bathroom.
Now that you have mastered the art of cleaning calcium buildup on faucets, you can enjoy the benefits of clean and pristine fixtures that enhance the look and functionality of your space.
Thank you for reading this comprehensive guide on how to clean calcium buildup on faucets. Happy cleaning!
With your faucet now sparkling clean, why not extend that fresh feeling to the rest of your home? There’s no better time than now to dive into our latest guide on effective home upkeep. From seasonal checks to routine fixes, our guide covers crucial tasks that keep your living space in prime condition. Don’t miss out on simple strategies that make a big difference in maintaining your home’s charm and functionality.
Frequently Asked Questions about How To Clean Calcium Buildup On Faucet
Was this page helpful?
At Storables.com, we guarantee accurate and reliable information. Our content, validated by Expert Board Contributors, is crafted following stringent Editorial Policies. We're committed to providing you with well-researched, expert-backed insights for all your informational needs.
0 thoughts on “How To Clean Calcium Buildup On Faucet”